
Using Touch ID for Local Authentication
Manny de la Torriente
Ever-increasing rates of phone theft and identity fraud have pushed second-factor authentication from a desired feature to a necessity. Touch ID allows developers to use the iPhone’s built-in fingerprint sensor without any of the heavy lifting of pattern recognition or low-level encryption. In this chapter, readers will learn about the framework and how to add fingerprint identification to their apps.
Introduction to Touch ID
Touch ID is a fingerprint sensing system that makes secure access to an iOS device fast and easy. In this chapter you’ll learn how to integrate and use the LocalAuthentication framework to request authentication from users using Touch ID. The LocalAuthentication class allows you to invoke Touch ID verification without involving the keychain.
Touch ID is an easy-to-use mechanism and is very secure. All Touch ID operations are handled inside Secure Enclave. The Secure Enclave is a coprocessor within the Apple A7 or later A-series processor, and it is responsible for processing fingerprint data from the Touch ID sensor. An application cannot access data associated with an enrolled fingerprint (or the kernel); it is only notified once a user has successfully authenticated (see diagram in Figure 14-1).

Figure 14-1. Architecture
LocalAuthentication security differs from that of keychain. In the keychain case, the trust is between the operating system and Secure Enclave. In the LocalAuthentication case, the trust is between the application and the operating system. No secrets will be stored in the case of LocalAuthentication as there is no direct access to Secure Enclave—only knowledge of any authentication results.
LocalAuthentication Use Cases
LocalAuthentication can be used as a generic policy evaluation mechanism to do the following:
- Verify that a user is enrolled so you can unlock certain features of an application.
- Enables parental control to be sure that the device owner is present.
- Provide first-factor authentication, without passcode backup.
The sample app you’ll write in this chapter requires a device that supports Touch ID. The iPhone 5s and newer, iPad Air 2, and iPad Mini 3 all support Touch ID.
Building a Touch ID Application
The sample application you’ll build will demonstrate a simple use case, which is to authenticate a user utilizing Touch ID without keychain. The app will consist of a single scene with a grouped table view similar to the illustration in Figure 14-2. The table view will have a single row that will be used to initiate an authentication flow when selected. Below the table view will be a text view that will serve as a window for log output.

Figure 14-2. The TouchIDApp main scene
If at some point you decide to support additional use case examples, you can simply add a new row for each use case.
The Touch ID prompt is a standard iOS user interface (UI), which can include a custom prompt message that you define. Also provided by the system is an Enter Passcode option as a fallback, as shown in Figure 14-3. The fallback case is detailed in the section “Creating the Project.”

Figure 14-3. Standard system UI for Touch ID and passcode input
Creating the Project
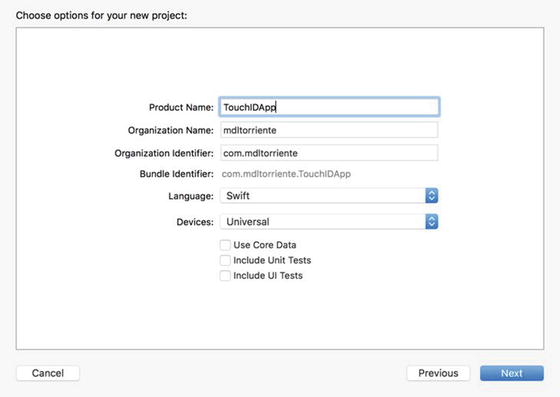
We are going to create an iOS single-view application Xcode project named TouchIDApp, select Swift as the Language, and use the defaults for Language and Devices.
Building the Interface
Open the storyboard, then delete the current view controller and replace it with a table view controller. Select Table View Controller, and then from the Attributes Inspector, set it as the initial view controller for the storyboard by setting the check box for Is Initial View Controller as shown on the right in Figure 14-5.

Figure 14-5. Main storyboard initial view
Open the ViewController.swift file and change the class declaration so that the base class is UITableViewController.
class ViewController: UITableViewController {
}
Open the storyboard and from the Identity inspector in the Custom Class section, set the class to ViewController as shown in Figure 14-6.

Figure 14-6. Setting the custom class
Note If ViewController is not visible in the drop-down, build the project and it will appear.
Now select the table view cell, and then from the Attributes Inspector, change the table view cell style to Subtitle. Also set the reuse Identifier to AuthenticateCell as shown in Figure 14-7.

Figure 14-7. Setting the table view cell style
Embed the table view controller in a navigation controller by selecting the table view controller, and then from the Xcode menu choose Editor ![]() Embed In
Embed In ![]() Navigation Controller. From the Documents Outline on the left, select the Table View object and change its style to Grouped in the Attributes Inspector. Set the title for the Navigation Item in the table view controller to Touch ID. Your storyboard should look similar to the one in Figure 14-8.
Navigation Controller. From the Documents Outline on the left, select the Table View object and change its style to Grouped in the Attributes Inspector. Set the title for the Navigation Item in the table view controller to Touch ID. Your storyboard should look similar to the one in Figure 14-8.

Figure 14-8. Embed the table view controller in a navigation controller
Add a text view below the table view cell and adjust the height so it’s similar to Figure 14-9. The text view will be used as a window to display log output.

Figure 14-9. Adding a text view for log output
Use the Assistant editor such that you have a split view with the storyboard on one side and the ViewController.swift file in the other, as in Figure 14-10. Control-drag from the text view on the storyboard to the view controller file to create an outlet. In the pop-up window type the name textView and click Connect.

Figure 14-10. Creating an outlet
In the viewDidLoad method, initialize the text view text to an empty string (see Listing 14-1).
Implementing the UITableView Methods
Because this sample only has a single section that contains a single row, you won’t need an actual data source. So the numberOfSectionsInTableView method should always return a value of 1. The table view method numberOfRowsInSection should also return a value of 1 as shown in Listing 14-2.
When the table view object asks for the title of a section, because there is only a single section, you return a string containing “Actions” to represent the section header as in Listing 14-3.
When the table view object asks for a cell to insert in a particular row, return a reusable table view cell object for the cell you set up in the storyboard with the reuse identifier AuthenticateCell. Set the cell’s text label text to Authenticate and its detailed text label text to Local Authentication using Touch ID (see Listing 14-4).
When you select a table view row, the table view object informs its delegate about the new row selection. Here is where the authentication workflow is initiated. Call the table view deselectRowAtIndexPath method, which will ensure that the table view row is deselected after any operation completes (see Listing 14-5). Then call the authenticate method which you will implement in an upcoming section.
Integrating Touch ID for Fingerprint Authentication
In the file ViewController.swift, import the LocalAuthentication framework; place it just below the UIKit import statement as shown in Listing 14-6.
Evaluating Authentication Policies
Authentication contexts are used to evaluate the authentication capabilities of an iOS device on which the application is run. An iOS device may or may not have a fingerprint scanner, or Touch ID may have been disabled by actions such as too many failed attempts to authenticate. Using a context to preflight an authentication policy allows an application to determine if it’s possible for authentication to succeed; for example, requesting the user authentication using personal information such as Touch ID. An authentication context is represented by the LAContext object.
Touch ID Authentication without Keychain
Touch ID without keychain is done in two steps.
The first step is to preflight an authentication policy to see if it’s possible for Touch ID authentication to succeed on the device. This is accomplished by calling the canEvaluatePolicy method of a local authentication context object. The authentication policy being evaluated is DeviceOwnerAuthenticationWithBiometrics, which is device owner authentication using a biometric method (Touch ID). The DeviceOwnerAuthenticationWithBiometrics is a property of the LAPolicy class.
If the canEvaluatePolicy conditions aren’t met, then the guard statement shown in Listing 14-7 is used to transfer program control out of scope.
If conditions are met and Touch ID is available, the second step is to obtain authorization from the user. This is accomplished by calling the evaluatePolicy method of a local authentication context object. The authentication policy being evaluated is DeviceOwnerAuthentication. The call must include a string with a short concise description of the reason for requesting authentication. The localizedReason parameter is required, so an empty string or nil value is not accepted. Notice that the error parameter is passed by value. See the code in Listing 14-8.
Note The canEvaluatePolicy method must not be called in the response block of evaluatePolicy because doing so could lead to a deadlock.
Listing 14-8 shows the complete authenticate method. Place this code at the bottom of the ViewController class.
The response block from evaluatePolicy is executed when policy evaluation finishes. This block is evaluated on a private queue internal to the framework in an unspecified threading context. If you intend to access any of the UI components from within the response, then be sure to access them in the main thread. The example in Listing 14-9 demonstrates how the printMessage convenience method updates a text view in the main thread. Add the code from Listing 14-9 to the end of the ViewController class.
The dispatch_async method submits a block for asynchronous execution on the main queue and returns immediately. The dispatch_get_main_queue method returns the serial dispatch queue associated with the application’s main thread.
User-Defined Fallback for Authentication
In the case where the biometric authentication fails, the Try Again prompt will present an Enter Password button. Tapping the Enter Password button will cause the response block to cancel the operation and return an error that indicates that a user defined fallback is expected. Table 14-1 shows the possible errors.
Table 14-1. LAContext Error Codes
Error Code | Description |
|---|---|
AuthenticationFailed | Authentication was not successful because the user failed to provide valid credentials. |
UserCancel | Authentication was canceled by the user—for example, the user tapped Cancel in the dialog. |
UserFallback | Authentication was canceled because the user tapped the fallback button (Enter Password). |
SystemCancel | Authentication was canceled by system—for example, if another application came to foreground while the authentication dialog was up. |
PasscodeNotSet | Authentication could not start because the passcode is not set on the device. |
TouchIDNotAvailable | Authentication could not start because Touch ID is not available on the device. |
TouchIDNotEnrolled | Authentication could not start because Touch ID has no enrolled fingers. |
Run the Application
Build and run the application. You’ll have to use a physical iOS device because the simulator doesn’t support Touch ID.
- Tap the Authenticate cell. If the device supports Touch ID, and Touch ID has been enabled and configured by the user, a touch request prompt will be presented.
- Authenticate with a registered fingerprint. An Authentication Success message should be output to the text view log window.
- Authenticate with an unregistered fingerprint. You should be prompted to Try Again, and an Enter Passcode option should be present.
- Enter a valid passcode. An Authentication Success message should be output to the text view log window.
Things to Remember
- Only foreground applications can use Touch ID.
- Policy evaluation may fail.
- The device may not support it.
- The device supports it, but it could be in a lockout state or some other configuration setting preventing its use.
- Your application should provide its own fallback password entry mechanism in the event policy evaluation fails.
Summary
In this chapter you built a sample app that demonstrates how LocalAuthentication can be used as a generic policy evaluation mechanism. You learned how to integrate and use LocalAuthentication to start Touch ID authentication and how to avoid a deadlock situation. You learned about how using different policy evaluation affects the workflow in the case where biometric authentication fails.
You also reviewed how to call into the main thread in a response block from an unspecified threading context.