Chef Provisioningis a part of the Chef toolset that orchestrates the creation of machines and supporting infrastructure, particularly in the cloud but also for on-premises infrastructure too. It lets you define your application topology in an infrastructure-as-code way via one or more Chef recipes. This is particularly powerful in today’s world of continuous delivery where we need fast feedback cycles - the ability to create, destroy, and re-create entire environments from scratch gives us flexibility, reliability, and repeatability; and as we know this eventually helps organizations reduce their time to market and lower support overheads by reducing recovery times.
Chef Provisioning operates a driver model so that it can communicate with different cloud providers and software platforms. There are Chef Provisioning drivers not only for Microsoft Azure but for Amazon Web Services (AWS), OpenStack, VMWare vSphere, Docker, and others too. See https://github.com/chef/chef-provisioning for a comprehensive list.
In this chapter we’ll make sure your local machine is configured for Chef Provisioning, describe the resources available for use, explore the options that are configurable on Azure, and run a couple of recipes to demonstrate the concepts of provisioning resources in Azure using Chef.
In chapter 5 we’ll enhance these recipes and look at examples of more sophisticated architectures that you can deploy using Chef Provisioning. Once you’ve mastered all that, in chapter 8 we’ll explore the end-to-end world of continuous provisioning and set up a continuous delivery pipeline using Chef on Azure.
About Chef Provisioning on Azure
Before we delve into the implementation specifics of the driver, Figure 4-1 shows the architecture of the Chef Provisioning driver for Azure Resource Manager.

Figure 4-1. Overview of Chef Provisioning and Azure
The Chef Provisioning driver for Azure is heavily dependent on the Azure SDK for Ruby, which provides helpful functionality to support modeling, authentication, threading, and error handling. The driver communicates with the Azure Resource Manager REST APIs, which then take on the hard work of dealing with idempotency, creating resources in the correct order and reporting status. Behind the scenes a set of Resource Providers are responsible for each operation they are handed to do. The Azure SDK for Ruby runs on Windows, OS X, and Linux.
Installation and Configuration
We’re going to be using our local workstation as a ‘provisioning node’ for this example, and we’ll configure it to talk to the organization on the hosted Chef server that you created in chapter 1. This is so that we can upload provisioning recipes and have the provisioned resources communicate with that same organization continuously after that. The provisioning node will be communicating with both the Chef Server and the Azure Management API over TLS (port TCP/443).
Installing the Chef Provisioning for Azure Resource Manager Ruby Gem
Chef Provisioning for Azure Resource Manager has the following dependencies that must be installed before we can start to build our recipes:
Chef Client
Chef Provisioning
Both of the above components were installed when we installed the ChefDK in chapter 1. So if you are reading this and don’t have the ChefDK installed, now would be a good time to go back and install it.
To verify we have all the required components, we can use the chef gem list command to view the Ruby gems that are installed:
PS C:UsersStuartPreston> chef gem list --local chef*** LOCAL GEMS ***chef (12.5.1 universal-mingw32)chef-config (12.5.1)chef-dk (0.10.0)chef-provisioning (1.5.0)chef-provisioning-aws (1.6.1)chef-provisioning-azure (0.4.0)chef-provisioning-fog (0.15.0)chef-provisioning-vagrant (0.10.0)chef-vault (2.6.1)chef-zero (4.3.2, 1.5.6)cheffish (1.6.0)chefspec (4.4.0)
If you see chef and chef-provisioning in the list, we’re ready to carry on. Otherwise, you’ll need to investigate why, and possibly reinstall the ChefDK (see chapter 1 for detailed instructions on how to do this).
We can now install the chef-provisioning-azurerm gem and its dependencies by using the following command:
PS C:UsersStuartPreston> chef gem install chef-provisioning-azurermFetching: concurrent-ruby-1.0.0.pre1.gem (100%)Successfully installed concurrent-ruby-1.0.0.pre1Fetching: timeliness-0.3.7.gem (100%)Successfully installed timeliness-0.3.7Fetching: ms_rest-0.1.1.gem (100%)Successfully installed ms_rest-0.1.1Fetching: faraday-cookie_jar-0.0.6.gem (100%)Successfully installed faraday-cookie_jar-0.0.6Fetching: ms_rest_azure-0.1.1.gem (100%)Successfully installed ms_rest_azure-0.1.1Fetching: azure_mgmt_resources-0.1.0.gem (100%)Successfully installed azure_mgmt_resources-0.1.0Successfully installed chef-provisioning-azurerm-0.3.1Parsing documentation for concurrent-ruby-1.0.0.pre1Installing ri documentation for concurrent-ruby-1.0.0.pre1Parsing documentation for timeliness-0.3.7Installing ri documentation for timeliness-0.3.7Parsing documentation for ms_rest-0.1.1Installing ri documentation for ms_rest-0.1.1Parsing documentation for faraday-cookie_jar-0.0.6Installing ri documentation for faraday-cookie_jar-0.0.6Parsing documentation for ms_rest_azure-0.1.1Installing ri documentation for ms_rest_azure-0.1.1Parsing documentation for azure_mgmt_resources-0.1.0Installing ri documentation for azure_mgmt_resources-0.1.0Parsing documentation for chef-provisioning-azurerm-0.3.1Installing ri documentation for chef-provisioning-azurerm-0.3.1Done installing documentation for concurrent-ruby, timeliness, ms_rest, faraday-cookie_jar, ms_rest_azure, azure_mgmt_resources, chef-provisioning-azurerm after 12 seconds7 gems installed
If you see output similar to the above, then that’s all we need from an installation perspective, and we can now progress on to configuring our node with the credentials required to connect to Azure. If not, you’ll need to stop at this point and troubleshoot.
Authenticating to Azure Resource Manager
Azure Resource Manager operates a claims-based authorization, meaning that every request sent to Azure needs to be accompanied with a token. Luckily for us this is dealt with behind the scenes; however we do need to configure a special type of object in Azure Active Directory for automation called a Service Principal.
A Service Principal is able to have permissions delegated to it so it can perform actions on your Azure subscription. Why can’t we just use a username and password? The primary advantage a Service Principal has over using a standard User object in Azure Active Directory is that a Service Principal is not subject to any restrictions when multifactor authentication is enabled.
Azure Resource Manager has Role-based Access Control (RBAC) measures built into it; this is a flexible system that allows fine-grained access management and allows only the necessary access required to perform tasks. RBAC can be applied to individual resources, to a Resource Group, or to a Subscription if required. That is what we are most interested in.
So in the following example, we’re going to grant our Service Principal the Owner permission on our Subscription A. This is depicted in Figure 4-2 below.

Figure 4-2. Service Principal in Azure Directory with specific rights against Subscriptions
Note
If you are interested in reading up on Role-based Access Control, have a read of https://azure.microsoft.com/en-us/documentation/articles/role-based-access-control-configure
Service Principals are objects that are attached to Applications within Azure Active Directory, and we use the ID of the Service Principal to assign a role against the relevant Subscription. So we have four things to achieve in order to complete this task:
1. Authenticate/Log in to Azure
2. Create an Application
3. Create a Service Principal for the Application
4. Assign the Service Principal to a valid Role on a Subscription
Configuring the Application and Service Principal
We can use either the cross-platform Azure-cli tool or PowerShell to configure the Application and add a Service Principal. In this section we will demonstrate both approaches.
Azure-cli
To use the Azure-cli to create our service principal, we need to ensure we are logged into our tenant within Azure Resource Manager correctly:
PS C:UsersStuartPreston> azure login --username [email protected]info: Executing command loginPassword: **********/ info: Added subscription Microsoft Partner Networkinfo: Added subscription Pendrica Production+info: login command OK
At this point, it would be a good idea to get the Tenant Id and the Subscription Id and make a note of them. This can be achieved by running azure account list --json and inspecting the output:
PS C:UsersStuartPreston> azure account list --json[{"id": "b6e7eee9-YOUR-GUID-HERE-03ab624df016","name": "Microsoft Partner Network","user": {"name": "[email protected]","type": "user"},"tenantId": "9c117323-YOUR-GUID-HERE-9ee430723ba3","state": "Enabled","isDefault": true,"registeredProviders": [],"environmentName": "AzureCloud","managementEndpointUrl": https://management.core.windows.net},{"id": "bcf669fc-YOUR-GUID-HERE-e2d1f9f4b1c3","name": "Pendrica Production","user": {"name": "[email protected]","type": "user"},"tenantId": "9c117323-YOUR-GUID-HERE-9ee430723ba3","state": "Enabled","isDefault": false,"registeredProviders": [],"environmentName": "AzureCloud","managementEndpointUrl": https://management.core.windows.net}]
As we can see the Tenant ID is 9c117323-YOUR-GUID-HERE-9ee430723ba3 and the Subscription ID we are interested in is b6e7eee9-YOUR-GUID-HERE-03ab624df016. Keep these values safe as we’ll use them shortly.
We can then create the new application by using the azure ad app create command; note that the --home-page and --identified-uris must be specified even though we won’t actually use them later on. The --password option is used to set a shared secret and will be used later on so make a note of it.
PS C:UsersStuartPreston> azure ad app create --name "automation-chef" --home-page "http://chef.io" --identifier-uris "https://pendrica.com/automation-chef" --password "my-top-secret-password"info: Executing command ad app create+ Creating application automation-chefdata: Application Id: 02a2ba0d-YOUR-GUID-HERE-0e7cd312d62bdata: Application Object Id: cafac4ae-YOUR-GUID-HERE-2d8b6eb2d21cdata: Application Permissions:data: claimValue: user_impersonationdata: description: Allow the application to access automation-chef on behalf of the signed-in user.data: directAccessGrantTypes:data: displayName: Access automation-chefdata: impersonationAccessGrantTypes: impersonated=User, impersonator=Applicationdata: isDisabled:data: origin: Applicationdata: permissionId: 6c98e9b7-YOUR-GUID-HERE-6c62693c5c4data: resourceScopeType: Personaldata: userConsentDescription: Allow the application to access automation-chef on your behalf.data: userConsentDisplayName: Access automation-chefdata: lang:info: ad app create command OK
By creating an application, we are returned an Application Id; we’ll need this to configure Chef Provisioning later on, so make a note of it. The next thing we’ll need to do is create our Service Principal for our application. For this we need to pass in the Application Id at the command line:
PS C:UsersStuartPreston> azure ad sp create 02a2ba0d-YOUR-GUID-HERE-0e7cd312d62binfo: Executing command ad sp create+ Creating service principal for application 02a2ba0d-YOUR-GUID-HERE-0e7cd312d62bdata: Object Id: c49c3e61-70a9-4af4-86d1-86c61ab2f428data: Display Name: automation-chefdata: Service Principal Names:data: 02a2ba0d-YOUR-GUID-HERE-0e7cd312d62bdata: https://pendrica.com/automation-chefinfo: ad sp create command OK
This time, we were returned an Object Id for our Service Principal, which we will use to assign a role. For this we need azure role assignment create command passing in the Object Id and Subscription Id as shown below:
PS C:UsersStuartPreston> azure role assignment create --objectId c49c3e61-70a9-4af4-86d1-86c61ab2f428 -o Owner -c /subscriptions/b6e7eee9-YOUR-GUID-HERE-03ab624df016info: Executing command role assignment create+ Finding role with specified namedata: RoleAssignmentId : /subscriptions/b6e7eee9-YOUR-GUID-HERE-03ab624df016/providers/Microsoft.Authorization/roleAssignments/53c94040-YOUR-GUID-HERE-cabe8abd6560data: RoleDefinitionName : Ownerdata: RoleDefinitionId : 8e3af657-YOUR-GUID-HERE-2fe8c4bcb635data: Scope : /subscriptions/b6e7eee9-YOUR-GUID-HERE-03ab624df016data: Display Name : automation-chefdata: SignInName :data: ObjectId : c49c3e61-YOUR-GUID-HERE-86c61ab2f428data: ObjectType : ServicePrincipal
We should now have a working Service Principal with access to the subscription. To verify that we can log in, we use the Application Id and Tenant Id (obtained from azure account list) along with the password for the application and the --service-principal option:
PS C:UsersStuartPreston> azure login -u 02a2ba0d-YOUR-GUID-HERE-0e7cd312d62b -p "my-top-secret-password" --service-principal --tenant 9c117323-YOUR-GUID-HERE-9ee430723ba3info: Executing command login/info: Added subscription Microsoft Partner Network+info: login command OK
PowerShell
Let’s set up a Service Principal using PowerShell now, following the same pattern as described above. First of all, we need to log in to Azure using the Login-AzureRmAccount cmdlet:
PS C:UsersStuartPreston> Login-AzureRmAccount You will be asked to authenticate using a browser-based form; then you should receive the below output or similar:
Environment : AzureCloudAccount : [email protected]TenantId : 9c117323-YOUR-GUID-HERE-9ee430723ba3SubscriptionId : b6e7eee9-YOUR-GUID-HERE-03ab624df016CurrentStorageAccount :
As you can see, we are presented the TenantId and the SubscriptionId upon login; we’ll need both of these later so make a note of them. We can now progress to create an application using the New-AzureRmADApplication cmdlet:
PS C:UsersStuartPreston> $app = New-AzureRmADApplication -DisplayName "automation-chef2" -HomePage "http://chef.io" -IdentifierUris "https://pendrica.com/automation-chef2" -Password "my-top-secret-password" If we examine $app we can see we are returned an ApplicationId that we can use:
PS C:UsersStuartPreston> $appType : ApplicationApplicationId : 5f2536db-YOUR-GUID-HERE-db080287b58aApplicationObjectId : 094a1477-YOUR-GUID-HERE-291432050fdbAvailableToOtherTenants : FalseAppPermissions : {{"claimValue": "user_impersonation","description": "Allow the application to access automation-chef2on behalf of thesigned-in user.","directAccessGrantTypes": [],"displayName": "Access automation-chef2","impersonationAccessGrantTypes": [{"impersonated": "User","impersonator": "Application"}],"isDisabled": false,"origin": "Application","permissionId": "43869379-YOUR-GUID-HERE-6f0fc7bfeae7","resourceScopeType": "Personal","userConsentDescription": "Allow the application to access automation-chef2 on your behalf.","userConsentDisplayName": "Access automation-chef2","lang": null}}
We can now create a service principal for the application using the New-AzureRmADServicePrincipal cmdlet:
PS C:UsersStuartPreston> New-AzureRmADServicePrincipal -ApplicationId $app.ApplicationIdDisplayName Type ObjectId----------- ---- --------automation-chef2 924895ba-YOUR-GUID-HERE-d1c8b4e208f2
Now we can assign the Owner role on the current subscription to the Service Principal using the New-AzureRmRoleAssignment cmdlet:
Tip
Use the Select-AzureRmSubscription cmdlet if the subscription you want to grant access to is not the current one.
PS C:UsersStuartPreston> New-AzureRmRoleAssignment -RoleDefinitionName Owner -ServicePrincipalName $app. ApplicationIdRoleAssignmentId : /subscriptions/b6e7eee9-YOUR-GUID-HERE-03ab624df016/providers/Microsoft.Authorization/roleAssignments/c3ee69b5-YOUR-GUID-HERE-afb8f5179d60Scope : /subscriptions/b6e7eee9-YOUR-GUID-HERE-03ab624df016DisplayName : automation-chef2SignInName :RoleDefinitionName : OwnerRoleDefinitionId : 8e3af657-YOUR-GUID-HERE-2fe8c4bcb635ObjectId : 924895ba-YOUR-GUID-HERE-d1c8b4e208f2ObjectType : ServicePrincipal
We can test this using Login-AzureRMAccount. We use the Application ID and the Password to create a credentials object:
PS C:UsersStuartPreston> $creds = Get-Credentials Then we can use these credentials as part of the Login request, passing in the TenantId we noted down earlier:
PS C:UsersStuartPreston> Login-AzureRmAccount -Credential $creds -ServicePrincipal -Tenant 9c117323-YOUR-GUID-HERE-9ee430723ba3Environment : AzureCloudAccount : 5f2536db-YOUR-GUID-HERE-db080287b58aTenantId : 9c117323-YOUR-GUID-HERE-9ee430723ba3SubscriptionId : b6e7eee9-YOUR-GUID-HERE-03ab624df016CurrentStorageAccount :
We have completed the four stages to creating a Service Principal using the command-line tools. We now can proceed to use the values captured above in order to configure our provisioning node so it can authenticate correctly and gain access to the requested resources. We’ll need the Tenant Id, Subscription Id, Application Id (otherwise known as a Client Id), and the Password (otherwise known as a Client Secret) from above.
Configuring Chef Provisioning for Authentication
Now that we have a Service Principal with delegated ownership permission on our Subscription, we need to configure the Chef Provisioning for Azure Resource Manager driver. The driver can read credentials from one of two locations:
1. A file located beneath the home directory of the user executing Chef Client
2. By reading in a set of environment variables
Here’s how:
Configuring the Credentials File
Our credentials are stored in the ∼/.azure/credentials file; let’s create it and add a section for our subscription:
                                                              Do not enter these:
[b6e7eee9-YOUR-GUID-HERE-03ab624df016]                        <- Subscription ID
tenant_id = "9c117323-YOUR-GUID-HERE-9ee430723ba3"            <- Tenant ID
client_id = "02a2ba0d-YOUR-GUID-HERE-0e7cd312d62b"            <- Application ID
client_secret = "my-top-secret-password"                      <- Application Password
Breaking this down, the first line [b6e7eee9-YOUR-GUID-HERE-03ab624df016] represents the Subscription Id, and is the connection between the Chef Provisioning recipe and Azure. The Tenant ID you will have already. In the credentials file the client_id and client _secret values are the Application Id and Password that were created above respectively. The Azure SDK for Ruby uses client_id and client_secret in its terminology (and error messages), which is why they are named like that.
Note
∼ (tilde) is an alias in most shells (including PowerShell) for the user’s home directory. This is the equivalent of using $env:USERPROFILE in Windows PowerShell or $HOME in OS X or a Unix shell.
Environment Variable-based Configuration
If it is preferable in your environment to set up some Environment variables, the following can be used. In this case we do not need to set the Subscription ID, because we will be passed it by the recipe. However, it means we can only support one Subscription per host, unless your Service Principal is granted access to multiple subscriptions:
AZURE_CLIENT_ID="02a2ba0d-YOUR-GUID-HERE-0e7cd312d62b"AZURE_CLIENT_SECRET="my-top-secret-password"AZURE_TENANT_ID="9c117323-YOUR-GUID-HERE-9ee430723ba3"
All done? Great. Now we can progress onto writing recipes!
Preparing the Chef-Repo
To follow the examples, we will need the .chef folder from the Starter Kit that you downloaded in chapter 1, which is preconfigured with the private keys required to talk to the hosted Chef server and the validation key that allows us to register newly provisioned nodes against it.
Starting from your home directory, let’s create a new repo for this chapter:
PS C:UsersStuartPreston> chef generate app chefazure-ch04 --copyright "Stuart Preston" --email "[email protected]" Copy the .chef folder from the Starter Kit zip file into the chefazure-ch04 folder.
We can now generate a new cookbook called provision. We do this with the chef generate cookbook command. Note that we start in the chefazure-ch04 folder:
PS C:UsersStuartPreston> cd chefazure-ch04PS C:UsersStuartPrestonchefazure-ch04> chef generate cookbook cookbooks/provision --copyright "Stuart Preston" --email "[email protected]"Compiling Cookbooks...Recipe: code_generator::cookbook* directory[C:/Users/StuartPreston/chefazure-ch04/cookbooks/provision] action create- create new directory C:/Users/StuartPreston/chefazure-ch04/cookbooks/provision[...]* directory[C:/Users/StuartPreston/chefazure-ch04/cookbooks/provision/recipes] action create- create new directory C:/Users/StuartPreston/chefazure-ch04/cookbooks/provision/recipes* template[C:/Users/StuartPreston/chefazure-ch04/cookbooks/provision/recipes/default.rb] action create_if_missing- create new file C:/Users/StuartPreston/chefazure-ch04/cookbooks/provision/recipes/default.rb- update content in file C:/Users/StuartPreston/chefazure-ch04/cookbooks/provision/recipes/default.rb from none to 505148(diff output suppressed by config)PS C:UsersStuartPrestonchefazure-ch04>
We can see by inspecting the output that a number of folders and files were created, including a default.rb recipe file. We’ll be using that to describe the machines we want to create using Chef Provisioning.
When we want to begin integrating some quality tooling with Chef we’ll need to use some more of these generated files, this will be covered later in chapter 6. For now, let’s open the whole repo in our code editor of choice. I use Microsoft’s Visual Studio Code but feel free to use your favorite editor:
PS C:UsersStuartPrestonchef-repo> code . Once the editor has launched, we can navigate to cookbooks/provision/recipes/default.rb as shown in the screenshot below and we’re ready to add some provisioning code. Figure 4-3 shows the default.rb recipe opened in our text editor:

Figure 4-3. Visual Studio Code showing the default recipe in the provision cookbook
Chef Provisioning Recipes
In this section, we’ll add to the blank recipe that is open and add the code required to define the resources we want to deploy. First of all, we need to tell Chef Provisioning that we’re interested in the AzureRM driver and provide it the Subscription ID of the subscription we want to work with. This is accomplished by adding the following two lines to default.rb:
require 'chef/provisioning/azurerm'with_driver 'AzureRM:b6e7eee9-YOUR-GUID-HERE-03ab624df016'
We’re now ready to add our resources to our recipe. To start off with, let’s create an Azure Resource Group in our subscription:
azure_resource_group "chef-azure-book" dolocation 'West Europe'tags CreatedFor: 'Using Chef with Microsoft Azure book'end
The resource actually defines two actions :create and :destroy - we will cover the destroy action later in the chapter. :create is the default action so does not need to be specified in the recipe. The full list of parameters is shown below in Table 4-1:
Table 4-1. azure_resource_group resource options
Parameter Name | Description | Example Value |
|---|---|---|
location | This is the location where the machine and storage account should be created. See chapter 2 for a list of all regions. | 'West Europe' |
tags | This is a comma-separated list of tag values to be applied to the resource group. Note that this field is not incremental - the tags on the target resource will be overwritten with the contents of this parameter each time the Chef client converges. | CreatedFor: 'Using Chef with Microsoft Azure book' |
At this point you should have a recipe that looks like the following:
require 'chef/provisioning/azurerm'with_driver 'AzureRM:b6e7eee9-YOUR-GUID-HERE-03ab624df016'azure_resource_group "chef-azure-book" dolocation 'West Europe'tags CreatedFor: 'Using Chef with Microsoft Azure book'end
We can now upload this to our server using knife cookbook upload:
PS C:UsersStuartPrestonchefazure-ch04> knife cookbook upload provisionUploading provision [0.1.0]Uploaded 1 cookbook.
Configuring the Provisioning Node as a Chef Client
We need to configure our workstation as a provisioning node in order to work with Azure. This is because when we send instructions to create resources in Azure, those resources need a real Chef Server to talk to. Unfortunately, we cannot use Chef Client in local mode for this scenario. So we’re going to set up our workstation as a full Chef Client. Don’t worry though: Chef Client will only run when we tell it to do so from the command line. There are three things we need to accomplish:
1. Copy the organization-validator.pem file from within your .chef folder to c:chef (Windows) or /etc/chef (OS X/Linux) depending on which platform you are on.
2. Copy the following lines from your knife.rb to c:chefclient.rb or /etc/chef/client.rb depending on your platform:
current_dir = File.dirname(__FILE__)validation_client_name "pendrica-chefazure-validator"validation_key "#{current_dir}/pendrica-chefazure-validator.pem"chef_server_url https://api.chef.io/organizations/pendrica-chefazure
3. At an administrative command prompt on Windows or via sudo on OS X and Linux, run chef-client once:
C:WINDOWSsystem32> chef-clientStarting Chef Client, version 12.5.1Creating a new client identity for DESKTOP-TIDJ3S8 using the validator key.resolving cookbooks for run list: []Synchronizing Cookbooks:Compiling Cookbooks...[2015-11-15T09:48:47+00:00] WARN: Node DESKTOP-TIDJ3S8 has an empty run list.Converging 0 resourcesRunning handlers:Running handlers completeChef Client finished, 0/0 resources updated in 20 seconds
We can see that a new client identity has been created. Behind the scenes a new key, client.pem, was generated and stored locally in either c:chef or /etc/chef depending on your platform.
If we log on to the hosted Chef Management interface at https://manage.chef.io with the credentials you created in chapter 1, then you’ll be able to see our new ‘node’ created successfully as shown in Figure 4-4:

Figure 4-4. Chef Management interface showing a new node has been created
We can now proceed to use our local node to provision cloud resources.
Executing the Provisioning Recipe
We now have a cookbook that has been uploaded to the server, and a client that talks to the same server. But how does the provisioning node know which recipe to run?
Chef Client lets us specify the items that should be in the runlist itself using the -r or -o options. The -r option will persist the run-list to the server so that it would run next time whereas the -o option simply overrides the run-list for that run.
At this point we want the ability to control the run list from the client so we will specify the -o option to override the runlist for this run.
PS C:UsersStuartPrestonchefazure-ch04> chef-client -o recipe[provision::default]Starting Chef Client, version 12.5.1[2015-11-15T10:12:49+00:00] WARN: Run List override has been provided.[2015-11-15T10:12:49+00:00] WARN: Original Run List: [][2015-11-15T10:12:49+00:00] WARN: Overridden Run List: [recipe[provision::default]][2015-11-15T10:12:50+00:00] WARN: chef-client doesn't have administrator privileges on node DESKTOP-TIDJ3S8. This might cause unexpected resource failures.resolving cookbooks for run list: ["provision::default"]Synchronizing Cookbooks:- provision (0.1.0)Compiling Cookbooks...Converging 1 resourcesRecipe: provision::default* azure_resource_group[chef-azure-book] action create- create or update Resource Group chef-azure-book[2015-11-15T10:12:54+00:00] WARN: Skipping final node save because override_runlist was givenRunning handlers:Running handlers completeChef Client finished, 1/1 resources updated in 27 seconds
We can see that our recipe was executed and the azure_resource_group resource took the :create action. To verify from the command line, we can use the azure group list command if using Azure-cli or the Get-AzureRmResourceGroup cmdlet if using PowerShell.
Azure-cli
PS C:UsersStuartPrestonchefazure-ch04> azure group listinfo: Executing command group list+ Listing resource groupsdata: Name Location Provisioning State Tags:data: -------------- ---------- ------------------- -----------------------data: chef-azure-book westeurope Succeeded CreatedFor=Using Chef with Microsoft Azure book[...]info: group list command OK
PowerShell
PS C:UsersStuartPrestonchefazure-ch04> Get-AzureRmResourceGroup | Format- TableResourceGroupName Location ProvisioningState----------------- -------- -----------------chef-azure-book westeurope Succeeded
Management Portal
We can also verify the creation of our resource group via the Azure Management Portal, as shown in Figure 4-5.

Figure 4-5. Azure Management Portal showing the chef-azure-book Resource Group and tags
It should be noted that if you were to change the tags option, and re-upload the cookbook and re-run the Chef client, the new tags would overwrite the first set that were uploaded. Now that we have verified the Resource Group exists, we can now add a Resource Template to our repository and execute it using the Chef client.
Chef Provisioning a Windows VM with Remote Desktop Enabled
We’re ready to add an Azure Resource Manager template to our recipe and watch resources from it get provisioned.
There are many sources of Azure Resource Manager templates, from creating your own from scratch using the documentation, to predefined templates that others have created. A good library of predefined templates is available at https://github.com/Azure/azure-quickstart-templates
Let’s find a template that we can use to demonstrate provisioning from Chef. In my example I use the one from https://github.com/Azure/azure-quickstart-templates/tree/master/101-vm-with-rdp-port as shown in Figure 4-6.

Figure 4-6. GitHub page for our sample Windows VM
Downloading the Template
Each template in the gallery has a file azuredeploy.json that contains the ARM template; let’s download it by clicking on the link, making sure you click on the Raw button as shown in Figure 4-7. Then save the entire file into the location cookbooks/provision/files/default/azuredeploy.json within your repo.
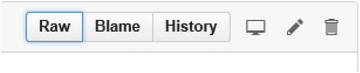
Figure 4-7. GitHub "Raw" button used to display the contents of a file in your browser
We should now be able to navigate to and inspect the azuredeploy.json file in our code editor, as shown in Figure 4-8.

Figure 4-8. Viewing azuredeploy.json in a code editor
We shouldn’t need to modify the azuredeploy.json file after this point; what we are interested in is the parameters. We need the names of all the parameters in order to add a resource to our Chef recipe. If we examine the parameters section of JSON we can see all the keys are the names of the parameters that we want to put in our recipe. I’ve highlighted them in bold below.
"parameters": {"dnsLabelPrefix": {"type": "string","metadata": {"description": "Unique public DNS prefix for the deployment. The fqdn will look something like '<dnsname>.westus.cloudapp.azure.com'. Up to 62 chars, digits or dashes, lowercase, should start with a letter: must conform to '^[a-z][a-z0-9-]{1,61}[a-z0-9]$'."}},"vmName": {"type": "string","defaultValue": "vm","metadata": {"description": "The name of the VM"}},"adminUsername": {"type": "string","defaultValue": "cloudguy","metadata": {"description": "The name of the administrator of the new VM. Exclusion list: 'admin','administrator'"}},"adminPassword": {"type": "securestring","metadata": {"description": "The password for the administrator account of the new VM"}},"rdpPort": {"type": "int","defaultValue": 50001,"metadata": {"description": "Public port number for RDP"}}}
We can now use the azure_resource_template resource to refer to our JSON file, and specify the required parameters. Table 4-2 explains the properties that are available on this resource.
Table 4-2. azure_template_resource resource options
Parameter Name | Description | Example Value |
|---|---|---|
resource_group | This is the name of the Azure Resource Group you want to provision your resources in. | 'chef-azure-book' |
template_source | This is the path to the ARM template you wish to deploy, relative to the root of the repo. | 'cookbooks/provision/files/default/azuredeploy.json' |
parameters | This is an array of key/value pairs used to define parameters. The key names match the parameter names in the ARM template. | username: 'test', password: 'P2ssw0rd' |
chef_extension | This is an array of key/value pairs used to determine whether a Chef VM Extension should be added to each Compute resource found in the ARM template. | client_type: 'ChefClient', version: '1210.12', runlist: 'role[webserver]' |
Here’s what our azure_resource_template recipe should look like after modifiation:
azure_resource_template "chef-azure-deployment" doresource_group "chef-azure-book"template_source "cookbooks/provision/files/default/azuredeploy.json"parameters dnsLabelPrefix: 'chef-azure-book',vmName: 'chefazurevm',adminUsername: 'azure',adminPassword: 'P2ssw0rd',rdpPort: 3389end
Let’s go through each of the parameters in turn to explain them and some of the Azure naming rules that apply.
dnsLabelPrefix - this is an Azure DNS entry that will be created dynamically. Only the first part of the name needs to be specified as. <location>.cloudapp.azure.com will be added automatically. In our case ‘chef-azure-book’.
vmName - the name assigned to the VM itself. In our case ‘chefazurevm’.
adminUsername/adminPassword - credentials for the VM.
rdpPort - TCP port number that will be used to create a rule allowing access to the machine on the RDP port. In our case we will use the default RDP port ‘3389’.
Ensure that you have saved both the recipe file and the template and we can now upload this to our server using knife cookbook upload:
PS C:UsersStuartPrestonchefazure-ch04> knife cookbook upload provisionUploading provision [0.1.0]Uploaded 1 cookbook.
We can now run our recipe again from our workstation:
PS C:UsersStuartPrestonchefazure-ch04> chef-client -o recipe[provision::default] The output should follow a similar pattern to below (I have shortened the output):
resolving cookbooks for run list: ["provision::default"]Synchronizing Cookbooks:- provisionCompiling Cookbooks...Converging 2 resourcesRecipe: provision::default* azure_resource_group[chef-azure-book] action create- create or update Resource Group chef-azure-book* azure_resource_template[chef-azure-deployment] action deploy- Result: Accepted- Resource Microsoft.Network/virtualNetworks 'VNET' provisioning status is Running- Resource Microsoft.Storage/storageAccounts 'chefazure2015' provisioning status is Running- Resource Microsoft.Storage/storageAccounts 'chefazure2015' provisioning status is Running- Resource Microsoft.Storage/storageAccounts 'chefazure2015' provisioning status is Running[...]- Resource Template deployment reached end state of 'Succeeded'.- deploy or re-deploy Resource Manager template 'my-deployment'Running handlers:Running handlers completeChef Client finished, 2/2 resources updated in 428.605428 seconds
We can verify that our resources have been created using the Azure-cli , PowerShell. or in the Management Portal:
Azure-cli
PS C:UsersStuartPrestonchefazure-ch04> azure group show chef-azure-book{"tags": {"CreatedFor": "Using Chef with Microsoft Azure book"},"id": "/subscriptions/b6e7eee9-YOUR-GUID-HERE-03ab624df016/resourceGroups/chef-azure-book","name": "chef-azure-book","provisioningState": "Succeeded","location": "westeurope","properties": {"provisioningState": "Succeeded"},"resources": [{"id": "/subscriptions/b6e7eee9-YOUR-GUID-HERE-03ab624df016/resourceGroups/chef-azure-book/providers/Microsoft.Compute/virtualMachines/vm","name": "vm","type": "virtualMachines","location": "westeurope","tags": null},[...]
PowerShell
PS C:UsersStuartPrestonchefazure-ch04> Get-AzureRmResource | where {$_.ResourceGroupName -eq "chef-azure-book" } | Select Name, ResourceTypeName ResourceType---- ------------vm Microsoft.Compute/virtualMachinesloadBalancer Microsoft.Network/loadBalancerschefazurevm-nif Microsoft.Network/networkInterfacespublicIp Microsoft.Network/publicIPAddressesVNET Microsoft.Network/virtualNetworkschefazure2015 Microsoft.Storage/storageAccounts
Management Portal
Figure 4-9 shows the Resource Group with the resources available after Chef Provisioning has run.

Figure 4-9. Resource Group showing created Resources in the Management portal
We can now connect to the machine by RDP if we wish. In our particular deployment, we have a load balancer with a NAT rule enabled that allows us to connect to the target VM on the standard port. Figure 4-10 shows the configuration that was created, entirely based on the JSON template combined with the parameters we specified.

Figure 4-10. Inbound NAT rules through a load balancer as seen in the Azure Management portal
Chef Provisioning and the Chef VM Extensions
If you recall from chapter 3, we have the ability to add the Chef VM Extension to compute resource in Azure as a ‘bootstrapless’ mechanism to get the Chef client installed and enabled on the machine. Chef Provisioning for Azure Resource Manager has a feature that allows this VM Extension to be automatically added to compute resources.
To enable the feature, we need to change the azure_resource_template resource to add a property chef_extension, which in turn has a couple of properties that are settable, such as the machine’s initial run_list on provision, and the version of the extension to deploy.
The additional property looks like this:
chef_extension client_type: 'ChefClient',
               version: '1210.12'
               runlist: 'role[webserver]'
If we add this property to our existing resource, our entire recipe now looks like this:
require 'chef/provisioning/azurerm'with_driver 'AzureRM:b6e7eee9-YOUR-GUID-HERE-03ab624df016'azure_resource_group "chef-azure-book" dolocation 'West Europe'tags CreatedFor: 'Using Chef with Microsoft Azure book'endazure_resource_template "chef-azure-deployment" doresource_group "chef-azure-book"template_source "cookbooks/provision/files/default/azuredeploy.json"parameters dnsLabelPrefix: 'chef-azure-book',vmName: 'chefazurevm',adminUsername: 'azure',adminPassword: 'P2ssw0rd',rdpPort: 3389chef_extension client_type: 'ChefClient',version: '1210.12'end
Having made these changes can now upload this recipe to our server using knife cookbook upload:
PS C:UsersStuartPrestonchefazure-ch04> knife cookbook upload provisionUploading provision [0.1.0]Uploaded 1 cookbook.
We can now run our recipe again from our workstation:
PS C:UsersStuartPrestonchefazure-ch04> chef-client -o recipe[provision::default] The output should follow a similar pattern to below (I have shortened the output):
resolving cookbooks for run list: ["provision::default"]Synchronizing Cookbooks:- provision (0.1.0)Compiling Cookbooks...Converging 2 resourcesRecipe: provision::default* azure_resource_group[chef-azure-book] action create- create or update Resource Group chef-azure-book* azure_resource_template[chef-azure-deployment] action deploy- adding a Chef VM Extension with name: vm and location: [parameters('location')]- Result: Accepted- Resource Microsoft.Compute/virtualMachines 'vm' provisioning status is Running- Resource Microsoft.Compute/virtualMachines 'vm' provisioning status is Running- Resource Microsoft.Compute/virtualMachines/extensions 'vm/chefExtension' provisioning status is Running- Resource Microsoft.Compute/virtualMachines/extensions 'vm/chefExtension' provisioning status is Running- Resource Microsoft.Compute/virtualMachines/extensions 'vm/chefExtension' provisioning status is Running- Resource Microsoft.Compute/virtualMachines/extensions 'vm/chefExtension' provisioning status is Running[...]- Resource Template deployment reached end state of 'Succeeded'.- deploy or re-deploy Resource Manager template 'chef-azure-deployment'[2015-11-15T13:41:53+00:00] WARN: Skipping final node save because override_runlist was given
We have now provisioned our first server via Chef Provisioning and enabled it to talk to the hosted Chef server via the Chef VM Extension. We are now able to manage the node like any other node in the organization.
What happened here? Via the Azure Resource Manager driver, we instructed Azure to add a Virtual Machine extension of type chefExtension to the existing VM that was created. We picked up the organization validator key from the local Chef client, and used the settings from our client to point our new node to the hosted Chef server.
If you navigate to the Hosted Chef management portal at https://manage.chef.io we can see that our node has registered successfully, as shown in Figure 4-11. You’ll note the machine is called <vm>.<resource group name> - this is so that the server can disambiguate the machines when they connect.

Figure 4-11. Hosted Chef portal showing vm.chef-azure-book is registered correctly
We can also check via Remote Desktop to the server that the settings in client.rb are as we expect them, as shown in Figure 4-12.

Figure 4-12. Confirming the configuration values set in client.rb are set correctly
Destroying Azure Resources
Now we have seen how to create resources in Azure, we had better work out how to remove them or else someone within your organization will get a large bill at the end of the month! Luckily we can simply destroy our resource group.
To destroy the resource group after use, we need to create a new recipe that destroys our resources by specifying the :destroy action on the azure_resource_group resource. We can generate the recipe using the chef generate recipe command:
PS C:UsersStuartPrestonchefazure-ch04> chef generate recipe cookbooks/provision destroy --copyright "Stuart Preston" --email [email protected]Compiling Cookbooks...Recipe: code_generator::recipe* directory[cookbooks/provision/spec/unit/recipes] action create (up to date)* cookbook_file[cookbooks/provision/spec/spec_helper.rb] action create_if_missing (up to date)* template[cookbooks/provision/spec/unit/recipes/destroy_spec.rb] action create_if_missing- create new file cookbooks/provision/spec/unit/recipes/destroy_spec.rb- update content in file cookbooks/provision/spec/unit/recipes/destroy_spec.rb from none to 0ef16e(diff output suppressed by config)* template[cookbooks/provision/recipes/destroy.rb] action create- create new file cookbooks/provision/recipes/destroy.rb- update content in file cookbooks/provision/recipes/destroy.rb from none to 660c50(diff output suppressed by config)
Now open up the destroy.rb recipe and modify it so that it looks similar to the one below, replacing your Subscription ID for the sample one:
require 'chef/provisioning/azurerm'with_driver 'AzureRM:b6e7eee9-YOUR-GUID-HERE-03ab624df016'azure_resource_group "chef-azure-book" doaction :destroyend
Having made these changes, upload this recipe to the hosted Chef server using knife cookbook upload:
PS C:UsersStuartPrestonchefazure-ch04> knife cookbook upload provisionUploading provision [0.1.0]Uploaded 1 cookbook.
We can now run our recipe again from our workstation:
PS C:UsersStuartPrestonchefazure-ch04> chef-client -o recipe[provision::destroy]Starting Chef Client, version 12.5.1[2015-11-15T14:57:15+00:00] WARN: Run List override has been provided.[2015-11-15T14:57:15+00:00] WARN: Original Run List: [][2015-11-15T14:57:15+00:00] WARN: Overridden Run List: [recipe[provision::destroy]][2015-11-15T14:57:16+00:00] WARN: chef-client doesn't have administrator privileges on node DESKTOP-TIDJ3S8. This might cause unexpected resource failures.resolving cookbooks for run list: ["provision::destroy"]Synchronizing Cookbooks:- provision (0.1.0)Compiling Cookbooks...Converging 1 resourcesRecipe: provision::destroy* azure_resource_group[chef-azure-book] action destroy- destroy Resource Group chef-azure-book[2015-11-15T15:01:52+00:00] WARN: Skipping final node save because override_runlist was givenRunning handlers:Running handlers completeChef Client finished, 1/1 resources updated in 04 minutes 58 seconds
The recipe can take up to five minutes to execute while locks are freed on all of the resources within the Resource Group. Chef Provisioning will wait for this to complete in case anything further down the recipe is dependent on the Resource Group being deleted.
While the resource group is being destroyed it is given the status of Deleting as seen in the portal in Figure 4-13.

Figure 4-13. Azure Resource Group in Deleting state as seen in the Management portal
We can see how an operation that would have taken quite a few clicks – refreshing and waiting in the portal – can be accomplished with a single line, and we don’t have to worry about shutting resources down in the correct order.
Summary
In this chapter we made sure your workstation was configured correctly to support Chef Provisioning and the Chef Provisioning Azure Resource Manager driver (chef-provisioning-azurerm). We went into detail on how to set up a Service Principal to allow us to configure Chef Provisioning correctly. We then looked at examples of ARM templates and showed you how to build a Windows Server using the framework. On top of that we looked at how to enable the Chef VM Extension so that every machine you boot up in Azure is configuration managed from Day 1.
By this point you will may be starting to see how this all comes together to express an entire Azure environment as code, using Chef to orchestrate the provisioning and the configuration management of the environment. Now that you understand the basics, we’ll move on to some more complex real-world scenarios.