© Sheran Gunasekera 2020
S. GunasekeraAndroid Apps Securityhttps://doi.org/10.1007/978-1-4842-1682-8_3

3. App Licensing and SafetyNet

Sheran Gunasekera1 
(1)
Singapore, Singapore
 

In this chapter, I want to look at how you can understand the integrity of your app and the integrity of the device that your app runs on. Let’s take those two topics and drill down a bit further.

On the app side, when you write and publish an app, you want to ensure that the app that is running on the end user’s device is indeed your app. In cases of commercial apps or apps that have a commercial component to it within the app, for example, buying additional features, you will want to make sure that the code being run and the back end that it is talking to know that it was built by you or your team. The reason you would want this check in place is if an attacker reverse engineers and modifies your app. For instance, an attacker can try to “purchase” or obtain certain paid content or features from your app by reverse engineering and patching your app. For instance, he can bypass a trial period check by patching the check to see if the trial period has expired. To do this, he would have to reverse engineer the app, edit the code, rebuild the app, sign it with his own key, and install it on his own device. Your app, without having a means to verify where it was actually installed from, will continue to work. App Licensing aims to correct this attack vector by working together with Google Play’s licensing server to make sure the app was legitimately downloaded or purchased through the Play Store. Any modified, side-loaded apps can be filtered out and disabled by this mechanism. I cover how to get App Licensing work in the first edition of this book in Chapter 9 – “Publishing and Selling Your Apps.” The concept itself remains the same; however, for an updated set of documentation, please see here: https://developer.android.com/google/play/licensing.

On the topic of ensuring the device that your app runs on, there is Android SafetyNet. On Google’s documentation for SafetyNet, we see the description that SafetyNet helps protect your app against security threats such as tampered devices, bad URLs, harmful apps, and fake users. Each of these topics is covered here [https://developer.android.com/training/safetynet], though I want to take a closer look at how to protect apps from being run in tampered devices. I will take a closer look at how to implement SafetyNet and look at some examples in practice. To do this, we will write an app that makes use of SafetyNet’s Attestation API and see how that works. Before that, let’s take a look at how the Attestation API works. Take a look at Figure 3-1.
../images/273312_2_En_3_Chapter/273312_2_En_3_Fig1_HTML.jpg
Figure 3-1

The steps taken for SafetyNet Attestation

Let’s look at each of the steps:
  1. 1.

    First, whenever a user of the app requests a feature or an action, the app will make a request to the back end to request a nonce.

     
  2. 2.

    The server responds with the nonce. This nonce is important for the lifetime of the entire transaction, and it prevents replay attacks. The nonce should be completely random and used only once.

     
  3. 3.

    The app calls the SafetyNet Attestation API in Google SafetyNet services on the device.

     
  4. 4.

    The SafetyNet Attestation API will evaluate the device state and then send a request to the back-end server of the Google SafetyNet Attestation API to reply with a signed response giving back the results of the attestation.

     
  5. 5.

    Google’s servers return a signed set of attestation results.

     
  6. 6.

    The SafetyNet services respond with the results to your app.

     
  7. 7.

    Using this set of results, your app calls your back end to fetch whatever user request there was.

     
  8. 8.

    Your back end decides whether or not to honor the request for services based on the results of the attestation. If the results show that the device has been tampered or has root, then you can choose not to interact with the device.


It is important to note the involvement of the back-end server in this whole transaction flow. Ultimately, it is the back-end server that enjoys a higher level of security and should be more trusted than getting results from the device. The device itself could be compromised and return a “Yup! I’m all safe over here” response, but that could entirely be fabricated. Hence, the need for the final validation from the server. Prior studies that have been done by independent companies have shown a very small percentage of developers or apps that make use of Google’s SafetyNet. This is understandable when you consider the amount of extra work that you have to do as a developer to get this implemented. The ideal scenario is that you write this into some sort of helper library and have it available for all your in-house developers to use. You can choose to enforce this at build time by doing a static source code assessment and failing the build if you detect no use of SafetyNet in all critical requests to the back end. The requests to the SafetyNet API are expensive and will add overhead to your requests. Therefore, you may want to consider that as well. You could also choose to make a single recurring call for the duration of your app usage, but this may not always work out, especially if your app is not long running or gets used for a prolonged duration of time.

Now let’s see how all this looks like in an app. For this demo, we will build both our app and our back end. Let’s first define what we want to do. Let’s say that we are a delivery bike rider and that we want to set our status as ready to accept deliveries from the back end. Let’s build out our application first. Let’s install Android Studio first so that we can use it to build our app. Visit https://developer.android.com/studio and click the Download Android Studio button. I am on a Mac, so these instructions will be MacOS focused; where possible, I will try to give Windows equivalents. Read and agree to the terms of use for Android Studio and download the package. Once downloaded, double-click to open the disk image. Drag the Android Studio icon into the Applications folder to install. In Windows, when you are asked if you want to allow the app to make changes on your device, verify that it says Android Studio and click Yes. At the first screen, click Next. Then you’re asked to pick components to install; leave the default ones and click Next. Then you’re asked to pick an install location. For this, as well, leave the default and click Next. Lastly, click Install on the window that comes up and wait while the files are installed. When the installation is complete, click Next on the resulting window and then click Finish to start Android Studio.

When Android Studio starts up, it will ask you if you want to import settings from a previous installation. I choose “do not import” and click OK. Then you should be brought into an Android Studio setup wizard. Click Next and select a Standard install type. Then pick your screen theme colors, click Next, and verify the options to install. On OS X, click Finish and wait while the final setup is done. On Windows, click Next at the SDK Components Setup and then click Finish. After final setup is done, click Finish again and you should end up with a screen that looks like the one in Figure 3-2.
../images/273312_2_En_3_Chapter/273312_2_En_3_Fig2_HTML.jpg
Figure 3-2

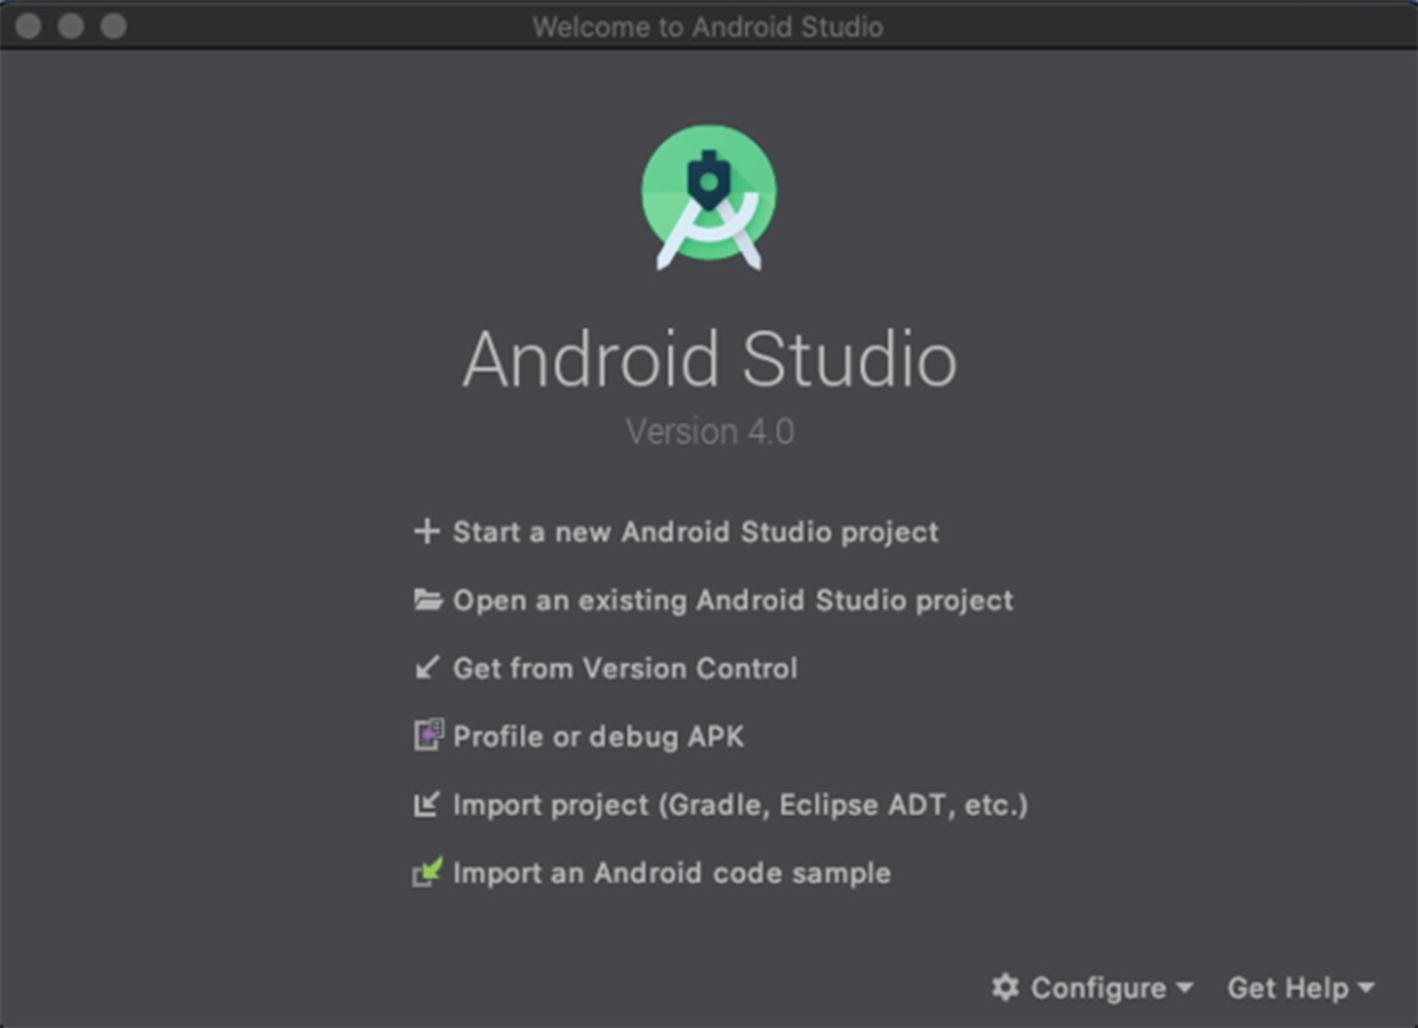
Android Studio start screen on OS X

Next, choose “Start a new Android Studio project” and then select Empty Activity from the resulting window. Next, we’re going to name our project. Pick a package name and an application name, the location where you will save the project (I leave it default), and the minimum SDK level required to run your project. Android Studio helpfully shows you the approximate percentage of all Android devices your app will run on based on your minimum SDK selection. For this project, I am giving the package name com.redteamlife.aas2 and the app name of aas2attest. The project configuration is shown in Figure 3-3.
../images/273312_2_En_3_Chapter/273312_2_En_3_Fig3_HTML.jpg
Figure 3-3

Naming our new project

I am including the full source code for you here, and you can also find both the client and the server source code at https://github.com/sheran/aas2-ch03-android_attest_client and https://github.com/sheran/aas2-ch03-go_attest_backend, respectively. I do, however, want to go over two of our classes which we use in the project and break down what they do:

Our MainActivity.kt file
01: package com.redteamlife.aas2.aas2attest
02:
03: import androidx.appcompat.app.AppCompatActivity
04: import android.os.Bundle
05: import android.util.Log
06: import android.widget.CompoundButton
07: import android.widget.Switch
08: import com.android.volley.toolbox.JsonObjectRequest
09: import com.android.volley.toolbox.RequestFuture
10: import com.android.volley.toolbox.Volley
11: import org.json.JSONObject
12: import java.util.concurrent.ExecutionException
13: import java.util.concurrent.TimeUnit
14: import java.util.concurrent.TimeoutException
15:
16: class MainActivity : AppCompatActivity() {
17:
18:     override fun onCreate(savedInstanceState: Bundle?) {
19:
20:         val TAG = "aas2attest"
21:
22:         super.onCreate(savedInstanceState)
23:         setContentView(R.layout.activity_main)
24:
25:         val attest = Attest(this)
26:
27:         val switch = findViewById<Switch>(R.id.switch1)
28:         switch.setOnCheckedChangeListener { buttonView, isChecked ->
29:             if (isChecked) {
30:                 switch.isEnabled = false
31:                 attest.getNonce()
32:             }
33:         }
34:     }
35: }
36:

The MainActivity file is not very busy as such. We have a simple switch widget that we have added to our Activity, and we check whether it is moved into the checked position or not in lines 28–29. If it is enabled, then we begin our process for attestation – lines 30–31.

Our Attest.kt file
01: package com.redteamlife.aas2.aas2attest
02:
03: import android.util.Log
04: import android.widget.Switch
05: import com.android.volley.Request
06: import com.android.volley.Response
07: import com.android.volley.toolbox.JsonObjectRequest
08: import com.google.android.gms.common.ConnectionResult
09: import com.google.android.gms.common.GoogleApiAvailability
10: import com.google.android.gms.safetynet.SafetyNet
11: import org.json.JSONObject
12:
13:
14: class Attest(activity: MainActivity){
15:
16:     private val mActivity = activity
17:     val TAG = "aas2attest"
18:     val main_url = "https://aas2.redteamlife.com:8443/"
19:
20:     fun getNonce(){
21:
22:         val queue = RQueue.getInstance(mActivity.applicationContext).requestQueue
23:         val url = main_url+"nonce"
24:         val jsonReq = JsonObjectRequest(Request.Method.GET,url,JSONObject(),Response.Listener {response ->
25:             requestAttest(response.getString("nonce"))
26:         },Response.ErrorListener {error ->
27:             Log.d(TAG,error.toString())
28:         })
29:         RQueue.getInstance(mActivity.applicationContext).addToRequestQueue(jsonReq)
30:     }
31:
32:     fun requestAttest(nonce:String){
33:         val API_KEY = "<insert _your_api_key_here>"
34:
35:         if (GoogleApiAvailability.getInstance().isGooglePlayServicesAvailable(mActivity.applicationContext)
36:             == ConnectionResult.SUCCESS) {
37:             SafetyNet.getClient(mActivity.applicationContext).attest(nonce.toByteArray(), API_KEY)
38:                 .addOnSuccessListener { resp -> validate(resp.jwsResult) }
39:                 .addOnFailureListener { err -> Log.d(TAG,err.toString()) }
40:         } else {
41:             Log.d(TAG,"Install Play Services")
42:         }
43:     }
44:
45:
46:     fun validate(jwsResult: String){
47:         val queue = RQueue.getInstance(mActivity).requestQueue
48:         val url = main_url+"validate"
49:         val jsonObj = JSONObject()
50:         jsonObj.put("jws_result",jwsResult)
51:         jsonObj.put("action","change_state")
52:
53:         val sw = mActivity.findViewById<Switch>(R.id.switch1)
54:         val jsonReq = JsonObjectRequest(Request.Method.POST,url,jsonObj,Response.Listener {response ->
55:             sw.isChecked = response.getBoolean("validation")
56:             sw.isEnabled = true
57:         },Response.ErrorListener {error ->
58:             Log.d(TAG,error.toString())
59:         })
60:         RQueue.getInstance(mActivity.applicationContext).addToRequestQueue(jsonReq)
61:     }
62: }

In our Attest.kt file, we have three methods in lines 20, 32, and 46. The first method, getNonce() , does just that; it fetches a nonce from our back-end server. Once it gets a nonce, it calls the requestAttest() method and passes this nonce to that method. This is the method that then queries Android SafetyNet APIs. Behind the scenes, the Android SafetyNet library makes a call back to Google’s APIs. Since you end up accessing Google’s APIs for this, you will need to get your own API key in order to call this specific endpoint. I will show you the steps in getting your API key later on. After you receive the result of the call, you are then ready to decide whether to allow or disallow the specific request that was just made. The best way to do this is, once again, on the server side as opposed to the client side. The client side can easily be intercepted and altered, and that is why we should never fully trust the end user’s device that he runs our apps on. That is why we have the validate() method. This last method will send the entire response from Android SafetyNet back to your own back-end server where you can decide whether or not to honor the request. We will talk about this more, but let’s first do two things: build a back end and get an API key.

API Key

As mentioned before, Google requires you to register for an API key before you call the SafetyNet Attestation API. You will need to have a Gmail account or a G Suite account to do this, so have this handy. In your browser, visit this URL: https://console.developers.google.com/apis/library and sign in if required.

Then, in the Search for APIs and Services search bar, search for and select the Android Device Verification API module. Then, enable it by clicking the Enable button. Figure 3-4 shows what that looks like. Each API requires that it be tied into a Google Cloud Platform project, so if you don’t already have a project, one named My First Project will automatically be created for you and the API enabled linked to this project.
../images/273312_2_En_3_Chapter/273312_2_En_3_Fig4_HTML.jpg
Figure 3-4

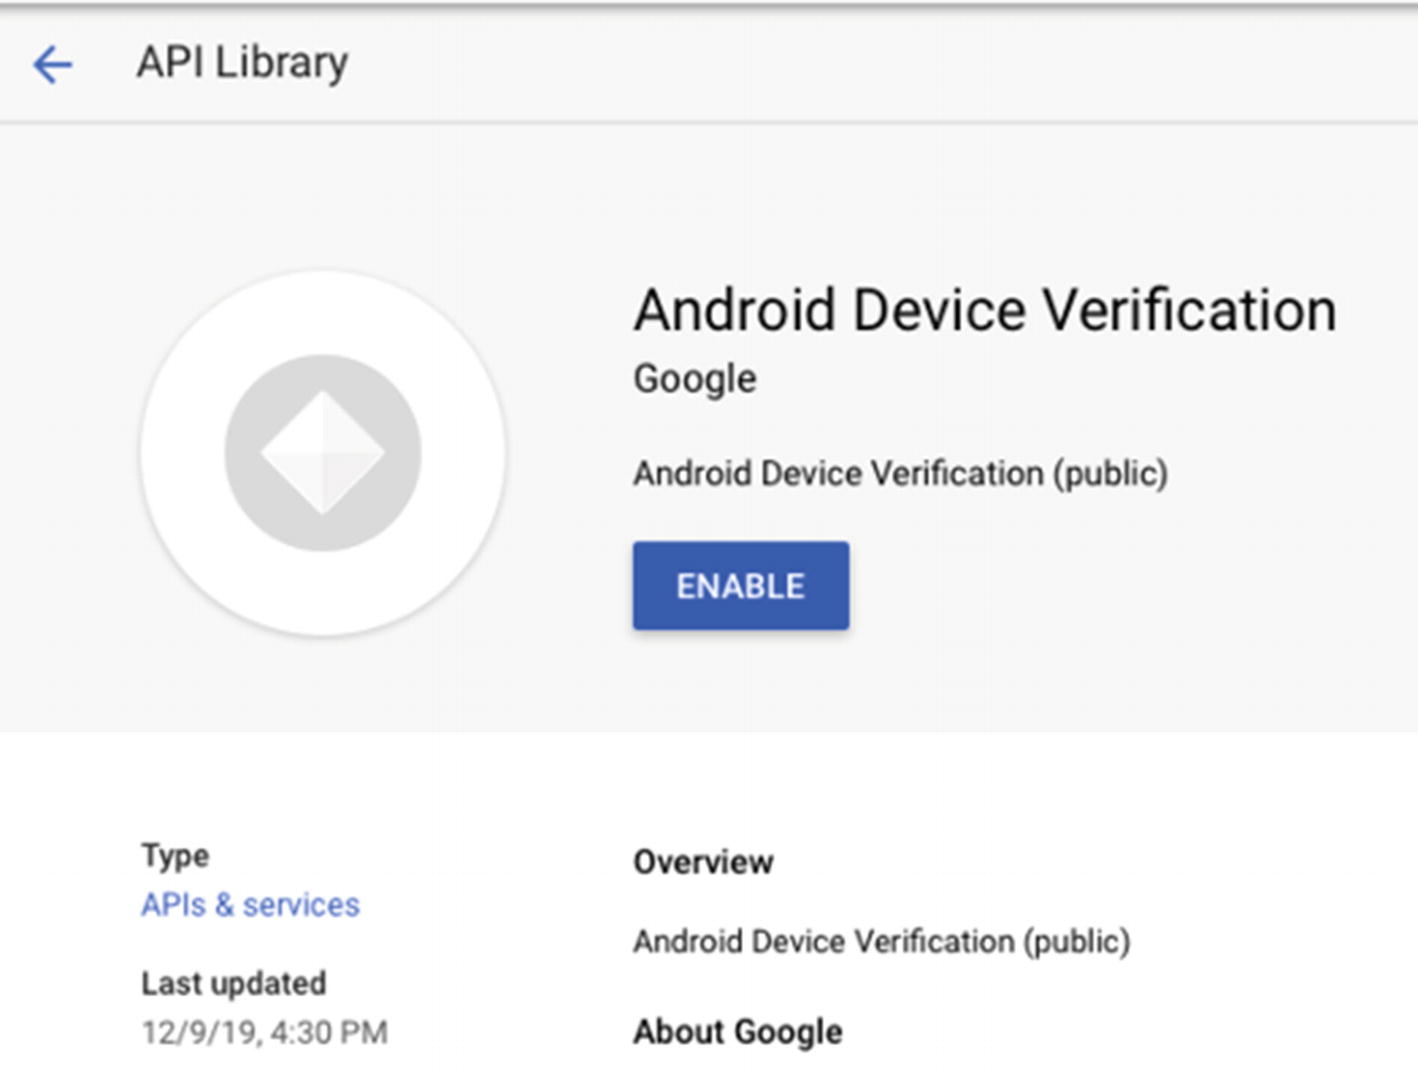
Enabling the Android Device Verification API

Once enabled, it is time to generate the API key. This can work in a few ways. If you see a screen similar to Figure 3-6 that says Add credentials to your project, then follow these steps further below. Now, if instead of the Add credentials screen, you saw a screen like the one in Figure 3-5, then click the Create Credentials as highlighted, or from the left sidebar, click the Credentials option. When you select those options, you will be brought to the screen as shown in Figure 3-7, and you can continue the process from there once again.
../images/273312_2_En_3_Chapter/273312_2_En_3_Fig5_HTML.jpg
Figure 3-5

Alternate approach to creating API keys

In the drop-down that is entitled Which API are you using? Select Android Device Verification as shown and then click the What credentials do I need? button. An API key should automatically be generated for you as shown in Figure 3-7. Copy this key and use this in your Android project.
../images/273312_2_En_3_Chapter/273312_2_En_3_Fig6_HTML.jpg
Figure 3-6

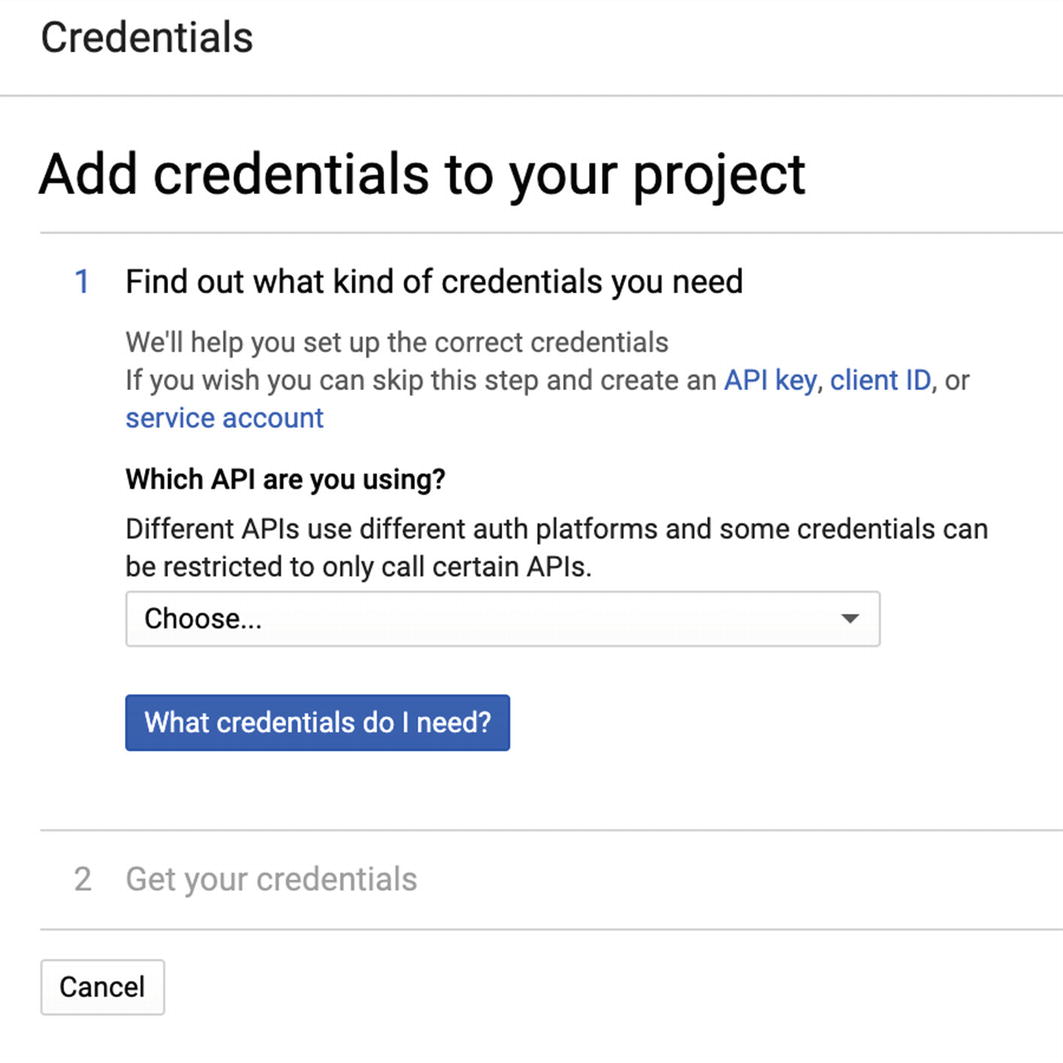
Screen showing Add credentials to your project

../images/273312_2_En_3_Chapter/273312_2_En_3_Fig7_HTML.jpg
Figure 3-7

API key being created

Building the Back End

Once again, the back-end source code will be provided, but I want to share with you the basics. The back end can be written in multiple languages; I have written mine in Go. I will give you a pseudocode interpretation of the endpoints so that you can effectively build it in any other language if required.

Our Go back end: main.go
001: package main
002:
003: import (
004:     "bytes"
005:     "crypto/rand"
006:     "crypto/sha256"
007:     "crypto/x509"
008:     "encoding/base64"
009:     "encoding/binary"
010:     "encoding/json"
011:     "encoding/pem"
012:     "fmt"
013:     "io"
014:     "log"
015:     "net/http"
016:     "strings"
017:     "time"
018:
019:     jose "github.com/square/go-jose"
020: )
021:
022: type Resp struct {
023:     JWSResult string `json:"jws_result"`
024:     Action string `json:"action"`
025: }
026:
027: func buildCert(data string) string {
028:     out := new(bytes.Buffer)
029:     ctr := 0
030:     out.WriteString("-----BEGIN CERTIFICATE----- ")
031:     for x := 0; x < len(data); x++ {
032:                if ctr == 64 {
033:                          out.WriteRune(' ')
034:                          ctr = 0
035:                }
036:                out.WriteByte(data[x])
037:                ctr++
038:     }
039:     out.WriteString(" -----END CERTIFICATE-----")
040:     return out.String()
041: }
042:
043: func (r *Resp) verify() ([]byte, error){
044:     certs := strings.Split(r.JWSResult, ".")[0] + "=="
045:     out, err := base64.StdEncoding.DecodeString(certs)
046:     if err != nil {
047:                return nil, err
048:     }
049:     var certObj map[string]interface{}
050:     if err := json.Unmarshal(out, &certObj); err != nil {
051:                return nil, err
052:     }
053:     pemCert := buildCert(certObj["x5c"].([]interface{})[0].(string))
054:     block, _ := pem.Decode([]byte(pemCert))
055:     derCert, err := x509.ParseCertificate(block.Bytes)
056:     if err != nil {
057:                return nil, err
058:     }
059:     object, err := jose.ParseSigned(r.JWSResult)
060:     if err != nil {
061:                return nil, err
062:     }
063:     oout, err := object.Verify(derCert.PublicKey)
064:     if err != nil {
065:                return nil, err
066:     }
067:     return oout,nil
068: }
069:
070: func (r *Resp) getDecodedResult(payload []byte) interface{} {
071:     var obj interface{}
072:     if err := json.Unmarshal(payload, &obj); err != nil {
073:                return nil
074:     }
075:     return obj
076: }
077:
078: func generateNonce(w http.ResponseWriter, req *http.Request) {
079:     // Here we do minimal error checking and do not bother whether we get a GET or POST
080:
081:     rbytes := make([]byte, 8)
082:     ctime := make([]byte, 8)
083:     binary.PutUvarint(ctime, uint64(time.Now().Unix()))
084:     _, err := io.ReadFull(rand.Reader, rbytes)
085:     if err != nil {
086:                http.Error(w, err.Error(), http.StatusInternalServerError)
087:     }
088:     hash := sha256.New()
089:     hash.Write(rbytes)
090:     hash.Write(ctime)
091:     fmt.Fprintf(w, `{"nonce":"%s"}`, base64.StdEncoding.EncodeToString(hash.Sum(nil)))
092:
093: }
094:
095: func validate(w http.ResponseWriter, req *http.Request) {
096:     var response Resp
097:     if err := json.NewDecoder(req.Body).Decode(&response); err != nil {
098:                http.Error(w, err.Error(), http.StatusInternalServerError)
099:                return
100:     }
101:     payload, err := response.verify()
102:     if err != nil{
103:                fmt.Println("Verification Failed")
104:                fmt.Fprintf(w, `{"validation":false}`)
105:     }
106:
107:     jwsResult := response.getDecodedResult(payload).(map[string]interface{})
108:     ctw := jwsResult["ctsProfileMatch"].(bool)
109:     bas := jwsResult["basicIntegrity"].(bool)
110:
111:     if !ctw || !bas {
112:                fmt.Println("Verification Failed")
113:                fmt.Fprintf(w, `{"validation":false}`)
114:     } else {
115:                fmt.Println("Verification Succeeded")
116:                fmt.Fprintf(w, `{"validation":true}`)
117:     }
118: }
119:
120: func main() {
121:
122:     http.HandleFunc("/nonce", generateNonce)
123:     http.HandleFunc("/validate", validate)
124:
125:     log.Fatal(http.ListenAndServeTLS(":8443", "fullchain.pem", "privkey.pem", nil))
126:
127: }
128:

A requirement for using Volley in Android on an actual device is that you are forced to use HTTPS rather than a plaintext HTTP. Therefore, you will need to get a server certificate to run the back end. I cover how to create a server certificate in Chapter 9. In our preceding code, you will notice two endpoints – /nonce and /validate. These two generate and reply with a unique nonce and validate a returned SafetyNet result, respectively.

Our nonce generation code is on lines 78–93. We take the current timestamp of the server in seconds, concatenate a set of random bytes, and then generate a SHA256 hash with that data. We then Base64 encode the SHA256 hash that we generated. We then return this Base64 string as our nonce.

Pseudocode for the Back End

The API endpoint that generates the nonce can be something like
  1. 1.

    Get server timestamp in seconds, convert to bytes, and concatenate 8 random bytes.

     
  2. 2.

    SHA256 hash the number from 1 and Base64 encode it before returning it to the requester.

     
The API endpoint to validate the JWS Result
  1. 1.

    Split the JWS Result into three parts with separator as the "." character.

     
  2. 2.

    Base64 decode the first part, then take the first certificate in the array of the label "x5c".

     
  3. 3.

    Extract the public key from 2 as pubkey.

     
  4. 4.

    Base64 decode the second part from 1.

     
  5. 5.

    Using pubkey and the algorithm from the label "alg" of point 1, verify the first two parts from point 1. They should match the third part from point 1.

     
  6. 6.

    On correct verification from point 1, verify that the labels ctsProfileMatch and basicIntegrity are both true. If not, the device has been tampered with.


Validation

When Android SafetyNet responds to your attestation request, you get a long Base64 encoded string. I found that there was insufficient information on the Google website that details the structure of the response. Instead, there is a link that sends you to the RFC [https://tools.ietf.org/html/draft-ietf-jose-json-web-signature-36] for JSON Web Signature (JWS) which is essentially the result that is given to us. A JSON Web Signature (JWS) is serialized with a URL-safe encoding called JSON Compact Serialization and is represented as three separate sections concatenated to each other and separated by the “ . ” character. The first section is the Protected Header, then next is the Payload, and the third is the Signature. Another alternative representation of JWS is the JWS JSON Serialization which has four parts. These are Protected Header, Unprotected Header, Payload, and Signature. In my experiments so far, the result has always been the JSON Compact Serialization with the three sections. I was unable to find out on Google’s documentation pages the type of response returned. In any case, it may make sense to check for the number of sections there are. I would expect, at minimum, some detail outlining the format that was returned, but as of writing this book, there is none.

One of the first steps that needs to be done is to verify that the included signature can be verified. To do this, the first two blocks (the Protected Header and Payload) are hashed and signature obtained. This is done by first decoding the header and extracting the certificate that is included. The public key of this certificate is then extracted and is used to verify whether it matches the included signature. See Figure 3-8.
../images/273312_2_En_3_Chapter/273312_2_En_3_Fig8_HTML.jpg
Figure 3-8

Verifying the signature

The JWS Protected Header when Base64 decoded contains a JSON structure similar to the one shown in Figure 3-9. Essentially, it contains two parts, the algorithm that was used to generate the signature and the collection of certificates used on the server to generate the signature. The first signature in the array is always the certificate that was used to generate the signature. Subsequent certificates can be used to verify the authenticity of the signing certificate.
../images/273312_2_En_3_Chapter/273312_2_En_3_Fig9_HTML.jpg
Figure 3-9

The JWS Protected Header structure

If the signature can be successfully verified, then you can trust the payload that was received. In our back-end code, you will see the signature verification process beginning at line 43. We use the Go library called go-jose developed and open sourced by Square to do our verification. If at any point during the verification process we generate an error, then we mark the entire process as failing the verification process. This is a full-on fail closed situation. You may want to consider how you want to handle the failure as you may want to be less strict. Once we verify that we can trust our payload successfully, we move on to the actual response to our attestation request from Google.

The Payload

Here is what the payload looks like when I ran the app on my Pixel 3 XL:
01: {
02:   "nonce": "Rk5XZkVRY1NYRm81WEJ3RGlvVUQ5T0dMcm9yRzE5NXpyQ0dGM0c1VncxWT0=",
03:   "timestampMs": 1592240053813,
04:   "apkPackageName": "com.redteamlife.aas2.aas2attest",
05:   "apkDigestSha256": "rs1zB8eAT1RJXRNxhfY0tGGt4SclVYpcRiV0xMjWhoI=",
06:   "ctsProfileMatch": true,
07:   "apkCertificateDigestSha256": [
08:     "lSUzNazD8+CoMyjoOWa05bxVuzWycKDOYq17UrnEZ3o="
09:   ],
10:   "basicIntegrity": true,
11:   "evaluationType": "BASIC,HARDWARE_BACKED"
12: }

Line 2 has the original nonce that we generated at the beginning of this attestation process. In our example, we are not doing anything with our nonces, but they ideally should be generated, placed in a temporary database such as Redis or a file, and then marked as used when the request completes its full cycle. The purpose of the nonce is so that an attacker can’t send the same request to us to find out more information about how our payloads are structured. If we detect the same nonce being sent to us after we marked it as used, then we know not to take further action and to drop the request.

Tip

You can further enhance the effectiveness of the nonce by giving it a certain time to live. So the instant that we generate a nonce, we also generate an expiry time of, let’s say, two minutes. This means that we have a two-minute window in which to receive our attestation response. Anything arriving later than that is disregarded, and the client has to start a new attestation cycle once again.

We are mostly interested in lines 6 and 10 – the ctsProfileMatch and basicIntegrity responses. These two parameters determine the integrity of the device that our app is running on. A false on one or both of those should put you on alert because this indicates that the device is tampered with. Take a look at Figure 3-10 which shows a table that gives reasons why one or more of the parameters are set to true or false.
../images/273312_2_En_3_Chapter/273312_2_En_3_Fig10_HTML.jpg
Figure 3-10

Integrity states and their explanation. Taken from https://developer.android.com/training/safetynet/attestation

If you look at our back-end code on lines 111–117, you will see where we decide whether to validate the request or not. We are using a strict approach here and only returning true if a device reports that both ctsProfileMatch and basicIntegrity are true. Further information regarding the parameters and their explanations can be found here: https://developer.android.com/training/safetynet/attestation#use-response-server.

Can This Be Bypassed?

This is indeed a good question, and until around April 2020 or so, the answer would have been a resounding yes (Figure 3-11). The rooting framework called Magisk (we dive deeper in Chapter 8) has an option that can hide itself and the fact that the device is rooted from Android SafetyNet. This has now changed thanks to how Google does the data gathering regarding the device state. As yet, I do not have the full picture, but have read that it has something to do with the use of the Trusted Execution Environment (TEE) which essentially hides key information from the Android operating system.
../images/273312_2_En_3_Chapter/273312_2_En_3_Fig11_HTML.jpg
Figure 3-11

The author of Magisk, John Wu, tweeting that it is no longer possible to bypass SafetyNet

So, Why Don’t Many People Use SafetyNet?

I think because it’s quite cumbersome and gives the developer yet another set of code to maintain outside of the normal set of app features. Also, I think for the longest time, it was possible to report false information about the device itself to SafetyNet if you used frameworks like Magisk. So, people most likely decided to skip the extra work that they would have had to do in getting SafetyNet up and running. I think differently, however, especially now with the more effective way of preventing manipulation even by frameworks such as Magisk. I think having SafetyNet Attestation as a complement to your app’s functionality is certainly a good thing and gives you a greater degree of control when it comes to protecting your app.

..................Content has been hidden....................

You can't read the all page of ebook, please click here login for view all page.
Reset
18.191.176.66