6
Playing with Chemicals
Chapter Contents
E Numbers: The Dewey Decimal System of Food Additives
Recipes
Bread-and-Butter Quick Pickles
Infused Oils and Herbed Butters
Interviews
Carolyn Jung’s Preserved Lemons
Hervé This on Molecular Gastronomy
HUMANS HAVE BEEN ADDING CHEMICALS TO FOOD FOR MILLENNIA. Salt preserves meats and fish, vinegar turns vegetables into pickles, and egg yolks form emulsions to create sauces like mayonnaise and hollandaise. The last few centuries have brought modern compounds, from alginates to vanillin, that are useful for both commercial and creative applications.
Food itself is made up of chemicals. Corn, chicken, and ice cream cones are just big piles of well-structured chemicals. A cook learns how to manipulate these piles of chemicals using all the techniques we’ve covered so far. But a talented cook has to also know how to manipulate the chemistry of food. Looking at food chemistry—the chemical makeup of ingredients and the changes that occur when they’re combined or processed—is a fun way to explore many cooking techniques. Every type of cook, from the most traditional home cook to the savviest industrial research chef, benefits from an understanding of the chemistry of ingredients.
How are foods structured? What’s happening to them when they’re combined or heated? How can you use a knowledge of chemistry to cook better food? And what creative new ideas can you come up with by understanding chemistry? Let’s look at some historical and modern techniques for chemically manipulating food.

Food Additives
Have you ever wondered how pickles, mayonnaise, or gummy candies are made? They’re not simple foods, at least in the sense of Mother Nature. The next time you’re standing in your kitchen, look at the various jars and packages of foods that you have. What gives those foods their textures and flavors? Invariably, the answer will involve ingredient chemistry. Vinegar pickles rely on acetic acid, mayonnaise wouldn’t exist without lecithin from egg yolks, and gummy candies use gelling agents like gelatin. How do these compounds work? And how can you change textures and flavors using similar compounds? This is where food additives come in.
To start, we should define what food additives are. The US FDA defines them as nonessential items that end up in food or somehow change it. (The full definition they give is a mouthful: they exclude items in use before 1958 or that industry determines are “generally recognized as safe.”) I’m going to use a more colloquial definition of food additive: any chemical with a definable molecular structure that’s used in food. Salt and sugar, by this loose definition, count. They’re chemical compounds—sodium chloride and sucrose, respectively—that can be used to change functional properties in foods. My definition also includes modern compounds like methylcellulose and transglutaminase, which we’ll cover later in the chapter. Food chemistry is much, much broader than food additives, of course. Still, looking at the different uses for food additives is a useful lens for understanding food chemistry.
Before looking at how food additives are used, I want to touch on politics. The use of chemicals in food is often misunderstood. I’m surprised how often the issue of safety is conflated with issues of how our food is produced. Our global food supply is driven by economics, ethics, and politics. These are not science topics, and I want to separate the issues out before diving into the science. (If the other topics interest you, see Marion Nestle’s excellent books What to Eat [North Point Press] and Food Politics [University of California Press].)
A brief digression on “generally recognized as safe,” normally abbreviated to “GRAS”: the US Food Additives Amendment of 1958 defines GRAS additives as compounds considered safe for the intended use based on review by a panel of qualified experts. The panel reviewing the additive is selected by industry, not government, and doesn’t have to disclose their research. In my opinion, the food industry will do better in the long run by communicating more openly about how our food is made and by disclosing everything. The distrust of industry has prompted a consumer aversion to chemicals and a preference for natural ingredients, but that has unintended consequences. “Natural” has no technical definition and isn’t the same thing as healthier! (The number of American consumers who push back on unfamiliar chemical ingredients while happily eating high-sugar, high-sodium foods shows the disconnect.) Anyway, enough with the tangent—let’s have some fun looking at the science of food chemistry!
One way to understand food additives is to look at the reasons they’re used commercially: to extend shelf life, to preserve nutritional value, to address dietary needs, and to aid in manufacturing at scale. Consider the current ingredient list for an Oreo cookie, a delicious marvel of the modern food world. Skipping sugar, cocoa, and salt, which are there for taste, everything else matches at least one of the four reasons:
Baking soda (a.k.a. sodium bicarbonate) and/or calcium phosphate
Aids in manufacturing by speeding up the baking process. Baking soda may seem traditional, but we’ve only used it in cooking since the late 1840s. (Any time you see “and/or” in an ingredient list, this is a tip-off that the manufacturer is choosing between the ingredients based on season, price fluctuations, or baking facility.)
Cornstarch (sometimes called “cornflour”)
Extends shelf life by stabilizing the food and acting as a humectant (something that retains moisture).
Enriched flour (wheat flour, niacin [B3], reduced iron, thiamin mononitrate [B1], riboflavin [B2], folic acid [B9])
Addresses dietary needs by adding in micronutrients that are removed during processing. Fortification is mandatory in over 50 countries; the US FDA requires that white flour be supplemented with B vitamins (to prevent various deficiencies) and iron (to prevent anemia, a low red blood cell count).
High oleic canola and/or palm and/or canola oil
Extends shelf life by providing fats that won’t go rancid as quickly as fats from butter and egg yolks. (“High oleic” refers to fatty acids; for more, see page 152).
Soy lecithin
Aids in manufacturing. A traditional recipe relies on egg yolks for lecithin, which acts as an emulsifier (see page 429), but because Oreos skip the eggs, lecithin needs to be added.
Vanillin (artificial flavor)
Aids in manufacturing at scale—the worldwide demand for vanilla flavoring far, far exceeds the available supply. (We’ll cover vanilla extract later in this chapter; see page 400.)
The Oreo has been around for over a century, but the recipe has shifted as newer additives replace older ones, most recently in 2006 when Nabisco switched from trans-based fatty acids to high oleic ones. Try making your own version: make butter cookies with cocoa powder (see page 224) and add a filling of 1 cup (120g) powdered sugar, 2–3 tablespoons (30–45g) butter, and ¼ teaspoon (1g) vanilla extract.
As you can see, some of the ingredients are compounds that home bakers wouldn’t normally add to their grocery lists: Soy lecithin? Vanillin? High oleic oil? But you’re probably already using some of these compounds, just not by these names. A quick look at a categorization system for food additives will help before we dive into their chemistry.
E Numbers: The Dewey Decimal System of Food Additives
It’s easy enough to find a recipe for cream-filled chocolate cookies, but how do you go about tweaking a recipe to solve certain challenges or create new foods? Heck, figuring out which food additives even exist can be a challenge. Looking at the back of a package of Oreos doesn’t begin to explain the range of possibilities.
The most commonly used index is compiled by the Codex Alimentarius Commission, a commission established by the United Nations and the World Health Organization that has created a taxonomy of food additives called E numbers. Like the Dewey Decimal classification system for books, E numbers define a hierarchical tree. A unique E number (totally unrelated to the number e, ~2.7182) is assigned for each chemical compound that’s approved for food usage in the European Union. E numbers are grouped by functional categories, with the numbering of chemicals determined by each chemical’s primary usage:
E100–E199: |
Coloring agents |
E200–E299: |
Preservatives |
E300–E399: |
Antioxidants, acidity regulators |
E400–E499: |
Emulsifiers, stabilizers, and thickeners |
E500–E599: |
Acidity regulators, anticaking agents |
E600–E699: |
Flavor enhancers |
E700–E799: |
Antibiotics |
E900–E999: |
Sweeteners |
E1000–E1999: |
Additional chemicals |
Many historical additives make an appearance in the list. Good ol’ vitamin C shows up (E300: ascorbic acid), as do vinegar’s acetic acid (E260) and cream of tartar (E334). Some synthetic compounds are listed too, such as propylene glycol (E1520); it’s the liquid in the nonalcoholic vanilla extract sold at your grocery store.
Your local grocery store will stock many of the additives covered in this chapter—pectin, gelatin, agar—but not everything. You can order others online. See http://cookingforgeeks.com/book/additives/ for a list of online suppliers.
Some compounds function in more than one way. Ascorbic acid, listed at E300, is also a preservative (200s) and a color fixer (100s). Lecithin (E322) is almost always culinarily used as an emulsifier (400s), but it’s also an antioxidant. Don’t think of additives as directly mapping to their categories; rather, the categories are a good framework to see the technical purposes for which the food additives are used.
Which additive to use for a particular purpose depends on the properties of the food and your specific goals. You can see some overlap between these categories and the types of colloids mentioned earlier. Some additives work in a broad pH range but are limited to certain temperatures, while others might handle narrower pH ranges but be fine with more heat. For example, agar is a strong gelling agent that can create gels for sweets, but with some ingredients it also exhibits syneresis—liquid weeping out of a gel. Carrageenan does not undergo syneresis but cannot handle an environment as acidic as agar can.
This chapter is loosely structured on these groupings, covering food additives that are common for the home cook, along with a few more playful items. There are a lot more out there, though, if you want to explore! For a full list of E-numbered additives, see http://cookingforgeeks.com/book/enumbers/.
Mixtures and Colloids
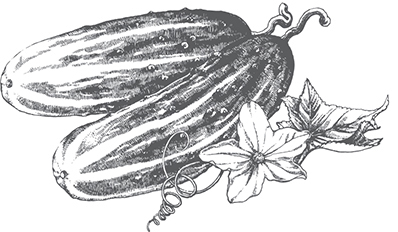
There’s one more concept we need to look at before investigating how chemicals interact with food. One of the biggest aha! moments for me in learning to cook was realizing that ingredients are not uniform, consistent things. I’m still learning examples of this—a slice of cucumber from the part nearest the blossom can contain a particular enzyme that turns pickles soft?!—but most ingredients don’t require knowing such trivia. The concept of mixtures and colloids explains why many foods react in more complicated ways than the simple rules of time and temperature would predict.
Very few foods are simple substances, chemically speaking. Water doesn’t even seem so simple to me anymore (even without trace minerals, H2O is complicated—see page 243). Vanilla extract and infused oils carry flavors in ethanol and fats. Jams balance sugars with acids to form gels. Mayonnaise is an emulsion of fats and water that aren’t truly mixed. Chocolate chip cookies are really complicated: pockets of syrupy, sugary liquid surrounded by a breadlike matrix that also has chocolate chips—cocoa solids blended into both liquid and solid cocoa fats. Ice cream gets exceedingly complicated.
To a food scientist, these are examples of mixtures and colloids. A mixture is two or more substances combined together, where the substances remain in their original chemical form. Sugar syrup is a mixture—the sucrose is dissolved in the water, but retains its sweet-tasting chemical structure. The combination of flour and baking soda is also a mixture. A colloid is a type of mixture; specifically, a combination of two substances—gas, liquid, or solid—where one substance is uniformly dispersed in the other, but the two aren’t dissolved together. In other words, the two compounds don’t associate with each other, even if the overall structure appears uniform to the naked eye. Sugar syrup is not a colloid (it’s a different type of mixture—a solution), but milk is, having solid fat particles that are dispersed throughout a water-based solution but that aren’t actually dissolved into the liquid.

Take a look at the table of colloid types. It shows the different combinations of particles and media, along with examples of foods for each colloid type. The medium of a colloid is called the continuous phase (e.g., the watery liquid in milk) and the particles are known as the dispersed phase (for milk, the fat droplets). Foods can be more complicated than this, though. Ice cream is a complex colloid—multiple types of colloids at once—being a water-based liquid containing pockets of air (foam), chunks of ice crystals (suspensions), and fats (emulsion) all at the same time. One surprise in this table is the relatively broad swath of techniques needed to create all these foods. Willy Wonka’s Invention Room would surely have a chart of it on one wall!
These techniques capture much more than traditional culinary techniques. The table is fertile ground for candy makers and experimental chefs alike, and it reveals the basis of many molecular gastronomy–inspired concepts. Whisking up fruit juice with the emulsifier lecithin creates foams that can be used to create a fun topping for an entrée or dessert. Flavorful liquids can be converted into forms that you can nibble, like gummy candies (often shaped like teddy bears or worms). An imaginative use of solid aerosols like smoke can convey intense aromas. Fear not: even if pushing the bounds of culinary possibilities isn’t your thing, most of the items in the table are still of great interest.
DISPERSED PHASE |
||||
Gas particles |
Liquid particles |
Solid particles |
||
CONTINUOUS PHASE |
Gas |
(N/A: gas molecules don’t have a collective structure, so gas/gas combinations either mix to create a solution or separate out due to gravity) |
Liquid aerosols • Mist sprays |
Solid aerosols • Smoke (e.g., when smoking foods) • Aerosolized chocolate |
Liquid |
Foams • Whipped cream • Whisked egg whites • Flavored foams • Ice cream (air bubbles) |
Emulsions • Milk • Mayonnaise • Ice cream (fat in water emulsion) |
Sols and suspensions • Commercial salad dressings • Ice cream (ice crystals and solid fats) |
|
Solid |
Solid foams • Bread • Marshmallows • Soufflés |
Gels • Butter • Cheese • Jelly/gummy candies • Jell-O |
Solid sols • Chocolate |
|
Preservatives
Ahh, salt: responsible for the salvation of many a food (or is that salivation?). The oldest chemical in use, salt was used in prehistoric times and there are records of its use for dry-curing hams in the third century BC by the Roman Cato the Elder. The use of sugar as a preservative wasn’t far behind; the Romans used honey to preserve foods as well. And another historical preservative is vinegar, used as an acidity regulator (sounds delicious when I put it that way, no?).
Chemical preservation has the fundamental purpose of preventing microbial growth. While there are plenty of other ways to preserve food, like smoking or drying, using chemicals doesn’t necessarily change flavors as much. Sausages, vinegar pickles, and fruit preserves all rely on chemicals to keep them safe for eating. Chemicals prevent microbial growth by either disrupting cells’ abilities to function, as nitrite does to sausage, or by changing any of the FAT TOM variables (see page 175) to be inhospitable, such as increasing acidity with vinegar or reducing moisture with sugar in fruit preserves.
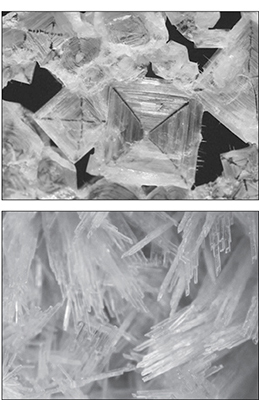
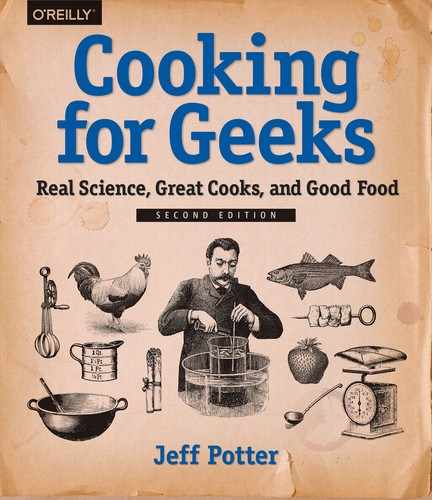
IMAGE COURTESY OF NASA
IMAGE COURTESY OF JUSTIN MEYERS
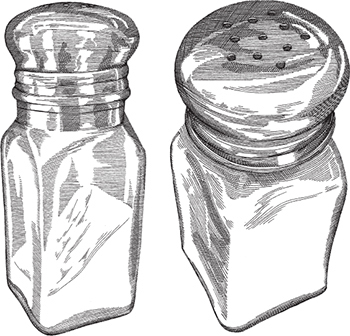
Different types of salt will form crystals in different shapes, based on the salt’s atomic crystalline structure. Sodium chloride’s crystalline structure is cubic, while potassium nitrate’s crystalline structure has a steep slant to it, creating needlelike crystals.
Salt’s ability to kill pathogens and preserve things isn’t limited to foods. For an adult human, the lethal dose of table salt is about 80 grams—about the amount in the saltshaker on your typical restaurant table. Overdosing on salt is reportedly a really painful way to go, as your brain swells up and ruptures. Plus, it’s unlikely the emergency room physicians will correctly diagnose the cause before it’s too late.
While the chemistry of preservatives may not seem important to everyday cooking, it’s revealing to understand how these ingredients work, and the basics of preservation apply to how most other food additives work. First, a quick refresher on a few definitions that’ll pop up throughout this chapter:
Atom
Basic building block of matter. By definition, atoms have the same number of electrons and protons. Some atoms are stable in this arrangement (e.g., helium), making them less likely to form bonds with other compounds (which is why you don’t see any compounds made of helium). Other atoms (e.g., sodium) are extremely unstable and readily react. A sodium atom (Na) will react violently with water (don’t try licking a sample of pure sodium—it’d ignite due to the water on your tongue), but when an electron is removed it turns into a delicious salty sodium ion (Na+).
Molecule
Two or more atoms bonded together. H = hydrogen atom; H2 = two hydrogen atoms, making it a molecule. When it’s two or more different atoms, it becomes a compound (e.g., H2O). Sucrose (a.k.a. sugar) is a compound with the composition C12H22O11—12 carbon, 22 hydrogen, and 11 oxygen atoms per molecule. Note that the composition doesn’t tell you what the arrangement of the atoms is, but that arrangement is part of what defines a molecule.
Ion
Any atom or molecule that’s charged—that is, where the numbers of electrons and protons aren’t equal. Because of the imbalance, ions can bond with other ions by transferring electrons to (or from) each other.
Cation
An atom or molecule that’s positively charged. Pronounced “cat-ion”—meow!—a cation is any atom or molecule that has more protons than electrons; it’s paw-sitively charged. For example, Na+ is a cation—an atom of sodium that has lost an electron, giving it more protons than electrons and thus a net positive charge. Ca2+ is a cation—a cation of calcium—that has lost two electrons.
Anion
An atom or molecule that’s negatively charged (i.e., one that has more electrons than protons). Cl– is an atomic anion—in this case an atom of chlorine that has gained an extra electron, giving it a net negative charge.
From these definitions, you’ll hopefully deduce that a lot of chemistry is about ions interacting with each other based on differences in electrical charges. Sodium chloride, common table salt, is a classic example: it’s an ionic compound composed of a cation and an anion. In solid form, though—the stuff in your salt shaker—salt is more complicated than one anion plus one cation. It takes the solid form of a crystal of atoms arranged in an alternating pattern (like a 3D checkerboard) based on charge: cation, anion, cation, anion. In water, the salt crystals dissolve and the individual ions are freed (disassociated). The anions and the cations separate out into individual ions, which can then react and form bonds with other atoms and molecules. That’s why salt is so amazing! Sucrose doesn’t do this.
Sodium chloride is one particular type of salt, made up of sodium (a metal, and one that in its pure form happens to react violently when dropped in water) and chloride (chlorine with an extra electron, making it an anion). There are many other types of salts, created with different metals and anions, and they don’t always taste salty. Monosodium glutamate, for example, is a salt that tastes savory and boosts the sensation of other flavors. Epsom salt—magnesium sulfate—tastes bitter.
Multiple types of salts are used to preserve foods. Salmon gravlax is cured with a large amount of sodium chloride, which preserves the fish by increasing osmotic pressure, dehydrating and starving living microbial cells of critical water as well as creating an electrolytic imbalance that poisons them. Many sausages, hams, prosciutto, and corned beef are cured using small quantities of sodium nitrite, which also gives these foods a distinctive flavor and pinkish color. Unlike gravlax, in which the sodium does the preserving, sodium nitrite works because of nitrite; the sodium is merely an escort for the nitrite molecule. Nitrites inhibit bacterial growth by preventing cells from being able to transport an amino acid, meaning they can’t reproduce. (Incidentally, nitrites are also toxic to us at high levels, for presumably the same reason; but without the nitrites, microbial growth would be toxic to us too—dosage matters!)
Sugar can also be used as a preservative. It works like sodium chloride, by changing the osmotic pressure of the environment (see page 386 for more on osmosis in food). With less available water, sugary foods such as candies and jams don’t require refrigeration to prevent bacterial spoilage. Think back to the M in the FAT TOM rule: bacteria need moisture for growth, and adding sugar reduces their ability to drink.
Sugar’s osmotic properties can be used for more than just preserving food. Researchers in the UK have found that sugar can be used as a dressing for wounds, essentially as a cheap bactericidal. The researchers used sugar (sterilized, please), polyethylene glycol, and hydrogen peroxide (0.15% final concentration) to make a paste with high osmotic pressure and low water activity, creating something that dries out the wound while preventing bacteria from being able to grow. Whoever thought of rubbing salt in a wound should’ve tried sugar!
Besides salts and sugar starving microbes of vital water, enzymatic inhibitors and acids are used to prevent their growth. Benzoate is one of the most commonly used modern preservatives, often used in breads to prevent mold growth. (Fans of The Simpsons may recall potassium benzoate as part of the curse of frogurt—see http://cookingforgeeks.com/book/frogurt/.) Like nitrite, benzoate interferes with a cell’s ability to function (in the case of bread, by decreasing fungi’s ability to convert glucose to adenosine triphosphate, thus cutting off the energy supply).
Compounds that lower a food’s pH also preserve the food, and are so critical that acidity regulators get an entire section in the E numbers list. Many of these compounds don’t have uses interesting to the home cook, who already has citric acid (thanks, lemon juice!) and acetic acid (from vinegar) on hand. For industry, the other acidity regulators give a wider range of flavoring options and functional properties, but for home use, there isn’t much repurposing to be explored beyond a few baking tricks like using a pinch of vitamin C (ascorbic acid) to give yeast a boost during fermentation.
Salt curing has been used for centuries to preserve fish caught at sea. It’s also easy to do at home! Surrounding fish with a sufficient quantity of salt draws out the moisture; this is called dry brining. But salt doesn’t just dry out the food (along with any bacteria and parasites). At sufficient concentration, dry brining actively disrupts a cell’s ability to function and kills it, rendering bacteria and parasites nonviable.
In a bowl, mix together:
5 |
teaspoons (30g) kosher salt |
1 |
tablespoon (12g) sugar |
3 |
tablespoons (12g) finely chopped fresh dill |
1 |
teaspoon (5 mL) vodka |
1 |
teaspoon (2g) crushed peppercorns (ideally, use a mortar and pestle) |
On a large piece of plastic wrap, place:
1 |
pound (450g) salmon, washed and bones removed; preferably a center cut so that its shape is rectangular |
Sprinkle the salt mixture over the fish and massage it in. Wrap the fish in plastic and store it in the fridge, flipping and massaging it twice a day for a day or two.
Store it in the fridge and consume within a week.
Remove the skin by placing the fish skin-side-down on a cutting board and carefully running a knife along the surface between the skin and flesh while using your hand to keep the fish from sliding around.
Notes
• Vodka is used here as a solvent to dissolve some of the non-water-soluble aromatic compounds. You can substitute other spirits, such as cognac or whiskey, to bring additional flavors in. And in place of dill, try using coriander seed, loose tea leaves (e.g., Earl Grey or Lapsang Souchong), shallots, or lemon zest. The Scandinavians traditionally serve salmon gravlax on top of bread with a mustard dill sauce.
• You can substitute other fatty fish, such as tuna, for the salmon and obtain a similar texture.
• This recipe is a bit heavy on the salt—6% by weight—to err on the side of safety. You can reduce the saltiness before eating the fish by rinsing the finished product in fresh water. Curing above 3.5% salt prevents most common bacterial growth, but not all. Modest concentrations of salt prevent Gram-negative bacteria—which are the most common ones found in food—from growing, but won’t handle the few that are Gram-positive, such as Listeria.
• Salt curing—as is done in salmon gravlax—is the first step in making lox. After curing, lox is also cold-smoked, which is the process of exposing a food to smoke vapors that have been cooled down. You can approximate the flavor of lox by adding liquid smoke to the rub—see page 403 for more.
Contrary to culinary wisdom, brining something does not draw water into the cells to make it juicier—that would be going against osmosis! Brining draws water out from cells and appears to increase the liquid in the tissues around the cells. But what is osmosis?
Osmosis is the physical process of a solvent passing through a membrane to equalize the concentration of solute on the membrane’s other side. For example, applying salt to the outside of meat or cooking fruit in sugar syrup causes water to pass from inside the cells through the cell walls and out into the salt or syrup solution to dilute the salt or sugar on the outside. This happens because salt and sugar are unable to penetrate the cell walls, but water can, so water leaves the cells in order to equalize the differences in concentration. (Salt also happens to break down some of the myofibril proteins and thus change the meat’s texture—but that’s not due to osmosis!)
Osmosis is all about diffusion. Molecules dissolved in liquid will distribute themselves out to roughly uniform concentrations, somewhat like steam in a hot shower will distribute itself through a room. (Can you imagine taking a hot shower and having all the steam stay in just the left half of the shower stall?!) The higher concentration on one side of a membrane like a cell wall causes the solute (the salt or sugar) to bounce up against the membrane, creating what’s called osmotic pressure. If that membrane is permeable to the solute, some of it will pass through to the other side until the pressure of molecules bouncing up against the membrane from both sides is roughly equal.
In cells, osmosis leads to dehydration, and if there’s a large enough difference of concentration between the two sides of the cell wall, plasmolysis occurs—the cell structure collapses. If too much water leaves, the cell dies. From a food safety perspective, the amount of salt necessary to cause sufficient plasmolysis to render bacteria nonviable depends on the species of bacteria involved and the type of food at hand. Salmonella, for example, is unable to grow in salt concentrations as low as 3%, while Clostridium botulinum dies at around 5.5%. Staphylococcus is hardy enough to survive in a salt concentration up to 20%. However, according to the US FDA, it is not a common concern in fish, so food safety guidelines consider salt solutions of ~6% generally safe for curing fish.


PHOTO BY JOANNE HOYOUNG-LEE
Carolyn Jung is a food journalist who worked for the San Jose Mercury News as a reporter, food writer, and editor before creating her own blog at http://www.foodgal.com.
What’s a day in the life of a food writer like?
It’s one of the most creative and enjoyable professions there is. Food is this innocuous way to get strangers talking, and it’s a very innocuous way to educate people—and not just about food. It teaches people about culture, about history, about different ethnicities, about different places in the world, about politics, about religion. All of those aspects make it interesting, much more so than people think at the outset.
Where does this recent fascination that people have for cooking come from?
A large impetus has been the Food Network, which has made food such a phenomenon. A lot of people who wouldn’t normally cook were attracted to shows like Iron Chef because it was almost like watching a boxing match or a football game. Who doesn’t dream about being the quarterback on their favorite team? Cooking shows have been the same; you imagine yourself in that contestant’s position. “Oh, my God, if I got a box with mushrooms and lemongrass and chicken and avocado, what the heck would I make?”
What’s been the most unexpected difference between your experience in the print world and your blog?
As a newspaper reporter, I was used to writing very long, involved pieces. On the Web, people don’t have that kind of attention span. You have a shorter window of time to attract a reader online, but you’re also able to build a very loyal audience. If someone likes what you’re doing, they will stay with you.
Are there any particular blog posts that have had much stronger reactions than you expected?
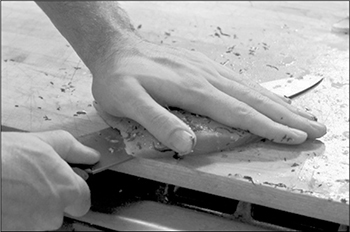
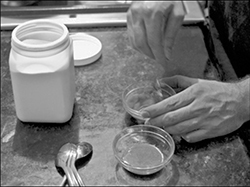
I wrote about how to make preserved lemons, and how I got, as my husband calls it, almost obsessed with watching my lemons. It’s the simplest thing ever. The first time I made this, I would wake up every day and look at my jar of lemons to see what they looked like. It was like a science experiment. The fun part is discovering all the uses there are.
All you need are a half-dozen washed (preferably organic) lemons, salt, and a glass jar with a tight-fitting lid.
Set 1 or 2 lemons aside. Cut the remaining lemons into quarters or eighths and remove any seeds. Sprinkle a thin layer of salt in the bottom of the jar and add a layer of lemons, and then cover them with salt. Continue layering the remaining lemon wedges, covering each layer with salt. Once you’re done, squeeze the juice from the 1 or 2 reserved lemons on top to give the lemons a head start. Store the jar in the fridge. After 2–3 weeks, the lemons will become soft and tender.
Once they’re ready, pick a lemon wedge out of the jar and use it however you’d like—chopped or sliced in thin slivers. The preserved lemon will be quite salty, so hold back any salt that you’d normally use in whatever recipe you’re following, or give the lemon wedge a quick rinse. Preserved lemons are fantastic in tuna salad for sandwiches, or try using them in pastas, bean salads, vinaigrettes, and marinades.
Try adding spices to the salt, or for a less salty, sweeter version, make a mix of 2 parts sugar to 1 part salt.
Quick pickles are made from cucumbers sliced into thin discs and cured in hot vinegar mixed with spices and sugar. It’s the sugar that makes them “bread-and-butter” pickles. They’re amazing with their namesake; try them on toasted bread slathered with good butter. Like refrigerator pickles, which are fermented for a few days before refrigeration, these aren’t properly preserved for long-term storage—not that I ever manage to keep them around very long.
In a medium saucepan, measure out:
2 |
cups (480 mL) white vinegar (5% acetic acid) |
1½ |
cup (300g) sugar (or brown sugar) |
3 |
tablespoons (30g) sea salt |
1 |
tablespoon (9g) mustard seeds |
½ |
teaspoon (1g) turmeric powder |
Wash 1 pound (450g) cucumbers—try to get a pickling variety like Kirby, or use slender, more interesting cucumbers than the standard market variety (“Green Blimp”). Trim and discard both ends and then cut the cucumbers into discs, about 1/8–¼” / 0.5–1 cm thick. Add the slices to the saucepan.
Trim and peel 1–2 onions, about ½ pound (~250g). Slice them in half, root end to tip, and then slice them into thin half-rings. Add the onion slices to the saucepan.
Optionally add more pickling spices or items to pickle—for example, peppercorns, celery seed, a few bay leaves, hot peppers sliced into rings, or a bunch of garlic cloves cut in half.
Bring the ingredients up to a boil and simmer them for 5 minutes with the lid on. Longer simmering times will produce softer pickles. Turn the heat off and allow the pickles to cool until it’s safe to transfer them to a storage container. Store them in the fridge and use them within a few weeks.
Notes
• Sea salt doesn’t have any iodine or anticaking additives, which cloud up water. It’s also half as dense as table salt, so if you substitute table salt for sea salt, adjust the volume measurements accordingly. Try mixing 2 tablespoons (20g) of sea salt into one glass of water and 1 tablespoon (18g) of table salt into a second glass to see the difference in how clear they are.
• When I first thought of using pickles as an example of preservation, I thought it’d be easy to explain. Heat, salinity, and acidity all kill pathogens! Turns out, that’s not enough. These quick pickles aren’t properly preserved, contrary to what many cookbooks and food shows say. Using hot vinegar speeds up how quickly the pickles are ready to eat, but the heat and pH change isn’t enough to handle C. botulinum. Without a true canning step, these pickles aren’t safe for long-term storage, even in the fridge, as the spores from C. botulinum are extremely hardy. Treat quick pickles like any other perishable food: keep them refrigerated and eat them within a few weeks.
• If you want to make shelf-stable pickles, you’ll need to can them. Canning is a good example of multiple preservation techniques being combined: cooking sealed jars in hot water removes Listeria, and the vinegar drops the pH to a range that C. botulinum spores won’t germinate in. The pH is critical: it must be below 4.6 because the canning step alone won’t destroy bacterial spores. Even changing the ratio of liquid to solids when making pickles can shift the pH! For canning steps for bread-and-butter pickles, see http://cookingforgeeks.com/book/pickles/. Tip: you don’t need a boiling water canner; use a large pot for boiling the water and a trivet you don’t mind getting wet set into the bottom of the pot.
Why aren’t refrigerator pickles actually preserved?
The USDA started studying pickles in the 1930s in its Food Fermentation Laboratory, but even as late as 1989 researchers were still finding issues. Listeria monocytogenes was showing up in refrigerator pickles contaminated after cooking. It’s not surprising, in hindsight: L. monocytogenes survives in liquids with a pH as low as 3, and in salt brines up to at least 10%, and reproduces at 34°F / 1°C, and is odorless and tasteless. (It just wants to live! Inside you!) Because regular spoilage bacteria won’t grow in these conditions, infected pickles won’t have an off taste or produce any foul-looking stuff. The USDA pulled its recommended recipe for refrigerator pickles, but it’s been bouncing around ever since.

PHOTOS USED BY PERMISSION OF HERVÉ THIS
Hervé This (pronounced “teess”) is a researcher at L’Institut National de la Recherche Agronomique in Paris known for his studies of chemical changes that occur in the process of cooking. Along with Nicholas Kurti and others, he organized the first “International Workshop on Molecular and Physical Gastronomy,” held in 1992 at Erice in Sicily, Italy.
What was the original reason you and Dr. Kurti had for picking the name “molecular and physical gastronomy”?
Nicholas Kurti was a retired professor of physics. He loved cooking, and he wanted to apply new technology in the kitchen—ideas from the physical lab, mostly vacuum and cold, low temperatures. For myself, the idea was different: I wanted to collect and test the old wives’ tales of cooking. Also, I wanted to use some tools in the kitchen that were already in chemistry labs.
For many years, when I was doing an experiment in Paris, he was repeating it in Oxford, and what he was doing in Oxford, I was repeating in Paris. It was great fun. In 1988, I proposed to Nicholas to create an international association of the kind of thing that we were doing. Nicholas said to me that it was too early but, probably, it would be a good idea to make a workshop with friends meeting together. This is why we needed a name, so I proposed “molecular gastronomy,” and at that time, Nicholas, who was a physicist, had the feeling that that would put too much emphasis on chemistry, so he proposed “molecular and physical gastronomy.” I accepted the idea only because Nicholas was a great friend of mine, not because I was convinced scientifically.
In the beginning, I published a paper in a main journal in organic chemistry, and in this paper I made the confusion between technology and science. In 1999, I realized that a clear distinction should be made between engineering and science because it is different.
How does the work that you do with molecular gastronomy differ from what a food scientist does who publishes in journals such as theJournal of Food Science?
It is a question of history. At that time [1988], food science was more the science of food ingredients or food technology. You had papers on, let’s say, the chemical composition of carrots. Nicholas and I were not interested at all in the chemical composition of carrots, in the chemistry of ingredients.
We wanted to do science, to explore the phenomena that you observe when you cook, and cooking was completely forgotten at that time. In the previous centuries, Lavoisier and others studied how to cook meat broth. This was exactly what we are doing. Food science had drifted; cooking was completely forgotten. Recently, I took the 1988 edition of Food Chemistry by Belitz and Grosch—a very important book in food science—and looked at the chapters on meat and wine. There is almost nothing about cooking wine or cooking meat; it is very strange.
It seems like there is much confusion about what you mean with the term “molecular gastronomy.”
Molecular gastronomy means looking for the mechanism of phenomena that you observe during cooking processes. Food science in general is not exactly that. If you look at the table of contents of the Journal of Agricultural and Food Chemistry, you will see very little material referring to molecular gastronomy.
So, molecular gastronomy is a subset of food science that deals specifically with transformation of food?
Exactly, it is a subset. In 2002, I introduced a new formalism in order to describe the physical organization of colloidal matter and of the dishes. This formalism can apply to food and also to any formulated products: drugs, coatings, paintings, dyes, cosmetics. It has something to do with physical chemistry and, of course, it has something to do with molecular gastronomy. So it’s true that molecular gastronomy is a particular kind of food science, but also it’s a particular kind of a physical chemistry.
It’s fascinating to see how easy it is to make inventions or applications from science. Every month I give an invention to Pierre Gagnaire. I should not, because it is invention, not discovery, but I can tell you that I just have to snap the finger and the invention is there. I take one idea of science, I ask myself, “What can I do with that?” and then I find a new application. It is very, very easy. The relationship is of use, and this is probably the reason why there is so much confusion between science and technology. We’ve been studying carrot stocks. We were studying what is going out of carrot roots into the water and how is it going out. One day, I came to the lab. I was looking at two carrot stocks made from the same carrot. One stock was brown; the other was orange. It was the same carrot, same water, same temperature, same time of cooking, and one stock was brown; the other was orange. I stopped everybody in the lab saying, “We have to focus on this, because we don’t understand anything.”
We focused on this story, and it was due to the fact that one preparation was made in front of light, and the other was in the darkness, and, indeed, we discovered that if you shine some light on the carrot stock, it will turn brown. So we explored the mechanism, how it turned brown. It was a discovery, not an invention, and thus it was science. At the same time, the application is of use, because cooks want to get a beautiful golden color to stocks, and in order to get the brown color, they grill onions and they put them in the stock. I can tell cooks now: avoid the onions and just add some light. So you see, the discovery is leading to invention immediately.
Tell me more about your collaboration with Chef Pierre Gagnaire.
I don’t know if it is a collaboration, it’s a friendship. Pierre’s wife told Pierre more than 10 years ago, “You’re crazy and Hervé is crazy, so you probably could play together.”
The real story is that, in 1998, Pierre opened a new restaurant in Paris. He was launching the restaurant with lunches for the press, for the media, for politics, etc., and I was invited. I did not know him, except from reputation, at the time. One year passed, and I was asked by the newspaper Libération for recipes for Christmas—scientific recipes. I told them I’m not a chef, and that I should not give recipes. I proposed, instead, that I would invite two wonderful chefs to do recipes from ideas that I would give to them, and Pierre Gagnaire would be one of the two chefs.
When I was in the cab driving to the restaurant for the interview and the picture, I realized that beer can make a foam. It means that you have proteins that are surfactants that can wrap the air bubbles. If the proteins can wrap the air bubbles, it means that they can wrap oil. When I arrived in the restaurant, Pierre was there; immediately I asked him, “Do you have some beer, and some oil, one whisk and one bowl?” He looked at me, and he asked for the ingredients and the hardware, and I told him, “Please, put some beer and then whisk the oil into the beer; I can predict that you will get an emulsion.” And he got it. He tasted the emulsion, and he found it very interesting, and he decided to make the dish after this wonderful emulsion.
One year later I was invited to lecture at the Academy of Sciences. I proposed to them to make the lecture with a dinner from Pierre. We worked for three months, meeting every Monday morning between 7 and 10. It was so fun that we decided that we had to play on and we never stopped. It’s not collaboration, it’s just playing together, where we are children.
It seems like some of the more novel cuisines are removed from the normal dining experience. How much of that experience is created by taking scientific discoveries and applying them to a meal, as opposed to a chef having a concept and coming to a scientist and asking, “Is there a way to make this?”
Well, there are many questions in that one. I have the feeling that we don’t cook the way we should. For example, we are still roasting chicken. Is it a good idea? I don’t know. We ask the question, “Should we go on as we always have?” Many chefs are changing their ways. Many of my inventions are free on Pierre Gagnaire’s website, and I know that chefs go there to get ideas for the kitchen. I publish the ideas for free; there are no patents, there is no money involved. It is all for free because I want to rationalize the way we cook. We don’t cook in a rational way. We are still roasting chicken.
For one of the books that I published, the title was translated as Cooking: The Quintessential Art, but in French it was Cooking: Love, Art, and Technique. The idea that cooking is an art was not even admitted some years ago: “Real art is painting or music or sculpture or literature.” I remember talking with a minister of public education in France. He was saying, “No, no, no, it’s not art. You’re just joking; it’s cooking.” It’s love first, then art, then technique. Of course, technology can be useful only for the technical part, not for the art, and not for the love component. Nowadays, Ferran of elBulli and Alinea’s Grant Achatz are using the technique, but there are a lot of possibilities for improvement. They will make their own interpretation, and then science has nothing to do with that. It is personal interpretation; it is feeling.
Do you think that elBulli and Alinea, or restaurants like them, are able to sufficiently use all three components: love, art, and technique?
The love component of cooking is not really formalized. The science needed is still not there. I have the idea that we need to do some science on the love component. Because I’m a physical chemist, it’s not very easy for me to make this study. It’s still very primitive. Currently, the chef behaves intuitively with the love component. If someone is friendly, he will greet you at the entrance of the restaurant, “Ah, here you are, very happy to have you,” and you are happy because you’re greeted as kind of a friend. But this is intuition. What I’m saying is that we need to scientifically study the mechanism of phenomena of this friendship. We don’t have this mechanism currently.
It almost sounds like psychology or sociology.
It is, exactly. My way of doing molecular gastronomy is to do physical chemistry, daily, at the lab, but I’m producing the concepts so that other people can pursue them in their own way. Their own way can be psychology, sociology, history, geography; we need the knowledge to understand the mechanism of phenomena that we observe in cooking. It is a very foolish idea to think that we cannot investigate all the phenomena. It can be done. Imagine that I discover, or someone discovers, a way to give more love to a dish. It means that the guest will be happier. But imagine that you give this knowledge to a dishonest guy, then the guy would use the knowledge dishonestly, and this will increase the power of dishonest people. If you give the same knowledge to kind people, they will do their best. This is the same question as with nuclear physics. If you are acting poorly, you will make a bomb; if you try to act for the good of humankind, you will make electricity. Science is not responsible for the application; you are responsible for the application.
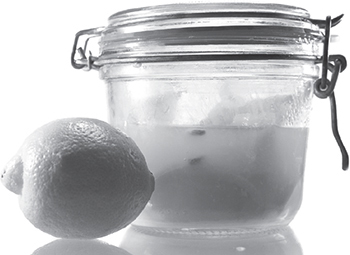
The most exciting discovery that I did was to put fruits like plums in various glasses full of water but with different quantities of sugar dissolved. In light syrups the fruits sink, but in concentrated syrups they float. This is, of course, linked with density, but when you wait, the fruits in light syrups swell (by osmosis) and explode, whereas they shrink in concentrated syrups.
This experiment is useful to know how to make a syrup of the exact concentration for preserving fruits: put them in concentrated syrup and slowly add water until they begin sinking. The osmotic pressure is then nil so that they will keep their shape and consistency.
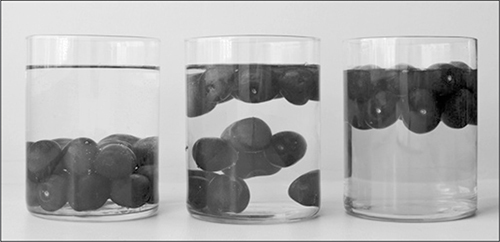
Left: cherries in fresh water will sink; center: cherries in a light sugar syrup will distribute themselves; right: cherries in a heavy sugar syrup will float.
Sugar is often added to preserve foods like jam or (in the form of honey) to give sandwich breads a darker color. But what if you wanted the functional properties of preservation or browning without sugar’s sweetness?
A trick of chemistry and taste does just this. Lactisole, which I jokingly call “antisugar,” is an additive used to reduce the sensation of sweetness. (Sadly, mixing sugar and antisugar does not release more energy than eating just plain sugar, nor does adding antisugar to foods reduce the calories.)
One of the challenges the food industry faces is maximizing how long foods remain edible while maintaining acceptable flavor and texture. In the early 1980s, a British researcher, Michael Lindley, discovered that the compound lactisole reduces the perception of sweetness. Added to foods at a concentration of around 100 parts per million (ppm), lactisole interferes with your taste buds to decrease the sensation of sweetness. (For you bio geeks, lactisole is a carboxylic acid salt that inhibits the TAS1R3 sweet protein receptor.) Unlike traditional methods of dampening sweetness in a dish (i.e., adding bitter or sour ingredients), lactisole works by inhibiting the sensation of sweetness on the tongue, so it does not impact perception of other tastes like saltiness, bitterness, or sourness.
With lactisole, you can make once-perishable foods shelf-stable by increasing the amount of sugar in them and then canceling out the additional perceived sweetness. Lactisole shows up in products such as salad dressings, in which sweetness from stabilizers or thickeners would be undesirable, and in some mass-manufactured breads. Pizza dough, when baked, is more visually appealing if it turns golden brown. Adding sugar is an easy way to get a browning reaction, but sweet pizza dough isn’t so appealing; using lactisole solves that.
Domino sells a product called Super Envision that is a blend of mostly sucrose, some maltodextrin, and “artificial flavor” at 10,000 ppm. (Lactisole is classified as a GRAS additive—it was found in roasted Arabica coffee beans—and is thus labeled as artificial flavor.) Super Envision is meant to be used at around a 1% concentration in the final product, so the 10,000 ppm becomes 100 ppm. (Hmm, I wonder if that “artificial flavor” could be lactisole?)
If you’re able to get your hands on some, try tasting it mixed into caramel sauce. Add a small quantity of the sweetness inhibitor to one bowl of caramel sauce (see page 228), leaving a second bowl of caramel unmodified for comparison’s sake. The flavors of the burnt compounds in the caramel sauce will be stronger in the adulterated bowl because the sweetness won’t be masking them. It’s a strange sensation!
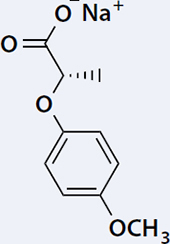
The S enantiomer of lactisole inhibits sweet receptors.
Salt is pretty amazing stuff, but I’ll confess that I’d say that about anything that can make ice cream. Adding salt to ice melts the ice because of freezing-point depression—that’s the lowering of the temperature at which water will freeze. But that’s only half the story of how salt and ice make ice cream. Dissolving table salt into water is also an endothermic reaction—a process that takes in heat, making the surrounding environment cooler.
When you drop a grain of table salt, a.k.a. sodium chloride (NaCl), into water it disassociates—splitting into smaller particles. In table salt, it’s the sodium (Na+) and chloride (Cl–) that are breaking apart, freeing them to roam around and interact with other molecules (or your tongue, in the case of sodium). That disassociation doesn’t come for free, though. Breaking those bonds takes energy and cools down the surrounding water.
1 |
small resealable plastic bag of about 1 quart (1 liter capacity) |
1 |
large resealable plastic bag of about 1 gallon (4 liter) capacity or a food container or paint can (with a lid) of roughly that size |
12 |
ice cubes from 1 tray of ice, or about 2 cups (480 mL) of frozen water |
1 |
cup (290g) salt |
½ |
cup (120 mL) heavy cream |
½ |
cup (120 mL) milk |
2 |
tablespoons (25g) sugar |
½ |
teaspoon (2.5 mL) vanilla extract |
Towel or gloves to hold the cold bag or container while shaking it (optional, but nice to have) |
|
Digital thermometer (optional) |
|
Spoon |
Pour the heavy cream, milk, sugar, and vanilla extract into the small plastic bag and seal it, leaving a pocket of air inside.
Add the ice and salt to the larger bag or container.
Place the small, sealed bag into the larger bag/container and close it.
Shake the container! If using a paint can, you can roll the can back and forth on a tabletop or the ground; if you’re using a bag, massage and shake it. Use gloves or wrap the container with a towel to keep your hands from getting too cold. After a few minutes, open the container and use a digital thermometer to measure the temperature of the salty water. Continue shaking and mixing for about 10 minutes, until the ice cream mixture has frozen to a soft-serve consistency.
Open the inner bag and use the spoon to taste the ice cream. What do you notice about the texture?
What do you think would happen if you used other compounds instead of salt? What would happen if you used Epsom salts, or sodium bicarbonate (baking soda)?
How much of a difference do you think the endothermic reaction makes? To find out, try making two batches of ice cream to test the difference. Make one batch with 1 cup of salt that’s been frozen, so it’s the same temperature as the ice but not mixed in. Then, make a second batch using 2 cups of water and 1 cup of salt mixed together that’s then chilled overnight in your freezer. (This is more salt than will fully dissolve, which is needed because not all the dry salt comes into contact with the ice in the normal method.)
Table salt, NaCl, is just one of many salts that show up in culinary uses: potassium chloride is used in salt substitutes (“please pass the potassium chloride shaker”?); calcium chloride is used to firm up vegetables (in the same manner as calcium in hard water does); and monosodium glutamate (MSG) adds glutamic acid to meals.
The amount of energy needed to disassociate table salt’s Na+ and Cl– ions is called the lattice energy. But there’s also heat given off when those ions associate with water molecules, called the hydration energy. Different types of salts will have different lattice and hydration energies. If the lattice energy is greater than the hydration energy, then it’s an endothermic reaction; if it’s the other way around, dissolving the salt will create an exothermic reaction—one that gives off heat.
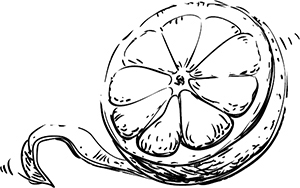
Candied rind is great chopped up and added to cookies, on top of desserts, or simply dipped into tempered chocolate (see page 157). Boiling the rind softens the tissue and neutralizes one of the bitter compounds in citrus pith, limonin. Sugar acts as a preservative by binding with water, but it’s not foolproof. Mold needs less available water than bacteria to grow, so if your rinds are too moist, you may see mold growth (and not the delicious kind).
In a pot, bring to a boil:
2 |
cups (480 mL) water |
2 |
cups (400g) sugar |
Rinds from 3-–6 oranges, cut into strips about ¼” / 0.5 cm wide |
Simmer for 20–30 minutes, until the rinds are tender. Remove the rinds from the pot and dry them on paper towels. Store the rinds in a container with sugar surrounding them to further dry them out.
Note
• Try other citrus fruits, such as grapefruits, lemons, limes, or tangerines, or fruits such as cherries, peaches, or apples. You can add spices such as cinnamon to the water as well, or substitute dark rum or a liqueur such as Grand Marnier for part of the water.
Flavorings
The flavor of food is incredibly important—arguably the single most important variable in your enjoyment of a meal. Flavors change our behavior: the smell of freshly baked bread draws us into the bakery, the aroma of fresh herbs and toasted spices in a meal makes us salivate, and the memory of what something tasted like brings us back for another purchase. The loss of smell—anosmia—is considered one of the most severe sensory losses. Think about the last time you had a cold with a plugged-up nose—food becomes so much less appealing without flavor!
Being able to add flavors to foods opens up new possibilities. Industry relies on flavorings as part of mass manufacturing. An acquaintance of mine who used to work at Campbell Soup Company pointed out that meats lose most of their flavor when steam-cooked (which is how chicken for chicken noodle soup is cooked at scale), so flavorings have to be added back in. Coloring extracts are added too, even if their source is traditional ingredients such as turmeric (yellow), paprika (red), or caramel (brown). Flavor is absolutely critical to industry, which knows very, very well that a quickly tapering-off flavor causes you to reach for a second bite, and an appealing flavor triggers a repurchase the next time you’re at the store.
Creating good aromas and flavors is so critical that there are several categories of E numbers just for compounds that change taste. One category, flavor enhancers (E600s), alters the way foods taste. (“Flavor enhancers” is something of a misnomer; “taste enhancers” would be better.) Most of the compounds in this range are glutamic acid salts like MSG (E621), but there are also those that make foods taste sweeter, like the amino acid glycine (E640). Speaking of sweet: artificial sweeteners (E900s) get their own E number category that includes compounds such as sucralose (E955) and stevia’s active chemical (E960). Unless you have some rather impressive lab equipment in your kitchen, making E-numbered compounds isn’t exactly a home project. (Time to whip up some fresh guanylic acid!?) Keep in mind that there are plenty of traditional ways to boost tastes, such as adding ingredients high in glutamic acids (see page 76), or simply a pinch of salt.
But what about actual flavorings? As I mentioned earlier, the E number list isn’t an exhaustive source of food additives. Vanillin doesn’t show up, even though it’s a single molecule with a well-defined structure that’s often added to food. Home cooks use vanilla extract, though, not vanillin powder, and that’s where we can get into some fun, creative experiments: flavor extracts.
Flavoring extracts are used to add new aromas to food or amplify existing ones. Their functional purpose is to carry volatile compounds—ones that easily evaporate—to tickle the sensory apparatus of the nose. Luckily, many volatile compounds in food are also easily dissolved by solvents. Solvents, as we’ll see, are the key to creating extracts that can carry flavors.
In cooking, we use three primary solvents: water, lipids, and alcohol. Each works on different types of compounds, so matching the chemistry of the solvent to the chemistry of the volatile compound is the key to making good extracts. The same chemical principle that allows water to dissolve compounds also applies to lipids and ethanol, so which solvent to use depends on the structure of the compounds being dissolved.
But how does a solvent work? What happens when one molecule bumps into another molecule? Will they form a bond (called an intermolecular bond—one that happens between different molecules) or repel each other? It depends on a number of forces that stem from differences in the electrical charges and charge distributions of the two molecules. Of the four types of bonds defined in chemistry, two are important in flavoring extracts: polar and nonpolar.
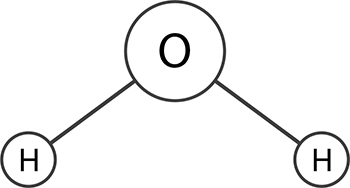
A molecule that has an uneven electrical field around it or that has an uneven arrangement of electrons is polar. The simplest arrangement, where two sides of a molecule have opposite electrical charges, is called a dipole. Water is polar because the two hydrogen atoms attach themselves to the oxygen atom such that the molecule as a whole has a negatively charged side—it’s a dipole.
When two polar molecules bump into each other, a strong bond forms between a positive region on the first molecule and a negative region on the second molecule, just like when two magnets are lined up. On the atomic level, the area of the first molecule that has a positive charge is balancing out the area of the second molecule that has a negative charge.
A water molecule is polar because of an asymmetric distributions of charges. This happens because oxygen is more electronegative than hydrogen and the bent shape of the water molecule. This shape gives it a positive charge on one side and a negative charge on the opposite side, making it polar.
A molecule that has a symmetric shape or atoms with only a small difference in electronegativity has a symmetric charge distribution on all sides—this is called nonpolar. Oil is nonpolar because it is made of mostly carbon and hydrogen, two molecules which have small differences in electronegativity.
In most cases, when a polar molecule bumps into a nonpolar molecule, the polar molecule is unlikely to find an electron to balance out its electrical field. It’s like trying to stick a magnet to a piece of wood: the magnet and wood aren’t actively repelled by each other, but they’re also not actually attracted. A polar and nonpolar molecule won’t form a bond and end up drifting off elsewhere, continuing to bounce around into other molecules.
This is why oil and water don’t normally mix, but sugar and water easily do. The water molecules are polar and form strong intermolecular bonds with other polar molecules—they’re able to balance out each other’s electrical charges. At an atomic level, the oil doesn’t provide a sufficiently strong bonding opportunity for the negatively charged side of the water molecule. Water and sugar (sucrose), however, get along fine. Sucrose is also polar, so the electrical fields of the two molecules are able to line up to some degree.
The strength of the intermolecular bond depends on how well the solvent and solute compounds line up, which is why some things dissolve together well while others only dissolve together to a certain point. A number of organic compounds that provide aromas in food are readily dissolved in ethanol but not in water or fats.
You will invariably encounter dishes where alcohol is used for its chemical properties, either as a medium to carry flavors or as a tool for making flavors in the food available in sufficient quantity for your olfactory system to notice. Alcohol is often added to sauces or stews to aid in releasing aromatic compounds “locked up” in the ingredients. Try adding red wine to a tomato sauce!
Toasting spices in oil—called blooming—causes the oil to capture flavor volatiles from the spices that evaporate as the seeds are heated.
Vanilla extract is a classic example of using alcohol as a solvent. Very few plant-based compounds are soluble in water—they’d wash away in nature. Hot water will work in some cases—how else would mint or chamomile tea work?—but when making extracts, you’ll need to use either ethanol or fat, depending upon the molecule you’re trying to extract. (Most aromas are based on multiple compounds, a detail I’m skipping here.)
Vanilla extract is easy to make. Ethanol from a spirit such as vodka (80 proof will be about 40% ethanol) will dissolve some of the 200+ compounds in the vanilla bean responsible for vanilla aroma, including vanillin, which gives vanilla most of its hallmark flavor. (The different ratios of some of the more pronounced compounds are what cause differences between various cultivars of vanilla.)
Vanilla beans are still pricey. Buy them online, and for making vanilla extract, Grade B is just fine. (Grade B is what industry normally uses—who cares that the pods aren’t as pretty when they’re going to be chopped up?)
In a small glass jar with a tight-fitting lid, put:
1 |
vanilla bean (~5g), sliced open lengthwise and chopped into strips to fit jar |
2 |
tablespoons (30 mL) vodka (use enough to cover the vanilla bean) |
½ |
teaspoon (2g) sugar |
Screw the lid on the jar or place plastic wrap over the jar’s top and store it in a cool, dark place (e.g., a pantry). Give the extract at least several weeks to steep.
Notes
• The vanilla bean can be left over from some other recipe. If you cook with vanilla frequently, consider keeping the jar of vanilla constantly topped off. Whenever you use a vanilla bean, add it to the jar, removing an old one when space requires it. And as you use the extract, occasionally top off the jar with a bit more liquid.
• Play with other variations: instead of vodka, which is used for its high ethanol content and general lack of flavor, you can use other spirits such as rum, brandy, or a blend of these. Or, instead of vanilla beans, try using star anise, cloves, or cinnamon sticks. Try varying both solvent and solute (e.g., Grand Marnier with orange peel in it).

Liquid Smoke, a.k.a. Water-Distilled Smoke Vapor
Smoking foods as a method of preservation was presumably discovered eons ago by cave-dwelling fire builders, but for us today, smoking is carried out for a second reason: smoked foods are delicious. By burning wood or other combustibles and directing the resulting smoke vapors toward fishes or meats, we deposit antimicrobial compounds onto the foods, preventing their spoilage. It’s only a quirk that the preservation process also deposits a whole bunch of smoky aromas that we happen to enjoy. But how can modern apartment dwellers get that delicious flavor without creating a bonfire in the center of the kitchen?

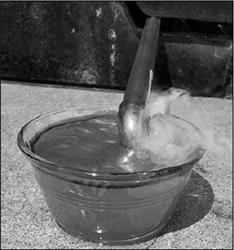
Kent Kirshenbaum demonstrates making liquid smoke using a blowtorch and a round-bottom flask at a New York University talk.
There’s a neat trick to capture smoke flavors into something called liquid smoke. Because those delicious smoky flavors are water-soluble byproducts of the chemical reactions that occur as wood burns, they can be dissolved into water and later applied to food. The commercial food industry does this to infuse smoke flavor into foods that are traditionally smoked but aren’t economical to smoke in large scale, such as bacon, and to add smoky flavors into foods whose flavor is enhanced by smoke essence but that could never actually be smoked, such as “smoked” tofu.
At home, the simplest way of creating a smoked flavor in your cooking—besides actually smoking it—is to include ingredients that are already smoked. You can infuse smoke flavors into your dish by adding spices such as chipotle peppers or smoked paprika, or by using dry rubs with smoked salts or smoked teas such as Lapsang Souchong. However, including smoked ingredients will also bring along the other flavors of the substance being used. Smoked salts, for example, can add too much salt to a dish. This is where liquid smoke comes in.
Liquid smoke isn’t complicated. There shouldn’t be a long list of ingredients on any bottle you buy; it should just read “water, smoke.” In and of itself, liquid smoke is not processed, in that there aren’t any chemical modifications or refining steps that alter or change the compounds that would have been present in traditional smoking.
Making liquid smoke involves heating wood chips to a temperature high enough for the lignins in wood to burn (around 752°F / 400°C) and piping the resulting smoke through water. The water-soluble components of smoke remain dissolved in the water, while the non-water-soluble components either precipitate out and sink or form an oil layer that floats and is then discarded. The resulting product is an amber-tinted liquid that you can brush onto meats or mix in with your ingredients.
Incidentally, the wood chips turn into charcoal in the process; they’re carbonized, but without oxygen present, they can’t combust. You can create your own charcoal by sealing up wood chips inside a container that will vent out smoke but not circulate air back in. You can also make charcoal from materials besides wood. I know one chef who uses leftover corn cobs and lobster shells to create “corn cob charcoal” and “lobster charcoal,” and because some of the flavor molecules from those items are extremely heat-stable, using the charcoal for cooking imparts a whiff of those flavors as well.
In theory, some of the mutagenic, cancer-causing compounds normally present in traditionally smoked foods are present in much smaller quantities in liquid smoke—they end up in the oil phase or precipitate—so using liquid smoke may be somewhat safer for you than traditionally smoking foods. However, liquid smoke still has some amount of mutagenic compounds present. As a substitute for smoked foods, it should be as safe, possibly safer, as traditional smoking, but you probably shouldn’t douse a teaspoon of it on your eggs every morning.
When grilling, make sure your fire is hot enough so that the lignins, not just the celluloses, break down.
Liquid smoke is fascinating stuff, as you can see. Try snagging a bottle of it and revisiting the Salmon Gravlax recipe from page 385, adding 10–15 drops to the salt mixture to give it a smoked flavor. Some of the more unusual recipes use liquid smoke to “smoke” foods that can’t normally be tossed onto a wood-burning grill, such as ice cream. With all the processing that happens to our foods, it’s nice to see that one of the more exotic-sounding ones turns out to be one of the most primitive ones.

Wood chips before heating...
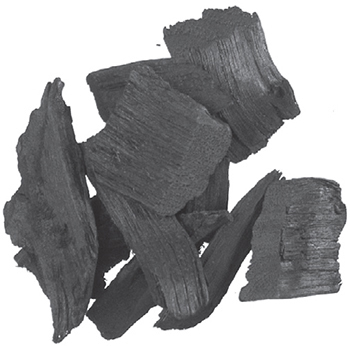
...and after heating.
Charcoal is traditionally made by heating combustible materials like wood in the absence of oxygen (called pyrolysis), evaporating water and breaking down volatile compounds. The result is a solid lump of mostly carbon that combusts more quickly than the original material would have.
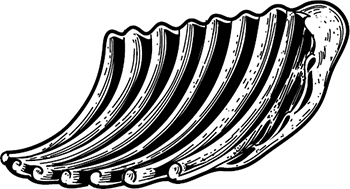
In a large baking pan (9” × 13” / 23 cm × 33 cm), place:
2 pounds (900g) pork baby back ribs, excess fat trimmed off
In a small bowl, create a dry rub by mixing:
1 |
tablespoon (18g) salt |
1 |
tablespoon (14g) brown sugar |
1 |
tablespoon (6g) cumin seed |
1 |
tablespoon (9g) mustard seed |
20 |
drops (1 mL) liquid smoke |
Cover the ribs with the spice mix. Cover the baking pan with foil and bake at 300°F / 150°C for 2 hours.
In a small bowl, create a sauce by mixing:
4 |
tablespoons (60 mL) ketchup |
1 |
tablespoon (15 mL) soy sauce |
1 |
tablespoon (14g) brown sugar |
1 |
teaspoon (5 mL) Worcestershire sauce |
Remove the foil from the baking pan and coat the ribs with the sauce. Bake for 45 minutes, or until done.
Note
• Experiment with other savory spices in the dry rub, such as chilies, garlic, or paprika. Also, try adding items such as onions, garlic, or Tabasco to the sauce.
This is an advanced home project, but if you’re up for the challenge, it’s fun to make. It’s also a great example of what chemists call dry distillation—separating compounds from solids under heat. (See page 360 for more about distillation.) Treat this as an experiment about process; I wouldn’t use the finished product on your foods.
The smells and tastes of smoky, barbecue goodness are from chemical reactions that occur during pyrolysis (burning) of wood, not from any chemical interaction between food and smoke. Some of the desirable compounds generated by smoke are water-soluble, a lucky quirk that means we can isolate them by piping smoke through water to dissolve those compounds. Other compounds are less pleasant—at strong enough concentrations, some of them can smell rotten, like old, foul garbage.
Wood is primarily made of cellulose, hemicellulose, and lignin, all of which convert to thousands of different chemical compounds during burning. The aromatic molecules that provide smoke flavoring are generated by the lignin, which breaks down at around 750°F / 400°C. Cellulose and hemicellulose break down at lower temperatures (480–570°F / 250–300°C), but they generate compounds that both detract from the flavor and are mutagenic. Burning wood at too low a temperature can create creosote, a black oily residue generated from incomplete combustion of wood that is denser than water.
Note that wood or charcoal grills tend to heat their enclosures several hundred degrees hotter than gas-based ones.
Hickory or cedar wood chips (or any other wood chips suitable for smoking) |
An aluminum foil disposable baking pan and tight-fitting lid (any shape pan will do; pie tins work well) |
A 16–24” / 40–60 cm length of copper pipe, ½” / 1 cm diameter or smaller |
A copper L-shaped elbow that fits tightly onto the copper pipe (available in your hardware store near the pipes) |
2 ounces / 60 mL of heat-safe epoxy, such as J-B Weld original cold epoxy |
A paper plate or piece of cardboard, for mixing epoxy |
A plastic knife or popsicle stick, for mixing epoxy |
A small glass bowl |
Water for the glass bowl |
An oven mitt or dry towel |
And, obviously, a grill and fuel for the grill |
We’re going to smoke the wood chips in the disposable baking pan that’s been sealed with epoxy (which will need to cure for several hours—plan ahead!), and then vent the smoke out through a pipe into a glass bowl filled with water. While the instructions are long, they’re easy:
Attach the L-shaped elbow to one end of the copper pipe. It should fit snugly.
Check that the pipe will fit on your grill: open your grill, lay the pipe with the elbow end extending off the edge to the side and the empty end somewhere near the center of the grill. The elbow end will need to point down and vent into the small glass bowl, so adjust your setup accordingly. Two important things to check at this point: 1) make sure that you can close the grill lid; 2) make sure that the bottom part of the elbow will be submerged at least ¼” in the water once the glass bowl is topped off.
Using the empty end of the pipe, punch a hole in the side of the disposable baking pan. You can do this by pressing the pipe against the side of the pan and rotating it back and forth, almost like a drill bit; after a few seconds, it should cut through the foil.
Set the baking pan onto the grill (which should be off!) and feed the pipe through the hole. Line up the elbow such that it vents into the empty glass bowl.
Add the wood chips to the baking pan, putting a full layer in the bottom. At this point, your setup should look something like this:

Mix the epoxy, using the paper plate or cardboard as a palette and a plastic knife or popsicle stick to stir it.
Seal the hole where the pipe enters the baking pan by smearing epoxy all around the pipe at the point right inside the baking pan and pulling the pipe out a tiny bit to drag some epoxy through and plug up the hole.
Prepare to seal the top of the baking pan by lining the pan’s top edge with epoxy. Place the lid on top of the pan, fold down the edges, and crimp and squeeze tight around all edges.
Wait several hours for the epoxy to cure.
Check that the epoxy is cured by gently pushing the pipe near where it enters the disposable baking pan. It shouldn’t move.
Fire up the grill! After a few minutes, you should start to see steam and then smoke venting out of the pipe. Once that starts happening, add water to the bowl. You should start seeing smoke bubbles billowing through the water. Yay!
Let the grill run for 5–15 minutes. You should notice the water change in appearance. If you’re using a gas grill, turn the heat off at this point; otherwise, use the oven mitt or towel to pick up the copper pipe and vent it outside of the water, and allow the grill to burn out.
Examine the water. What do you notice? What colors do you see?
Is there stuff floating on top? What does it smell like? What do you think happens, in terms of odor, when some compounds are more concentrated than normal?
Pour off some of the top layer and look at the liquid in the middle. Dip just a tiny part of your finger into it and carefully taste a little. What does it taste like?
Remember the creosote described earlier? Do you notice anything like that? What would that mean about the temperature of your grill?
Thickeners
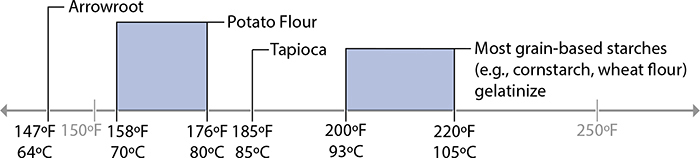
Gelation temperatures of common starches.
Starches are used to thicken many foods—gravies, pies, sauces—because they’re easy to use and easy to find. It’s no surprise that starches are used as thickeners in almost all of the world’s cuisines! Wheat flour is common in Western cooking for its starch, cornstarch is common in Chinese dishes, and tapioca starch and potato starch (sometimes called “potato flour” but not actually a flour) are also common. Many modern thickeners like maltodextrin are also derived from starch, and have been developed for use in everything from baking jam-filled pastries to creating novel textures in high-end cuisine.
Starches are made up of two compounds, amylose and amylopectin. The ratio of these two compounds and how a plant stores them differs between types of plants, which is why starches from wheat flour need near-boiling water to thicken while potato starch will set at lower temperatures. (This is also why different plants need different cooking temperatures—see page 205 for more.)
A starch’s thickening power is determined by both its amylopectin and amylose content. With heat and moisture, starches swell up and gelatinize, absorbing water into the molecular structure and changing its texture. (This is what happens to pasta when you cook it!) Amylopectin absorbs water, and starches with higher levels of it will absorb more moisture (cornstarch and wheat starch are roughly 75% amylopectin, while tapioca and potato are 80–85%). After gelatinizing, another process unfolds—gelation—which is amylose leaving the starch granule and entering the surrounding water. It’s this change that gives starches with higher amylose content their ability to thicken and gel foods.
The starch structure varies based on the plant, which is why different types of starches have different thickening capabilities. When heated in water to near-boiling, 3 teaspoons (8g) of flour is approximately the same as:
1½ |
teaspoons (4g) cornstarch |
1½ |
teaspoons (4g) arrowroot |
1 |
teaspoon (3g) tapioca starch |
2/3 |
teaspoon (6g) potato starch |
Flour isn’t as good a thickening agent as pure starches are, because it contains other stuff in addition to starch: proteins, fat, fiber, and minerals.
How quickly and how much a starch can thicken a liquid depends on the size of the starch granules. (Starch is stored in granules; it will take longer for the amylose to leach out of larger granules.) Likewise, the length and ratios of the molecular structures and variations in the crystalline structure will impact the speed and degree to which a starch will thicken; these structures are determined by the growing conditions of the plant. Moisture, too, is critically important for thickening—the starch has to absorb water in order to swell! This is why adding too much sugar can slow down cooking times for sweet liquids: sugar, being hygroscopic, competes for the water, so be sure to cook sugary liquids longer.
Thickened foods can exhibit a phenomenon known as shear thinning, which is when a substance changes its viscosity under certain conditions. Many sauces, like ketchup, mustard, and mayonnaise, hold their shape—a blob of ketchup doesn’t settle down—but will flow and change shape when pressure is applied (this property is called thixotropy). Squeeze the bottle or tube, and the sauce flows easily, but let go, and it holds its shape. With enough of a thickening agent, a food will firm up to a true solid: one with a defined shape that can be sliced, poked, and prodded.
Arrowroot and Cornstarch
Two of the most common thickeners are arrowroot and cornstarch. The former is derived from a root and the latter from a grain, a fact that is responsible for a number of differences between the two. It’s because of these differences that one or the other will work better, depending upon the chemistry of the dish it’s being used in.
Like all starch-based thickeners, arrowroot and cornstarch thicken mixtures when amylopectin swells to absorb water and amylose leaches out of the starch granules. Depending upon the recipe, they can be used as binders in place of eggs (mix 2 tablespoons / 15g starch with 3 tablespoons / 45 mL of water) or to make fried foods crispier (mix a few spoonfuls of starch and seasoning spices together and toss ingredients like tofu or chicken in the mix before pan-frying them).
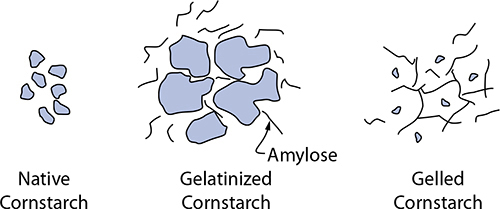
Amylose leaks out of cornstarch granules heated with water; upon cooling, the amylose molecules form a gel.
Arrowroot starch |
Cornstarch |
|
Instructions for kitchen use |
To thicken liquids, use toward the end of cooking: create a slurry in cold liquid like water, mix in, and briefly cook until set. Avoid boiling. |
To thicken liquids, use at the beginning of cooking, create a roux (starch cooked in fat, usually flour in butter), and then whisk other liquids in. |
Temperature |
Root starches require less heat to gelatinize. |
Grain starches require more heat to gelatinize. (Temperatures above ground in direct sunlight can be hot, so the starch granule structure compensates to avoid cooking!) |
Things to avoid |
Avoid dairy. When combined, arrowroot and dairy form a slimy, gooey mixture. Use cornstarch for dairy-based dishes. |
Don’t freeze. Cornstarch-thickened items will “weep,” or expel liquid (called syneresis), when frozen and thawed. |
Industry uses |
Used to form clearer gels (arrowroot forms a clearer gel than cornstarch). |
Cornstarch is gluten-free, so in addition to traditional uses, it’s also used as a thickening substitute for gluten-free items. |
Origin and chemistry |
Derived from the rhizome of the tropical Central and South American plant Maranta arundinacea, arrowroot was first used by Europeans as a supposed cure for poison arrows (hence the name) and other medicinal woes in the 17th century. The 1830s and 1840s saw its introduction as a health food, and it’s been used in culinary applications ever since. |
Derived from corn (shocker, I know), cornstarch was first made in 1842 and commercialized in 1844. Production significantly ramped up by the late 1850s, presumably as a cheaper, less objectionable alternative to arrowroot (which had to be grown in the subtropics and shipped, and whose health-conscious users objected to the slave labor involved at the time). |
Lemon meringue pie is the combination of three separate components, each with its own chemistry and challenges: pie dough, a meringue, and a custard-like filling. We’ve already covered pie dough (see page 259) and meringues (see page 293), so the only thing left is the filling itself. Flip to those recipes for instructions on how to make the pie dough and meringue topping, and blind-bake the bottom shell.
To make the lemon custard, place in a saucepan off heat and whisk together:
2½ |
cups (500g) sugar |
¾ |
cup (100g) cornstarch |
½ |
teaspoon (3g) salt |
Add 3 cups (720 mL) of water, whisk the ingredients together, and place the saucepan over medium heat. Stir the mixture until boiling and the cornstarch has set. Remove the pan from the heat.
In a separate bowl, whisk together:
6 |
egg yolks |
Save the whites for making the meringue. Make sure not to get any egg yolk in the whites! The fats in the yolk (nonpolar) will prevent the whites from being able to form a foam when whisked.
Slowly add about a quarter of the cornstarch mixture to the egg yolks while whisking continuously. This will mix the yolks into the cornstarch mixture without cooking the egg yolks (tempering). Transfer the entire egg mixture back into the saucepan, whisk in the following ingredients, and return the pan to medium heat and cook the mixture until the eggs are set, about a minute:
1 |
cup (240 mL) lemon juice (juice of about 4 lemons) |
Zest from the lemons (optional; skip if using bottled lemon juice) |
Transfer the filling to a prebaked pie shell. Cover the shell with Italian meringue made using the 6 egg whites (see page 293, making a double batch), and bake the pie in a preheated oven at 375°F / 190°C for 10–15 minutes, until the meringue begins to turn brown on top. Remove the pie and let it cool for at least 4 hours—unless you want to serve it in soup bowls with spoons—so that the cornstarch has time to gel.
To create decorative peaks on the meringue, use the back of a spoon: touch the surface of the unbaked meringue and pull upward. The meringue will stick to the back of the spoon and form peaks.
Gelling agents typically come as a powdered substance that is added to water or whatever other liquid you are working with. Upon mixing with the liquid, and typically after heating, the gelling agent rehydrates and as it cools it forms a three-dimensional lattice that “traps” the rest of the liquid in suspension. By default, add your gelling agent to a cold liquid and heat that up. Adding gelling agents to hot liquid usually results in clumps because the powder will hydrate and then gel up before it has a chance to disperse.

PHOTO USED BY PERMISSION OF ANN BARRETT
Ann Barrett is a food engineer specializing in food textures. She works for the Combat Feeding Directorate of the US Army Natick Soldier Research, Development, and Engineering Center (NSRDEC).
What does a food engineer do?
It’s like applied chemical engineering but for food. The training focuses on how to process food and how to preserve food, looking at food as material. I happen to have a specialty in food texture or food rheology; rheology means how something flows or deforms. My PhD topic was on the fracturability of crunchy food. How do you measure crunchiness or fracturability, and how do you quantitatively describe the way a food fails? When you chew a food and it breaks apart, can you describe that quantitatively and then relate that to the physical structure of the food?
Tell me a little bit about the NSRDEC.
There are several RDECs (research, development, and engineering centers) throughout the country. NSRDEC is focused on everything the soldier needs for survival or sustenance, aside from weaponry: food, clothing, shelters, and parachutes. The food part is largely driven by the fact that the military is potentially deployed in every kind of physical environment, so we need a wide range of foods to support soldiers operating in a wide range of situations. They have large depots of rations, and that drives a very long shelf-life requirement. Most of the food that we make needs to be shelf-stable for three years at 80°F / 26.7°C. That is not to say that the soldier will always eat something that’s three years old, but they definitely might. That drives a lot of the research here; foods that are shelf-stable but also good, that the soldiers will want to eat.
It must be really interesting to work with the constraints that you’ve got while trying to preserve flavor and texture. How do you go about doing that?
Well, it’s often one part experience or knowledge combined with two parts trial and error. There’s a lot of bench-top development here. Most of my experience has been in processing and engineering analysis of food, but I do have a project now where we’re trying to develop flavors for sandwich fillings. All flavors are chemicals, so you can replicate a natural flavor by knowing what the chemistry is.
For example, we’re working on a peanut butter filling for sandwiches. We’re trying to make a chocolate peanut butter flavor, a bit like Nutella. We have the peanut butter formula, and we’ve been looking at adding cocoa and at different chocolate flavors. We put three into storage to see how they would work, and two of them came out just okay, and one of them was delicious. When you’re developing something, you have to look at a number of different ingredients to see what works. There will be changes in both the flavor and texture of a food during long-term storage. Flavors tend to become less intense, or off-flavors might develop. Texture can degrade by moisture equilibrating, say in a sandwich, or by staling. There are a multitude of flavors that are commercially available, and also a multitude of ingredients that will adjust texture—for example, starches and gums for liquid or semisolid foods, enzymes and dough conditioners for breads. So during development you need to optimize a formula to make sure the food is good after you make it and also good after storage.
Even with all the hard science, you still have some degree of, well, “Let’s just try it and see what happens?”
Oh, absolutely. You make a product up for a project, sample it, store it, and then sample it again. Everything is actually tasted here, and as a matter of fact, part of our duties is to go over and participate in the sensory panels because the food scientists here, the nutritionists, the dieticians, are all considered expert tasters. The first thing we do is make our product on the bench and then put it into a box that’s 120°F / 49°C for four weeks. Those conditions approximate a longer period of time at a lower temperature; it’s just a quick test to see if quality holds up. If the product holds up, next is 100°F / 38°C for six months; that’s supposed to approximate the quality you would get at three years at 80°F / 27°C. Then you have to check that it’s microbiologically stable, so it goes to the microbiologist for clearance, and then you can ask people to come and evaluate it. We rate the appearance, aroma, flavor, texture, and the overall quality.
How does the science of food texture work into enjoyment of food?
There are expected textural properties of whatever food category you’re dealing with. Sauces are supposed to be creamy; meats are supposed to be at least somewhat fibrous; bread and cake are supposed to be soft and spongy; cereals and crackers are supposed to be crunchy. When texture deviates from what’s expected, the food quality is poor. If you are going to measure and to optimize the texture of a product, you need to pinpoint the exact sensory properties you want.
For example, for liquids, flowability or viscosity is the defining physical and measurable characteristic. There are “thin” liquids and “thick” liquids, and you can often change thin to thick by adding hydrocolloids or thermal treatment. Solid foods come in many different textural types. There are elastic solids that spring back after deformation (Jell-O); there are plastic solids that don’t (peanut butter). Then besides “solid” solids there are also porous solids—think bread, cake, puffed cereal, extruded snacks such as cheese puffs. Porous foods have the structure of sponges, and like a wet versus a dry sponge, they can be elastic or brittle.
Somebody cooking in the kitchen is actually manipulating these things both physically and chemically?
Yes, that’s exactly what cooking is. Take cooking an egg. The protein albumin will denature with heat, causing molecular crosslinking and solidification. Another example is kneading bread dough, which is a mechanical rather than a thermal process that makes the gluten molecules link up; that gluten network is what allows the bread to rise because a structure is developed that will hold gas liberated by yeast. And of course, every time you use cornstarch or flour to thicken a gravy or sauce, you’re employing a physico-chemical process. Heat and moisture will make the starch granules absorb water and swell and then bleed out individual starch polymers, which are like threads attached to the granules. The starch polymers then entangle, creating an interconnected structure that builds viscosity. That’s why your gravy gets thick.
Methylcellulose
Methylcellulose isn’t a typical starch-derived thickener, and it’s not used for traditional thickening purposes. It has the unusual property of getting thicker when heated—thermo-gelling, in chem-speak. Take jam: when heated, it loses its gel structure (the pectin melts), causing it to flow out of things like jam-filled pastries. Adding methylcellulose prevents this by absorbing the water in the jam when heated. And since methylcellulose is thermoreversible—it can go back and forth between states based on temperature; in this case between gelled and ungelled—upon cooling after baking, the jam returns to its normal consistency. Magic!
Hollywood movies use methylcellulose to make slime. Add a bit of yellow and green food dye, and you’ve got yourself Ghostbusters-style slime. To get good consistency, whisk it vigorously to trap air bubbles into the mixture.
Methylcellulose has been used in some novel culinary dishes for its thermo-gelling effects. One famous example is hot ice cream in which the ice cream is actually hot cream that’s been set with methylcellulose. As it cools to room temperature, it melts.
Instructions for kitchen use |
Dissolve methylcellulose into hot water (around 122°F / 50°C) and then whisk it while it’s cooling down. Mixing it directly in cold water can be difficult because the powder will clump up as it comes into contact with water. In hot water, though, the powder doesn’t absorb any liquid, allowing it to be uniformly mixed. It’s easiest to stir methylcellulose into your liquid, using between 1.0% and 2.0% of the weight of the total recipe, and let it rest overnight in the fridge to dissolve fully. You can then experiment with setting the liquid. Try baking a small dollop of it, or dropping it by the ice cream scoopful into a pan of simmering water. |
Industry uses |
Methylcellulose is used to prevent “bake-out” of fillings in baked goods. Methylcellulose also has high surface activity, meaning that it can act like an emulsifier by keeping oil and water from separating, so it is also used in low-oil and no-oil dressings and to lower oil absorption in fried foods. |
Origin and chemistry |
Methylcellulose is made by chemically modifying cellulose (if you’re a chemistry geek, via etherification of the hydroxyl groups). There can be great variation between types and derivatives of methylcellulose, in terms of thickness (viscosity), gelling temperature (122–194°F / 50–90°C), and strength of gel (ranging from firm to soft). If your methylcellulose isn’t setting correctly, check the specifications of the type you have; see http://cookingforgeeks.com/book/methylcellulose/ for more. |
Methylcellulose increases surface tension—well, actually, “interfacial tension” because “surface” refers to a two-dimensional shape—which is why it works as an emulsifier.

When cold (on left), water molecules are able to form water clusters around the methylcellulose molecule. With sufficient heat—around 122°F / 50°C—the water clusters are destroyed and the methylcellulose is able to form crosslinks, resulting in a stable gel at higher temperatures.
Unlike the marshmallows covered earlier in this chapter (see page 383), these marshmallows firm up when heated but melt when they cool. This recipe is adapted from a recipe by Linda Anctil (http://www.playingwithfireandwater.com); see page 121 for more about Linda.
In a saucepan, bring to a boil:
2 1/8 |
cups (500 mL) water |
1 |
cup (200g) sugar |
Let cool, and then whisk in:
10 |
grams methylcellulose (use a scale to ensure an accurate measurement) |
1 |
teaspoon (5 mL) vanilla extract |
Let the mixture rest in the fridge until thick, around 2 hours. Once it’s thick, whisk it for 2–3 minutes to create a super-frothy foam. Transfer to a 9” × 9” / 20 cm × 20 cm baking pan lined with parchment paper. Bake it for 5–8 minutes at 325°F / 160°C, until set. The marshmallows should feel dry to the touch and not at all sticky. Remove the pan from the oven, cut the marshmallows into your desired shapes, and coat them with powdered sugar.

Two marshmallows on a plate of powdered sugar.

Two marshmallows after being coated with powdered sugar while still hot.
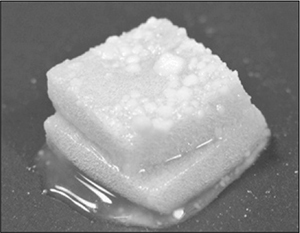
Same marshmallows after cooling for a few minutes.

When working with gels, you can quickly cool the hot liquid by whisking it while running cold water over the outside of the pan. The water will adhere to the bottom of the pan.
Maltodextrin
Maltodextrin is a starch that easily dissolves in water with a mildly sweet taste. In manufacturing, it’s spray-dried and agglomerated, which creates a powder that’s very porous on the microscopic level. Because of this structure, maltodextrin is able to soak up fatty substances, making it useful for working with fats when designing food. It also absorbs water, so it’s used as an emulsifier and thickener, as well as a fat substitute: once hydrated, it literally sticks around, mimicking the viscosity and texture of fats.
Since maltodextrin is a powder and absorbs fats, using a lot of it creates a fun, unusual result: it’ll turn liquids and solids that are high in fat into powders. Mix enough of it into olive oil or peanut butter, and they become a colloid of sorts, although in powdered form. And because maltodextrin dissolves in water, the resulting powder dissolves in your mouth, effectively “melting” back into the original ingredient and releasing its flavor. Since maltodextrin itself is generally flavorless (only slightly sweet), it doesn’t substantially alter the flavor of the product that is being “powderized.”
In addition to the novelty and surprise of, say, fish topped with a powder dusting that melts into olive oil in your mouth, powders can carry flavors over into applications that require the ingredients to be solid. Think of chocolate truffles rolled in chopped nuts: in addition to providing flavor and texture contrast, the chopped nuts provide a convenient “wrapper” that allows you to pick up the truffle without the chocolate ganache melting in your fingers. Powdered products can be used to coat the outsides of foods in much the same way.
Instructions for kitchen use |
Add maltodextrin powder slowly to your melted fat or oil for a ratio of about 60% fat, 40% maltodextrin by weight. You can pass the results through a sieve to change the texture from breadcrumb-like to a finer powder. |
Industry uses |
Maltodextrin is used as a filler to thicken liquids (e.g., the liquid in canned fruits) and as a way to carry flavors in prepackaged foods such as chips and crackers. Since it traps fats, any fat-soluble substances can be “wicked up” with maltodextrin and then more easily incorporated into a product. |
Origin and chemistry |
Maltodextrin is derived from starches such as corn, wheat, or tapioca. It’s made by cooking starches at moderate heat for many hours (usually with an acidic catalyst) and running the resulting hydrolyzed starches through a spray-dryer. Chemically, maltodextrin is a sweet polysaccharide typically composed of between 3 and 20 glucose units linked together. |
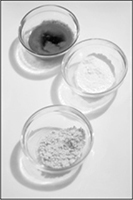
Browned butter tastes rich and nutty, and is great for adding flavor (see page 156). When melted and whisked with maltodextrin, it can be turned into a powder that “melts” back into browned butter in your mouth. Try using this browned butter powder as a garnish on top of or alongside fish, or making a version with peanut butter and sprinkling it on desserts.
In a skillet, melt:
4 |
tablespoons (60g) salted butter, or unsalted butter with ¼ teaspoon (1g) salt |
Once the butter is melted, continue to heat it until all the water has boiled off. The butter solids will start to brown. Once the butter has completely browned and achieved a nutty, toasted aroma, remove it from the heat and allow it to cool for a minute or two.
In a small mixing bowl, measure out:
½ |
cup (40g) maltodextrin |
While whisking the maltodextrin, slowly dribble in the browned butter until the mixture reaches the consistency of wet sand.
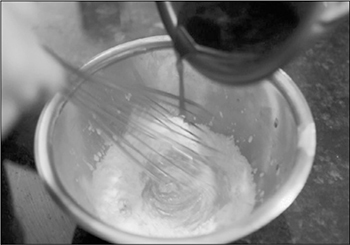
Notes
• Stir slowly at the beginning because maltodextrin is light and will easily aerosolize. The ratio between maltodextrin and the food will vary. If your result is more like toothpaste, add more maltodextrin.
• If the resulting powder is still too clumpy, try drying it carefully by transferring it to a frying pan and applying low heat for a few minutes. This will help eliminate any dampness present from room humidity. It will also partially cook the food item, which might not work for powders containing ingredients such as white chocolate.
• For a finer texture, try passing the powder through a sieve or strainer using the back of a spoon.
• Additional flavors to try: peanut butter, almond butter, coconut oil (virgin/unrefined), caramel, white chocolate, Nutella, olive oil, bacon fat (cook some bacon and save the fat drippings—this is called rendering). You don’t need to heat the fats first, but it might take a bit of working to get the maltodextrin to combine. For liquid fats (e.g., olive oil), you will need to use roughly 2 parts maltodextrin to 1 part fat: 50g olive oil, 100g maltodextrin.
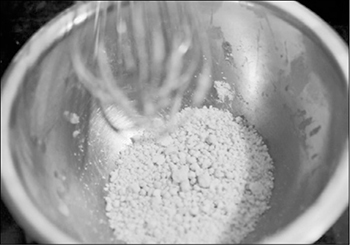
Gelling Agents
The next time you slather jelly onto a slice of bread, you can thank pectin for its ability to form gels—solid colloidal mixtures with a defined shape that trap liquids. Without gelling agents like pectin we’d have a much less interesting world, at least in the sweets aisle. Gelling agents thicken liquids, and at higher concentrations they create gels. In low concentrations they can also act as emulsifiers (thicker liquids don’t separate as easily) and can prevent sugar crystals from ruining candies or stop water crystals from turning ice cream gritty.
There are two key concepts for gels: strength and concentration. Gram for gram, some gelling agents are able to form stronger gels than others. And, of course, there has to be enough of a gelling agent present for a gel to form.
Weak gelling agents and low concentrations of stronger gelling agents act as thickeners. Without enough of the gelling agent present to create a proper structure, viscosity increases but liquids remain flowable or at least pliable. Jams are a great example of weak gels: they’re flowable and don’t have a proper shape. Some gelling agents are almost always used for weak gels. Carrageenan, for example, is commonly used for thickening. The hazelnut milk I drank this morning had a thick, tongue-coating feel; a quick peek at the ingredient label listed carrageenan. (Presumably the manufacturer thinks consumers want something with the same mouthfeel as regular milk.)
With enough of a strong gelling agent, liquids become true gels—solid colloids. Foods like jelly, Jell-O, and cooked egg whites are gels due to pectin, gelatin, or ovomucin proteins. Gels are formed by tightly interconnected lattices that prevent the food from flowing at all, so they form a solid that you can slice into shapes or unmold and use as a component in a dish. Gels have a memory of their cast shape, meaning that they will revert to that shape when not being pushed or poked at.
In industrial applications, gelling agents are typically used for their functional properties to thicken liquids or modify texture (“improve mouthfeel,” as they say—like my hazelnut milk). Carrageenan is extremely common; half the cream cheese and yogurt in my local store uses it. Agar is used in many sweet Asian desserts, and tapioca is used for balls in bubble tea.
In modern cuisine, gelling agents are used to create dishes in which foods that are normally liquid are turned into something that can be smeared or even made completely solid. Gels can also be formed on surfaces (well, technically, interfaces—where two substances meet) in a technique sometimes called spherification. Let’s see how a handful of different gelling agents work to create everything from everyday jams to novel spherification.
American-style jelly is made with the juice of fruit—no fruit pulp—and turned into a gel using sugar and pectin so that it holds its shape, making it spreadable. Jam includes mashed fruit, making it thick, and uses less pectin, thickening it but not setting it into a true gel.
Pectin
Pectin is amazing stuff: in nature, it acts as glue, holding cells together in plant tissue. The pectin used in cooking acts as a thickener and comes from a family of polysaccharides that, depending on processing, are divided into two broad types: high- and low-ester pectins, sometimes called high-methoxyl (HM) and low-methoxyl (LM). The difference between the high and low types has to do with the esterification of the molecular structure—this is just a detail of the pectin molecules that can vary. The number of esters present in the pectin molecules is naturally high, but with processing it can be reduced, which changes the way pectin forms a gel. High-ester pectin requires sugar and acid in order to link together; low-ester pectin can also create a gel using cations like potassium or calcium.
To complicate matters, the labels of high- and low-ester are based on an arbitrary cutoff point for the degree of esterification. All the requirements for gelling can be satisfied, but the time for the gel to actually set can vary from 20 seconds to 250 seconds. If you’re making jam and pull a sample to test gel level, you may have to wait 4 minutes or so to actually determine if you’ve created the right conditions, depending on the specifics of the high-ester pectin you’re using.
Making jam? Throw some spoons in the freezer before you start. When making the jam, drip the hot jam onto the cold spoon to let it cool for a few minutes to check if it forms a good gel.
Commercially, pectin is extracted from cooked citrus rinds or apple pomace (what’s left after the juice is pressed out of the fruit) and cores. You can use the same method to make your own pectin; you’ll end up with high-ester pectin in liquid. (The process to convert it to low-ester pectin isn’t a home project.) The natural presence of pectin in some fruits is also why a jam recipe may not even call for pectin—it’s already in the ingredients!
High-ester pectin won’t form gels when there’s too much water around. Adding sugar reduces the amount of available water, plus sugar is needed for high-ester pectin to set. High-ester pectin also forms gels only in a pH range of around 2.5 to ~3.5, which is why some recipes add an acid like lemon juice to drop the pH range. Fruits that have more natural sugars will require less added sugar, and likewise more acidic fruits won’t require the addition of something like lemon juice.
Low-ester pectin is made by processing high-ester pectin with an acidified alcohol. This creates a pectin that sets in the much wider pH range of 2.5–6.0 and tolerates more water, although low-ester pectin does still gel better at the lower pH range (below 3.6). Low-ester pectin is more forgiving than high-ester pectin: it can handle more free water and less acidic environments but still does better when treated like high-ester pectin. Low-ester pectin has the benefit of being able to create low-sugar or low-acid foods, allowing for less sugary jams.
In general, if you can get low-ester pectin, use it—it’s just easier to work with, as you can see from the chemistry. Otherwise, be patient with high-ester pectin: use about 1% (by weight), plenty of sugar (60–75%), and enough acid (like lemon juice) to drop the pH.
Carrageenan
Carrageenan is another common gelling agent, used in food as far back as the 15th century. Commercial mass production of carrageenan gums became feasible after World War II, and now it shows up in everything from cream cheese to dog food, acting as a flavorless thickener.
Instructions for kitchen use |
Mix 0.5% to 1.5% carrageenan into room-temperature liquid. Gently stir the liquid to avoid trapping air bubbles in the gel; lumps are okay at this stage. (They’re hard to get out unless you have a vacuum system.) Allow the mixture to rest for an hour or so; carrageenan takes a while to rehydrate. To set the carrageenan, bring it to a simmer either on a stovetop or in an oven. If you are working with a liquid that can’t be heated, create a thicker concentration using just water, heat that, and then mix it into your dish. |
Industry uses |
Carrageenan is used to thicken foods and to control crystal growth (e.g., in ice cream, keeping ice crystals small prevents a gritty texture). Carrageenan is commonly used in dairy (check the ingredients on your container of heavy whipping cream!) and water-based products, such as fast-food shakes (it keeps ingredients in suspension and enhances mouthfeel) and ice creams (it prevents aggregation of ice crystals and syneresis, the expulsion of liquid from a gel). |
Origin and chemistry |
Derived from seaweed (such as Chondrus crispus, a.k.a. Irish moss), carrageenan refers to a family of molecules that all share a common shape (a linear polymer that alternates between two types of sugars). The seaweed is sun-dried, treated with lye, washed, and refined into a powder. Variations in the molecular structure of carrageenan cause different levels of gelification, so you can achieve different effects by using different types of carrageenan (which, helpfully, grow in different varieties of red seaweed). Kappa carrageenan (k-carrageenan) forms a stronger, brittle gel, and iota carrageenan (i-carrageenan) forms a softer brittle gel. |
Technical notes |
||
i-carrageenan |
k-carrageenan |
|
Gelling temperature |
95–149°F / 35–65°C |
95–149°F / 35–65°C |
Melting temperature |
131–185°F / 55–85°C |
131–185°F / 55–85°C |
Gel type |
Soft gel: gels in the presence of calcium ions |
Firm gel: gels in the presence of potassium ions |
Syneresis |
No |
Yes |
Working concentrations |
0.3–2% |
0.3–2% |
Notes |
• Poor solubility in sugary solutions • Interacts well with starches |
• Insoluble in salty solutions • Interacts well with nongelling polysaccharides (e.g., gums like locust bean gum) |
Thermoreversible |
Yes |
Yes |

On the molecular level, carrageenan, when heated, untangles and loses its helical structure (left); when cooled, it reforms helices that wrap around each other and form small clusters (right). The small clusters can then form a giant three-dimensional net that traps other molecules.
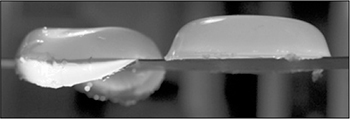
Iota carrageenan (left, 2% concentration set in water) creates a soft, elastic gel that sags, while kappa carrageenan (right, 2% concentration set in water) creates a firm, nonelastic gel that’s much more brittle. Both of these are true colloidal gels: solid structures with liquids trapped inside.
This isn’t, in and of itself, a tasty recipe (add some chocolate, though, and you’ve got the beginnings of commercial chocolate pudding). Still, it will give you a good sense of what adding a gelling agent does to a liquid and provides a good comparison between flexible and brittle gels.
In a saucepan, whisk to combine and then bring to a boil:
1 |
teaspoon (1.5g) iota carrageenan |
3.5 |
ounces (100 mL) milk |
Pour the mixture into a glass, ice cube tray, or mold and chill it in the fridge until set (about 10 minutes).
Again in a saucepan, whisk to combine and then bring to a boil:
1 |
teaspoon (1.5g) kappa carrageenan |
3.5 |
ounces (100 mL) milk |
Pour the mixture into a second glass, ice cube tray, or mold and chill it in the fridge until set.
Notes
• Try modifying the recipe by adding 1 teaspoon (4g) of sugar and substituting half-and-half for the milk. Microwave the mixture for a minute to set it and then pour the hot liquid into a ramekin that has a thin layer of jam or jelly and toasted sliced almonds in the bottom. Once it’s gelled, invert the set gel onto a plate for something roughly approximating a flan-style custard.
• Since the carrageenan is thermoreversible (once gelled, it can still be melted), you can take a block of food gelled with kappa carrageenan, slice it into cubes, and do silly things like serve it with coffee or tea (one lump or two?).
• You can take a firm brittle gel and break up the structure using a whisk to create dishes like thick chocolate pudding.
Agar
Like carrageenan, agar—sometimes called agar-agar—has a long history in food, but it has only recently become known in Western cuisine because of its use as a vegetarian substitute for gelatin. First used by the Japanese in the firm, jelly-type desserts that they’re known for, such as mizuyokan, agar’s use stretches back many centuries.
When it comes to food additives, agar is one of the simplest to work with. You can add it to just about any liquid to create a firm gel—a 2% concentration in, say, a cup of Earl Grey tea will make it firmer than Jell-O—and it sets quickly at room temperature. It comes in two general varieties: flakes or powder. The powdered form is easier to work with (just add it to liquid and heat). When working with the flake variety, presoak it for at least five minutes and make sure to cook it long enough so that it breaks down fully.
Instructions for kitchen use |
Dissolve 0.5% to 2% agar by weight in cold liquid and whisk to combine. Bring liquid to a boil. As with carrageenan, you can create a thicker concentrate and add that to a target liquid if the target liquid can’t be boiled. Compared to carrageenan, agar has a broader range of substances in which it will work, but it requires a higher temperature to set. |
Industry uses |
Agar is used in lieu of gelatin in products such as jellies, candies, cheeses, and glazes. Since agar is vegetarian, it’s a good substitute in dishes that traditionally call for gelatin, which is derived from animal skins and bones. Agar has a slight taste, though, so it works best with strongly flavored dishes. |
Origin and chemistry |
Like carrageenan, agar is a seaweed-derived polysaccharide used to thicken foods and create gels. When heated above 185°F / 85°C, the galactose in agar melts, and upon cooling below 90–104°F / 32–40°C it forms a double-helix structure. (The exact gelling temperature depends on the concentration of agar.) |
During gelling, the endpoints of the double helices are able to bond to each other. Agar has a large hysteresis; that is, the temperature at which it converts back to a gel is much lower than the temperature at which that gel melts back to a liquid, which means that you can warm the set gel up to a moderately warm temperature and have it remain solid. For more information on the chemistry of agar, see http://cookingforgeeks.com/book/agar/.
Technical notes |
|
Gelling temperature |
90–104°F / 32–40°C |
Melting temperature |
185°F / 85°C |
Hysteresis |
140°F / 60°C |
Gel type |
Brittle |
Syneresis |
Yes |
Concentrations |
0.5–2% |
Synergisms |
Works well with sucrose |
Notes |
Tannic acid inhibits gel formation (tannic acid is what causes overbrewed tea to taste bad; berries also contain tannins) |
Thermoreversible |
Yes |

When heated, the agar molecule relaxes into a relatively straight molecule (first image) that upon cooling forms a double helix with another agar molecule (second image). The ends of these double helices can bond with other agar double helices (third image), forming a 3D mesh (fourth image).
Panna cotta—Italian for “cooked cream”—traditionally gets its structure from gelatin, but a small amount of agar can create a more stable version, and one that happens to be vegetarian. This is a good example of how agar can be used to provide a firmer texture than traditional ingredients, useful for applications that require additional strength.
In a saucepan, whisk together and gently simmer (below boiling—just until small bubbles form on the surface) for 1 minute:
3.5 |
ounces (100 mL) milk |
3.5 |
ounces (100 mL) heavy cream |
½ |
vanilla bean pod, sliced lengthwise and scraped |
8 |
teaspoons (20g) powdered sugar |
1 |
teaspoon (2g) agar powder |
Turn off heat, remove the vanilla bean pod, and add, briefly stir, and let rest:
3.5 |
ounces (100g) bittersweet chocolate, chopped into fine pieces to assist in rapid melting |
After a minute, add and whisk to thoroughly combine:
2 |
egg yolks (23g; reserve whites for some other recipe) |
Pour the mixture into glasses, a bowl, or molds and store it in the fridge. The gel will set in as little as 15 minutes, depending upon the size of the mold and how long it takes the mousse to drop below agar’s gelling point (around 90°F / 32°C).
Note
• Try using this recipe as a component for other desserts. Roll a ball in toasted nuts to create a truffle-like confection, or spread a layer of it before it sets into a prebaked pie crust and then top it with raspberries and whipped cream.
We talked about using gels to clarify liquids in the previous chapter (see page 349), but what if the liquid you’re using doesn’t naturally gel? Adding agar to a liquid will set it up into something that allows for gel clarification. This example, for clear lime juice, comes from Dave Arnold (see page 358).
Squeeze the juice from 10 limes into a container, running it through a sieve to remove the pulp. Measure the juice; it should be around 2 cups (480 mL). Set it aside.
In a pan, create an agar gel using water and agar by mixing ½ cup water (120 mL) with 7 teaspoons (14g) agar, heating the liquid to a boil to melt the agar. (This will create an agar gel at about 10% agar; when mixed with the lime juice it’ll result in a roughly 2.0% concentration.)
Once the agar has melted, remove the pan from the heat and pour the water–agar mixture into the container with the lime juice. Let it rest for a half hour or so, until set.

Once the lime gel has set, use a whisk to break it into pieces. Make zigzag slashing cuts with the whisk; don’t actually whisk the gel.

Transfer the broken gel to a cheesecloth (real cheesecloth, not the loose mesh stuff) or towel. Fold the cloth up into a ball.
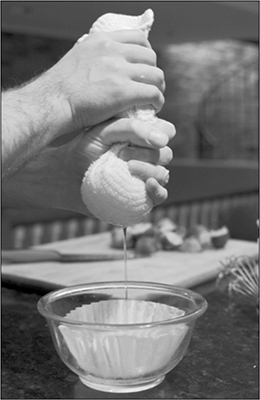
Hold the balled cloth above a coffee filter and squeeze it with your other hand, massaging it to force out as much liquid as possible. (The coffee filter will catch any small chunks of agar that happen to leak through.) Remove the filter and use the juice as desired.
Sodium Alginate
The gels covered so far are all homogenous, in the sense that they are incorporated into the entire liquid and then heated. Sodium alginate, however, sets via a chemical reaction with calcium, not heat, which allows for an interesting application: setting just part of the liquid by exposing it to calcium. One example of this technique is fake cherries, invented in 1942 by William Peshardt (for the curious, see US Patent #2,403,547). Chef Ferran Adrià refined the concept in 2003, and it became something of a trend. It’s a clever yet simple idea: by controlling what regions are exposed to the gelling agents, you can gel selective regions.
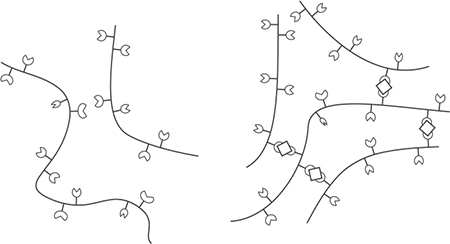
Alginate does not normally bind together (left), but with the assistance of calcium ions is able to form a 3D mesh (right).
You set sodium alginate by adding it to one liquid, adding calcium to a second liquid, and then exposing the two liquids to each other. The sodium alginate dissolves in water, freeing up the alginate, which sets in the presence of calcium ions where the two liquids touch. Imagine a large drop of sodium alginate–filled liquid: the outside of the drop sets once it has a chance to gel with the assistance of the calcium ions, while the center of the drop remains liquid. It’s from this application that the spherification technique mentioned earlier is derived.
Instructions for kitchen use |
Add 1.0–1.5% sodium alginate into your liquid (use water for your first attempt). Let the liquid rest for 2 hours or so to hydrate fully. It will be lumpy at first; don’t stir or agitate the liquid, as doing so will trap air bubbles in the mixture. |
Industry uses |
Sodium alginate is used as a thickener and emulsifier. Since it readily absorbs water, it easily thickens fillings and drinks and is used to stabilize ice creams. It’s also used in manufacturing assembled foods; for example, some pimento-stuffed olives are actually stuffed with a pimento paste that contains sodium alginate. The olives are pitted, injected with the paste, and then placed in a bath with calcium ions to gel the paste. |
Origin and chemistry |
Sodium alginate is derived from the cell walls of brown algae, which are made of cellulose and algin. Alginates are block copolymers—repeating units of the same compounds, in this case mannopyranosyluronic and gulopyranosyluronic acids. Based on the sequence of the two acids, different regions of an alginate molecule can take on one of three shapes: ribbon-line, buckled shape, and irregular coils. Of the three shapes, the buckled shape regions can bind together via any divalent cation. (Recall that a cation—meow!—is just an ion that’s positively charged—that is, missing electrons. Divalent simply means having a valence of two, so a divalent cation is any ion or molecule that is missing two electrons.) |

This is a quick example to illustrate how to work with sodium alginate. Start with water; once you’ve got that working, try it with other liquids. Create a 1% solution of sodium alginate and water. Add food coloring so that you can see the mixture as you work with it. Using a squeeze bottle, pipe out a strand into a bowl containing a 0.67% solution of calcium chloride in water.
Try making drops and other shapes as well. One food trend that’s been making the rounds is mini “caviar.” The small drops of set sodium alginate liquids have a similar texture and feel to caviar, but with the flavor of whatever liquid you use.
Once you’ve played with this using water, try using other liquids. Jolt Cola? Cherry juice? Keep in mind that liquids that are high in calcium or very acidic will cause the alginate solution to gel up on its own. Straight-up lime juice won’t work, because the alginate will precipitate out in the presence of concentrated acids. If you’re willing to experiment further, try using sodium citrate to adjust the pH.
Depending upon the amount of calcium in the liquid, adding the sodium alginate straight to it can cause the liquid to set, giving you something similar to a brittle gel. Swapping the chemicals—adding the calcium chloride to the food and setting it in a sodium alginate bath—doesn’t work; calcium chloride is nasty-tasting. Luckily, it’s the calcium that’s needed for the gelling reaction, not the offensive-tasting chloride, so any compound that’s food-safe and able to donate calcium ions will work; calcium lactate happens to fit the bill. This technique is sometimes called reverse spherification. For example, to create mozzarella spheres, mix 2 parts mozzarella cheese with 1 part heavy cream under low heat. Add around 1.0% of calcium lactate to this liquid and then set it in a water/sodium alginate solution of 0.5% to 0.67% concentration.
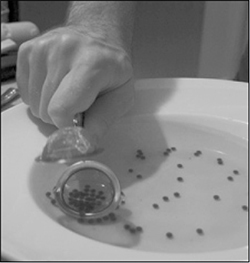
Spherification, a clever name for the process of creating spheres of liquid held together by a thin layer of gel on the surface, is one of the whimsical inventions of modern cuisine. Similar to the gel “dots” just described, with spherification you create larger “dots,” letting them set long enough that you can carefully remove them using a slotted spoon. Spheres of olive juice can be quite delightful—they look the same as traditional olives, but when bit into, explode with a flavor that can be described as “more olive than olive.”
You can set liquids into shapes other than spheres by freezing them in a mold and then thawing them in a calcium bath. The final shape won’t retain the crisp edges of the original frozen shape—it’ll swell and bloat out slightly—but you’ll still get a distinctive shape.
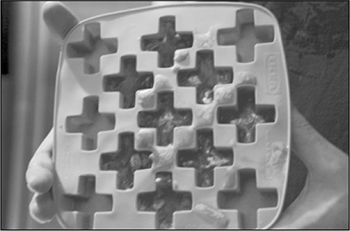
Freezing the liquid in a mold before setting the sodium alginate will create more interesting shapes.

PHOTO USED BY PERMISSION OF MARTIN LERSCH
Martin Lersch is a chemist who writes about food at http://khymos.org and is the editor of Texture: A Hydrocolloid Recipe Collection (http://blog.khymos.org/recipe-collection/).
How did you get interested in chemistry in cooking?
My whole food interest is in no way related to my studies or my work, apart from chemistry. I’ve always liked cooking. Every chemist should actually be a decent cook, because chemists, at least organic chemists, are very used to following recipes. It’s what they do every day at the lab. I often tease my colleagues, especially if they claim that they can’t bring a cake to the office for a meeting; I say, “Well, as a chemist, you should be able to follow a recipe!” I’ve always had, in a way, curiosity. I bring that curiosity back home into the kitchen and wonder, “Why does the recipe tell me to do this or that?” That’s really the case.
How has your science background impacted the way that you think about cooking?
I think about cooking from a chemical perspective. What you do in cooking is actually a lot of chemical and physical changes. Perhaps the most important thing is temperature, because many changes in the kitchen are due to temperature variations. Searing meat and sous vide are also good places to start. With sous vide, people gradually arrive at the whole concept themselves. If you ask them how they would prepare a good steak, many people would say you should take it out of the refrigerator ahead of time, so you temper the meat. While you temper it, why not just put it in the sink? You could use lukewarm water. Then if you take that further, why not actually temper the meat at the desired core temperature? Most people will say that’s a good idea, then I say that’s sous vide. It becomes obvious for people that that’s actually a good idea.
I’m very fascinated by the hydrocolloids. One of the reasons I spent so much time putting the recipes together was that when I bought hydrocolloids, maybe one or two recipes would be included, but I found them not to be very illustrative. Everyone is familiar with gelatin, less so with pectin, but all the rest are largely unfamiliar. People don’t know how they work, how you should disperse them and hydrate them, or their properties. The idea was to collect recipes that illustrate as many of the ways to use them as possible. You can read a couple of the recipes and then can go into the kitchen and do your own stuff. That’s what I hope it will enable people to do.
Is there a particular recipe from which you’ve learned the most or found interesting or unexpected in some way?
It’s hard to think of one recipe. When talking about molecular gastronomy, it’s easy to focus too much on the fancy applications like using liquid nitrogen or hydrocolloids. It’s important to emphasize that this is not what molecular gastronomy is about, although many people think that; many people associate molecular gastronomy with foams and alginate.
For a great collection of several hundred recipes based on gelling agents, check out Texture: A Hydrocolloid Recipe Collection, available online for free on Martin’s blog at http://blog.khymos.org/recipe-collection/ (mirrored at http://cookingforgeeks.com/book/hydrocolloid/).
Emulsifiers
Emulsifiers prevent two liquids from separating, creating liquid–liquid colloids. In cooking, emulsions are almost always water–fat combinations, sometimes fat in water (like salad dressing) or water in fat (like mayonnaise). You might wonder why liquids like oil and water are able to “mix” in the presence of an emulsifying agent, after the earlier discussion about polar (e.g., water) versus nonpolar (e.g., oil) molecules not being able to mix. An emulsifier has a hydrophilic/lipophilic structure: part of the molecule is polar and thus “likes” water, and part of the molecule is nonpolar and orients itself toward oil.
Adding an emulsifier keeps foods from separating by providing a barrier between droplets of oil. Think of it like a skin around the oil droplets that prevents different droplets from touching and coalescing. Emulsifiers reduce the chance that oil droplets will aggregate by increasing what chemists call interfacial tension. The oil and water don’t actually mix; they’re just held apart at the microscopic level.
Emulsifiers stabilize foams by increasing their kinetic stability; that is, the amount of energy needed to get the foam to transition from one state to another is higher. Take bubble bath as an example: the soap acts as an emulsifier, creating a foam of air and water. Water doesn’t normally hold on to air bubbles, but with the soap (the emulsifier), the interfacial tension between the air and water goes way, way up, so it takes more energy to disrupt the system. The more energy it takes, the more kinetically stable the foam is, and the longer it’ll last.

Emulsifiers like lecithin are molecules with both polar and nonpolar regions. Those regions can orient themselves at the interface between two different liquids.
Lecithin
In cooking, lecithin is almost always the emulsifier of choice because it’s easy to use and works in a broad range of foods. Without lecithin, we wouldn’t be able to make mayonnaise; it’s the lecithin in the egg yolks that provides most of the emulsification. Mustard seeds and finely ground spices like paprika can also emulsify foods, at least for a short while—they’ll slow down how quickly the liquids coalesce. This is why mayonnaise recipes often call for mustard. If you ever see a vinaigrette recipe call for mustard, don’t skip it!
Lecithin can create foams for the same reason that it emulsifies. If you’ve ever been served a dish that has a “foam” liquid component—I’ve had both cod topped with a carrot foam and uni (sea urchin) topped with a green apple foam—the chef probably created it by adding lecithin to the liquid and then whipping or puréeing it. It’s a fun way to introduce a flavor to a dish without adding much body.

A photo of a half-water, half-oil solution under a light microscope. (The slide is pressing the oil droplets flat.)
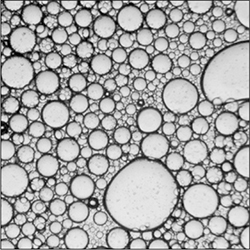
The same mixture with 1% lecithin added. The droplets are stable and do not coalesce into larger drops because of the increased kinetic stability.
Instructions for kitchen use |
For emulsions, add about 0.5–1% lecithin powder (by weight) and whisk. To create foams, add about 1–2% lecithin powder to your liquid (by weight) and use an immersion blender or whisk to froth the liquid. If you have a cream whipper (see page 313), lecithin can be used to make stable foams from liquids that wouldn’t normally hold bubbles after being sprayed. |
Industry uses |
Lecithin is used to create stable emulsions. It’s also used as an antispattering agent in margarines, in chocolate to reduce the viscosity of the melted chocolate during manufacturing, and as an active ingredient in nonstick food sprays. |
Origin and chemistry |
Lecithin is typically derived from soya beans as a byproduct of creating soy-based vegetable oil. Manufacturers extract lecithin from hulled, cooked soya beans by crushing the beans and then mechanically separating out (via extraction, filtration, and washing) crude lecithin. The crude lecithin is then either enzymatically modified or extracted with solvents (e.g., de-oiling with acetone or fractionating via alcohol—I know, sounds yummy). Lecithin can also be derived from animal sources, such as eggs and animal proteins, but animal-derived lecithin is much more expensive than plant-derived lecithin, so it is less common. |
Foams are a fun, interesting component to a dish. We use whipped cream on top of many desserts, but what if we could come up with a foamed topping for savory applications? Try this with any strongly flavored liquid, such as coffee, or a brightly colored liquid like beet juice. Lecithin foams best at around a 1–2% concentration (2g lecithin per 100 mL of liquid).
In a large mixing bowl or other similarly large and flat container, measure out:
½ |
cup (120 mL) water |
½ |
cup (120 mL) juice, such as carrot, lime, or cranberry |
1 |
teaspoon (3g) lecithin (powder) |
If you have an immersion blender, blend the ingredients together for a minute or so, angling the blade so that it’s whisking air in. If you don’t have an immersion blender, use either a hand mixer or a whisk, being a little more patient.
Allow the mixture to rest for a minute after blending, so that the resulting foam that you spoon off is more stable.

Foamed carrot juice made with lecithin is surprisingly stable for long periods of time.
Enzymes
Ever pondered where the word enzyme comes from? It’s based on two words, en and zyme. En is easy (“in”), but zyme? You’d have to either be a language buff or a Greek speaker to recognize zyme as “yeast.” Even though enzyme’s origins are Greek, it was a German doctor who proposed the term in the 1870s while isolating the protein trypsin. He chose it to describe compounds that assisted in fermentation, using the Greek for “in yeast,” not knowing that enzymes appear in almost all living things.
Enzymes are used all over the place in biological systems, working as catalysts that change other compounds. From a chemistry perspective, enzymes can do one of two things. They either provide an alternative reaction pathway—taking a different, easier route to get to the same outcome—or they trigger an entirely different reaction. Enzymes are amazingly selective. They’ll fit very, very few molecular structures, allowing for a biological precision envied by drug makers. (Some drug compounds, like protease inhibitors, are based on inhibiting enzymes!)
While many enzymes are naturally present in food, we sometimes add foreign enzymes to change flavors and textures when cooking. Cheese was traditionally made by exposing milk to parts of a ruminant animal’s stomach, which has a group of enzymes, called rennet, that normally aid in digestion but also cause coagulation (leading to cheese formation). A simpler example is the breakdown of sucrose. Imagine a sucrose molecule, which is one glucose molecule and one fructose molecule, bound together by a common oxygen atom. When heated in the presence of water, the molecule vibrates with more and more kinetic energy, and eventually a water molecule manages to slip in where that oxygen atom is linking them, breaking the sucrose molecule into one glucose and one fructose molecule. (The water takes the place of the oxygen atom in one of them, making this a hydrolysis reaction.)
There’s an enzyme, invertase (enzyme names often end in “ase”), that provides an alternative pathway for this reaction. Invertase wraps around part of the sucrose molecule, gripping it in such a way that a water molecule can more easily slip into where the oxygen atom is holding the two simple sugars together. Once that water molecule slips in, the sucrose breaks down; the invertase enzyme can no longer hold on to the two parts and drifts away. Less energy is required for the reaction, and it’s very selective—other compounds in the system won’t have to be exposed to as much heat to cause the reaction. Enzymes are powerful!
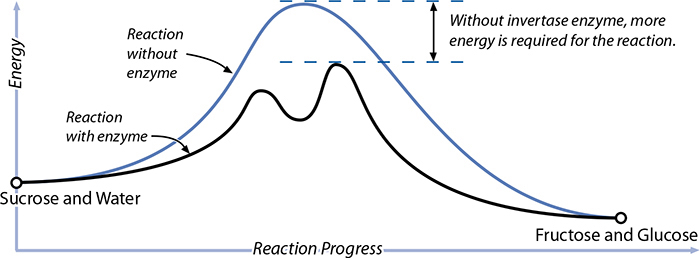
Making your own cheese is a great experiment to see how closely related two seemingly different things can be. Cheese is made from curds—coagulated casein proteins—in milk. The whey is separated out via an enzymatic reaction, allowing the curds to be cooked and then kneaded, stretched, and folded to create that characteristic structure found in string cheese.
In two small bowls or glasses, measure out and set aside:
½ |
teaspoon (1.4g) calcium chloride dissolved in 2 tablespoons (30 mL) distilled water |
¼ |
tablet rennet, dissolved in 4 tablespoons (60 mL) distilled water (adjust quantity per your rennet manufacturer’s directions) |
In a stock pot, mix and slowly heat to 88°F / 31°C:
1 |
gallon (4 liters) nonhomogenized whole milk, not ultra-pasteurized or homogenized |
1½ |
teaspoon (12.3g) citric acid |
¼ |
teaspoon (0.7g) lipase powder |
Once the liquid is at 88°F / 31°C, add the calcium chloride and rennet mixtures and continue to slowly heat to 105°F / 40.5°C, stirring every few minutes. At this point, you should begin to see curds separating from whey.
Once the liquid is at 105°F / 40.5°C, remove it from the heat, cover the pot, and wait 20 minutes. At this point, the curds should be fully separated from the whey; if not, wait a while longer.
Transfer the curds to a microwave-safe bowl using a slotted spoon, or strain out the whey and transfer it from your strainer. Squeeze as much of the whey out of the curds as possible, tipping the bowl to drain the liquid. Microwave the curds on high for 1 minute. Squeeze more of the whey out. The cheese should now be sticky; if not, continue to microwave it in 15-second increments until it is warm and sticky (but not too hot to handle).

Add ½ teaspoon (3g) flaked salt to the cheese and knead it. Microwave it for 1 more minute on high until the cheese is around 130°F / 54.4°C. Remove and stretch it, working it just like Silly Putty: stretch, fold in half, twist, and stretch again, over and over, until you’ve achieved a stringy texture.
What’s homogenized milk?
In the homogenization process, milk is forced through a very tight nozzle that shears the fat globules into pieces. Those pieces become small enough that they don’t separate out due to drag force. (This is the same Stokes’ Law mentioned on page 317.)
Homogenized milk and ultra-pasteurized milk won’t make good cheese because both the homogenization process and the higher-heat ultra-pasteurization process disrupt the protein structures such that they can no longer bind together. You’ll end up with a squeaky mess that vaguely resembles cottage cheese but doesn’t melt together. Use pasteurized, but not homogenized, milk when following this recipe. Alternatively, you may be able to fake it by mixing 9 parts nonfat milk with 1 part heavy cream, depending on how heavy cream is processed where you live.
For instructions on making mozzarella the more traditional and much more involved way, see http://cookingforgeeks.com/book/mozzarella/.

Benjamin Wolfe is an assistant professor of microbiology in the Department of Biology at Tufts University. His lab uses food microbial communities to address fundamental questions in microbial ecology and evolution.
How did you get into studying mold?
I did my PhD on fungal diversity, ecology, and evolution at Harvard and I was studying mushroom farming fungi. If you’ve ever played Mario Brothers, you’ve probably seen that red mushroom with the white dots on the top of it. That’s a real thing called Amanita. I became fascinated with fungi and for my postdoc, I had the amazing opportunity to work with the microbial diversity of cheese. I now have my own lab at Tufts University, where we’re doing a lot more work with food molds in particular.
Most of us aren’t familiar with mold other than, “Oh, that peach has gone moldy, let me throw it away.” Can you describe molds to a layperson?
Fungi live by decomposing stuff. They break down the environment that they live in and use that decomposed stuff as a way to make energy to grow. A log rotting in a forest or the bread sitting on your counter rots via mold. The mold produces enzymes that break down things in the environment to take in glucose and other sugars that they get from decomposition. All fungi have a compound called chitin that they use to build their cells, and all fungi have a network of cells called a mycelium. When you’re looking at a piece of bread that is moldy, that big fluffy cloud that’s spreading across the bread is a whole bunch of fungal cells all united together.
Which came first, the log or the mold?
One group of molds and fungi that people never really see are living in the soil, breaking down things in the soil, and they connect up with roots underground, and deliver nitrogen, phosphorus, and other compounds to the plants and in return the plants give that fungi carbon. It actually feeds them sugars from photosynthesis. What happened is that these fungi evolved first and allowed plants to colonize barren land that existed many millions of years ago and so, we do think actually the fungi came first and then came the plants. The log came after the fungi.
On the flip side, is there stuff about mold that’s dangerous?
Absolutely. They can wipe out entire crops; they can wipe out animals and infect humans. They produce compounds called mycotoxins, which can be very dangerous, and these compounds are produced for reasons we don’t totally understand. We think they produce mycotoxins to fight with other microbes, as these toxins can sometimes kill off neighboring microbes.
In the 1950s and ’60s, there were some big outbreaks of molds. In Europe, a bunch of feed given to turkeys was contaminated by a particular fungus-producing mycotoxin. All these turkeys started dying because of an Aspergillus disease, which is caused by mold. After that discovery, we realized that there are a lot of different types of places where molds can grow and produce mycotoxins. Often peanuts are screened for a mycotoxin called aflatoxins. These are pretty potent carcinogens that we need to monitor in our food systems.
How do I avoid mycotoxins at home?
Most high-risk foods we know are prone to mycotoxins are generally screened as per requirements by the US FDA. Peanut-based products in the US require regular screening for aflatoxins; they’re really the highest-risk product. There is research going on right now to try to evaluate coffee and chocolate, which both can get pretty moldy. But in general, if you’re eating food that’s been produced in a clean, safe way—which most of the things in the US are produced as such—you don’t have to worry about mycotoxins.
If you’re making your own cheese or salami, you have to be careful that you’re inoculating with beneficial molds that don’t produce mycotoxins. The whole idea of color being an indicator of the safety of molds is really not a safe thing to be using for the home fermenter. Leave fancy moldy cheese and salami production to the people who are experts.
Cheeses, salami, and you mentioned coffee and chocolate... You’re mentioning some of my favorite things!
And they’re all dependent on mold! My favorite mold in food is Aspergillus oryzae, which brings you sake and miso and soy sauce and all those wonderful Asian fermented foods.
In cheese and in salami, we also have wonderful molds. Camemberts and bries have that thick white sweater on their outside. That is a mold called Penicillium camemberti. The fungus is slowly decomposing the cheese curd that is on the inside of the cheese. It breaks down the proteins and the fats, which releases various flavors. It also makes it nice and creamy. When you look at aged salami, it’s also white and dusty on the outside because of Penicillium nalgiovense. This is another mold that is inoculated. In this case it’s more for keeping other molds off of the surface and creating this beautiful pure white product; it doesn’t add a whole lot of flavor.
Coffee and chocolate go through what is called heap fermentation. You just pile up all the cacao pods and let them rot for a little bit of time. People largely attribute the downstream flavors of things like chocolate to the yeast and bacteria that are fermenting those products.
Foods like salami and miso and cheeses are clearly fungal-dominated, and the fungi play huge roles in the flavor production of those foods.
Should you eat the rind on cheeses that have visibly moldy outsides?
If it’s a cheese that’s supposed to be moldy, then you’re probably fine. Camembert and brie are definitely supposed to have mold on the outside. In fact, they encourage you to eat it because often the flavors of the cheese are partly in the rind. Then there are cheeses where the surface is crusty and has a weird texture, very crunchy and dry and really unpleasant. I don’t recommend eating the rinds on those cheeses, but on mold-ripened cheeses, they’re called “mold-ripened” because you’re supposed to eat the mold.
If you are eating plastic-wrapped cheddar and eventually it gets moldy, be careful because you don’t know what that particular mold is. While it may appear to be only on the surface, it’s often unclear exactly how far in it’s grown, and it’s unclear if it’s producing any kind of toxins. If it’s not supposed to be moldy, I wouldn’t eat it.
Any tips for managing good molds? How we store these things must impact whether the beneficial mold is doing the right thing.
People know from watching their bread go bad that there are molds everywhere. We breathe in spores of mold all the time. You just have to create a really clean environment where you minimize all those spores that are coming down onto your product.
It’s also a seasonal thing. In the spring there’s a lot more growth in temperate regions, so there’s a higher risk of contamination then. In the fall, we get a lot of moldy “Frankencheeses,” as I like to call them, sent to our lab to be analyzed, because in the fall you have a lot of leaves dropping to the ground, there’s a lot of wind blowing spores around, and you end up getting a lot more colonization of bad molds at that time of the year as well.
What other unexpected things have you come across with mold?
Wherever you have a moldy food, you will have mites, tiny little insects that freak a lot of people out. So you’ve probably heard of cheese mites that really should be called “mold mites” because they’re not really there for the cheese. They’re there to eat the molds, but they’re also disturbing your cheese or salami surface.
A lot of cheese makers will either go through with a big vacuum cleaner or leaf blowers and blow the mites off of their cheese. It’s so ridiculous how much time and money is spent on cheese mites in the industry. I have a video that I think is adorable of a cheese mite eating mold. I think it’s great!
See http://cookingforgeeks.com/book/cheesemites/ for a video of cheese mites.
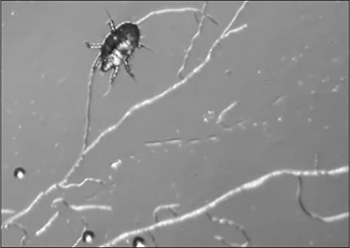
Transglutaminase
One of the more unusual food additives is transglutaminase, an enzyme originally found in blood. It can bond glutamine with other amino acids—it’s protein glue. It can fuse together two or three pieces of meat to create one larger piece, and it can thicken milk and yogurts by lengthening their proteins. It’s also used to firm up pastas and make gluten-free breads more elastic (able to stretch without tearing). Pretty much anywhere proteins are involved, transglutaminase can bind them together.
What could you do in the kitchen with transglutaminase? There’s of course the obvious opportunity to use it to make Frankenstein meats (e.g., chicken stuck to steak), but while these sound fun, they aren’t delicious; plus, the different temperature ranges needed for cooking makes them infeasible. The bacon-wrapped scallop recipe will give you a starting idea, but really the concept of binding proteins can apply to any protein-rich items that you want to manipulate.
Imagine simplifying chicken Kiev—flattened chicken breast that’s traditionally rolled and tied around a center of herbed butter—by sealing the edges of the flattened chicken breast together with transglutaminase. More creative dishes like turducken—an unusual holiday dish of a chicken cooked inside a duck cooked inside a turkey—can be bonded together for stability. Heat-stable aspics and terrines can be made using transglutaminase where heat-sensitive gelatins would fail. You get the idea—experiment!

An example of chicken being bonded to steak. This isn’t delicious, but it shows the concept well. Notice that the cooked steak itself is weaker than the interface where it’s joined to the chicken!
Instructions for kitchen use |
Create a slurry of 2 parts water to 1 part transglutaminase and brush it onto the surfaces of the pieces of meat that you want to join. Press them together and wrap the meat with plastic wrap. (If you have a vacuum sealer, use it to improve the fit between the two pieces of meat.) Store the meat in the fridge for at least two hours. |
Industry uses |
Transglutaminase is used to combine scrap meats into large pieces, such as in imitation crab meat and gluten-free hot dogs. Some cold cuts and lunch meats use transglutaminase too. (That gorgeous ham at the deli counter is not from the rare boneless pig!) |
Origin and chemistry |
Transglutaminase is manufactured using the bacteria Streptomyces mobaraensis. Anywhere that glutamine and a suitable amine are present, transglutaminase can be used to cross-link the two, causing the atoms composing the two groups to line up so that they form covalent bonds, in which two atoms share electrons. |

Before interaction (left), strands of proteins with glutamine and lysine groups are unattached; after interaction (right), the glutamine and amine groups are bonded wherever transglutaminase has a chance to catalyze.
The traditional way of making these is with toothpicks to hold the bacon against the scallop. If you can order some transglutaminase, try this recipe as an example of how to work with it. It’s cool to see bacon-wrapped scallops where the bacon just sticks to the scallop!
In a small bowl, mix roughly 2 parts water to 1 part transglutaminase by weight to create a thick slurry.
On a plate that will fit in your fridge, lay out:
8 |
scallops, as large and as cylindrical as possible, patted dry |
8 |
slices bacon, cut in half so that they just wrap around a scallop once |
Using a brush, coat one side of each piece of bacon with the slurry. Place a scallop on the bacon and roll the bacon around the scallop. Repeat for each scallop and transfer them to the fridge for at least 2 hours to allow the transglutaminase to set.
After resting, the bacon should be well adhered to the scallops.
Preheat your oven to 400°F / 200°C.
Place the scallops in an oven-safe hot frying pan lightly coated with oil or a small amount of butter, with one of the exposed ends down. This will cause the scallop to develop a nice brown crust, along with great flavor. After a minute or so, flip the scallops over so that the other exposed side is in contact with the pan and immediately transfer your frying pan to the oven.
Finish the scallops in the oven for about 5–8 minutes, until the bacon is done and the scallops are cooked.
Notes
• Don’t plunge your hands into the powder, and gloves are a good idea—you’re made of protein too!
• Transglutaminase requires cooking foods to proper food-safe temperatures. Unlike a single piece of steak where the center is sterile, the center of meat bonded together has been exposed to bacteria, just like ground meats.
• Since transglutaminase has the same structures as the amino acids it binds, it’s capable of binding to itself. After a few hours exposed at room temperature, it will lose its enzymatic properties, so it’s not a huge deal if you spill some on your countertop. When working with a bag of it, seal and store it in your freezer to slow the rate of the binding reaction.
• Since transglutaminase binds proteins at the molecular level, you can use it as a binder to create solids. An analogy: imagine taking wood glue and, instead of gluing two boards together, using it to create a paste with sawdust and spreading it out into a sheet. You’d end up with particleboard or chipboard—a composite that’s 99% wood, but not in the form that it occurs in nature. The same concept applies here: a purée of protein-rich foods and transglutaminase can be formed into a solid and set.
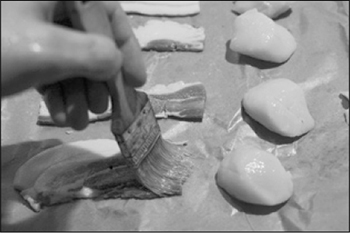
Use a pastry brush to coat one side of a strip of bacon with transglutaminase. Roll the bacon around the scallop and pinch and press the ends together for a few seconds.

A cross-sectional slice of the cooked bacon-wrapped scalloped shows the joined surface of the bacon and the scallop.

PHOTO OF HAROLD MCGEE USED BY PERMISSION OF KARL PETZKE
Harold McGee writes about the science of food and cooking. He is the author of the culinary classic On Food and Cooking (Scribner, 1984). His website is at http://www.curiouscook.com.
How do you go about answering a food mystery?
It depends on the nature of the mystery. It can start with and mainly involve experiments in the kitchen, doing a particular process several different ways, changing one thing at a time, and seeing what the effect is. Or it can mean going to the food science or technical literature and hunting for information that might be relevant.
A recent example of the latter would be this column I wrote for the New York Times about keeping berries and fruits longer than normal. I had been going to the farmers’ market and getting way too much fruit. It looked and tasted so good, but I couldn’t eat it all, and after a day, it would begin to mold, sometimes even in the refrigerator. I thought there might be a way to deal with this. So I drove up to UC Davis and used their online databases to search the literature for methods of controlling mold growth on produce.
I discovered that back in the 1970s some guys at one of the ARS [USDA Agricultural Research Service] stations here in California came up with a mild heat treatment that didn’t damage the fruit but did slow down substantially the growth of mold on the outside. I came back and gave it a try, and it worked. I didn’t have the knowledge or the tools to deal with it without doing some library research. I put it to the test because it’s one thing to read about something in the literature and another thing to make sure that it actually plays out that way in somebody’s kitchen.
Why not do this kind of literature search online? Is there something that UC Davis or an institution like that is able to provide researchers that they can’t get directly online back home in front of their computers?
There are wonderful resources that are available at both university and public libraries that an individual just can’t afford to subscribe to. In institutions with a food science department, there are resources on the shelf that you would never know about without going and looking, and I enjoy doing that, not necessarily to answer the question “What do people know today about X?” but more “How have people dealt with X over the centuries?”
Centuries? Can you give me an example of something from that kind of historical research?
Tomato leaves are not toxic the way people thought they were. In fact, they’re probably beneficial to eat because they bind to cholesterol and prevent us from absorbing it. The question arose: “How did we get this idea that they’re toxic if they’re not?”
I delved back as far as I could in some pretty obscure literature to try to figure that out, and that included going up to UC Davis and taking a look at a couple of books from the 17th and 18th centuries on Dutch ethnography of the Pacific. I tracked down a reference to people eating tomato leaves on an island in the Indonesian Archipelago in the 17th century. This would have been shortly after tomatoes had been introduced there because they are not native to that part of the world. That fleshes out the story of how this plant found its way around the world, how it developed a reputation, and the kinds of aesthetic judgments that people made about it.
In Europe, people didn’t eat the leaves because they thought they stank. In Central and South America, where tomatoes came from, the leaves weren’t much eaten, which I still don’t understand. Just pulling all of these bits together to me is part of the pleasure of understanding and appreciating the food that I sit down and eat at my table today. There is this tremendous depth of history and complexity that, if you delve into it, can make it even more pleasurable to eat these things.
One of the things I like best about the job I have is not so much the writing; it’s the exploring, it’s tracking down these books and reading this paragraph about people on this island centuries ago doing this with the leaves, then coming home and trying to get some sense of what that tasted like using leaves from my own backyard and the equivalent of the preserved fish that they were probably using back then to season them.
I imagine that our understanding about food is getting more refined, and we’re correcting a lot of previous misconceptions. What do you hope future research will spend time working on?
If I could name one area that I wish people with the equipment, expertise, and resources would pay more attention to and work harder on, it is flavor and the influence of different cooking methods on the ultimate experience of particular preparations. There are so many interesting questions about different ways of doing the same thing where, at the moment, basically you have your own personal experience and the experience of other people but no good, objective yardstick.
What are the real differences? Are we experiencing the same set of compounds differently because we have different sensory systems, or do, in fact, different techniques produce different sets of compounds where you happen to prefer this and I happen to prefer that? An example would be making stocks. There are some people who are real partisans of doing stocks in pressure cookers and others who think that the long, slow, barely-at-a-simmer method gives you a superior result. I’ve done both, and I like both, but they are different. I’m not sure I can really explain how they are different, so I would love to know what’s going on there.
What does the home cook need to understand about what they’re doing in the kitchen?
A scale and a good thermometer are absolutely essential if you’re going to try to understand things and do experiments carefully enough to draw real conclusions. You need to be able to measure, and temperature and weight are the main variables.
Is there something that really surprised you in the kitchen?
I suppose the one moment in my life that really confounded my expectation was the copper bowl versus glass bowl for beating egg whites. I was reading Julia Child while I was writing the book [On Food and Cooking] the first time in the late 1970s. She said that you should whip egg whites in a copper bowl because it acidifies the whites and gives you a better foam for meringue and soufflés, but the chemistry was wrong. Copper doesn’t change the pH of solutions, so I thought that since the explanation was wrong, there probably was nothing to the claim either.
Then a couple of years later, when it came time to get ready for publication, I was looking at old graphic sources for illustrations for the book. I looked at a French encyclopedia from the 17th century that had a lot of professions illustrated. One of them was a pastry kitchen. In the engraving, there was a boy beating egg whites, and it said that the boy was beating egg whites in a copper bowl to make biscuits. It specified a copper bowl, and it looked exactly like today’s copper bowls: it was hemispherical and had a ring for hanging. I thought if a French book from 200 years ago is saying the same thing that Julia Child said, then maybe I should give it a try.
I tried a glass bowl and a copper bowl side by side, so I could look at them and taste them, and the difference was huge. It took twice as long to make a foam in the copper bowl; the color was different, the texture was different, the stability was different. That was a very important moment for me. You may know that somebody else doesn’t know the chemistry, but they probably know a lot more about cooking than you do. That certainly got me to realize that I really did have to check everything I could.
A French chef told me a story. He’d made a million meringues in his life, and one day he was in the middle of whipping the egg whites in a machine. The phone rang—there was some kind of emergency and he had to go away for 15 or 20 minutes—so he just left the machine running. He came back to the best-whipped egg whites he’d ever seen in his life. His conclusion from that was, in French, “Je sais, je sais que je sais jamais.” It sounds a lot better in French than it does in English, but the English is, “I know, I know that I never know.”
Thanks to that experience with the copper bowl, that’s been my motto as well. No matter how crazy an idea sounds or how much I distrust my own senses when I do something, and it somehow seems inexplicably different from what it should be, I know that I’m never going to understand everything completely, and there’s probably a lot more to learn about whatever it is that’s going on.
Manage expectations and perceptions. When you’re cooking for someone, expectations and perceptions are just as important as the objective quality of the dish. Only you, as the cook, will know what it was supposed to be. If the chocolate soufflé falls, call it a fallen chocolate cake, toss some berries on top, and ship it.

Use quality ingredients. The number one predictor of a great-tasting meal is great-tasting produce and ingredients. Tomatoes should taste like tomatoes, avocados should be soft and creamy, and apples should have their distinctive crispness.
Create harmony and balance. Harmony comes from combining compatible ingredients. Balance comes from adjusting sweetness and sourness (acids) and seasoning correctly with salt. Start with good produce, taste it, and adjust with an acid (vinegar, lemon juice), salt, or sugar.

Practice food safety. When working in the kitchen, be mindful of the growing conditions for pathogens. Avoid cross-contamination by washing your hands. Frequently. Foodborne illness isn’t fun, but it’s easily managed with some understanding of where the risks lie.

Eat whole foods. There’s nothing inherently wrong with processed foods, but they tend to be higher in salt, sugar, and fat. Like anything, too much of them can be problematic because of what our body does or doesn’t do in response.

Measure temperatures, not time. Proteins in meats and starches in grains undergo reactions at certain temperatures, regardless of whether they’re boiled, grilled, or sautéed. A 4-pound chicken will cook faster than a 6-pound chicken, but both will be done at the same temperature. Timers are useful, but internal temperature tells you a lot more.

Add flavor and aroma with browning reactions. When sugars caramelize (for sucrose, starting at around 340°F / 171°C) and proteins undergo Maillard reactions (starting at around 310°F / 155°C), they break down and form hundreds of new compounds. Some dishes benefit from how those compounds smell, so cook accordingly!

Pay attention to the details when baking. Use weight instead of volume measurements, and pay attention to the various variables in play—gluten levels, moisture content, and pH levels especially. Baking is a great place for A/B experimentation: the ingredients are cheap and relatively consistent, and the results are easy to foist off onto coworkers trying to lose weight (muhahaha).

Experiment! If you’re not sure how to do something, take a guess. If you aren’t sure which way to do something, try both. One way will probably work better, and you’ll learn something in the process. Worst case, you can always order pizza. Have fun and be curious, but use your common sense and be safe.
