Share Printers and Disks
With a gateway set up to handle local computers and hooked into the internet, your next step may be to attach a printer to the access point so that it can be shared among all the local computers. In this chapter, I explain in overview how to use a gateway in this fashion, although the details vary so widely that you may plug everything in and see it work without a stitch, or need to consult the manuals for your hardware to fiddle with settings.
You can typically share printers via either USB or Wi-Fi, while disk drives need to be plugged in directly via USB.
Add a Printer
Printers used to be connected to a network via a USB port on a gateway, or sometimes via a USB hub, for gateways that allowed multiple USB devices in that fashion.
More commonly now, printers connect via Wi-Fi, and already act as shared devices. The only gateway issue is how hard it is to add a printer with Wi-Fi security enabled.
Add a Gateway Printer to a Mac
To add a shared printer to a Mac, make sure the printer is on and not in standby-power mode, and then use these steps:
Go to Apple > System Preferences > Printers & Scanners.
Near the bottom-left corner, click the plus
 button to open the Add window (Figure 47).
Figure 47: Choose the Bonjour-shared printer. If needed, click Default at the top of the window to see the printers available over Apple’s network discovery standard, Bonjour.
Select the printer in the list. After a moment, the Mac should recognize the printer and display its driver in the Use pop-up menu, and note the name of the access point in the Location field. If the Use menu doesn’t fill in, choose the driver from the pop-up menu.
Click Add. Your Mac may automatically download printer drivers.
The printer should now be available from the Print dialog in your various Mac applications. If not, consult Troubleshoot an Unavailable Shared USB Printer, later in this chapter.
Add a Gateway Printer in Windows 10
Here’s how to connect a shared printer in Windows 10:
Open Settings.
Go to Devices > Printers & scanners.
Click “Add a printer or scanner.”
At this stage, your printer may appear and you can advance to step 6. If your printer doesn’t appear, click “The printer that I want isn’t listed.”, and then follow the next step.
Pick the correct option from the list, which is typically “Add a Bluetooth, wireless, or network discoverable printer,” and click Next. You can also select “My printer is a little older” (Figure 48).

Figure 48: The Add Printer dialog lets you find “older” printers. After a moment, “Choose a device or printer to add to this PC” should appear (Figure 49). Select your printer and click Next.

Figure 49: Your device should appear as an option. A dialog appears that says “Installing printer.” Click Close to complete the set up.
The printer is now available to all applications.
Set Up a Shared Disk
As noted earlier, an easy way to share disk access across a network is by using network-attached storage (NAS). NAS units can cost a fair amount of money, though, for which they offer the kind of high performance typically need for video streaming or intensive small-office use. An alternative is connecting a USB drive to a gateway that offers disk sharing.
Here are a few things to consider when deciding between the two:
If you share the network with other people, can you limit access to a shared drive through a password or user accounts? Many gateways can’t; there’s only universal access. Others may allow a single user (Figure 50).
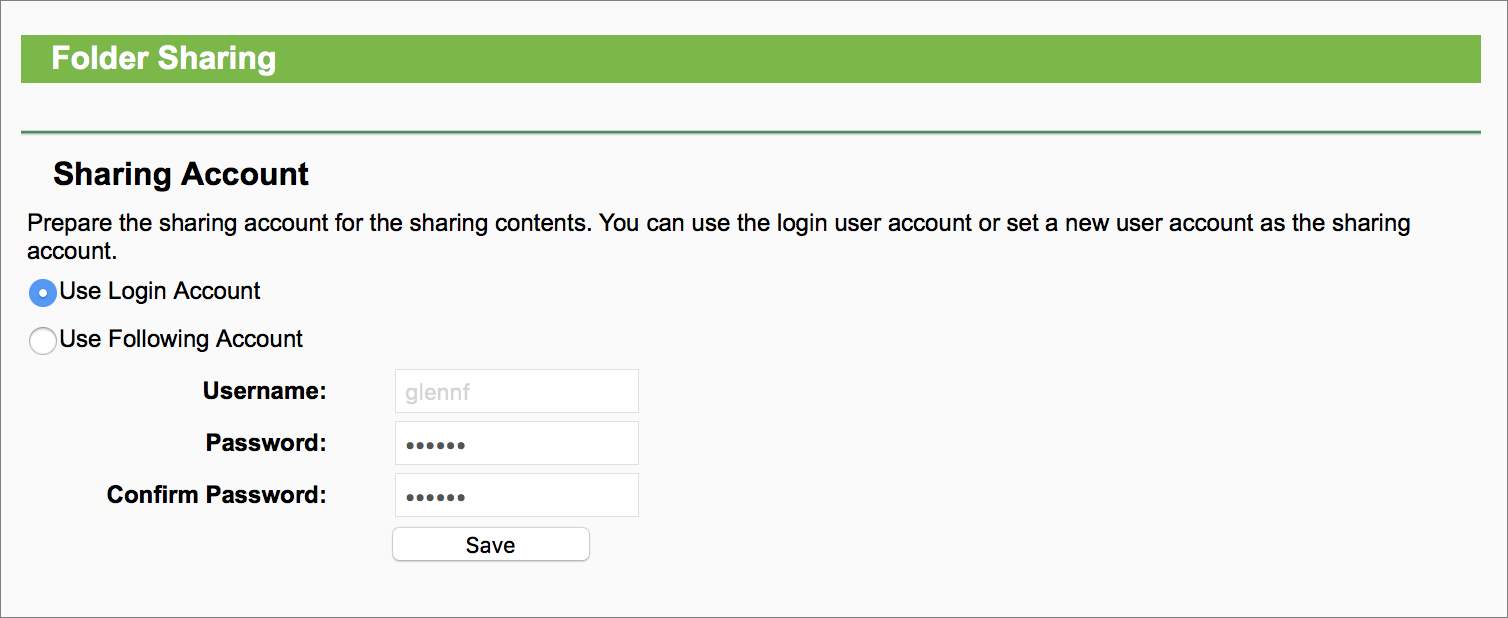
Figure 50: Some gateways can only create a single user for disk and folder sharing (here, a TP-Link model). Do you want to share the entire drive; selected drives; or selected drives with specified users? Depending on the gateway, you may only have one or two of those three possibilities available.
Do you have a USB 3 drive and a USB 3 port on the gateway? This makes sure you have the fastest performance. USB 2.0 is relatively slow.
Do you need to format the drive—to FAT32 or another file system—to provide access to the operating systems on the network that need to reach it? Typically, gateways must use compatible formats to share, but not all gateway manuals will explain that to you.
While there used to be a variety of file-sharing protocols, the industry has generally standardized around Samba, which can be accessed via Windows, Linux, and macOS.
Mount on a Mac
You can mount a shared drive through the Finder, just like any other network volume. Open any Finder window, and look in the sidebar’s Shared section for a list of servers.
The sidebar shows any servers on the local network with Samba volumes available for mounting, as well as FTP servers that use Bonjour to advertise their availability.
To mount a volume from one of these servers, follow these steps:
Select the server name in the Shared section of the sidebar.
Select the Registered User radio button in the upper-right corner, enter your credentials, and click Connect (Figure 51).

Figure 51: Enter your login credentials to proceed. If only a single volume is shared, it will now occupy the window and be mounted on your Mac.
If there are multiple volumes, double click a volume that’s shown in the mounted server window to mount it on your system.
Mount in Windows 10
In Windows 10, follow these steps:
Use the gateway’s admin page to determine the local network IP address of the access point, which will be something like
10.0.1.1.Click the Windows menu and launch the File Explorer.
In the location field, enter
\plus the IP address (like\10.0.1.1) and press Enter.In the Name field (Figure 52):
If you don’t have a user account because the access point has a single password and no user account name, enter any short bit of text or leave the field blank.
If you have a user account name, enter it.

Figure 52: Enter your credentials to log in. In the Password field, enter the access point, disk, or account password.
Select the volume or volumes you want to mount, and click OK.
To unmount a disk, find the volume under My Computers or on the desktop, right-click the volume, and select Disconnect.