
11
Insert and manage simple graphics
In this chapter
With the ready availability of professionally designed templates, presentations have become more visually sophisticated and appealing. Gone (ideally) are the days of presenters reading a list of bullet points to the audience; successful presentations are likely to have fewer words and more graphic elements. You can use images, diagrams, animations, charts, tables, and other visual elements to graphically reinforce your spoken message (which can be conveniently documented in the speaker notes attached to the slides).
The term graphics generally refers to several kinds of visual objects, including photos, clip art images, diagrams, charts, and shapes. You can insert all these types of graphics as objects on a slide and then size, move, and copy them. Because elements on a PowerPoint slide float independently, it is simpler to creatively present information on PowerPoint slides than in Word documents.
This chapter guides you through procedures related to inserting, moving, and resizing pictures; editing and formatting pictures; drawing and modifying shapes; capturing and inserting screen clippings; and creating a photo album.
Insert, move, and resize pictures
You can place digital photographs and images created and saved in other programs on slides in your PowerPoint 2019 presentations. Collectively, these types of images are referred to as pictures. You can use pictures to make slides more visually interesting, but in a PowerPoint presentation, you’re more likely to use pictures to convey information in a way that words cannot.

Pictures can help illustrate a concept
You can insert a picture onto a slide either from your computer or from an online source, such as the internet or your cloud storage drive.
![]() IMPORTANT
IMPORTANT
Pictures you acquire from the web are often copyrighted, meaning that you cannot use them without the permission of the image’s owner. Sometimes owners will grant permission if you give them credit. Professional photographers usually charge a fee to use their work. Always assume that pictures are copyrighted unless the source clearly indicates that they are license free.

Choose an online storage location or search for an image
After you insert a picture, you can make it larger or smaller and position it anywhere you want on the slide.
Inserting or selecting a picture activates its sizing handles and the Format tool tab in the Picture Tools tab group. This tab contains commands for formatting the appearance of a picture and controlling its position relative to text, images, and other page elements.
![]() Tip
Tip
You can save PowerPoint slides as pictures that you can insert in other types of documents.
To insert a picture from your computer
Do either of the following to open the Insert Picture dialog box:
If the slide has a content placeholder, select the Pictures button in the placeholder.
If the slide doesn’t have a content placeholder, on the Insert tab, in the Images group, select the Pictures button.
In the Insert Picture dialog box, browse to and select the picture (or pictures) you want to insert. Then select Insert.
 Tip
TipIf a picture might change, you can ensure that the slide is always up to date by selecting the Insert arrow and then selecting Link To File to insert a link to the picture, or by selecting Insert And Link to insert the picture and link it to its graphic file.
The inserted picture is surrounded by a frame to indicate that it is selected. You can use the handles around the frame to size and rotate the picture.
To insert a picture from an online source
Do either of the following to open the Insert Pictures window:
If the slide has a content placeholder, select the Online Pictures button in the placeholder.
If the slide doesn’t have a content placeholder, on the Insert tab, in the Images group, select the Online Pictures button.
In the Online Pictures window, select the source you want to use (such as OneDrive) or enter a search term in the search box.
Browse to and select the picture or pictures you want to insert. Then select Insert.
To select a picture for editing
Click or tap the picture once.
To move a picture
Point to the image. When the cursor changes to a four-headed arrow, drag the picture to its new location.
TipAs you drag, red dotted lines, called smart guides, might appear on the slide to help you align the picture with other elements.
To resize a picture
Select the picture, and then do any of the following:
To change only the width of the picture, drag the left or right size handle.
To change only the height of the picture, drag the top or bottom size handle.
To change both the height and the width of the picture without changing its aspect ratio, drag a corner size handle or set the Height or Width measurement in the Size group on the Format tool tab, and then press Enter.
Edit and format pictures
From time to time in this book, we have alluded to the modern trend away from slides with bullet points and toward presentations that include more graphics. Successful presenters have learned that most people can’t listen to a presentation while they are reading slides. So these presenters make sure most of their slides display graphics that represent the point they are making, giving the audience something to look at while they focus on what is being said. PowerPoint gives you the tools you need to create graphic-intensive rather than text-intensive presentations.
After you insert any picture into a presentation, you can modify it by using the commands on the Format tool tab. For example, you can do the following:
Remove the background by designating either the areas you want to keep or those you want to remove.
Sharpen or soften the picture, or change its brightness or contrast.
Enhance the picture’s color.
Make one of the picture’s colors transparent.
Choose an effect, such as Pencil Sketch or Paint Strokes.
Apply effects such as shadows, reflections, and borders; or apply combinations of these effects.
Add a border consisting of one or more solid or dashed lines of whatever width and color you choose.
Rotate the picture to any angle, either by dragging the rotating handle or by choosing a rotating or flipping option.
Crop away the parts of the picture that you don’t want to show on the slide. (The picture itself is not altered—parts of it are simply covered up.)
Minimize the presentation’s file size by specifying the optimum resolution for where or how the presentation will be viewed—for example, on a webpage or printed page. You can also delete cropped areas of a picture to reduce file size.
All these changes are made to the representation of the picture on the slide and do not affect the original picture.
To crop a picture
Select the picture. On the Format tool tab, in the Size group, select Crop to display thick black handles on the sides and in the corners of the picture.
Drag the handles to define the area you want to crop to. The areas that will be excluded from the cropped picture are shaded.

Cropping a photo
 IMPORTANT
When you select a crop handle, be careful not to drag the picture sizing handles instead—they’re very close to each other.
When you finish defining the area, click away from the picture, or select Crop again to apply the crop effect.
TipTo redisplay the uncropped picture at any time, select it and select the Crop button.
Or
Select the picture. On the Format tool tab, in the Size group, select the Crop arrow, and then do either of the following:
Select Crop to Shape, and then select a shape.
Select Aspect Ratio, and then select an aspect ratio.
PowerPoint crops the picture to meet your specifications.

You can crop photos to shapes
To frame a picture
Select the picture. On the Format tool tab, in the Picture Styles group, select the More button to display the Picture Styles gallery.
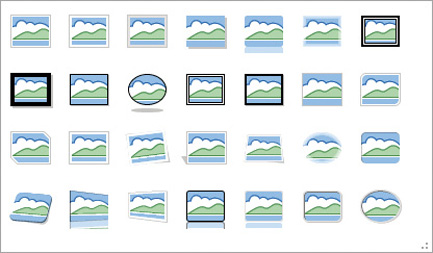
Picture styles can add frames, shadows, reflections, and more
Point to each picture style in turn to display a live preview of the frame applied to your picture. Select the picture style you want to apply.

You can experiment with the picture styles to identify those you like
To remove a background from a picture
Select the picture. On the Format tool tab, in the Adjust group, select Remove Background to display the Background Removal tool tab and apply purple shading to the areas of the picture that the tool thinks you want to remove.

The accuracy of the estimate depends on the intricacy of the background
On the Background Removal tool tab, select Mark Areas to Keep, and then with the pencil tool, select any shaded areas of the photo that you’d like to expose and keep.
On the Background Removal tool tab, select Mark Areas to Remove, and then select any areas of the photo that aren’t shaded that you’d like to remove.
Depending on the simplicity of the picture, you might need to make a lot of adjustments or only a few. When you finish, select Keep Changes to display the results. You can return to the Background Removal tool tab at any time to make adjustments.

Select elements of photos to decorate your slides
To apply an artistic effect to a picture
Select the picture. On the Format tool tab, in the Adjust group, select Artistic Effects to display the Artistic Effects gallery.
Point to each effect to display a live preview of the effect on the selected photo.

Try out all the effects
Select the effect that you want to apply.
Provide additional information about pictures
PowerPoint 2019 has two features that make it easy to provide additional information about images that you insert in your presentations.
You can provide information about the image; the photographer, artist, or copyright holder; and the image licensing in the form of an attribution. PowerPoint 2019 automatically inserts image attributions when you insert an image by using the Online Pictures feature. You can manually insert attributions for pictures that you insert from your computer.

An automatic attribution for an online image with Creative Commons licensing
The attribution provided for online pictures includes two important hyperlinks. The first is to the picture in its online location so that it can be seen in context. The second is to the applicable licensing information.
Attributions are provided as normal text within floating text boxes. You can modify the attribution text and move or rotate the text box; when you do, the attribution remains linked to, and part of, the picture object.

A vertical attribution can save space and be less distracting
Provide additional information about pictures An important accessibility feature, alt text provides an alternative text description for images. This is useful for people using screen readers, when the content of an image is unclear, or when the image doesn’t render. PowerPoint 2019 automatically generates alt text when you insert a picture from your computer or will generate it when you request it.

Auto-generated alt text is not always accurate but at least provides a starting point
You might use images in your presentations that accompany and enhance text but don’t provide additional information—for example, a decorative image in the slide footer. You can mark these images as decorative to indicate to screen-reading software that it should skip over the image and its alt text.
To select an attribution for editing
Select the picture. Point to the top of the attribution area (the bottom of the picture), and when the pointer changes to a four-headed arrow, click to select the attribution text box.
To modify the attribution for an online picture
Select the attribution text box. Then click within the text and edit it.
To move an online picture attribution
Select the attribution text box, and then drag it to the new location.
To rotate an online picture attribution
Select the attribution text box, and then drag the rotation handle.
Drag the text box size handle to match the text box width to the side of the picture you’re aligning it with.
To add or edit alt text for a picture
Do either of the following:
Select the picture. On the Format tools tab, in the Accessibility group, select Alt Text.
Right-click the picture, and then select Edit Alt Text.
In the Alt Text pane, if PowerPoint doesn’t generate alt text automatically or accurately, do either of the following:
In the text box, enter text that describes the image and gives it context.
Select Generate a description for me, and then edit the alt text in the text box if you want.
If the image is not important in context, select the Mark as decorative check box.
Create a photo album
When you want to display a dynamic array of pictures in a presentation, you can use a photo album template to do the initial layout and then customize the album by adding frames of different shapes, in addition to captions, or by applying layouts from the Design Ideas pane.

A PowerPoint photo album
The first step in creating a photo album is to choose the pictures you want to include. After you know the album contents, you can configure the album options.
When creating a photo album, you have several choices. The primary choice is the slide layout. You can choose from seven layouts that display one, two, or four pictures per slide. The pictures can optionally have titles. The default layout is Fit To Slide, which creates one slide per photo. The photo album uses the layout you select on all pages of the album.
A basic preview of the selected layout is available in the Photo Album dialog box while you’re creating the album. When you choose a layout, a slide number appears next to the first picture that will be on that slide. If you want to group pictures differently, you can reorder the photos before creating the album.
You can insert a text box on a photo album page, where it takes the place of a picture. You can use the text boxes to display comments about the pictures on that page, or you can leave them blank to control the layout. The total number of text boxes and pictures on a slide is the same as the layout that you choose. (In other words, if you choose a four-picture layout, the slide can display any combination of pictures and text boxes for a total of four objects.)
When you choose any layout other than Fit To Slide, you can opt to display captions below all the pictures. It isn’t necessary to specify the captions when you select the photos for the album; if you choose the option to have captions, PowerPoint creates placeholders for them.
You can choose from these seven picture frame styles:
Rectangle
Rounded Rectangle
Simple Frame, White
Simple Frame, Black
Compound Frame, Black
Center Shadow Rectangle
Soft Edge Rectangle
PowerPoint applies the same frame to all the pictures in the album.
You can choose a theme for the album when you’re creating it, but it’s easier to create the album and then apply the theme separately, because you can’t preview the theme in the Photo Album dialog box.
You can also choose to render all the pictures in the album in black and white rather than their native colors.
You can make these changes when creating the album, or you can create an album and then edit its settings to make changes.
![]() Tip
Tip
To integrate the slide layouts from a photo album template into a more traditional presentation, create the photo album and then import its slides into the other presentation by selecting Reuse Slides at the bottom of the New Slide gallery. For information about reusing slides, see “Copy and import slides and content” in Chapter 10, “Create and manage slides.”
To create a photo album
Start PowerPoint and display any blank or existing presentation. (PowerPoint creates the photo album as an entirely separate file.)
On the Insert tab, in the Images group, select Photo Album to open the Photo Album dialog box.
In the Insert picture from area, select File/Disk to open the Insert New Pictures dialog box.
Browse to the folder that contains the pictures you want to use, and select the photos. Then select Insert to add the selected files to the Pictures In Album list in the Photo Album dialog box.
TipIf you want to include all the pictures in a folder in your photo album, browse to the folder, select one picture, and press Ctrl+A to select all the folder contents. Then select Insert to add all the files to the photo album.
Review the images in the Preview window. Select any image that you want to rotate or recolor, and use the commands beneath the Preview window to do so.
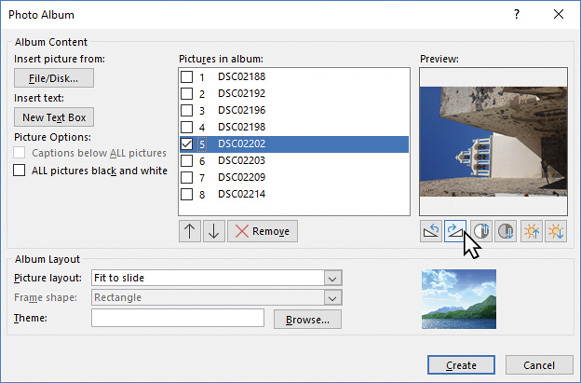
Default photo album settings
Next, configure the album layout. In the Picture layout list, select the layout you want to use. A generic preview of the layout appears to the right of the list. The numbers preceding the photo file names change to reflect the slide number the photo appears on.
Now confirm the picture order and slide content. Do any of the following in the Pictures in album list:
To preview a picture, select its file name (not its check box).
To move a picture to an earlier position, select its check box, and then select the Move Up button.
To move a picture to a later position, select its check box, and then select the Move Down button.
To rotate or adjust the coloring of a picture, select its check box, and then select the buttons below the preview to rotate it, or to increase or decrease the contrast or brightness.
To insert a blank text box in a picture position, select the picture that you want to precede the text box, and then select New Text Box.
To remove a photo from the album, select its check box, and then select Remove.
Next, if the picture layout is set to something other than Fit To Slide, choose the picture frame. In the Frame shape list, select the frame you want to use.

The generic preview updates to reflect your frame choice
Finally, do any of the following:
If you want to display captions below the photos, select the Captions below ALL pictures check box.
If you want to display grayscale versions of the photos, select the ALL pictures black and white check box.
If you know the theme you want to apply to the photo album, select the Browse button to the right of the Theme box, and then double-click the theme you want to use.
Select Create to create the photo album.
Review the photo album, and do any of the following:
Change the photo album title from the generic Photo Album to something more meaningful.
If you added titles, captions, or text boxes, insert appropriate content in the placeholders.
If you didn’t choose a theme, or don’t like the theme you chose, choose an appropriate theme from the Themes gallery on the Design tab.
Save the photo album.
To edit photo album settings
On the Insert tab, in the Images group, select the Photo Album arrow, and then select Edit Photo Album to open the Photo Album dialog box with all the current settings.
Add, remove, and modify photos; change the photo order; insert or remove text boxes; change the picture layout or frame; add or remove captions; or make any other changes you want.
When you finish, select the Update button to apply your changes.
Capture and insert screen clippings
Many people rely on the web as a source of information. At times, there might be information that you want to include in a PowerPoint presentation. For example, you might display an image of a page of a client’s website in a sales presentation. PowerPoint 2019 provides a screen-clipping tool that you can use to easily capture an image of anything visible on your computer screen. After you capture the image, you can edit it just as you can other graphics.
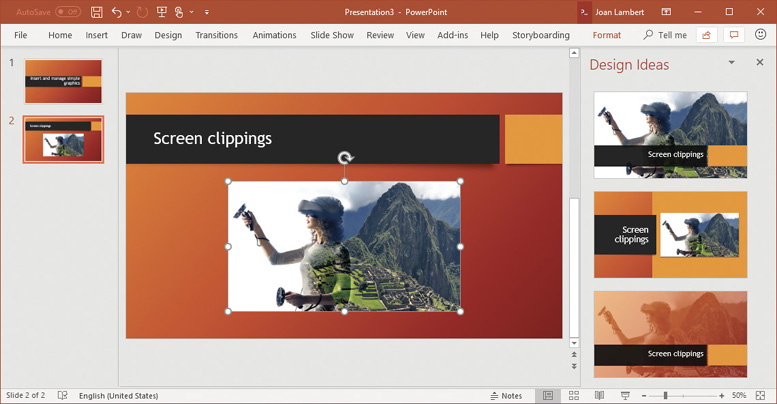
The Design Ideas pane offers creative design ideas when inserting images
![]() Tip
Tip
You aren’t limited to capturing screen clippings with the Office tools; you can also use the Snipping Tool (available in the Windows Accessories folder) to capture an image and add it to your Screenshot list.
To insert an image of an on-screen window
Display the window that you want to capture and size it to display its contents as you want to show them.
Switch to PowerPoint and display the slide you want to insert the screen content on.
On the Insert tab, in the Images group, select Screenshot. The Screenshot menu displays thumbnails of all the windows on your screen that are currently available to insert.

Some open windows aren’t available from this menu and must be captured as clippings
IMPORTANTAt the time of this writing, the Screenshot menu displays only desktop app windows; it doesn’t display Store app windows.
On the Screenshot menu, select the window you want to insert an image of on the slide.
Resize the inserted image to suit your needs.
To capture a screen clipping from PowerPoint
Display the content that you want to capture.
Switch to PowerPoint and display the slide you want to insert the screen content on.
On the Insert tab, in the Images group, select Screenshot.
On the Screenshot menu, select Screen Clipping. The PowerPoint menu minimizes to the taskbar, and a translucent white layer covers the entire display.
TipIf you change your mind about capturing the screen clipping, press the Esc key to remove the white layer.
When the cursor changes to a plus sign, point to the upper-left corner of the area you want to capture, and then drag down and to the right to define the screen clipping borders.

The screen clears from the area you select
When you release the mouse button, PowerPoint captures the clipping, restores the window, and inserts the clipping in the center of the slide.
 SEE ALSO
For information about formatting pictures, see “Insert, move, and resize pictures” and “Edit and format pictures” earlier in this chapter.
Insert and format icons
A terrifically useful feature that was introduced in Office 365 and has now been made available in Word, Excel, PowerPoint, and Outlook is an extensive icon library. At the time of this writing, the icon library contains approximately 500 different icons that you can insert into your PowerPoint presentations.

The Office icon library
The icon library is stored online—which is good because Microsoft can easily add new icons to it, but not perfect, because it requires an internet connection to access it. Provided that you’re online, the icon library is easy to access and use. The library is not searchable but is divided into categories that make it a bit easier to find what you’re looking for. Because the library is updated from time to time, it’s worth looking there for simple image formats before you look online, for these reasons:
There are no rights or permission issues when using icons from the icon library.
The icons provide clear and consistent representations of the image subjects.
You can smoothly scale the icons to whatever size you need without worrying about them developing jagged edges.
You can easily recolor the icons to fit the color scheme of your presentation.
You can convert the icons to Office shapes, which allows you to ungroup the icon elements and recolor or otherwise modify them individually.

An icon converted to an Office shape and modified as individual elements
To insert an icon
Position the cursor where you want to insert the icon.
On the Insert tab, in the Illustrations group, select Icons.
Scroll the icon library or select any category in the left pane to move to that section of the library.
Select each icon that you want to insert. A check mark appears in the corner of each selected icon. Then select Insert to insert the icon or icons as individual drawings.
To convert an icon to an Office shape
Do either of the following:
Select the icon. On the Format tool tab for drawings, in the Change group, click Convert to Shape.
Right-click the icon, and then select Convert to Shape.
In the Microsoft PowerPoint message box prompting you to confirm that you want to convert the icon to a Microsoft Office drawing object, select Yes.
To resize, recolor, rotate, or otherwise modify an icon
Select the icon, and then use the standard tools on the Format tool tab to modify it as you would any other image object.
Draw and modify shapes
An extensive library of shapes is available in PowerPoint. Shapes can be simple, such as lines, circles, or squares; or more complex, such as stars, hearts, and arrows. Some shapes are three-dimensional (although most are two-dimensional). Some of the shapes have innate meanings or intentions, and others are simply shapes.
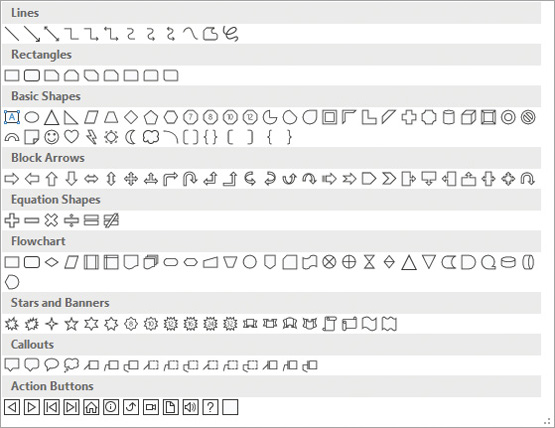
Simple representations of the shapes you can insert on a slide
Pointing to any shape in the gallery displays a ScreenTip that contains the shape name.
Draw and add text to shapes
After you select a shape that you want to add to your slide, you drag to draw it on the slide. Shapes are also text boxes, and you can enter text directly into them. You can format the text in shapes just as you would regular text.

Shapes can help to visually reinforce a concept
With a little imagination, you’ll soon discover ways to create images by combining shapes. You can use these images to illustrate a concept on a slide, or you can animate the drawings to convey actions or draw attention to specific elements.
![]() SEE ALSO
SEE ALSO
For information about animating shapes and text on slides, see “Animate text and pictures on slides” in Chapter 12, “Add sound and movement to slides.”
To create a shape on a slide
On the Insert tab, in the Illustrations group, select Shapes and then, on the Shapes menu, select the shape you want to insert.
TipIf you select a shape button and then change your mind about drawing the shape, you can release the shape by pressing the Esc key.
When the cursor changes to a plus sign, do either of the following:
Click on the slide to create a shape of the default size.
Drag diagonally on the slide to specify the upper-left and lower-right corners of the rectangle that surrounds the shape (the drawing canvas).
TipTo draw a shape that has the same height and width (such as a circle or square), hold down the Shift key while you drag.
To add text to a shape
Select the shape, and then enter the text you want to display on the shape. There is no cursor to indicate the location of the text; simply start typing and it appears on the shape.
Locate additional formatting commands
You control the area of the shape available for text by formatting the Text Box margins of the shape. This setting is gathered with many others in the Format Shape pane, which you can display by selecting the dialog box launcher (the small diagonal arrow) in the lower-right corner of the Shape Styles, WordArt Styles, or Size group on the Format tool tab.

You can display different pages of settings by selecting the text and icons at the top of the pane
In PowerPoint 2019, the most frequently used formatting commands are located on the ribbon. If additional commands are available, the ribbon group includes a dialog box launcher. Selecting the dialog box launcher displays either a dialog box or a control pane.
Move and modify shapes
You can change the size, angles, outline and fill colors, and effects applied to the shape. You can apply different colors to the outline and inside (fill) of a shape.
When you first draw a shape and any time you select it thereafter, PowerPoint displays a set of handles.

You can easily modify the shape, size, and angle of an image
You can use the handles to manipulate the shape in the following ways:
Drag the side or corner handles (hollow circles) to change the size or aspect ratio of the shape.
Drag the angle handles (yellow circles) to change the angles or curves of the text within the shape. Not all shapes have angle handles.
Drag the rotate handle (circling arrow) to rotate the shape on the slide.

Nine shapes arranged to create a recognizable image
To select a shape for editing
Select the shape once.
To select multiple shapes
Select a shape, hold down the Shift or Ctrl key, and select each other shape.
Drag to encompass all the shapes you want to select.
To resize a shape
Select the shape, and then do any of the following:
To change only the width of the shape, drag the left or right size handle.
To change only the height of the shape, drag the top or bottom size handle.
To change both the height and the width of the shape, drag a corner size handle.
To resize a shape without changing its aspect ratio, hold down the Shift key and drag a corner size handle or press an arrow key.
To move a shape on a slide
Select the shape that you want to move.
Drag the shape or press the arrow keys to move it to the new location.
To rotate or flip a shape
Select the shape.
On the Format tool tab, in the Arrange group, select the Rotate Objects button.

The menu illustrates the rotate and flip options
On the Rotate Objects menu, select the Rotate or Flip option you want.
TipYou can rotate or flip any type of image. Rotating turns a shape 90 degrees to the right or left; flipping turns a shape 180 degrees horizontally or vertically.
Or
Select the shape.
Drag the Rotate handle in a clockwise or counterclockwise direction until the shape is at the angle of rotation you want.
To change a shape to another shape
Select the shape you want to change.
On the Format tool tab, in the Insert Shapes group, select the Edit Shape button, select Change Shape, and then select the new shape.
Changing the shape doesn’t affect the shape formatting or text.
Format shapes
When a shape is selected, the Format tool tab in the Drawing Tools tab group appears on the ribbon. You can use the commands on the Format tool tab to do the following:
Replace the shape with another without changing the formatting.
Change the fill and outline colors of the shape, and the effects applied to the shape.
Separately, change the fill and outline colors and effects of any text that you add to the shape.
Arrange, layer, and group multiple shapes on a slide.
Having made changes to one shape, you can easily apply the same attributes to another shape, or you can apply the attributes to all future shapes you draw on the slides of the active presentation.

A happy fan cheering her team to victory!
When you have multiple shapes on a slide, you can group them so that you can copy, move, and format them as a unit. You can change the attributes of an individual shape—for example, its color, size, or location—without ungrouping the shapes.
To format a shape
Select the shape that you want to format.
On the Format tool tab, in the Shape Styles group, select the More button to display the Shape Styles gallery.

The shape style color options reflect the current color scheme
Point to thumbnails to display live previews of their effects, and then select a style thumbnail to apply the selected style.
To format text on a shape
Select the shape.
On the Format tool tab, in the WordArt Styles group, modify the style, text fill, text outline, or text effects.
Or
Select the text on the shape.
Do either of the following:
On the Format tool tab, in the WordArt Styles group, modify the style, text fill, text outline, or text effects.
On the Home tab, in the Font and Paragraph groups, use the standard text formatting commands.
To copy formatting from one shape to another
Select the formatting source shape.
On the Home tab, in the Clipboard group, select the Format Painter button.
Select the shape you want to copy the formatting to.
To set formatting as the default for the active presentation
Right-click the formatting source shape, and then select Set as Default Shape.
TipThe Set As Default Shape command doesn’t actually set a default shape; it sets only the default shape formatting.
To group shapes together as one object
Select all the shapes on a slide that you want grouped together.
On the Format tool tab, in the Arrange group, select the Group button (when you point to this button, the ScreenTip that appears says Group Objects) and then, in the list, select Group.

Grouped objects have a common set of handles
To move an entire group
Point to any shape in the group.
When the pointer changes to a four-headed arrow, drag the group to the new location.
To ungroup shapes
Select the group.
On the Format tool tab, in the Arrange group, select the Group button, and then select Ungroup.
To regroup shapes
Select any one shape from the former group.
On the Format tool tab, in the Arrange group, on the Group menu, select Regroup.
Connect shapes
If you want to show a relationship between two shapes, you can connect them with a line by joining special handles called connection points.
To connect shapes, follow these steps:
On the Insert tab, in the Illustrations group, select Shapes. In the Lines area of the Shapes gallery, select a Connector shape.

You can identify connectors by the word
Point to the first shape that you want to connect.
When a set of small gray connection points appears, point to a connection point, press and hold the mouse button, and then drag to the other shape (don’t release the mouse button).
When connection points appear on the other shape, point to a connection point, and release the mouse button.

When you move a shape, the connector line adapts to the change
TROUBLESHOOTING The connector has green handles when the shapes are connected. If a handle is white, drag it to a connection point.
After you draw a connector, you can adjust its shape by dragging a yellow handle and format it by changing its color and weight. If you move a connected shape, the connector moves with it, maintaining the relationship between the shapes.
Key points
PowerPoint makes it easy to use images of your own or from online sources to provide information and decoration within a presentation. You can modify the appearance of images in many ways.
Shapes can add interest to a slide and draw attention to key concepts. However, they can become tiresome and produce an amateurish effect if overused. The Office 2019 icon library provides hundreds of professional, scalable images that you can easily match to your presentation theme.
The screen clipping tool makes it easy to capture and insert an image from your computer screen into a presentation.
You can easily create a photo album of images within a PowerPoint presentation without having to individually import and place the images. Key points
 Practice tasks
Before you can complete these tasks, you need to copy the book’s practice files to your computer. The practice files for these tasks are located in the Office2019SBSCh11 folder. You can save the results of the tasks in the same folder.
The introduction includes a complete list of practice files and download instructions.
Insert, move, and resize pictures
Open the InsertPictures presentation, and then perform the following tasks:
Display slide 5.
In the content placeholder, select the Pictures icon. Browse to the practice file folder, and insert the Flowers01 picture.
From the Size group on the Format pane, resize the picture to a width of 4”. Ensure that the aspect ratio doesn’t change.
Move the picture on the slide to identify locations in which the smart guides appear—for example, the edges of the content space and below the slide title. Align the picture with the upper-right corner of the content area as defined by the smart guides.
On the Insert tab, in the Images group, select Online Pictures. In the Online Pictures window that opens, enter the word flowers in the Bing search box, and then press Enter.
Review the search results and locate a picture that you like. Insert the picture onto the slide.
Resize the picture to a width of 4”, and align it with the right side of the content area, near the bottom of the slide (a smart guide might not appear at the bottom of the slide). Note that the pictures overlap near the center of the slide.
Close the presentation, saving your changes if you want to.
Edit and format pictures
Open the EditPictures presentation, and then perform the following tasks:
Display slide 5.
Select the picture located on the right side of the slide.
On the Format tool tab, in the Adjust group, select Corrections, and then point to the thumbnails to identify one that will brighten the picture to make it similar to the picture on the left. Select that thumbnail to apply the correction.
Select the Crop arrow, point to Aspect Ratio, and then select 1:1. Adjust the picture so the flowers are in the center, and then complete the cropping process.
Display the Picture Styles gallery, and point to the thumbnails in the gallery to find one that you like. Select the thumbnail to apply the picture style.
Select the picture located on the left side of the slide.
Remove the neutral background from the selected picture.
Close the presentation, saving your changes if you want to.
Provide additional information about pictures
Open the AccreditPictures presentation, and then perform the following tasks:
Display slide 2.
Select the picture located on the right side of the slide.
From the Format tool tab, open the Alt Text pane.
Have PowerPoint generate a description of the photograph for you.
Edit the description to read Sunset over the Aegean Sea.
Display slide 5.
Select the Online Pictures icon. In the Online Pictures window, search for Greece.
Select and insert a search result that you like. (You can choose a layout from the Design Ideas pane if it opens.)
Close any open panes and zoom in on the slide as necessary to read the attribution inserted with the image.
Close the presentation, saving your changes if you want to.
Create a photo album
Start PowerPoint, and then perform the following tasks:
From the Insert tab, create a new photo album. Select photos from the practice file folder, or select your own photos.
While creating the album, do the following:
Experiment with the different picture layouts and frame shapes.
Change the order of the pictures in the album.
Insert text boxes to make spaces between photos.
Apply a theme.
After you create the album, experiment with the changes you can make from within PowerPoint. For example:
Replace placeholder text.
Change the theme.
Resize pictures.
If you want to, select the Edit photo album command to return to the Photo Album dialog box and make additional changes.
Save your photo album as MyPhotoAlbum, and then close it.
Capture and insert screen clippings
Open the InsertScreens presentation, and then perform the following tasks:
Display slide 4.
Open a web browser window and locate a webpage that has information about tablets.
Return to PowerPoint. Then capture and insert a screen clipping of part of the webpage.
Close the presentation, saving your changes if you want to.
Insert and format icons
Open the InsertIcons presentation, and then perform the following tasks:
Slide 1 provides a neutral outdoor background. Consider what sort of story you could tell on this slide.
From the Insert tab, open the Insert Icons window. Scroll through the window and look for icons that you could tell a story with on the slide.
In the People category, select any icon that depicts a person.
In the Weather and seasons category, select the icon that depicts the sun coming out from behind a cloud, and the icon that depicts an umbrella.
Insert the three selected icons. (Close the Design Ideas pane if it opens.)
Click anywhere on the slide away from the icons to release the selection, and then drag the icons to the following positions:
Position the sun and cloud in the upper-right corner.
Position the person at the edge of the street.
Position the umbrella above the person.
Resize the three icons as you like.
Select the sun and cloud icon and, from the Format tool tab, fill the image with the gold color.
Ungroup the parts of the icon, converting it as you do so.
Select only the cloud portion of the icon, and fill the shape with a gray color.
Experiment with resizing and recoloring the other icons you inserted. Insert more icons if you want to!
Close the presentation, saving your changes if you want to.
Draw and modify shapes
Open the DrawShapes presentation, and then perform the following tasks:
Display slide 5.
Draw a 5-Point Star shape (in the Stars and Banners category of the Shapes gallery) near the center of the slide.
Draw a small arrow (in the Block Arrows category of the Shapes gallery) to the right of the star.
Drag a copy of the arrow to the left of the star, and align it with the right arrow. Then flip the left arrow so that it points away from the star.
Adjacent to the left arrow, add a scroll shape, and then adjacent to the right arrow, add a heart shape.
Paste a copy of the heart shape on top of the original, and make the second heart smaller than the first.
In the star, enter the word ME. Then increase the font size to make it prominent.
Repeat task 7 to add the word Education to the scroll shape and Family to the heart shape. Then resize the shapes as necessary to make all the words fit on one line.
Select the scroll, star, and heart shapes (don’t select the text), and apply the style Intense Effect – Light Blue, Accent 6.
Suppose you have completed your education and entered the workforce. Change the scroll shape to the Up Arrow (in the Block Arrows category) to reflect your new status.
In the up arrow shape, change the word Education to Job. Then adjust the size and position of the shape so that it balances with the other shapes on the slide, using the smart guides to help align the shapes.
Group all the shapes together as one object, and apply a purple outline.
Move the entire group until the shapes are centered and balanced with the slide title.
Change the fill color of the left and right arrows to Purple.
Close the presentation, saving your changes if you want to.