The a6600 has a remarkable number of features and options you can use to customize the way your camera operates. Not only can you change the settings used at the time the picture is taken, but you can adjust the way your camera behaves. This chapter and the next three will help you sort out the settings for all the menus. These include the Camera Settings I, Camera Settings II, Network, Playback, and Setup menus, plus the My Menu custom menu screen. This chapter details options with the Camera Settings I menu; the Camera Settings II menu will be covered in Chapter 4; the Network and Playback menus in Chapter 5; and the Setup and My Menu options will be addressed in Chapter 6.
Why four entire chapters just on the menus, when other sources may have just a single chapter with a line or two about each menu entry explaining what they do? As you’re discovering, the a6600 is an incredibly versatile camera with a mind-numbing number of different menu entries, many of which have submenus and multiple options. Even if you’re a Sony veteran or an advanced photo enthusiast, you want more than just a brief explanation of what all the menu options do. You also need to know what they don’t do, when to use each one, and, most importantly, when not to use them.
And, I’ll bet, you purchased this book because you also wanted to know my personal preferences for settings and how I use these features. When I share what I know in person at workshops and other sessions with groups of photographers, I always tell them my informal motto: I make terrible mistakes, so you don’t have to! I like to push cameras to their limits and, in the process, discover exactly what they can do, and what they can’t.
So, like most of the rest of this book, Chapters 3 to 6 will cover both aspects in some detail. I’m not going to waste a lot of space on some of the more obvious menu choices in these chapters, especially those with only On/Off or Enable/Disable options. Instead, I’ll concentrate on the more complex aspects of setup, such as autofocus. I’ll start with an overview of using the camera’s menus themselves.
Anatomy of the Menus
The menu system is quite easy to navigate. Pressing the MENU button takes you to a screen like the one shown in Figure 3.1. Rotate the control dial to move from one top level menu tab to the next. Each tab is assigned a color: Camera Settings I (red), Camera Settings II (purple), Network (green), Playback (blue), and Settings (yellow). When a tab is active its highlight color will be bright, and the hues of the other tabs more subdued, as you can see in the figure.

Figure 3.1 Navigating the a6600’s menu system. This is the Camera Settings I-01 (Quality/Image Size 1) menu.
To navigate among menu entries:
- Change main tabs. When only the tab is highlighted (that is, none of its entries are highlighted in orange), you can quickly move from one main menu tab to the next by using the control dial or the control wheel’s left/right directional buttons. Reminder: the control dial changes tabs only when none of the entries in a tab are highlighted in orange. If an entry is highlighted, the control dial moves from one menu page to the next one.
- Select a menu entry. To choose a specific menu entry within a main menu tab, use the up/down controls of the control wheel’s directional buttons to highlight a specific menu entry.
- Change menu pages. Each main menu tab has multiple pages. When any entry in a main menu tab is highlighted you can move from one page within that tab to the next using the left/right controls or the control dial. When you reach the last page of a tab’s menus, additional movement wraps over to the first page of the next tab. The current page within a tab is shown by a numeric value (such as 1/14) and by a series of boxes at the bottom of the screen (you’ll find both in Figure 3.1).
For example, if you are using the Camera Settings I menu, the right key will take you from Camera Settings I-01 to Camera Settings I-02, and thence onward to the Camera Settings I-03 to I-14 tabs. Pressing the right key an additional time takes you onward to the Camera Settings II-01 page.
- Select a menu entry. To choose a menu entry within the pages of a main menu tab, use the up/down controls of the control wheel’s directional buttons You can also rotate the control dial or control wheel to highlight a specific menu entry.
- Make adjustments. When a menu entry is highlighted, press the control wheel’s center button to view options. After making adjustments, press the button again to confirm and exit, or MENU to cancel.
REMINDER Each of the main tabs may have several pages: the Camera Settings I menu has pages 1 to 14; Camera Settings II menu has pages 1 to 9; Network has 2 pages; Playback menu has 3; and the Setup menu boasts pages 1 to 7. My Menu starts out with one page, but you may add additional pages to accommodate up to 30 entries. The advantage to having so many menu pages is that all the entries for a given page can be shown on a single screen, with no downward scrolling required.
Of course, not everything has to be set using these menus. The a6600 has some convenient direct setting controls, such as the buttons of the control wheel that provide quick access to the drive modes, display information, and the ISO options. These and other buttons can be assigned other direct access functions. These control features allow you to bypass the multi-tabbed menus for many of the most commonly used camera functions.
There is also a Function menu that appears when you press the Fn button, with a set of shooting setting options, as I described in Chapter 2. Although the Fn menu has a default set of 12 functions, you can redefine those entries as well. Your a6600 offers a remarkable degree of customization. If a menu entry is unavailable, it will be “grayed out.” Often this happens when you really want to use the feature, too. Scroll down to the grayed-out entry and press the center button. A help screen will generally pop up explaining what the problem is. Within this book, I’ll also try to tell you the conditions that disable a particular feature, although there are so many possible interactions it is sometimes impossible to list them all. A quick fix is to reset the camera to its default settings, as described in Chapter 6, to eliminate any conflicts.
FINAL REMINDER: CONTROL DIAL VS CONTROL WHEEL
Remember that the control dial is the control in the upper-right corner of the a6600, and the control wheel is the control located on the back of the camera, surrounding the center button.
ABOUT THOSE ICONS
Menu entries are preceded by an icon, such as the “mountain” icon shown next to the six entries in Figure 3.1. A mountain icon indicates that the particular menu entry applies only to still photography; an icon resembling a film frame shows that the menu entry applies only to movie making. Presumably, entries without any icon can be used with both. A few menu entries, such as Memory Recall, Proxy Recording, Slow and Fast Motion, Enlarge, and Language are preceded by their own graphic or text icons, and are apparently used just for decorative purposes.
Camera Settings I Menu Entries
Figure 3.1, earlier, shows the first screen of the Camera Settings I menu. As you can see, at most only a half-dozen items are displayed at one time. The items found in this menu are listed here.
Quality/Image Size (Pages 01–02)
- File Format (Stills)
- JPEG Quality (Stills)
- JPEG Image Size (Stills)
- Aspect Ratio (Stills)
- Long Exposure Noise Reduction (Stills)
- High ISO Noise Reduction (Stills)
- Color Space (Stills)
- Lens Compensation
Shoot Mode/Drive (Pages 03–04)
- Scene Selection
- Drive Mode
- Bracket Settings
- Interval Shooting Functions
- Recall
- Memory
- Register Custom Shooting Set
Autofocus (Pages 05–07)
- Focus Mode
- Priority Setting in AF-S
- Priority Setting in AF-C
- Focus Area
- Focus Area Limit
- Switch Vertical/Horizontal AF Area (Stills)
- AF Illuminator (Stills)
- Face/Eye AF Settings
- AF with Shutter (Stills)
- Pre-AF (Stills)
- Eye-Start AF (Stills)
- AF Area Registration (Stills)
- Delete Registered AF Area (Stills)
- AF Area Auto Clear
- Display Continuous AF Area
- Circulation of Focus Point
- AF Micro Adjustment
Exposure (Pages 08–9)
- Exposure Compensation
- ISO Setting
- Metering Mode
- Face Priority Multi Metering
- Spot Metering Point
- Exposure Step
- AEL with Shutter (Stills)
- Exposure Standard Adjustment
Flash (Page 10)
- Flash Mode
- Flash Compensation
- Exposure Compensation Setting
- Wireless Flash
- Red Eye Reduction
Color/White Balance/Image Processing (Pages 11–12)
- White Balance
- Priority Setting in Auto White Balance
- DRO/Auto HDR
- Creative Style
- Picture Effect
- Picture Profile
- Shutter AWB Lock (Stills)
Focus Assist (Page 13)
- Focus Magnifier
- Focus Magnification Time
- Initial Focus Magnification (Stills)
- AF in Focus Magnification (Stills)
- Manual Focus Assist (Stills)
- Peaking Setting
Shooting Assist (Page 14)
- Face Registration
- Registered Faces Priority
- Self-portrait/-Timer
File Format (Stills)
Options: RAW, RAW & JPEG, JPEG
Default: JPEG
My preference: RAW & JPEG
This menu item lets you choose the file format setting that will be used by the a6600 to store its still photo files. You have three options: RAW, RAW & JPEG, and JPEG. The two entries that follow this one allow you to specify the RAW file type (compressed or uncompressed), and JPEG quality (Extra Fine, Fine, and Standard). Sony has separated these options; some previous a7-series cameras combined format and quality in a single Image Quality entry.
Should you select RAW, JPEG, or both? You can elect to store only JPEG versions of the images you shoot, or you can save your photos as “unprocessed” RAW files, which consume several times as much space on your memory card. Or, you can store both file types at once as you shoot. Note that to open a RAW file, you must have an image editor or RAW processor capable of converting the RAW file to editable form. The free Sony Imaging Edge software can do this for you; Photoshop, Lightroom, Photoshop Elements, and other programs compatible with Adobe Camera Raw (ACR) can also make the conversion for you.
FOR USERS OF OLDER PHOTOSHOP VERSIONS
Adobe stopped upgrading its ACR software for the stand-alone (non–Creative Cloud/CC version) of Photoshop with Photoshop CS6. If that is your primary image editor, you’ll need to use an external RAW processor, Adobe’s free DNG Converter, or, my preference, MetaRAW ($49.95), which is available for both Windows and macOS from www.thepluginsite.com. MetaRAW seamlessly “updates” the previous versions of Adobe Camera RAW by adding Adobe DNG converter capabilities to it when needed. As you import an “unsupported” RAW file, MetaRAW invisibly ushers the file through a DNG converter (which must also be installed on your computer), and thence to ACR, where you can use Camera Raw’s adjustments. You can use Adobe Camera Raw, Adobe DNG Converter, and MetaRaw’s own converter for opening camera raw files. If one does not support a certain raw file, one of the others is used automatically.
Many photographers elect, as I do, to shoot both a JPEG and a RAW file (RAW & JPEG), so they’ll have a JPEG version that might be usable as-is, as well as the original “digital negative” RAW file in case they will later want to make some serious editing of the photo with imaging software for reasons discussed shortly. If you use the RAW & JPEG option, the camera will save two different versions of the same file to the memory card: one with a .JPG extension, and one with the .ARW extension that signifies Sony’s proprietary ARW RAW format that consists of raw data.
JPEG vs. RAW
You’ll sometimes be told that RAW files are the “unprocessed” image information your camera produces, before it’s been modified. That’s nonsense. RAW files are no more unprocessed than old-school camera film is after it’s been through the chemicals to produce a negative or transparency. A lot can happen in the developer that can affect the quality of a film image—positively and negatively—and, similarly, your digital image undergoes a significant amount of processing before it is saved as a RAW file. Sony even applies a name (BIONZ) to the digital image processor used to perform this magic in Sony cameras.
A RAW file is closer in concept to a film camera’s processed negative. It contains all the information, with no compression, no sharpening, no application of any special filters or other settings you might have specified when you took the picture. Those settings are stored with the RAW file, so they can be applied when the image is converted to JPEG or another format compatible with your favorite image editor. However, using RAW converter software such as Adobe Camera Raw (in Photoshop, Elements, or Lightroom) or Sony’s Imaging Edge software (available for download from various Sony websites worldwide), you can override a RAW photo’s settings (such as White Balance and Saturation) by applying other settings in the software. You can make essentially the same changes there that you might have specified in your camera before taking a photo.
Making changes to settings such as White Balance is a non-destructive process in a RAW converter since the changes are made before the photo is fully processed by the software program. Making a change in settings does not affect image quality, except for changes to exposure, highlight or shadow detail, and saturation; the loss of quality is minimal however, unless the changes you make for these aspects are significant. The RAW format exists because sometimes we want to have access to all the information captured by the camera, before the camera’s internal logic has processed it and converted the image to a standard file format.
Note that RAW files are generally recorded using 14 bits per pixel (“bit depth”), except when using Long Exposure Noise Reduction, Silent Shooting, Continuous Shooting in Superior Auto mode, and for Bulb exposures. In those cases, the RAW files are stored using 12 bits per pixel. Two bits may not sound like much (unless you’re getting a shave-and-a-haircut), but it translates into many more colors available to render your image with a wider dynamic range. I’ll explain bit depth in more detail under the Color Space entry later in this chapter.
A RAW photo does take up more space than a JPEG and, in uncompressed mode, preserves all the information captured by your camera after it’s been converted from analog to digital form. Since we can make changes to settings after the fact while retaining optimal image quality, errors in the settings we made in-camera are much less of a concern than in JPEG capture. When you shoot JPEGs, any modification you make in software is a destructive process; there is always some loss of image quality, although that can be minimal if you make only small changes or are skilled with the use of adjustment layers.
JPEG provides smaller files by compressing the information in a way that loses some image data. The lost data is reconstructed when you open a JPEG in a computer, but this is not a perfect process. If you shoot JPEGs at the highest quality (Extra Fine) level (JPEG Quality choices are explained below), the compression (and loss of data) is minimal; you might not be able to tell the difference between a photo made with RAW capture and a Large/Fine JPEG. If you use the lower quality level, you’ll usually notice a quality loss when making big enlargements or after cropping your image extensively.
So, why don’t we always use RAW? Although some photographers do save only in RAW format, it’s more common to use either RAW plus the JPEG option or to just shoot JPEG and eschew RAW altogether. While RAW is overwhelmingly helpful when an image needs to be modified, working with a RAW file can slow you down significantly. The RAW images take longer to store on the memory card, so you cannot shoot as many in a single burst. Also, after you shoot a series, the camera must pause to write them to the memory card, so you may not be able to take any shots for a while (or only one or two at a time) until the RAW files have been written to the memory card. When you come home from a trip with numerous RAW files, you’ll find they require more post-processing time and effort in the RAW converter, whether you elect to go with the default settings in force when the picture was taken or make minor adjustments.
Those who often shoot long series of photos in one session, or want to spend less time at a computer, may prefer JPEG over RAW. Wedding photographers, for example, might expose several thousand photos during a bridal affair and offer hundreds to clients as electronic proofs on a DVD. Wedding shooters take the time to make sure that their in-camera settings are correct, minimizing the need to post-process photos after the event. Given that their JPEGs are so good, there is little need for them to get bogged down working with RAW files in a computer. Sports photographers also avoid RAW files because of the extra time required for the camera to record a series of shots to a memory card and because they don’t want to spend hours in extra post-processing. As a bonus, JPEG files consume a lot loss memory in a hard drive.
My recommendation: When shooting sports, I’ll switch to shooting Large/Extra Fine JPEGs (with no RAW file) to minimize the time it takes for the camera to write a series of photos to the card; it’s great to be able to take another burst of photos at any time, with little or no delay. I also appreciate the fact that I won’t need to wade through long series of photos taken in RAW format.
In most situations however, I shoot virtually everything as RAW & JPEG. Most of the time, I’m not concerned about filling up my memory cards, as I usually carry at least three 64GB or 128GB memory cards with me. If I know I may fill up all those cards (say, on a long trip), I’ll also carry a notebook computer and an external 2 terabyte hard drive to back up my files.
JPEG Quality (Stills)
Options: Extra Fine, Fine, Standard
Default: Fine
My preference: Extra fine
To reduce the size of your image files and allow more photos to be stored on a given memory card, the camera’s processor uses JPEG compression to squeeze the images down to a smaller size. This compacting reduces the image quality a little, so you’re offered your choice of Extra Fine, Fine, and Standard compression. Standard compression is quite aggressive; the camera discards a lot of data. While Fine is, well, just fine, you’ll find that Extra Fine provides even better results, so it should really be your standard when shooting JPEG photos.
For most work, extra compression (or lower resolution, described next) is false economy. You never know when you might need that extra bit of picture detail. Your best bet is to have enough memory cards to handle all the shooting you want to do until you have the chance to transfer your photos to your computer or a personal storage device.
JPEG Image Size (Stills)
Options: L, M, S
Default: L
My preference: L
Here you can choose between the a6600’s Large, Medium, and Small settings for JPEG still pictures. The larger the size that’s selected, the higher the resolution: the images are composed of more megapixels. If you select RAW or RAW & JPEG for File Format, you’ll find that the Image Size option is still available, but will be applied only to recorded JPEG files; RAW files are always stored in Large format, even if JPEG files are recorded in Medium or Small sizes.
As you scroll among the options, you’ll note that the size for Large, Medium, and Small is shown in megapixels, as shown for the a6600 in Table 3.1. The number of pixels will vary, depending on the aspect ratio you’ve chosen. For example, with the a6600, you’ll get 24MP in Large mode using the 3:2 aspect ratio, and 20MP in Large mode using the 16:9 aspect ratio.
TABLE 3.1 Image Sizes Available

As I noted earlier, there are some limited advantages to using the Medium and Small resolution settings, and similar space-saving benefits accrue to the Standard JPEG compression setting. All these options help stretch the capacity of your memory card, so you can shoehorn quite a few more pictures onto a single card. That can be useful when you’re away from home and are running out of storage, or when you’re shooting non-critical work that doesn’t require full resolution (such as photos taken for real estate listings, web page display, photo ID cards, or similar applications).
Scroll to this Image Size menu item, press the center button, and scroll to the desired option: L, M, or S. Then press the center button to confirm your choice. As I noted, the actual size of the images depends on the aspect ratio you have chosen in the subsequent menu item (discussed below), the standard 3:2, the wide-screen 16:9 format, or square 1:1 format.
There are few reasons to use a size other than Large with this camera, even if reduced resolution is sufficient for your application, such as photo ID cards or web display. Starting with a full-size image gives you greater freedom for cropping and fixing problems with your image editor. An 800 × 600– pixel web image created from a full-resolution (large) original often ends up better than one that started out as a small JPEG.
Of course, the Medium and Small settings make it possible to squeeze more pictures onto your memory card. The smaller image sizes might come in handy in situations where your memory cards are almost full, and/or you don’t have the opportunity to offload the pictures you’ve taken to your computer. For example, if you’re on vacation and plan to make only 4 × 6–inch snapshot prints of the photos you shoot, setting a lower resolution will stretch your memory card’s capacity. Even then, it makes more sense to simply buy and carry memory cards with higher capacity and use your a6600 camera at its maximum resolution.
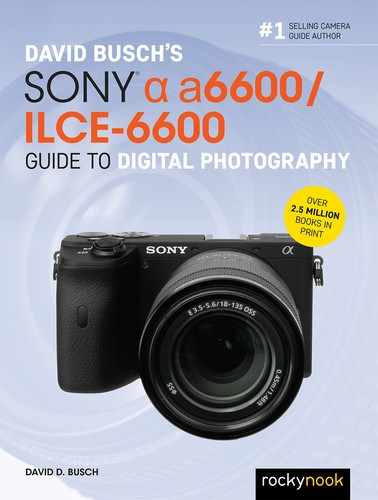
Aspect Ratio (Stills)
Options: 3:2, 16:9, and 1:1 aspect ratios
Default: 3:2
My preference: 3.2; you can always crop to any of the others in your image editor
The aspect ratio is simply the proportions of your image as stored in your image file. The standard aspect ratio for digital photography is approximately 3:2; the image is two-thirds as tall as it is wide, as shown by the outer green rectangle in Figure 3.2. These proportions conform to those of the most common snapshot size in the USA, 4 × 6 inches. Of course, if you want to make a standard 8 × 10–inch enlargement, you’ll need to trim some of the length of the image area since this format is closer to square; you (or a lab) would need 8 × 12–inch paper to print the full image area. The 3:2 aspect ratio was also the norm in photography with 35mm film.
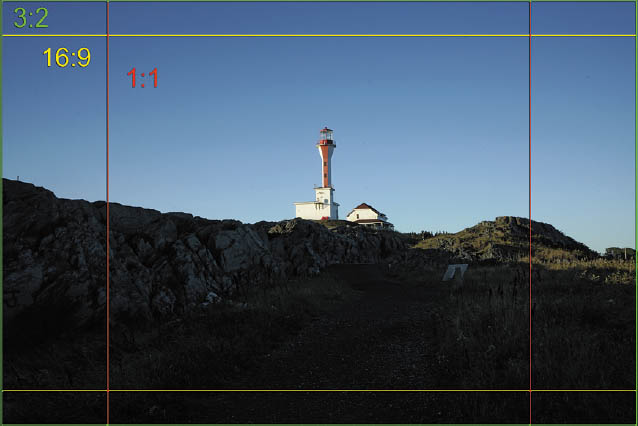
Figure 3.2 The 3:2 aspect ratio is shown by the outer green box. The yellow bars indicate the 16:9 aspect ratio (achieved either in-camera or later by cropping in software).
If you’re looking for images that will “fit” a wide-screen computer display, or a high-definition television screen, you can use this menu item to switch to a 16:9 aspect ratio, which is much wider than it is tall. The camera performs this magic by cutting off the top and bottom of the frame (as illustrated by the yellow boundaries in Figure 3.2) and storing a reduced resolution image (as shown in Table 3.1). Your 24MP image becomes a 20MP shot if you set the camera to shoot in 16:9 aspect ratio instead of using the default 3:2 option. If you need the widescreen look or are posting on social media, this menu option will save you some time in image editing, but you can achieve the same proportions (or any other aspect ratio) by trimming a full-resolution image with your software. The 16:9 and 1:1 options are most useful if you plan to take a lot of photos that will work best in those formats. Only the JPEG version of a shot is cropped; the RAW file retains its full image area, which will be trimmed by your RAW converter when you import the image into your image editor.
Long Exposure NR/High ISO NR (Stills)
Long Exposure NR: Options: On/Off; Default: On
High ISO NR: Options: Normal, Low, Off; Default: Normal
My preference: Off for both
I’ve grouped these two menu options together, because they work together, each under slightly different circumstances. Moreover, the causes and cures for noise involve some overlapping processes. Digital noise is that awful graininess that shows up as multicolored specks in images, and these menu items help you manage it. In some ways, noise is like the excessive grain found in some high-speed photographic films. However, while photographic grain is sometimes used as a special effect—most often in moody, black-and-white photography—the distracting colored speckles that results from noise is rarely desirable in a digital photograph.
The visual noise-producing process is something like listening to music in your car, and then rolling down all the windows. You’re adding sonic noise to the audio signal, and while increasing the volume may help a bit, you’re still contending with an unfavorable signal-to-noise ratio that probably mutes tones (especially higher treble notes) that you really want to hear.
The same thing happens when the analog signal is amplified: You’re increasing the image information in the signal but boosting the background fuzziness at the same time. Tune in a very faint or distant AM radio station on your car stereo. Then turn up the volume. After a certain point, turning up the volume further no longer helps you hear better. There’s a similar point of diminishing returns for digital sensor ISO increases and signal amplification as well.
Your a6600 can reduce the amount of grainy visual noise in your photo with noise reduction processing. That’s useful for a smoother look, but NR processing does blur some of the very fine detail in an image along with blurring the digital noise pattern. These two menu items let you choose whether to apply noise reduction to exposures of longer than one second and how much noise reduction to apply (Normal or Low) when shooting at a high ISO level (at roughly ISO 1600 and above).
High ISO NR is grayed out when the camera is set to shoot only RAW-format photos. The camera does not use this feature on RAW-format photos since noise reduction—at the optimum level for any photo—can be applied in the software you’ll use to modify and convert the RAW file to another format. (If you shoot in RAW & JPEG, the JPEG images, but not the RAW files, will be affected by this camera feature.) As well, high ISO Noise Reduction is never applied when the camera is set to continuous shooting or continuous bracketing; when using Sports Action, Hand-held Twilight, and Anti Motion Blur scene modes; or when the ISO is set to Multi Frame Noise Reduction.
Digital noise is also created during very long exposures. Extended exposure times allow more photons to reach the sensor but increase the likelihood that some photosites will react randomly even though not struck by a particle of light. Moreover, as the sensor remains switched on for the longer exposure, it heats up, and this heat can be mistakenly recorded as if it were a barrage of photons. To minimize the digital noise that can occur during long exposures, the a6600 uses a process called “dark frame subtraction.” After you take the photo, the camera fires another shot, at the same shutter speed, with the shutter closed to make the so-called dark frame. The processor compares the original photo and the dark frame photo and identifies the colorful noise speckles and “hot” pixels. It then removes (subtracts) them so the final image saved to the memory card will be quite “clean.”
Context-Sensitive
The a6600 has a novel “context-sensitive” noise-reduction algorithm that examines the image to identify smooth tones, subject edges, and textures, and apply different NR to each. This processing works best with areas with continuous tones and subtle gradations and does a good job of reducing noise while preserving detail. Because the BIONZ X digital processing chip is doing so much work, you may see a message on the screen while NR is underway. You cannot take another photo until the processing is done and the message disappears. If you want to give greater priority to shooting, set Long Exposure NR and High ISO NR to Off.
Long Exposure NR works well, but it causes a delay; roughly the same amount of time as the exposure itself. That would be a long 10 seconds after a 10-second exposure. During this delay the camera locks up, so you cannot take another shot. You may want to turn this feature off, as I do, to eliminate that delay when you need to be able to take a shot at any time. This feature is Off by default in continuous shooting and bracketing modes.
You might want to turn off noise reduction for long exposures and set it to a weak level for high ISO photos to preserve image detail. (NR processing blurs the digital noise pattern, but it can also blur fine details in your images.) Or, you simply may not need NR in some situations. For example, you might be shooting waves crashing into the shore at ISO 200 with the camera mounted on a tripod, using a neutral-density filter and long exposure to cause the pounding water to blur slightly. To maximize detail in the non-moving portions of your photos, you can switch off long exposure noise reduction.
It’s also important to turn off noise reduction when taking interval photos, as explained in Chapter 9. For example, the long exposures needed to record star trails would trigger the dark frame subtraction process, producing a 30-second delay following each 30-second exposure in a continuous sequence. You’d want to disable noise reduction to allow shooting long exposures, one after another, to capture your star trails.
Color Space (Stills)
Options: sRGB, Adobe RGB
Default: sRGB
My preference: sRGB
This is the first of two entries in the second page of the Camera Settings I menu (see Figure 3.3). The Sony a6600’s Color Space option gives you two different color spaces (also called color gamuts), named Adobe RGB (because it was developed by Adobe Systems in 1998), and sRGB (supposedly because it is the standard RGB color space). These two color gamuts define a specific set of colors that can be applied to the images your a6600 captures.
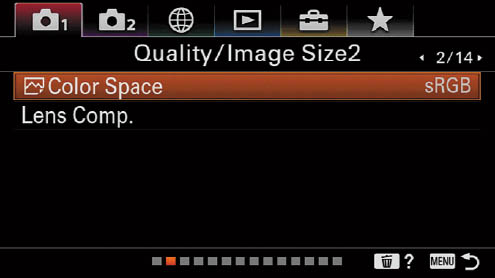
Figure 3.3 The Camera Settings I-02 (Quality/Image Size 2) menu page.
You’re probably surprised that the Sony a6600 doesn’t automatically capture all the colors we see. Unfortunately, that’s impossible because of the limitations of the sensor and the filters used to capture the fundamental red, green, and blue colors, as well as that of the phosphors used to display those colors on the LEDs in your camera and computer monitors. Nor is it possible to print every color our eyes detect, because the inks or pigments used don’t absorb and reflect colors perfectly.
On the other hand, the a6600 does capture quite a few more colors than we need. A 14-bit RAW image contains a possible 281 trillion different hues (16,384 colors per red, green, or blue channel), which are condensed down to a mere 16.8 million possible colors when converted to a 24-bit (eight bits per channel) image.
The set of colors, or gamut, that can be reproduced or captured by a given device (scanner, digital camera, monitor, printer, or some other piece of equipment) is represented as a color space that exists within the larger full range of colors. That full range is represented by the odd-shaped splotch of color shown in Figure 3.4, as defined by scientists at an international organization back in 1931. The colors possible with Adobe RGB are represented by the black triangle in the figure, while the sRGB gamut is represented by the smaller white triangle. The location of the corners of each triangle represent the position of the primary red, green, and blue colors in the gamut.
Figure 3.4 The outer curved figure shows all the colors we can see; the outlines show the boundaries of Adobe RGB (black triangle), sRGB (white triangle), and ProPhoto RGB (yellow triangle).
A third color space, ProPhoto RGB, represented by the yellow triangle in the figure, has become more popular among professional photographers as more and more color printing labs support it. While you cannot save images using the ProPhoto gamut with your a6600, you can convert your photos to 16-bit ProPhoto format using Adobe Camera RAW when you import RAW photos into an image editor. ProPhoto encompasses virtually all the colors we can see (and some we can’t), giving advanced photographers better tools to work with in processing their photos. It has richer reds, greens, and blues, although, as you can see from the figure, its green and blue primaries are imaginary (they extend outside the visible color gamut). Those with exacting standards need not use a commercial printing service if they want to explore ProPhoto RGB: many inkjet printers can handle cyans, magentas, and yellows that extend outside the Adobe RGB gamut.
Regardless of which triangle—or color space—is used by the a6600, you end up with some combination of 16.8 million different colors that can be used in your photograph. (No one image will contain all 16.8 million! To require that many, only about two pixels of any one color could be the same in a 42-megapixel image!) But, as you can see from the figure, the colors available will be different.
Adobe RGB, like ProPhoto RGB, is an expanded color space useful for commercial and professional printing, and it can reproduce a wider range of colors. It can also come in useful if an image is going to be extensively retouched, especially within an advanced image editor, like Adobe Photoshop, which has sophisticated color management capabilities that can be tailored to specific color spaces. As an advanced user, you don’t need to automatically “upgrade” your a6600 to Adobe RGB, because images tend to look less saturated on your monitor and, it is likely, significantly different from what you will get if you output the photo to your personal inkjet. (You can profile your monitor for the Adobe RGB color space to improve your on-screen rendition using widely available color calibrating hardware and software.)
While both Adobe RGB and sRGB can reproduce the exact same 16.8 million absolute colors, Adobe RGB spreads those colors over a larger portion of the visible spectrum, as you can see in the figure. Think of a box of crayons (the jumbo 16.8 million crayon variety). Some of the basic crayons from the original sRGB set have been removed and replaced with new hues not contained in the original box. Your “new” box contains colors that can’t be reproduced by your computer monitor, but which work just fine with a commercial printing press. For example, Adobe RGB has more “crayons” available in the cyan-green portion of the box, compared to sRGB, which is unlikely to be an advantage unless your image’s final destination are the cyan, magenta, yellow, and black inks of a printing press.
The other color space, sRGB, is recommended for images that will be output locally on the user’s own printer, as this color space matches that of the typical inkjet printer fairly closely. You might prefer sRGB, which is the default for the Sony a6600 and most other cameras, as it is well suited for the range of colors that can be displayed on a computer screen and viewed over the Internet. If you plan to take your image file to a retailer’s kiosk for printing, sRGB is your best choice, because those automated output devices are calibrated for the sRGB color space that consumers use.
BEST OF BOTH WORLDS
If you plan to use RAW+JPEG for most of your photos, go ahead and set sRGB as your color space. You’ll end up with JPEGs suitable for output on your own printer, but you can still extract an Adobe RGB version from the RAW file at any time. It’s like shooting two different color spaces at once—sRGB and Adobe RGB—and getting the best of both worlds.
Of course, choosing the right color space doesn’t solve the problems that result from having each device in the image chain manipulating or producing a slightly different set of colors. To that end, you’ll need to investigate the wonderful world of color management, which uses hardware and software tools to match or calibrate all your devices, as closely as possible, so that what you see more closely resembles what you capture, what you see on your computer display, and what ends up on a printed hardcopy. Entire books have been devoted to color management, and most of what you need to know doesn’t directly involve your Sony a6600, so I won’t detail the nuts and bolts here.
To manage your color, you’ll need, at the bare minimum, some sort of calibration system for your computer display, so that your monitor can be adjusted to show a standardized set of colors that is repeatable over time. (What you see on the screen can vary as the monitor ages, or even when the room light changes.) I use the SpyderX Pro monitor color correction system from Datacolor (www.datacolor.com) for my computer’s 32-inch main monitor, flanked by two 26-inch wide-screen LCD displays. The unit checks room light levels every five minutes and reminds me to recalibrate every week or two using a small sensor device, which attaches temporarily to the front of the screen and interprets test patches that the software displays during calibration. The rest of the time, the sensor sits in its stand, measuring the room illumination, and adjusting my monitors for higher or lower ambient light levels.
If you’re willing to make a serious investment in equipment to help you produce the most accurate color and make prints, you’ll want a more advanced system (up to $500) like the various other Spyder products from Datacolor and other vendors.
Lens Compensation
Options: Shading Compensation, Chromatic Aberration, Distortion Compensation: Auto, Off (for each)
Default: Shading/Chromatic Aberration: Auto; Distortion: Off
My preference: Auto for all three
This trio of submenus optimizes lens performance by compensating for optical defects; they’re useful because very few lenses in the world are even close to perfect in all aspects. All three items work only with E-mount lenses and not when using A-mount lenses with an adapter accessory.
Shading
One key defect is caused by a phenomenon called vignetting, which is a darkening of the four corners of the frame because of a slight amount of fall-off in illumination at those nether regions. This menu option allows you to activate built-in “shading” compensation, which partially (or fully) compensates for this effect. Depending on the f/stop you use, the lens mounted on the camera, and the focal length setting, vignetting can be non-existent, slight, or may be so strong that it appears you’ve used a too-small hood on your camera. (Indeed, the wrong lens hood can produce a vignette effect of its own.)
Vignetting, even if pronounced, may not be much of a problem for you. I actually add vignetting, sometimes, in my image editor when shooting portraits and some other subjects. Slightly dark corners tend to focus attention on a subject in the middle of the frame. On the other hand, vignetting with subjects that are supposed to be evenly illuminated, such as landscapes, is seldom a benefit. Figure 3.5, left, shows an image without shading correction at top, and a corrected image at the bottom. I’ve exaggerated the vignetting a little to make it more evident on the printed page. Note that this effect is applied to both RAW and JPEG images.
Chromatic Aberration
The second defect involves fringes of color around backlit objects, produced by chromatic aberration, which comes in two forms: longitudinal/axial, in which all the colors of light don’t focus in the same plane, and lateral/transverse, in which the colors are shifted in one direction. (See Figure 3.5, top right.) When this feature is enabled, the camera will automatically correct images taken with one of the supported lenses to reduce or eliminate the amount of color fringing seen in the final photograph. (See Figure 3.5, bottom right.)
Figure 3.5 Vignetting (top left) is undesirable in a landscape photo, but the camera’s shading correction feature can fix dark corners (bottom left). Lateral chromatic aberration, which shows as color fringes (top right), can also be corrected (bottom right).
Distortion
Distortion is the tendency of some lenses to bow outward (most often wide-angle lenses) or curve inward (found in some telephoto lenses). Figure 3.6, left, shows an exaggerated version of the outward-curving variety, called barrel distortion, exhibited by many wide-angle lenses—especially in fisheye optics, where the distortion is magically transformed into a feature. This feature works with most E-mount lenses, but not with all.
In Figure 3.6, right, you can see inward bowing, or pincushion distortion, as found in many telephoto lenses. Both types can be partially fixed using Photoshop’s Lens Correction or Photoshop Elements’ Correct Camera Distortion filters. Or, you can apply this in-camera feature to fix mild distortion. You should realize that correcting lens distortion involves warping pixels, mostly at the edges of the frame, providing a little less sharpness in those areas. The image area of your final picture will be slightly smaller than the frame you composed, and, during playback the active focus point is not shown in the review image.

Figure 3.6 Left: Barrel distortion in wide-angle lenses becomes a useful feature with fisheye lenses. Right: Pincushion distortion causes straight lines at the edges of the frame to curve inward.
In addition, applying distortion correction involves extra processing, which can reduce the number of consecutive shots possible. Because the correction is applied after you take the picture, the effect is not displayed on the screen when shooting in live view. (That is, Setting Effect is set to On in the Live View Display entry of the Camera Settings II-07 menu, as discussed in Chapter 4.)
Scene Selection
Options: Select Scene Modes: Portrait, Sports Action, Macro, Landscape, Sunset, Night Scene, Hand-held Twilight, Night Portrait, Anti-Motion Blur
Default: None
My preference: N/A
This entry, the first on the Camera Settings I-03 (Shoot Mode/Drive 1) page (see Figure 3.7), is available only when the mode dial is set to SCN. It provides an alternate method for choosing among the available scene modes. It would have been brilliant if Sony had made Scene Selection one of the definable actions for a custom key or as a Function Menu option (at least for those who use scene modes a lot), but no such luck. However, it’s here if you want to use it. You’ll learn more about Scene modes in Chapter 7.

Figure 3.7 The third page of the Camera Settings I menu (Shoot Mode/Drive 1).
Drive Mode
Options: Single Shooting; Cont. Shooting (Hi+, Hi, Mid, Low); Self-timer Single (2, 5, 10 seconds); Self-timer Continuous (2, 5, or 10 seconds/3 or 5 shots); Continuous Bracket (to 3, 5, or 9 images at 0.3, 0.7, 1.0, 2.0, 3.0 increments); Single Bracket (3, 5, or 9 images at 0.3, 0.7, 1.0, 2.0, or 3.0 increments); White Balance Bracket (3 images, Lo/Hi); DRO Bracket (3 images, Lo/Hi)
Default: Single Shooting
My preference: N/A
Just as with the Drive (left directional) button on the back of the camera, there are several choices available through this single menu item. Your choices include:
- Single Shooting. Takes one shot each time you press the shutter release button. You must use this mode or one of the self-timer modes (described shortly) if you want to use the a6600’s built-in Auto HDR (high dynamic range) feature or take a Bulb (long exposure) setting when working with Manual exposure.
- Continuous Shooting (Hi+, Hi, Mid, Low). Captures images at a rate of up to 11 frames per second at the Hi+ setting; 8 fps (Hi), 6 fps (Mid), or 3 fps (Lo). The 11 fps setting captures at the maximum possible rate, but the viewfinder or LCD image will “lag,” and not show the actual live view image. Use the Hi setting or slower if you want to view what is being captured in real time between frames.
Note: Focus is locked at the point calculated for the first exposure in a sequence if you’re using an f/stop smaller than f/11 (for example, f/16 or f/22). That’s unlikely to be a problem, because of the greater depth-of-field provided at smaller apertures.
While the a6600 can otherwise adjust exposure and focus as necessary for each shot, you can lock both at the settings used for the initial frame in a series by changing the AEL w/shutter entry in the Camera Settings I-09 menu to Auto or Off, and the Focus Mode setting in the Camera Settings I-05 menu to Continuous AF (AF-C).
![]()
NOTE Continuous shooting may be slower if you have turned the e-Front Curtain Shutter off, and is not available at all when using Scene Selection (other than Sports Action); when Rich-tone Mono Picture Effect is enabled; or when using Auto HDR or the Multi Frame Noise Reduction ISO option.
- Self-Timer Single (2 sec., 5 sec., 10 sec.). Takes a single picture after two, five, or ten seconds have elapsed. When this choice is highlighted, press the left/right buttons to switch among the three durations.
- Self-Timer Continuous (2, 5, or 10 seconds/3 or 5 shots). The self-timer counts down, and then takes either 3 or 5 images, after delays of 2, 5, or 10 seconds. The left/right buttons cycle among the choices. You can cancel the timer by pressing the Drive button and selecting Single Shooting, or by tapping the shutter button a second time. Note that if you’re using any of the continuous self-timer, continuous shooting, or continuous bracketing options, manual Bulb exposures produce an exposure time of 1/30th second.
- Continuous Bracket (3, 5, or 9 images at 0.3, 0.7, 1.0, 2.0, 3.0 increments). Captures 3, 5, or 9 images in one burst when the shutter release is held down, bracketing them 0.3, 0.5, 0.7, or 1.0 stops apart. Increments of 2.0 or 3.0 stops apart are also available, but only 3 or 5 images can be taken. Use the left/right buttons to select the increment and number of shots.
In Manual exposure (when ISO Auto is disabled), or in Aperture Priority, the shutter speed will change. If ISO Auto is set in Manual exposure, the bracketed set will be created by changing the ISO setting. In Shutter Priority, the aperture will change. Use continuous mode when you want all the images in the set to be framed as similarly as possible, say, when you will be using them for manually assembled high dynamic range (HDR) photos. You can use an external flash when continuous bracketing is active, but, because of the time required for the flash to recycle, you’ll need to press the shutter button each time to take subsequent images (effectively switching the camera into Single Bracket mode, described next).
Only the last shot in the set is displayed when using Auto Review. With all types of bracketing, the exposure/bracket scale at the bottom of the EVF or LCD monitor (in Display All Info mode) will display indicators showing the number of images shot and the relative amount of under/overexposure. Don’t forget that you can dial in exposure compensation, and that will affect the amount of over/underexposure applied while bracketing. Continuous bracketing (and Single Bracketing) is disabled when using Intelligent Auto.
- Single Bracket (3, 5, or 9 images at 0.3, 0.7, 1.0, 2.0, or 3.0 increments). Captures one bracketed image in a set of 3, 5, or 9 shots each time you press the shutter release, bracketing them 0.3, 0.7, or 1.0 stops apart. Only 3 and 5 shots are available with the 2.0 or 3.0 EV increments. The left/right buttons are used to select the increment and number of shots. In this mode, you can separate each image by an interval of your choice. You might want to use this variation when you want the individual images to be captured at slightly different times, say, to produce a set of images that will be combined in some artistic way.
You can set continuous and single bracket modes, and still make use of the self-timer. Access Bracket Settings (discussed next) and activate Self-Timer During Bracketing.
- White Balance Bracket (3 images, Lo/Hi). Shoots three images with adjustments to the color temperature. You can’t specify which direction the color bias is tilted, but you can select Lo (the default) for small changes, or Hi, for larger changes using the left/right buttons. Only the last shot taken is displayed during Auto Review.
- DRO Bracket (3 images, Lo/Hi). Shoots three image adjustments to the dynamic range optimization. Although you can’t specify the amount of optimization, you can select Lo (the default) for small changes, or Hi, for larger changes, using the left/right buttons. Again, only the last shot taken is displayed during Auto Review.
Bracket Settings
Options: Self-timer during bracketing: Off, 2 sec., 5 sec., 10 sec.; Bracket Order: 0-+, -0+
Default: Off, 0-+
My preference: Bracket Order: -0+; others: No preference
This item has two entries that let you customize how bracketing is applied.
- Self-timer during bracketing. You can choose delays of 2, 5, or 10 seconds before bracketing begins, or disable the self-timer during bracketing. This clever option solves a problem: how to use the self-timer (say, to avoid shaking a camera mounted on a tripod) when bracketing (which resides in the same Drive menu). With continuous bracketing, all exposures will be taken after the self-timer delay; if you’re using single bracketing, the delay takes place before each shot in the bracket set is exposed.
- Bracket order. The default is metered exposure > underexposure > overexposure. However, if you’re shooting photos that will later be manually assembled into an HDR photo, you might find it more convenient to expose in order of progressively more exposure: underexposure > metered exposure > overexposure. The order you choose will also be applied to white balance bracketing.
Interval Shooting Functions
Options: Interval Shooting, Shooting Start Time, Shooting Interval, Number of Shots, AE Tracking Sensitivity, Silent Shooting in Interval, Shoot Interval Priority
Default: Interval Shooting (Off), Shooting Start Time (1 second), Shooting Interval (3 seconds), Number of Shots (30), AE Tracking Sensitivity (Mid), Silent Shooting in Interval (On), Shoot Interval Priority (Off)
My preference: N/A
Interval (or time-lapse) shooting has had the distinction of long being one of the most desired features for Sony’s E-mount mirrorless cameras. Until recently, you needed an external intervalometer device or a special app to capture individual shots at regular intervals—say, to take progressive photographs of a flower opening. Now, Sony has included this capability in some of its latest models, so your a6600 can now capture a series of shots of the moon marching across the sky, or compile one of those extreme time-lapse picture sets showing something that takes a very, very long time, such as a building under construction.
You probably won’t be shooting such construction shots, unless you have a spare a6600 you don’t need for a few months (or are willing to go through the rigmarole of figuring out how to set up your camera in precisely the same position using the same lens settings to shoot a series of pictures at intervals). However, other kinds of interval and time-lapse photography are entirely within reach. Best of all, with Sony’s free Imaging Edge software, you can turn a series of time-lapse stills into a movie! I’ll provide step-by-step instructions for capturing interval stills and time-lapse video in Chapter 9, and include tips on recommended intervals between shots. You’ll also learn more about the seven major settings you have to work with, shown in Figure 3.8:
- Interval shooting. Choose On or Off to enable/disable the feature. You’ll want to keep this setting at Off until you are ready to begin interval shooting.
- Shooting start time. Use this setting to delay the start of image capture, from 0 minutes 0 seconds (begin immediately) to 99 minutes, 59 seconds. Say you’re planning on capturing a sunset and know that the best time to begin shooting will be in one hour. Specify 60 minutes and 0 seconds, set up your camera, and the a6600 will begin taking your sequence at the designated time. You’re free to do other things in the interim.
- Shooting interval. Specify how often an image should be captured. You might need an interval of 3 to 4 seconds to capture the march of fast-moving clouds across the sky, or prefer a more relaxed 10 to 12 seconds to shoot clouds with a slower pace. Intervals can range from 1 to 60 seconds between shots.
- Number of shots. This setting determines the total number of exposures in a time-lapse sequence. You can choose from 1 to 9999 shots. A message at the bottom of the screen will display how long it will take to capture the number of shots you specify using the shooting interval you’ve chosen. If you select the maximum 60-second interval and 9999 shots, your sequence will take just shy of one week to capture (166 hours and 36 minutes).
- Autoexposure Tracking Sensitivity. When the light levels are changing—say when capturing an entire day’s activity, or something that happens fairly quickly, such as a sunset—you can specify whether the a6600 adjusts exposure quickly, or slowly. Select from High, Mid (Medium), or Low sensitivity. Quick changes in exposure can be jarring, especially when combining shots into a time-lapse movie. You may want to experiment to see what works for your particular sequence, but the Mid setting should work for most projects. Note: if you want to see dramatic light shifts as your scene lightens or darkens, use Manual Exposure and set the shutter speed, ISO, and aperture to give the correct “normal” exposure (say, for mid-day when shooting a day-long series). The dawn/early morning and dusk/night exposures will have different degrees of underexposure—probably for a more dramatic effect.
Figure 3.8 Interval Shooting options.
- Silent Shooting in Interval. Choose On or Off. If you select On, the a6600 will operate silently, which allows capturing your sequence in “stealth” mode if you need it. Silent shooting also makes the series of shots less intrusive in environments where low noise levels are prized—such as religious ceremonies, concerts, college libraries prior to finals week, or capturing a sleeping baby without interrupting parents’ “quiet time.”
- Shoot Interval Priority. When shooting sequences using Program or Aperture Priority modes, the a6600 will adjust the shutter speed to provide the correct exposure. Unfortunately, when light levels are low, that may result in a shutter speed that is longer than the specified interval. That is, you may want to take a photo every two seconds, but the camera calculates that a four-second exposure is required.
If you select Off for this setting, when the a6600 encounters a conflict, it will go ahead and expose for the correct amount of time, skipping the shot that would have taken place. This is the default behavior and often the best choice. In most cases, there is not enough subject motion between frames to result in a jarring effect. You’re more likely to dislike having that conflicting image underexposed, which is what happens when this setting is On. When another interval exposure is due, the a6600 will terminate the previous shot (underexposing it) and begin the next one on schedule. You might use the On option if you feel that just dropping the poorly exposed image from the sequence produces the best series.
Recall
Options: Select settings
Default: None
My preference: N/A
The a6600 gives you the option of storing up to two different groups of settings in separate registers in the camera, plus four more that are stored on the current memory card. You can then make any of those seven different settings active, and recall the adjustments in that setting instantly by rotating the mode dial to the two MR positions, labeled 1 and 2.
Because Sony elected to list the Recall entry before the Memory entry, it’s easy to get their purpose mixed up. If you have not stored any settings, this Recall entry will be grayed out and unavailable. The order in which to use each of the menu entries is this:
- Recall (this entry). Use this to load settings from a register into your camera’s 1 and 2 memory dial positions. You must have the mode dial set to the 1 or 2 position to do this. You can then replace the values in the mode dial’s current position with any of four other settings (labeled M1, M2, M3, and M4) stored on your memory card. I’ll explain how to save those other four sets in the next section.
Sony throws you a curve ball in its naming of the various Recall components. It uses numerals for both the MR positions on the mode dial (1 and 2), and for the separate memory “slots” on your memory card (M1, M2, M3, M4). They probably should have named the latter A1, A2, A3, and A4. Just keep in mind:
- Mode Dial Positions. These are numbered 1 and 2, and represent the internal memory registers in the a6600 camera itself. You access the settings stored in those registers by rotating the mode dial to the 1 or 2 position.
- Memory Card Registers. These are numbered M1, M2, M3, and M4, and represent individual settings stored on the memory card. To use any of them, simply copy one of them to Mode Dial Position 1 or 2. If you remove the memory on which they are stored, they are no longer available.
- Memory. This menu entry (which probably should have been named Memory Store) is used to store sets of settings for later recall. To register the camera’s current settings, the mode dial must be in a position other than MR. It should be rotated to the shooting mode you want to be saved in the memory register along with the desired f/stop, shutter speed, and other camera settings.
I’ll explain recalling settings here, and show you how to store them under the next menu entry, Memory.
This item is a powerful and useful tool. It enables you to recall almost all the settings that you use for a particular shooting situation, and transfer them into one of the two mode dial memory positions. This function lets you retrieve any of four distinct collections of camera settings. Each will be a custom-crafted set that you can activate at any time. Simply activate the set that fits your current needs. For example, you might set up Register 1 with the settings you use while shooting volleyball in an indoor arena, and Register 2 for use in landscape photography outdoors. Whenever you encounter any of those types of scenes, activate the memory register (1 or 2) with the suitable settings for that situation by rotating the mode dial to 1 or 2. You can then begin shooting immediately.
Remember that the camera itself has two memory registers (1 and 2), plus four additional memory settings, numbered M1, M2, M3, and M4, which are stored on the memory card currently in the camera. You can load the M1, M2, M3, or M4 settings into the 1 or 2 positions. If you switch memory cards, you can access four more! Remove your card (or reformat it), and those extra four settings are lost! (Smart move, Sony.)
SETTINGS LIBRARY
You can keep separate memory cards for each type of photography you like to do, and store M1, M2, M3, and M4 settings on each of them. But remember when you reformat the card, those settings are lost. Bonus feature: settings stored on a card can also be recalled on any other a6600 you (or a friend/colleague) happen to own, so you can share your settings, if you like, by exchanging memory cards.
To recall settings previously stored on your memory card using the Memory command (described next), just follow these steps:
- 1. Rotate the mode dial to the 1 or 2 position. If you’ve stored and used these memory registers before, you can immediately begin shooting with the settings stored in the selected “slot.” To change to different settings, continue with the next step.
- 2. Access the Memory Recall screen. A screen like the one shown in Figure 3.9, left, appears when you first rotate to the 1 or 2 position. This Recall screen will appear automatically.
- 3. Evaluate your stored settings. The currently active register (in this case, Register 1 in Figure 3.9, left) will be highlighted in orange. The screen shows the current settings in that register. You can press the down button to scroll through the list of additional settings that are now stored in that memory slot. If you’re satisfied with the current settings, you can press Enter to exit, and begin using those settings.
- 4. Load different settings. Use the left/right directional buttons to cycle among 1 and 2 (registers stored in your camera represented by the 1 and 2 positions on the mode dial) or to continue to M1, M2, M3, or M4 (the registers stored on your current memory card). You can only activate sets of settings that have previously been stored.
- 5. Check available settings. As M1 to M4 are highlighted, the current settings stored in those positions will be displayed. If you have stored settings, they will replace the ones currently shown on your screen. If nothing has been saved for a particular register, the message No File will be displayed instead.
- 6. Load settings from card. When you have highlighted settings you would like to use, press the center button. That collection of settings will be loaded into the current mode dial position (1 or 2).
- 7. Exit. Once you’ve pressed the center button to confirm your choice, the camera will automatically exit and return to shooting mode. Your new settings are now active in the camera for that mode dial position.
Memory
Options: Store settings
Default: None
My preference: N/A
This entry, which you can think of as Memory Store (the opposite of Recall) allows you to store your camera’s current settings in registers 1 or 2 on your camera, or deposit them into the M1, M2, M3, or M4 positions on your memory card.
The power of the Memory feature stems from the fact that so many shooting settings can be saved for instant recall in any memory register. Before you access this Memory item in the menu, with the mode dial in any position other than MR, make the desired settings in terms of camera operating mode, drive mode, ISO, white balance, exposure compensation, metering mode, and focus mode.
Then, to save your current settings on your memory card in one of the M1, M2, M3, or M4 slots, just follow these steps:
- 1. Set up your camera. Set your camera to the shooting mode, and adjust the camera to use the settings you’d like to store. The register can preserve shooting mode, aperture, shutter speed, and settings from the Camera Settings I menu. If you decided that you wanted to configure your camera for indoor volleyball, an arena using settings that have worked for you before, you might set Fluorescent White Balance, +2/3 exposure compensation, ISO 1600, Continuous AF and Drive mode, Wide Area AF, the Vivid Creative Style, and Large/Fine JPEG.
Reminder: Your mode dial should not be set to the Memory 1 or 2 position. Use the P, S, A, or M position you want to save/retrieve.
- 2. Navigate to the Memory entry. Select the Memory entry in the Camera Settings I-03 menu, and press the center button. A screen like the one shown in Figure 3.9, right, appears.
- 3. Review settings. Use the up/down buttons to scroll through the current settings to make sure they are satisfactory. A great deal more information is available than is shown in the figure (note the scroll bar at right). You can press the up/down buttons to view additional screens with detailed listings of your current settings. Exit and change desired settings, then start again at Step 2.
- 4. Choose Register. Press the left/right buttons to select which of the memory locations you’d like to store your current settings in.
- If you choose 1 or 2, the settings will be loaded into the camera’s memory and will be available regardless of which memory card is in the camera.
- If you choose M1, M2, M3, or M4, the settings will be stored on the memory card and will be available only when that memory card resides in the camera.
- 5. Proceed or cancel. Press the center button to confirm and store your settings, or the MENU button to cancel.
- 6. Activate register. To use your stored settings, rotate the mode dial to the MR position, and follow the instructions listed under Recall, above.
Figure 3.9 Recall settings stored on your memory card (left). Store settings in the 1 or 2 registers in the camera, or as M1, M2, M3, or M4 on your memory card (right).
Register Custom Shooting Set
Options: Recall Custom Hold 1, 2, or 3
Default: Custom Hold 1
My preference: N/A
This entry is the only listing on the Camera Settings I-04 page (and not illustrated in a figure). The function is an expansion of the Memory feature and available when using P, A, S, and M exposure modes. It allows storing sets of settings for temporary recall at the press of a custom key, and lets you choose to store some settings and ignore others. You can register three groups of settings but can assign only one at a time to your defined key. The Custom Shooting set is active only while you are holding down the defined key; when you release it the a6600 returns to its previous settings. You might want to use this feature to switch quickly and temporarily from one set of registered settings to another. Perhaps you’re shooting landscapes and unexpectedly spy a rare raptor swooping by. If you’ve registered a set of parameters for “birds in flight” you can press your custom button, capture the bird, then release it and continue with your landscape shooting.
There are three available slots (Recall Custom Hold 1–3) and you can assign each of the three to a different button, giving you three settings available at the press of a defined button, two settings available from the 1 and 2 physical mode dial positions, and four settings stored as M1 to M4 on your current memory card. Here’s how to use this feature, which is available only when P, A, S, and M modes are active:
- 1. Access this setting from the Camera Settings I-04 (Shoot Mode/Drive 2) menu. The screen shown in Figure 3.10, left, appears.
- 2. Choose registration number in which to store your settings. Select from Custom Hold 1 to Custom Hold 3.
- 3. Check current settings. You can view the current settings of the camera. Only the settings that can be registered are shown. Use the up/down controls to scroll.
- 4. Adjust or disable settings. There are two columns in the settings display: Enabled/Disabled (represented by a checked/unchecked box) and setting name/and current setting. (See Figure 3.10, center.) The left/right controls switch you from the Enable/Disable column to the Setting Name/Setting column.
- 5. To disable registration of a setting. Highlight the left column of a setting listing and press the center button to add/remove the checkmark.

Figure 3.10 Select a Custom Hold register number (left). Review settings (center). Import settings (right).
- 6. To change a setting. Highlight the right column of a setting listing and press the center button. A screen will appear with the available options. For example, for Shoot Mode you can switch from the current mode to Program Auto, Aperture Priority, Shutter Priority, or Manual exposure.
- 7. Store settings. Scroll down to the bottom of the screen and highlight Import Current Setting. Press the center button. The screen shown in Figure 3.10, right, appears.
- 8. Register additional numbers. Highlight Register to return to the screen seen in Figure 3.10, left, to register additional groups of settings.
- 9. Assign a Custom Key. To use this feature, you must assign a button to the Recall Custom Hold x (1, 2, or 3) behavior. Use the Custom Key entry in the Camera Settings II-08 (Custom Operation 1) menu, which I’ll describe in Chapter 4. Note that you can define settings for all three Custom Hold registration numbers and can define separate buttons for each one. That means you can instantly (and temporarily) recall three additional sets of memory settings using custom keys, if you can spare that many from other duties.
- 10. Use Custom Shooting Set. Press the defined key to activate the Custom Hold settings assigned to that key, then press the shutter release down all the way to take a picture using those settings. When you release the custom key, your a6600 will return to its previous settings.
Focus Mode
Options: Single-shot AF (AF-S), Automatic AF (AF-A), Continuous AF (AF-C), DMF (Direct Manual Focus), MF (Manual Focus)
Default: Single-shot AF (AF-S)
My preference: Automatic AF (AF-A)
This menu item is the first in the Camera Settings I-05 (AF 1) menu (see Figure 3.11). This menu item can be used to set the way in which the camera focuses. I’ll discuss focus options in detail in Chapter 8.
Figure 3.11 The Camera Settings I-05 (AF 1) menu.
- Single-shot AF (AF-S). With this default setting, the camera will set focus and it will keep that focus locked as long as you maintain slight pressure on the shutter release button, as discussed in the previous section; even if the subject moves before you take the photo, the focus will stay where it was set. If you use this setting for still photos and then switch to Movie mode, the camera switches temporarily to AF-C.
- Automatic AF (AF-A). Begins to focus using AF-S but will switch to continuous autofocus (AF-C) if your subject is moving. This is a good all-purpose setting when you aren’t sure whether your subject will suddenly begin moving around as you shoot.
- Continuous AF (AF-C). The camera will continue to adjust the focus if the camera-to-subject distance changes, as when a cyclist approaches your shooting position. The camera will constantly adjust focus to keep the subject sharply rendered. It uses predictive AF to predict the moving subject’s position at the time you’ll take the next shot and focusing at that distance. This option is useful when you’re photographing sports, active children, animals, or other moving subjects, making it possible to get a series of sharply focused shots.
- Direct Manual Focus (DMF). Press the shutter button halfway down to let the camera start the focusing process; then, keeping the button pressed halfway, turn the focusing ring to fine-tune the focus manually. You might want to use DMF when you are focusing from a short distance on a small object and want to make sure the focus point is exactly where you want it. If you use this setting for still photos and then switch to Movie mode, the camera switches temporarily to AF-C.
- Manual Focus (MF). If you select Manual Focus, you turn the focusing ring on the lens to achieve the sharpest possible focus. With both DMF and Manual Focus, the camera will show you an enlarged image to help with the focusing process, if you have the MF Assist option turned on in the Camera Settings I-13 (Focus Assist) menu (described later).
Priority Set in AF-S/Priority Set in AF-C
Options: AF, Release, Balanced Emphasis
Default: Balanced Emphasis
My preference: Release
These are two separate entries, one for AF-S and one for AF-C autofocus, but functionally they are identical, differing only in the autofocus mode they are applied to. It makes sense to describe them together.
This feature lets you specify whether the camera waits to actually take the picture until it has achieved sharp focus (when using an autofocus mode, not manual focus mode); whether it takes the picture immediately, even if sharp focus is not guaranteed; or using a balanced approach somewhere between the two. For most kinds of candid photography, sports, or photojournalism, most of us would rather get the shot rather than lose a fleeting moment, and so Release is often your best choice. If you have a little more time, and the shot won’t be affected by a short delay (perhaps half a second, on average), Balanced Emphasis, the default, will do the job. If you’re looking for the best sharpness your camera can provide, the AF choice might be your best option. The choices are as follows:
- AF. The shutter is not activated until sharp focus is achieved. This is best for subjects that are not moving rapidly.
- AF-S. When using AF-S, most prefer to set this to AF, because in this focus mode the subject is usually not moving rapidly, and it makes sense to allow a slight extra delay to get the best focus possible. However, I find that with the a6600, when equipped with a lens having a built-in focus motor, in combination with the hybrid AF system, focus is fast enough that I can choose Release instead. If your camera/lens combination is slower to focus, you’ll want to stick with the AF setting.
- AF-C. When working in AF-C focus mode, if you select AF, the a6600 will continue to track your subjects’ movement, but the camera won’t take a picture until focus is locked in. An indicator in the viewing screen will flash green until focus can be achieved. You might miss a few shots, but you will have fewer out-of-focus images. Sports shooters probably won’t choose AF priority for AF-C. Instead, they’ll select release priority, discussed next.
- Release. When this option is selected, the shutter is activated when the release button is pushed down all the way, even if sharp focus has not yet been achieved. As I noted, I prefer this option for AF-C mode, as Continuous Focus focuses and refocuses constantly when autofocus is active, and even though an image may not quite be in sharpest focus, at least I got the shot. Use this option when taking a picture is more important than absolute best focus, such as fast action or photojournalism applications. (You don’t want to miss that record-setting home run, or the protestor’s pie smashing into the governor’s face.) Using this setting doesn’t mean that your image won’t be sharply focused; it just means that you’ll get a picture even if autofocusing isn’t quite complete. If you’ve been poised with the shutter release pressed halfway, the camera probably has been tracking the focus of your image.
- Balanced Emphasis. In this mode, the shutter is released when the button is pressed, with a slight pause if autofocus has not yet been achieved. It can be selected for both AF-S and AF-C modes and is probably your best choice if you want a good compromise between speed of activation and sharpest focus. However, you would not want to use this setting if the highest possible continuous shooting rates are important to you.
Focus Area
Options: Wide, Zone, Center, Flexible Spot, Expand Flexible Spot, Tracking
Default: Wide
My preference: Wide for general use; Tracking Wide for sports and action
When the camera is set to Autofocus, use this menu option to specify where in the frame the camera will focus when you compose a scene in still photo mode, using the focus area selection you specify. I’ll explain these options, the special requirements, and include illustrations of the focusing areas in Chapter 8.
- Wide. The camera uses its own electronic intelligence to determine what part of the scene should be in sharpest focus, providing automatic focus point selection. A green frame is displayed around the area that is in focus. Even if you set one of the other options, Wide is automatically selected in certain shooting modes, including both Auto and all SCN modes.
- Zone. Select one of nine focus areas (described in Chapter 9), and the camera chooses which section of that zone to use to calculate sharp focus. You can move the focus zone with the directional buttons.
- Center. Choose this option if you want the camera to always focus on the subject in the center of the frame. Center the primary subject (like a friend’s face in a wide-angle landscape composition); allow the camera to focus on it; maintain slight pressure on the shutter release button to keep focus locked; and re-frame the scene for a more effective, off-center, composition. Take the photo at any time and your friend (who is now off-center) will be in the sharpest focus. Use this option instead of manually selecting a focus point to quickly lock focus on the center of the frame, then press the defined AF lock button to fix the focus at that point so you can recompose the image as you prefer.
- Flexible Spot. This mode allows you to move the camera’s focus detection point (focus area) around the scene to any one of multiple locations using the directional controls. When this option is highlighted, use the left/right directional buttons or control wheel to change the size range of the spot among Small (S), Medium (M), and Large (L).
This mode can be useful when the camera is mounted on a tripod and you’ll be taking photos of the same scene for a long time, while the light is changing, for example. Move the focus area to cover the most important subject, and it will always focus on that point when you later take a photo.
- Expand Flexible Spot. If the camera is unable to lock in focus using the selected focus point, it will also use the eight adjacent points to try to achieve focus. You can move the spot using the directional controls.
- Tracking. In this mode, the camera locks focus onto the subject area that is under the selected focus spot when the shutter button is depressed halfway. Then, if the subject moves (or you change the framing in the camera), the camera will continue to refocus on that subject. You can select this mode only when the focus mode is set to Continuous AF (AF-C). Note that Tracking is different from Center Tracking, discussed in this chapter, and in more detail in Chapter 8.
This option is especially powerful because you can activate it for any of the five focus area options described above. That is, once you’ve highlighted Tracking on the selection screen, you can then press the left or right directional button and choose Wide, Zone, Center, Flexible Spot, or Expand Flexible Spot.
Focus Area Limit
Options: Wide, Zone, Center, Flexible Spot (Small, Medium, Large), Expand Flexible Spot, Tracking
Default: All available
My preference: Deactivate little-used focus area choices
Experiencing too much of a good thing? This entry allows you to deactivate focus options that you rarely (or never) use, so that they don’t appear when you select a focus area using the Focus Area entry (above), or use the Function menu’s Focus Area option. Only the choices you enable will be shown; the others will be grayed out.
When you select this entry, the screen shown in Figure 3.12 appears. The check marks above each focus area indicate that that option is available. To disable/enable a particular focus area choice, highlight it using the directional buttons and press the center button to remove/add the check mark. The top row shows the non-tracking options (left to right): Wide, Zone, Center, Flexible Spot (Small), Flexible Spot (Medium), Flexible Spot (Large), and Expand Flexible Spot. The bottom row includes the Tracking counterparts of the exact same choices.
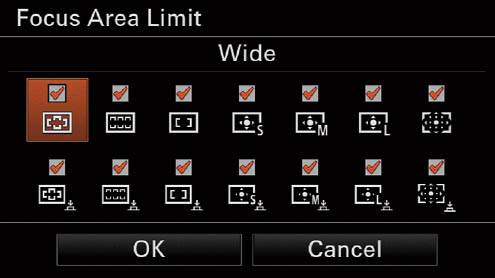
Figure 3.12 Focus Area Limit options.
That configuration gives you a great deal of flexibility. You can have one set of focus areas enabled for general use, and choose a different set when using the a6600’s Tracking capabilities. In my case, I use the Flexible Spot (Small) focus area frequently, but disable the Medium and Large options. However, when shooting sports and action, I use Tracking almost exclusively, so I disable all the Tracking choices except for Flexible Spot (Small), (Medium), and (Large). So, all I need to do is press the Fn button, highlight Focus Area, and select Tracking. I can then switch among Small, Medium, or Large by pressing the left/right directional buttons.
But wait, there’s more! As you’ll learn in Chapter 4, you can assign the Switch Focus Area function to a Custom Key, using that entry in the Camera Settings II-08 menu. After you’ve enabled/disabled the Focus Area options to your liking, you can cycle among those that remain simply by pressing the assigned function key.
Switch Vertical/Horizontal AF Area (Stills)
Options: Off, AF Point Only, AF Point+AF Area
Default: Off
My preference: Depends on subject
Here you can choose whether the Focus Area mode and the location of the focusing area within the frame adjusts when you change the camera’s orientation from horizontal to vertical. It’s especially useful when you want to change orientation frequently for the same type of subject matter. For example, when I am photographing family and individual portraits I might shoot one set of images with the camera held horizontally to capture several members of a group, then rotate to use a vertical frame to capture a head-and-shoulders image of an individual. Many sports, such as basketball, involve the same sort of adjustment—a horizontal photo showing two or three players fighting for the ball, followed by a vertically oriented picture of a pair of roundballers going after a rebound off the boards.
Here are some things to consider:
- You can/must set the Focus Area mode and/or focus point for each orientation individually. That is, you must choose a Focus Area mode/focus point for horizontal orientation, then shift to each of the two vertical orientations and select a different location for either/both. If you don’t specify a new location, the Focus Area and focus point remain where they were.
- Only three orientations available. They are horizontal, rotated 90 degrees clockwise with the shutter release on the lower half of the camera, and rotated 90 degrees from horizontal with the shutter release on the upper half of the camera. The horizontal/upside down orientation is the same as the conventional horizontal orientation. When the camera is pointed straight up (toward the sky) or straight down (toward your feet), the a6600 has no idea about how it is otherwise oriented.
- AF Area Mode/Focus Point Switching Disabled. Changes in orientation are ignored if you are using Intelligent Auto, Movie, or S&Q Motion shooting modes. The feature is also disabled if you press the shutter halfway down (and then change orientations), during autofocus, continuous shooting, self-timer countdown, or Focus Settings adjustments. Using the Focus Magnifier also disables the feature.
You have three options for this feature:
- Off. The Focus Area mode and Focus Point (Frame) remain the same regardless of camera orientation. If you’ve selected a particular Focus Area mode and you’ve placed the focus at the lower-left area of the frame when shooting horizontally (as seen in Figure 3.13, top center), it will remain in the equivalent position when you rotate the a6600 90 degrees counterclockwise (Figure 3.13, top left), or 90 degrees clockwise. (See Figure 3.13, top right.)
- AF Point Only. The Focus Area mode remains the same while the Focus Point adjusts to the position you have specified for each camera orientation. The center row in Figure 3.13 shows different focus points for each of the three orientations.
- AF Point+AF Area. Both the Focus Area mode and Focus Point adjust, so you can use a different Focus Area mode for each orientation. The bottom row shows different AF point locations and AF areas in each orientation. (See Figure 3.13, bottom row.)
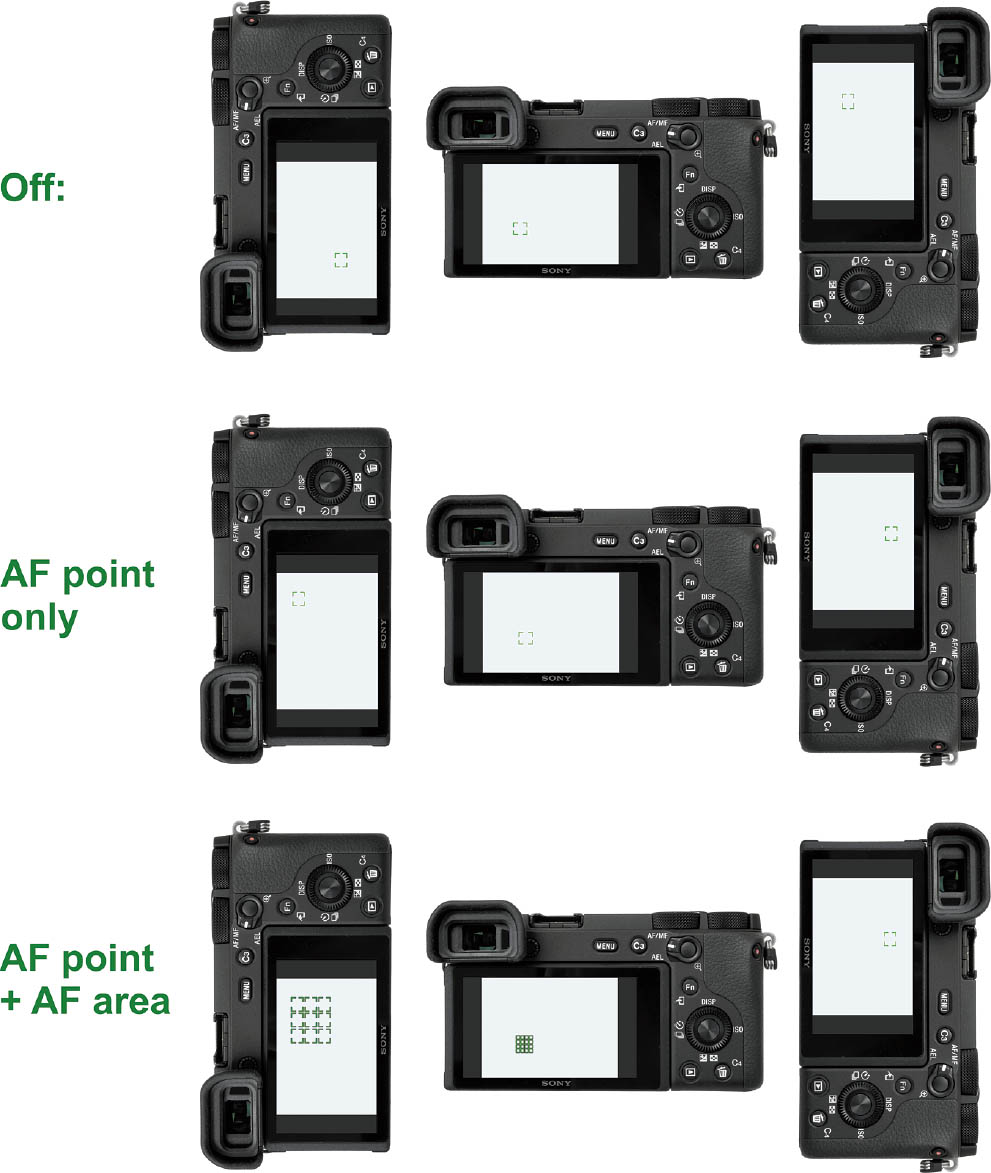
Figure 3.13 When the feature is turned off, the focus points remain in the same relative position as the camera is rotated (Top). When switching is enabled, you can position the focus points in different locations within the frame for each of the three orientations (Center). You can also optionally specify a different Focus Area mode for each presentation (Bottom).
AF Illuminator (Stills)
Options: Auto, Off
Default: Auto
My preference: Auto
This is the first entry in the Camera Settings I-06 menu. (See Figure 3.14.) The AF illuminator is a light activated when there is insufficient light for the camera’s autofocus mechanism to zero in on the subject. This light emanates from the same lamp on the front of the camera that provides the indicator for the self-timer. The extra blast from the AF illuminator provides a bright target for the AF system to help the camera set focus for subjects roughly no farther away than 10 feet. When you’re shooting in environments so dark that conventional focusing is difficult, the a6600 will ignore the focus area you’ve specified and instead focus on whatever the AF assist lamp is able to illuminate. This menu item is a still-photos-only option, as the illuminator does not operate while shooting conventional or Slow & Quick motion movies.
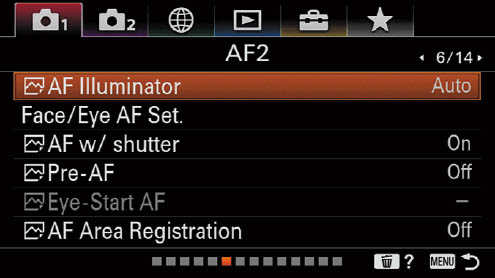
Figure 3.14 Camera Settings I-06 (AF 2) menu
The default setting, Auto, allows the AF illuminator to work any time the camera judges that it is necessary. Turn it off when you would prefer not to use this feature, such as when you don’t want to disturb the people around you or call attention to your photographic endeavors. The AF illuminator doesn’t work when the camera is set for manual focus or when using AF-C or AF-A while the subject is moving. It is also disabled when using the Focus Magnifier, or one of the EA-LA adapters (which allow using A-mount lenses on the a6600).
![]()
NOTE Some Sony flash units (currently only the HVL-F45RM) include a white LED video light that the a6600 will use as an AF illuminator lamp if the flash is mounted on the camera and powered up.
Face/Eye AF Settings
Options: Face/Eye Priority in AF: On, Off; Subject Detection: Human/Animal; Right/Left Eye Select: Right, Left, Auto; Face Detect Frame Display: On, Off; Animal Eye Display: On, Off
Default: Face/Eye Priority in AF: On; Subject Detection: Human; Right/Left Eye Select: Auto; Face Detect Frame Display: On; Animal Eye Display: On
My preference: I use the defaults; this feature rocks!
When you’re photographing people, the a6600 can optionally look for faces and can base its autofocus decisions on the faces it locates. Even better, you can give certain countenances a higher priority than others by registering them with the camera, so, say, if your significant other is ensconced in the frame, the camera will favor that person as its AF focus (so to speak) over other humans in the frame. Further, the camera can locate human or animal eyes within your frame, and focus on them. Face/Eye detection can’t be used with digital zoom, the Focus Magnifier, the Posterization Picture Effect, Landscape/Night Scene/Sunset Scene modes, 120p/100p movies, or 120 fps/100 fps Slow & Quick Motion video. The Eye AF feature is unavailable when capturing all movies and Slow & Quick Motion clips.
Using this entry, you have the following choices (see Figure 3.15, left):
- Face/Eye Priority in AF. Choose On and the a6600 can give a higher priority to detected faces. Select Off and AF will proceed without looking for faces. Up to eight faces, if present, may be detected. When autofocus is activated, the camera will attempt to focus on the eyes, if they are located within the active focus area. Note that when using Superior Auto, Face/Eye Priority is locked at On. Note: Enabling Face/Eye Priority does not mean the camera will automatically focus on those areas. See the sidebar that follows.
The Eye AF portion of Face/Eye Priority AF may not function as expected with subjects which are rapidly moving, have long bangs, closed eyes, or are wearing sunglasses. Shady conditions, backlight, and low-light situations can also hinder eye detection.
- Subject Detection. When set to Human, the camera looks for human faces and eyes. If you choose Animal instead, it looks for animal eyes only; apparently creatures’ faces are too varied to detect reliably.
- Right/Left Eye Select. Chooses whether to detect the left or right eye of the subject. Note that this feature uses the subject’s eye, which may be on the opposite side from your perspective (that is, your subject’s right eye is on the left side of your frame). (See Figure 3.15, right.)
- Face Detection Frame Display. The camera automatically shows a small white square around a human eye it is focusing on, and that frame will turn green when the subject is in focus. But you can also enable a frame around entire faces with this option. (If you want the frames to display, but disappear after a time, use AF Area Auto Clear, described later in this chapter.)
Although the eye-focus box is helpful, I find the additional box around the face very useful and leave it on at all times so I know exactly what face(s) have been detected. When enabled, a gray selection box appears around detected faces. The box around the face used for autofocus turns white. If there are several faces in the frame and you’ve registered and prioritized some or all of them, the boxes around the other faces turn reddish-purple. (I’ll show you how to register faces later in this chapter.) If you find the boxes distracting, you can turn them off, and face detection, if enabled, as described earlier, will still be active.
- Animal Eye Display. Again, animal faces are not detected, but you can choose to have the camera place a frame around their eyes when they are found.
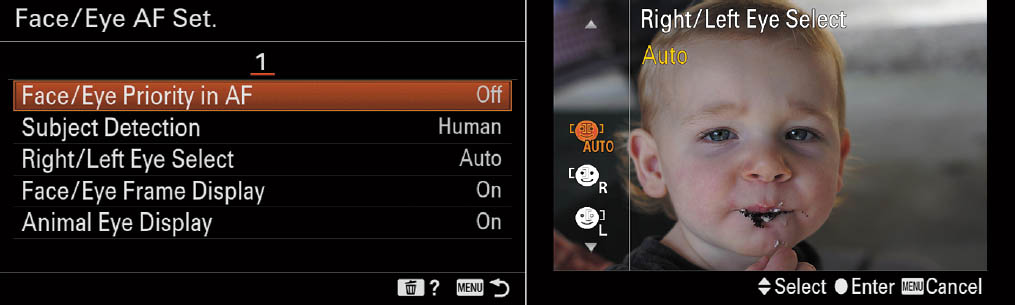
Figure 3.15 Face/Eye AF Settings (left); Choose Right Eye, Left Eye, or Auto selection (right).
For some unknown reason, Sony has thrown you a curve ball with this feature. Activating Face/Eye Priority in Autofocus means that your a6600 will detect faces and eyes, but doesn’t guarantee that it will automatically focus on them! The difference is so subtle, you may not notice. What actually happens is that when detection is enabled, the camera will prioritize focus on the face/eye it has found if that face or eye is within the Focus Area you are using. So, if you’re using the Center focus area and your human subject happens to reside outside that area, the camera will helpfully detect a face/eye and display a frame around it, but will focus only on whatever is actually within the focus area.
You might not realize this, particularly if the actual subject you have focused on is located near to, but slightly in front of or behind, a human. Further, most of our “people” shots have the person in the center of the frame, and, with some focus modes (such as Wide), the focus area is so large that your human may actually be in an appropriate location, anyway. You should be aware of this distinction.
You can guarantee, at least, that Eye AF will be used, regardless of your selected Focus Area, by defining Eye AF to a Custom Key, as described next.
Customizing Eye AF
You can customize the eye detection component (Eye AF) of the feature by assigning a custom key to one of these two behaviors, or a different key to each of them. I’ll show you how to set up custom keys in Chapter 4.
- Activate Eye AF with Custom Key. The Eye AF function can be assigned to a key, and the a6600 will detect and focus on the eye as long as you are holding down the custom key. The camera will search for human eyes within the entire frame, regardless of the Focus Area you’ve selected. Press the shutter release down all the way while holding the key to take the picture. This fixes the potential problem I described in the sidebar above. It also means that if you have a preferred Focus Area setting for a particular shooting session, you don’t have to switch to another in order to make Eye AF function properly.
- Switch Eyes with Custom Key. If your subjects are always facing you, then setting Right/Left Eye Select to Auto may be your best bet. That’s because if you apply the Switch Right/Left Eye behavior to a custom key, should you not like the camera’s eye selection, press and hold the defined key to temporarily switch focus to the other eye. Moreover, if you’ve told the a6600 to always choose the Left (or Right) eye, you can switch to the alternate by pressing the key.
AF with Shutter (Stills)
Options: On/Off
Default: On
My preference: N/A
As you know, a gentle touch on the shutter release button causes the camera to begin focusing when using an autofocus mode. There may be some situations in which you prefer that the camera not re-focus every time you touch the shutter release button, such as when you want to work with back-button focus, which I’ll explain in detail in Chapter 8.
Let’s say you are taking multiple pictures in a laboratory or studio with the subject at the same distance; you have no need to refocus constantly, and there is no need to put an extra burden on the autofocus mechanism and on the battery. But, you don’t want to switch to manual focus. Instead, you can set AF w/Shutter to Off. From then on, the camera will never begin to autofocus, or to change the focus when the shutter release is pressed. You can still initiate autofocus by pressing a key that you’ve assigned the AF-On function (as I’ll describe later under Custom Keys). The defined AF-On button will start autofocus at any point, independent of the shutter release. Pressing the shutter release still locks exposure, unless you’ve disabled that function, too, using the AEL w/Shutter entry in the Camera Settings I-09 (Exposure 2) entry discussed later in this chapter.
Pre-AF (Stills)
Options: Off, On
Default: Off
My preference: N/A
It tells the camera to attempt to adjust the focus even before you press the shutter button halfway, giving you a head start that’s useful for grab shots. When an image you want to capture appears, you can press the shutter release and take the picture a bit more quickly. However, this pre-focus process uses a lot of juice, depleting your battery more quickly, which is why it is turned off by default. Reserve it for short-term use during quickly unfolding situations where the slight advantage can be useful.
In my tests with the a6600 and various lenses, Pre-AF can be a little slow to respond sometimes, but it does work with all autofocus modes and E-mount optics. If you find Pre-AF to be sluggish, say, under low-light conditions, just press the shutter release halfway to commence autofocus manually.
Eye-Start AF (Stills)
Options: On, Off
Default: Off
My preference: Off
This feature is available only when using the EA-LA2 or EA-LA4 adapters and a compatible A-mount lens. These two adapters are the counterparts to the LA1/LA3 (APS-C/Full frame) to allow using A-mount lenses on E-mount cameras like the a6600. However, unlike the odd-numbered versions, they contain their own semi-translucent mirror phase detect autofocus systems similar to those used in cameras like the Sony a77 II or a99 II. Both adapters include an autofocus motor built-in, so you can use A-mount lenses that do not have built-in motors.
When Eye-Start AF is turned On, the camera will start autofocusing the instant you move the viewfinder to your eye. The display on the LCD vanishes, the camera adjusts autofocus, and, if you’re using any Shooting mode other than Manual exposure, it sets the shutter speed and/or aperture so you’re ready to take the shot. You don’t even need to touch the shutter release button or another button to summon autofocus. Of course, it’s not magic. There is a sensor just above the viewfinder window that detects when your face (or anything else) approaches the finder.
This is useful because it increases the odds of capturing a fleeting moment. On the other hand, some people find this feature annoying. When it’s On, the camera will begin to autofocus every time a stray hand or other object passes near the viewfinder. Also, if you’re wearing the camera around your neck, you may hear a continuous clicking as the camera rubs against your body, triggering the focusing mechanism. When this happens often, it will consume a significant amount of battery power.
After experimenting with this feature, you may decide to turn Eye-Start AF off. After you do so, when using the a6600 with the LA2/LA4 adapters, it reverts to its boring old behavior of not initiating focus until you partially depress the shutter button (or another defined button). Naturally, the electronic viewfinder will still activate when your eye (or anything else) is near the sensors (if the FINDER/MONITOR setting, described in Chapter 4, is set to Auto). But you won’t get autofocus until you’re certain you want AF to start.
AF Area Registration (Stills)
Options: Off, On
Default: Off
My preference: On
This is an absolute killer feature for sports photographers, as it allows you to switch from your current focus point to a pre-registered point—and then back to your original point—just by pressing a custom key. Say you’re covering a baseball game and frequently alternate between photographing the batter or some other position and first base, where a lot of action takes place. If you’ve registered first base (as I’ll describe shortly), you’re free to focus elsewhere and then, when the batter makes contact and begins running toward first (or the pitcher decides to throw to first to cut off a base runner who’s taken a lead), you can press the defined key and the focus point will instantly move back to the registered first base location within the frame.
To use this feature, just follow these steps:
- 1. Activate AF Area Registration. Navigate to this menu entry and choose On, then press the center button to confirm. A message will appear reminding you to register a specific focus area. I’ll explain how to do that shortly. Press the center button again to exit to the menu.
- 2. Access Custom Keys (Stills). To relocate the focus point to a registered position, you’ll need to define a custom button to do that. Access the Camera Settings II-08 (Custom Operations 1) menu and select the Custom Key (Stills) entry at the top of the list.
- 3. Define a custom button. Select an unused custom button to use and press the center button to view the behavior choices available. Several pages listing available functions can be displayed, and then correspond to menu pages. Use the left/right buttons to scroll to the AF2 page within the definition screens for your selected key and choose how you want to enable the switch to the registered autofocus point. The three relevant options are as follows:
- Registered AF Area Hold. Pressing the button switches to the registered location only while you hold the button down. When you release the custom key the focus point returns to your previous focus point. This option is useful if you want to be able to switch to the registered area only temporarily. If you find it awkward to manipulate two buttons at once (holding down your custom key, plus pressing the shutter release to take the picture), you may be better off switching back and forth using the toggle option described next.
- Registered AF Area Toggle. Press and release the button to switch to the registered location and press it a second time to return to your previous focus point. Use this if you think you’ll need to take several consecutive images using the registered point. Toggle is the only available option for the left, right, and down keys.
- Registered AF Area+AF On. When the custom key is pressed the focus point switches to the registered area and autofocus is initiated. When you release the custom key, the focus point returns to its previous location. If you’ve registered first base you can then move the focus point to home plate and continue to capture the batter’s efforts. Then, if action unfolds at first base, press the defined button and the a6600 will switch to your registered focus point and focus. You can then continue to hold the key while pressing the shutter release down to take the picture. Release the button and the focus point returns to home plate. (You can avoid the need to hold down the button if you’re using back-button focus, which decouples the AF activation feature from the shutter release.) This sounds complicated if you don’t know how back-button focus works, but I’ll explain it in more detail in Chapter 8.
- 4. Registered focus frame appears. When the defined custom key is pressed, the focus frame and points will flash in the viewfinder and on the LCD monitor.
AF Area Registration cannot be used when shooting movies or S&Q video, when using digital zoom, tracking, while focus is locked, or when you are focusing using the lens’s focus ring or the a6600’s Touch Focus feature.
Delete Registered AF Area (Stills)
Options: Delete, Cancel
Default: Cancel
My preference: N/A
This is the first entry in the Camera Settings I-07 (AF 3) menu (see Figure 3.16). Use this to delete a registered focus area. That prevents the camera from shifting to the previously defined area if you accidentally press the defined custom key.
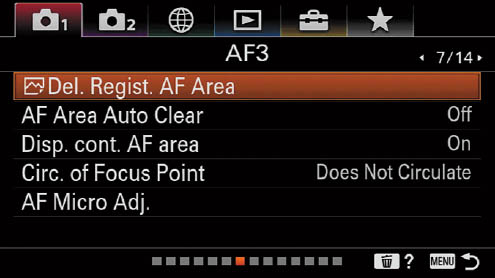
Figure 3.16 Camera Settings II-07 (AF 3) menu.
AF Area Auto Clear
Options: Off, On
Default: Off
My preference: Off
This setting controls whether the focus area is shown all the time as you shoot, or whether it disappears a short time after focus is achieved. Choose On if you prefer having an uncluttered screen while you shoot. I prefer to have focus information available at all times, so I leave this setting at its default Off value.
Display Continuous AF Area
Options: On, Off
Default: On
My preference: On
This item determines whether the previewing display on the monitor or EVF shows the active Wide or Zone focus areas when you’re using Continuous AF. It has no effect on their display if you’re using Center or Flexible Spot in Continuous AF area modes, or autofocus modes other than AF-C.
Sometimes too much information can be distracting. That’s especially true in AF-C mode, because if you’ve framed a moving subject, the camera can continue to change the active focus areas if your subject is moving. In Wide mode, you may be treated to a dancing array of green rectangles squirming around on your screen as the a6600 focuses and refocuses in anticipation of you eventually pressing the shutter release all the way down and taking a picture. I think that the constantly shifting focus requires less continual feedback about what focus areas are being used, so you may want to switch the feature off. In my case, I don’t mind the display, and I tend to leave it on most of the time, even though it consumes a little more battery power.
Circulation of Focus Point
Options: Does Not Circulate, Circulate
Default: Does Not Circulate
My preference: N/A
This setting simply determines whether you can only move the focus point within the image frame, or whether, when it reaches the left, right, top, or bottom edges it wraps around to the opposite side. Unless you played too much Pac-Man in your youth, you will probably prefer Does Not Circulate.
AF Micro Adjustment
Options: AF Adjustment Setting, Amount, Clear
Default: None
My preference: N/A
If you’ve sprung for the $300 to $400 (in the US) required to purchase the optional LA-EA2 or LA-EA4 mount adapters and are using A-mount lenses on your a6600, you may find that some slight autofocus adjustment is necessary to fine-tune your lens. Note: I have noticed that my LA-EA adapters fit quite snuggly on my a6600, a much tighter fit than on some of my previous Sony cameras. It sometimes requires a bit of effort to attach the adapter until it clicks, but I want to remind you that under no circumstances should you try to force the connection. It may be possible that slight tolerance differences have made your adapter and your camera not the best match. Seek help from Sony if you have a problem mounting an adapter—or any Sony lens to your a6600.
This menu item allows choosing a value from –20 (to focus closer to the camera) to +20 (to change the focus point to farther away). You can enable/disable the feature, and clear the value set for each lens. The camera stores the value you dial in for the lens currently mounted on the camera and can log up to 30 different lenses (but each lens must be different; you can’t register two copies of the same lens). Once you’ve “used up” the available slots, you’ll need to mount a lesser-used lens and clear the value for that lens to free up a memory slot. This adjustment works reliably only with Sony, Minolta, and Konica-Minolta A-mount lenses. I’ll show you how to use this feature in Chapter 12.
A-MOUNT ADAPTERS ONLY
You’ll note that no such adjustment is supplied for E-mount lenses. That’s because the a6600 calculates focus using actual data collected at the sensor—whether operating in contrast detection or phase detection mode. Front- or back-focus issues don’t exist. The LA-EA2 and LA-EA4 adapters, on the other hand, use their separate SLT-style AF sensors, and slight alignment issues can make a difference. Sony recognizes this and has kindly provided this feature.
Exposure Compensation
Options: From +5 to –5
Default: 0.0
My preference: N/A
This is the first entry on the Camera Settings I-08 (Exposure 1) page (see Figure 3.17). It is one of three ways to specify exposure compensation:
- This menu entry. Here you can adjust EV values from +5 to –5 using the directional buttons, or by rotating the control wheel or rear dial.
- Function menu. Press the Fn button and navigate to the Exposure Compensation icon (located by default in the top row, fourth from the left). Use the same controls described above.
- Exposure Compensation (Down) button. Probably the quickest way is to elect to use the physical button and the control wheel, rear dial, and directional buttons (once the adjustment screen has appeared).
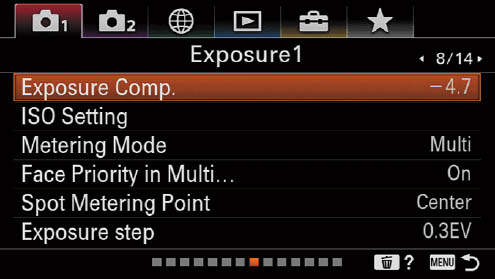
Figure 3.17 The Camera Settings I-08 (Exposure 1) menu.
Scroll until you reach the value for the amount of compensation you want to set to make your shots lighter (with positive values) or darker (with negative values). When shooting movies, only +2 to –2 values are valid. I’ll discuss exposure compensation in more detail in Chapter 9.
Remember that any compensation you set will stay in place until you change it, even if the camera has been powered off in the meantime. It’s worth developing a habit of checking your display to see if any positive or negative exposure compensation is still in effect; return to 0.0 before you start shooting. The amount is shown numerically in the EVF, and on a scale in the viewfinder.
Exposure compensation cannot be used when the camera is set to Intelligent/Superior Auto, or when using Scene modes. In Manual exposure mode, the EV settings only apply if ISO has been set to ISO Auto. The EV changes you make with the menus will be in either 1/3 or 1/2 EV increments, depending on the step size you specify in the Exposure Step entry, which I’ll explain shortly.
ISO Setting
Options: Fixed settings from 50 to 102400, plus ISO Auto, ISO Range Limits, ISO Auto Minimum Shutter Speed
Default: ISO Auto (ISO 100–12800); Range Limit: 50–102400; ISO Auto Minimum Shutter Speed: Standard
My preference: The defaults work best for general shooting, except I prefer to lower ISO Auto’s top range to ISO 3200 to avoid excessive noise.
When you select ISO Setting from the menu, a screen appears with three choices: ISO, ISO Range Limit, and ISO Auto Minimum Shutter Speed. Earlier models spread some of these choices over several top-level entries, but Sony has combined them into one for the a6600. I’ll address each of the sub-screens separately.
ISO
This menu item can also be accessed by pressing the right (ISO) button on the control wheel. It allows you to use the ISO setting (sensor sensitivity) in one of two ways:
- Multi Frame NR (Noise Reduction). The camera takes 4 or 12 shots and first aligns them (because, hand-held, there is probably some camera movement between shots) and sorts out the image pixels that are common to all the shots (and which remain more or less the same in each individual shot) from the random visual noise pixels (which will be different in each shot, because they are random). It then creates an image that (in theory) uses only the image pixels, with much less visual noise. The processing takes a few seconds, so you wouldn’t want to use it when you plan to take multiple shots within a short period of time.
To activate Multi Frame NR, highlight the entry (which is by default confusingly labeled ISO Auto, rather than Multi Frame Noise Reduction). You can then press the right button to highlight the left option at the bottom of the figure and set either ISO Auto, or select a fixed ISO sensitivity. Then press the right button and choose the amount of multi frame noise reduction to be applied (High or Standard). The camera will take and combine 12 shots if you choose High, and 4 shots if you select Standard.
Multi Frame NR can only be used when Image Quality is set to JPEG, and is unavailable when D-Range Optimizer or Auto HDR are activated. Note: the camera also offers a Hand-held Twilight scene mode, which doesn’t let you choose shutter speed, ISO setting, white balance, and other parameters, but produces comparable (or sometimes even better) images. If your image suits the automated settings of the Hand-held Twilight mode, it’s certainly faster and requires fewer decisions from you.
- ISO Auto. The Auto ISO setting is at the top of the scrolling list. When it’s highlighted, press the right button and choose a minimum ISO to be used as well as the maximum ISO applied (which prevents the camera from taking a clutch of pictures at, say, ISO 25600, unbeknownst to you). For general shooting, I use ISO 100 and ISO 3200 for my limits, as I mentioned. I sometimes lower the upper limit to ISO 1600 when I especially want to minimize noise, and raise the upper end to ISO 6400 or higher for indoor subjects (especially sports, which can benefit from faster shutter speeds and/or smaller f/stops).
- Fixed ISO settings. You can Select ISO settings from 50 to 102400, and the camera will take all its shots at that sensitivity. Strictly speaking, ISO 100 is the lowest real sensitivity the camera can produce; that’s the “native” sensitivity of the sensor. The 50/64/80 settings are “interpolated” and produce slightly higher contrast and lower quality. The a6600 places horizontal bars above and below the number for those values as a “warning.” Similarly, the same bars sandwich ISO settings above 32000 to let you know that quality is reduced at the loftier settings.
I recommend using the interpolated lower values only when you really need a lower sensitivity, say, to use a wider f/stop in very bright conditions, or when you want to use a slower shutter speed to intentionally produce blur of, perhaps, a waterfall. A neutral-density filter attached to your lens can also reduce the amount of light reaching the sensor. The upper extended settings are best reserved for situations where you really need high ISO sensitivity and are willing to accept the visual noise that results. I’ll explain noise reduction in a little more detail in Chapter 7.
FAST FORWARD
If you’re choosing fixed ISO settings and want to move quickly down the list, use the control wheel—which tells the a6600 to jump in whole-stop leaps (i.e., from ISO 100 to 200 to 400) rather than the intermediate settings.
When making fixed ISO adjustments, you can scroll up and down the list in 1/3-stop increments with the up/down directional controls, and by rotating the control wheel. Rotate the control dial to make adjustments in full 1 EV steps. Your choices are restricted when you’re using movies or S&Q video (only ISO 100 to 32000, plus ISO Auto are available) or Intelligent Auto (ISO Auto is set automatically). Note too that ISO Auto is not available in M mode; you must set a numerical value. Settings up to 25600 are available in still mode, and up to 12800 for movies. (If you’ve selected a higher sensitivity when you switch to movie-making mode, the camera will automatically change to 12800.)
Surprise! You can use ISO Auto in Manual exposure mode, giving you an “automatic” exposure mode. You still select the shutter speed and aperture and the a6600 will increase or decrease ISO sensitivity to produce an appropriate metered exposure within the Minimum ISO and Maximum ISO settings you specify. The ISO Auto label will appear at lower right of the viewfinder or LCD monitor screen, indicating that sensitivity is being set automatically.
ISO Range Limit
If you want to intentionally restrict the ISO settings that are available (say, to avoid accidentally using settings you find are not usable from a quality standpoint), you can do that here. You can specify the minimum and maximum available ISO settings from 50 to 102400. The a6600 does let you set the minimum and maximum to the same figure, that is a Minimum of ISO 100 and a Maximum of ISO 100 (thus locking you into a single ISO sensitivity), but it is intelligent enough to keep you from setting a maximum that is lower than your minimum. (See Figure 3.18.)
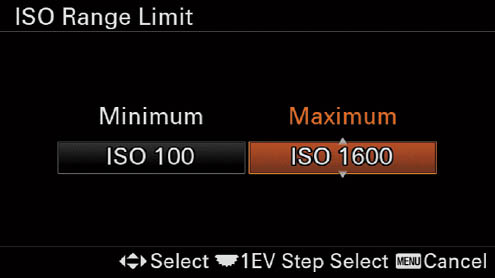
Figure 3.18 ISO Auto allows specifying minimum and maximum ISO sensitivity.
ISO Auto Minimum Shutter Speed
Use this entry with the a6600 to specify the shutter speed that activates the ISO Auto feature described above. You’ll want to use ISO Auto most frequently to avoid having the camera select a blur-inducing slow shutter speed when using P (Program Auto) or A (Aperture Priority) modes. (You always select the shutter speed yourself in S and M modes.) Depending on how well you can hand-hold the camera, or your level of trust for the lens and/or in-body image stabilization, you can choose which shutter speed you deem “too slow,” and your a6600 will boost the ISO sensitivity as required when ISO Auto is active. You can choose from values that the camera calculates, or supply a specific shutter speed, below which Auto ISO will start to do its stuff.
The camera-calculated minimum speeds are very cool because they are based on the focal length of your lens, giving you faster minimum speeds with telephoto lenses, and longer minimum speeds with wide angles. You can choose general settings or choose specific shutter speeds. The Fast and Fastest settings increase the minimum shutter speed by 1 and 2 stops (respectively) from the standard setting for a particular focal length. The Slow and Slower settings lower the minimum shutter speed for that focal length by 1 and 2 stops (respectively).
- General settings. Highlight the top entry in the screen, then press the left/right buttons to select one of the following options:
- Faster/Fast. When you highlight this entry, you can press the left/right directional buttons to choose between Faster and Fast, STD (Standard), Slow, or Slower. The a6600 will activate ISO Auto at shutter speeds that are faster than the “standard” setting (which is calculated individually based on the focal length or zoom setting of your lens). This is a more conservative setting.
- STD (Standard). The camera detects the current focal length/zoom setting and selects a minimum shutter speed that takes into account the effect the focal length has in magnifying the degree of blur. That is, a 200mm lens calls for higher shutter speeds than, say, a 50mm lens.
- Slow/Slower. This is a more liberal setting that allows slightly slower shutter speeds than specified by STD before ISO Auto kicks in. Use if you have an extraordinarily steady hand.
- 1/4000th–30 seconds. You can bypass the camera’s internal algorithm mumbo-jumbo and scroll down the list to select a shutter speed that you want to use to activate ISO Auto. If you choose 1/4000th second, ISO Auto will effectively be active all the time. Select 30 seconds, and ISO Auto will not activate at all.
Metering Mode
Options: Multi, Center, Spot (Standard, Large), Entire Screen Averaging, Highlight
Default: Multi
My preference: Multi
The metering mode determines how the camera will calculate the exposure for any scene. The camera is set by default to Multi, which is a multi-zone or multi-segment metering approach. No other options are available in Intelligent Auto mode or when you’re using digital zoom. You’ll find more information on these modes in Chapter 7, where exposure considerations are discussed in detail.
- Multi. Evaluates 1,200 individual segments of the scene using advanced algorithms; often, it will be able to ignore a very bright area or a very dark area that would affect the overall exposure. It’s also likely to produce a decent (if not ideal) exposure with a light-toned scene such as a snowy landscape, especially on a sunny day. While it’s not foolproof, Multi is the most suitable when you must shoot quickly and don’t have time for serious exposure considerations. Note: When Face Priority in Multi Metering (discussed next) is On, this metering mode will base exposure on faces detected, if any.
- Center. Center-weighted metering primarily considers the brightness in a large central area of the scene, while still taking into account the average value of the rest of the frame. This approach ensures that a bright sky that’s high in the frame, for example, will not severely affect the exposure. However, if the central area is very light or very dark in tone, your photo is likely to be too dark or too bright (unless you use exposure compensation).
- Spot. When using Spot metering, the camera measures only the brightness in a very small central area of the scene; again, if that area is very light or very dark in tone, your exposure will not be satisfactory; it’s important to spot meter an area of a medium tone. Use this mode to zero in on a specific area of your image, such as a performer on a darkened stage.
- Size of spot. When Spot is highlighted, press the left/right controls to change from a standard size spot to a larger spot.
- Position of spot. By default, the metering spot is placed in the center of the frame. You can optionally link the spot to the current focus point using the Spot Metering Point entry in the Camera Settings I-08 (Exposure 1) menu, discussed shortly.
- Entire Screen Averaging. The a6600 calculates exposure based on the average brightness of the entire frame. This setting is useful if the overall scene has similar brightness values throughout; you can recompose slightly, or your subject can move within the frame and the exposure will not change.
- Highlight. In this mode, the camera adjusts the exposure to avoid blowing out the highlights, if at all possible. Use this setting if the highlights of a scene are the most important and you don’t care if some shadow detail is lost. You can give Highlight metering some extra muscle by activating D-Range Optimizer or Auto HDR. The a6600 will segment the image into small areas and analyze the difference between the light and dark areas, preserving the highlights but also keeping as much shadow detail as possible.
Face Priority in Multi Metering
Options: On, Off
Default: On
My preference: Off
When you choose On, this setting tells the a6600 to adjust its Multi metering to prioritize exposure for any faces in the scene. Select Off, and the standard 1,200-zone evaluative metering system is used. For most shooting I disable this feature, as Multi metering does a good job of exposing so that faces and other parts of the image are well exposed. I turn it on when I am photographing individuals or groups and their surroundings are extra-bright or dark and I want to make sure the faces receive optimal exposure.
Spot Metering Point
Options: Center, Focus Point Link
Default: Center
My preference: Focus Point Link
If Focus Area is set to Flexible Spot or Expand Flexible Spot, and Spot metering is selected as the Metering Mode, then the Spot metering area can be linked to the focus point, rather than locked in the center. Just choose Focus Point Link here. If Center is selected instead, the focus point is locked in the center of the frame.
![]()
NOTE Focus Point Link also works when Focus Area is set to Tracking: Flexible Spot or Tracking: Expand Flexible Spot, but the spot metering area is moved to the starting area and does not move once tracking begins. All these AF nuances are explained in Chapter 8.
Exposure Step
Options: .03 EV, .05 EV
Default: 0.3 EV
My preference: 0.3 EV
This setting specifies the size of the exposure change for both exposure compensation and flash exposure compensation. The 0.3 EV (1/3-stop) default allows fine-tuning exposure more precisely, while selecting 0.5 EV (1/2 stop) lets you make larger adjustments more quickly, which is useful when you are trying to capture more dramatic exposure changes. The actual difference between 1/3-stop and 1/2-stop changes is relatively small, so this setting is primarily a convenience feature that’s most useful when you plan to, say, use exposure compensation and want to move from 0.0 to plus or minus several whole stops in bigger jumps. I’m never in that much of a hurry, so I opt for the greater precision of the 1/3 EV steps.
Autoexposure Lock with Shutter (Stills)
Options: Auto, On, Off
Default: Auto
My preference: On
This item is the first in the Camera Settings I-09 menu. (See Figure 3.19.) It allows the a6600 to lock the exposure (as well as the focus in AF-S mode) when you apply light pressure to the shutter release button. Point the camera at your primary subject and maintain contact with the button while re-framing for a better composition. This technique will ensure that both focus and exposure are optimized for the primary subject.
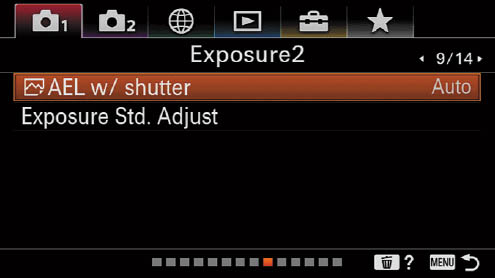
Figure 3.19 The Camera Settings I-09 (Exposure 2) menu.
There are three modes to choose from:
- Auto. Adjusts focus and then locks in exposure in AF-S mode when you press the shutter release down halfway. In AF-A mode, the camera will do the same thing if the subject is stationary. If the subject is moving (that is, the camera switches to AF-C mode) or you are shooting continuously in burst mode, exposure is not locked. However, even if Auto is activated, pressing the AEL lock button overrides this behavior.
- On. Exposure is locked when you press the shutter release halfway.
- Off. Pressing the shutter release halfway locks only focus. Exposure is not locked when you press the shutter release halfway, and exposure will be adjusted automatically during continuous shooting. Exposure isn’t locked until you press the shutter release down all the way to take the photo, or you press the AEL lock button. Use this setting when you prefer to lock exposure manually using the AEL button or when taking the actual picture.
You might want to choose the Off option to lock focus on one subject in the scene while locking the exposure for an entirely different part of the scene. To use this technique, focus on the most important subject and keep the focus locked by keeping your finger on the shutter release button while you recompose. You can then point the lens at an entirely different area of the scene to read the exposure, and lock in the exposure with pressure on the AEL button. Finally, reframe for the most pleasing composition and take the photo.
In your image, the primary subject will be in sharpest focus while the exposure will be optimized for the area that you metered. This technique makes the most sense when your primary subject is very light in tone like a snowman or very dark in tone like a black Lab dog. Subjects of that type can lead to exposure errors, so you might want to expose for an area that’s a middle tone, such as grass. I’ll discuss exposure in detail in Chapter 5; then, the value of this menu option will be more apparent.
Exposure Standard Adjustment
Options: Adjust Multi, Center, Spot, Entire Screen Averaging, or Highlight metering
Default: None
My preference: None
This setting is a powerful adjustment that allows you to dial in a specific amount of exposure compensation that will be applied to every photo you take using each of the five metering modes. No more can you complain, “My a6600 always underexposes by 1/3 stop!” If that is the case, and the phenomenon is consistent, you can use this menu adjustment to compensate.
Exposure compensation is usually a better idea (does your camera really underexpose that consistently?), but this setting does allow you to “recalibrate” your camera yourself. You can fine-tune exposure separately for each of the metering modes. However, you have no indication that fine-tuning has been made, so you’ll need to remember what you’ve done. After all, you someday might discover that your camera is consistently overexposing images by 1/3 stop, not realizing that your Exposure Standard Adjustment setting is the culprit.
In practice, it’s rare that the a6600 will consistently provide the wrong exposure in any of the five metering modes, especially Multi metering, which can alter exposure dramatically based on the camera’s internal database of typical scenes. This feature may be most useful for Spot metering, if you always take a reading off the same type of subject, such as a human face or 18 percent gray card. Should you find that the gray card readings, for example, always differ from what you would prefer, go ahead and fine-tune optimal exposure for Spot metering, and use that to read your gray cards. To use this feature:
- 1. Select Exposure Standard Adjustment. Select this menu entry from the Camera Settings I-09 (Exposure 2) page.
- 2. Consider yourself warned. In the screen that appears, choose OK after carefully reading the warning that Sony insists on showing you every time this option is activated.
- 3. Select metering mode to correct. Choose Multi, Center, Spot, Entire Screen Averaging, or Highlight-weighted metering in the screen that follows by highlighting your choice and pressing the center button. You can set the standard adjustment separately for each exposure mode.
- 4. Specify amount of correction. Press the up/down buttons to dial in the exposure compensation you want to apply. You can specify compensation up to + 1 or –1 stops in increments of 1/6 stop, half as large a change as conventional exposure compensation. This is truly fine-tuning.
- 5. Confirm your change. Press the center button when finished to return to the previous menu. You can repeat the action to fine-tune the other exposure modes if necessary. When finished, press MENU to exit. Note: The values you set will survive using the Reset option of the Setting Reset entry in the Setup 7 menu but will be canceled if you choose Initialize instead.
Flash Mode
Options: Flash Off, Auto Flash, Fill Flash, Slow Sync., Rear Sync.
Default: Depends on shooting mode
My preference: N/A
The first entry in the Camera Settings I-10 (Flash) menu (see Figure 3.20), this item offers options for the several flash modes that are available. Not all the modes can be selected at all times, as shown in Table 3.2. I’ll describe what these modes do, and the use of flash in detail in Chapter 13.
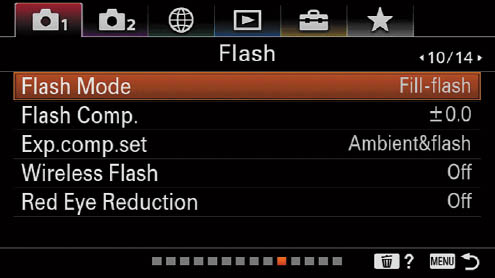
Figure 3.20 Flash Mode is the first entry in the Camera Settings I-10 (Flash) menu.
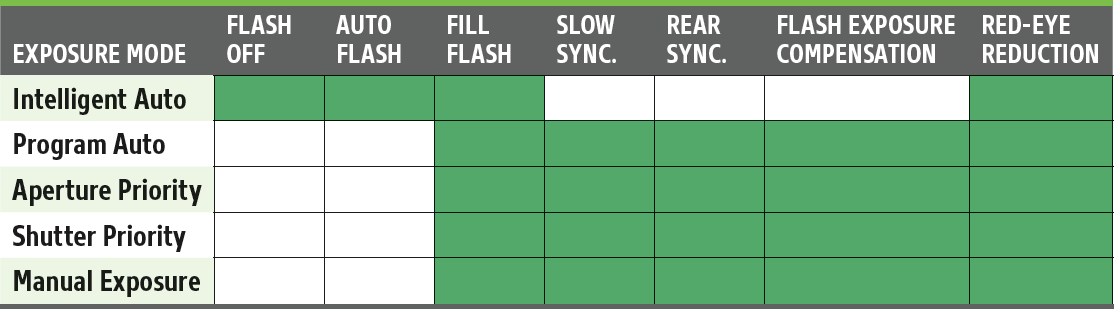
Flash Compensation
Options: –3 to +3 in 1/3 or 1/2 EV steps
Default: 0.0
My preference: N/A
This feature controls the flash output. It allows you to dial in plus compensation for a brighter flash effect or minus compensation for a subtler flash effect. If you take a flash photo and it’s too dark or too light, access this menu item. Scroll up/down to set a value that will increase flash intensity (plus setting) or reduce the flash output (minus setting) by up to three EV (exposure value) steps. You can select between 1/3 and 1/2 EV increments in the Exposure Step entry described later in this chapter. Flash compensation is “sticky” so be sure to set it back to zero after you finish shooting. This feature is not available when you’re using Intelligent Auto mode. I’ll discuss this and many other flash-related topics in detail in Chapter 13.
Exp. Comp. Set
Options: Ambient & Flash, Ambient Only
Default: Ambient & Flash
My preference: Ambient & Flash
When this item is at the default setting, any exposure compensation value that you set will apply to both the ambient light exposure and to the flash exposure when using flash. You’d want to stick to this option in flash photography when you find that both the available-light exposure and the flash exposure produce an image that’s too dark or too light. Setting plus or minus exposure compensation will affect both. However, in another situation when using flash, you might want to control only the brightness of the ambient light exposure and not the flash exposure.
The Ambient Only option allows you to control only the brightness of the background such as a city skyline behind a friend when you’re taking flash photos at night in a scene of this type. Setting exposure compensation will now allow you to get a brighter or a darker background (at a + and – setting, respectively) without affecting the brightness of your primary subject who will be exposed by the light from the flash. (Any exposure compensation you set will have no effect on the flash intensity.)
Wireless Flash
Options: Off, On
Default: Off
My preference: N/A
Sony is still playing catch-up in the electronic flash arena, having supported only optically triggered wireless flash until recently, but now offers radio-controlled wireless flash using the Sony AF-WRC1M/FA-WRR1 wireless radio commander/receiver combination or radio-compatible external flash units like the Sony HVL-45RM. This entry allows you to enable/disable both optical and radio wireless modes. I’ll explain these and other flash options in Chapter 13.
Red Eye Reduction
Options: On, Off
Default: Off
My preference: Off
When flash is used in a dark location, red-eye is common in pictures of people, and especially of animals. Unfortunately, your camera is unable, on its own, to totally eliminate the red-eye effects that occur when an electronic flash bounces off the retinas of your subject’s eyes and into the camera lens. The effect is worst under low-light conditions (exactly when you might be using a flash) as the pupils expand to allow more light to reach the retinas. The best you can hope for with this option is to reduce or minimize the red-eye effect. After all, the feature is called red-eye reduction, not red-eye elimination.
It’s fairly easy to remove red-eye effects in an image editor (some image importing programs will do it for you automatically as the pictures are transferred from your camera or memory card to your computer). But, it’s better not to have glowing red eyes in your photos in the first place.
To use this feature, you first have to attach an external flash to the multi interface shoe. When Red Eye Reduction is turned on through this menu item, the flash issues a few brief bursts prior to taking the photo, theoretically causing your subjects’ pupils to contract, reducing the red-eye syndrome. It works best if your subject is looking toward the flash. Like any such system, its success ratio is not great.
White Balance
Options: Auto WB, Daylight, Shade, Cloudy, Incandescent, Fluorescent (4 options), Flash, Underwater Auto, C.Temp/Filter, Custom 1–3, Custom Setup
Default: Auto (AWB)
My preference: AWB
This is the first entry in the Camera Settings I-11 (Color/WB/Image Processing 1) menu. (See Figure 3.21.) The various light sources that can illuminate a scene have light that’s of different colors. A household lamp using an old-type (not Daylight Balanced) bulb, for example, produces light that’s quite amber in color. Sunlight around noon is close to white but it’s quite red at sunrise and sunset; on cloudy days, the light has a bluish bias. The light from fluorescents can vary widely, depending on the type of tube or bulb you’re using. Some lamps, including sodium vapor and mercury vapor, produce light of unusual colors.
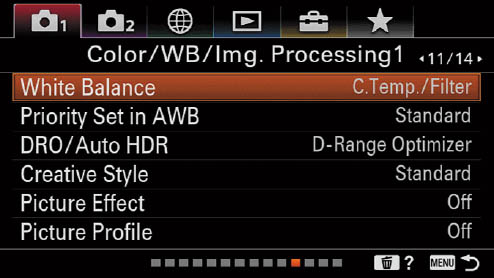
Figure 3.21 The Camera Settings I-11 (Color/WB/Image Processing 1) menu.
The Auto White Balance feature works well, particularly outdoors and under artificial lighting that’s daylight balanced. Even under lamps that produce light with a slight color cast such as green or blue, you should often get a pleasing overall color balance. One advantage of using AWB is that you don’t have to worry about changing it for your next shooting session; there’s no risk of having the camera set for, say, incandescent light, when you’re shooting outdoors on a sunny day.
The a6600 also lets you choose a specific white balance option—often called a preset—that’s appropriate for various typical lighting conditions, because the AWB feature does not always succeed in providing an accurate or the most pleasing overall color balance. Your choices include:
- Daylight. Sets white balance for average daylight.
- Shade. Compensates for the slightly bluer tones encountered in open shade conditions.
- Cloudy. Adjusts for the colder tones of a cloudy day.
- Incandescent. Indoor illumination is typically much warmer than daylight, so this setting compensates for the excessive red bias.
- Fluorescent (four types). You can choose from Warm White, Cool White, Day White, and Daylight fluorescent lighting.
- Flash. Suitable for shooting with the a6600’s external electronic flash unit.
- Underwater Auto. Although you may find a vendor offering an underwater housing for your a6600, it’s more likely that your “underwater” shooting will involve photographing fish and other sea life through the glass of an aquarium of the commercial variety. This setting partially tames the blue-green tones you can encounter in such environments (see Figure 3.22, top), producing a warmer tone that some (but not all) may prefer (Figure 3.22, bottom).
- C.Temp/Filter/Custom/Custom Setup. These advanced features provide even better results once you’ve learned how to fine-tune color balance settings, which I’ll explain in Chapter 9.
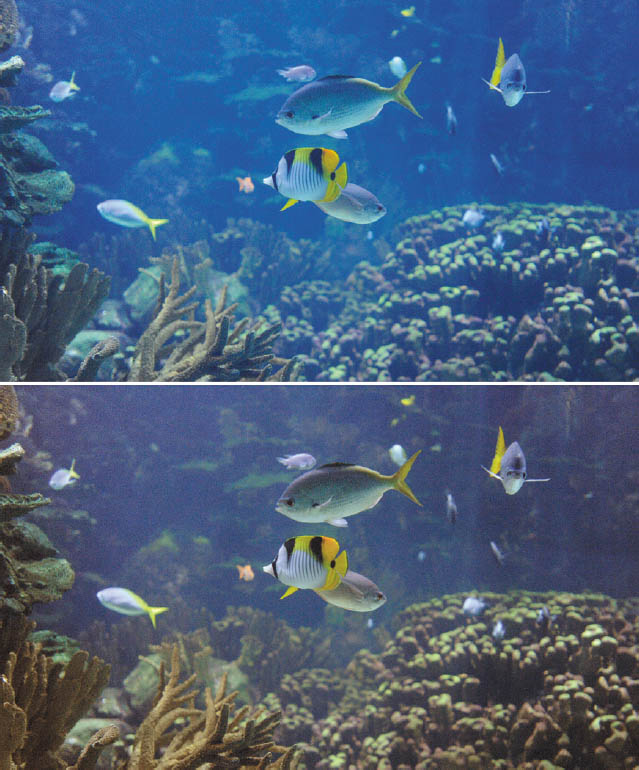
Figure 3.22 The Underwater Auto setting can reduce the blue cast of typical subsurface photos.
When any of the presets are selected, you can press the right button to produce a screen that allows you to adjust the color along the amber/blue axis, the green/magenta axis, or both, to fine-tune color rendition even more precisely. The screen shown in Figure 3.23 will appear, and you can use the up/down and left/right controls to move the origin point in the chart shown at lower right to any bias you want. The amount of your amber/blue and/or green/magenta bias are shown numerically to the left of the chart. You’ll find more information about White Balance in Chapter 9.
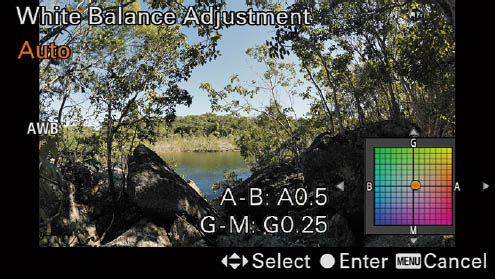
Figure 3.23 Fine-tune the color bias of your images using this screen.
My recommendation: If you shoot in RAW capture, though, you don’t have to be quite as concerned about white balance, because you can easily adjust it in your software after the fact. Here again, as with ISO and exposure compensation, the white balance item is not available in Intelligent Auto mode; the camera defaults to Auto White Balance.
Priority Setting in AWB
Options: Standard, Ambience, White
Default: Standard
My preference: Standard
You can finally exercise some control over Auto White Balance. This setting allows you to fine-tune how AWB works, producing “automatic” color balance that may more closely suit your personal taste than the default balance the a6600 is initially set for. You have three choices:
- Standard. The camera makes its own adjustments for white balance, based on its interpretation of the colors it sees in your scenes. The a6600 does a pretty good job of telling daylight from incandescent illumination and responding accordingly, and a fair job with other forms of illumination. This will work for you most of the time, although you’ll want to use one of the presets or other white balance customizing features described above when appropriate.
- Ambience. Detects the light source and, if a naturally warm source is identified, will bias the color to keep warmer tones. Your interior photos, fireside chats, and similar scenes can keep their rosy colors. An indicator on your shooting settings screens will indicate that Ambience (or White) bias is being used.
- White. The reverse of Ambience, this setting tries to preserve whites in scenes with warm color temperatures.
DRO/Auto HDR
Options: DRO Off; DRO Auto (Auto or Levels 1–5); Auto HDR (Auto or 1–6 EV intervals)
Default: DRO Auto
My preference: DRO Off
The brightness/darkness range of many images is so broad that the sensor has difficulty capturing detail in both bright highlight areas and dark shadow areas. That’s because a sensor has a limited dynamic range. However, the a6600 is able to expand its dynamic range using extra processing when dynamic range optimization (DRO) is active. It’s on by default at the Auto level where the camera evaluates the scene contrast and decides how much extra processing to apply; this is the only available setting in Intelligent Auto. In other modes, you can turn DRO off, or set it manually to one of five intensity levels. There’s also an Auto HDR feature discussed in a moment.
When the DRO Auto option is highlighted, you can press the left/right controls to set the DRO to a specific level of processing, from 1 (weakest) to 5 (strongest). You’ll find that DRO can lighten shadow areas; it may darken bright highlight areas too, but not to the same extent. By level 3, the photos you take will exhibit much lighter shadow areas for an obviously wide dynamic range; DRO Auto will never provide such an intense increase in shadow detail.
In addition, you’ll find the Auto HDR (High Dynamic Range) feature, available only in the P, A, S, or M shooting modes (Program, Aperture Priority, Shutter Priority, and Manual). If you select this option instead of DRO, the camera will take three photos, each at a different exposure level, and it will combine them into one HDR photo with lighter shadow areas and darker highlight areas than in a conventional shot. You can control the intensity of this feature. After scrolling to Auto HDR, press the left/right controls to choose an exposure increment between shots, from 1.0 to 6.0 EV. The one you select will specify the difference in exposure among the three photos it will shoot: 1 EV (minor exposure difference) for a slight HDR effect to 6 EV (a huge exposure difference) for a dramatic high dynamic range effect. If you don’t choose a level, the camera selects an HDR level for you. I’ll provide tips and examples of DRO and HDR in Chapter 7.
![]()
NOTES DRO and Auto HDR are both automatically set to Off when using Picture Effects or Picture Profiles. Auto HDR cannot be used at all with Intelligent Auto or any scene mode; DRO is disabled when using Sunset, Night Scene, or Night Portrait scene modes. In other scene modes, DRO is set to Auto.
Creative Style
Options: 13 Presets: Standard, Vivid, Neutral, Clear, Deep, Light, Portrait, Landscape, Sunset, Night Scene, Autumn Leaves, Black & White, Sepia; 6 Style Box (numbered) settings: 1: Standard, 2: Vivid, 3: Neutral, 4: Portrait, 5: Landscape, 6: Black & White
Default: Standard
My preference: Standard
This option gives you two types of adjustments that tweak the appearance of your images:
- Presets. These consist of 13 different Creative Style settings, which you can select to apply special appearance adjustments, such as Vivid, Sunset, Black & White, or Sepia. Highlight any of these, and you can press the right button and highlight Contrast, Saturation, or Sharpness to tweak each of those settings for that particular preset. In effect, you are adding adjustments to that preset—for example, the Vivid preset already has boosted saturation, but you can increase color richness or contrast even more if you prefer. (See Figure 3.24.)
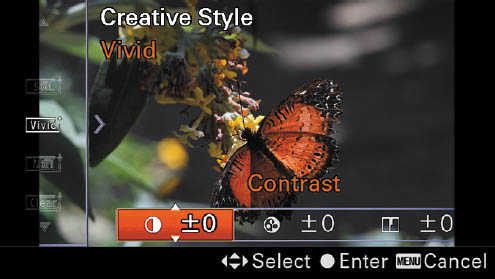
Figure 3.24 You can adjust the Contrast, Saturation, and Brightness of any of the presets.
- Style Box Settings. Six settings (1: Standard, 2: Vivid, 3: Neutral, 4: Portrait, 5: Landscape, 6: Black & White) have a numbered prefix (1–6) and default values reflecting their default names. You can adjust Contrast, Saturation, or Sharpness, as you can with the presets.
However, you can also adopt the default settings of any of the 13 basic presets (thus renaming the Style Box setting) and make further adjustments. For example, say you don’t use the Style Box setting 3: Neutral very often, but would like to have a second Portrait setting. Press the right button to highlight the available adjustments, and press the down button to access a drop-down list that shows the 13 presets. Select Portrait. Then, adjust Contrast, Saturation, and Sharpness. When you’re finished, you will have three Portrait Creative Styles: the standard Portrait preset, 3: Portrait (the new one you just defined) and the default Style Box numbered setting 4: Portrait.
Sony has made Creative Styles a little confusing by providing an unnumbered list of 13 Presets, and a numbered list of Style Box settings that bear the same names as six of the Presets. Just keep in mind that the 13 unnumbered Presets can be adjusted, but not renamed, and that the six numbered Style Box settings can assume the basic settings of any of the 13 Presets, and then adjusted further. I discuss the use of Creative Styles in Chapter 9.
Picture Effect
Options: Off, Toy Camera, Pop Color, Posterization (Color, B&W), Retro Photo, Soft High-key, Partial Color (Red, Green, Blue, Yellow), High Contrast Monochrome, Rich-tone Monochrome
Default: Off
My preference: Off
This camera feature allows you to create JPEG photos with special effects provided by the camera’s processor in JPEG capture mode (but not in RAW or RAW & JPEG) when the camera is in P, A, S, or M mode. It’s not available for use when shooting movies. Scroll through the options in this item and watch the change in the preview image display that reflects the effect that each option can provide if you activate it; if you find one that looks interesting, press the center button or touch the shutter release button to confirm your choice and return to shooting mode.
When some effects are highlighted, left/right triangles will appear next to their label, indicating you can press the left/right keys to select an option available for that effect. Not all provide this extra benefit.
- Toy Camera. Produces images like you might get with a Diana or Holga “plastic” camera, with vignetted corners, image blurring, and bright, saturated colors. It’s at Normal by default but when you press the left/right buttons you can select Normal, Cool, Warm, Green, or Magenta.
- Pop Color. This setting adds a lot of saturation to the colors, making them especially vivid and rich looking. When used with subjects that have a lot of bright colors, the effect can be dramatic. Duller subjects gain a more “normal” appearance; try using this setting on an overcast day to see what I mean.
- Posterization. This option produces a vivid, high-contrast image that emphasizes the primary colors (as shown in Figure 3.25, top) or in black-and-white, with a reduced number of tones, creating a poster effect. The default rendition is Color, but a monochrome option also appears if you press the left/right controls.
- Retro Photo. Adds a faded photo look to the image, with sepia overtones.
- Soft High-key. Produces bright images with reduced contrast.
- Partial Color. Attempts to retain the selected color of an image, while converting other hues to black-and-white. (See Figure 3.25, center.) It’s set at Red by default, indicating that photos will retain red tones, but you can also choose Blue, Green, or Yellow instead.
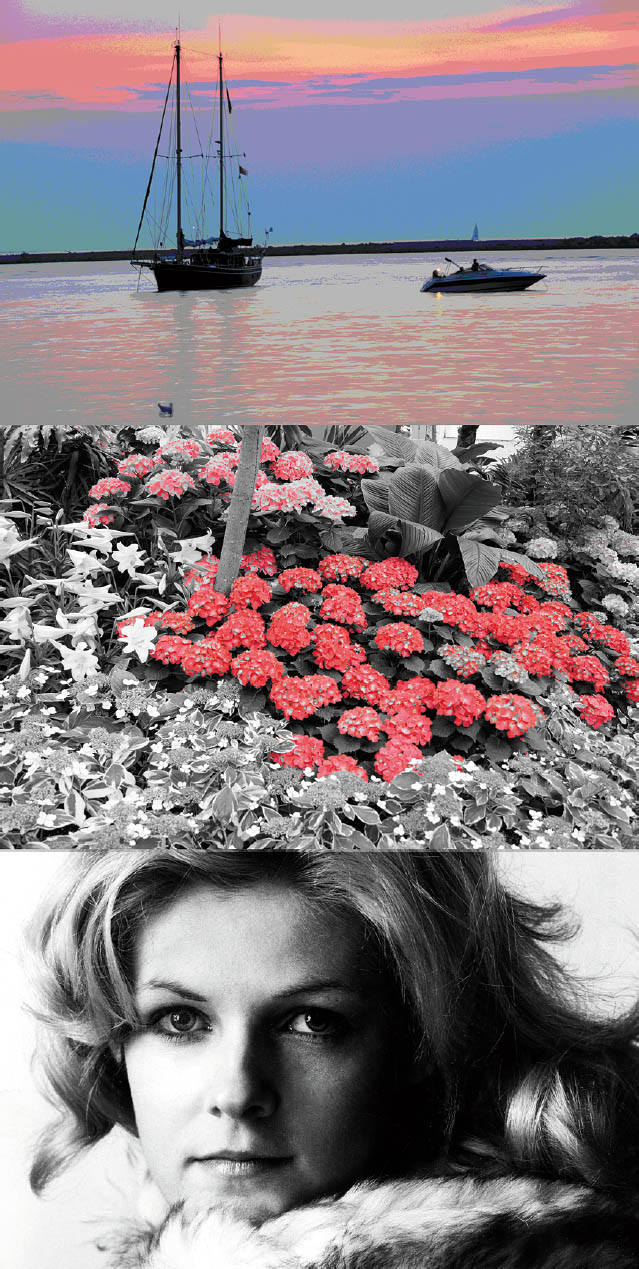
Figure 3.25 From top: Posterization, Partial Color, and High Contrast Monochrome.
- High Contrast Monochrome. Converts the image to black-and-white and boosts the contrast to give a stark look to the image. (See Figure 3.25, bottom.)
- Rich-tone Monochrome. Uses the same concept as High Contrast Monochrome but creates a long-gradation black-and-white image (by darkening bright areas but keeping dark tones rich) from three consecutive exposures.
Picture Profile
Options: Picture Profiles PP1–PP10, Off
Default: Off
My preference: Off
Picture Profiles are a great tool for advanced movie shooters. You can customize the picture quality, including color and gradation of your movies by defining the parameters included in each of ten different Picture Profiles. To make these adjustments, connect the camera to a TV or monitor using the HDMI port, and use the picture on the screen as a guide while making your changes. After connecting the camera to your HDTV/monitor, navigate to this menu entry and select which Picture Profile you want to modify. Press the right button to access the index screen, then press the up/down buttons to select the parameter to be changed. Then make your adjustments and press the center button to confirm.
Even a short course in how each of the parameters affects video images, and a discussion of how to select the best settings would require a chapter or two of technical discussion and is thus beyond the scope of this book. I’m going to provide a quick listing of each type of setting for a reminder; your Sony manual provides more information about each of these. The ten Picture Profile presets already have default values:
- PP1: Example setting using [Movie] gamma
- PP2: Example setting using [Still] gamma
- PP3: Example setting of natural color tone using the [ITU709] gamma
- PP4: Example setting of a color tone faithful to the [ITU709] standard
- PP5: Example setting using [Cine1] gamma
- PP6: Example setting using [Cine2] gamma
- PP7: Example setting using [S-Log2] gamma
- PP8: Example setting using [S-Log3] gamma with the Picture Profile’s Color Mode set to [S-Gamut3.Cine]
- PP9: Example setting using [S-Log3] gamma with the Picture Profile’s Color Mode set to [S-Gamut3]
- PP10: Example setting for HDR Movies using [HLG2] gamma
The list that follows is not for the faint-of-heart. As I noted, you can find entire books and motion-picture school classes on color grading and adjusting these parameters:
- Black Level. Sets the black level (–15 to +15). Black level is the level of brightness at which no light is emitted from a screen, resulting in a pure black screen. Adjustment of this parameter ensures that blacks are seen as black, and not a dark shade of gray.
- Gamma. Selects a gamma curve, a formula which corrects for the nonlinear relationship between the brightness (luminance) captured by a sensor and the brightness of the image as it’s displayed on a monitor. In other words, correction is needed to make what you see on a screen more closely resemble what the camera captured in real life. You can choose from 14 different gamma curves.
- Black Gamma. Corrects gamma in low-intensity areas, using Range and Level controls.
- Knee. Sets “knee point” and slope for video signal compression to prevent overexposure by limiting signals in high-intensity areas of the subject to the dynamic range of your camera. In short, a higher knee level produces more detail in the highlights; a lower knee level produces fewer details in the highlights. Your adjustments include:
- Mode. In Auto mode, the knee point and slope are set automatically; in Manual mode, they are set manually.
- Auto Set. Even when the Mode is set to Auto, you can still choose maximum point for the knee point, from 90 to 100 percent, and Sensitivity, from High, Medium, or Low.
- Manual Set. When Mode is set to manual, you specify a knee point (75 to 105 percent), and Slope from gentle (–5) to steep (+5).
- Color Mode. Sets type and level of colors, from among Movie, Still, Cinema, Pro, ITU-709 Matrix, Black & White, and S-Gamut, S-Gamut3.Cine, S-Gamut3, PT-2020, and 709.
- Saturation. Sets the color saturation, from –32 to +32 values.
- Color Phase. Sets the color phase (–7 to +7).
- Color Depth. Sets the color depth for each color phase.
- Detail. Sets parameters including Level, and Detail adjustments including Mode, Vertical/Horizontal Balance, B/W Balance, Limit, Crispning (sic), and Hi-Light Detail.
- Copy. Copies the settings of the picture profile to another picture profile number.
- Reset. Resets the picture profile to the default setting. You cannot reset all picture profile settings at once.
Shutter AWB Lock (Stills)
Options: Shutter Halfway Down, Continuous Shooting, Off
Default: Off
My preference: Off
This is the only entry in the Camera Settings I-12 (Color/WB/Image Processing 2) menu. (Not shown in a figure.) As described earlier, your a6600 actually has two Auto White Balance controls—the standard AWB setting and Underwater Auto. Each selects the appropriate white balance for their respective conditions. However, neither auto white balance option is perfect; you may find that white balance adjustments may occur as you hold the shutter release down halfway, or during continuous shooting. If color consistency between individual shots is important, you can tell the camera to lock color balance temporarily.
These are the settings:
- Shutter Halfway Down. If you choose this setting, the camera will always lock the white balance at its current setting whenever AWB or Underwater Auto are active and the shutter release is half-pressed. If the Drive mode is Continuous, when you press the shutter release down all the way and hold it down, the white balance is locked for the entire sequence.
- Continuous Shooting. White balance is locked only during continuous shooting. Either Auto WB setting may continue to make adjustments when the shutter release is half-pressed.
- Off. White balance may change during a half-press or continuous shooting when either of the two Auto white balance presets are enabled. (The non-auto fixed presets, of course, do not change until you adjust them.)
Focus Magnifier
Options: Activate
Default: Off
My preference: N/A
This is the first entry in the Camera Settings I-13 (Focus Assist) menu. (See Figure 3.26.) If you like to focus manually, this is a very useful aid, one of several that Sony generously offers to enhance the chore of achieving sharp focus. (The others include Manual Focus Assist and Peaking Level.) Here’s how to tell the three aids apart:
- Focus magnifier. Enlarges the viewfinder/LCD image to 5.9X or 11.7X so you can view the subject you are trying to bring into focus more easily. It operates when using any Focus Mode other than AF-C, which means you can use it with AF-A or AF-S in addition to Manual Focus (MF) or Direct Manual Focus. (You need to activate the autofocus capability using the AF in Focus Magnification entry discussed shortly.)
You must summon the Focus Magnifier manually, either by accessing this menu entry or by pressing a custom key that you define to activate it. Note: as you’ll learn in Chapter 8, with Direct Manual Focus, the camera autofocuses automatically when the shutter release is pressed halfway; you can then fine-tune focus manually.
- Manual focus assist. This feature, discussed shortly, automatically provides a magnification of 5.9X (or 11.7X) if you press the center button when you rotate the lens focus ring while in Manual Focus or Direct Manual Focus mode. In that sense, it is easier to use than the Focus Magnifier, because no special menu entry or defined button is needed to activate it. However, it cannot be used with AF-S or AF-C focus modes. If you only want to use magnification sometimes, and for autofocus as well as manual focus, you’re better off with the focus magnifier.
- Peaking Level. This option, also described later in this chapter, operates in Manual Focus or Direct Manual Focus modes. Peaking outlines out-of-focus areas with your choice of red, yellow, or white highlighting. If you zoom in using the focus magnifier or manual focus assist, the colored highlighting is retained. This option is especially useful when attempting to manually focus in dark or dim conditions.
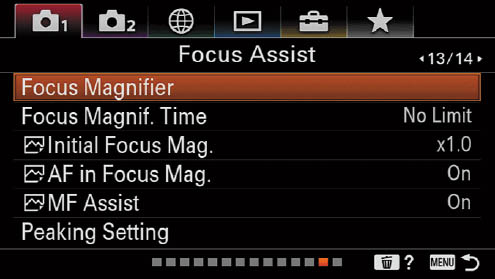
Figure 3.26 The Camera Settings I-13 (Focus Assist) menu.
While you will probably find the focus magnifier most useful when using manual focus, it is also available when using autofocus. I’m going to explain its use in MF mode first. To use the Focus Magnifier, just follow these steps:
- 1. Summon Focus Magnifier. If you’re not using AF-C as your focus mode, press the defined key for Focus Magnifier, or use this menu entry to activate it. The viewfinder/LCD monitor image is first presented with 1.0X magnification (that is, none). Press the center button and the image is enlarged to 5.9X, and a navigation window appears at lower left showing an orange rectangle that represents the current location of the blown-up section. (See Figure 3.27.)
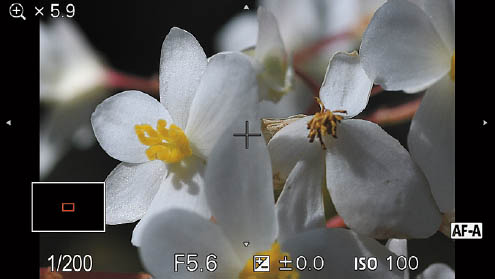
Figure 3.27 The Focus Magnifier can be zoomed from 1X to 5.9X (as shown) and 11.7X.
- 2. Adjust the magnified area. A quartet of triangles surrounds the image, indicating that you can move the enlarged window around with the frame. Use the left/right/up/down keys to move the enlarged area. Note that you can also rotate the control wheel to move the window from side to side, and the control dial to move the window vertically. This is much slower, and not recommended.
- 3. Center the magnifier. You can press the Trash button to center the magnified section back in the center of the frame.
- 4. Zoom in/out. Pressing the center button enlarges the image from 1X to 5.9X and 11.7X. An additional press exits the magnifier.
- 5. Focus. Use one of these options:
- Manual focus mode. Rotate the lens’s focus ring to achieve sharp focus. A scale along the bottom of the screen shows the approximate focus distance.
- Direct Manual focus mode. Press the shutter release halfway to autofocus on the enlarged image, and then (optionally) rotate the focus ring to fine-tune.
- AF-S or AF-C mode. Press the shutter button halfway to autofocus on the enlarged image. Remember you must set AF in Focus Magnification to On to use this technique. If Off is specified instead, pressing a half-press cancels magnification.
Your a6600’s touch screen may be a faster way to invoke the Focus Magnifier. You’ll need to enable Touch Operation, which is found in the Setup 2 menu. I’ll explain all the settings for the touch screen in Chapter 6. When enabled, simply double tap the LCD monitor to select the area to focus on. You can then use a finger on the monitor screen to drag the focused area around. Double tap the monitor again to exit (if you’re using manual focus) or by pressing the shutter release down halfway (if you’re using the Focus Magnifier with autofocus). You’ll need to enable the Focus Magnifier for autofocus using the AF in the Focus Magnification entry of this menu, which I’ll explain a few menu entries after this one.
Focus Magnifier Time
Options: 2 sec., 5 sec., No Limit
Default: 2 sec.
My preference: 5 sec.
This entry can be used to specify the length of time that the Focus Magnifier will magnify the image during manual focusing. If you find that it takes you longer than two seconds to manually focus using MF Assist, you can change the time to five seconds, or to No Limit; the latter will cause the image to remain magnified until you tap the shutter release button (you don’t need to actually take a picture), press the center button again to return to full frame, or double tap the LCD monitor if you have enabled Touch Operation.
Initial Focus Magnification (Stills)
Options: 1.0X, 5.9X
Default: 1.0X
My preference: 5.9X
You can specify the initial magnification presented when the Focus Magnifier is invoked. The default is 1.0X (no magnification), which is fine if your first step is frequently to move the magnification window around in the frame before zooming in. At 1.0X, you see the entire frame and can position the window anywhere you like. I prefer to skip that step and jump right in at 5.9X, which usually positions the window close enough that I can go ahead and move it within the frame if I want. The 5.9X magnification is automatically used if you have enabled Touch Operation and double tap the LCD monitor to zoom in.
AF in Focus Magnification (Stills)
Options: On, Off
Default: Off
My preference: Off when not shooting macro/close-up images
As I mentioned earlier, the Focus Magnifier works just fine in autofocus mode. You can use it to view an enlarged image to confirm that correct focus has been achieved automatically, or to fine-tune focus when working with Direct Manual Focus (DMF) mode.
Once you’ve enabled the AF focus magnification option, activate the Focus Magnifier as described earlier and adjust the enlarged area using the directional controls and the navigation box. Avoid positioning the enlarged area at the edges of the frame, as the camera may be unable to focus at those positions. When you’re ready, press the shutter release halfway. In any AF mode or DMF, the a6600 will focus on the center of the enlarged area. If you’re using DMF, you can fine-tune focus with the lens’s focus ring. Then press the shutter release down all the way to take the photo.
Autofocus using focus magnification cannot be used when shooting movies; when the Focus mode is set to AF-C; when using AF-A and continuous shooting or a shooting mode other than P, A, S, or M. The feature is also disabled when using one of the EA-LA mount adapters. Certain autofocus features are disabled when using the focus magnifier, including Eye-AF, Center Tracking, Eye-Start AF, Pre-AF, and Face Priority in AF.
Manual Focus Assist (Stills)
Options: On, Off
Default: On
My preference: On
Forget about the need to activate the Focus Magnifier manually. Set this entry to On and any time you are using manual focus or manual focus in the DMF mode, the a6600 will automatically enlarge the screen so you can better judge by eye whether the important part of your subject is in sharp focus. As you begin to focus manually by rotating the focus ring on the lens, the image on the LCD will appear at 5.9X its normal size (press the center button to zoom in to 11.7X). This version of the Focus Magnifier is available only for still photography. You can then scroll around the image using the directional controls. As with the manually activated Focus Magnifier, this feature makes it easier to check whether the most important subject area is in the sharpest focus. When you stop turning the focus ring, the image on the LCD display will revert back to normal (non-magnified) so you can see the entire area that the camera will record. You can turn this feature Off however, if you find that you don’t need it, and adjust the magnifier time-out using the Focus Magnifier entry described previously.
Peaking Setting
Options: Peaking Display (On, Off); Peaking Level (High, Mid, Low); Peaking Color (Red, Yellow, White)
Default: Off, Mid, White
My preference: On, High, Red
This is a useful manual focusing aid (available only when focusing in Manual and Direct Manual modes) that’s difficult to describe and to illustrate. You’re going to have to try this feature for yourself to see exactly what it does. Focus peaking is a technique that outlines the area in sharpest focus with a color; as discussed below, that can be red, white, or yellow. The colored area shows you at a glance what will be very sharp if you take the photo at that moment. If you’re not satisfied, simply change the focused distance (with manual focus). As the focus gets closer to ideal for a specific part of the image, the color outline develops around hard edges that are in focus. You can choose how much peaking is applied (High, Medium, and Low), select a specific accent color (Red, Yellow, or White) or turn the feature off.
Peaking Color allows you to specify which color is used to indicate peaking when you use manual focus. White is the default value, but if that color doesn’t provide enough contrast with a similarly hued subject, you can switch to a more contrasting color, such as red or yellow. (See Figure 3.28.)
Figure 3.28 You can choose any of three colors for peaking color (for manual focus), but only if you have activated the Peaking Level item. For these blossoms, red was a better choice than white or yellow.
Face Registration
Options: New Registration, Order Exchanging, Delete, Delete All
Default: None
My preference: N/A
This is the first entry on the Camera Settings I-14 (Shooting Assist) menu. (See Figure 3.29.) When you access this entry, the screen shown in Figure 3.30 (left) appears. The top option, New Registration, allows you to log up to eight different faces. For best results, line up your victim (subject) against a brightly lit background to allow easier detection of the face. A white box appears that you can use to frame the face. (See Figure 3.30, right.) Press the shutter button. A confirmation message appears (or a Shoot Again warning suggests you try another time, usually because you need to frame the face better). When Register Face? appears, choose Enter or Cancel, and press the MENU button to confirm.
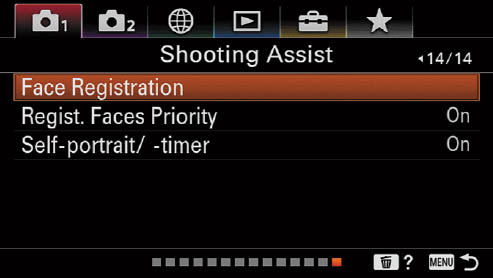
Figure 3.29 The Camera Settings I-14 (Shooting Assist) menu.
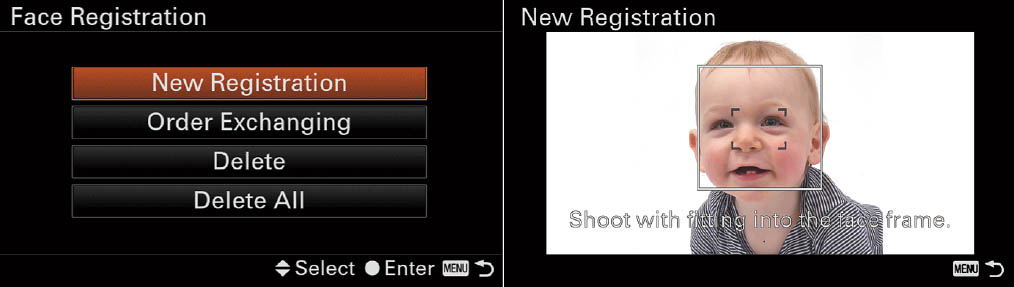
Figure 3.30 Face Registration has four options (left). Capture an image of the face you want to register (right).
The Order Exchanging option allows you to review and change the priority in which the faces appear, from 1 to 8. (See Figure 3.31.) The a6600 will use your priority setting to determine which face to focus on if several registered faces are detected in a scene. For example, place close family members high on your list, and relegate that annoying brother-in-law to last place. You can also select a specific face and delete it from the registry (say, you broke up with your significant other!) or delete all faces from the registry (your SO got custody of the camera). Face data remains in the camera when you delete individual faces but is totally erased when you select Delete All.
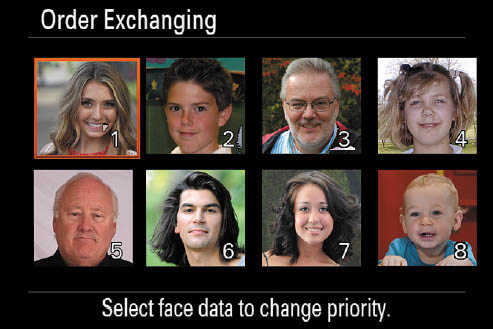
Figure 3.31 You can change the order—and therefore the priority assigned—to each face.
Registered Faces Priority
Options: On, Off
Default: On
My preference: Off
This entry simply tells the a6600 whether it should give a higher priority to registered faces during the autofocus process when Face Priority in AF (discussed earlier) has been set to On.
Self-Portrait/-Timer
Options: On, Off
Default: Off
My preference: Off
This entry simplifies taking selfies by automatically triggering the self-timer when you press the shutter release. There’s no need to change the Drive mode; just choose On and flip the LCD monitor 180 degrees upward. Press the shutter release down all the way, or tap the subject on the monitor. The self-timer will activate and take a picture after three seconds. If you need a longer delay, leave this setting at Off and use the conventional self-timer mode in the Drive settings.