
Yii has a very good set of form widgets, but as with every framework out there, Yii does not have them all. In this recipe, we will learn how to create your own input widget. For our example, we will create a range input widget.
We will start with the widget itself:
- Create a widget class named
protected/components/RangeInputField.phpas follows:<?php class RangeInputField extends CInputWidget { public $attributeFrom; public $attributeTo; public $nameFrom; public $nameTo; public $valueFrom; public $valueTo; protected function hasModel() { return $this->model instanceof CModel && $this->attributeFrom!==null && $this->attributeTo!==null; } function run() { if($this->hasModel()) { echo CHtml::activeTextField($this->model, $this->attributeFrom); echo ' → '; echo CHtml::activeTextField($this->model, $this->attributeTo); } else { echo CHtml::textField($this->nameFrom, $this->valueFrom); echo ' → '; echo CHtml::textField($this->nameTo, $this->valueTo); } } } - Now, we need to test how it works. We will need a form model named
protected/models/RangeForm.php:<?php class RangeForm extends CFormModel { public $from; public $to; function rules() { return array( array('from, to', 'numerical', 'integerOnly' => true), array('from', 'compare', 'compareAttribute' => 'to', 'operator' => '<=', 'skipOnError' => true), ); } } - Now create a controller named
protected/controllers/RangeController.phpas follows:<?php class RangeController extends Controller { function actionIndex() { $success = false; $model = new RangeForm(); if(!empty($_POST['RangeForm'])) { $model->setAttributes($_POST['RangeForm']); if($model->validate()) $success = true; } $this->render('index', array( 'model' => $model, 'success' => $success, )); } } - Create a view named
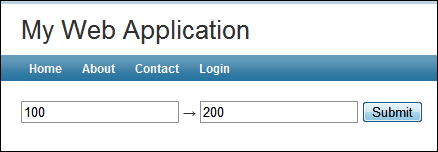
protected/views/range/index.phpas follows:<?php if($success):?> <p>Success!</p> <?php endif?> <?php echo CHtml::errorSummary($model)?> <?php echo CHtml::beginForm()?> <?php $this->widget('RangeInputField', array( 'model' => $model, 'attributeFrom' => 'from', 'attributeTo' => 'to', ))?> <?php echo CHtml::submitButton('Submit')?> <?php echo CHtml::endForm()?> - Now, run the range controller to see a widget in action, as shown in the following screenshot:
A typical input widget can be used both with a model as an active field widget and without a model. An active field widget handles the value and validation automatically.
As there are two fields (From and To) in our widget, we define three pairs of public properties: attribute, name, and value. The attribute pair is used if there is a model passed to a widget; this means that the widget is used as an active input. The name and value pairs are used if you want to generate the input with custom names and values.
In our case, we simply override the run method to render two fields in a customized way. Actual field handling is delegated to CHtml::activeTextField and CHtml::textField.
In order to render a widget in a view, we use the CController::widget method as follows:
   <?php $this->widget('RangeInputField', array(
      'model' => $model,
      'attributeFrom' => 'from',
      'attributeTo' => 'to',
   ))?>
All options set in an array are assigned to the corresponding public properties of a widget.
In order to learn more about widgets, you can use the following resources:
- The Configuring components and Configuring widget defaults recipes in Chapter 1, Under the Hood