
The query service enables us to retrieve data from Microsoft Dynamics AX without having to use the .NET Business Connector or, even worse, access the SQL database directly.
By using the query service, you can fetch data using any of the following query types:
- Static query: This is used to retrieve data using queries that are present in the AOT. We will use this query in the demonstration.
- User-defined query: A query can also be created using the
QueryMetadataclass. By doing this, you can create a query in the same way you create queries in X++ code. - Dynamic query: Another way of running a query is by creating an X++ class that extends the
AifQueryBuilderclass. You can invoke theExecuteQueryoperation by passing in the name of the query builder class. It is also possible to pass arguments using a class that extends from theAifQueryBuilderArgsclass.
Now let's put some code behind the clicked event handler of the Refresh button. The idea is to invoke the query service to retrieve the data of the selected query and then put it into the DataGridView control.
Put the following code behind the Refresh button's clicked event handler to get the job done:
private void cmdRefresh_Click(object sender, EventArgs e)
{
    this.refreshData();
}
Before this can work, we obviously need to add a refreshData() method that does the refreshing part. This is put in a separate method to support the reuse of the code when we add paging later on:
private void refreshData()
{
    try
    {
        // Determine the selected query / datamember
        string dataMember = cboAxQueryName.Text;
        string queryName = cboAxQueryName.Text;

        // Create a binding source for members
        BindingSource bindingSource = new BindingSource();

        // Set the binding source as the data source for the data grid
        dtgAxData.DataSource = bindingSource;

        // Create a service client
        QueryServiceClient queryClient = new QueryServiceClient();

        // Create an empty paging object
        Paging paging = null;

       // Call the query to retrieve the results
       DataSet dataSet = queryClient.ExecuteStaticQuery(queryName, ref paging);

       // Set as the data source of the binding source
       bindingSource.DataSource = dataSet;
       bindingSource.DataMember = dataMember;
   }
   catch (Exception _ex)
   {
       MessageBox.Show(_ex.Message);
   }
}
The first two lines of code sets the chosen query name and the data member. This data member is the actual list that is bound to the binding source. Here, we have the same name as the query because the CVRMember table has the same name as the CVRMember query object, as shown in the following code:
        // Determine the selected query / datamember
        string dataMember = cboAxQueryName.Text;
        string queryName = cboAxQueryName.Text;
Next, the binding source is created and set as the data source of the DataGridView control:
        // Create a binding source for members
        BindingSource bindingSource = new BindingSource();

        // Set the binding source as the data source for the data grid
        dtgAxData.DataSource = bindingSource;
Now we can start to think about fetching data from Microsoft Dynamics AX. So, let's create a service client and call the operation to execute the query. Note that for now, we have a variable of the type Paging that is set to null, as shown in the following code, because we add the paging functionality later in this chapter:
        // Create a service client
        QueryServiceClient queryClient = new QueryServiceClient();

        // Create an empty paging object
        Paging paging = null;

       // Call the query to retrieve the results
       DataSet dataSet = queryClient.ExecuteStaticQuery(queryName, ref paging);
Once the dataset containing the resulting records is returned, we can set it as the data source for the binding source.
       // Set as the data source of the binding source
       bindingSource.DataSource = dataSet;
       bindingSource.DataMember = dataMember;
That's all there is to it. To test the code, run the application and hit the Refresh button with the CVRMember query selected. The result should look like the following screenshot:
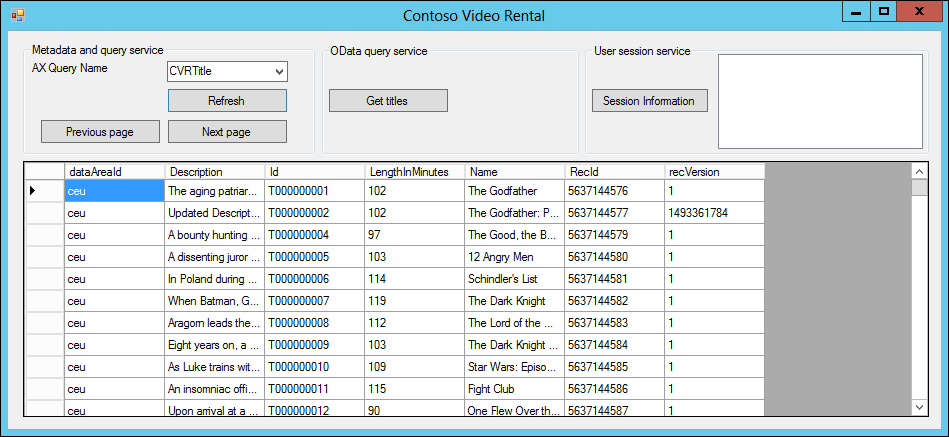
The next thing that we want to enable in our application is paging. To handle large data sets, we can make use of paging to retrieve only a defined number of records at a time. In our example, we want to use pages of ten records.
The first thing to do is to add a member variable to the form that keeps track of the starting position, as shown in the following code:
private int nextStartPosition = 1;
The code behind the paging buttons is rather simple and will just decrement or increment the starting position for data retrieval by 10. After adjusting the starting position, the data is refreshed by calling the refreshData() method as seen before:
private void cmdNextPage_Click(object sender, EventArgs e)
{
    nextStartPosition += 10;
    this.refreshData();
}
private void cmdPreviousPage_Click(object sender, EventArgs e)
{
    nextStartPosition -= 10;
    this.refreshData();
}
The code behind the paging buttons is in place, but we still need to add some code to the refreshData() method to actually deal with the paging of the data. So, we need to replace the following line of code:
// Create an empty paging object
Paging paging = null;
Replace it with the following piece of code that tells the query service to only fetch 10 records starting from the currently calculated starting position:
 // Create a paging object to start at the starting offset and fetch
 // 10 records
 Paging paging = new PositionBasedPaging()
 {
     NumberOfRecordsToFetch = 10,
     StartingPosition = nextStartPosition
 };
When we now run our application, the result should be as shown in the following screenshot:
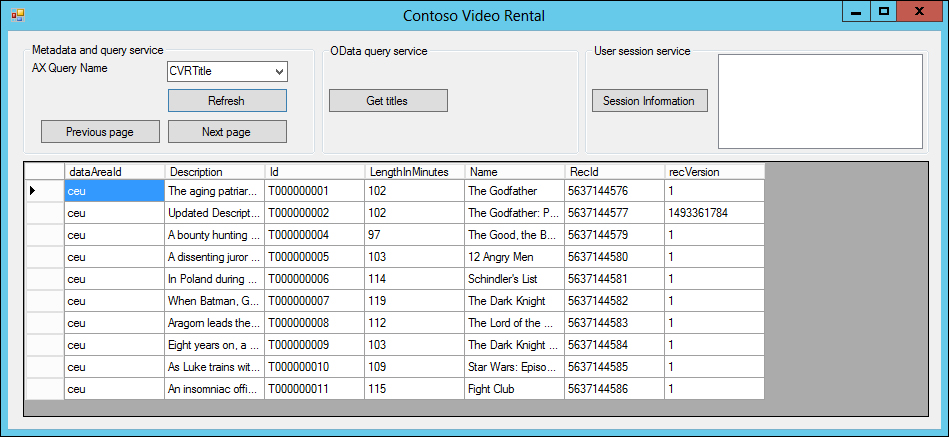
Notice that we only have 10 records in our DataGridView control, and by clicking on the Next page button, we get to see the next set of records, as shown in the following screenshot:
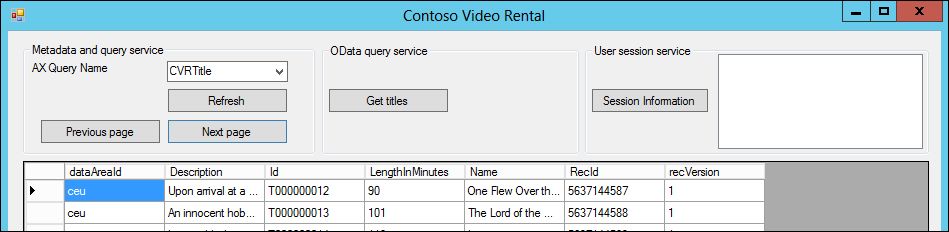
Note
For paging techniques such as position-based paging to work, you have to use a query that contains at least one sorting field. This field will be used to order the results before the paging is applied. In our demo application, the CVRTitle query has the Id field in the Order By node of the query data source. The CVRTitleListPage query does not have a sorting field, which is why it will not work if you try to retrieve all titles using that query.