Easy-to-understand and impressive reporting is the key to a successful Vulnerability Assessment. It is very important to understand who the target audience is before you write a Vulnerability Assessment report. Most of the time, a Vulnerability Assessment report will be read by different groups and by audiences at varying levels of proficiency. Some of them may have very strong knowledge about technical terms and some may not understand anything technical; hence, it's important that the report have the right mix of material that addresses both technical and non-technical audiences. It is important to generate a comprehensive Vulnerability Assessment report to make others aware of the vulnerabilities found in the text format so that it is easy to understand for the target readers.
This chapter will show you how to write a successful vulnerability report. The key areas that will be covered in this chapter are as follows:
- Report generation
- Report customization
- Report automation
What to include and what not to include in a vulnerability assessment or penetration testing report has always been a subject of discussion. It is important for you to understand that a Vulnerability Assessment will not achieve its objective without a good report.
The report should be written keeping the audience in mind. In most of the cases, Vulnerability Assessment reports are distributed to different teams in a big enterprise, with different levels of understanding about the report.
A management professional is not interested in looking into the details of each vulnerability. They would rather see a summary of the assessment with a quick screenshot of the number of vulnerabilities that have been identified, categorized by their severity; this can be better captured in a graphical representation along with some text around the section showing critical/high/medium/low severity vulnerabilities. On the other hand, a technical person would like to see more technical details about the vulnerability report and a step-by-step procedure, in case it is a penetration testing report; this will help them reproduce the vulnerability. A technical person would also like to receive recommendations on how to fix the vulnerability.
Nessus generates a report of the successful scan, which captures details about each vulnerability. Depending on the audience, the report can be customized. It is recommended to choose and apply appropriate filters to decide on report content if you perform the scan very often and want to produce the report in the same format each time. Security consultants may not want to do that since they get different reporting requirements from different clients.
Nessus generates reports for all completed scans, which can be exported to the local system and it allows you to generate reports from previous scans as well. Multiple formats of the report are available in Nessus, that can be chosen while generating the report.
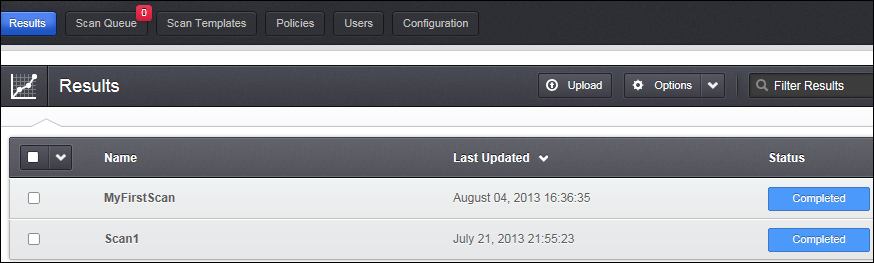
After completing a scan, Nessus stores the scan results. Nessus stores scan results under the Results tab as shown in the following screenshot:
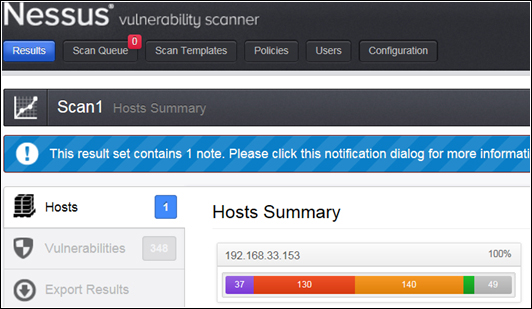
A double-click on the scan result will show the detailed view of that particular scan result. This view has three different tabs: Hosts, Vulnerabilities, and Export Results. Under the Hosts tab, the host summary can be seen. This has the severity-wise (critical, high, medium, low, and informational) count of the vulnerabilities.
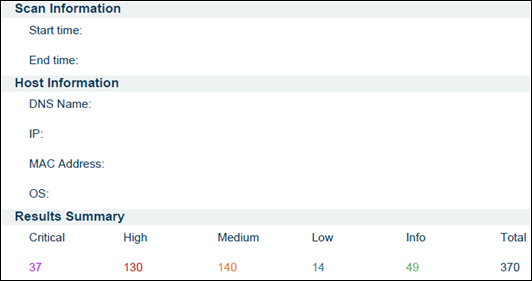
The following screenshot shows that a host has been scanned, which has thirty-seven critical, one hundred and thirty high, one hundred and forty medium, zero low, and forty-nine informational vulnerabilities:
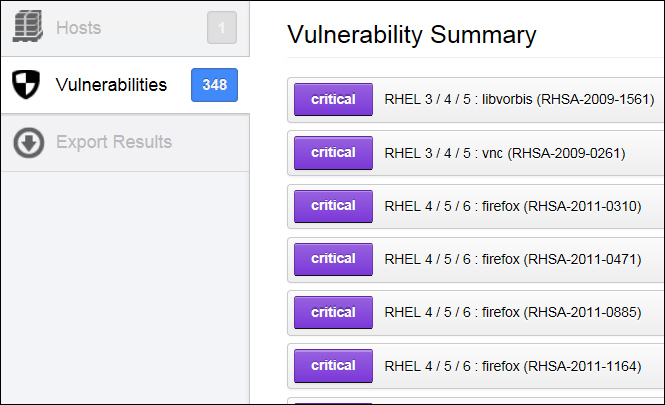
The next tab is the Vulnerabilities tab; this shows the vulnerabilities summary with the risk severity of each vulnerability. Double-clicking on any vulnerability will take you to a detailed view of that vulnerability, which details the synopsis, description, solution, vulnerability web links, plugin information, risk information, vulnerability information, reference information, plugin output, and so on. A risk severity modification option is also available in the detailed view. The following screenshot shows a vulnerability summary view:
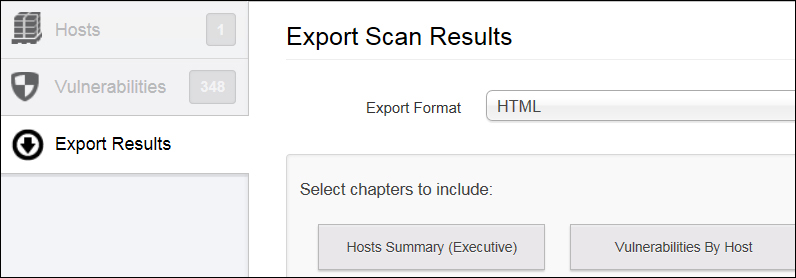
The last tab is Export Results; this provides an option to export a Nessus scan result report in different formats, such as HTML, PDF, and CSV. You can also select what requires to be included in the report from the following options:
- Hosts Summary (Executive): This option will export a report that shows a high-level summary of the vulnerabilities discovered
- Vulnerabilities By Host: This option will export a report that shows the vulnerabilities by host
- Compliance Checks (Executive): This option will export a report that shows an executive summary related to the selected compliance checks
- Vulnerabilities By Plugin: This option will export a report that shows the vulnerabilities by plugin
- Compliance Checks: This option will export a report that shows details related to the selected compliance checks
The preceding options can be seen in the following screenshot:
One or more options can be chosen, depending on the need.
Nessus provides you with an option to remove or delete a vulnerability before you export the reports so that if you know that vulnerability is not applicable to you, you can remove or delete it from the Nessus vulnerability list.
At the top of the Results page, a filtering option is available. This option allows you to filter a Nessus report based on the few available criteria you select from the drop-down menu. You can add multiple filters at a time.
For example, you can add multiple filters by choosing the options in the filter drop-down menu to get the report with vulnerabilities, which have a high risk factor, can be exploitable with Exploit Available in MetaSploit and exploitability ease is Exploit Available.
The following screenshot shows how to add a filter:
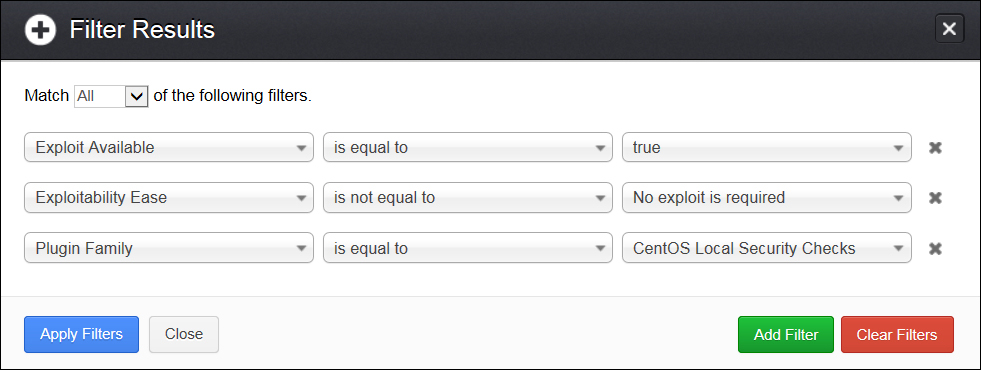
Filters can be added and removed using the Add Filter and Clear Filters buttons, respectively. Nessus also gives a Match option with Any and All conditions. The Any condition indicates whether or not any one of the filter options specified is met. The All condition indicates that all the filter conditions set should be met.
Other options in the Nessus reporting tool are for comparing the results of two scans and audit trails. Nessus also allows you to upload the scan results from a different machine, using which you can generate reports as per your need.
The Nessus report contains a lot of details about the scan and vulnerabilities. Information about the scan is in the form of a list of scanned IPs, the scan's start time and end time, DNS name, Mac address, operating system, and a result summary that gives an overall vulnerability count as well as the severity-wise breakup of vulnerability.
The following scan information is captured in Nessus reports:
- Target IP address
- Target host name
- Target Mac address
- DNS name
- Scan start time
- Scan end time
- Target operating system
Some of the fields are shown in the following screenshot:
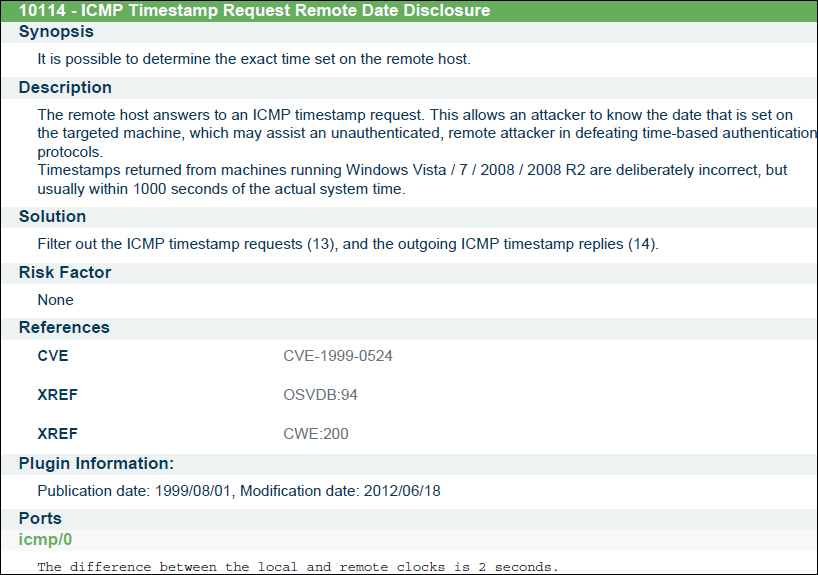
The Nessus report details the vulnerabilities found in a Nessus scan for the scanned hosts. This includes the following information about each vulnerability:
- Vulnerability against the plugin numbers
- Synopsis
- Description
- The See Also link about that vulnerability
- Solution
- Risk factor
- CVSS base score
- References
- Plugin information
- Exploit With
- Ports
The following screenshot shows a sample vulnerability with the details of a vulnerability shown in a Nessus-generated report: