
A sequential reading of this chapter is required for readers before jumping into this section. In the previous sections, we have explained the prerequisites one should take care of before running a scan. Also, it has been discussed how a scan policy should be configured and customized as per the target organizations security policy and what the differences are between a credential and a noncredential scan.
How to initiate and execute a scan is illustrated in this section. To initiate a scan, we assume that the scan prerequisites that were previously mentioned in this chapter have been executed. For initiating a scan, log in to Nessus by using your Nessus credentials and click on Scan Queue from the uppermost bar of Nessus.
The Scan Queue bar has two buttons, namely New Scan and Options, which is a drop-down menu that provides you with options to resume a scan, pause a scan, or stop a running scan. Click on the New Scan button to initiate a new scan.
This has two options in the left-most panel, one for general settings and an other for e-mail settings.
General settings are the settings of a new scan such as what will be the name of the scan, do you want to run it now or save it as a template, which scan can be run later or you may want to schedule a scan for a desired time, and on which scan it will automatically take place. You can also select the policy which you want to use for this new scan from the policy's drop-down menu. Also, this is the place where you provide IPs that you want to scan. This also provides you with the ability to upload a file, which has a list of IPs to be scanned during this new scan.
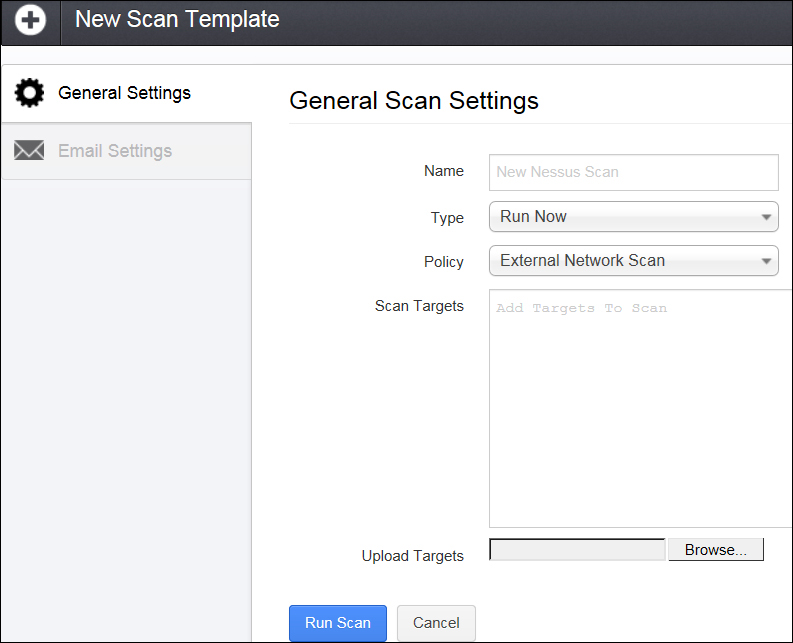
The following table describes the settings given in the preceding screenshot:
|
General scan setting |
Description |
|---|---|
|
Name |
How you want to name your scan |
|
Type |
This has the following three options in a drop-down menu:
|
|
Policy |
This is again a drop-down menu that lists all your Nessus scan policies. We discussed about creating a policy in the previous section. This policy should be selected from the drop-down menu, which will be used for the scan. |
|
Scan Targets |
All IPs, which need to be scanned should be listed here. |
|
Upload Targets |
If you have a text file, which has a list of IPs to be scanned, the same can be imported here in Nessus. |
In the end, you have a Run Scan button that will initiate the scan.
E-mail settings can be configured for a scan if your Nessus is configured with an SMTP server. This is used to e-mail the scan results automatically post completion. Recipients' e-mail IDs can be keyed in here in the Recipient(s) input box. Also, report filters can be configured. In this case, results will be e-mailed to the recipients if the report filter matches, as shown in the following screenshot:
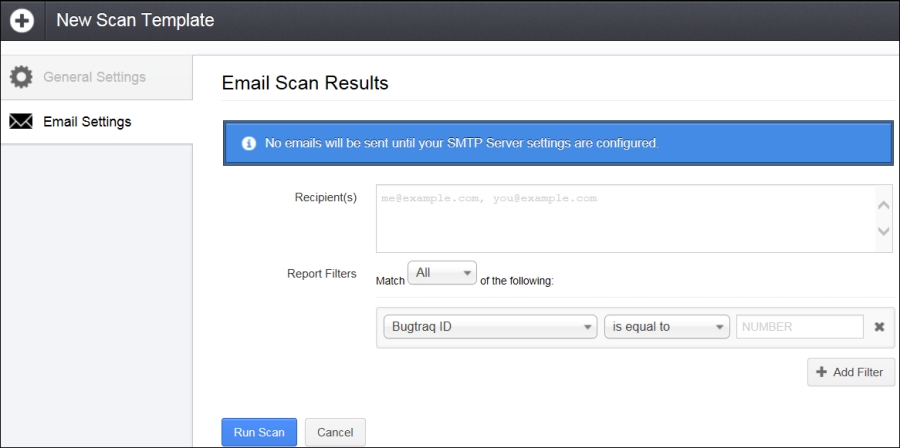
The following table describes the settings given in the previous screenshot:
|
Email Scan Result Settings |
Description |
|---|---|
|
Recipient(s) |
To whom you want to send the automated e-mails of the scan results, e-mail IDs of the recipients to be given here. |
|
Report Filters |
Report filters can be configured here to match a particular condition or filter. If that matches, an automated e-mail of the result will trigger to the recipients. |
At the end, you have a Run Scan button that will initiate the scan.
In the previous section, we have seen how a scan should be initiated. Once you click on Run Scan, the scan takes place.
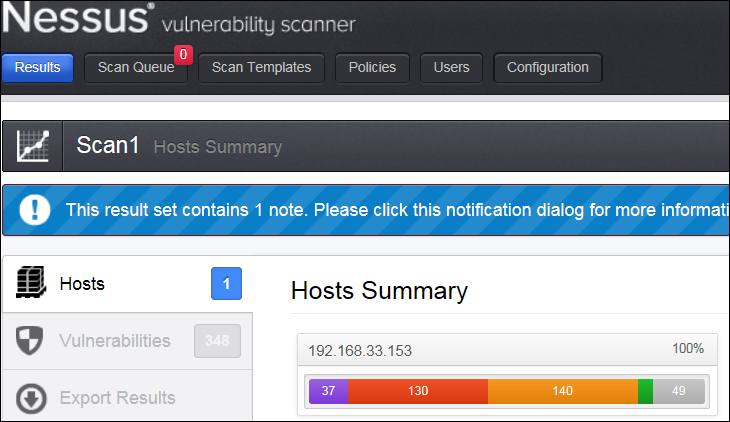
Results of completed scans can be seen under the Results tab. A double-click on the scan result will open the detailed view of a particular scan result. This has three different tabs, namely Hosts, Vulnerabilities, and Export results. Under the Hosts tab, the host summary can be seen. This has a severity-wise count (critical, high, medium, low, and informational) of vulnerabilities.
The following screenshot shows that a host is scanned, which has 37 critical, 130 high, 140 medium, 0 low, and 49 informational vulnerabilities:
The next tab is Vulnerabilities; this shows the vulnerabilities' summary with the risk severity of each vulnerability. Double-clicking on any vulnerability will take you to a detailed view of that vulnerability, which details synopsis, description, solution, vulnerability web links, plugin information, risk information, vulnerability information, reference information, plugin output, and so on. A risk severity modification option is also available in the detailed view.
The final tab is Export Results; this provides an option to export a Nessus scan results report in different formats, such as HTML, PDF, and CSV. One can also select what is required to be included in the report from the following options:
- Host summary and executive summary
- Vulnerabilities by host
- Vulnerabilities by plugin
- Compliance check executive
- Compliance check
One or many of these options can be chosen depending on the requirements.
A few sections of this chapter have been referenced from the learning material available on Nessus website: http://www.tenable.com.