
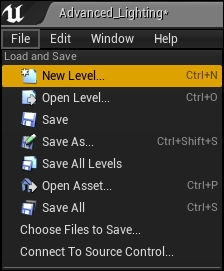
If you want to start creating a level from scratch, simply click on File and navigate to New Level..., as shown here:
You can then select between Default and Empty Level. I think selecting Empty Level is a good idea, for the reasons that are mentioned later.

The new level will be completely black in color to start with. Try dragging and dropping some objects from the Content Browser tab again.
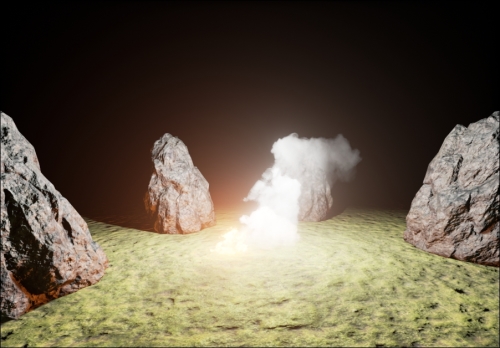
This time, I added a resized shapes / box for the ground plane and textured it with moss, a couple of Props / SM_Rocks, Particles / P_Fire, and most importantly, a light source.
Be sure to save your map. Here's a snapshot of my map (how does yours look?):
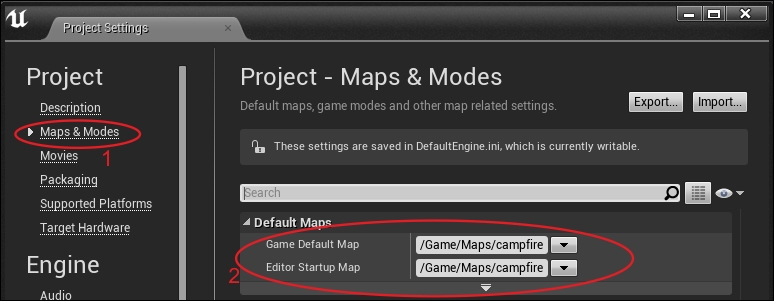
If you want to change the default level that opens when you launch the editor, go to Project Settings | Maps & Modes; then you will see a Game Default Map and Editor Startup Map setting, as shown in the following screenshot:
Note that if your scene appears completely black, it is possible that you forgot to put a light source into it.
In the previous scene, the P_Fire particle emitter acts as a light source, but it only emits a small amount of light. To make sure that everything appears well-lit in your scene, you should add a light source, as follows:
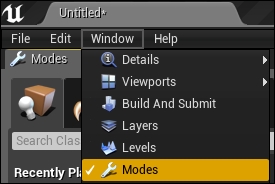
- Go to Window and then click on Modes to ensure that the light sources panel is shown:
- Then, from the Modes panel, drag one of the Lights object into the scene:

- Select the lightbulb and box icon (it looks like a mushroom, but it isn't).
- Click on Lights in the left-hand side panel.
- Select the type of light you want and just pull it into your scene.
If you don't have a light source, your scene will appear completely black.
You might have noticed that, so far, the camera just passes through all the scene geometry, even in play mode. That's not good. Let's make it such that the player can't just walk through the rocks in our scene.
There are a few different types of collision volumes. Generally, perfect mesh-mesh collisions are way too expensive to do at runtime. Instead, we use an approximation (a bounding volume) to guess the collision volume.
The first thing we have to do is associate a collision volume with each of the rocks in the scene.
We can do this from the UE4 editor as follows:
- Click on an object in the scene for which you want to add a collision volume.
- Right-click on this object in the Scene Outliner tab (the default appears on the right-hand side of the screen) and select edit, as shown in the following screenshot:

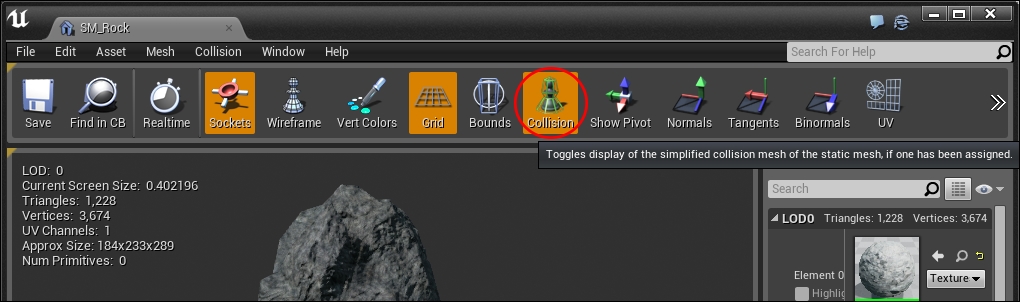
- Ensure that the collision volume is highlighted, at the top of the screen:
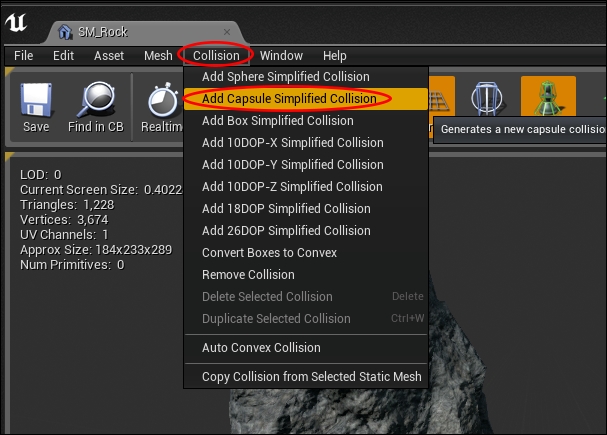
- Go to the Collision menu and then click on Add Capsule Simplified Collision:
- The collision volume, when added successfully, will appear as a bunch of lines surrounding the object, as shown in the following images:
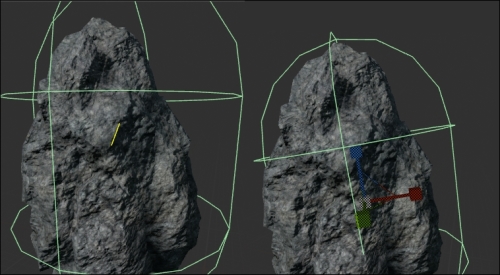
The default collision capsule (left) and manually resized versions (right)
- You can resize (R), rotate (E), move (W), and change the collision volume as you wish, the same way you would manipulate an object in the UE4 editor.
- When you're done with adding collision meshes, try to click on Play; you will notice that you can no longer pass through your collidable objects.