In this chapter, we will look at ways to improve the return on investment from the Salesforce CRM application, by adding further values and improving the experience of users in the system.
We will look at user adoption and describe ways to maximize the benefits of CRM within your organization, by introducing additional functionalities using external applications from the AppExchange Marketplace. These include the Salesforce Adoption Dashboards app, which is a free app provided by Salesforce through their Force.com Labs AppExchange listing.
As businesses evolve and processes change, new functionalities and information requirements are often identified. Here, we will look at the importance of planning and scheduling the release of changes to your application and provide some best practices relating to change management.
It will be seen how achieving successful user adoption can enhance your business processes and increase productivity, and the more the business's teams use Salesforce CRM, the more valuable the data and information analysis becomes.
We will discuss how successful user adoption can be achieved by empowering users and making their working lives easier. By providing users with information relevant to their daily tasks, keeping data clean and keeping functionality simple, users are not overburdened with unnecessary actions that overcomplicate and reduce productivity.
The Salesforce AppExchange Marketplace is a website provided by Salesforce.com that enables organizations to select additional applications, known as apps, to add new features to their Salesforce CRM application.
Both the Salesforce CRM application and the AppExchange provide web-delivered platforms to use and build applications. This integrated web-delivered approach allows for the installation of applications and new functionalities from AppExchange into Salesforce, which is often far simpler and more cost-effective than traditional software update mechanisms. The benefits of the AppExchange are that system administrators can easily extend the Salesforce CRM application as your company's business requirements change.
There is a wealth of solutions available from the Salesforce AppExchange marketplace to help achieve most requirements. In this section, we will describe and step through the process of installing an example app.
The apps and services listed on AppExchange are provided by the Salesforce community of third-party developers and system integrators. Many of the apps are also provided by Salesforce themselves, through their team known as the Force.com Labs.
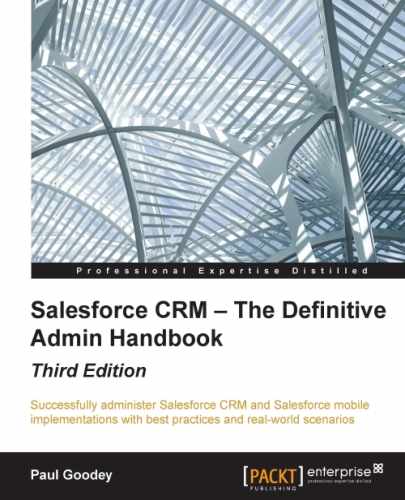
Apps can sometimes incur additional costs, but there are many that are provided for free or for a small fee. In general, apps provided by the Salesforce.com Force.com Labs team tend to be free. To access AppExchange, navigate to Setup | AppExchange Marketplace, as shown in the following screenshot:
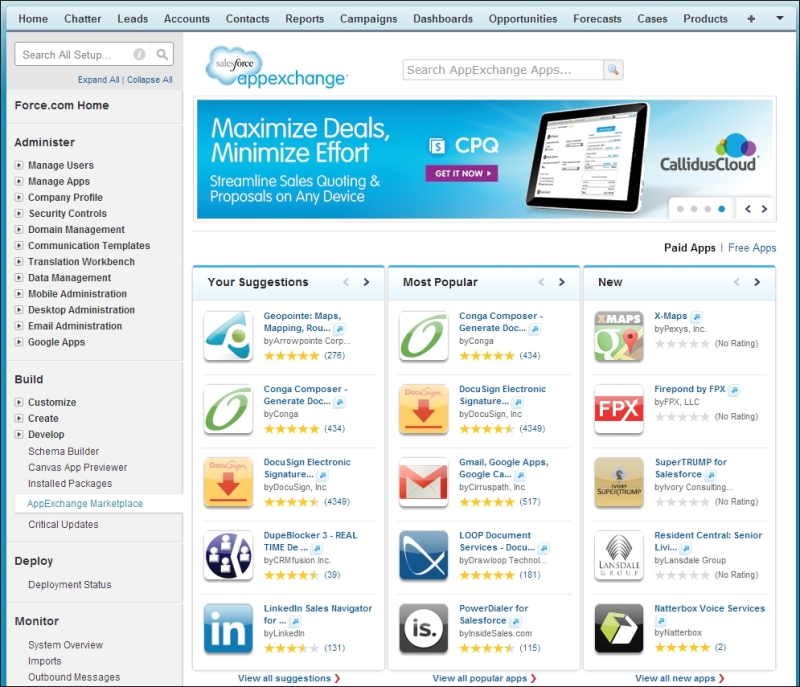
You can also access the AppExchange Marketplace website directly outside Salesforce CRM by navigating to http://www.appexchange.com/, as shown in the following screenshot:
As a directory, Salesforce AppExchange is similar to consumer websites, such as App Store from Apple, in the way that it seeks to provide an open, community-based channel for the distribution, retrieval, and installation of applications.
AppExchange differs, however, in that it provides not only the facilities for third-party distribution of apps, but also the listing of services by system integrators. This enables the Salesforce community to search for and review both apps and services from a central site.
Salesforce terms the collection of components and applications that are distributed through AppExchange as a package. There are two types of packages, namely managed and unmanaged.
Managed packages differ from unmanaged packages by the use of protected components that allow the managed packages to be upgraded by the developers, perhaps to add new functionality or to refactor in any changes in the Salesforce environment. By protecting certain components such as Apex Code, managed packages also serve to protect the intellectual property of the developer organization.
Unmanaged packages, on the other hand, do not protect components, and are therefore static within your organization as they cannot be upgraded by the publishing developer. They allow you to access all of the implemented customization or code and can be useful if you want to change or extend the functionality yourself.
Sometimes, the apps are distributed by Independent Software Vendors (ISVs), which use the AppExchange package as a channel to advertise their presence and to showcase their range of products.
By showcasing on the AppExchange Marketplace website, ISVs often provide free apps, which help drive traffic and interest toward their core products, which in turn complement Salesforce CRM and are usually provided as web-based solutions in the same way as Salesforce.
These complementary applications are typically deployed alongside Salesforce CRM in support of a specific business process or function. For example, incentive and commission management, project management, product configuration, expense management, address checking, and so on are all examples of Salesforce apps that are available from AppExchange.
Salesforce inspects all registered apps to be sure that they have no obvious security risks. However, it is worth noting that since the apps are developed by third-party providers, you should also carry out extensive testing and due diligence to eliminate any risk before installing the app into your production instance.
After an app has passed the Salesforce inspection, the core functionality and code can no longer be changed. However, custom links and web tabs are allowed to be changed because they might need to be altered after the installation. For example, simple target URLs might need to be changed from one organization to another.
You need to be aware how these links might introduce risks as part of your decision whether to trust the source of an app before installing to production. This is described in more detail in the upcoming sections.
The following steps are recommended to help you understand more about the app and to determine any risks or need for further setup for your organization before actually installing the app into your production instance:
- Read specifications and reviews
- Review screenshots and customization guides
- Take a test drive
Before installing, read the specification associated with the app, where you will see these details: which Salesforce editions are supported, which languages are supported, component summary, and package details.
It is often worth looking at the reviews that have been left by others who have attempted to install the app. Although there is no guarantee that the reviews are 100 percent accurate and they may be subjective, it can give you an indication of the complexity of use and the successful installation of an app by other system administrators.
Most apps that have been listed on the AppExchange website provide screenshots and guides for any post-installation customization that might be required. These are useful and provide a quick indicator of whether the app will be of use to you and your organization.
Apps typically offer a test drive option (especially the more complex apps), where you are directed to an external Salesforce application and can use the app as a read-only user before actually having to install it. A test drive gives you a far better way to determine whether the app is suitable for your organization before installing.
Within the test drive, you have the opportunity to check the app and its components to ensure that they are suitable and pose no security risks. For example, components such as custom links, formula fields, and web tabs can send Salesforce session IDs to external web services.
Salesforce.com recommends that you check all links to external services that include a session ID merge field, because if these session IDs are shared with an external service, they expose your data, and there can be a significant security risk that need to be aware of.
The following steps describe the process of how to install an app into your Salesforce CRM application from the AppExchange Marketplace:
- Get it now
- Examine the package
- Review the security
- Install
- Perform the post-installation configuration
The best way to guide you through the use of new technology is by demonstrating it with an example.
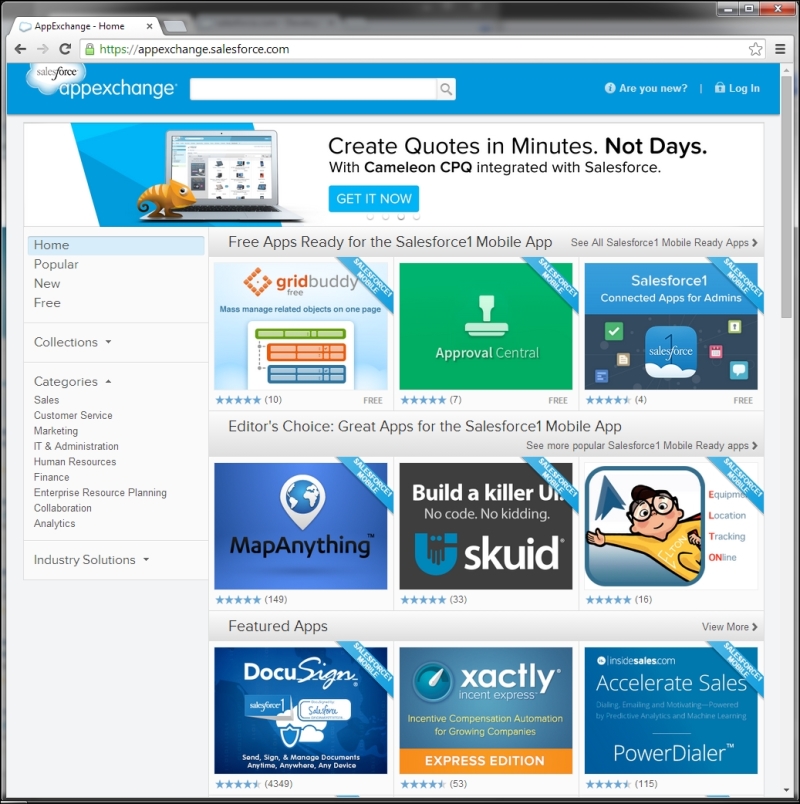
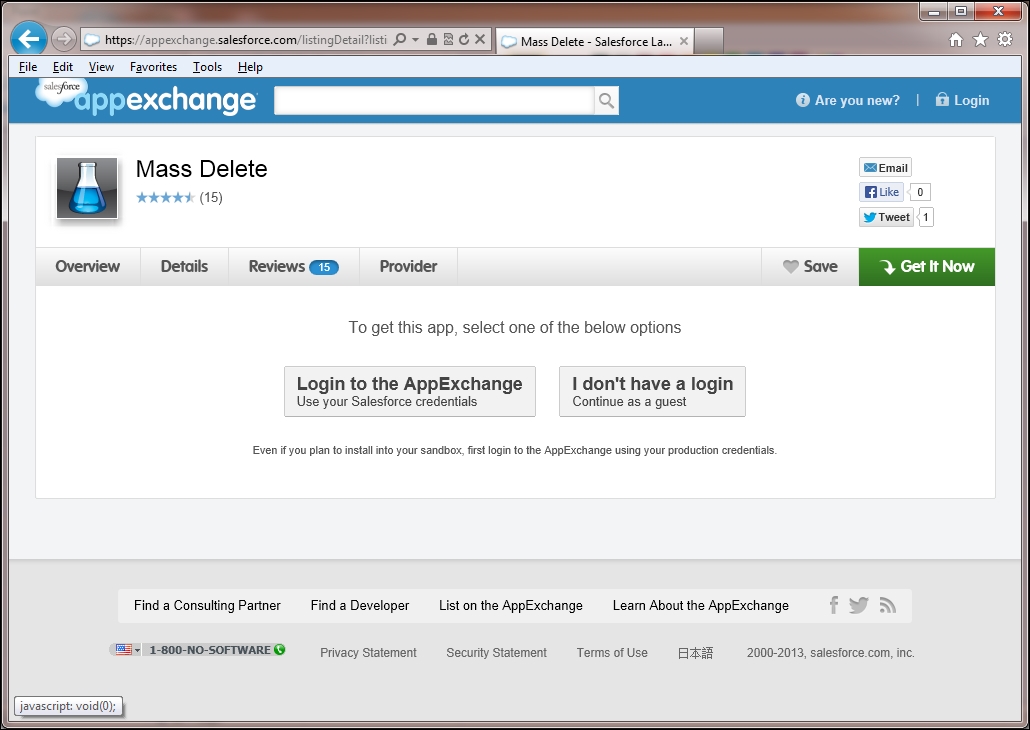
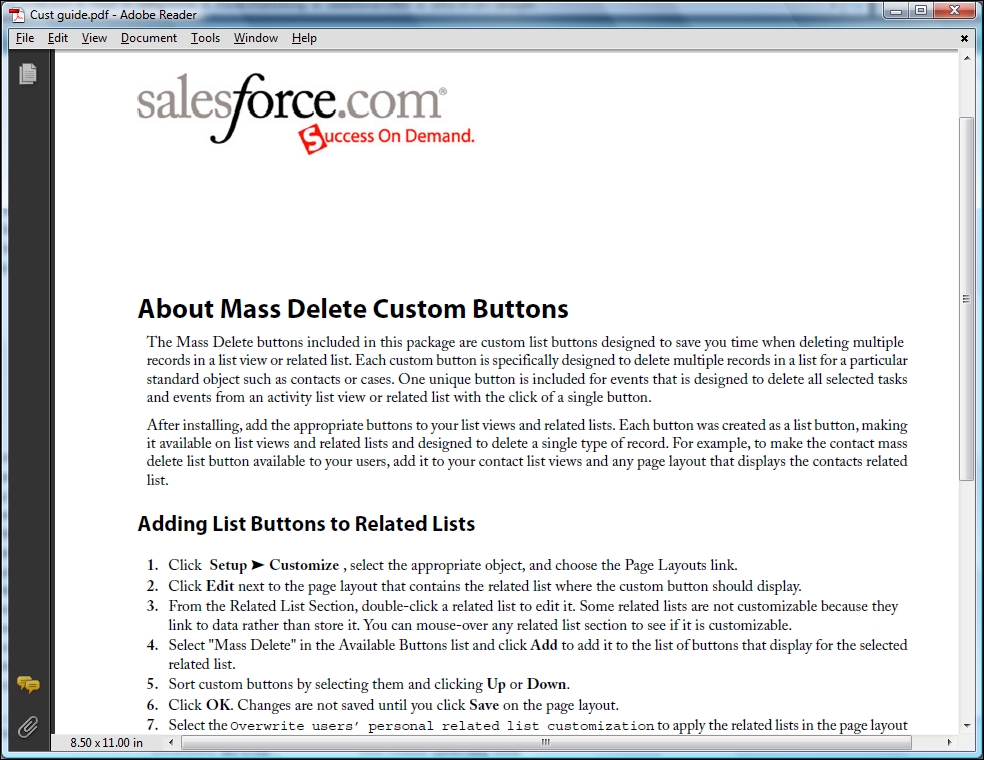
Here, we are going to install an application called Mass Delete, which has been developed and published by Salesforce.com's Force.com Labs team. This is a free app that provides a set of custom buttons that allow users to select any number of records and delete all of them with a single click.
Note
The Mass Delete app from Force.com Labs is available from the AppExchange Marketplace directly through the following URL:
http://appexchange.salesforce.com/listingDetail?listingId=a0N300000016YuDEAU
The Mass Delete app page looks as follows:
By clicking on the Get It Now button, you will start the process of installing the application where you will be prompted to log in to AppExchange using your Salesforce credentials, as shown in the following screenshot:
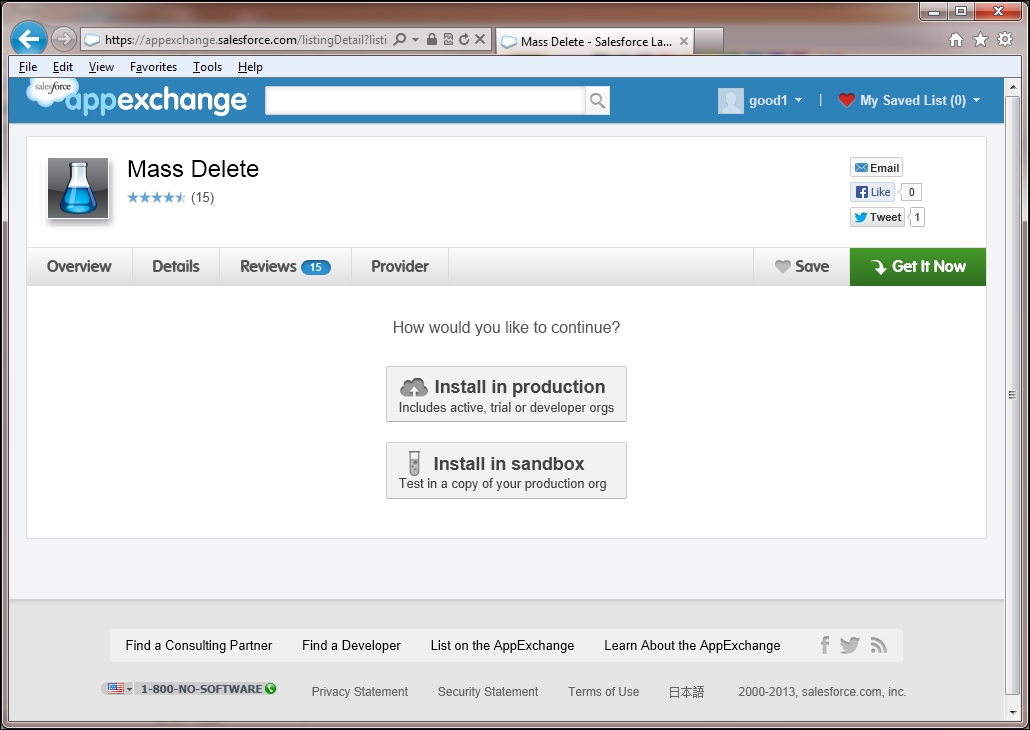
You will then be asked to select the location for the installation, where the options are set to either Install in production or Install in sandbox, as shown in the following screenshot:
You will then be presented with details of the app that will be installed (listed in the What you are installing section) and the Salesforce organization where the app will be installed (listed in the Where you are installing section), as shown in the following screenshot:
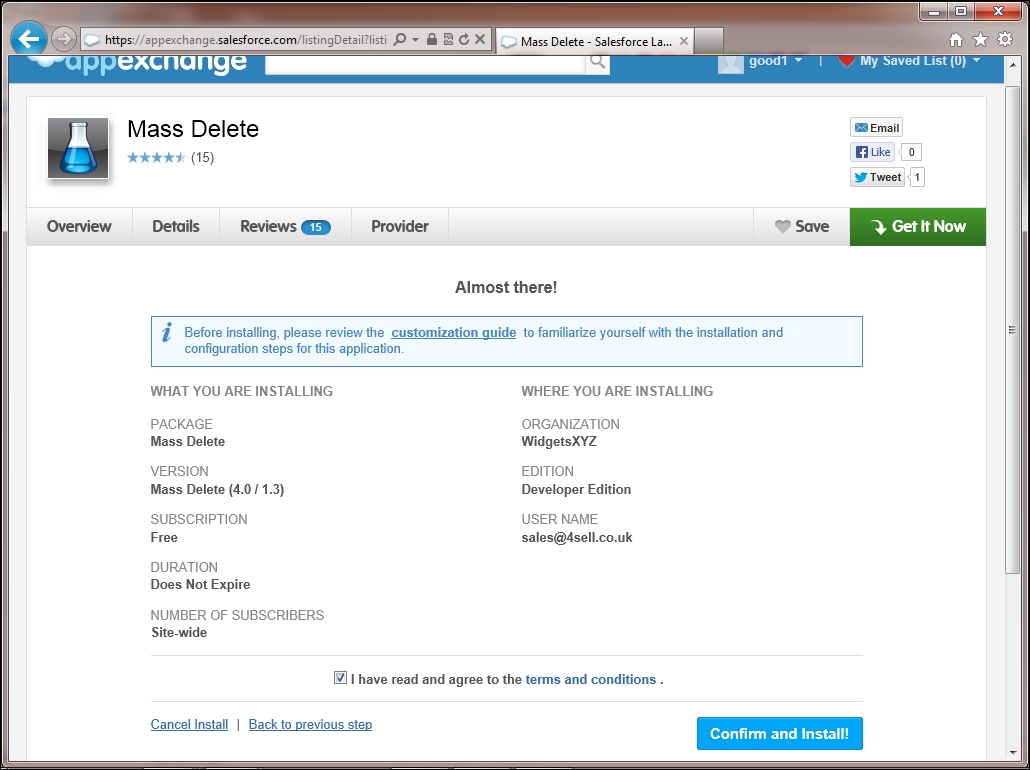
This page shows you information about Package and Version, along with the Subscription, Duration, and Number of Subscribers information, which is a part of the app package.
Click on the checkbox labeled I have read and agree to the terms and conditions to confirm that you agree to proceed with the installation, and then click on the Confirm and Install! button to continue to the Salesforce login screen, as shown in the following screenshot:
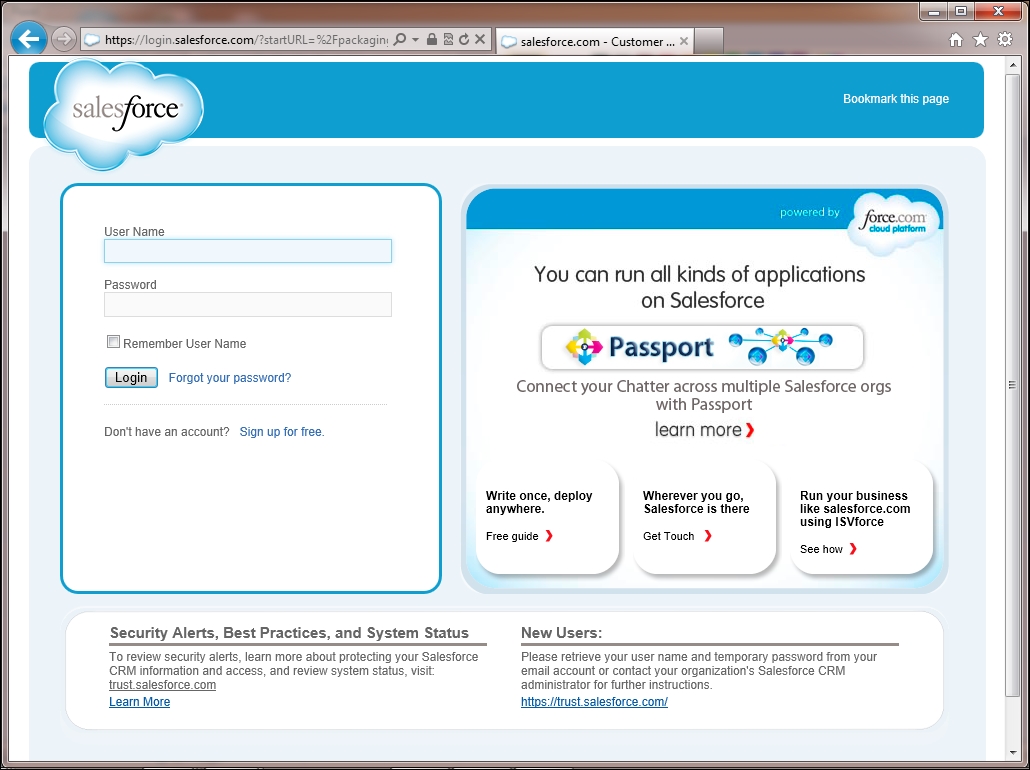
This screen allows you to log in to the Salesforce app. If you wish to install the app into your production org, you would use your production login details along with the Salesforce production URL, which might be https://login.salesforce.com. If you want to install the app into a sandbox org, you must change the login URL to that of the sandbox, which is https://test.salesforce.com, and use you sandbox login details.
Now, enter the User Name and Password fields, and then click on Login to proceed to the next screen.
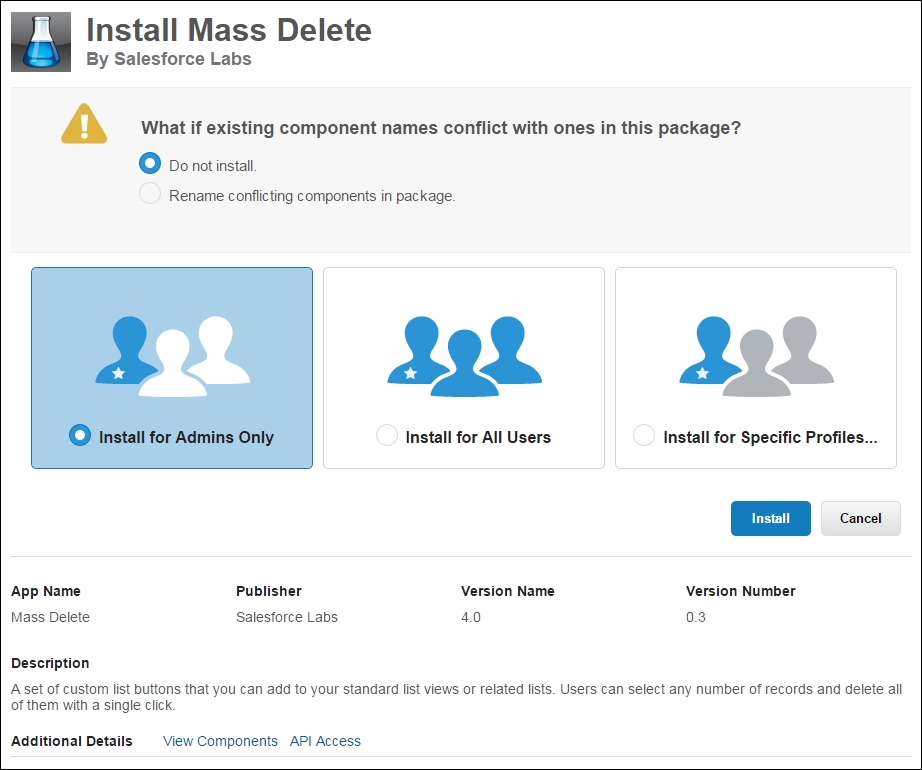
In this pre-install screen, you are presented with an option, termed What if existing component names conflict with ones in this package?, the purpose of which is to handle a situation when an existing component's name conflicts with a component being installed. Here, the options available are Do not install or Rename conflicting components in package.
Also within this pre-install screen you are presented with three options to either Install for Admins Only, Install for all Users, or Install for Specific Profiles...
Choosing the third option Install for Specific Profiles... will allow you select which profiles profiles are given access to the package contents.
Now, click on the Install button to proceed with the installation.
Upon successful installation you will be presented with the following Installation Complete! Screen:
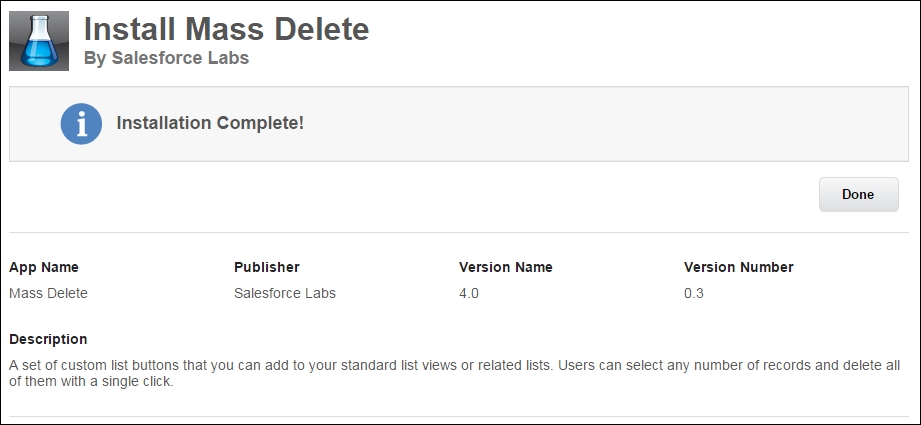
The final Installation Complete! screen shows you information about App Name, Publisher, Version Name, and various other details that make up the app package.
This screen provides confirmation that the app package has been successfully installed.
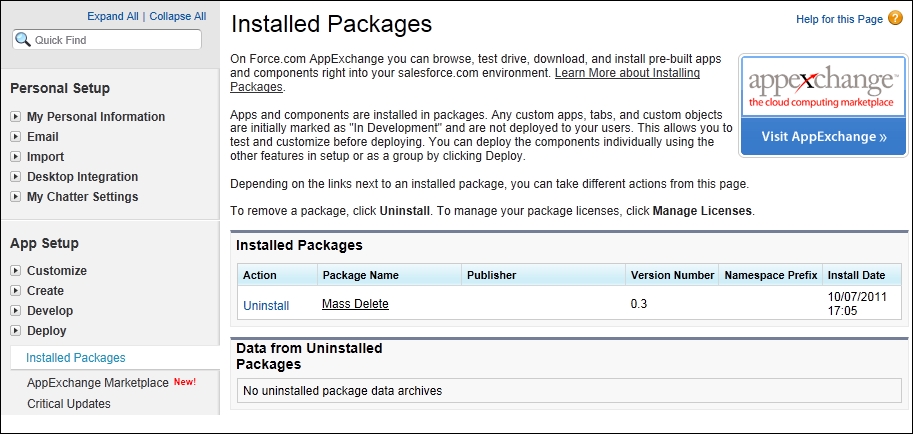
On In this final confirmation screen, clicking on the Done button will navigate from the confirmation page to a screen showing all installed packages for your Salesforce organization.
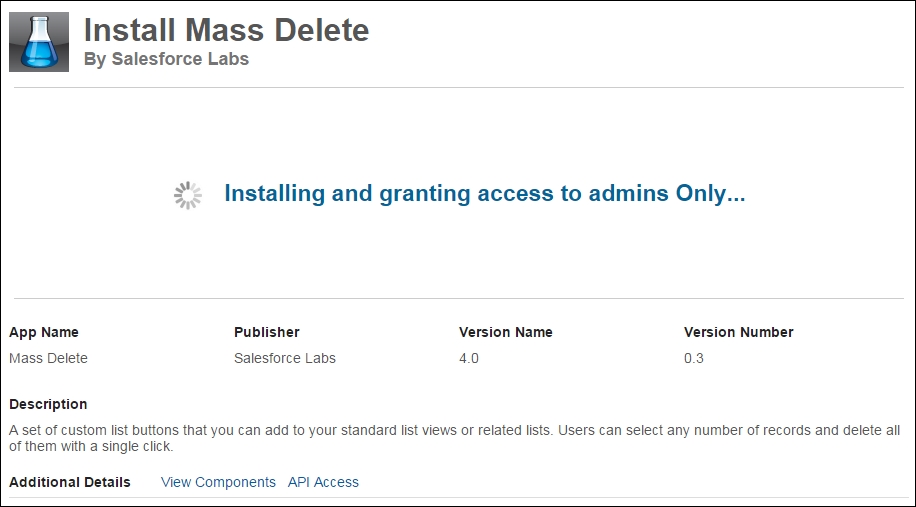
For large and complex apps, you might not see the Installation Complete Confirmation screen straightaway. Instead, either a screen that shows a message that the installation has been scheduled is displayed, for which you later receive an e-mail notification when complete, or a screen is shown indicating the installation is in progress, as shown in the following screenshot:
In this Mass Delete app, included in the package components, is a PDF guide that describes the post-installation configuration that must be applied to the app before the functionality can be used. The guide can be accessed from within the Documents tab, as shown in the following screenshot:
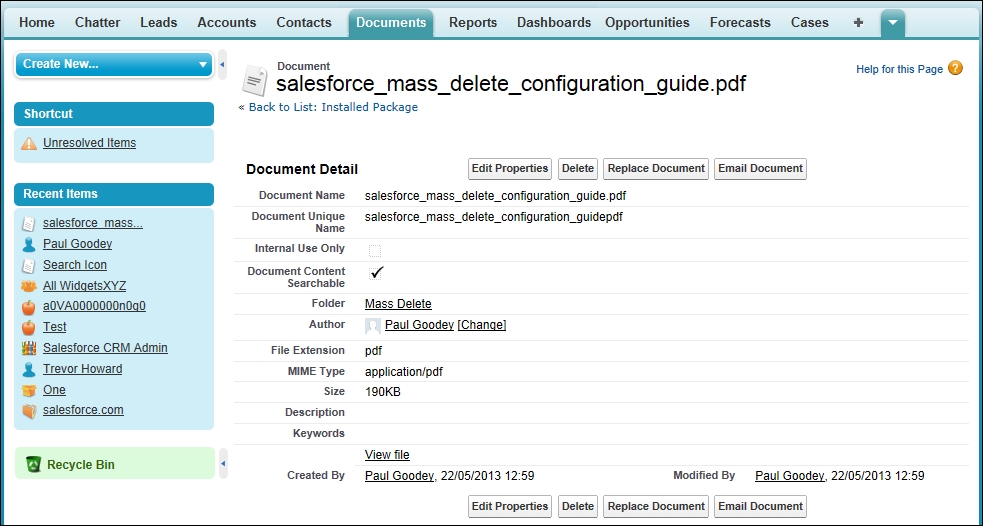
If you do not see the Document tab in your list of tabs, you can add this tab by referring to the section Hiding and showing tabs in Chapter 3, Configuration in Salesforce CRM.
Alternatively, to find the document you could instead use the Global Search option, as described in Chapter 1, Organization Administration, and type the following search term salesforce_mass_delete_configuration_guide.pdf.
The guide describes how to complete the installation and customization of the app:
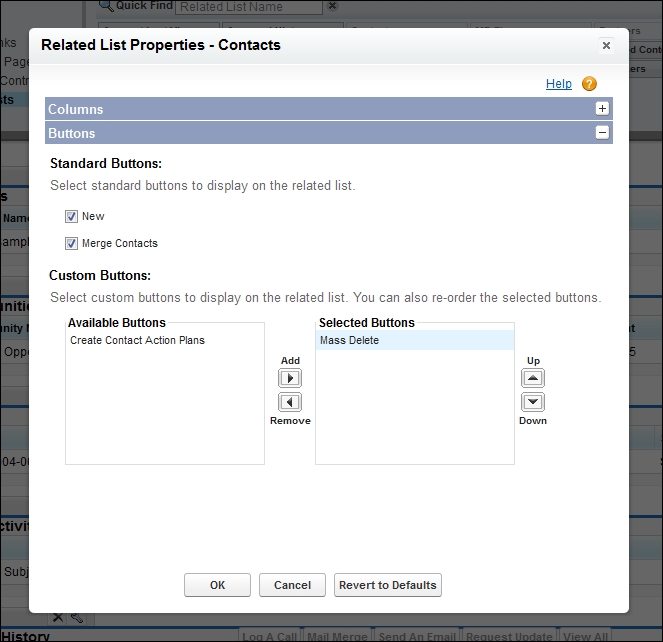
Using the guide, we add the custom list button to the Contacts related list within the Accounts detail page, as shown in the following screenshot:
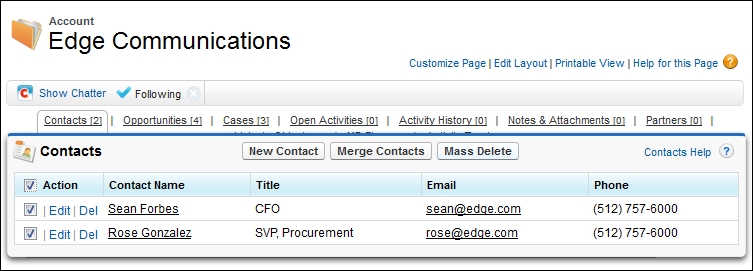
Finally, to verify the installation and customization, we can navigate to the Accounts detail page and access the Contacts related list section, whereupon we can access the Mass Delete custom button and the associated functionality.
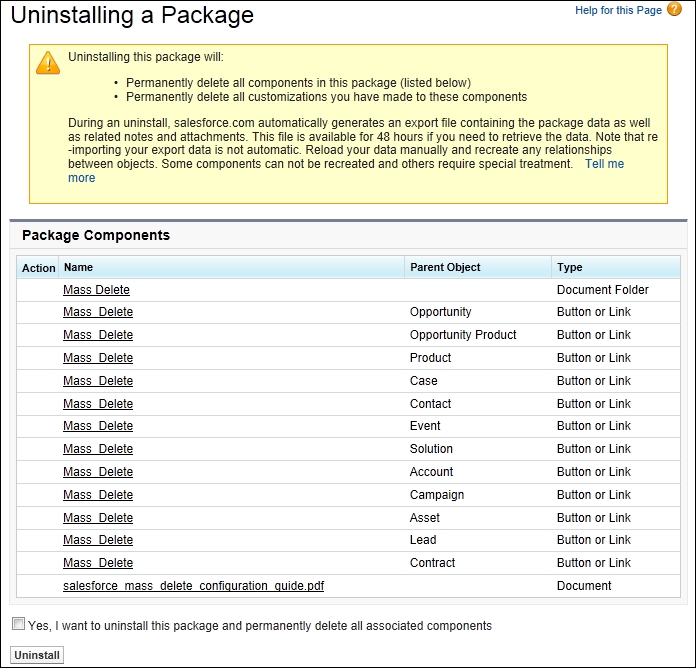
You can uninstall an app that has been installed from the AppExchange, there are some considerations however. If you uninstall a package that includes a custom object, all components associated with that custom object are deleted, such as custom fields, validation rules, workflow rules, approval processes, custom buttons and links, and so on.
Note
You cannot uninstall a package if any component in the package is referenced by a component that will not be included in the uninstall operation, or if a field added by the package is being updated by a scheduled job, such as a time-based workflow field update (you must wait until the background job finishes and retry).
After an uninstall operation, Salesforce automatically creates an export file containing the package data. When the uninstall operation is complete, Salesforce sends an e-mail containing a link to the admin user who is carrying out the uninstall operation.
The export files (plus related notes and attachments) are listed below the list of installed packages.
Now, select the installed package and either click on the Uninstall action or click on the package name to review the details of the package. Then set the uninstall confirmation checkbox. Finally, click on the Uninstall button as shown in the following screenshot:
The following best practices should be applied as part of the installation of apps from the AppExchange Marketplace website:
- Clarify that the specification for the app meets the requirements and assess any reviews and comments
- Take a test drive, if available
- Review all the components that are included in the package and be aware of any security issues concerning links and session IDs
- Test the app in a sandbox before deploying it into production
- Try to enlist business support to own and validate the app before deploying it into production
- Consider undertaking a pilot deployment for selected users if the app is particularly complex
- Communicate the app to the business prior to deployment and activation in production
- Prepare training material for all affected users if the app is particularly complex