You can configure your organization's workflow by creating workflow rules. Each workflow rule consists of:
- Criteria that cause the Salesforce CRM application to trigger the workflow rule
- Immediate actions that execute when a record matches the criteria
- Time-dependent actions that the Salesforce CRM application processes when a record matches the criteria and executes according to the specified time triggers
The following table is an overview of the key aspects of configuring workflow rules in Salesforce CRM:
Rules
Actions
Users
Object
Criteria
E-mail alerts
Immediate
People
Time-dependent
Tasks
Immediate
Time-dependent
Field updates
Immediate
System
Time-dependent
Outbound messages
Immediate
Time-dependent
Example workflow rule
Opportunity
Whenever an opportunity record is updated
E-mail Alert
Immediate
Account Owner
The following steps outline what's required to create a workflow rule:
- Create the workflow rule and select the object.
- Configure the settings and criteria for the workflow rule.
- Specify the workflow actions.
- Activate the workflow rule.
To create a workflow rule, navigate to Setup | Create | Workflow & Approvals | Workflow Rules.
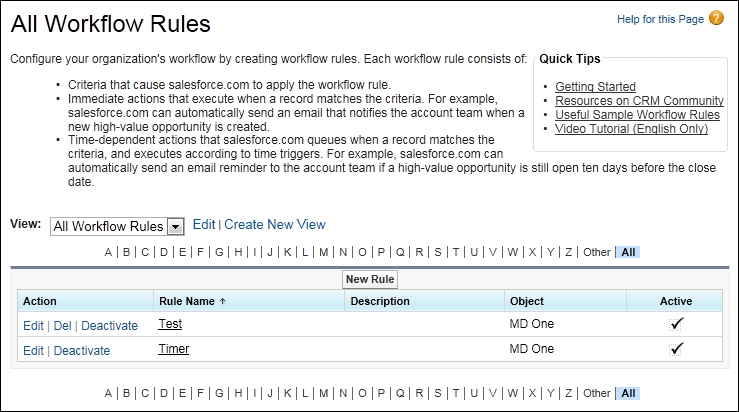
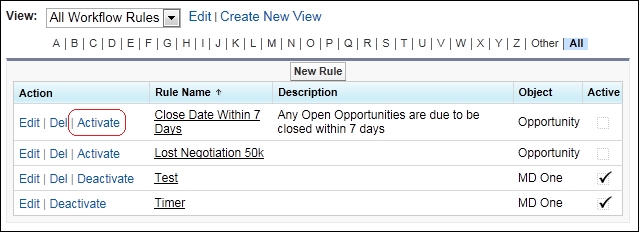
The Workflow Rules details page shows you a list of the current workflow rules along with various properties, such as the associated object and whether the rule is active. On this page, you can create views to help filter and manage the list of rules as the numbers increase. The following screen shows you the list of all the workflow rules in our organization using the All Workflow Rules view.
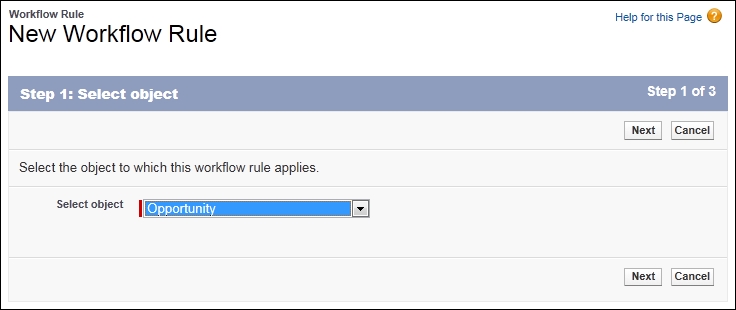
From the workflow rules list page, you can click on the New Rule button and then select an object (either a custom or standard object) on which you want to apply your new workflow rule. In the Step 1: Select object screen shown as follows, the standard object Opportunity has been selected.
Now, click on Next to navigate and display the Step 2: Configure Workflow Rule page to allow the rule settings and criteria to be specified, as shown in the following screenshot:
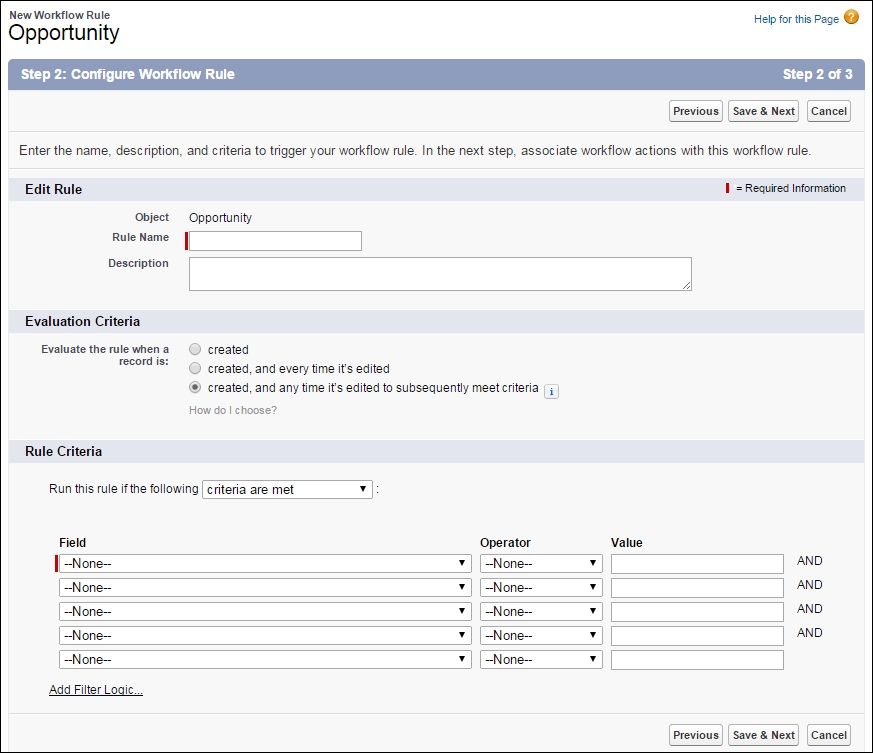
In the Edit Rule section, you must enter a rule name and, optionally, you can enter a description for the rule.
In the Evaluation Criteria section, you choose the appropriate criteria that causes the Salesforce CRM application to trigger the workflow rule.
The criteria can be selected from the following three options:
- created: Choose this option to ignore any subsequent updates to existing records, as the rule will only ever run once—when the record is inserted.
- created, and every time it's edited: Choose this option to include new record inserts and updates to existing records. These actions cause repeated triggering of the rule as long as the record meets the criteria.
- created, and any time it's edited to subsequently meet criteria: Choose this option to include new records and updates to existing records.
For example, if the updating of an opportunity record's probability to 90 percent causes the rule to run, with this option, the rule will only get triggered again if the probability changes and then changes back to 90 percent, regardless of how many times the record itself is updated.
In the Rule Criteria section, there are two ways to formulate the logic that is used to trigger the workflow rule. They are as follows:
- Run this rule if the following criteria are met
- Run this rule if the following formula evaluates to true
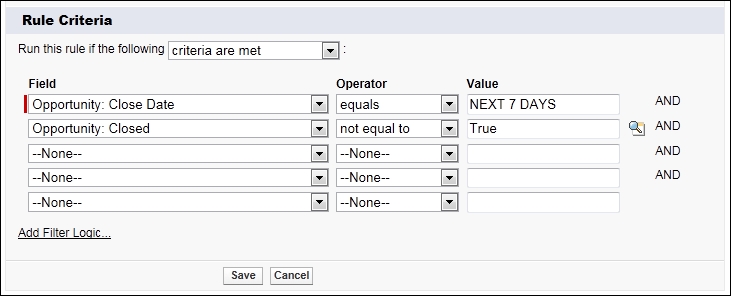
The run this rule if the following criteria are met option is displayed by default and allows you to select the filter criteria that a record must meet to trigger the rule.
As an example, the filter has been set to:
- Opportunity: Close Date equals NEXT 7 DAYS AND
- Opportunity: Closed not equal to True
These criteria would allow us to construct a workflow rule that could be used to notify a salesperson that they have an open opportunity with a close date that will be reached within a week.
Clicking on the Add Filter Logic... link presents additional options to add rows and advanced filter conditions, as shown in the following screenshot:
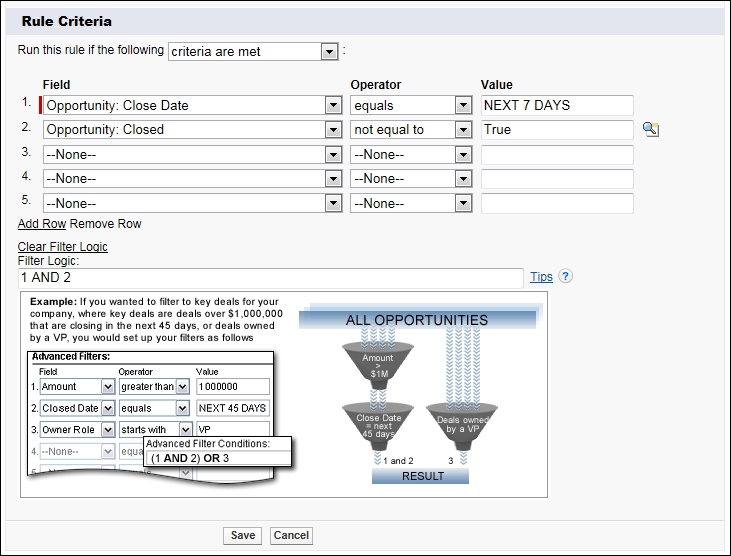
The Add Row link allows you to add more criteria options where up to a maximum of 25 can be added. The Filter Logic section allows you to use Boolean expressions to set the criteria. These expressions are known as Advanced Filters. For example, (1 AND 2) results in an expression that requires both of the first two filter lines to be valid.
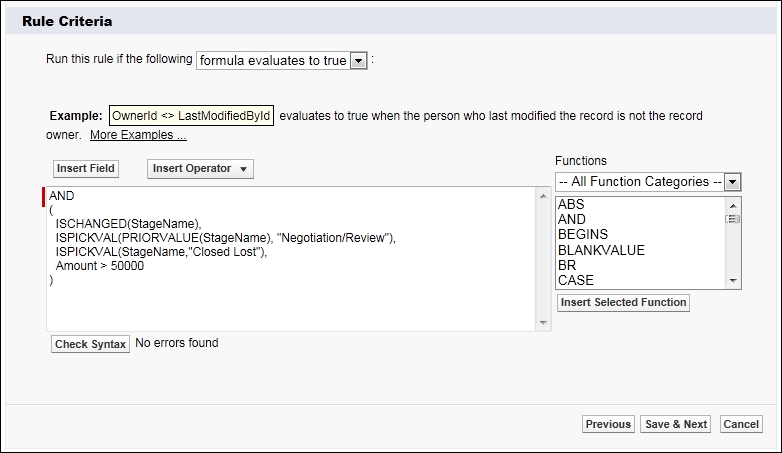
The run this rule if the following formula evaluates to true option allows you to enter a formula that returns a value of True or False. The Salesforce CRM application triggers the rule if the formula returns True.
Workflow formulas can be used to capture complicated logic, as shown for this use case example: whenever an opportunity is set as lost where the sales stage was previously "Negotiation/Review" and the amount is greater than $50,000, send an e-mail or task to be sent to Sales Management for a follow-up.
In addition to the functions that are shown on the right-hand side of the Rule Criteria section, you can also use merge fields for directly related objects in workflow rule formulas. The Formula evaluates to true rule can be useful wherever it is needed to trigger some actions if the value of a particular field is being changed. As for all formula merge fields that allow you to reference fields on related objects across multiple relationships, the field name is prefixed by the name of the relationship. For standard relationships, the name of the relationship is the master object. For example, you can reference the account name merge field from an opportunity using Account.Name.
Now, click on Save & Next to proceed to the Step 3: Specify Workflow Actions page, which allows you to configure the workflow actions.
The Specify Workflow Actions page allows you to add both immediate and time-dependent actions to the workflow rule, as shown in the following screenshot:
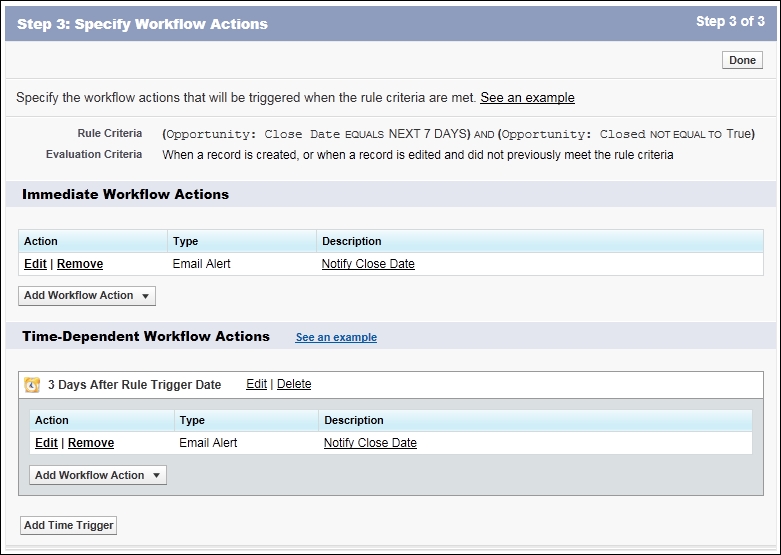
Immediate actions are triggered as soon as the evaluation criteria are met. As shown in the preceding example, the Salesforce CRM application can immediately send an e-mail to the salesperson if an opportunity is created or edited and is still open seven days before the specified close date.
Time-dependent actions specify when Salesforce CRM will execute the workflow action. As shown in the preceding example, the Salesforce CRM application can automatically send an e-mail reminder to the salesperson 3 days later if an opportunity is created or edited and is still open seven days before the specified close date.
Tip
Time-dependent actions and time triggers are complex features with several considerations
Workflow rules that have time-dependent actions should be specified with a default workflow user to ensure they are fired for future actions. This is if the user who activated the workflow later leaves the organization and is set as an inactive user.
To add an immediate workflow action, click on the Add Workflow Action drop-down selection in the Immediate Workflow Actions section and choose either New Task, New Email Alert, New Field Update, New Outbound Message, or Select Existing Action to select an existing action to associate with the rule:
- New Task to create a task to associate with the rule
- New Email to create an e-mail alert to associate with the rule
- New Field Update to define a field update to associate with the rule
- New Outbound Message to define an outbound message to associate with the rule
- Existing Action to select an existing action to associate with the rule
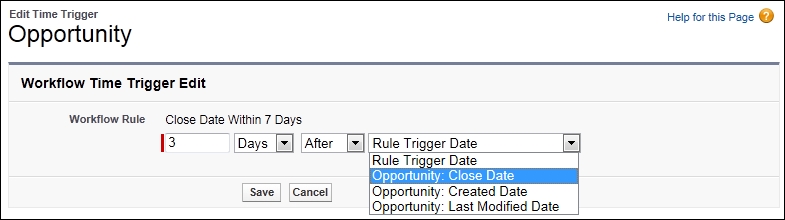
To add a time-dependent workflow action, click on Add Time Trigger in the Time-Dependent Workflow Actions section. Then, specify the number of days or hours before or after a date relevant to the record, such as the date on which the record was created or modified or even for an opportunity close date, as shown in the following screenshot:
The Add Time Trigger button is unavailable if either:
- The rule criteria is set to Every time a record is created or edited
- The rule is already active (here, you must temporarily deactivate it in order to apply the action)
- The rule is deactivated but has pending actions in the workflow queue
Additional, immediate, or time-dependent actions can now be configured, and then finally, click on the Done button in the top-right corner of the screen.
The Salesforce CRM application will not trigger a workflow rule until you have manually activated it.
To activate a workflow rule, click on Activate on the workflow rule detail page. Click on Deactivate to stop a rule from triggering (or if you want to edit the time-dependent actions and time triggers associated with the rule).
Consider the following when configuring workflow rules:
- You can deactivate a workflow rule at any time. However, if you deactivate a rule that has pending actions, Salesforce.com completes these actions as long as the record that triggered the rule is not updated.
- You cannot add time-dependent workflow actions to active workflow rules. You must deactivate the workflow rule first, add the time-dependent workflow action, and then reactivate the rule.
- Workflow rules on custom objects are automatically deleted if the custom object is deleted.
- You cannot create e-mail alerts for workflow rules on activity records.
- Creating new records or updating existing records can trigger more than one rule.
- Time-dependent field updates can retrigger the reevaluation of workflow rules.
- The order in which actions are executed is not guaranteed. Field update actions are executed first, followed by other actions.
For example, in a custom publishing application, you can create a workflow rule that sets the status of a book (the master object) to In Process - Editor when a chapter (the detail object) is being reviewed by the editor.
Cross-object field updates work for custom-to-custom master-detail relationships, custom-to-standard master-detail relationships, and a few standard-to-standard master-detail relationships, and they are displayed in the following way:

Note
If you require cross-object actions for standard objects such as updating a field on each Opportunity Product record when a certain field on the Opportunity changes, or further complex updating such as automatic record creation or deletion actions, you would need to use Visual Workflow or develop Apex triggers instead of workflow rules.
You can use the time-based workflow queue to monitor any outstanding workflow rule that has time-dependent actions. Here, you can view pending actions and cancel them if required.
To access the Time-based Workflow queue, navigate to Setup | Monitor | Time-Based Workflow, where the following page is presented:
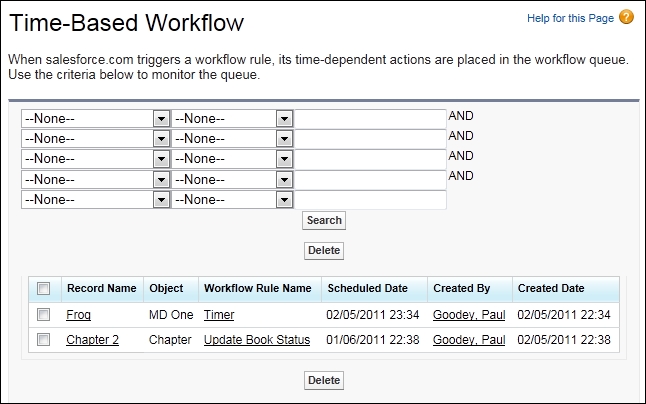
Click on Search to view all the pending actions for any active time-based workflow rules, or set the filter criteria and click on Search to view only the pending actions that match the criteria. Set the checkbox for any listed workflow rule(s) that you wish to cancel and then click on Delete to terminate the selected queued workflow rule(s).
To summarize, workflow rules allow one or more actions to fire based on fields meeting certain conditions in the record (or its parent). Workflow rules are a little more complex than validation rules and take a bit more familiarity with Salesforce.com to properly execute. However, they can offer powerful business automation and can be implemented without any custom code or the work of a developer.