The game, as you might see in the project files, contains only four blueprints. As I said earlier, a blueprint can be an object in your world or even a piece of logic without any physical representation inside the game view. The four blueprints responsible for the game are explained here:
ball: This is the blueprint that is responsible for the ball rendering and movement. You can consider it as an entity in the game world, as it has its own representation, which is a 3D ball.platform: This one also has its visual representation in the game world. This is the platform that will receive the player input.levelLayout: This one represents the level itself and its layout, walls, blocks, and game camera.bricksBreakingMode: Every game or level made with Unreal Engine should have a game mode blueprint type. This defines the main player, the controller used to control the gameplay, the pawn that works in the same way as the main player but has no input, the HUD for the main UI controller, and the game state that is useful in multiplayer games. Even if you are using the default setting, it will be better to make a space holder one!
I've always been a big fan of planning the code before writing or scripting it. So, I'll try to keep the same habit here as well; before making each game, I'll explain how the gameplay workflow should be. With such a habit, you can figure out the weak points of your logic, even if you didn't build it. It helps you develop quickly and more efficiently.
As I mentioned earlier, the game has only three working blueprints, and the fourth one is used to organize the level (which is not gameplay logic and has no logic at all). Here are the steps that the game should follow one by one:
- At the start of the game, the
levelLayoutblueprint will start instantiating the bricks and set a different color for each one. - The
levelLayutblueprint sets the rendering camera to the one we want. - The
ballblueprint starts moving the ball with a proper velocity and sets a dynamic material for the ball mesh. - The
platformblueprint starts accepting the input events on a frame-by-frame basis from mouse or touch inputs, and sets a dynamic material for the platform mesh. - If the
ballblueprint hits any other object, it should never speed up or slow down; it should keep the same speed. - If the
ballblueprint crossed the bottom line, it should restart the level. - If the player pressed the screen or clicked on the mouse, the
platformblueprint should move only on the y axis to follow the finger or the mouse cursor. - If the
ballblueprint hits any brick from thelevelLayoutblueprint, it should destroy it. - The ball plays some sound effects. Depending on the surface it hits, it plays a different sound.
As the game will be based on one level only and the engine already gives us this new pretty level with a sky dome and light effects with some basic assets, all of this will not be necessary for our game. So, you need to go to the File menu, select New Level, add it somewhere inside your project files, and give it a special name. In my case, I made a new folder named gameScene to hold my level (or any other levels if my game is a multilevel game) and named it mainLevel.
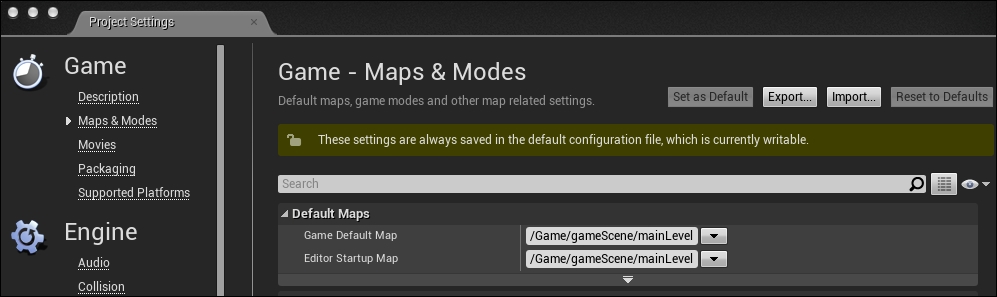
Now, this level will never get loaded into the game without forcing the engine to do that. The Unreal Editor gives you a great set of options to define which is the default map/level to be loaded when the game starts or when the editor runs. Even when you ship the game, the Unreal Editor tells us which levels should be shipped and which levels shouldn't be shipped to save some space.
Open the Edit menu and then open Project Settings. When the window pops up, select the Maps & Modes section and set Game Default Map to the newly created level. Editor Startup Map should also have the same level: