
We know by now that LibGDX is this awesome tool for creating games across many platforms with the ability to iterate on our code at superfast speeds. But how do we start using it?
Thankfully, some helpful people have made the setup process quite easy. However, before we get to that part, we need to ensure that we have the prerequisites installed, which are as follows:
Not that big a list! Follow the given steps:
- First things first. Go to http://www.oracle.com/technetwork/java/javase/downloads/index.html.
- Download and install the latest JDK if you haven't already done so. Oracle developers are wonderful people and have provided a useful installation guide, which you can refer to if you are unsure on how to install the JDK, at
http://docs.oracle.com/javase/8/docs/technotes/guides/install/install_overview.html.
- Once you have installed the JDK, open up the command line and run the following command:
java -versionIf it is installed correctly, you should get an output similar to this:
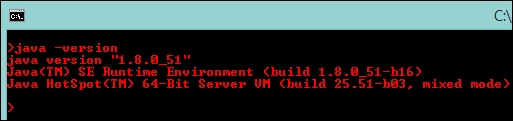
- If you generate an error while doing this, consult the Oracle installation documentation and try again.
- One final touch would be to ensure that we have JAVA_HOME configured. On the command line, perform the following:
- For Windows, set JAVA_HOME =
C:PathToJDK - For Linux and Mac OSX, export JAVA_HOME =
/Path/ToJDK/
- For Windows, set JAVA_HOME =
- Next, on to the Android SDK.
At the time of writing, Android Studio has just been released. Android Studio is an IDE offered by Google that is built upon JetBrains IntelliJ IDEA Java IDE. If you feel comfortable using Android Studio as your IDE, and as a developer who has used IntelliJ for the last 5 years, I suggest that you at least give it a go. You can download Android Studio + Android SDK in a bundle from here:
http://developer.android.com/sdk/index.html
Alternatively, if you plan to use a different IDE (Eclipse or NetBeans, for example) you can just install the tools from the following URL:
http://developer.android.com/sdk/index.html#Other
You can find the installation instructions here:
https://developer.android.com/sdk/installing/index.html?pkg=tools
However, I would like to point out that the official IDE for Android is now Android Studio and no longer Eclipse with ADT.
For the sake of simplicity, we will only focus on making games for desktops for the greater part of this book. We will look at exporting to Android and iOS later on.
Once the Android SDK is installed, it would be well worth running the SDK manager application; so, finalize the set up.
If you opt to use Android Studio, you can access this from the SDK Manager icon in the toolbar. Alternatively, you can also access it as follows:
- On Windows: Double-click on the SDK's
Manager.exefile at the root of the Android SDK directory - On Mac/Linux: Open a terminal and navigate to the
tools/directory in the location where the Android SDK is installed, then execute Android SDK.
The following screen might appear:
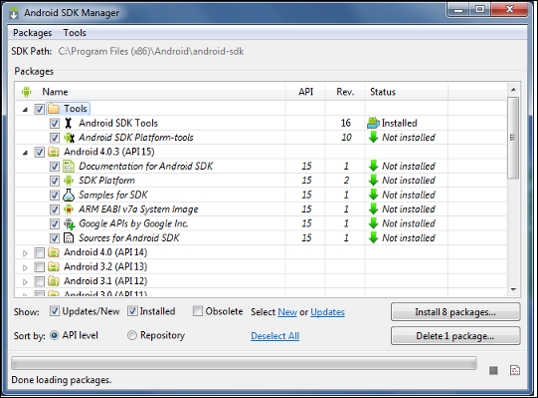
As a minimum configuration, select:
- Android SDK Tools
- Android SDK Platform-tools
- Android SDK Build-tools (latest available version)
- Latest version of SDK Platform
Let them download and install the selected configuration. Then that's it!
Well, not really. We just need to set the ANDROID_HOME environment variable. To do this, we can open up a command line and run the following command:
- On Windows: Set
ANDROID_HOME=C:/Path/To/Your/Android/Sdk - On Linux and Mac OS X: Export
ANDROID_HOME=/Path/To/Your/Android/Sdk
Phew! With that done, we can now move on to the best part—creating our first ever LibGDX game!