
In this chapter, we will take our Snake project further towards being a complete game. This will include more on collisions, restarting the game, and maintaining a high score. You will also learn how to use LibGDX to help in making it easier to debug your game along with how to handle multiple screen sizes.
The following will be covered in this chapter:
- Introducing the
ShapeRendererclass - More on collisions
- Game state
- High score
- Handling different screen sizes
You are probably wondering why we are not diving straight into making more improvements to the game. Well, it is because I would like to show you something that will make your life easier when you start making more games, especially if you don't have any art ready for the game you are making and you want to see things come to life sooner. As an eager game developer myself, I know what that is like; you have an idea and you want to bring it to life faster than your artist can design, draw, and deliver. Alternatively, in the case of our Snake game, we can draw the grid that our snake moves in.
So, I introduce you to the ShapeRenderer class; its job is simple. According to http://libgdx.badlogicgames.com/nightlies/docs/api/com/badlogic/gdx/graphics/glutils/ShapeRenderer.html, the ShapeRenderer class does the following:
"Renders points, lines, shape outlines and filled shapes."
This means we will have the ability to draw boxes on the screen. Let's put this into our Snake game so you can see it in action.
The first thing to do is to add the ShapeRenderer class to our GameScreen class. The following code shows how to add and create a ShapeRenderer object:
private ShapeRenderer shapeRenderer;

  @Override
  public void show() {
    shapeRenderer = new ShapeRenderer();
    // Other code omitted for now
  }
We now have a ShapeRenderer object ready to go!
Well, it is great that we have it, but how do we use it? The ShapeRenderer class has quite a few drawing methods available, giving it the ability to draw arcs, circles, cones, rectangles, lines, and more. However, right now we are only interested in using it for drawing rectangles.
When using the ShaperRenderer class, much like the SpriteBatch class, we need to call the drawing methods in a particular order, which is as follows:
- Begin a new batch.
- Draw our shapes.
- Finish our batch and ensure they get rendered.
First, let's create a method to draw our grid; again, this is all happening in our GameScreen class:
   private void drawGrid() {
}
Let's now add our begin and end calls:
private void drawGrid() {
  shapeRenderer.begin(ShapeRenderer.ShapeType.Line);
  shapeRenderer.end();
}
You may have noticed that the begin method call takes a parameter of type ShapeRenderer.ShapeType. This is because we need to tell the ShapeRenderer object what type of shape we are going to render. We only want to draw the outline of our shapes, or rectangles in our case, so we can use the Line type. There are others as well; feel free to experiment to see what happens if you choose one of the others!
Next, we need to draw our grid; to do this, we need to know what our grid is. Our grid comprises of squares that are 32x32 pixels in size, and we will want to render one of these squares ever 32 pixels both horizontally and vertically. We can achieve this by two simple loops. The following code shows this implementation:
private void drawGrid() {
  shapeRenderer.begin(ShapeRenderer.ShapeType.Line);
  for (int x = 0; x < Gdx.graphics.getWidth(); x += GRID_CELL) {
    for (int y = 0; y < Gdx.graphics.getHeight(); y += GRID_CELL) {
      shapeRenderer.rect(x,y, GRID_CELL, GRID_CELL);
      }
    }
  shapeRenderer.end();
}
The call itself to ShapeRenderer is fairly self-explanatory:
shapeRenderer.rect(x,y, GRID_CELL, GRID_CELL);
It takes four parameters, that is, the x and y coordinates and the width and height. Since we want a square, our width and height values will be the same.
We have also introduced a constant field to define the size of our cell:
private static final int GRID_CELL = 32;
Finally, we just need to update our render() method so that it calls our drawGrid() method:
public void render(float delta) {
      // Other code omitted for now
  drawGrid();
  draw();
}
Now, when you run your project, you will see the following:
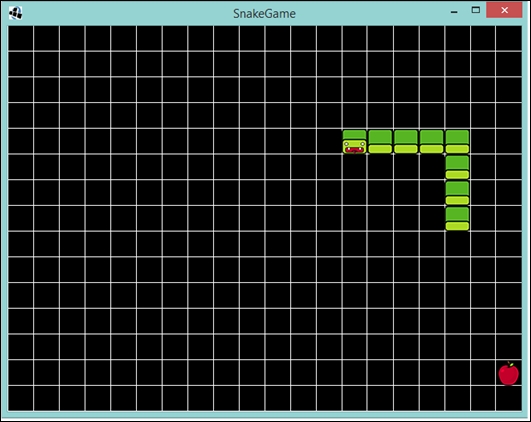
As I mentioned earlier in this chapter, the ShaperRenderer class is very useful when you want to make a game and you do not have your art assets ready; you want to quickly prototype the game; or, in our case, you want to make things a bit clearer in the game you're currently creating.
Finally, another useful aspect is being able to set the color of the shapes that are drawn. The method call is setColor() and I use it do draw different game objects in different colors, so I can tell them apart!