
We almost have a platforming game! Admittedly, it doesn't do much—yet! But hey, let's change that. One of the main components of a platformer is having something for the player to collect. Considering Pete is a squirrel, I guess it is only right that he collects acorns.
To add our collectable to the game, we are going to need to do a couple of things. Firstly, we need to find a way for us to place the collectables in the game in an easy-to-do manner , next, have them successfully load that information into LibGDX, and then, finally, have the interaction between Pete and the acorn.
Our acorn will look as follows:

So, what can we use to place the acorn(s) in the level? Well, luckily, we have been using a certain mapping tool in this chapter that we can use to do this. Yup, that's right! Tiled has the capability to help us.
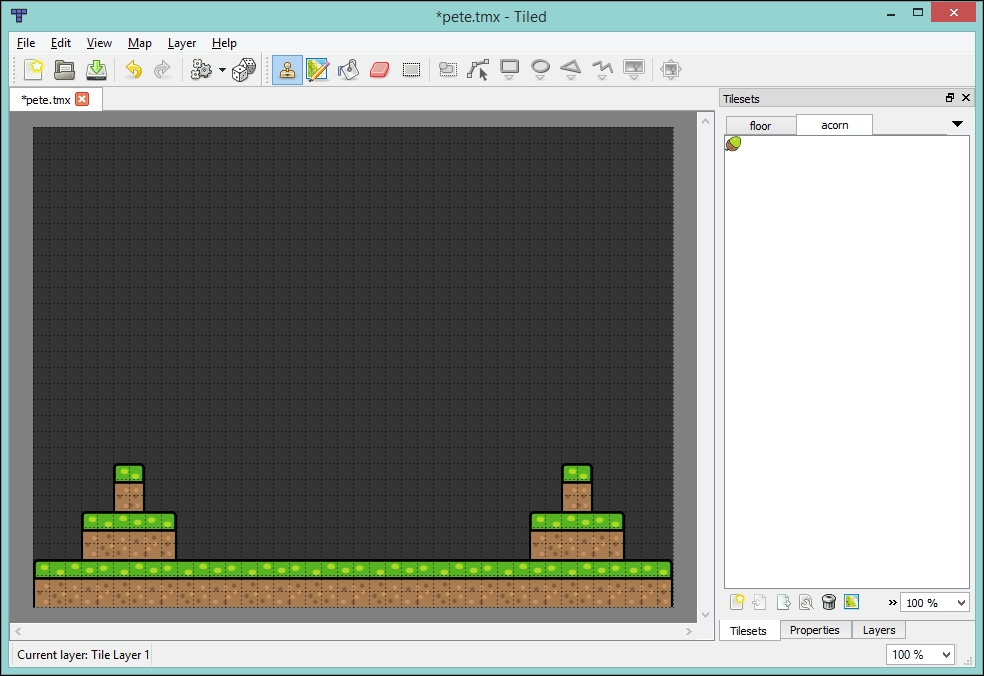
In Tiled, our first task is to add our acorn image as a tileset so that we can use it. Simply select New Tileset from the Map menu, navigate to the acorn image, and select it. This should now appear in our Tilesets pane.
Next, we add a new layer, but this time we are going to add an object layer. From the Layer drop-down menu, select Add Object Layer. You will now be given the option to name it, call it Collectables.
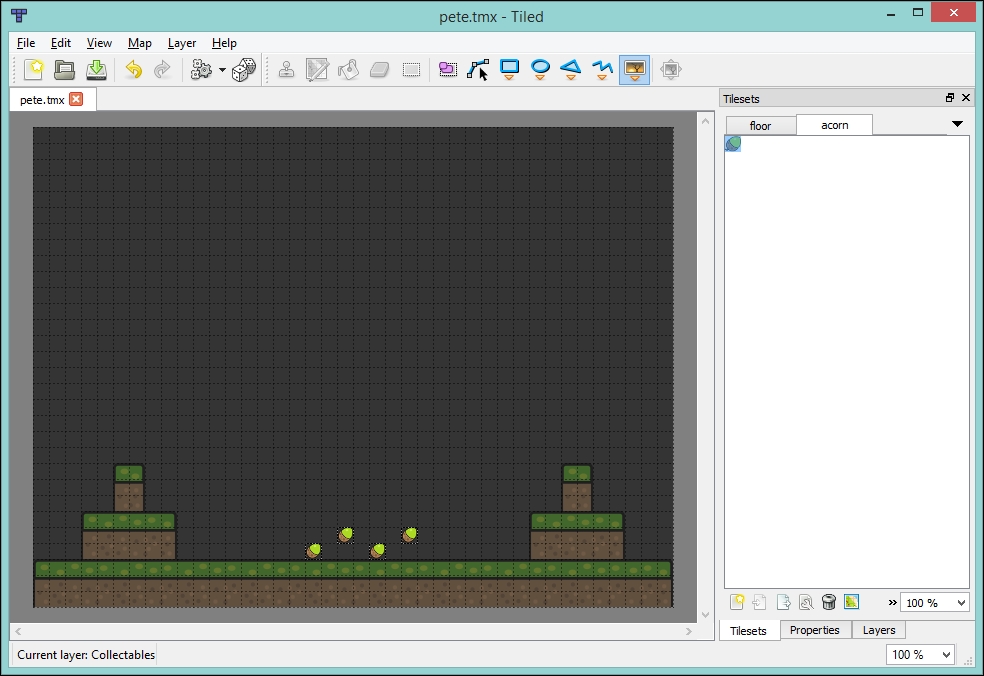
Make sure the Collectables layer is selected, and return to the acorn tileset. Then, select the insert tile button on the toolbar before finally selecting the acorn. Now we can start placing them on the level.
Hopefully, you should end up something like the following screenshot:
With our acorns placed, our next step is to query the layer in LibGDX to access the location of the acorns.
Our first task here is to create an Acorn class, which will contain the texture and location of the acorn. Create the following class:
public class Acorn {
  public static final int WIDTH = 16;
  public static final int HEIGHT = 16;
  private final Rectangle collision;
  private final Texture texture;
  private final float x;
  private final float y;
  public Acorn(Texture texture, float x, float y) {
    this.texture = texture;
    this.x = x;
    this.y = y;
    this.collision = new Rectangle(x,y, WIDTH,HEIGHT);
  }

  public void draw(Batch batch) {
    batch.draw(texture, x, y);
  }
}
Let's now add an array of acorns to our GameScreen class:
private Array<Acorn> acorns = new Array<Acorn>();
Next, we need to add a method to our GameScreen class that will extract the information from the TiledMap object. Again, add the following method to your GameScreen class:
private void populateAcorns() {
  MapLayer mapLayer = tiledMap.getLayers().get("Collectables");
  for (MapObject mapObject : mapLayer.getObjects()) {
    acorns.add(
      new Acorn(peteGame.getAssetManager().get("acorn.png", Texture.class),
        mapObject.getProperties().get("x", Float.class),
        mapObject.getProperties().get("y", Float.class)
      )
    );
  }
}
Here we are requesting the layer from the TiledMap object that we created and called Collectables. Next we are iterating over the MapObject instances that this layer contains. For each MapObject we are creating an Acorn instance and adding to our acorns array. The x and y coordinates are located in the properties of the MapObject class, hence why we need to extract them like we do. This is actually a pretty neat way, as in the future you could add your own properties in Tiled and then access them this way.
Next, we update our draw() method to render our acorns:
private void draw() {
  //Code omitted for brevity
  for (Acorn acorn : acorns) {
    acorn.draw(batch);
  }
  pete.draw(batch);
  batch.end();
}
Next, we need to add our populateAcorns() method call to our show() method as follows:
public void show() {
  // Code ommitted for brevity
  populateAcorns();
}
Finally, we need to add our acorn texture to our asset manager in the loading screen; otherwise, it won't get loaded! So, update the show() method of our LoadingScreen class with the following code:
peteGame.getAssetManager().load("acorn.png", Texture.class);We should now be ready to rock and roll! If you load up the game, you should now be presented with acorns.
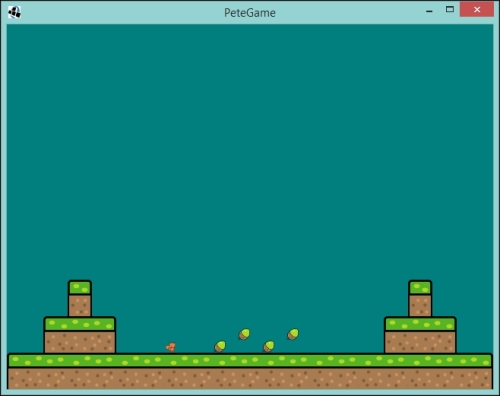
Excellent! We are almost there. You may notice that nothing happens when Pete passes over the acorns. Well, that's what we are going to look at next. Just a quick collision check, then we can remove them from the screen!
Let's add the following code to our GameScreen class:
private void handlePeteCollisionWithAcorn() {
  for (Iterator<Acorn> iter = acorns.iterator(); iter.hasNext(); ) {
    Acorn acorn = iter.next();
    if (pete.getCollisionRectangle().overlaps(acorn.getCollisionRectangle())){
      iter.remove();
    }
  }
}
Here we are iterating over our Acorn objects, and checking to see if Pete overlaps with any of them. If they do, we remove the acorn.
Finally, add a call to this method in our update() method:
private void update(float delta) {
  pete.update(delta);
  stopPeteLeavingTheScreen();
  handlePeteCollision();
  handlePeteCollisionWithAcorn();
}
Now if you run the project, you will find that acorns will disappear when Pete comes in contact with them! Awesome! We have the basis here for a good platforming game. While nothing happens when you collect the acorns, we have covered a couple of things in previous chapters that can be reused to have an outcome. I shall leave that as an exercise for you, the reader, to have a go at. You can do it!