
Flappee Bee is flying pretty fine now, don't you think? However, we are still not done! This chapter will focus a bit more on the tools available to us in LibGDX. We will take a look at the AssetManager class and see how it can be used to make our life better. We will then use it to create a loading screen so that we can load our textures and at the same time provide feedback to the user that the game is doing something. We will then take this a step further and look at how we can combine our assets into a single entity and explain why this is a good habit to get into. Finally, we will look at Hiero, the font converter, which is built into LibGDX to allow us to convert and style fonts as we desire.
The following topics will be covered in this chapter:
- Loading assets asynchronously with the
AssetManagerclass - Creating a loading screen
- Using a texture packer to combine all the assets into a single texture
- Hiero—the LibGDX font converter
So, what is this
AssetManager class that we want to take a look at? Well, according to the documentation what it does is:
Note
Loads and stores assets such as textures, bitmap fonts, tile maps, sounds, music, and so on. Visit the following link for more details: http://libgdx.badlogicgames.com/nightlies/docs/api/com/badlogic/gdx/assets/AssetManager.html
You might be wondering what it can do for us. Well, truthfully, it won't actually make an impact on the game we have here. The amount of assets we have isn't that large in number or size. So then, why are we looking at it? Because, later down the line, when you make your own awesome, amazing games, you will need to know about tools like this that will make your life easier!
Right now, Flappee Bee only has about seven textures with the biggest being the background which is 480 x 640 pixels in size. Having this amount of textures, of this size isn't going to cause us that much of a problem. However, what if we suddenly have lots of textures—equally not as good, but we will cover that later—or our textures are at a higher resolution? The second one is more likely to occur; my artist loves HD textures!
You might now be wondering what the impact would be if you were to have lots of large separate textures, and you are right to think this. Right now, with our textures being small and not as numerous they are loaded without delay. However, the moment they become bigger, they will appear to pause the game to the player. In Flappee Bee's case, it will be as the user presses the Start button; if our textures were huge, it would appear to the player the game had crashed as the hardware was loading the texture. While we can't completely negate this pause by using the AssetManager class, as certain assets will need to be loaded on the rendering thread, we can provide feedback to on the loading player the progress.
Just to reiterate at this stage, Flappee Bee probably doesn't need this AssetManager parameter as the resource loading is negligible at this stage. However, I see this as a great opportunity to use it as we can look at it in the most simple case. Most of the time, it will be your decision as a game-maker whether you want to use it. According to the LibGDX wiki page, the reasons why you would want to use the AssetManager parameter are as follows:
- Loading of most resources is done asynchronously, so you can display a reactive loading screen while things load.
- Assets are reference counted. If two assets, A and B, both depend on another asset C, C won't be disposed until A and B have been disposed. This also means that if you load an asset multiple times, it will actually be shared and only take up one lot of memory!
- It is a single place to store all your assets.
- It allows you to transparently implement things such as caches.
Personally, I always start all my games with the AssetManager parameter enabled! But like I said, I know what my artist is going want to provide me with.
Note
Before we start using
AssetManager, it might be worth just checking out the wiki page on the LibGDX website: https://github.com/libgdx/libgdx/wiki/Managing-your-assets
This will give you a better idea of what else it can do, as here, we are just going to focus on loading the textures.
Now, enough talk, lets code! In Flappee Bee, we currently have four textures that are used:
bg.pngflowerBottom.pngflowerTop.pngbee.png
We will load these textures and keep them around forever. However, if we were to have the game reload the GameScreen class at any point, the textures would be reloaded afresh, and since we are not disposing of the previous textures, we would just fill up the memory. The AssetManager parameter will ensure that we don't do that!
First things first, we need to add our AssetManager to our GameScreen class, and add the following to the GameScreen class:
private final AssetManager assetManager = new AssetManager();
public GameScreen() {
  assetManager.load("bg.png", Texture.class);
  assetManager.load("flowerBottom.png", Texture.class);
  assetManager.load("flowerTop.png", Texture.class);
  assetManager.load("bee.png", Texture.class);
  assetManager.finishLoading();
}
In the preceding code, we have instantiated the AssetManager then we have instructed which assets to load and their type. In this case, these are just of type Texture. Finally, we round it off by telling the manager to pause until it finishes loading. As certain aspects of the texture loading are done asynchronously and others are done synchronously, if we don't add the call to the finishLoading() method, then there is a chance we will crash our game when it tries to access something that doesn't exist. Right now, this would still cause a pause in our rendering, but let's finish adding the AssetManager and then look at rectifying it.
Next, we need to change the way we access the textures. Let's update the code in our show() method to reflect the new way:
public void show(){
  // Code omitted for brevity
  background = assetManager.get("bg.png");
  flowerBottom = assetManager.get("flowerBottom.png");
  flowerTop = assetManager.get("flowerTop.png");
  flappeeTexture = assetManager.get("bee.png");
  // Code omitted for brevity
}
Here, we no longer control the Texture object; we don't even know how the loading is handled, which from a software development perspective, is great—decoupled code!
We use the get() method to return our Texture parameter. If you now load the game, it will run just like it did earlier, except now we are using the power of the AssetManager.
If you would like to see what the AssetManager is loading, there is a logger available that we can set the log level to. Add the following code to the GameScreen constructor:
assetManager.getLogger().setLevel(Logger.DEBUG);
Now, when you run the preceding code, you will see the following output trace:
AssetManager: Loading: bg.png, com.badlogic.gdx.graphics.Texture
AssetManager: Loading: flowerBottom.png, com.badlogic.gdx.graphics.Texture
AssetManager: Loading: flowerTop.png, com.badlogic.gdx.graphics.Texture
AssetManager: Loading: bee.png, com.badlogic.gdx.graphics.Texture
Perfect!
Great! We now have the manager in place; however, you might argue that we are still in the same situation. If our textures were a lot larger or if we had many more, we would still get a pause.
So what can we do about this? Add a loading screen, of course!
Having a loading screen is a great way to provide information back to the player that the game is actually doing something rather than giving the appearance that the game has just crashed.
First, let's create a new Screen subclass, called LoadingScreen. This class will take a FlappeeBeeGame object in the constructor as we move the AssetManager object to the FlappeeBeeGame class, so we will have only one instance of this class.
Our LoadingScreen class should look something like this:
public class LoadingScreen extends ScreenAdapter{

  private static final float WORLD_WIDTH = 480;
  private static final float WORLD_HEIGHT = 640;
  private static final float PROGRESS_BAR_WIDTH = 100;
  private static final float PROGRESS_BAR_HEIGHT = 25;
  private ShapeRenderer shapeRenderer;
  private Viewport viewport;
  private Camera camera;
  private float progress = 0;
  private final FlappeeBeeGame flappeeBeeGame;
  public LoadingScreen(FlappeeBeeGame flappeeBeeGame) {
    this.flappeeBeeGame = flappeeBeeGame;
  }

  @Override
  public void resize(int width, int height) {
    viewport.update(width, height);
  }

  @Override
  public void show() {
    camera = new OrthographicCamera();
    camera.position.set(WORLD_WIDTH / 2, WORLD_HEIGHT / 2, 0);
    camera.update();
    viewport = new FitViewport(WORLD_WIDTH, WORLD_HEIGHT, camera);
    shapeRenderer = new ShapeRenderer();
    flappeeBeeGame.getAssetManager().load("bg.png", Texture.class);
    flappeeBeeGame.getAssetManager().load("flowerBottom.png", Texture.class);
    flappeeBeeGame.getAssetManager().load("flowerTop.png", Texture.class);
    flappeeBeeGame.getAssetManager().load("bee.png", Texture.class);
  }

  @Override
  public void render(float delta) {
    update();
    clearScreen();
    draw();
  }

  @Override
  public void dispose() {
    shapeRenderer.dispose();
  }

  private void update() {
    if (flappeeBeeGame.getAssetManager().update()) {
      flappeeBeeGame.setScreen(new GameScreen());
    } else {
      progress = flappeeBeeGame.getAssetManager().getProgress();
    }
  }

  private void clearScreen() {
    Gdx.gl.glClearColor(Color.BLACK.r, Color.BLACK.g, Color.BLACK.b, Color.BLACK.a);
    Gdx.gl.glClear(GL20.GL_COLOR_BUFFER_BIT);
  }

  private void draw() {
    shapeRenderer.setProjectionMatrix(camera.projection);
    shapeRenderer.setTransformMatrix(camera.view);
    shapeRenderer.begin(ShapeRenderer.ShapeType.Filled);
    shapeRenderer.setColor(Color.WHITE);
    shapeRenderer.rect(
      (WORLD_WIDTH  - PROGRESS_BAR_WIDTH) / 2, (WORLD_HEIGHT  - PROGRESS_BAR_HEIGHT / 2),
      progress * PROGRESS_BAR_WIDTH, PROGRESS_BAR_HEIGHT);
    shapeRenderer.end();
  }
}
Let's break down what we have here. Some of it will be fairly familiar to what we have done earlier with the Camera, Viewport, and ShapeRenderer classes. The key point in this class is that we specify which textures to load in the show() method, as shown here. It should be noted that we have moved the AssetManager parameter from the GameScreen parameter to the FlappeeBeeGame class and added a simple getter:
public void show(){
  // Code omitted for brevity
  flappeeBeeGame.getAssetManager().load("bg.png", Texture.class);
  flappeeBeeGame.getAssetManager().load("flowerBottom.png", Texture.class);
  flappeeBeeGame.getAssetManager().load("flowerTop.png", Texture.class);
  flappeeBeeGame.getAssetManager().load("bee.png", Texture.class);
}
Next, in our update() method, we add the following code:
private void update() {
  if (flappeeBeeGame.getAssetManager().update()) {
    flappeeBeeGame.setScreen(new GameScreen());
  } else {
    progress = flappeeBeeGame.getAssetManager().getProgress();
  }
}
In the preceding code, you can see that we call the update() method on the AssetManager class this will give us an indication of whether or not it has finished loading. The manager will return true if it is complete, or false otherwise. If it is false, and there are more assets for the manager to load, we then query how far along the manager is and store this in a class level field for use later on. If the manager has completed all the asset loading, we can just change the screen to our game screen; job done!
Finally, we just need to give the player some sort of visual representation of the loading screen. There are many different ways this can be achieved; I am sure you have seen many yourself. Here, we will go with a traditional loading bar, but you may try out other ways in the future. Just remember, the more visually complex your loading screen becomes, the more it might need to be loaded itself!
Here is the code that handles the rendering of our progress bar:
private void draw() {
  shapeRenderer.setProjectionMatrix(camera.projection);
  shapeRenderer.setTransformMatrix(camera.view);
  shapeRenderer.begin(ShapeRenderer.ShapeType.Filled);
  shapeRenderer.setColor(Color.WHITE);
  shapeRenderer.rect(
    (WORLD_WIDTH  PROGRESS_BAR_WIDTH) / 2, (WORLD_HEIGHT  - PROGRESS_BAR_HEIGHT) / 2,
  progress * PROGRESS_BAR_WIDTH, PROGRESS_BAR_HEIGHT);
  shapeRenderer.end();
}
The key piece of code is the shaperenderer.rect() call. We ask the renderer to draw a filled rectangle in the center of the screen, offset by its maximum sizes. We then calculate the width of the bar in proportion to the loading time. This will expand the progress bar as more and more assets are loaded.
We now have a loading screen; we just need to hook it to our screen flow. In our StartScreen parameter we can now update the Play button listener to set the screen to an instance of LoadingScreen, as shown here. It should be noted that the game class that we now have in StartScreen should be updated to the type FlappyBeeGame:
play.addListener(new ActorGestureListener() {
  @Override
  public void tap(InputEvent event, float x, float y, int count, int button) {
    super.tap(event, x, y, count, button);
    game.setScreen(new LoadingScreen(game));
    dispose();
  }
});
If you now launch the game, when you click on Start, you should get the loading screen briefly appearing before going to the actual game!
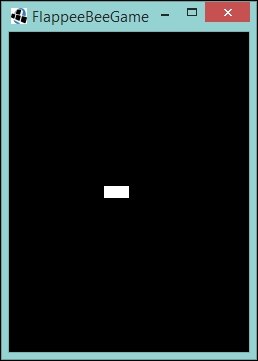
I agree it isn't much to look at, but it does the job!
To finish off, we can now remove the AssetManager object from the GameScreen parameter and just reference the one from the FlappeeBeeGame class.
So, update the GameScreen so that we now pass in the FlappeeBeeGame object, and then remove the AssetManager code we introduced previously. Now, update the show() method to reference the FlappeeBeeGame object, as follows:
public void show(){
  // Code omitted for brevity
  background = flappeeBeeGame.getAssetManager().get("bg.png");
  flowerBottom = flappeeBeeGame.getAssetManager().get("flowerBottom.png");
  flowerTop = flappeeBeeGame.getAssetManager().get("flowerTop.png");
  flappeeTexture = flappeeBeeGame.getAssetManager().get("bee.png");
  // Code omitted for brevity
}
Now, we will use the textures loaded while this screen is being loaded.
Going forward, there is much more you can do with the loading screen than we have done here; make it more dynamic with what it loads. Currently, it is very much tied to the game we have here. If we had multiple screens with different assets associated with them, it would get quite messy to do it all in one loading screen like we did here. However, you wouldn't want to load everything at once; essentially, we should only be loading what we need.