
So far we have created a level using Tiled, and we have implemented tile maps in LibGDX so that we can see that level. The next step is to introduce our characters into this world and have them interact with the surroundings.

The preceding image shows Pete, our lovely squirrel! He has four different poses, two for walking and one each for jumping up and down.
Before we add our textures to Pete, let's go through the process of creating our character in code and have them interact with the world, then we can implement the animations.
Let's create class for Pete, I have called it Pete and in that class we are going create the core components for controlling Pete, and also add a basic collision rectangle. This class is also going to be very similar to the Flappee class from the previous chapters.
Here is how the Pete class should look:
public class Pete {
  private static final float MAX_X_SPEED = 2;
  private static final float MAX_Y_SPEED = 2;
  public static final int WIDTH = 16;
  public static final int HEIGHT = 15;
  private final Rectangle collisionRectangle = new Rectangle(0, 0, WIDTH, HEIGHT);
  private float x = 0;
  private float y = 0;
  private float xSpeed = 0;
  private float ySpeed = 0;
  public void update() {
    Input input = Gdx.input;
    if (input.isKeyPressed(Input.Keys.RIGHT)) {
      xSpeed = MAX_X_SPEED;
    } else if (input.isKeyPressed(Input.Keys.LEFT)) {
      xSpeed = -MAX_X_SPEED;
    } else {
      xSpeed = 0;
    }
    x += xSpeed;
    y += ySpeed;
    updateCollisionRectangle();
  }
  public void drawDebug(ShapeRenderer shapeRenderer) {
    shapeRenderer.rect(collisionRectangle.x, collisionRectangle.y, collisionRectangle.width, collisionRectangle.height);
  }

  private void updateCollisionRectangle() {
    collisionRectangle.setPosition(x, y);
  }
}
In the preceding code, we first start off by setting up some parameters for Pete, such as maximum speed and how big in world units Pete will be, and we will also define a Rectangle object that we will use for collision purposes. Finally, we define variables that hold information about where in the world Pete is, and his current speed.
Next, we define an update() method. This will be called on every game loop cycle we poll for the player input, depending on the input we assigned for the speed at which Pete should be moving. So, in this case, let's show that code snippet again:
if (input.isKeyPressed(Input.Keys.RIGHT)) {
  xSpeed = MAX_X_SPEED;
} else if (input.isKeyPressed(Input.Keys.LEFT)) {
  xSpeed = -MAX_X_SPEED;
} else {
  xSpeed = 0;
}
If the player is pressing right, then we will set the speed to be the maximum speed. This means Pete will move right—remember our 0,0 position is in the bottom left—then, if left is pressed, we set the speed to be the negative of the maximum speed, which means that when we apply it to our x and y variables, it will move Pete left. Finally, if neither is pressed, then we set the speed to 0.
The final part of the update method is to apply our speed to our x and y variables, and then update our collision rectangle to the new position—similar to how we did it in our Flappee Bee game.
The final step to introducing Pete into the game is to add the Pete class to the GameScreen class.
First, add a reference:
private Pete pete;
Then, update our show() method to instantiate our class.
public void show() {
  // Code omitted for brevity
  pete = new Pete();
}
Finally, call the update() method in the GameScreen class' update() method, and the drawDebug() method in the corresponding drawDebug() method:
private void update(float delta) {
pete.update();
}
private void drawDebug() {
shapeRenderer.setProjectionMatrix(camera.projection);
shapeRenderer.setTransformMatrix(camera.view);
shapeRenderer.begin(ShapeRenderer.ShapeType.Line);
pete.drawDebug(shapeRenderer);
shapeRenderer.end();
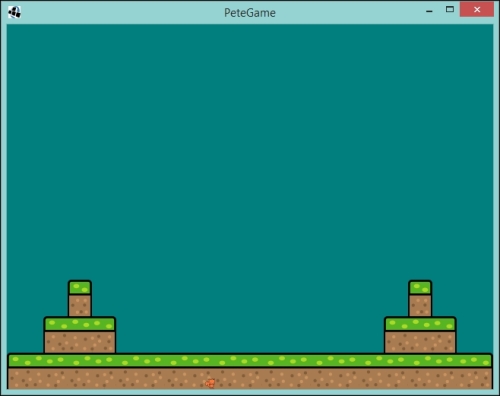
}Superb! Now if you run the project, you should get a white box appearing in the bottom-left corner of your screen that you can control with the left and right arrows keys on your keyboard!
You may have noticed a couple of things.
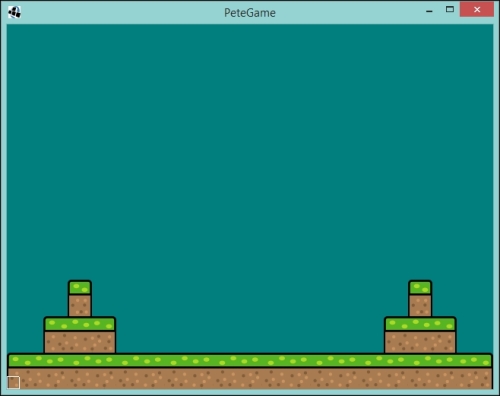
- Pete is probably over the top of the level you made—we will come to this.
- Pete can only move left and right, and can disappear off the edge of your screen.
Before we address the first point, let's address the second point. As we discussed at the start of this chapter, a platformer involves making the character jump from platform to platform. Well, Pete can't jump! Let's make Pete jump!
Let's consider what we need to do to achieve a platforming style jumping mechanism, as, unfortunately, it isn't as simple as it was moving Pete left or right. There are certain rules we want to obey.
- We want to jump to a maximum height, no indefinite jumping.
- We don't want to let the player jump until Pete has landed, otherwise we inadvertently give them a flying capability.
- We don't want to block the player moving left or right during the jump.
Hopefully, those rules sound quite reasonable for a platformer. Now, we know what we would like to achieve, so let's start by stopping Pete from leaving the screen.
First, we need to provide a way for the game to update Pete's position for when it is decided that he has left the screen. In our Pete class, let's add the following methods:
public void setPosition(float x, float y) {
  this.x = x;
  this.y = y;
  updateCollisionRectangle();
}

public float getX() {
  return x;
}

public float getY() {
  return y;
}
Here we have added the ability to query the x and y position of Pete, while being able to set the position which then updates the collision rectangle.
Next, in our GameScreen class, we need to interrogate Pete to find out his position and then put him back into view if needed. So, go back to our GameScreen class and add the following method:
private void stopPeteLeavingTheScreen() {
  if (pete.getY() < 0) {
    pete.setPosition(pete.getX(), 0);
  }
  if (pete.getX() < 0) {
    pete.setPosition(0, pete.getY());
  }
  if (pete.getX() + Pete.WIDTH > WORLD_WIDTH) {
    pete.setPosition(WORLD_WIDTH - Pete.WIDTH, pete.getY());
  }
}
Hopefully, this code is straightforward to read. We are essentially checking if Pete has left via the bottom of the screen, then the left, and then the right. You might be wondering why on the final if statement we are looking at Pete's width. Well, if we don't do that, then he will leave the screen before our code to reposition him is called, as, remember, our coordinates all work off of the bottom-left side.
Finally, add a call to pete method in our update() method:
private void update(float delta) {
  pete.update();
  stopPeteLeavingTheScreen();
}
Brilliant! Now when you run the game, Pete should not be able to leave the screen.
Ok, so now that we have sorted it out, we can start thinking about making Pete jump. So, to conform to our rules, we need to have two variables that will help us control Pete's jumping ability:
private boolean blockJump = false;
private float jumpYDistance = 0;
Add the preceding two variables to our Pete class. The blockJump variable will be used to signal to not allow any more up movement and jumpYDistance will be used to keep track of how far Pete will have traveled on the y plane while jumping up. Next, we should define what is the maximum distance (or height) we want Pete to be able to jump:
private static final float MAX_JUMP_DISTANCE = 3 * HEIGHT;
Add the preceding line to Pete; here we are using a value of three times the height of Pete. This may or may not fit the game. The beauty of making games is we can always change these values to help decide what feels fun and enjoyable.
Now that we have those in place, we can start adding some logic to triggering the jump. Since we are using the arrow keys to control Pete, let's use the up arrow to trigger the jump action. In the update() method of our Pete class, let's insert the following code:
if (input.isKeyPressed(Input.Keys.UP) && !blockJump) {
  ySpeed = MAX_Y_SPEED;
  jumpYDistance += ySpeed;
  blockJump = jumpYDistance > MAX_JUMP_DISTANCE;
} else {
  ySpeed = -MAX_Y_SPEED;
  blockJump = jumpYDistance > 0;
}
Place it just before the following lines of code:
x += xSpeed;
y += ySpeed;
"What are we telling Pete to do here?" You might be thinking; well, I am going to tell you. So, if the player presses up and our blockJump variable is false, we will set the ySpeed variable to the maximum value, we will then increment our variable, jumpYDistance, to keep track of how far Pete has moved, and then we will decide to block the jump action if that distance traveled has gone above our maximum we declared before.
If the player isn't pressing up, we set the y value to be the negative maximum and we will block the jump if the distance traveled is above zero. The reason for doing this is if the player has released the up key before Pete has traveled the full distance of his jump. This will allow the player to make smaller jumps.
With that added, if you run the project now and press up, Pete will jump. Now, press up again. Oh, Pete didn't jump. Well, we should have expected that as we haven't reset our jump blocking variable. That won't make a good game if Pete can only jump once.
So, what we should do is provide way for the game to tell Pete if he has landed on something. Now, we haven't implemented our collision detection on our tile map yet, but we do land before Pete goes off the bottom of the screen.
Let's add a landed() method to our Pete class:
public void landed() {
  blockJump = false;
  jumpYDistance = 0;
  ySpeed = 0;
}
As you can see in the preceding code, we are just resetting our jump control parameters. All we have to do now is have this called from our GameScreen class. So, we just need to update our stopPeteLeavingTheScreen() method as follows:
private void stopPeteLeavingTheScreen() {
  if (pete.getY() < 0) {
    pete.setPosition(pete.getX(), 0);
    pete.landed();
  }
  if (pete.getX() < 0) {
    pete.setPosition(0, pete.getY());
  }
  if (pete.getX() + Pete.WIDTH > WORLD_WIDTH) {
    pete.setPosition(WORLD_WIDTH - Pete.WIDTH, pete.getY());
  }
}
Here we have just added the call when Pete has been deemed to leave the screen from the bottom.
If you run the project now, you will find that you make Pete, or the square that represents Pete, jump and bounce all over the place!
So there is the basics, of getting a jump mechanic going. Obviously, games will take this far further when refining the controls. For example, you would have acceleration and deceleration factors to consider, which would make the jumping feel a touch more realistic, for example, Pete could gradually slow down as he reached the top of his jump capability. Also, the concept of gravity could be introduced, which would affect the movement. But for what we are looking to achieve here, this will do!
With Pete jumping about and moving around, albeit in square form, we can now look to bring him alive by added the Pete texture.
Our first step is to add the texture to our asset manager; we can do this in the LoadingScreen class. Let's update the show() method with the following line of code:
peteGame.getAssetManager().load("pete.png", Texture.class);Next, we need to update our Pete class to take this texture and turn it into an animation and individual TextureRegion objects. So, in our Pete class, let's add the following code:
private float animationTimer = 0;
private final Animation walking;
private final TextureRegion standing;
private final TextureRegion jumpUp;
private final TextureRegion jumpDown;
public Pete(Texture texture) {
  TextureRegion[] regions = TextureRegion.split(texture, WIDTH, HEIGHT)[0];
  walking = new Animation(0.25F, regions[0], regions[1]);
  walking.setPlayMode(Animation.PlayMode.LOOP);
  standing = regions[0];
  jumpUp = regions[2];
  jumpDown = regions[3];
}
From the preceding code, you can see we have added references to the textures and to the animation object we are going to set up. Next we have our constructor, here we are passing in the texture that represents Pete and we split it into the tiles. We create our animation; this should all feel familiar as we did essentially the same thing with Flappee Bee in the previous chapter.
Next, we need to update our update() method so that we can update our animation timer:
public void update(float delta) {
  animationTimer += delta;
  //Code omitted for brevity
}
Finally, we need to add a draw() method. Here, we will pass in our SpriteBatch object, considering which image of Pete to draw, depending on what he is doing:
public void draw(Batch batch) {
  TextureRegion toDraw = standing;
  if (xSpeed != 0) {
    toDraw = walking.getKeyFrame(animationTimer);
  }
  if (ySpeed > 0) {
    toDraw = jumpUp;
  } else if (ySpeed < 0) {
    toDraw = jumpDown;
  }

  if (xSpeed < 0) {
    if (!toDraw.isFlipX()) toDraw.flip(true,false);
  } else if (xSpeed > 0) {
    if (toDraw.isFlipX()) toDraw.flip(true,false);
  }

  batch.draw(toDraw, x, y);
}
So, in the preceding code, we start off assuming Pete is standing. Then, depending on the speed at which he is moving, we assigned either a frame from the walk animation or the jumping textures. The reason we have the jump textures check last is that even if there is a non-zero value for xSpeed, we still want the jump texture.
Finally, in this method, we look to flip the texture if Pete is facing the other way.
With that added, update your GameScreen class to reflect our changes to the Pete class. I trust you can do this! Once you have, run the project, and we should get the following output:
As you can see from the preceding screenshot, and hopefully your screen too, Pete is being fully animated!
Now onto the collision detection.