Once it is installed, open NetBeans to begin the creation of the first project. You can create a new project by performing the following steps:
- Open the File menu and click on New Project....
- We want to create a new java application. Java Application is already selected by default. Therefore, simply click on Next.
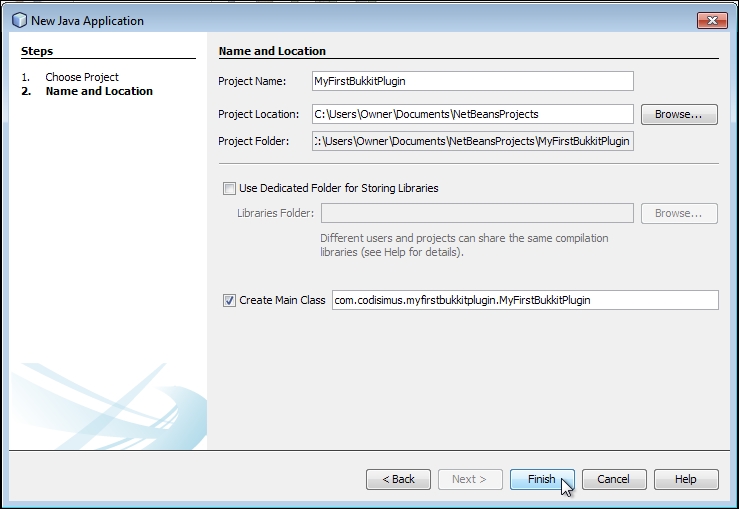
- We must now name the first project. It is a good idea to avoid using spaces in a name. Let's name this project
MyFirstBukkitPlugin. - Unless you want to store your project in another location, you can leave the default value of Project Location.
- Ensure that Create Main Class is checked.
The main class is where we will put the code that is needed to enable the plugin that we want to create. For this field, you must determine the package of your project. This usually involves your website's domain name in the reverse order. For example, Bukkit uses org.bukkit and I use com.codisimus. Assuming that you don't have your own domain name, you can use your e-mail address, such as com.gmail.username. You need to use something that will be unique. If two plugins were to have the same package, it might cause collisions in class names, and Java will have no way of knowing which class you are referring to. Using an e-mail address or a domain name that you own is a good way to ensure that other developers don't use the same package. For this same reason, you should exclude bukkit or minecraft from your package name. The package should also be in lowercase, as shown in the previous examples.
Once you have a package, you need to name your main class. To avoid confusion, most Bukkit plugin developers use the project name as the main class name. The name of the main class should start with a capital letter.
The following screenshot is an example of how your forms should appear before clicking on Finish: