
Bukkit plugins are designed to run on a CraftBukkit or Spigot server. At this point, you have a Spigot server and a simple plugin. After completing this chapter, you will have your new plugin installed on your server. In this chapter, you will make changes to your plugin's code, and you will quickly see it being reflected on your server. This will help you develop the plugin much faster and allow you to accomplish more as you create new plugins. You will also learn how to troubleshoot the code in order to fix it when it is not working properly. This chapter will cover the following topics:
- Building a JAR file for your plugin
- Installing the plugin on your server
- Testing the plugin
- Testing new versions of the plugin
- Debugging the code
In order to install a plugin on a server, we need a .jar file. A JAR file is a Java executable. It contains all the written code, which is bundled together in a ZIP file format. This code needs to be translated so that a computer can understand and run it.
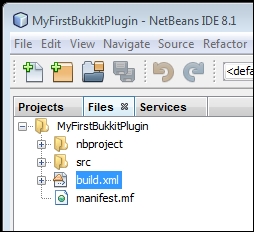
In NetBeans, there is a single button that we can click on to build a project. This will generate the .jar file that we need. Let's add a block of code to our project to automatically copy the created .jar file to a more convenient location. In NetBeans, click on the Files tab to access the build.xml file for your project, as shown in the following screenshot:
Open build.xml and add the following block of code after the import file line:
<target name="-post-jar">
  <copy file="${dist.jar}" todir="../Plugin Jars" failonerror="true"/>
</target>
This additional code will be executed after the JAR file is successfully built. It will copy the JAR file from the dist directory to the specified location. You can change "../Plugin Jars" to whichever directory you want. Here, .. means to go up one folder. Therefore, if your NetBeans project is located at C:UsersOwnerDocumentsNetBeansProjectsMyFirstBukkitPlugin, then the .jar file will be copied to CUsersOwnerDocumentsNetBeansProjectsPlugin JarsMyFirstBukkitPlugin.jar. Adding this code to each of your plugins will keep them organized in a central folder. After adding this new code, your file will look similar to the following piece of code:
<?xml version="1.0" encoding="UTF-8"?>
<project name="MyFirstBukkitPlugin" default="default" basedir=".">
  <description>Builds, tests, and runs the project MyFirstBukkitPlugin.</description>
  <import file="nbproject/build-impl.xml"/>
  <target name="-post-jar">
    <copy file="${dist.jar}" todir="../Plugin Jars" failonerror="true"/>
  </target>
</project>
Tip
In the preceding code, failonerror is set to true. This means that an error will be presented when building in case the JAR file fails to be copied to the defined location. An error such as this may indicate that the location does not exist or you have insufficient privileges. You can set this value to false if you do not wish to see these warnings.
Note that you will have many additional lines between <!-- and -->. These are comments, and I encourage you to read them if you wish to learn more about what you can add to the build.xml file. Once you save this file, you are ready to build your project. You can do so by clicking on the hammer icon or using the F11 shortcut key. The hammer icon, which is present on your toolbar, looks like the following image:
If NetBeans fails to successfully build a jar, then you may have errors in your code.
These errors are most likely shown by the red lines and light bulbs, as seen in Chapter 3, Creating Your First Bukkit Plugin. You can usually find these errors by hovering over or clicking on the bulbs for help. If you are not able to do so, refer to the previous chapter to check whether your code is correct or not. If you still have doubts, refer to Chapter 2, Learning the Bukkit API for help.