
EC2 is the most common of the compute services that AWS offers within its library. This is largely due to its vast variety of instance family types offering different performance and cost options. With this wide acceptance of EC2 by millions of customers, there is an inherent need to ensure that we are able to secure the resource when in operation to prevent it from being compromised by those with malicious intent.
In this chapter, we will be looking into a number of security points relating to EC2 and how they can be configured and implemented. We will be studying the following topics:
- Performing a vulnerability scan using Amazon Inspector
- Creating and securing EC2 key pairs
- Isolating instances for forensic investigation
- Using AWS Systems Manager to administer EC2 instances
Technical requirements
To complete some of the examples within this chapter, you will need to have an AWS account with an EC2 Linux instance running and permissions to access the instance. You will also need permissions to run and configure Amazon Inspector and AWS Systems Manager. For more information on permissions and access control, please refer to Chapter 4, Working with Access Policies.
Performing a vulnerability scan using Amazon Inspector
Amazon Inspector is a fully managed service that allows you to secure your instances and the applications that run on top of them by performing vulnerability assessments via an agent.
The assessments that are run are based upon rules packages that contain hundreds of different known security weaknesses, threats, and vulnerabilities that could exist within your EC2 instance. These rules packages are pulled from five different sources:
- The Center for Internet Security (CIS) Benchmarks, which is a list of global standards and best practices
- A publicly known reference of well documented security threats and flaws found within the common vulnerabilities and exposures list, also known as the CVE
- General security best practices known across the industry, which helps you find deviations within your infrastructure
- Runtime behaviour analysis, which is used to assess and monitor security weaknesses as your EC2 instance is running during an assessment made by Amazon Inspector
- Network reachability, which looks at the configuration of your network settings to discover security vulnerabilities
At the end of the assessment, a report is generated showing your findings that were discovered based upon the packages selected for the assessment.
As I mentioned previously, the service uses an agent to help perform the assessments. This agent allows Amazon Inspector to monitor the behavior of the instance during a scheduled assessment. It will look at activity across the entire EC2 instance, from network activity to processes that are being run at the time of the assessment. When the assessment ends, the data is collected, and this telemetry data that has been captured is then sent back to Amazon Inspector for review and assessment. By utilizing an agent, you can easily implement Amazon Inspector across your existing fleet of instances.
There are a number of different ways you can install this agent, which are as follows:
- You can install the agent on each EC2 instance by logging into the resource and running one of the appropriate scripts.
- You can install the agent on a group of EC2 instances or a single instance by using the Run command from within Systems Manager. We shall be discussing Systems Manager in more depth later in this chapter, and we will see how to use the service to administer our EC2 instances.
- When defining your targets that you want Amazon Inspector to assess, you have the option to install the agent as a part of that initial assessment.
- Alternatively, you could use an Amazon AMI that already has the agent installed, meaning you do not have to perform any manual installation. This AMI is called the Amazon Linux AMI with Amazon Inspector Agent, as shown in the following screenshot, and can be found in the AMI Marketplace (https://aws.amazon.com/marketplace/search/results?x=0&y=0&searchTerms=Amazon+Linux+AMI+with+Amazon+Inspector+Agent):

As we will be discussing Systems Manager later in the chapter, let's see instead how to install the agent on a Linux-based EC2 instance using the script method mentioned previously.
Installing the Amazon Inspector agent
To begin with, you will need to have an EC2 Linux instance that has access to the internet running within your AWS account. Then follow these steps:
- Connect to your EC2 Linux instance.
- Run either of the following commands to download the script required to install the agent:
wget https://inspector-agent.amazonaws.com/linux/latest/install

curl -O https://inspector-agent.amazonaws.com/linux/latest/install
We get the following output when we execute the wget command:
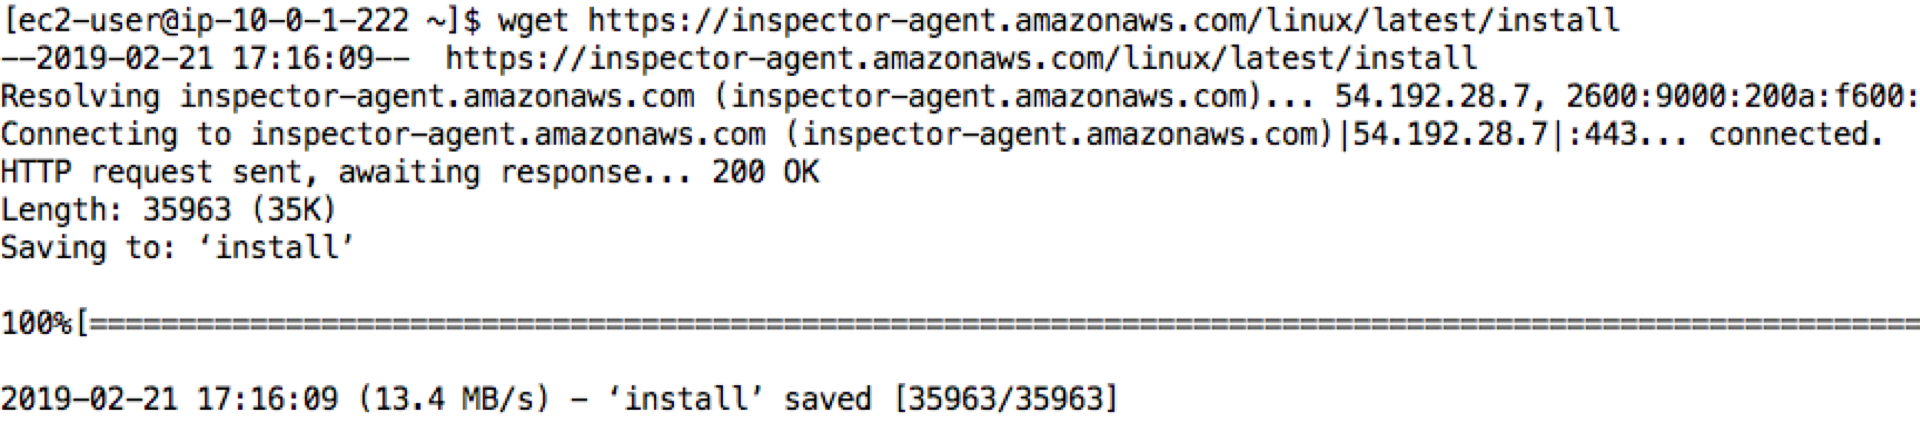
-
Once it is downloaded, you then need to run the script by entering the sudo bash install command, and you will get the following output:

Now the agent is installed, let’s now go ahead and configure Amazon Inspector to perform a vulnerability scan on the EC2 instance.
Configuring assessment targets
To configure Amazon Inspector, we need to create a number of components within the Amazon Inspector service, starting with the assessment target. An assessment target is a grouping of AWS EC2 instances that you want to run an assessment against. This grouping is defined and managed by the tags associated with your EC2 instances within your environment:
- From within the AWS Management Console, select the Amazon Inspector service found in the Security, Identity & Compliance category.
- Select Assessment targets in the left menu:

- Select the blue Create button, and this will display the following options:

From here, you create the assessment targets:
-
- Enter a name for your assessment target.
- If you want to include all of your EC2 instances in your AWS account and your current region, then you can tick the appropriate box to do so.
- Using the drop-down lists for the Key and Value options, select the tags that you have configured for your EC2 instances. You can select more than one tag to refine your EC2 groupings. For example, you might have tags associated with your EC2 fleets such as the following:
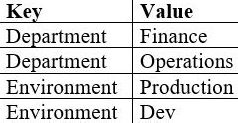
Here, you might want to only select EC2 instances that are in the Production environment and the Operations team, and so you could select a Key of Department with Value set to Operations, and then another Key set to Environment with a Value of Production.
-
- Finally, you can choose to install the Inspector Agent on the targets if they do not already have it running using the checkbox.
- Once you have configured your assessment target, click the blue Save button.
- Click on the OK button to accept the creation of a service-linked role by Amazon Inspector:

- Your assessment target is now completed and will appear in the console. In this example, my configuration looked as follows:

I selected a single instance that I had named Amazon Inspector Linux, which was the instance that I installed the agent on earlier in this chapter. You can now, of course, configure additional assessment targets with a different EC2 instance grouping as required.
Once you have configured your assessment targets, you then need to configure an assessment template.
Configuring an assessment template
The assessment template consists of a number of configurable options that defines how an assessment will be run against your EC2 instances that you just defined as targets. To configure it, follow these steps:
- Remain within the Amazon Inspector console and select Assessment Template on the left-hand side.
- Click the blue Create button and the following configurable page will appear:
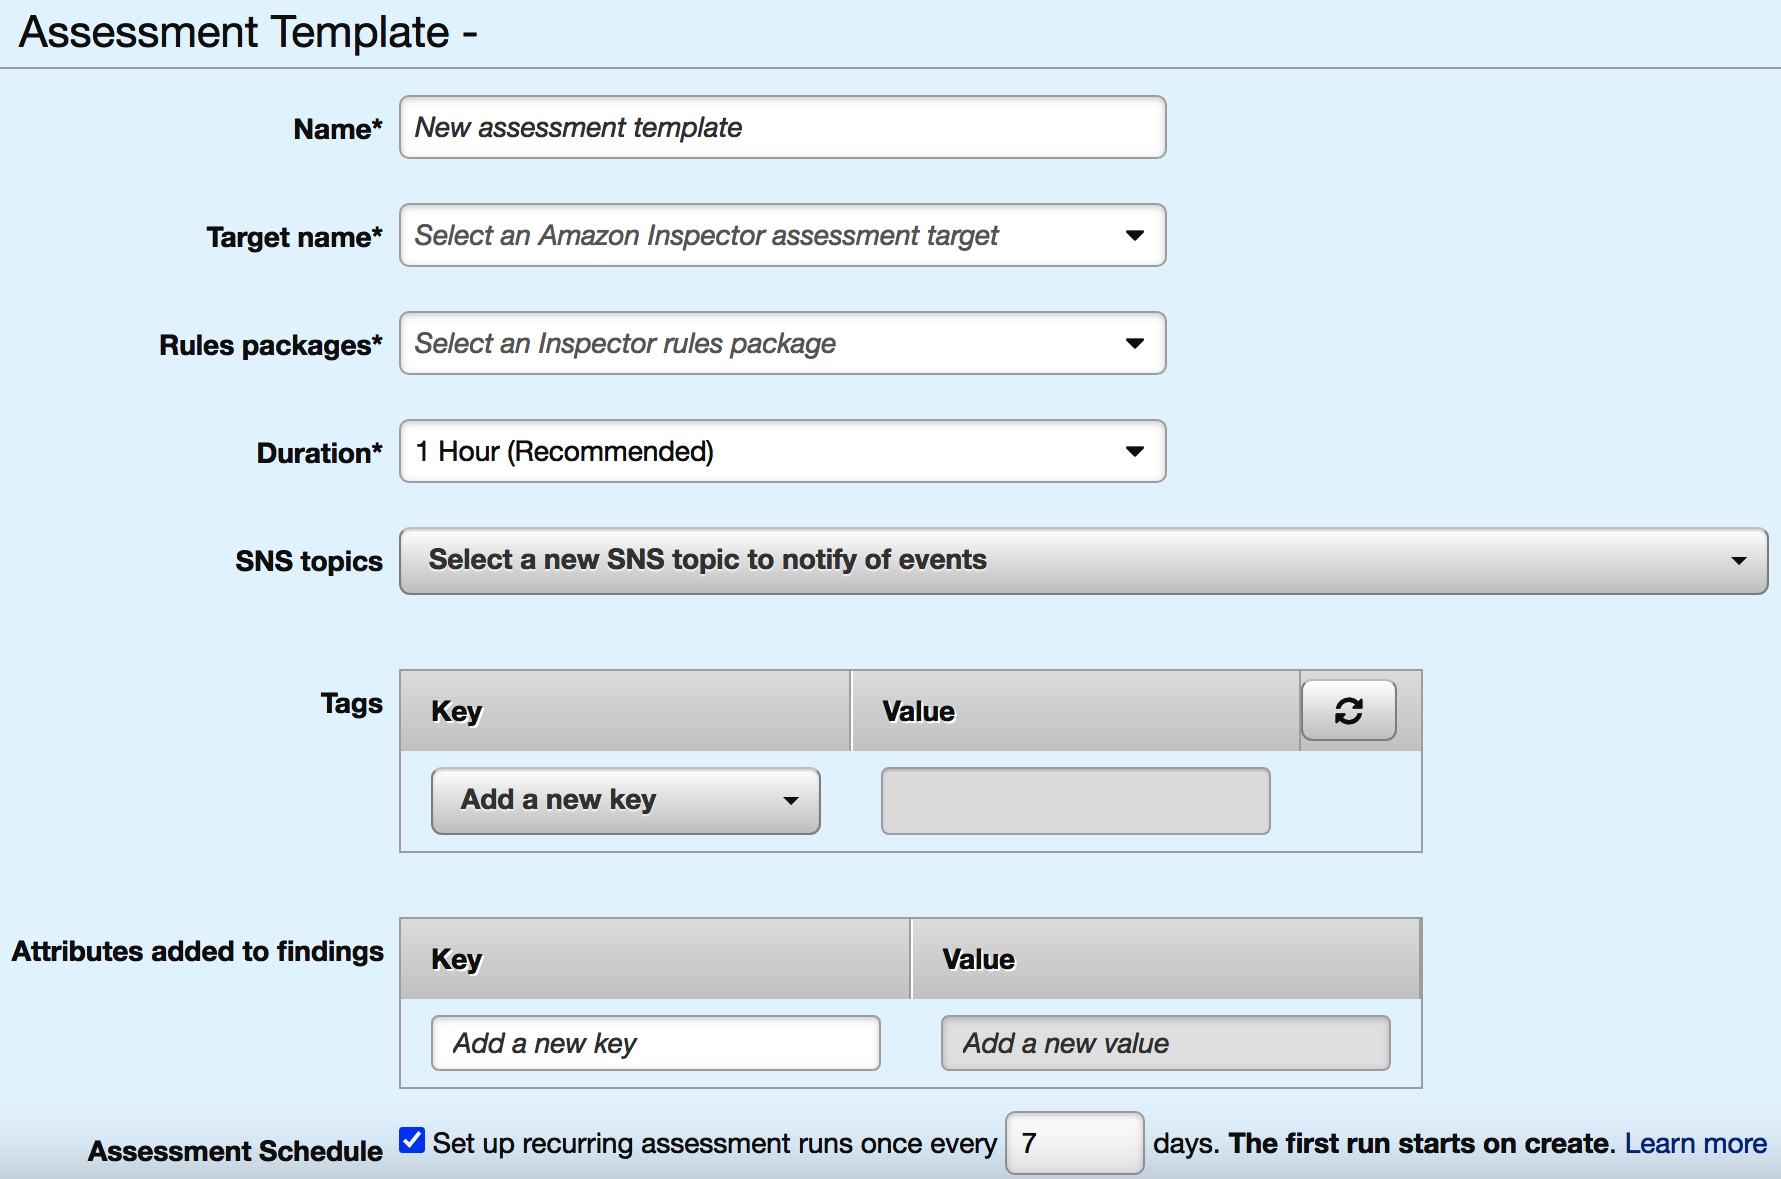
- Similar to the assessment targets, you now have a number of configurable parameters to define your assessment starting with a name for the assessment template. Ensure it is something meaningful that will identify its use.
- You must then select a Target name using the drop-down list. Now this will list all of your assessment targets that you have created in Amazon Inspector. Select the appropriate assessment target. In this example, I have a single assessment target that I created in the previous demo called Stu_EC2_Instance:

- Next, you need to select a Rules package. Rules packages are used to define what the telemetry data will be assessed against during an assessment run and each of these rules packages contains a number of individual rules that the telemetry data is checked against. These rules packages are as follows:

- You can select one or more of these rules packages, but do be aware that not all of the packages are available on all operating systems. The following constraints exist:
- Network Reachability: Does not support EC2 classic networks. Besides, you do not need an agent on the EC2 instance for this rules package.
- Security Best Practices: The rules in this package will only discover findings for Linux-based OSes and not for Windows-based OSes.
- Runtime Behaviour Analysis: This package can be run against both Linux-based and Windows-based OSes; however, not all rules in the package will be applied to Windows-based OSes.
- CIS Operating System Security Configuration Benchmarks: This package contains set rules for both Linux-based and Windows-based OSes.
- Common Vulnerabilities and Exposures: This package contains set rules for both Linux-based and Windows-based OSes.
- Once you have chosen your rules packages, you must then decide how long you want to run the assessment for. The longer the assessment is running, the greater the chance that additional security weaknesses will be found. However, AWS recommends at least running the assessment for one hour. You should also perform these assessments when the EC2 instances are in heavy use as this will yield the greatest amount of findings. The options for setting a time frame are as follows:

- Next, you are able to define an SNS topic to send your findings to once they are available following the assessment. Use the drop-down list to select an SNS topic that you may already have created within your AWS account.
- You can then add an optional tag to the assessment template as you would do for another AWS resource if you need to use the appropriate drop-down lists:

- At the bottom of the configuration page you are able to set up a recurring schedule of when you want this assessment to run by selecting the checkbox and choosing how often you want the assessment to run, in days:
![]()
- We're almost done. My configuration of the assessment template looks as follows:

- At this stage, you can either select Create and run, Create, or Cancel. For this demonstration, select Create.
At this point, your assessment template is now created and ready to run against the assessment targets defined within your assessment template. Do bear in mind that once your template is created, it is not possible to update it. The template will also be listed within the assessment template dashboard, as shown here:
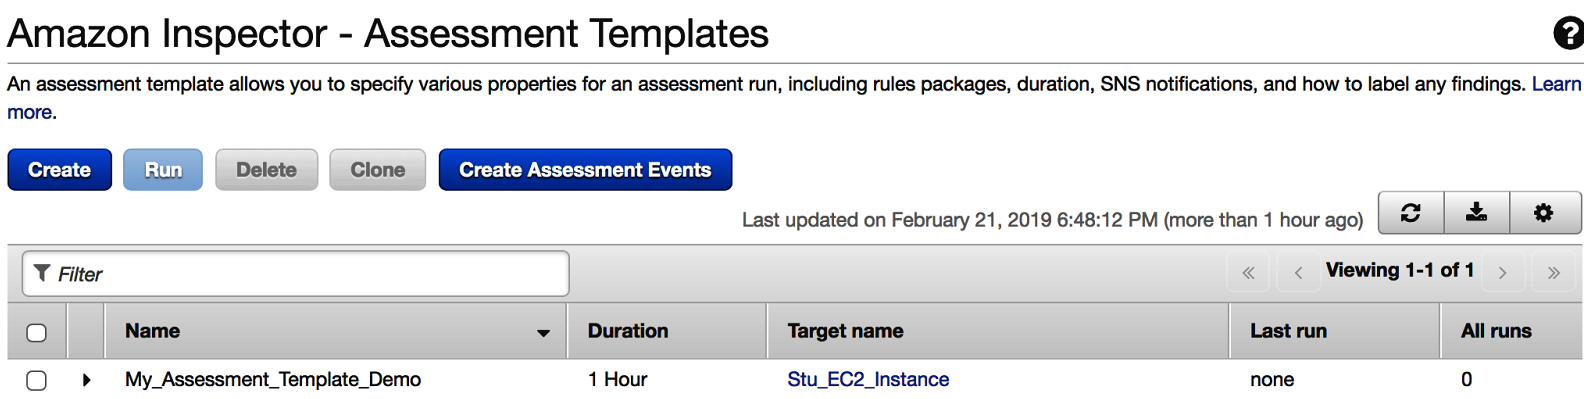
You are now in a position to run the assessment against your targets.
Running an assessment
Execute the following steps to run an assessment:
- From the Assessment Templates dashboard in Amazon Inspector, select the assessment template you would like to run.
- Select the blue Run button. A message will then appear stating that the assessment has started.
- At this point, the Last run column status will update to Preparing to run:

- While the assessment is taking place, you can view more information by selecting Assessment Runs in the left menu. Here, you will find the status of the assessment as it runs, for example, Collecting data:

- Once the assessment duration has completed, the status will change to Analyzing.
- Once the analysis is complete, the assessment run will show the number of findings. In my example, we can see that Amazon Inspector has 20 findings for my Linux instance:

Getting these findings after you have run the assessment, isn't the end. Let me now explain how you can dive into these findings to gather more information.
Viewing findings
Let's execute the following steps to view the findings:
- From within the Amazon Inspector dashboard, select the Findings option from the left menu:
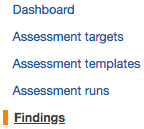
- This will display all of the findings that were recorded in your assessment. The findings that I have looked for are as follows:
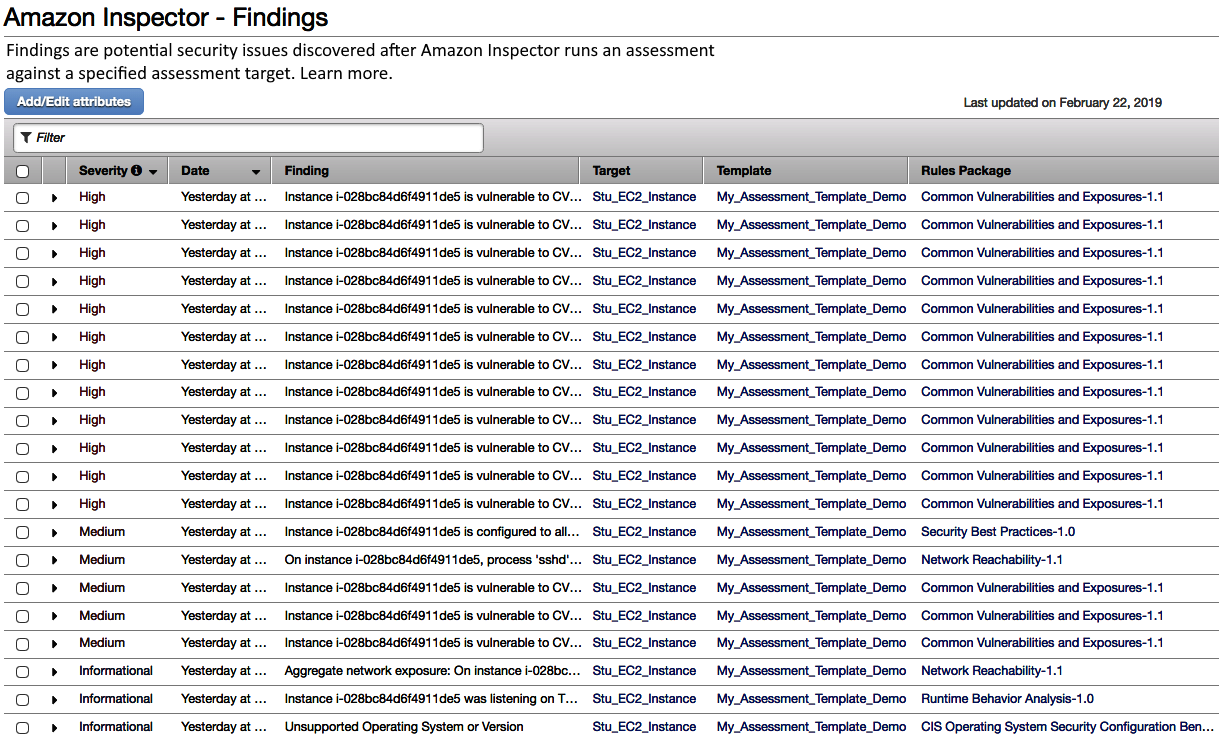
We can see that the Findings page provides information for each finding based on the following:
-
- The severity of the finding
- The date it was found
- The finding itself, which relates to a rule in one of the rules packages
- The target the finding was found on
- The template assessment used to find the finding
- The rules package that the finding relates to
It is worth noting that the severity range is High, Medium, Low, and Informational. In my example, we can see that we have a lot of High severity findings that need investigation, and these should always be investigated first as there is a chance that my instance can be or already has been compromised.
- To drill down into a finding, you can select it from the list. The following screenshot shows one of my High severity findings detected using the CVE package:

This provides additional data on the finding and provides all the information you need to help mitigate the issue. Amazon Inspector does a great job of identifying remediation steps to help you secure your infrastructure.
- The remediation information is provided at the bottom of this page, and the parts that I am most interested in are the following:
Here, you can see that it provides additional information on the finding. In this example, we can see that the instance is vulnerable to CVE-2018-16839. It also shows a description of the security weakness and finally a remediation option to resolve the issue and to help protect the instance. Within this remediation, it also provides a URL link to the CVE in question in case you wanted to gather further information on this finding.
For further examples of findings that I received, see the following screenshots to see some of the variations found by different deployment packages:
Network Reachability package finding:

Security Best Practices package finding:

Runtime Behaviour Analysis finding:

In this example, we were able to review any findings that had been identified and captured by Amazon Inspector. Analyzing these findings allows you to implement the necessary steps to remediate any security issues, threats, or vulnerabilities detected, and hence Amazon Inspector is a very useful tool.
Creating and securing EC2 key pairs
As a part of the process for creating an EC2 instance you are asked to create or select an existing key pair. In this section, we will be looking into the importance of these key pairs and how to manage them.
Key pairs are used to allow you to connect to your instance, whether it is Linux-based or Windows-based. The method for connecting to each of these OSes with key pairs differs, and we shall look into these methods shortly.
Each key pair uses public key cryptography using 2,048-bit SSH-2 RSA keys and are used to encrypt and decrypt administrative logs on credentials to the instance. Public key cryptography uses two separate keys to encrypt and decrypt data; these are known as the public key and the private key. The public key is maintained by the EC2 instance, and the private key is kept by us as the customers. We must download and store this private key securely, as it is unrecoverable if we lose it. The public key encrypts the credentials, and our private key will decrypt them, allowing us to gain access to the instance.
Creating key pairs
Without the creation of these key pairs, it is not possible to connect to your EC2 instance when it has been deployed. You can still create your EC2 instance without a key pair, but you would not be able to connect to it locally to perform any kind of maintenance or local administration.
The two methods for creating key pairs that we will be looking into are as follows:
- Creating key pairs during EC2 deployment
- Creating key pairs within the EC2 console
Creating key pairs during EC2 deployment
You can create a key pair for your instance during its creation. To do so, follow these steps:
- At the end of the configuration option, and just as you click on Launch Instances, the following window will appear:

- EC2 asks you to either select an existing key pair or create a new one. However, in fact you have three choices. Select the drop-down list and then click on Choose an existing key pair:

You don't have to create a new key pair for each and every instance that you would like to connect to. By selecting the first option here, you can use the same key pair that you have already used for a previous instance from the second drop-down box. This means that EC2 will use the same public key associated with that saved key pair, and you have to ensure that you still have the matching private key.
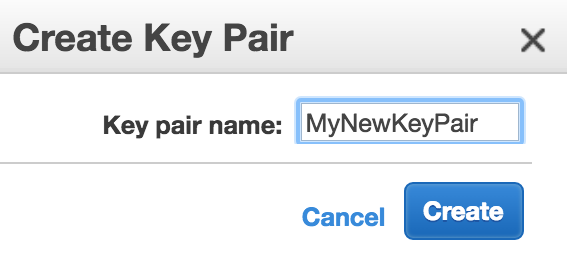
- If you want to create a new key pair, you can do so by selecting the second option, and this will prompt you to give the key pair a name and explains that you need to download the key pair as you will not get another opportunity to do so:

- Select the option of proceeding without a key pair will still allow you to launch the instance. It simply means that you will not be able to connect to it locally to administer it, which isn't always required. In fact, this option effectively adds another layer of security by removing the potential threat of a key pair breach. The only option of connecting to the instance would be if you know the password built into the AMI:

You can also create your key pairs from within the EC2 dashboard of the Management Console, which we will be looking into next. You can then select these key pairs during the creation of an EC2 instance.
Creating key pairs within the EC2 console
To create a new key pair from the EC2 dashboard, follow these steps:
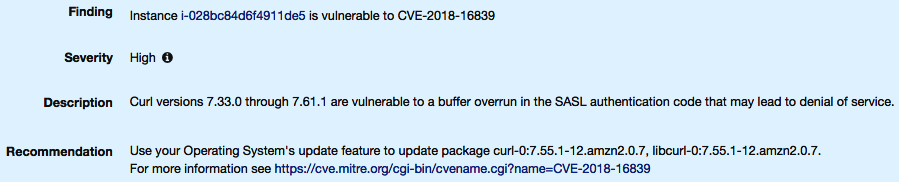
- From the EC2 console, select Key Pairs from the left menu in the NETWORK & SECURITY category:
- Select Create Key Pair.
- Add a name for your new key pair:
Your key pair will now appear in the list of active key pairs and can be used as a key pair when you create new EC2 instances.
With this, you have learned how to create a key pair. But what if you ever need to delete it? The next subsection will deal with this.
Deleting a key
Over time, you may want to delete a key pair for any number of reasons. When you delete a key pair from the EC2 Management Console, you are no longer able to use that key pair for any new EC2 instances. However, this deletion simply only deletes the copy of the public key that AWS holds; it does not delete the public keys that are attached and associated to any EC2 instances that are already created with it. Therefore, as long as you have the private key to the same pair, you can still connect to that same EC2 instance.
Deleting a key using the EC2 console
To delete a key using the EC2 Management Console, follow these steps:
- From the EC2 console, select Key Pairs from the left menu in the NETWORK & SECURITY category.
- Select the key pair that you need to delete and select Delete:

- Confirm the deletion by selecting Yes.
Next, we will see how we can recover a lost private key.
Recovering a lost private key
If you lose your private key, then you could be in a situation of never being able to access you EC2 instance again; however, this is dependant on what storage was selected for the root device of your EC2 instance. If your EC2 instance was EBS-backed and you lost your private key, then you can recover it. However, if it was an instance store-backed instance, then this is not possible.
To determine if your EC2 instance is EBS-backed or instance store-backed, follow these steps:
- Open the EC2 dashboard within the AWS Management Console.
- Select Instances and then select the instance you want to check.
- In the Details pane at the bottom of the screen, look for the Root device type:
![]()
If the instance is EBS-backed, then the value will be ebs, as shown in the preceding screenshot; alternatively, it will be instance store for an instance store-backed device.
Connecting to a Linux-based instance with your key pair
Once you have downloaded your private key to your Linux instance, you can connect to the resource:
- Open the EC2 dashboard from within the AWS Management Console.
- Select Instances and then select the instance that you would like to connect to.
- Select Actions | Connect:
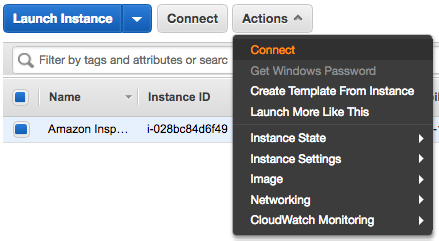
- This will then provide further information and instructions on how to connect to your instance using a four-step process, as shown here:

- Once you have followed steps 1 to 4, you can then use the command shown in the Example section in the preceding screenshot to connect. So, to connect to this instance we simply need to copy and paste the following command into the client:
ssh -i "AmazonInspector1.pem" [email protected]
AmazonInspector1.pem is the name of the private key and ec2-user is the name of the user configured on the instance using the AMI. Finally, the IP address 34.244.16.68 is the address of the instance connected.
Connecting to a Windows-based instance with your key pair
Connecting to a Windows instance is slightly different and uses the key differently:
- Open the EC2 dashboard from within the AWS Management Console.
- Select Instances and then select the instance that you would like to connect to.
- Select Actions | Connect.
- This will then provide further information and instructions on how to connect to your instance:

The Download Remote Desktop File button uses your RDP client to directly connect to your Windows instance, much the same as the Example link when connecting from a Linux box. Once you are presented with the Windows logon screen, you will then be asked for a username and password. The username is displayed. In this example, it is Administrator; however, you will need to get the password using the private key.
- To get the password, click on Get Password and you will see the following screenshot:

This screen allows you to navigate to your private key to decrypt the administrator password.
- Select Choose File next to Key Pair Path and locate the same key as shown under Key Name. Once you have done this, the contents of the private key will be displayed in the box:

- Select Decrypt Password. This will use the date from the private key to provide you with the password for the administrator:

You can now connect to the instance using the RDP shortcut with the username and password provided.
In this section, we focused on the importance of creating, deleting, recovering, and using your key pairs with both Windows and Linux-based instances. Remember, if you want to connect to your EC2 instance to perform any kind of administration then you will need to ensure you create a key pair for that instance.
In the next section of this chapter, I want to explain how to isolate your instance should it become compromised to minimize the blast radius affecting your other infrastructure.
Isolating instances for forensic investigation
When you encounter a security threat within your AWS environment and have identified that an EC2 instance may have been compromised, what actions should you take to help prevent the threat from extending further into your network and affecting and compromising even more resources?
AWS monitoring and logging services
Thankfully, AWS provides a number of monitoring and logging services and features that you should implement and architect into your environment to help you in such a situation. The more information you have, the quicker you can detect and block the attack or threat. This will ultimately reduce the blast radius within your infrastructure and the effect it has both on your customers and on your business from a financial perspective.
Some of these logging and monitoring services and features are detailed in the following sections.
AWS CloudTrail
This is a service that tracks and records just about all API calls made within your AWS account. This is a fantastic service to have at your side. For every API call made, AWS will track the following:
- The API that was called
- The service to which the API call was made against
- The timestamp when it was called
- The source IP address of the requester
This is all great information when trying to identify when and how an incident occurred within your environment.
More on AWS CloudTrail will be discussed in Chapter 12, Implementing Logging Mechanisms.
AWS Config
AWS Config can provide a whole realm of resource management activities, including the following:
- Acting as a resource inventory for your infrastructure.
- Ability to capture and log any changes to your resources.
- You can take a snapshot of your configurations.
- Storing and reviewing the configuration history of resources.
- It integrates with AWS CloudTrail and will show you which API call made specific changes.
- Identify relationships held between different resources, for example, which EBS volumes are associated to which instances, and which instances are within which subnet.
- Through the use of compliance checks underpinned by AWS Lambda you can implement automatic checking for compliance rules, for example, to check all EBS volumes provisioned are encrypted.
All of this helps you to perform security analysis across your environment. More on AWS Config will be discussed in Chapter 13, Auditing and Governance.
Amazon CloudWatch
CloudWatch is probably the most common monitoring service provided by AWS. It collates and collects metrics across a variety of your resources running in your AWS account. This allows you to monitor your resources' performance over time and configure and respond to alerts that meet customized and defined thresholds.
On top of this metric monitoring, you can use CloudWatch along with a unified Cloud Agent to collect logs of your applications running on EC2 instances and a number of different AWS services. This log's data can be read from within CloudWatch, providing you with a real-time logstream of data. Using CloudWatch Logs in this way essentially allows you access to central repository of real-time log data.
More on Amazon CloudWatch will be discussed in Chapter 12, Implementing Logging Mechanisms.
VPC Flow Logs
VPC Flow Logs can capture all IP traffic from network interfaces on your instances, a subnet for the Virtual Private Cloud (VPC), or the VPC itself. This data is then sent to CloudWatch logs, allowing you to view the data as a stream showing all the entries. This data and information can help you resolve incidents and help with security remediation by identifying traffic that shouldn't be destined for a specific resource.
These are just a few of the logging capabilities offered by AWS. The point is, there are services and features, but you need to architect them into your solution in order to get the maximum benefit. As a general rule, you should ensure you have some form of logging enabled within your account.
So, going back to our first point at the start of this section, when you encounter a security threat and have identified that an EC2 instance may have been compromised, what action should you take? The key point is isolation.
VPC Flow Logs will be discussed in more depth in Chapter 12, Implementing Logging Mechanisms.
Isolation
Once you have identified a compromised instance, you must isolate it from everything else and remove it from your production network, thus preventing anything else from gaining access to it. There are a number of different steps you could take to do this:
- You should build in a forensic security group within your production environments. This allows you to quickly change the EC2 instance security group to one that prevents it from communicating with any other resource on your network. This effectively removes it from the network as no other connection can be made to or from it. If and when you need to connect to the resource, configure the security group using very specific ports and protocols (such as SSH and RDP) and configure the inbound source as a single IP address of the engineer that will be connecting.
- Create a snapshot of the EC2 instance, allowing you to restore it somewhere else in a secure environment for further analysis.
- If possible, take a memory dump of the instance.
- Store any log data to a dedicated S3 bucket. You could also use S3, again with dedicated buckets, to store information from the memory dump and disk information.
- Implement bucket-level permission on any S3 buckets used to a single identity.
- Create a separate forensic VPC purely for compromised resources.
- This forensic VPC should not be connected to any other VPCs.
- Enable logging, such as VPC Flow Logs.
- Create specific IAM roles that only allow read-only access to resources. This prevents you from inadvertently changing any data on the instance, preserving the condition for thorough forensic analysis.
Your main goals are to remove the compromised instance from the production network as quickly as possible (usually achieved by changing the security group of the instance). You will also want to preserve the instance in its exact state as much as possible to ensure you are not responsible for making any changes to it that could show up in logs during the investigation of the cause and impact and that would slow the investigation down. By taking a snapshot of the instance you can restore it within a different environment, allowing you to analyze it in safer and more restrictive circumstances.
In this section, I introduced you to some of the logging services that can be used to capture important data, including AWS CloudTrail, AWS Config, Amazon CloudWatch, and VPC Flow Logs. These services will be covered in greater detail in Chapter 12, Implementing Logging Mechanisms and Chapter 13, Auditing and Governance. I also explained some of the methods that can be used to help you isolate an instance should it become compromised, which will help you to reduce the chances of the malicious user gaining access to other resources.
In the next section, we will see how we can use the AWS Systems Manager to administer EC2 instances.
Using Systems Manager to administer EC2 instances
AWS Systems Manager is a powerful tool that allows you to easily and quickly administer and perform operational actions against your instances (both Windows- and Linux-based) at scale for both on-premise resources and within AWS without having to SSH or RDP to those instances. From a security standpoint, being able to remove these protocols from security groups reduces the attack surface of your instances even further. Having a single dashboard providing this administration also allows you to gain insights into your EC2 fleet and as a result provides you with greater visibility of your infrastructure. You will, for example, be able to see systems configurations and the patching levels of your instances, as well other software installations on the instance. Systems Manager can also aid with your compliance requirements by scanning instances against set patch baselines and anti-virus definitions.
System Manager works on the basis of resource groups. These groups are simply a customized collection of regional resources based on resource types and tags. These groups are then saved and used by Systems Manager to both simplify the management of your resources and to provide an overview and visibility of the groupings operational data. When you have resources grouped together, it makes performing actions such as deploying patches and security updates far easier.
Creating resource groups in Systems Manager
In this example, we will create a resource group of your EC2 instances tagged with the following information, but feel free to use your own tags:
| Key | Value |
| Project | AWS |
| Domain | Security |
Create a resource group with the following steps:
- Log into your AWS Management Console.
- Navigate to the Systems Manager service found within the Management & Governance category:

- In the left-hand menu, select Find Resources:

The following screen will then appear, which allows us to create our resource group:

- To define your resources for your group, select the Resource types drop-down box and select AWS::EC2::Instance:

- Next, you need to add your tag keys and values into the appropriate box and click Add:

- At this point, you have defined the resource type that you want to be a part of this group (EC2 instances) and filtered them using tag keys and values. To identify the resources that meet this criterion you must then click the View query results button. This will then display any resources that match your query of the resource type and matching tags. As you can see in the following screenshot, we have two EC2 instances that match. To save these results as your group, click the orange Save query as group button:

- You are then prompted to enter a name for your group. In our example, we have named the group My-EC2-Instances. You also have the option of adding a description for the group, in addition to applying tags. When you have entered the details, click the orange Create group button to save this group:

- Lastly, you will be notified that the group has been created successfully within your region:
![]()
We have now created a resource group with specific tags relating to our environment, which will enable us to manage them easier within Systems Manager. The feature that we will be exploring next is the built-in insights.
Built-in insights
AWS Systems Manager uses built-in insights (integrations with other AWS services and features) to provide you with an overview of how your resources are operating within your resource groups. Currently, these built-in insights can review your resources groups against the following:
- Configuration compliance and history (integration with AWS Config)
- CloudTrail
- Personal Health Dashboard
- Trusted Advisor
We will discuss these one by one. But first, let's access these insights using the left menu by selecting Built-in Insights:

This will present the following simple dashboard, where you can then select each of the following insights:
- Config: This shows the config details, where you can filter to see how your resources are responding to compliance checks configured within AWS Config, in addition to the resource history:

- CloudTrail: This shows the latest AWS calls made to the instances within the group:

- Personal Health Dashboard: If there were any outages or incidents within AWS that affected your resources, then they will be shown here:

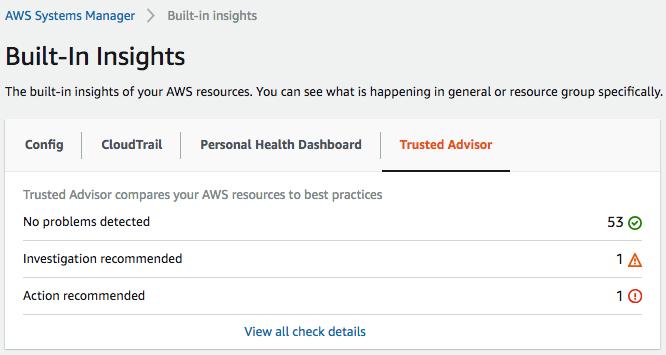
- Trusted Advisor: This will display any issues that are detected using the Trusted Advisor checks. As we can see in the following screenshot, it has detected one issue where investigation is recommended, and another issue where action is recommended. If we select the View all check details link at the bottom, it takes us to Trusted Advisor to identify the issue, and we can then resolve the problem:
These built-in insights allow you to gain great visibility into the state of your EC2 instances, such as any non-compliance or best practices that are not being followed, thanks to resource groups and its integration with other AWS services and features.
AWS Systems Manager has a wide range of administration features, but we will just run through a few of the key components of the service to highlight what they are used for.
Actions
In this section, we will focus on the actions of AWS Systems Manager. These actions allow you to perform a number of different tasks and operations against your resources, from implementing a level of automation to creating packages to distribute to your fleet of instances. Let's take a look at each of them.
The Actions list can be found in the menu on the left of the dashboard:

We will go through each of these actions in the following sections.
Automation
Here, you can automate processes against groups of resources through a series of steps via SSM documents. This helps to simplify the management of your resources and your EC2 fleet, as it enables you to implement common tasks using both custom and pre-defined documents, which are written in JSON. These SSM documents enable you to perform recurring and common operational tasks automatically, for example, patching your EC2 instances or creating AMIs. Another common use is to implement operational changes at scale, with the inclusion of approval steps and controls to prevent unexpected behavior.
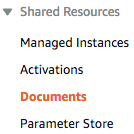
In order to access the automation documents, you can navigate to the Shared Resources menu on the left and select Documents:
Automation should be used where ever possible to ensure tasks and operations are carried out predictably and accurately without human intervention, so the automation action is a great feature of SSM.
Run Command
The Run Command allows you to manage your fleet of EC2 instances remotely and securely, allowing you to perform maintenance and management without ever having to log into the instances. Much like with the Automation section, the Run Command also uses SSM documents to help you perform administrative tasks and configuration changes.
As an example, we will see how to update the SSM agent on a EC2 instance. The SSM agent is preinstalled with most versions of Linux and Windows, and its main purpose is to process requests from AWS Systems Manager. To update the SSM agent using the Run Command, execute the following steps:
- From within the Systems Manager console, select Run Command from the Actions section:

- In the Command document list, search for AWS-UpdateSSMAgent:

- The Command parameters section is optional; you can specify a specific version of the agent you want to install, or if you want to downgrade to a previous agent:

- Next, you can select your target EC2 instances that you want to update the agent on, you can do this by tag selection or by manually selecting the instances. Do bear in mind that for your EC2 instances to be visible here you must have configured the EC2 instances with permission to communicate with SSM. This is done by associating the EC2 instances with a role with the permissions set out in the AWS managed policy of AmazonEC2RoleforSSM:

- Next, you configure the Other parameters section. Here, you can add any additional comments (optional) regarding the command and set a timeout in seconds for how long the command should wait before failing should an issue arise:

- Next is the Rate Control, which allows you to customize how many resources should be updated at once, either as a number of targets or the percentage of targets. In addition, you can also set the command to fail once it has reached a set number of errors or percentage of failures:

- The next section to complete is the Output options. This section allows you to send output generated by the results of the Run Command to either S3 or Amazon CloudWatch Logs, or both:

- If you would also like notifications generated by SNS of the status of your Run Command, then this can be configured in the SNS Notifications section by simply selecting Enable SNS notifications:

- Finally, you are given the option of using the AWS CLI to perform the same actions as defined during the configuration, and it provides you with the complete command, as shown here:

- Once you have configured all of your options, you then click Run, and this will then execute the Run Command and provide a status screen showing you the progress:

- Once the command has finished, the status will change to Completed. For reference, the following output is what was sent to S3 by SSM on completion:
Updating amazon-ssm-agent from 2.3.372.0 to latest

Successfully downloaded https://s3.eu-west-1.amazonaws.com/amazon-ssm-eu-west-1/ssm-agent-manifest.json
Successfully downloaded https://s3.eu-west-1.amazonaws.com/amazon-ssm-eu-west-1/amazon-ssm-agent-updater/2.3.479.0/amazon-ssm-agent-updater-linux-amd64.tar.gz
Successfully downloaded https://s3.eu-west-1.amazonaws.com/amazon-ssm-eu-west-1/amazon-ssm-agent/2.3.372.0/amazon-ssm-agent-linux-amd64.tar.gz
Successfully downloaded https://s3.eu-west-1.amazonaws.com/amazon-ssm-eu-west-1/amazon-ssm-agent/2.3.479.0/amazon-ssm-agent-linux-amd64.tar.gz

Initiating amazon-ssm-agent update to 2.3.479.0
amazon-ssm-agent updated successfully to 2.3.479.0
In this example, we looked at how you can use the Run Command to update the SSM agent on an EC2 instance, both remotely and securely, showing you that it's possible to perform administrative tasks and configuration changes.
Session Manager
The Session Manager helps to maintain security and audit compliance across your fleet. It helps to reduce the level of access control required on your instances, in addition to optimizing your security groups by closing inbound ports for your resources too, for example, by removing SSH. Session Manager allows you to connect securely to your instances via a browser-based shell or the CLI without having to maintain and configure bastion hosts or manage SSH keys. Any access gained to the instances is fully audited via session logs for additional compliance requirements. This allows an instance access activity to be monitored and tracked and enables an overview of user access. The session logs also allow you to track any actions or changes that were performed.
To connect to an instance using Session Manager from within the console, follow these steps:
- Select Session Manager from the Actions menu on the left side of the console.
- Select the orange Start session button.
- Select your instance you want to connect to:

- Select Start session.
- You will then be securely connected to the instance via your browser, as shown in the following screenshot:

In this example, I showed you how you can access your instances through a browser-based shell using Session Manager.
Distributor
The Distributor allows you to create packages to distribute your own software across your instances. Alternatively, there are also a range of AWS managed and compiled packages that you can also take advantage of, such as AWSKinesisTap, which would install the Windows Kinesis agent on an instance. If you create your own package, it is published to AWS Systems Manager, where it can then be deployed by using the Run Command as explained earlier, or by using State Manager.
State Manager
This is used to help you maintain a consistent and measurable state of your EC2 instances. Some of the key uses of State Manager include the following:
- Configuring network settings
- Bootstrapping your instances, allowing you to install specific software on boot
- Ensuring the installation of specific agents are updated on a regular schedule
- Joining Windows-based instances to a domain
- Running scripts on instances
By using State Manager, you can help to reduce the configuration drift that can be experienced by instances over time through various different updates and configuration changes. This helps to maintain your compliance requirements across your fleet of instances.
I now want to pay additional attention to the Patch Manager feature, as it's important to understand how patching is managed through Systems Manager.
Patch Manager
Quite simply, this provides a method of automating the management of patch updates across your fleet of EC2 instances. This is great way to push out a newly released patch that protects you from new vulnerabilities across your whole fleet with a few clicks. It also has the ability to scan your instances to see which patches are missing, and if configured to do so it will update any missing patches for you.
There are four key points to Patch Manager, as highlighted by the AWS Systems Manager Patch Console:

So, let's take a look at each of these in turn.
Use default patch baselines, or create your own
A key element of Patch Manager is patch baselines. They simply provide a patch baseline for each supported OS. There are a number of predefined patch baselines that AWS provides. To view them from within the Systems Manager console, follow these steps:
- Select Patch Manager from the menu on the left.
- Select View predefined patch baselines:

- This will then present a list of predefined patch baselines that have been created by AWS for each OS:

- To view the settings of a baseline, select the Baseline ID:

- Here, you can see the description and, importantly, the approval rules of the baseline, which determine the classification of patches included, the severity of patches, and any auto-approval delay.
Depending on the settings within these predefined patch baselines you can determine if you would like to use one of these baselines or create your own.
I now want to show you how to create your own patch baseline:
- From the list of predefined AWS patch baselines, select Create patch baseline:

Here, there are a few selections to be made:
-
- The first elements you will need to configure are the name and optional description of your baseline.
- You must also select which OS this baseline will be associated with.
- If required, you can select a checkbox to make this baseline a new default for instances with the same OS.
- Following this section, you will then need to configure the approval rules for the OS. You must have a minimum of 1 rule and a maximum of 10:
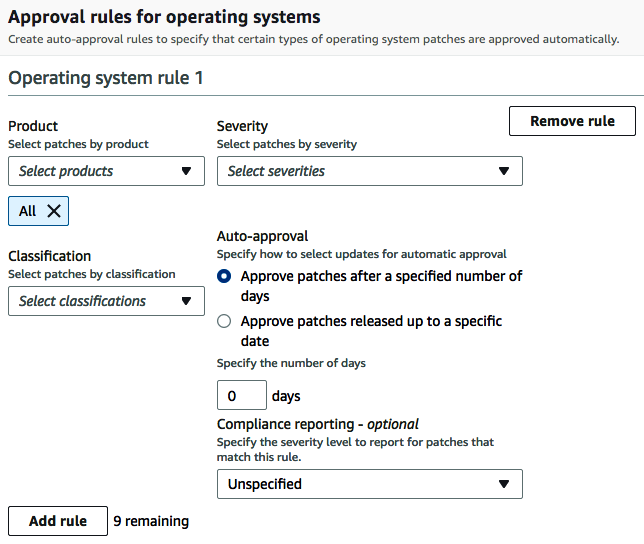
- The Product dropdown allows you to select from the list the version of the OS; for example, if Windows was selected, you could select the version of Windows you wanted:

- The Classification dropdown allows you to select patches as per their classification, the options here are as follows:

So, going back to our predefined default baseline for the Windows OS we saw earlier, the classification contained CriticalUpdates and SecurityUpdates. If we wanted our patch baseline to include ServicePacks as well, for example, then we would need to create our own baseline as we are doing here, and add the required classifications.
- Next, we have Severity, which allows you to select your patches by the defined severity:

- Next is the Auto-approval component. This allows you to configure when the patches defined by the severity, classification, and product settings already made will be approved by your baseline. You can either approve the patches after a specified number of days once they are released, or all patches up to a specific release date:

- The last part in this section allows you to select a level of severity for patches that match this rule for optional compliance reporting:
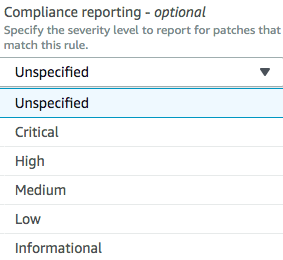
- If you would like to add an additional rule, select Add rule:
![]()
- Further down the configuration screen, you will see Patch exceptions:

This section allows you to provide a list of approved patches regardless of whether the rules specified within the patch baseline match it or not. You just need to add them to the Approved patches box. You can also explicitly reject any patches that you do not want installed as a part of your patch baseline, even if the rules in your baseline allow it. For these rejected patches, you can specify whether you would like to have them installed if they are a dependency on another patch, or block it completely regardless of any dependencies:

- Finally, select Create Patch Baseline. Your baseline will now appear in the list of predefined patch baselines.
Next, I want to talk about how to organize instances into patch groups, which is an optional step.
Organizing instances into patch groups (optional)
Once you have your baselines defined and configured, even if that means using the default predefined baselines created by AWS, you can then choose to create patch groups if required.
Patch groups are exactly what you would expect them to be: they allow you to associate a number of instances with a group, which is then associated with a single patch baseline. This helps you to organize your instances and patches more easily by grouping similar instances together, perhaps within the same environment. For example, you could group together all Windows instances within your test environment.
Also, any instance that is not associated with a patch group will automatically receive the default patch baseline for that OS.
So, when a task is run to apply patches to your instances, SSM will know if the instance belongs to a patch group. If it does, the associated patch baseline of that group will be used to apply any patches. If an instance does not belong to a patch group, then the instance will use the default patch baseline available, which, as we know, could be a patch baseline that you have configured yourself instead of the predefined ones created by AWS.
Automate the patching schedule by using maintenance windows
You can use maintenance windows to schedule specific times when maintenance activities should occur to reduce the performance impact for your end users. Actions to be run within these configured windows could include patch updates or software installations.
There are three options to select from a patching schedule perspective:
- Select an existing maintenance window: This allows you to use an existing maintenance window that you have already configured.
- Schedule in a new maintenance window: You can create a new maintenance window when configuring patching.
- Skip scheduling and patch instances now: Lastly, you can simply decide to carry out your patch update immediately outside of any preconfigured maintenance windows.
The final element of using Patch Manager is monitoring your patch status to ensure compliance.
Monitoring your patch status to ensure compliance
Once you have completed your patch installations on your instances, compliance data is available immediately to you. AWS Systems Manager provides three different methods of viewing your patch compliance data:
- AWS Systems Manager Explorer (https://docs.aws.amazon.com/systems-manager/latest/userguide/Explorer.html)
- AWS Systems Manager Configuration compliance (https://docs.aws.amazon.com/systems-manager/latest/userguide/systems-manager-compliance.html)
- AWS Systems Manager Managed Instances (https://docs.aws.amazon.com/systems-manager/latest/userguide/managed_instances.html
Each of these capabilities will provide you with a method of obtaining and viewing your EC2 patch compliance.
Now we have looked at patch baselines, patch groups, automating the patching schedule, and the different capabilities of monitoring your patch compliance. I now want to quickly walk you through setting up your patch configuration:
- From the Patch Manager dashboard within Systems Manager, select Configure Patching.
- You will then be taken a configuration page, where you will need to define the following:
- Which instances to patch
- A patching schedule
- The patching operation:

- Firstly, you must select which instances you would like to patch, either via instance tags, a patch group, or by manually selecting them.
- Next, you must select a patching schedule. As I explained earlier, there are three options. The following screenshot shows the configuration options for creating a new maintenance schedule for your patching:

- Finally, you must select which patching operation you would like to use:

As we can see, Scan and install will scan each target instance and download any patches that are approved and missing from the instance that fall within the patch baseline settings. Scan only will simply identify the missing patches for you to review without installing them.
- Once you have select the options required for your patching, select Configure Patching.
Your patching will then be configured and will be run as per your patching schedule, instance selection, and patching operation.
In this section, we looked at how you can use Patch Manager within Systems Manager to create, define, and run patch updates across your EC2 fleet for all different OSes using patch baselines to determine the patches of interest using classifications and severity levels.
Summary
This chapter covered a range of methods and services that can be used to help you protect and manage your EC2 instances. Compute resources, which of course includes EC2 instances, are likely to be widely used within your environment, and as a result you should be familiar with an array of techniques and methods to protect and secure them at all levels. This includes being able to detect potential threats and vulnerabilities, access management, compliance, and operational maintenance. All of these points are essential when looking at how best to secure you EC2 instances. Some of the topics and services that are mentioned here will be covered in more detail in later chapters of the book.
In the following chapter, my focus will be moving onto securing your infrastructure within AWS.This will include your VPC and its core components, including Network Access Control Lists (NACLs), security groups, network segmentation, NAT gateways, and internet gateways.
Questions
As we conclude, here is a list of questions for you to test your knowledge regarding this chapter's material. You will find the answers in the Assessments section of the Appendix:
- True or False: AWS Systems Manager is a fully managed service that allows you to help secure your instances and the applications that run on top of them by performing vulnerability assessments via an agent.
- True or False: Amazon Inspector requires an agent to be installed to remotely run assessments.
- Is the public key of an EC2 instance key pair held by AWS or you as the customer?
- Which service is used to track and record API calls made within your AWS account?
- Which service allows you to easily and quickly administer and perform operational actions against your instances (both Windows- and Linux-based) at scale for both on-premise resources and within AWS without having to SSH or RDP into those instances?
Further reading
For more information on some of the best practices when securing EC2 instances, please review the following info from AWS, at: https://aws.amazon.com/answers/security/aws-securing-ec2-instances/.