Chapter 12: Deploying Applications to the Cloud
In the previous chapter, we focused our efforts on integrating our models within the Flask framework to develop two main methods of serving data to end users: Graphical User Interfaces (GUIs), and Application Programming Interfaces (APIs). Using the Flask framework, we managed to locally deploy our models for development purposes only. In this chapter, we will take the next step forward and deploy our model to the cloud, thus making it available not only locally to ourselves but also across the web to many other users.
There are many different deployment platforms out there, such as Amazon Web Services (AWS), Google Cloud Platform (GCP), Azure, and Heroku, each of which serves to fulfill a number of needs. In each of these platforms, there are a number of solutions, each containing its respective pros and cons. For each of these solutions, there are a number of ways we can deploy a framework within them. Essentially, the number of possible ways to deploy a solution is practically uncountable, and because of this, users can get easily overwhelmed. Over the course of this chapter, we will explore some of the most common and straightforward paths new developers generally take to deploy their applications.
Throughout the following sections, we will cover the following topics:
- Exploring current cloud computing platforms
- Understanding containers and images
- Tutorial – deploying a container to AWS (Lightsail)
- Tutorial – deploying an application to GCP (App Engine)
- Tutorial – deploying an application's code to GitHub
With these objectives in mind, let's go ahead and get started!
Exploring current cloud computing platforms
One of the most significant technology trends over the last few years has been the shift to cloud computing. Although most companies used to prefer to own, operate, and maintain their own data centers and infrastructure, most enterprises around the globe now maintain a cloud-first approach. There are many reasons as to why companies have moved down this path, such as reduced costs, scalability, security, and much more. Given the surge in demand for cloud computing capabilities, a number of cloud computing platforms began to grow and expand in the market in response to this major movement in the digital world.
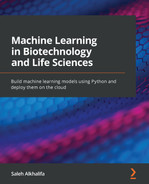
Over the last few years, many of these cloud computing platforms began to not only develop solutions to meet major infrastructure needs but also focus on targeted needs specifically within the field of data science. The main platforms are AWS, GCP, and Microsoft Azure, as depicted in the following diagram:
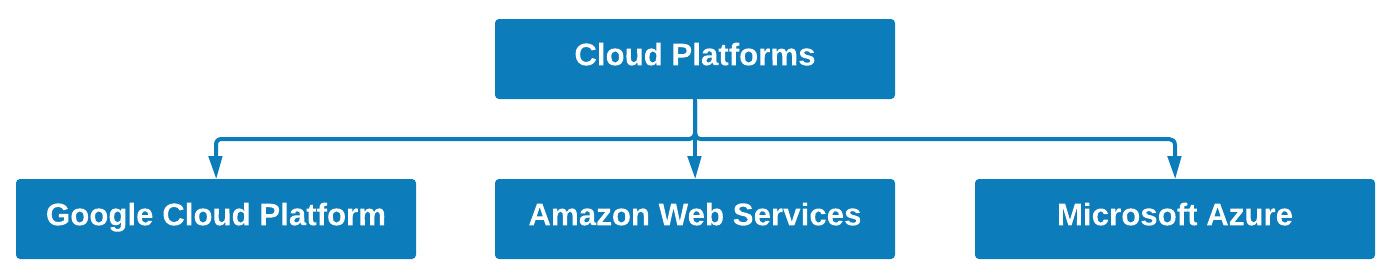
Figure 12.1 – Some common cloud computing platforms
Many companies around the world generally operate at the enterprise level with one of these providers for consistency. From the perspective of data scientists and developers, these platforms are nearly identical as they generally contain very similar solutions to meet our needs.
Each of these platforms includes numerous solutions designed to deploy frameworks and make them available to end users in some form. The degree to which these resources are provided to end users is generally the difference between these platforms. For example, a developer may expect high levels of activity for a given web application and may therefore decide to deploy their model using AWS Elastic Beanstalk or Amazon Elastic Container Service (ECS). On the other hand, another user may only wish to deploy their web application to a few users and in the simplest way possible and would therefore choose to use Amazon Elastic Compute Cloud (EC2). In any case, the specific solution a developer chooses is generally selected based on the specific need. Let's go ahead and take a look at some of the most popular solutions out there, as depicted in the following screenshot:
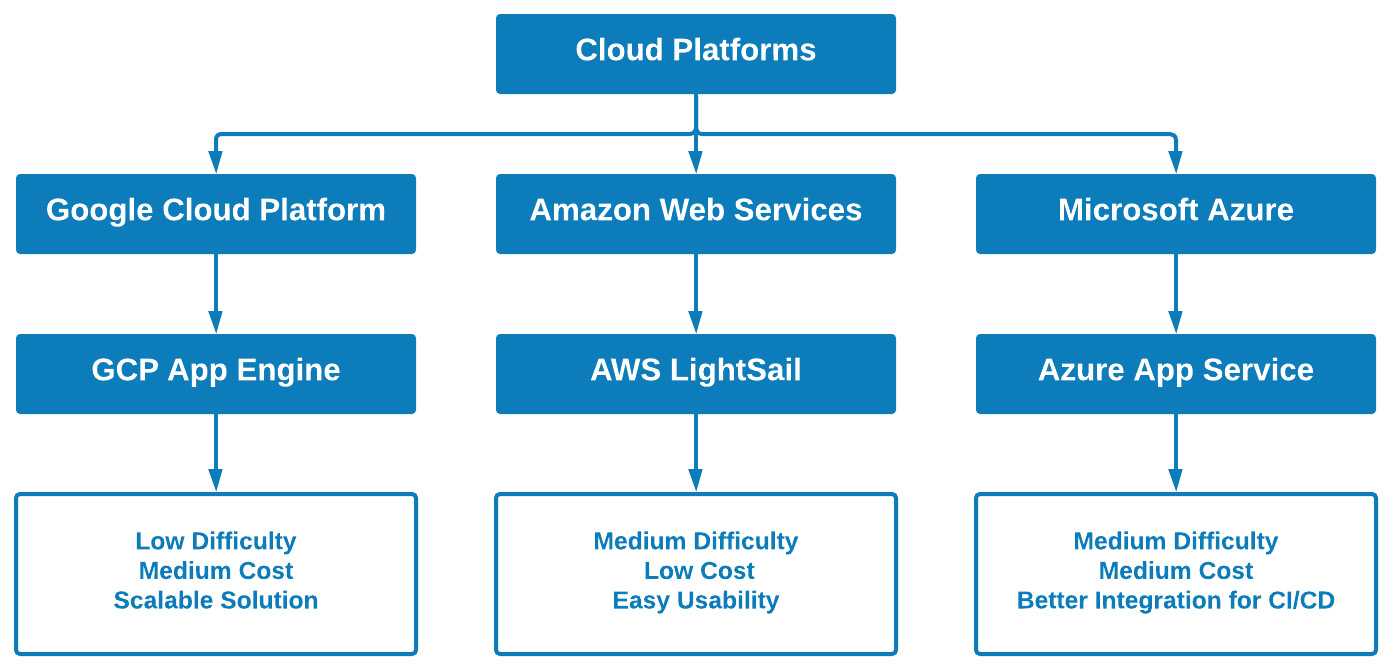
Figure 12.2 – Some of the most common tools to deploy web applications
When it comes to deploying Flask applications, three deployment solutions have gained a great deal of traction in recent years within the data science community. Each of these solutions contains its respective pros and cons, and it is the responsibility of the data scientist or developer to ensure that the business needs for a given web application are matched to the best possible solution in any of these platforms.
As web applications began to increase in popularity, it soon became evident that consistency within the applications was needed to ensure that an application that a developer creates and deploys within one platform can be just as easily deployed in another platform with the smallest number of changes. In the following section, we will discuss the idea of containerization using an example known as Docker.
Understanding containers and images
One of the easiest ways to build, deploy, and manage a web application is through the use of containers. We can think of containers as buckets or vessels containing all items that make up a web application but in the form of an Operating System (OS) virtualization. Think back for a moment to the previous chapter—Chapter 11, Deploying Models with Flask—in which we created a virtual environment to better maintain the packages we needed to install for the application. Containers can be thought of in quite a similar way, only on the OS level.
Containers consist of a number of items such as executables, libraries, binary code, and much more. Given that they do not contain some of the heavier items servers tend to have such as OS images, they are considered to have less overhead, making them more lightweight. Since these lightweight containers are considered to be packaged up and ready to go, developers (or automated systems) are able to easily deploy multiple instances of these containers to meet the needs of the increased traffic to a given website or application.
Understanding the benefits of containers
There are many benefits to using a container when managing and deploying web applications, especially at the enterprise scale. Ultimately, they provide a consistent and streamlined way to build, deploy, and manage multiple applications in an efficient manner. A few of the main benefits include the following:
- Greater scalability—Easily deploy more instances to meet a given need.
- Increased portability—Deploy to different platforms and OSes.
- Reduced overhead—Use fewer resources than traditional methods.
Containers are highly effective in many different areas—two in particular fall within the scope of microservices and automation. In the case of microservices, applications are generally broken down into smaller components in which each component needs to be deployed and scaled independently of the others. It is no surprise that containers in this case would be an excellent solution for the given problem. On the other hand, in the case of automation, containers can be easily created or removed in an automated fashion, making them very useful for scalability, as well as for Continuous Integration/Continuous Deployment (CI/CD) pipelines.
Important note
We can think of CI/CD pipelines as methods to automate software delivery in order to standardize processes and reduce human error. There are generally four stages for any given CI/CD pipeline: new code being pushed to a repository such as GitHub (which we will see later in this chapter), a building script that builds or compiles the code, a testing script that tests certain parts of the code, and finally the deployment platform that hosts the final product.
In the following tutorial, we will explore the process of deploying a container—specifically, a Docker container—to AWS Lightsail.
Tutorial – deploying a container to AWS (Lightsail)
AWS Lightsail is a managed cloud platform that has gained a great deal of popularity in recent years due to its simple interface and fast deployment capabilities and is overall a great way to get started when deploying applications using AWS. Some of the most common use cases for using Lightsail as opposed to other AWS products or solutions include simple Machine Learning (ML) web applications (such as ours!), static portfolio websites, and dynamic e-commerce websites, as well as simple APIs.
Over the course of this tutorial, we will deploy our Flask application to AWS Lightsail using the AWS Command Line Interface (CLI). You can install the CLI by navigating to the AWS CLI page (https://docs.aws.amazon.com/cli/latest/userguide/install-cliv2.html), selecting an OS of interest, and following the installation instructions. You can confirm that the CLI was correctly installed by running the following command:
$ aws configure --profile
If the installation was properly completed, you will be guided through the configuration process. Please go ahead and configure the CLI as needed. The process may request Identity and Access Management (IAM) credentials—go ahead and provide it with the proper credentials from our previous examples or prepare a new set of credentials, as we have previously done in Chapter 9, Natural Language Processing, specifically in the Working with unstructured data section.
With the CLI and credentials all set, let's now once again focus on the application, starting with the content. If you recall from Chapter 11, Deploying Models with Flask Applications, the content of the application should now include the virtual environment, styles.css, index.html, and, of course, app.py, as depicted in the following screenshot:
Figure 12.3 – The content of our current working directory
In order to deploy our application, we will need a few more files that we will soon explore to help both with the deployment process and the containerization process. In addition to AWS Lightsail, we will also be using Docker—a commonly used tool that allows users to create, deploy, and run applications in isolated containers. You can download Docker for your specific OS by visiting the Docker website (https://docs.docker.com/get-docker/). Let's go ahead and explore these new files, their content, and how they will be used within the application.
First, we begin with the Dockerfile, which contains a set of instructions to prepare the environment for the application. These instructions include the version of Python, establishing the working directory, copying the files of interest, and of course, installing the requirements. The code is illustrated in the following snippet:
FROM python:3.8
EXPOSE 5000/tcp
WORKDIR /app
COPY requirements.txt .
COPY models/ch10_scaler.pickle /models/ch10_scaler.pickle
COPY models/ch10_scaler.pickle /models/ch10_rfc_clf.pickle
COPY styles /app/styles
COPY models /app/models
COPY templates /app/templates
COPY app.py .
ENV IN_DOCKER_CONTAINER Yes
RUN pip install --upgrade pip
RUN pip3 install -r requirements.txt
CMD [ "python", "./app.py" ]
With the Dockerfile prepared, we can now go ahead and build the container image. We can build the container using Docker, which we installed earlier, by executing the following command:
$ docker build -t flask-container .
Upon executing this command (don't forget the . at the end, which signifies the current directory!), Docker will build a container tagged as flask-container.
Our next step will be to create a container service using the AWS CLI. We can do this by executing the following code, in which we specify service-name, power, and scale parameters. Note that these parameters specify the capacity of the service:
$ aws lightsail create-container-service --service-name flask-service --power small --scale 1
Upon executing this command, you should be able to monitor the progress. Once the service changes from a state of pending to active, you can execute the next command, which pushes the container image:
$ aws lightsail push-container-image --service-name flask-service
--label flask-container --image flask-container
Upon executing this command, you will see the following value in the results:
":flask-service.flask-container.X"
Please note that X should be a numeric value that corresponds to the time the image was pushed to the container service. If this is the first time you have done this, the value should be 1.
Next, we will need to create a file called containers.json, specifying the Flask image as well as the port, containing the following code:
{
"flask": {
"image": ":flask-service.flask-container.X",
"ports": {
"5000": "HTTP"
}
}
}
Go ahead and replace X with the numerical value you received before. Again, if this is your first time deploying the container, the value should be 1. With that done, we can now go ahead and create our final file called public-endpoint.json, which specifies the container name and port, containing the following code:
{
"containerName": "flask",
"containerPort": 5000
}
At this point, the hierarchy of the directory should include all of the previous files in addition to containers.json, Dockerfile, and public-endpoint.json, as depicted in the following figure:

Figure 12.4 – The content of our current working directory
Now that the files and containers are all in order, we can now proceed with the final steps of deploying the container to end users. In order to do so, we can use the create-container-service-deployment command with the following code:
$ aws lightsail create-container-service-deployment --service-name flask-service --containers file://containers.json --public-endpoint file://public-endpoint.json
Upon executing the code, you should see the state of the application be listed as Deploying. Once the state changes to Running, you can use the get-container-services command to monitor the current application by executing the following command:
$ aws lightsail get-container-services --service-name flask-service
Upon completion of the command, you will see a Uniform Resource Locator (URL) as output. Go ahead and navigate to the URL listed, and you should be able to see the application we developed online and available to our end users. We can see an example of this in the following screenshot:
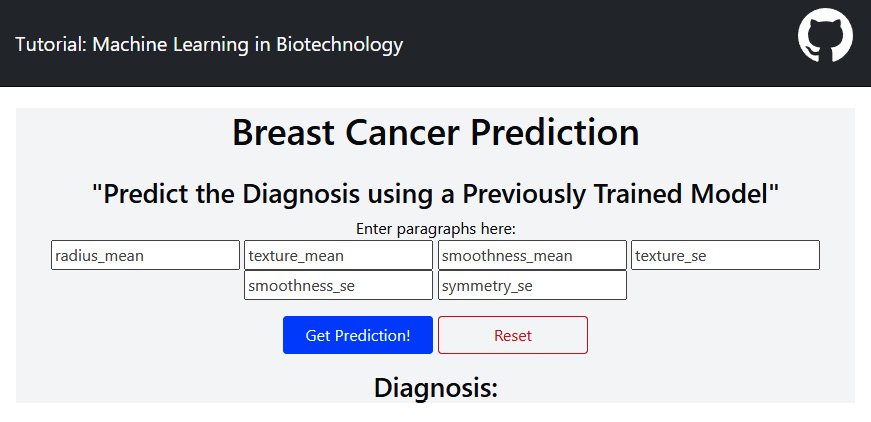
Figure 12.5 – Web application running on AWS Lightsail
Alternatively, you may want to view the application using the management console on AWS. To do so, navigate the console and search for AWS Lightsail. You should be redirected to the AWS Lightsail page where you should see your instance and container, as depicted in the following screenshot:
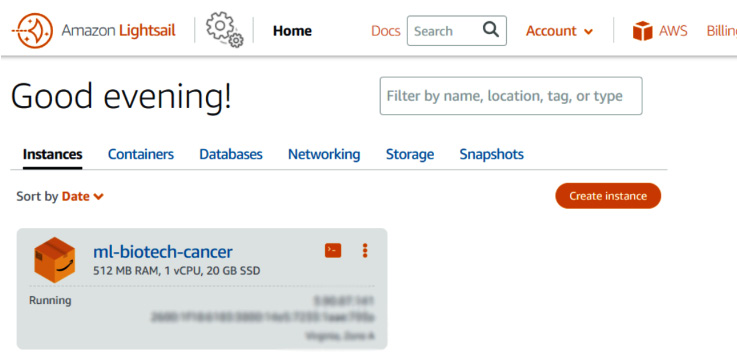
Figure 12.6 – AWS Lightsail management console
In this tutorial, we successfully took our local implementation of Flask and deployed it as a web application to AWS. In the following tutorial, we will deploy the same application to GCP's App Engine.
Tutorial – deploying an application to GCP (App Engine)
Over the course of this tutorial, we will deploy the same application to GCP's App Engine. One of the biggest benefits of GCP relative to most other cloud platforms is its ease of use while ensuring users can deploy models with minimal problems and errors. With that in mind, let's go ahead and deploy our application to GCP.
We can begin by installing the GCP CLI. Go ahead and navigate to the installation page (https://cloud.google.com/sdk/docs/install), select the OS that best corresponds to your machine, and follow the installation instructions. Once completed, you will be asked if you would like to log in to GCP. Go ahead and answer yes using the y key, as shown here:
You must log in to continue. Would you like to log in (Y/n)? y
You will be redirected to your browser where you can log in using your Google account. Go ahead and log in using the same Google credentials you used in our previous adventure in Chapter 7, Supervised Machine Learning, concerning GCP.
Once logged in, you will be prompted to select a project. Select the project you previously created earlier in this book. Go ahead and complete any other remaining items such as the default region, and finish up the configuration.
Once completed, you should have the gcloud CLI installed on your system. Be sure to restart the command-line window you are using, as some PATH variables may need to be refreshed.
With the CLI now installed and working, we can go ahead and get started. Navigate to the flask_cancer_ae directory found in the accompanying code. We will need to create a new file called app.yaml in our directory, containing the following code:
runtime: python37
This will simply specify the runtime for our application. With this file saved, we can go ahead and do some preliminary configuration. We will first need to set the project Identifier (ID), if we've not already done so, using the following command:
$ gcloud config set project GCP-PROJECT-ID
Be sure to replace GCP-PROJECT-ID with your associated project ID. With that set, we will now need to enable the Cloud Build CLI, which is used to create a container for the application using our files, with the following command:
$ gcloud services enable cloudbuild.googleapis.com
Next, we will initialize the application in App Engine for this particular project. We can do so using the following command:
$ gcloud app create --project= GCP-PROJECT-ID
Be sure to replace GCP-PROJECT-ID with your particular project ID. Finally, in order to go ahead and deploy the project, we can use the following command:
$ gcloud app deploy
Once the process is complete, the project will be deployed to GCP! We can check the application using the browse command, as shown here:
$ gcloud app browse
In addition to using the CLI, we can also visit the App Engine dashboard found in the GCP console to complete a number of tasks, such as the following:
- Access the application.
- Monitor traffic.
- Review billing.
- …and much more!
GCP has many wonderful capabilities, giving users a great experience when it comes to deploying applications, managing data, and monitoring traffic. If you are interested in learning more about GCP, I highly encourage you to follow and complete the many great tutorials provided by the GCP platform.
With our application now deployed to GCP, our next step will be to explore a different way to send our code elsewhere: through the git CLI. In the following section, we will explore the process of pushing code to GitHub.
Tutorial – deploying an application's code to GitHub
Over the last two tutorials, we deployed our applications to cloud platforms in order to allow users to interact with our models using the Flask framework. In the first platform, we used AWS Lightsail, and in the second, we used GCP's App Engine. In this tutorial, our objective will be to deploy our code, not with the intent of making the models available to users but to showcase our code and hard work to other data scientists, as well as potential future employers. We will do so by deploying our code using GitHub.
All of the coding examples and tutorials throughout this book have been made available online using GitHub. If you have not done so already, I highly encourage you to create your own account. You can think of GitHub as LinkedIn for coders—a space to showcase your hard work to others.
You can create a free GitHub account by navigating to their main website (https://github.com/) and registering as a new user. Once you are registered, you will be able to save your code and work with projects or repositories. You can think of a repository as a space to save your work, with multiple versions being saved so that users can revert to older code when needed.
The way this works is that users will have an instance or copy of a given project or repository locally on their computers. Every now and then, when significant progress has been made, a user can make an update or commit, and then push those new changes to the remote repository for backup, as depicted in the following figure:
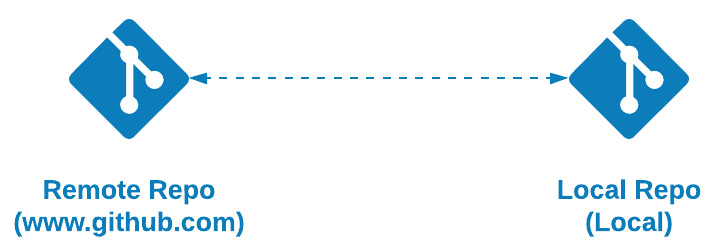
Figure 12.7 – Local and remote repositories
With your profile created, let's go ahead and install git on the command line. We can get things going by navigating to https://git-scm.com/book/en/v2/Getting-Started-Installing-Git and installing git for your given OS. You can confirm the installation was successful by running the git command on the command line, which should return a list of commands and possible parameters to use.
Let's go ahead and navigate to one of the applications we previously deployed using the command line. Depending on where in your local computer you created the application, your path may look similar to this:
C:UsersUsernameDocumentsGitHubMachine-Learning-in-Biotechnology-using-Pythonchapterschapter12flask_cancer_ls
Go ahead and navigate to your directory either through a command-line window or by using Visual Studio Code (VSC). Once there, go ahead and initialize a new repository using the following command:
$ git init
Once the repository has been initialized, we will need to create a repository on your GitHub account (and later connect to it). We can do so using the following simple steps:
- Log in to your new GitHub account, as illustrated in the following screenshot:
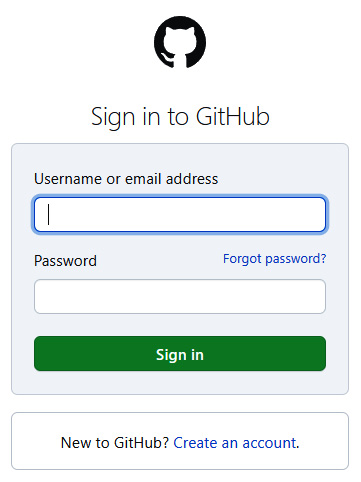
Figure 12.8 – GitHub login page
- On the main page, click the New button on the left-hand side of the screen, as illustrated in the following screenshot:
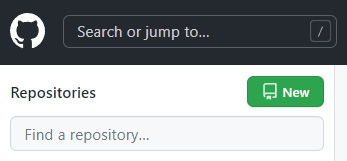
Figure 12.9 – Creating a new repository
- Give the new repository a name, such as flask-cancer-ls. While leaving all other fields with their default values, go ahead and click Create repository, as illustrated in the following screenshot:
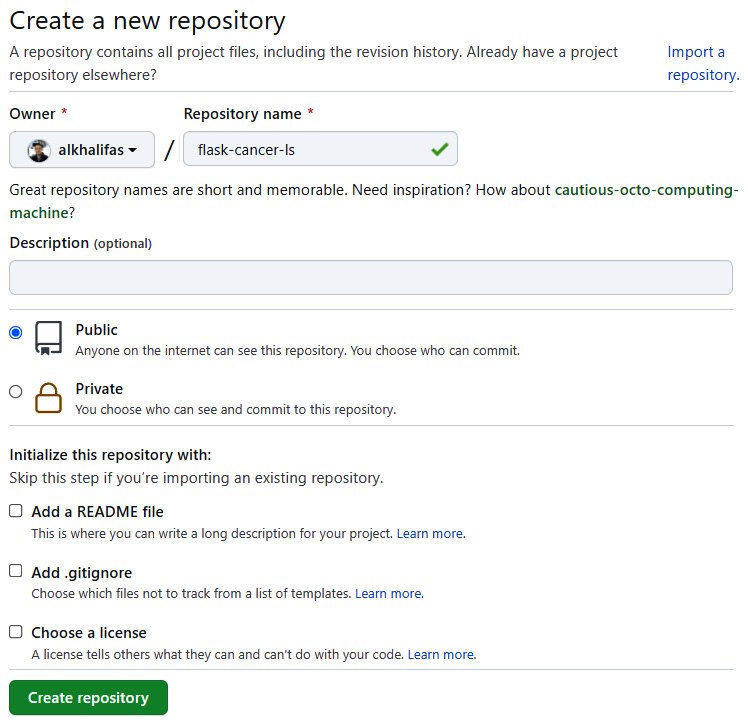
Figure 12.10 – Creating a new repository (continued)
Once created, you will be redirected to a new page containing some sample code for you to use. Given that we have already created a new repository, we will not need to go through this again. If we head back to the command line, we can go ahead and run the following command to add our files to git to be tracked. Tracked files are monitored by git and allow it to determine any new changes that need to be sent to GitHub. We could specify which file explicitly using the add command, like this:
$ git add app.py
Or, we could add all files using the period notation, like this:
$ git add .
It is generally considered better practice to add files individually as you are less likely to run into errors. Trust me!
With the files added to the staging area using the add command, our next step is to commit them. We can think of the staging area as a space where we stage our new code that is about to be sent to the remote repository. We can do so using the commit command, followed by a useful message describing the current commit, as illustrated in the following code snippet. You can use messages to briefly describe the changes in your commit. This will make things much easier when looking back at older code, trying to find a specific change on the GitHub website:
$ git commit -m "This is my first commit"
Upon executing this code, you may encounter an error asking you to specify your name and email address. Go ahead and complete this using the following commands:
$ git config --global user.email "[email protected]"
$ git config --global user.name "Your Name"
With your credentials saved and your commit completed, we can now go ahead and link together our local repository and the remote repository using the following command:
$ git remote add origin https://github.com/username/reponame.git
Be sure to replace username and reponame with your respective values! Once that is complete, you can go ahead and complete the final step, which is pushing your code to GitHub, using the following command:
$ git push origin master
With that step completed, if you navigate back to the GitHub website, you will be able to see your code here! Unlike the last two tutorials where we deployed our code in the form of an application to an online website available to end users to interact with, the objective here is to store our code and other content in a safe space. We have the option to allow other users to see our code or keep it private to ourselves. In addition, there are a number of platforms out there, such as Heroku, that are able to deploy an application simply by providing it with a link to the repository.
Summary
Over the course of this chapter, we reviewed a number of ways to deploy our application to end users in the cloud. First, we explored the use of AWS Lightsail, which allowed us to deploy our code in the form of an online web application using a Docker container. Next, we explored the use of GCP's App Engine to deploy our code, once again in the form of an online web application, using its user-friendly and abstract methodologies. Finally, we deployed our code in the form of a repository to GitHub, allowing us to expose the content to users, professionals, and tentative employers alike.
Congratulations! With this last tutorial now complete, we have come to the end of this book. Looking back at the last 12 chapters, we have covered many different topics in a diverse set of areas. In the beginning, we learned some new languages such as Python and Structured Query Language (SQL) and used them to analyze and visualize our data. We then explored some of the most common ML and Deep Learning (DL) architectures out there and used them to develop powerful predictive models. We then turned our attention to some specific areas of application, such as Natural Language Processing (NLP) and time series. Finally, we explored a few ways to deploy our applications to end users using AWS and GCP. Although we have covered a great deal of material within this book, there is still a vast galaxy of knowledge and information out there waiting for you. Before you move on to your next great adventure, there are three things you should always remember:
- The simplest solutions are often the best solutions. Never overcomplicate a model if you don't need to.
- Never ever stop learning. We live in a digital age where new discoveries are being achieved faster than ever.
- Metrics are your best friend. They will guide you throughout development and will help you make your arguments as a data scientist. Remember—everything is a sales pitch.
With these three things now in mind, go forth and do data science!