Chapter 3: Installing Your First Kubernetes Cluster
In the previous chapter, we had the opportunity to explain what Kubernetes is, its distributed architecture, the anatomy of a working cluster, and how it can manage your Docker containers on multiple Linux machines. Now, we are going to get our hands dirty because it's time to install Kubernetes. The main objective of this chapter is to get you a working Kubernetes for the coming chapters. This is so that you have your own cluster to work on, practice with, and learn about while reading this book.
All Kubernetes installations require two steps. First, you need to install the Kubernetes cluster itself, and second, you need to configure your kubectl HTTP client so that it can perform API calls to the kube-apiserver component installed on your master node.
Installing Kubernetes means that you have to get the different components to work together. Of course, we won't do that the hard way with systemd; instead, we will use automated tools.These tools have the benefit of launching and configuring all of the components for us locally.
If you don't want to have a Kubernetes cluster on your local machine, we're also going to set up a minimalist yet full-featured production-ready Kubernetes cluster on Google Kubernetes Engine (GKE), Amazon Elastic Kubernetes Service (EKS), and Azure Kubernetes Service (AKS). These are cloud-based and production-ready solutions. In this way, you will be able to practice and learn on a real-world Kubernetes cluster hosted on the cloud.
Whether you want to go local or on the cloud, it is your choice. You'll have to choose the one that suits you best by considering each solution's benefits and drawbacks. In both cases, however, you'll require a working Kubectl installed on your local workstation to communicate with the resulting Kubernetes cluster. Installation instructions for Kubectl are available in the previous chapter, Chapter 2, Kubernetes Architecture – From Docker Images to Running Pods.
In this chapter, we're going to cover the following main topics:
- Installing a single-node cluster using Minikube
- Installing a multi-node local cluster using Kind
- Installing a full-featured Kubernetes cluster on GKE
- Installing a full-featured Kubernetes cluster on Amazon EKS
- Installing a full-featured Kubernetes cluster on AKS
Technical requirements
To follow along with the examples in this chapter, you will require the following:
- Kubectl installed on your local machine
- Reliable internet access
- A Google Cloud Platform (GCP) account with a valid payment method to follow the Installing a full-featured Kubernetes cluster on Google GKE section
- An AWS account with a valid payment method to follow the Installing a full-featured Kubernetes cluster on Amazon EKS section
- An Azure account with a valid payment method to follow the Installing a full-featured Kubernetes cluster on Azure AKS section
Installing a single-node cluster with Minikube
In this section, we are going to learn how to install a local Kubernetes cluster using Minikube. It's probably the easiest way to get a working Kubernetes installation locally. By the end of this section, you're going to have a working single-node Kubernetes installation on your local machine.
Minikube is easy to use and completely free. It's going to install all of the Kubernetes components on your local machine and configure all of them. Uninstalling all of the components through Minikube is easy too, so you won't be stuck with it if, one day, you want to destroy your local cluster.
Minikube has one big advantage: it's a super useful tool in which to test Kubernetes scenarios quickly. However, its major drawback is that it prevents you from running a multi-node Kubernetes cluster and, therefore, all of the multi-node scenarios we will discuss later won't be testable for you. That being said, if you do not wish to use Minkube, you can completely skip this section and choose another method described in this chapter.
Launching a single-node Kubernetes cluster using Minikube
The main purpose of Minikube is to launch the Kubernetes components on your local system and have them communicate with each other. To do this, Minikube can work with two different methods:
- A virtual machine
- A Docker container
The first method requires you to install a hypervisor on top of your local system. Then, Minikube will wrap all of the Kubernetes components onto a virtual machine that will be launched. This method is fine, but it requires you to install a hypervisor such as KVM on Linux or HyperKit on macOS to work.
The other method is simpler. Instead of using a virtual machine, Minikube uses a local Docker daemon to launch the Kubernetes components inside a big Docker container. This method is simpler since you just need to have Docker installed on your system. That's the solution we will use.
If you do not have Docker installed on your system, make sure that you install it following the instructions at https://docs.docker.com/get-docker/. The installation process is easy, but the steps are slightly different depending on your operating system.
After Docker has been installed, we need to install Minikube itself. Here, again, the process is slightly different depending on your operating system:
- Use the following commands for Linux:
$ curl -Lo minikube https://storage.googleapis.com/minikube/releases/latest/minikube-linux-amd64
$ chmod +x minikube
$ mkdir -p /usr/local/bin
$ sudo install minikube /usr/local/bin
- Use the following commands for macOS:
$ curl -Lo minikube https://storage.googleapis.com/minikube/releases/latest/minikube-linux-amd64
$ chmod +x minikube
$ mkdir -p /usr/local/bin
$ sudo install minikube /usr/local/bin
- You can also install it from Homebrew using the following command:
$ brew install minikube
- For Windows, once Minikube has been installed on your system, you can immediately run your first Kubernetes cluster using the following command:
$ minikube start --driver="docker"
minikube v1.8.2 on Darwin 10.14.5
Using the docker driver based on user configuration
Appending --driver might not be required. If you do not have any hypervisor such as VirtualBox or HyperKit, then Minikube should automatically fall back to Docker. However, if you do have multiple hypervisors on your system, you can set the Docker value explicitly, as shown in the previous example. The result of this command will be a working Kubernetes cluster on your localhost. It's actually as simple as that; you now have a Kubernetes cluster on your system with literally just one command.
Once the command is complete, you can run the following command to check the state of the Kubernetes components installed by Minikube:
$ minikube status
host: Running
kubelet: Running
apiserver: Running
kubeconfig: Configured
The preceding output shows that the cluster is up and running, and we can now start interacting with it.
Now, we need to create a kubeconfig file for our local Kubectl CLI to be able to communicate with this new Kubernetes installation. The good news is that Minikube also generated one on the fly for us when we launched the minikube start command. The kubeconfig file generated by Minikube is pointing to the local kube-apiserver endpoint, and your local Kubectl was configured to call this cluster by default. So, essentially, there is nothing to do: the kubeconfig file is already formatted and in the proper location.
Use the following command to display the current kubeconfig file. You should observe a cluster, named minikube, that points to a local IP address:
$ kubectl config view
Following this, you can run this command, which will show the Kubernetes cluster your Kubectl is pointing to right now:
$ kubectl config current-context
minikube
Now, let's try to issue a real Kubectl command to list the nodes that are part of our Minikube cluster. If everything is okay, this command should reach the kube-apiserver component launched by Minikube, which will return only one node since Minikube is a single-node solution. Let's list the nodes with the following command:
$ kubectl get nodes
NAME STATUS ROLES AGE VERSIO
m01 Ready master 2m41 v1.17.3
If you don't view any errors when running this command, it means that your Minikube cluster is ready to be used and is fully working!
This is the very first real kubectl command you ran as part of this book. Here, a real kube-apiserver component received your API call and answered back with an HTTP response containing data coming from a real Etcd datastore. In our scenario, this is the list of the nodes in our cluster. Good job! You just set up your first ever Kubernetes cluster!
Important note
Since Minikube creates a single-node Kubernetes cluster, this command only outputs one node. This node is both a master node and a worker node at the same time. It will run both Kubelet and the control plane components. It's good for local testing, but do not deploy such a setup in production.
What we can do now is list the status of the control plane components so that you can start familiarizing yourself with kubectl. In fact, they are both the same; the second one is just an alias for the first one. There are a lot of aliases in kubectl along with more than one way to type the same command:
$ kubectl get componentstatuses
$ kubectl get cs # The exact same command, "cs" is an alias
NAME STATUS MESSAGE ERROR
scheduler Healthy ok
controller-manager Healthy ok
etcd-0 Healthy {"health":"true"}
This command should output the status of the control plane components. You should see the following:
- A running Etcd datastore
- A running kube-scheduler component
- A running kube-controller-manager component
Stopping and deleting the local Minikube cluster
You might want to stop or delete your local Minikube installation. To proceed, do not kill the Docker container directly, but rather, use the Minikube command-line utility. Here are the two commands to do so:
$ minikube stop
Stopping "minikube" in docker ...
Node "m01" stopped.
The preceding command will stop the cluster. However, it will continue to exist; its state will be kept, and you will be able to resume it later using the following minikube start command again. You can check it by calling the minikube status command again:
$ minikube status
host: Stopped
kubelet: Stopped
apiserver: Stopped
kubeconfig: Stopped
If you want to completely destroy the cluster, use the following command:
$ minikube delete
If you use this command, the cluster will be completely destroyed. Its state will be lost and impossible to recover.
Now that your Minikube cluster is operational, it's up to you to decide whether you want to use it to follow the next chapters or pick another solution. Minikube is fine, but you won't be able to practice when we get to multi-node scenarios. If you are fully aware of this and you still wish to continue, you can skip the next sections of this chapter. Otherwise, let's examine another tool in which to set up a local Kubernetes cluster, called Kind.
Launching a multi-node Kubernetes cluster with Kind
In this section, we are going to discuss another tool called Kind, which is far less known than Minikube, but which resembles it a lot. This tool is also designed to run a Kubernetes cluster locally just like Minikube. The main difference is that Kind is capable of launching multi-node Kubernetes clusters contrary to Minikube, which is a single-node solution.
The whole idea behind Kind is to use Docker containers such as Kubernetes worker nodes thanks to the Docker-in-Docker (DIND) model. By launching Docker containers, which themselves contain the Docker daemon and the Kubelet, you can manage to make them behave as Kubernetes worker nodes.
This is exactly the same as when you use the Docker driver for Minikube, except that there, it will not be done in a single container but in several. The result is a local multi-node cluster. Similar to Minikube, Kind is free, and you don't have to pay to use it.
Important Note
Similar to Minikube, Kind is a tool that is used for local development and testing. Please never use it in production because it is not designed for it.
Installing Kind onto your local system
Since Kind is a tool entirely built around Docker, you need to have the Docker daemon installed and working on your local system. If you do not have Docker installed on your system, make sure that you install it by following the instructions at https://docs.docker.com/get-docker/. The installation process is easy, but the steps are slightly different depending on your operating system.
After Docker has been installed, we need to install Kind itself. Again, the process will be different depending on your operating system:
- Use the following commands for Linux:
$ curl -Lo ./kind https://kind.sigs.k8s.io/dl/v0.8.1/kind-$(uname)-amd64
$ chmod +x ./kind
$ mv ./kind /usr/local/bin/kind
- Use the following commands for macOS:
$ curl -Lo ./kind https://kind.sigs.k8s.io/dl/v0.8.1/kind-$(uname)-amd64
$ chmod +x ./kind
$ mv ./kind /usr/local/bin/kind
- You can also install it with Homebrew:
$ brew install kind
- Use the following commands for Windows:
$ curl.exe -Llo kind-windows-amd64.exe https
- You can also install it with Chocolatey:
$ choco install kind
Once Kind has been installed on your system, you can immediately proceed to launch a new Kubernetes cluster using the following command:
$ kind create cluster
Creating cluster "kind" ...
When you run this command, Kind will start to build a Kubernetes cluster locally by pulling a Docker image containing all of the control plane components. The result will be a single-node Kubernetes cluster with a Docker container acting as a master node. That being said, we do not want this setup since we can already achieve it with Minikube. What we want is a multi-node cluster. To do this, we must write a very small configuration file and tell Kind to use it as a template to build the local Kubernetes cluster. So, let's get rid of the single-node Kind cluster that we just built, and let's rebuild it as a multi-node cluster:
- Run this command to delete the cluster:
$ kind delete cluster
Deleting cluster "kind" ...
- Then, we need to create a config file that will serve as a template for Kind to build our cluster. Simply copy the following content to a local file in this directory, for example, ~/.kube/kind_cluster:
Kind: Cluster
apiVersion: kind.sigs.k8s.io/v1alpha3
nodes:
- role: control-plane
- role: worker
- role: worker
- role: worker
Please note that this file is in YAML format. Pay attention to the nodes array, which is the most important part of the file. This is where you tell Kind how many nodes you want in your cluster. The role key can take two values: control plane and worker.
Depending on which role you chose, a different node will be created.
- Let's relaunch the kind create command with this config file to build our multi-node cluster. For the given file, the result will be a one-master three-worker Kubernetes cluster:
$ kind create cluster --config ~/.kube/kind_cluster
Creating cluster "kind" ...
Following this, you should have four new Docker containers: one running as a master node and the other three as worker nodes of the same Kubernetes cluster.
Now, as always with Kubernetes, we need to write a kubeconfig file in order for our Kubectl utility to be able to interact with the new cluster. And guess what, Kind already generated the proper configuration and appended it to our ~/.kube/config file, too. Additionally, Kind set the current context to our new cluster, so there is essentially nothing left to do. We can immediately start querying our new cluster. Let's list the node using the kubectl get nodes command. If everything is okay, we should view four nodes:
$ kubectl get nodes
Everything seems to be perfect. Your Kind cluster is working!
Just as we did with Minikube, you can also check for the component's statuses using the following command:
$ kubectl get cs
Stopping and deleting the local Kind cluster
You might want to stop or remove everything Kind created on your local system to clean the place after your practice. To do so, you can use the following command:
$ kind stop
This command will stop the Docker containers that Kind is managing. You will achieve the same result if you run the Docker stop command on your containers manually. Doing this will stop the containers but will keep the state of the cluster. That means your cluster won't be destroyed, and simply relaunching it using the following command will get the cluster back to its state before you stopped it.
If you want to completely remove the cluster from your system, use the following command. Running this command will result in removing the cluster and its state from your system. You won't be able to recover the cluster:
$ kind delete cluster
Now that your Kind cluster is operational, it's up to you to decide whether you want to use it to practice while reading the coming chapters. You can also decide whether to pick another solution described in the following sections of this chapter. Kind is particularly nice because it's free to use and allows you to install a multi-node cluster. However, it's not designed for production and remains a development and testing solution for a non-production environment. Kind makes use of Docker containers to create Kubernetes nodes, which, in the real world, are supposed to be Linux machines.
Installing a Kubernetes cluster using Google GKE
Google GKE is a cloud offering that is part of GCP, which is Google's cloud offering. If you do not want to install anything on your local system, this solution might be good for you. Indeed, Google GKE is a cloud-based solution, meaning that the resulting Kubernetes won't run on your own system.
Google GKE allows you to set up a full-featured Kubernetes cluster on the cloud that is built for production. The result of the service will be a Kubernetes cluster that runs on Google's machines on their cloud platform, not on your own local machine. Your local machine will only serve as a Kubernetes client thanks to Kubectl pointing to a remote endpoint exposed by Google.
The main advantage is that you will have a real production-ready and full-featured Kubernetes cluster to practice with, which is ideal in which to train and improve your skill. However, Google GKE is a commercial product, so you'll have to spend some dollars in order to use it, as well as having a valid payment method linked to your GCP account. Indeed, Google requires you to link your credit card to your GCP account prior to accessing any of their services.
Here, we assume you already have a GCP account with a valid payment method linked, and you are ready to set up a Kubernetes cluster on Google GKE.
Launching a multi-node Kubernetes cluster on Google GKE
There are different ways in which to set up a Kubernetes cluster on Google GKE. The easiest way is through the gcloud command-line utility. Indeed, GCP exposes all its cloud services as a command-line utility called gcloud. This tool can literally set up a Kubernetes cluster on the GCP cloud using just one command. So, let's proceed to install the gcloud utility onto your local system:
- Use the following commands for Linux:
$ curl https://sdk.cloud.google.com | bash
$ exec -l $SHELL
$ gcloud init
- Use the following commands for macOS:
$ curl https://sdk.cloud.google.com | bash
$ exec -l $SHELL
$ gcloud init
- On Windows, you need to download the ZIP file at https://dl.google.com/dl/cloudsdk/channels/rapid/google-cloud-sdk.zip. Then, unzip it, run the google-cloud-sdkinstall.bat script, and follow the instructions. Restart your command line and run the following command:
C:> gcloud init
The gcloud init command is an interactive command. Simply follow the instructions it outputs and it should be fine. At some point, gcloud will require you to authenticate to your GCP account by opening your default web browser. Simply proceed, and gcloud should notice that you are successfully authenticated.
Then, gcloud will require you to create a new project. To explain a little bit about how GCP works, the platform is divided into projects that are logical units used to organize your workloads.
With GCP, the first thing to do is create a project that will contain your resources. So, let's create a project that will host our Kubernetes cluster on GKE. There is a little problem here: project IDs are meant to be unique across all GCP accounts. That means if someone in the world ever uses a project ID, you can't use it anymore. In order to find a free project ID, you can add some random values to it. I named mine gke-cluster-0123456789:
- Use the following command to create your project:
$ gcloud create projects gke-cluster-0123456789
Please choose a unique name, and then try to append some random characters to it to find a free project ID. Use this command and replace my gke-cluster-0123456789 ID with your own project ID.
- Once the project has been created, select it from the drop-down menu on the GCP web console:

Figure 3.1 – The GCP web console
- Now that the project is ready, let's define it as our current project at the gcloud level, too:
$ gcloud config set project gke-cluster-0123456789
Updated property [core/project].
- The last thing you need to do is to enable billing on your GCP account. To do that, open the Google GKE console on the menu on the left-hand side and select Clusters:
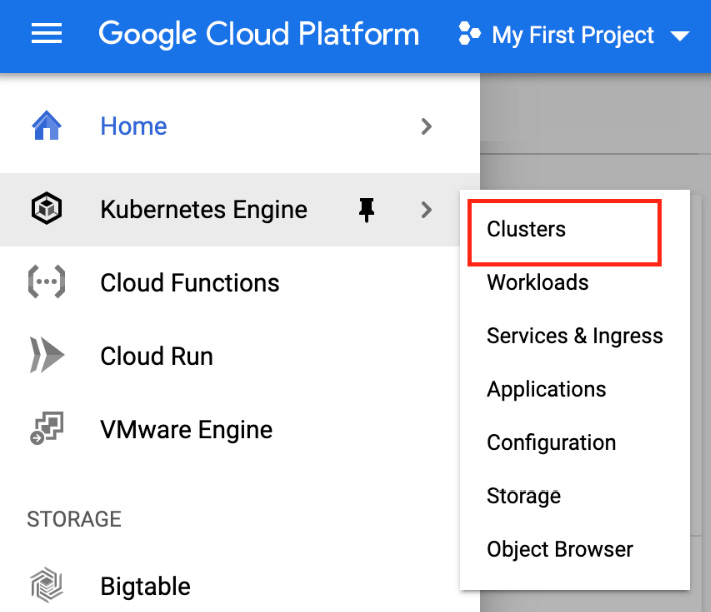
Figure 3.2 – The GCP web console GKE clusters menu
On this screen, you should see an Enable Billing button. Click on this button and enter your billing information. Once done, GCP will proceed in enabling the Kubernetes Engine API for your project. This can take a few minutes, but after that, you will be able to create your first cluster on GKE.
To create the cluster, there are two ways you can use, as follows:
- You can use the web console.
- You can use the gcloud command-line tool.
Let's use the gcloud command line. The good news is that gcloud can literally bootstrap a GKE cluster and configure Kubectl afterward in just one command:
- Run the following command:
$ gcloud container clusters create mygkecluster --num-nodes 3 --machine-type e2-medium --europe-west1
This command will create a Kubernetes cluster on GKE, called mygkecluster, that will have three worker nodes. These worker nodes will be run as e2-medium instances, which are two CPU virtual machines.
The cluster is going to be created in the europe-west1 region of the GCP cloud. You should pick the nearest region to where you are in order to reduce network latency. In my case, europe-west-1 is fine, but you should pick us-west-1 if you live in the US, for example. The complete list of available regions for GCP is available at https://cloud.google.com/compute/docs/regions-zones.
- After you have launched the command, the new cluster should appear on the Google GKE screen, as shown in Figure 3.3:
Figure 3.3 – The GCP web console
Good job! Wait a little bit for the cluster creation to complete; it can take a few minutes. Bear in mind that you will be billed the moment the cluster gets launched!
After a few minutes, the Kubernetes cluster is launched on Google GKE and is ready to use. Remember, the gcloud command we ran also generated a kubeconfig file for our local environment. So, we will not have to write the configuration file by ourselves.
- Run the following command to make sure your Kubernetes cluster is up and running and the Kubectl command line is properly configured to query it:
$ kubectl get nodes
This command should authenticate against the Kubernetes cluster running on Google GKE and retrieve the list of the nodes running as part of the cluster. Good job! You have successfully set up a Kubernetes cluster on GKE!
Stopping and deleting a Kubernetes cluster on Google GKE
Cloud providers bill you when you use their services. Every second a Kubernetes cluster is in the running state in GKE is a second that you will be charged for at the end of the month. So, it's a good idea to stop cloud services when they are not being used and resume them when needed.
Unfortunately, you can't stop a GKE cluster the way you can with Minikube or Kind. We are forced to completely destroy it and recreate it, meaning that we will lose the state of the cluster each time. It's not a big deal, though, as, for now, we're just looking for a practice cluster that we can break and recreate at will. To proceed with cluster removal, type in the following command:
$ gcloud container clusters delete mygkecluster --region europe-west-1
You are all set to go! If you are happy with GKE, you can proceed to the next chapter and use your brand-new cluster to practice while reading this book. Otherwise, you can pick another solution. Bear in mind that GKE is not free; you are charged $0.1 per hour to use it, resulting in a $72/month if the cluster is running the whole month. Add to this price the cost of the worker nodes, which are instances that are billed independently based on their instance types.
Installing a Kubernetes cluster using Amazon EKS
If you do not wish to have a local Kubernetes cluster nor use Google GKE, you can also set up a remote cluster on the AWS cloud. This solution is ideal if AWS is your preferred cloud provider. This section will demonstrate how to get a Kubernetes cluster using Amazon EKS, which is the public cloud offering by AWS.
Using this solution is not free. Amazon EKS is a commercial product that is a competitor to Google GKE. Amazon EKS offers to manage a Kubernetes control plane just for you. That means the service will set up some nodes running all of the control plane components without exposing you to these machines. You will get an endpoint for a remote kube-apiserver component and that's all.
Once done, you'll have to set up a few Amazon EC2 instances (which are virtual machines), and you'll have them join the control plane. These Amazon EC2 instances will be your worker nodes. In this way, you'll have a multi-node Kubernetes cluster with a multi-worker setup. This result of this lab will be a full-featured multi-node Kubernetes cluster, which is an ideal solution with which to enter the coming chapters. Of course, we won't set up all of this ourselves; a lot of solutions exist in which to provision a fully configured Amazon EKS instance, and we will examine one of these solutions. Additionally, we will try not to spend a lot money on AWS ideally.
The cost of the infrastructure will depend on the AWS region where your cluster is going to be deployed:
- The control plane, which costs $0.74/hour
- 3 x t3.medium worker nodes (around 0.42 USD per instance depending on the AWS region where you'll deploy your cluster)
Because it's an hourly pricing model, remember to destroy everything from your AWS account when you are not using it in order to save money.
There is a prerequisite when it comes to working with Amazon EKS. You need to have an AWS account with a properly linked payment method. Indeed, similarly to GCP, AWS requires you to link a valid payment method prior to gaining access to their services. In this section, we assume that you already have an AWS account with a valid payment method linked to it.
Launching a multi-node Kubernetes cluster on Amazon EKS
There are multiple ways in which to get a working cluster with Amazon EKS. You can use CloudFormation, Terraform, AWS CLI commands, or even the web AWS console. Additionally, AWS offers a CLI tool to communicate with the Amazon EKS service, called eksctl, which can be used to set up Kubernetes clusters on Amazon EKS with just one or two commands. However, we're not going to use this solution because it would require you to install another tool on your machine dedicated to AWS, which is not the purpose of our discussion here.
Instead, in this tutorial, we are going to use AWS CloudFormation for the sake of simplicity. AWS has already put together a working CloudFormation template that allows you to deploy a Kubernetes cluster. You can find this template on the GitHub repository, called AWS Quickstart, at https://github.com/aws-quickstart/quickstart-amazon-eks.
AWS makes use of something called virtual private clouds (VPCs). In fact, everything you deploy on AWS is deployed inside of a VPC, and Amazon EKS is no exception. There are two possible solutions, as follows:
- You deploy your EKS cluster onto an existing VPC.
- You deploy your EKS cluster in a new VPC.
The first choice will work, but there is a risk that deploying the cluster into an existing VPC will overlap with existing resources. To not impact any applications that might already exist on your AWS account, we are going to deploy the Amazon EKS cluster on a new VPC. Fortunately for us, the CloudFormation template allows us to create a new VPC while provisioning the Amazon EKS cluster. I encourage you to create a new VPC since VPC creation is free. Bear in mind that you are still limited to five VPCs per AWS region when using them.
Let's sum up all of the different steps required to bootstrap a cluster on Amazon EKS:
- Create a key pair on the Amazon EC2 service.
- Launch the CloudFormation template in the Amazon CloudFormation service.
- Create an IAM user in the Amazon IAM service.
- Install and configure the AWS CLI with the IAM user created earlier.
- Generate a kubeconfig file with the AWS CLI.
First, you need to create an EC2 key pair:
- Please sign in to the AWS web console and open the Amazon EC2 service. You can find the service by searching for it in the search bar under the Compute menu on the home page:
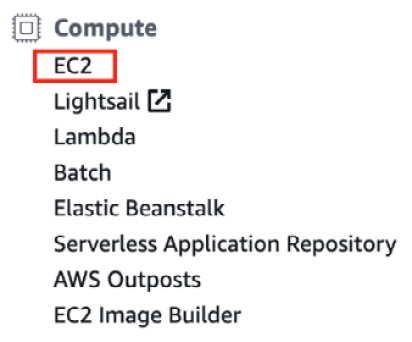
Figure 3.4 – The EC2 menu in the AWS web console
- Once you have opened the EC2 service, select the Key Pairs tab on the left-hand side:

Figure 3.5 – The Key Pairs menu in the EC2 web console
- From this screen, click on the Create Key button. Give the new key pair an arbitrary name and then download the .pem file. This key pair is going to be useful for you to SSH to your worker nodes later.
- The next step is to create the Kubernetes cluster itself. We are going to do that through the CloudFormation template that we talked about earlier. To do that, enter the CloudFormation web console that is accessible under the Management & Governance menu on the home page:
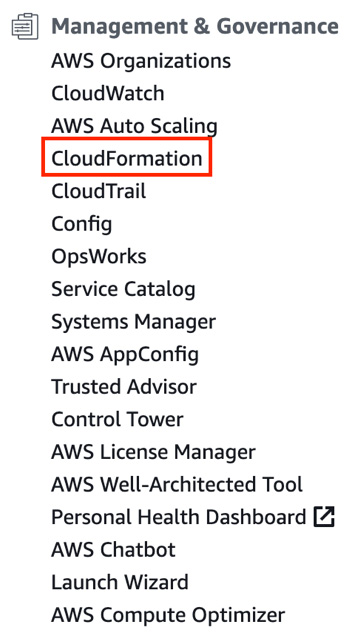
Figure 3.6 – The CloudFormation menu in the AWS web console
- Select Create a stack from an Amazon S3 URL and enter the following URL into the input: https://s3.amazonaws.com/aws-quickstart/quickstart-amazon-eks/templates/amazon-eks-entrypoint-new-vpc.template.yaml. Please refer to the following screenshot:
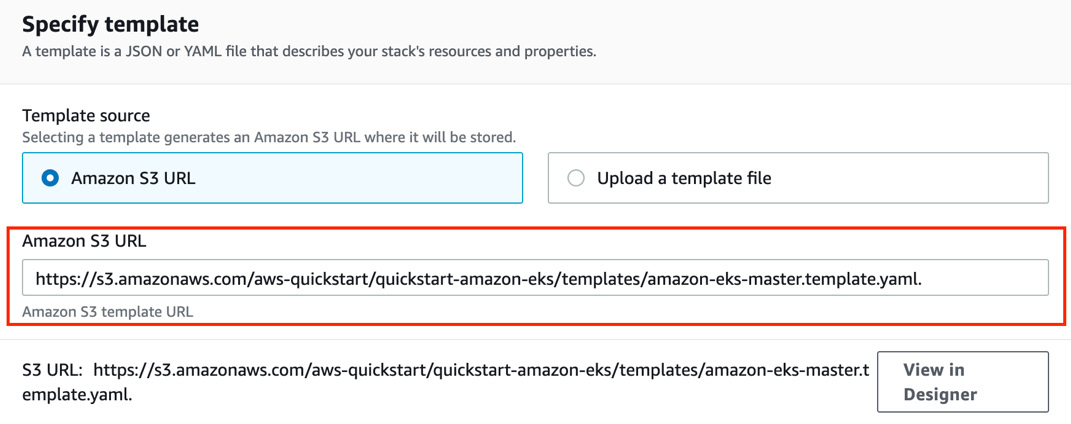
Figure 3.7 – The S3 URL displayed in the CloudFormation stack creation web view
- The next screen will enable you to define some variables and parameters that are needed by the CloudFormation template to launch your Amazon EKS cluster. You'll observe that a lot of variables are declared with a default value, but some of them must be set by you. Pay attention to the following input that should be displayed in the console:
- Stack name: Set a logical name for CloudFormation to keep track of the resources created by the template. For example, you can set eks_cluster.
- Availability Zone: Pick at least two availability zones available in your current AWS region.
- Allowed external access CIDR: You can define your own IP address followed by a /32 to allow your IP address to communicate with the EKS cluster. Otherwise, you can set 0.0.0.0/0 to allow remote communication from the whole internet if you do not know your IP address.
- Number of Availability Zones: Set 2 or 3 availability zones so that your EKS cluster will be highly available.
- Provision bastion host: You should set enabled if you do want to deploy a bastion host on your VPC. The bastion host will be an SSH jump machine to access the instances that will be launched deeper into your VPC.
- SSH key name: Select the name of the SSH key pair that you created in the previous step.
- After you have filled in all of these options, select the Next button until you are asked to start the new stack creation. CloudFormation will begin provisioning your new Amazon EKS cluster; it can take approximately 15 minutes to complete, as the process is quite long. There is nothing left to do in CloudFormation. Please wait for the cluster to be fully provisioned before going any further.
- After a few minutes, your new clusters will enter the ready state. We need to generate a new kubeconfig file in our local machine to be able to interact with the Amazon EKS cluster. Unfortunately for us, CloudFormation cannot do that. There are additional steps to take, and they require the usage of the AWS CLI command-line utility in order to generate a kubeconfig file. That's why we must install the AWS CLI:
- Use the following commands for Linux:
$ sudo apt-get update
$ sudo apt-get install awscli
- Use the following commands for macOS:
$ sudo apt-get update
$ sudo apt-get install awscli
- On Windows, download and launch the MSI installer accessible at https://awscli.amazonaws.com/AWSCLIV2.msi.
- Use the following commands for Linux:
- Once the AWS CLI has been installed, we need to retrieve AWS access keys from the AWS console in order to configure the AWS CLI. To get those keys, we must create a new IAM user in the Amazon IAM web console. Go to the AWS web console and open the IAM service that is underneath the Security, Identity, & Compliance category:
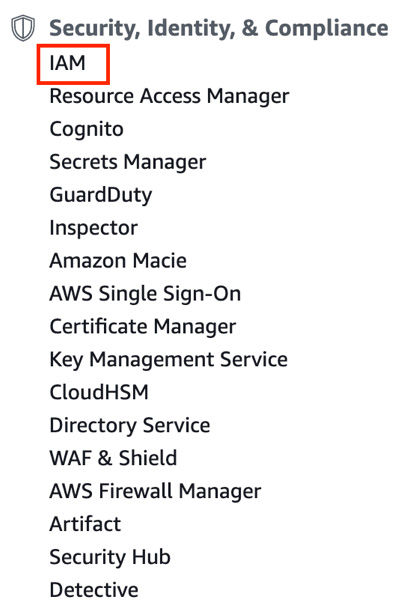
Figure 3.8 – The IAM menu in the AWS web console
- Once you are in the AWS IAM console, select Users from the tab on the left-hand side:
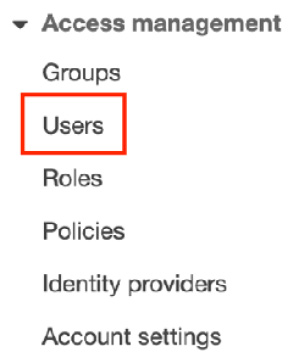
Figure 3.9 – The Users menu in the IAM web console
- In this new screen, click on the Add user button and fill in the different options as follows:
- User Name: Select an arbitrary name. Let's name it eks_user.
- Access Type: Select programmatic access.
- Now you should be at the permission selection screen. AWS recommends that you respect the least privileged principle: that is, each user should strictly have access to the resource it needs to interact with. However, for the sake of simplicity, we will violate this principle and grant the AdministratorAccess policy to our eks_user.
- Pick the Attach existing policy directly option and select AdministratorAccess, which should be displayed first in the drop-down list. From the next screen, you can set tags for the new user. Following this, review and create it.
- When the user has been created, AWS gives you an access key ID and a secret access key. Grab these two values because we are going to need them. Run the following command to start the configuration of the AWS CLI:
$ aws configure –profile eks_user
AWS Access Key ID [None]: [Access Key ID]
AWS Secret Access Key [None]: [Secret access key]
Default region name [None]: [Your current AWS region]
Default output format [None]: json
- Once you have configured the AWS CLI, export a new variable in your local shell to authenticate AWS CLI calls against your AWS account:
$ export AWS_PROFILE=eks_user
- Now, you can run your first AWS CLI command. Let's list the Kubernetes clusters created in the Amazon EKS service. You should see the Kubernetes cluster created by the CloudFormation template:
$ aws eks list-clusters
{
"clusters": [
"EKS-XXXXXX"
]
}
- Now that the AWS CLI has been fully configured, we can use it to generate the kubeconfig file. Run the following command. The name of the cluster required is the value that was outputted in the previous command:
$ aws eks update-kubeconfig --name EKS-XXXXX
Added new context arn:aws:eks:eu-west-1:XXX:cluster/EKS-XXX to /root/.kube/config
- As you can see, this command generates a kubeconfig file and directly places it in the correct directory, which is $HOME/.kube/config. You can now run your first kubectl command, which will list the nodes that are part of the Amazon EKS clusters:
$ kubectl get nodes
The preceding command should output the master and worker nodes running on the Amazon EKS cluster. This was challenging! But you have successfully set up a Kubernetes cluster using Amazon EKS.
This cluster is a production-ready, multi-node cluster. You can use it to practice on a real-world Kubernetes setup. However, bear in mind that it is not free, and you are spending money each second the service is running. That is why you should understand how to delete the Kubernetes cluster when it is not being used. We will explore this next.
Deleting the Kubernetes cluster on Amazon EKS
Unfortunately for us, there is no way to stop and resume a Kubernetes cluster running on the Amazon EKS service. The feature does not exist. The only thing we can do is to completely destroy it and then recreate it. This will work, but destroying it will result in a state loss. This means that you won't be able to restore the cluster to the state it had before its removal.
Deleting a cluster is super easy since we created it with a CloudFormation template. The easiest way to get rid of the cluster is to go to the stack list in the CloudFormation web console and remove the stack. As a result, CloudFormation will remove all of the resources that were created.
If you want to recreate the cluster, you can simply recreate it using the CloudFormation template once more. You won't have to reconfigure the AWS CLI since you have already done it once, but of course, you will need to regenerate a new kubeconfig file using the aws eks update-kubeconfig command, as demonstrated earlier in this chapter.
Bear in mind that you should destroy the cluster when you are not using it, for example, during nighttime. Removing the resources that you are not using is the best way to save money on your cloud bill.
Installing a Kubernetes cluster using Azure AKS
Lastly, I'd like to show you how you can provision a Kubernetes cluster on the Azure AKS service. Azure AKS is a service that is part of the Azure cloud provider, which is offered by Microsoft. AKS is the third major Kubernetes cloud offering around and is a competitor to Amazon EKS and Google GKE. Mostly, the service does the same job as the other two: it allows you to create Kubernetes clusters in just a few clicks directly on the Azure cloud. This solution might be good for you if you are willing to install a Kubernetes cluster without using your own machine or if Azure is simply your preferred cloud provider.
Launching a multi-node Kubernetes cluster on Azure AKS
Bootstrapping a cluster on Azure AKS is very easy. Similar to Google GKE, it has a command-line utility, called az, which can start a Kubernetes cluster in just one command. The az command line can also generate a kubeconfig file for us to allow Kubectl to communicate with our Kubernetes cluster on AKS:
- Let's install the AKS command-line utility:
- Use the following commands for Linux:
$ sudo apt-get update
$ sudo apt-get install ca-certificates curl apt-transport-https lsb-release gnupg
$ curl -sL https://packages.microsoft.com/keys/microsoft.asc | gpg --dearmor |sudo tee /etc/apt/trusted.gpg.d/microsoft.gpg > /dev/null
$ AZ_REPO=$(lsb_release -cs)
$ echo "deb [arch=amd64] https://packages.microsoft.com/repos/azure-cli/ $AZ_REPO main" | sudo tee /etc/apt/sources.list.d/azure-cli.list
$ sudo apt-get update
$ sudo apt-get install azure-cli
- Use the following commands for macOS:
$ brew update && brew install azure-cli
- On Windows, you need to download and launch the MSI installer that is available in the official documentation from Microsoft. You can locate it at https://docs.microsoft.com/fr-fr/cli/azure/install-azure-cli-windows?view=azure-cli-latest&tabs=azure-cli.
- Use the following commands for Linux:
- Once the az command line has been installed, you need to configure it. The first thing to do is to configure authentication against your Azure account so that the az command line can issue a query against your Azure cloud:
$ az login
- This command will open your default web browser and ask you to authenticate your Azure web console again. Once authenticated, the az command line will detect it. The next step is to create a resource group.
The Azure cloud works in the following way: everything you create in Azure must be created inside a logical unit called a resource group. Resource groups are a bit like projects in GCP. Additionally, the AWS cloud has something called resource groups, but they have a less important role in the AWS world.
- Let's create a resource group in our Azure cloud in order to create our AKS cluster. Run the following command to create a resource group that is called az_cluster:
$ az group create --name az_cluster --location francecentral
This command will create a resource, called az_cluster, at the francecentral location. This location is fine to me, but you should pick one that is closer to your location. If you need to access all of the possible locations that Azure has, run the following command:
$ az account list-locations
Once the resource group has been created, you can check for its presence in the Azure web console:

Figure 3.10 – The az_cluster resource group displayed in the Azure web console
- Now, we are ready to create the AKS cluster. Again, the az command line can achieve that with just one command:
$ az aks create --resource-group aks_cluster --name my_aks_cluster --node-count 3 --generate-ssh-keys
- The following command will create an AKS cluster, called my_aks_cluster, with three nodes in the resource group, called az_cluster, that we created earlier. We also ask Azure to generate SSH keys for us to SSH to our nodes. That command can take a few minutes to complete. However, after its completion, you will have a working Kubernetes cluster created on Azure AKS:

Figure 3.11 – The AKS cluster displayed in the Azure web console
- The last thing to do now is to configure a kubeconfig file in order to get Kubectl to communicate with the cluster on the AKS cluster. Fortunately for us, the az command line can do that easily. Run the following command to generate a kubeconfig file and place it in the correct directory:
$ az aks get-credentials --resource-group az_cluster --name my_aks_cluster
- Now, everything is ready for us to issue our first command to the AKS cluster. Let's run the following command to list the nodes that are part of the cluster:
$ kubectl get nodes
If everything is okay, you should be able to view the three nodes that we created earlier.
Stopping and deleting a Kubernetes cluster on Azure AKS
Like all cloud offerings, Azure AKS is not free. It's a commercial product. You should stop it and resume it when you are not using your cluster in order to avoid being billed too much. Unfortunately, it is impossible to stop and resume a cluster on AKS without losing its state. You must destroy it and then recreate it.
To remove an AKS cluster, we prefer to remove the resource group itself since a resource's life cycle is bound to its parent resource group. Deleting the resource group should delete the cluster. The following command will get rid of the AKS cluster:
$ az group delete --name az_cluster --yes --no-wait
Summary
This chapter was quite intense! You require a Kubernetes cluster to follow this book, and so, we examined five ways in which to set up Kubernetes clusters on different platforms. You learned about Minikube, which is the most common way to set up a cluster on a local machine. You also discovered Kind, which is a tool that can set up multi-node local clusters, which is a limitation of Minikube. Then, we looked at the three major Kubernetes cloud services, which are Google GKE, Amazon EKS, and Azure AKS. These three services allow you to create a Kubernetes cluster on the cloud for your practice and train with. This was just a quick introduction to these services, and we will have the opportunity to dive deeper into these services later. For the moment, simply pick the solution that is the best for you. Personally, I use both Kind and Amazon EKS, as they are my preferred tools.
In the next chapter, we are going to dive into Kubernetes by exploring the concept of Pods. The Pod resource is the most important resource that Kubernetes manages. We will learn how to create, update, and delete Pods. Additionally, we will look at how to provision them, how to get information from them, and how to update the containers they are running. We will deploy an NGINX Pod on a Kubernetes cluster and examine how we can access it from the outside. By the end of the next chapter, you will be capable of launching your first containers on your Kubernetes cluster through the usage of Pods. The cluster that you installed here will be very useful when you follow the real-world examples that are coming in the next chapter.