Away3D materials use a number of shading techniques, sometimes in combination, to achieve their end result. These techniques can be used to apply a texture to the surface of a 3D object, illuminate a 3D object using an external light source, display a reflection of the surrounding environment, or simulate the appearance of a bumpy surface.
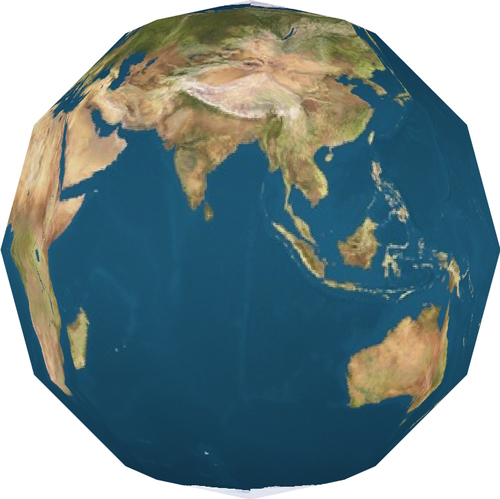
Texture mapping is used to apply an image, usually from a PNG, JPG, or GIF file, to the surface of a 3D object. It is used on its own to display a single texture, or it can be used in conjunction with the other shading techniques.
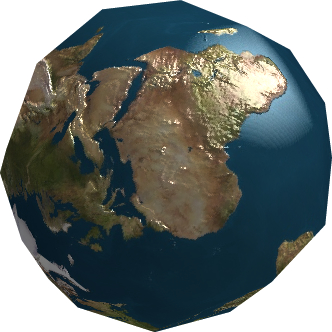
The following image shows a sphere that uses texture mapping to display a single texture representing the Earth:
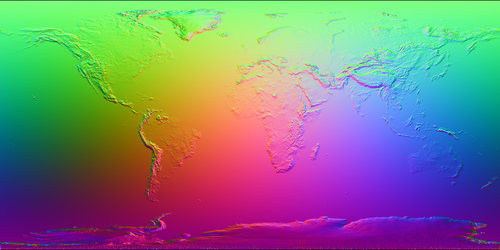
Normal mapping is a technique that is used to add the appearance of depth to a 3D object. This is done by using the information stored in an image called a normal map to calculate how each part of the material should be shaded. This shading gives the impression of a bumpy surface.
Normal mapping has the benefit of adding depth detail without using additional polygons. A normal mapped low-polygon 3D object will generally be rendered faster than a high-polygon 3D object with a standard material, while maintaining much of the visual quality of the high-polygon 3D object.
Tip
A useful utility for creating normal maps can be found at http://www.tartiflop.com/disp2norm/. This tool will create normal maps from a grayscale displacement map that can be applied to flat or spherical 3D objects.
The following image is an example of a normal map that can be applied to a sphere:
This effect is shown in the following image, where you can see how the sphere appears to have a rough surface. From the angle in the screenshot, this roughness is especially apparent over the African continent.
Environment mapping is used to draw a 3D object's surroundings as a reflection. Reflecting the true surroundings of a 3D object on its surface is far too computationally expensive, but the effect can be approximated using a single texture, or a collection of textures that form a cube that appears to surround the 3D object.
Environment mapping is useful for creating the appearance of shiny 3D objects, like those with a polished or metallic surface. In the following image, the first two 3D objects have had a material applied that implements environment mapping (reflecting a marble texture). The torus on the left has applied an environment map over a base texture map, while the one in the middle has applied the environment map over a solid color. As a comparison the torus on the right has had a material applied to it that uses only texture mapping.
The effect that is produced by environment mapping can be difficult to appreciate in a static screenshot, but it is immediately apparent as the 3D object moves relative to the camera.

Flat shading is used to illuminate each polygon against a light source. It is very quick to calculate, but since each triangle face is shaded as a whole it does tend to highlight the edges of a low-polygon 3D object.
The following sphere has been illuminated using flat shading. As you can see it is easy to discern each of the triangle faces that make up the sphere.
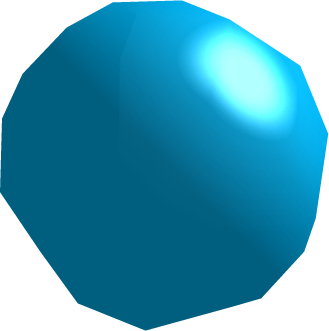
Phong shading will calculate the illumination of each pixel on the surface of a 3D object against a light source. This eliminates the sharp edges that can be produced by flat shading, but does so with a performance cost.
The following sphere has been illuminated using phong shading. Because each pixel is lit independently of the triangle faces, the end result is much smoother than the flat shading technique discussed previously.