In this section, we are going to take a look at how to create a new claim user.
The following screenshot shows the same user window we saw previously:
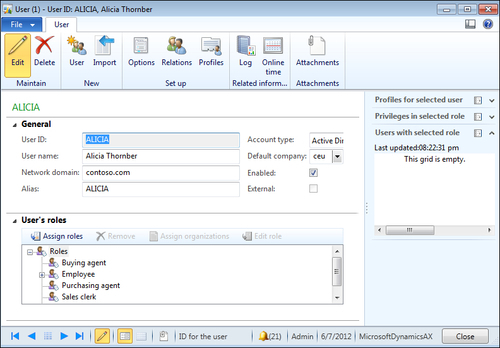
The process for creating a claim user is similar to the process we followed in the previous section, with a few changes in some steps; they are as follows:
- Go to System administration |Common |Users |Users.
- From the upper left-hand corner of the user list page, click on User.
- In the new window that appears, enter the user ID in the User ID field.
- Enter the user's full name in the User name field.
- In the Network domain field, enter
FBAProvider. - In the Alias field, enter either the name, a short form of the name, or the nickname of the user.
- You have to confirm that the Account type field is set to Claims user.
- Mark the Enabled checkbox.
- Click on Close to close this window.
We performed the same steps we did when creating a new user. We just changed the account type for the selected user to differentiate the organization's Active Directory users from any other user that doesn't belong to the organization.
Users created so far don't have any permissions. We will see how to create permissions in the later recipes.
Claim users: These are users who are not in an organization's Active Directory, like vendors or customers who need to access Enterprise Portal.