
In this project, we will build a line following robot that is controlled by your Raspberry Pi.
In this project, we will build a line following robot that will follow a black line against a white background. The robot will make use of a pair of infrared sensors to track the orientation of the robot and drive the robot accordingly.
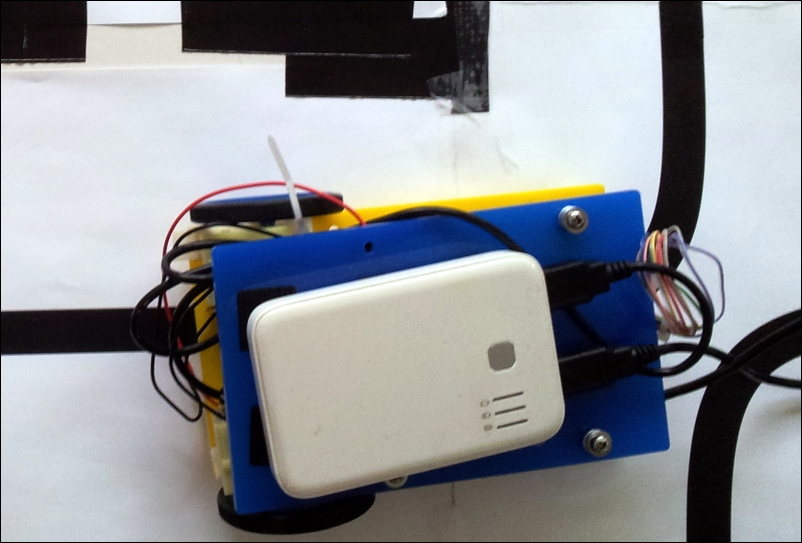
A line following robot
The Pi, as you have seen in the last few projects, offers you immense functionality and many advantages over microcontrollers. You can bring this power and smaller footprints to robotics. So, we are getting you started off with the line following robot. Once you get this under control, the possibilities are endless, making this an awesome segue into robotics and beyond.
In this project, we will build the line following robot in the following steps:
- Assembly of the Pi Plate for the line following robot
- Sensor selection, interfacing sensors, and data interpretation
- Implementation of line following logic based on sensor data
- Testing the motor driver circuit
- Preparation of the line following course
- Designing the chassis for the line following robot
- A step-by-step assembly of the robot
There are off-the-shelf products available to build a line following robot, for example, Make:it Basic Robotics Starter Kit (http://www.makershed.com/products/makeit-robotics-start-kit). Alternatively, in order to build a line following robot, the following items are required and the reader may add or remove components to the robot based on his/her creativity:
|
Item |
Cost |
|---|---|
|
A line following sensor array |
10 USD (in terms of components) |
|
DC motors with a gearbox * 2 – 60 rpm (http://www.pololu.com/product/1594) |
11 USD |
|
Arduino Uno (http://store.arduino.cc/product/A000066) |
30 USD |
|
Plastic wheels – 1 pair (http://www.pololu.com/product/1425) |
8 USD |
|
H Bridge chip – for example, L293D (http://www.pololu.com/product/24) |
3 USD |
|
An acrylic sheet (preferably 12 inch x 24 inch to cut the chassis using a laser cutter) |
5 USD |
|
A USB battery pack (preferably 10,000 mAh, 1A max output) |
15 USD |
|
A poster board |
3 USD |
|
Pi Plate from Adafruit Industries (https://www.adafruit.com/product/801) |
15 USD |