
In this task, we will review interfacing the arcade style buttons (shown in the following image) to Raspberry Pi to play the game. In this task, we will just discuss the software part of the code.
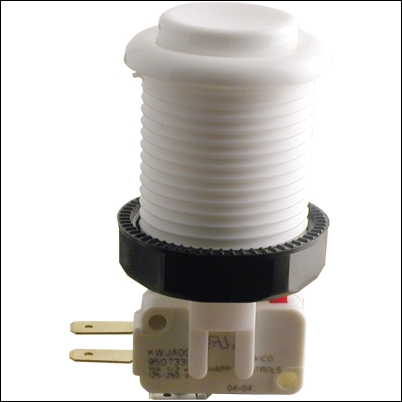
Momentary arcade pushbutton switch (http://na.suzohapp.com/all_catalogs/pushbuttons/58-9111-L)
We will make use of the PiFace interface board available at http://www.piface.org.uk/products/piface_digital/ to interface these buttons to Raspberry Pi. The board is a stackable add-on hardware that can be used to interface eight inputs and eight outputs. The PiFace comes with four tactile switches and we can get started with testing the inputs.
The main reason behind using the PiFace is that we need to monitor the switch states to determine there is a key press. The PiFace comes with an I/O expansion option and can be accessed through the SPI interface. These features enable simple control of the game inputs.
- Raspberry Pi's Serial Peripheral Interface (SPI) drivers need to enabled by editing the
/etc/modprobe.d/raspi-blacklist.conffile using a text editor such asnano:sudo nano /etc/modprobe.d/raspi-blacklist.conf- The drivers can be enabled by inserting an
#before the following line:#blacklist spi-bcm2708 - The SPI drivers need to be loaded using the
modprobecommand:sudo modprobe spi-bcm2708 - The drivers/tools required to interface with the PiFace module can be installed as follows:
wget http://pi.cs.man.ac
.uk/download/old_install.txt
Note
The installation packages for the PiFace module are available as Debian packages. Refer to the installation guide from http://www.piface.org.uk/guides/. If you install the Debian packages, the Python module imports and the methods used to read the inputs might also vary accordingly.
- The drivers can be enabled by inserting an
- Let's rename the file and execute it:
mv install.txt install.sh
chmod +x install.sh
./install.sh
- Once the required tools are installed, Raspberry Pi has to be restarted using the following command:
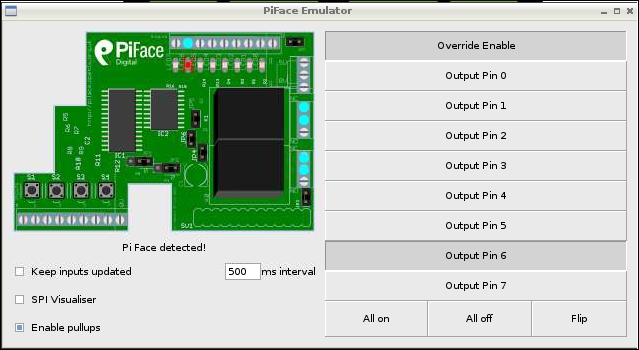
sudo reboot - Once Raspberry Pi has restarted, the emulator that comes along with the tool can be tested. The emulator enables you to test all inputs and outputs of the PiFace interface. The emulator can be launched from the command-line terminal as follows:
Piface/scripts/piface-emulator - The emulator interface would be something like the one shown in the following screenshot:
- Let's test the buttons available on the PiFace module using a Python script:
import piface.pfio as pfio
- The
piface.pfiomodule needs to be imported and initialized:pfio.init()
- The
read_input()method returns an 8-bit number that represents the input states of all the eight buttons:while True: print(pfio.read_input())
- Each bit of the 8-bit number corresponds to a digital input on the PiFace module. The following table shows the switch positions that are represented by bit positions:
S7
S6
S5
S4
S3
S2
S1
S0
Switch positions represented by bit positions
- When a switch is pressed, a particular bit is set and this bit can be used to interpret the column position of the Connect Four game.
- For example, when
S0is pressed, the bit 0 is set and hence the 8-bit word value is 1. WhenS1is pressed, the bit 1 is set and the 8-bit word value is 2 and so on. - We ignore scenarios when two switches are pressed at the same time as the Connect Four game involves playing only one column at a time.
- The Connect Four game was designed to be played using a mouse. Let's perform some tweaks to play it using buttons. Let's get started by commenting out the
getHumanMove()function. - When the game is played using a mouse, the coin is actually dragged and dropped by the player. This needs to be simulated while using the buttons. In order to do so, let's create a copy of the
animateComputerMoving(board,column)method and rename it asanimatePlayerMoving(board,column). - In the game, the computer plays the red colour coins while the human player plays with the black colour coins. So, let's change the
animatePlayerMoving(board,column)method to simulate the human player's coin movements. - The following are the modifications required in the
animatePlayerMovingmethod:x = REDPILERECT.left y = REDPILERECT.top drawBoard(board, {'x':x, 'y':y, 'color':RED}) animateDroppingToken(board, column, RED) - Similarly, the main game loop also needs to be modified to simulate the human player's game moves:
if turn == HUMAN:

  animatePlayerMoving(mainBoard,0)
  makeMove(mainBoard, RED, 0)

  moves_sound.play()
if isWinner(mainBoard, RED):
  winnerImg = HUMANWINNERIMG
  break

turn = COMPUTER # switch to other player's turn
- The next step is to interface the buttons to the game. The following code needs to be added under the human player's turn:
#wait for a button press while column == 0: column = pfio.read_input() column_position = 0 if column == 1: column_position = 0 elif column == 2: column_position = 1 elif column == 4: column_position = 2 elif column == 8: column_position = 3 elif column == 16: column_position = 4 elif column == 32: column_position = 5 elif column == 64: column_position = 6 - We use the
read_input()function to detect any button press. When a button is pressed, the returned value can be anywhere between 1 and 64. The return value is used to identify the column position and the coin movement is simulated. - Similarly, the main menu of the game needs to be modified to be controlled using buttons. The game is launched when button 1 is pressed and the player leaves the game when a button is pressed:
if e.type == EVENT_CHANGE_STATE:
  if state == 0:
    rect_list,state = menu.update(e,state)
    column = 0
    while column == 0:
      column = pfio.read_input()
      pygame.display.update()
    if column == 1:
      state = 1
    elif column == 2:
      state = 2

    if state == 1:
      menu_sound.stop()
      runGame(isFirstGame)
      isFirstGame = False
      state = 0
      prev_state = 1
    elif state == 2 :
      print 'Exit'
      pygame.quit()
      sys.exit()