
The reason I am focusing on INET in this book is because many of the available simulation framework packages require INET to work. INET is a brilliant backbone to create your own frameworks from and is a great way of really getting to grips with OMNeT++!
INET has been brilliantly documented and is available online for free at http://inet.omnetpp.org/doc/INET/neddoc/index.html.
The reference will give you a detailed look at the various components and capabilities included in INET.
With INET built inside your OMNeT++ IDE, navigate to the examples folder in the Project Explorer pane. To run an example simulation in Linux, perform the following steps:
- Locate the folder that INET has been built in and open the
examplesfolder. - Now double-click on run-demo and select Run in Terminal.
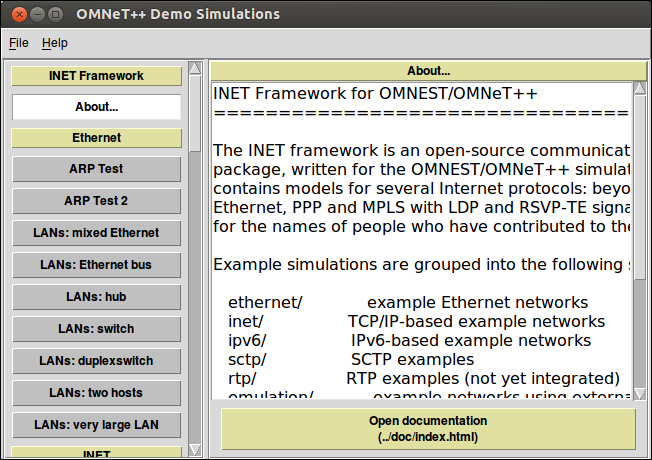
- Now you will see an interface that can be used to navigate and launch different simulation examples. Please do spend a bit of time getting familiar with these examples and remember that you can adapt these to create your own simulations. It will also be a good idea to read the About... page.
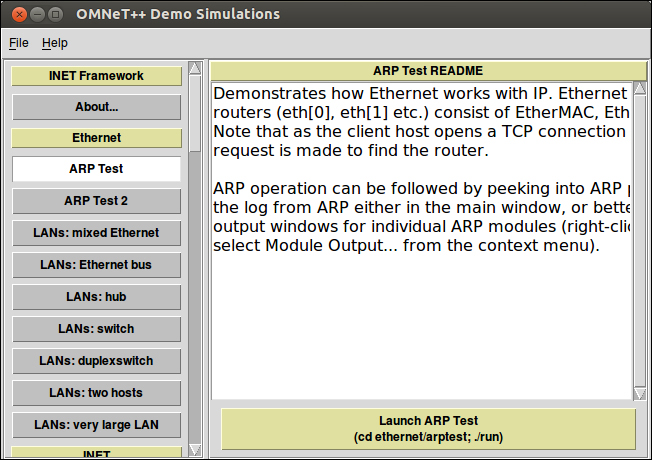
- Let's now select an example by clicking on the left of the window. I'm going to select ARP Test. To launch the simulation, I will click on the Launch ARP Test button, as seen in the following screenshot:
- When you see the following dialog box, just click on OK to proceed. What this dialog is asking is for you to select the configuration to use for this simulation that will be defined by the configuration
omnetpp.inifile: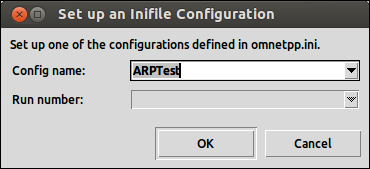
The configuration for the preceding simulation is as follows:
[General]
network = ARPTest
sim-time-limit = 500s
cpu-time-limit = 600s
total-stack = 2MiB
tkenv-plugin-path = ../../../etc/plugins
#record-eventlog = true
#debug-on-errors = true

[ConfigARPTest]
# tcp apps
**.client.numTcpApps = 1
**.client.tcpApp[*].typename = "TCPSessionApp"
**.client.tcpApp[*].active = true
**.client.tcpApp[*].localAddress = ""
**.client.tcpApp[*].localPort = -1
**.client.tcpApp[*].connectAddress = "server"
**.client.tcpApp[*].connectPort = 1000
**.client.tcpApp[*].tOpen = 1.0s
**.client.tcpApp[*].tSend = 1.1s
**.client.tcpApp[*].sendBytes = 1MiB
**.client.tcpApp[*].sendScript = ""
**.client.tcpApp[*].tClose = 0

#**.server.tcpApp[*].typename="TCPSinkApp"
**.server.numTcpApps = 1
**.server.tcpApp[*].typename = "TCPEchoApp"
**.server.tcpApp[0].localAddress = ""
**.server.tcpApp[0].localPort = 1000
**.server.tcpApp[0].echoFactor = 2.0
**.server.tcpApp[0].echoDelay = 0

# Ethernet NIC configuration
**.eth[*].mac.duplexMode = true

# Queues
**.ppp[*].queueType = "DropTailQueue"
**.ppp[*].queue.frameCapacity = 10
**.eth[*].queueType = "DropTailQueue"
**.eth[*].queue.dataQueue.frameCapacity = 10

# Ethernet switch
**.switch*.relayUnitType = "MACRelayUnitNP"
**.relayUnit.addressTableSize = 100
**.relayUnit.agingTime = 120s
**.relayUnit.bufferSize = 1MiB
**.relayUnit.highWatermark = 512KiB
**.relayUnit.pauseUnits = 300# pause for 300*512 bit (19200 byte) time
**.relayUnit.addressTableFile = ""
**.relayUnit.numCPUs = 2
**.relayUnit.processingTime = 2us

#**.mac[*].txrate = 0   # autoconfig
**.mac[*].duplexMode = true
In the first few lines of the preceding code snippet, you can see [ConfigARPTest]. If there were other configurations, you would be able to use the previous dialog box to select them. This allows you to set up many different scenarios for the network topology that you have created. [ConfigARPTest] is one scenario for the network simulation. The second scenario could be called [ConfigARPTest alternative], where different values are given to the parameters in the configuration.
You can now play with the example and explore the interface that it presents to give you a greater insight into the simulation. When you click on RUN, the simulation will start and will look like the following:
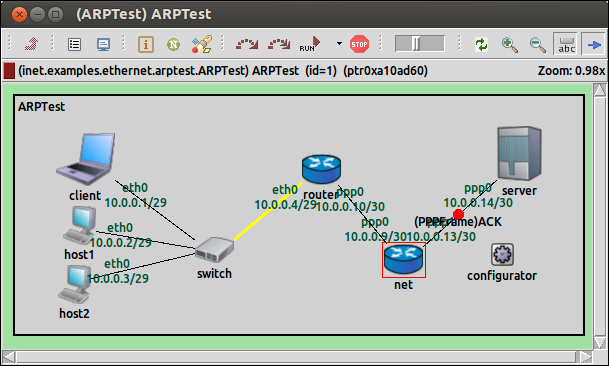
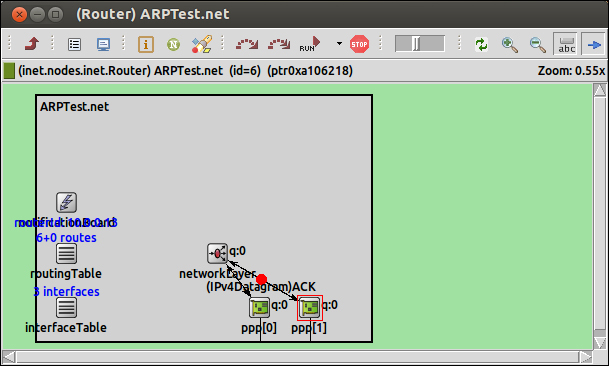
This gives us a very high-level look at what is going on. However, if we double-click on one of the objects in this simulation, it will take you deeper into what is happening. For example, if we click on the net router, we see the components that make up that compound module and also what those modules are currently doing, as shown in the following screenshot:
I recommend spending some time to modify the examples that come with INET and also the ones that can be found in the samples folder of your OMNeT++ folder. I find that the easiest way to learn is just to get involved, play around, explore the possibilities of what you can use all these functionalities for, and most importantly, have fun!