
![]()
Getting Readys
Web API 2 is the latest evolution of Microsoft’s web services toolkit, which allows you to create RESTful applications built on the ASP.NET platform. It provides a standards-based approach and a high-productivity development model that makes it easy to deliver services to a wide range of clients, including mobile devices.
In this book, I take you right from creating your first Web API web services to the most advanced techniques and features. No prior knowledge of HTTP web services or Web API is required. I start with the basics and explain everything you need to know. In short, this book will give you expert insight and understanding of how to create, customize, and deploy complex, flexible, and robust HTTP web services.
Web services don’t exist in isolation, so I also show you how to write browser-based single-page applications to consume them. I demonstrate how these clients influence the way that Web API web services respond and how you can adapt your web service to different client types.
What Do You Need to Know?
You should be familiar with using the ASP.NET MVC framework to create web applications. This means you are able to use Visual Studio to write C# classes and know how to use Razor and HTML to create views. The term Expert in the title refers to the degree of depth that I cover in this book, and you don’t need any knowledge of Web API or HTTP web services; however, if you don’t know how to use ASP.NET MVC, then you will struggle to follow many of the examples. If you want to brush up on your knowledge of MVC, then read my Pro ASP.NET MVC 5 and Pro ASP.NET MVC Platform books, both published by Apress.
What Does Expert Mean?
This book is for programmers who want to understand every aspect of web services development using ASP.NET Web API. Or, put another way, you want to be an expert in Web API. I dig deeply into the details of how Web API works behind the scenes in this book and give you a warts-and-all view of how Web API can be used to create sophisticated and secure RESTful web services. You don’t have to know anything about Web API or HTTP web services before you start. I build on your existing knowledge of the MVC framework to give you all the information you need.
What Is the Structure of This Book?
This book is split into three parts, each of which covers a set of related topics.
Part 1: Getting Ready
Part 1 of this book provides the information you need to get ready for the rest of the book. It includes this chapter and a primer for the techniques you will need to follow the examples in this chapter. I also show you how to build your first web service and single-page client and take you through the process of building a more realistic application, called SportsStore.
Part 2: Results and Parameters
Part 2 of this book focuses on the aspect of Web API that you will spend most of your time on during your first real projects: the data sent from clients and the responses that you produce in return. I explain how to create different kinds of HTTP responses using Web API, how to master the data binding process that Web API uses to process request data, and how to ensure that the data you receive from clients is valid.
Part 3: Dispatching Requests
Part 3 of this book explains how Web API dispatches HTTP requests from the moment they arrive from the client until the response is generated. I describe all of the steps that a request goes through and show you how to configure and customize just about every class and interface that Web API relies on to get fine-grain control over how your web services operate. I show you how Web API uses the URL routing system to support RESTful web services, how controllers and action methods are selected, and how to deal with errors and cross-cutting concerns. Many of these techniques are similar to the ones you know from MVC framework development, but Web API uses its own namespaces and classes and has a different approach than the one you are used to using.
Are There Lots of Examples?
There are loads of examples. The best way to learn Web API is by example, and I have packed as many of them as I can into this book. To maximize the number of examples in this book, I have adopted a simple convention to avoid listing the contents of files over and over again. The first time I use a file in a chapter, I’ll list the complete contents, just as I have in Listing 1-1.
Listing 1-1. A Complete Example Document
using System;
using System.Collections.Generic;
using System.Linq;
using System.Web.Http;

namespace SportsStore {
    public static class WebApiConfig {
        public static void Register(HttpConfiguration config) {

            config.MapHttpAttributeRoutes();

            config.Routes.MapHttpRoute(
                name: "DefaultApi",
                routeTemplate: "api/{controller}/{id}",
                defaults: new { id = RouteParameter.Optional }
            );

            config.Formatters.Remove(config.Formatters.XmlFormatter);
        }
    }
}
This listing is taken from Chapter 6. Don’t worry about what it does; just be aware that the first time I use a file in each chapter there will be complete listing, similar to Listing 1-1 shown here. For the second and subsequent examples, I show you just the elements that change, in a partial listing. You can spot a partial the listing because it starts and ends with ellipsis (...), as shown in Listing 1-2.
Listing 1-2. A Partial Listing
...
public Product GetProduct(int id) {
    Product result = Repository.Products.Where(p => p.Id == id).FirstOrDefault();
    if (result == null) {
        throw new HttpResponseException(HttpStatusCode.BadRequest);
    } else {
        return result;
    }
}
...
This is a subsequent listing from Chapter 6. You can see that just the GetProduct method is shown and that I have highlighted a number of statements. This is how I draw your attention to the part of the example that shows the feature or technique I am describing. In a partial listing like this, only those parts shown have changed from the full listing earlier in the chapter.
This convention lets me pack in more examples, but it does mean it can be hard to locate a specific technique. To this end, all of the chapters in which I describe Web API features in Parts 2 and 3 begin with a summary table that describes the techniques contained in the chapter and the listings that demonstrate how they are used.
Where Can You Get the Example Code?
You can download all of the examples for all of the chapters in this book from www.apress.com. The download is available without charge and includes all of the supporting resources that are required to re-create the examples without having to type them in. You don’t have to download the code, but it is the easiest way of experimenting with the examples and cutting and pasting them into your own projects.
If you do want to re-create the examples from scratch, then you will find that every chapter contains detailed listings of all the files I create and modify. I never refer you to an external file or hand-wave about leaving the rest of the example as an exercise; every detail you need to re-create every example is contained within this book.
How Do You Set Up a Development Environment?
The most important software you need for this book is Visual Studio 2013, which contains everything you need to get started, including a built-in application server for running and debugging Web API applications, an administration-free edition of SQL Server for developing database-driven applications, and, of course, a code editor compiler and debugger.
Getting Visual Studio
There are several editions of Visual Studio, but I will be using the one that Microsoft makes available free of charge, called Visual Studio Express 2013 for Web. Microsoft adds some nice features to the paid-for editions of Visual Studio, but you will not need them for this book, and all of the figures that you see throughout this book have been taken using the Express edition, which you can download from www.visualstudio.com.
There are several versions of Visual Studio 2013 Express, each of which is used for a different kind of development. Make sure you get the Web version, which supports ASP.NET applications.
![]() Note All of the examples in this book will work with Visual Studio Express 2013 for Web, except those in Chapter 26 where I use Visual Studio Express 2013 for Windows Desktop, which allows me to create a console application.
Note All of the examples in this book will work with Visual Studio Express 2013 for Web, except those in Chapter 26 where I use Visual Studio Express 2013 for Windows Desktop, which allows me to create a console application.
I follow a specific approach to creating ASP.NET projects: I don’t use the predefined templates that Microsoft provides, preferring to explicitly add all of the packages I require. This means more work is required to get set up, but the benefit is that you end up with a much better understanding of how an application fits together. I provide a primer in Chapter 2 that gives an example of what you can expect.
![]() Tip Visual Studio includes NuGet for downloading and installing software packages. I use NuGet throughout this book and always specify the version of each NuGet package so that you are sure to get the results that I demonstrate. If you are in doubt, download the source code for this book from www.apress.com, which contains complete projects for each chapter.
Tip Visual Studio includes NuGet for downloading and installing software packages. I use NuGet throughout this book and always specify the version of each NuGet package so that you are sure to get the results that I demonstrate. If you are in doubt, download the source code for this book from www.apress.com, which contains complete projects for each chapter.
Preparing Visual Studio
Visual Studio Express contains all the features you need to create, test, and deploy Web API applications, but some of those features are hidden away until you ask for them. To enable all of the features, select Expert Settings from the Visual Studio Tools ![]() Settings menu.
Settings menu.
![]() Tip Microsoft has decided that the top-level menus in Visual Studio should be all in uppercase, which means that the menu to which I just referred is really TOOLS. I think this is rather like shouting, and I will capitalize menu names like Tools is here throughout this book.
Tip Microsoft has decided that the top-level menus in Visual Studio should be all in uppercase, which means that the menu to which I just referred is really TOOLS. I think this is rather like shouting, and I will capitalize menu names like Tools is here throughout this book.
Getting Google Chrome
In this book, I use the Google Chrome browser. In part this is because it has some excellent F12 developer tools (so-called because they are accessed by pressing the F12 key) but also because using Chrome allows me to use Postman, an outstanding HTTP client that makes it easy to test web services by manually crafting HTTP requests.
You can download Chrome from https://www.google.com/chrome/browser and, once it is installed, get the Postman client from www.getpostman.com. Both are available without charge, but I encourage you to donate to the Postman developers if you find it useful.
You will also need the Postman Interceptor extension, which increases the functionality and is available through the Google Chrome Extension Store as a zero-cost installation. Click the Chrome settings button (the one with three horizontal lines at the right side of the screen) and select Tools ![]() Extensions. Search for Postman Interceptor and follow the installation instructions.
Extensions. Search for Postman Interceptor and follow the installation instructions.
Selecting Chrome for Debugging
You can select Chrome as the browser that Visual Studio will start when you debug a project by selecting it from the drop-down list of browsers, as shown in Figure 1-1.
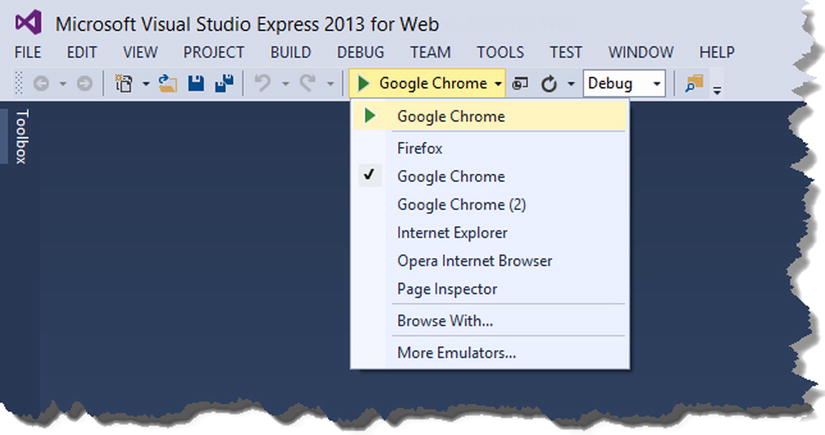
Figure 1-1. Selecting Google Chrome in Visual Studio
Summary
In this chapter, I outlined the content and structure of this book and outlined the software that is required for Web API web development. As I said earlier, the best way to learn Web API is by example, and in Chapter 2 I jump right in and show you how to create your first web service and client application.