
Flash is a social creature. Not only does it rub elbows with HTML—coexisting happily with text, JavaScript, images, audio, video, CSS, and more—but it can also reach out past its own SWF boundaries to collaborate with data hosted on a server.
In the hands of an experienced programmer, Flash can interact with database applications by way of the URLLoader and URLVariables classes, perform web service and Flash remoting calls, and even slap a secret handshake with Ajax, thanks to the ExternalInterface class. All this from a browser plug-in that began its life as a way to improve on animated GIFs! It's easy to see why Flash has become a widespread phenomenon, and its versatility makes equally social creatures of the countless designers and developers who end up warming their diverse mitts around the same campfire because of it.
This book isn't here to make programmers out of artists. We don't have the page count to delve into most of the concepts just mentioned, but we are going to introduce you to a markup language called XML that, with a bit of help from ActionScript, can make your SWFs dynamic.
Here's what we'll cover in this chapter:
Retrieving and filtering XML data using E4X syntax
Using retrieved data in collaboration with ActionScript
The following files are used in this chapter (located in Chapter13/ExerciseFiles_Ch13/Exercise/):
LoadXML.flapopeye.xmlLoadXML-E4XBonusRound.flaCopyMotion.flaCopyMotion.xmlXMLDrawing.fladrawings.fla
The source files are available online from either of the following sites:
http://www.FoundationFlashCS4.comhttp://www.friendsofED.com/download.html?isbn=9781430210931
If you haven't already worked with XML, we bet our next single malt Scotch you've at least heard of it. The letters stand for eXtensible Markup Language, and extensibility—the ability to create your own HTML-like tags—is almost certainly the reason XML has become a towering champ in data communication. Countless markup languages and file formats are based on XML, including SMIL, RSS, XAML, MXML, RDF, WAP, SVG, SOAP, WSDL, OpenDocument, XHTML, and so on—truly more than would fit on this page. We'll leave the letter combinations to a Scrabble master.
"That's fine and dandy," you might be saying, "but guys, what is XML?" Fair enough. The remarkable thing about this language is that it can basically be whatever you want it to be, provided you stick by its rules. The W3C defines the syntax recommendation for XML (XML 1.0, fourth edition, which is the latest at the time this book was written) at http://www.w3.org/TR/2006/REC-xml−20060816/.
The main purpose of XML is to expedite the sharing of data. In fact, XML is so flexible that newcomers are often baffled about where to even begin. On paper—or rather, on the screen—XML looks a lot like another famous W3C specification: HTML. However, rather than using the predetermined tags and attributes supplied by HTML, XML lets you organize your content into descriptive tags of your own design. While HTML formats data for display, XML actually describes data. The combination of familiar, hierarchical format and completely custom tags generally makes XML content easy to read, both to computers and humans. By separating your data from the movie, you give yourself the opportunity to change content from the outside, affecting SWFs without needing to republish them.
So, are you ready to write some XML?
Let's say you've been tasked with organizing a collection of vintage Popeye cartoons. You have five short films on your list: "I Yam What I Yam," "Strong to the Finich," "Beware of Barnacle Bill," "Vim, Vigor, and Vitaliky," and "Little Swee' Pea." Each cartoon has its own release date, running time, and cast of characters. Where to begin? Let's take a look.
Every XML document must have at least one tag, which constitutes its root element. The root element should describe the document's contents. In this case, we're dealing with cartoons, so let's make that our root:
<cartoons></cartoons>
Note
Looks kind of crazy, doesn't it? It's almost like you're getting away with something mischievous. After all, a technology that facilitates stock market transactions and configures user preferences should be somewhat serious, right? Hey, if you don't think Popeye is seriously funny, you haven't spent enough time with Descartes. I think, therefore I yam. (Thank you! We'll be here all week.)
The rest of our elements will stack themselves inside this first one. Every cartoon is its own film, so we'll add five custom <film> elements:
<cartoons>
  <film></film>
  <film></film>
  <film></film>
  <film></film>
  <film></film>
</cartoons>
Again, these tag names aren't things that exist in XML. It's up to you to decide which elements make sense for the data at hand, to name those elements accordingly, and then to use them.
Note that each opening tag has a closing tag partner (with a slash in it), which is a characteristic required by the XML standard. If an element doesn't contain further data inside it, that element can optionally serve as its own opening and closing tags. In such a case, the <film></film> pairing would look like this: <film />. But here, each film has a title, so these elements will remain as tag pairs.
The next step—adding a title—seems obvious enough:
<cartoons>
  <film>
    <title>I Yam What I Yam</title>
  </film>
  <film>
    <title>Strong to the Finich</title>
  </film>
  <film>
    <title>Beware of Barnacle Bill</title>
  </film>
  <film>
    <title>Vim, Vigor, and Vitaliky</title>
  </film>
  <film>
    <title>Little Swee' Pea</title>
  </film>
</cartoons>
The difference here is that the <title> tags contain textual data instead of additional elements, but you get the idea. Hold on a minute—all of these tags contain data! The <title> tags contain text nodes (that is, nonelement text content), and the <film> and <cartoons> tags contain XML element nodes (that is, descriptive tags). It doesn't take much effort to connect the rest of the dots. An excerpt of the completed document might look something like this:
<cartoons>
  <film>
    <title>I Yam What I Yam</title>
    <releaseDate>September 29, 1933</releaseDate>
    <runningTime>6 min</runningTime>
  </film>
  . . .
</cartoons>
Actually, that isn't complete after all, is it? The cast of characters is missing. For that, another tier of elements is in order:
<cartoons>
  <film>
    <title>I Yam What I Yam</title>
    <releaseDate>September 29, 1933</releaseDate>
    <runningTime>6 min</runningTime>
    <cast>
      <character>Popeye</character>
      <character>Olive Oyl</character>
      <character>Wimpy</character>
      <character>Big Chief</character>
    </cast>
  </film>
  . . .
</cartoons>
That would certainly do it. The tag names are meaningful, which is handy when it comes time to retrieve the data. The nested structure organizes each concept into a hierarchy that makes sense: characters belong to a cast, which is one aspect of a film, along with title, release date, and running time. Nicely done, but in a sizable collection, this particular arrangement might come across as bulky. Is there a way to trim it down? Sure thing. Remember that XML allows you to create your own attributes, so you have the option of rearranging the furniture along these lines:
<cartoons> <film title="I Yam What I Yam" releaseDate="September 29, 1933"runningTime="6 min"> <cast> <character name="Popeye" /> <character name="Olive Oyl" /> <character name="Wimpy" /> <character name="Big Chief" /> </cast> </film> . . . </cartoons>
The exact same information is conveyed. The only difference now is that some of the data has been shifted to tag attributes, or attribute nodes, rather than tags. HTML provides the same mechanism, by the way. Consider the src attribute of an <img> tag (<img src="someImage.jpg" />). All it does here is change how the data would be retrieved, as you'll see in the "Using E4X syntax" section of this chapter. Which approach is better? Honestly, the choice is yours. It's not so much a question of "better" as it is what best matches your sense of orderliness. Ironically, this open-ended quality, which is one of XML's strongest assets, is the very thing that seems to scare off so many XML freshmen.
Note
Working with and structuring an XML document follows the first principle of web development: "No one cares how you did it. They just care that it works." Find what works best for you, because in the final analysis, your client will never pick up the phone and say, "Dude, that was one sweetly structured XML document you put together."
Folks, this is a bit like a ceramics class. As long as you're careful around the kiln, no one can tell you whose vase is art and whose isn't. Just work the clay between your fingers, let a number of shapes mull around your noggin, and then form what you have into a structure that appeals to you. While you're at it, keep a few rules in mind:
If you open a tag, close it (
<tag></tag>).If a tag doesn't come in two parts—that is, if it contains only attributes, or nothing at all—make sure it closes itself (
<tag />).Close nested tags in reciprocating order (
<a><b><c /></b></a>is correct, but<a><b><c /></a></b>lights your pants on fire).Wrap attribute values in quotation marks (
<tag done="right" />, <tag done=wrong />).
The Popeye example we just discussed would be saved as a simple text file with the .xml file extension, as in popeye.xml.
Now that our introductions have been made, let's get social.
Note
Feel free to use a text editor such as WordPad on the PC or TextEdit on the Mac to create your XML files. Just be sure you add the .xml extension to the file's name. If you have Dreamweaver CS4, that's even better, because it offers tools like code completion to speed up your workflow.
The ActionScript required for loading an XML document isn't especially involved. You'll need an instance of the XML and URLLoader classes, and, of course, an XML document. In our case, the document will always be an actual XML file, although XML documents can be built from scratch with ActionScript.
Open the LoadXML.fla file that accompanies this chapter. Click into frame 1 of the scripts layer and open the Actions panel to see the following code:
var xmlDoc:XML = new XML();
var loader:URLLoader = new URLLoader();
var req:URLRequest = new URLRequest("popeye.xml");
loader.load(req);

loader.addEventListener(Event.COMPLETE, completeHandler);
function completeHandler(evt:Event):void {
  xmlDoc = XML(evt.target.data);
  trace(xmlDoc);
};
Let's break it down. The first two lines declare a pair of variables: xmlDoc and loader, which point to instances of the XML and URLLoader classes, respectively. The third line declares a third variable, req, which points to an instance of the URLRequest class and specifies the location of the actual XML document.
Line 4 then invokes the URLLoader.load() method on the loader instance, specifying req as the parameter. req's value—"popeye.xml" in this example—is the name of your XML file, including a file path if necessary. This procedure starts the load process, but the data isn't available until the XML document has fully arrived from the server. For this reason, the final block attaches an Event.COMPLETE listener to the loader instance, and then defines the associated function, completeHandler().
In response to a completely loaded document, the event handler function sets the value of the xmlDoc instance to the data property of the target property of the evt parameter passed into the function. That's a mouthful, but you'll understand it when we look at the expression in smaller chunks.
To begin with, the incoming parameter, evt, is an instance of the Event class. As is possible with any other class, Event features properties, one of which is called target. The target property refers to the object that dispatched this event in the first place, which is xmlDoc. Being an instance of the XML class, xmlDoc features a data property, which refers to the text content of the popeye.xml file—in other words, the actual XML data. To let Flash know it should interpret this text content as XML, the expression evt.target.data is wrapped inside a pair of parentheses (()) and preceded by XML. This is called casting, where one data type (String) is converted to another compatible type (XML), and the expression is passed to the xmlDoc variable. At this point, the text file's XML tags become a "living XML object" inside the SWF, accessible via the xmlDoc variable.
To prove it with this sample, a trace() function sends the full set of Popeye nodes to the Output panel. Test the movie and compare the Output panel's content to the popeye.xml file itself, which you can open with Dreamweaver CS4 or any simple text editor.
The preceding sample code will serve as the basis for all loading for the rest of the chapter. It's really that simple. Even better, ActionScript 3.0 makes it just as easy to actually use XML, so let's jump right in.
In ActionScript 2.0, interacting with an XML class instance was a bit like groping in the dark with your toes for matching socks (and it's hard enough to sort laundry with the lights on!). This was because of the way XML nodes were accessed once loaded, which wasn't by the practical tag names supplied earlier in the chapter.
Until Flash CS3 (and therefore ActionScript 3.0) arrived on the scene, XML in Flash was not up there on the list of "cool things I really need to do." In fact, many designers and developers (one of the authors among them) regarded the use of XML as being similar to the long walk to the principal's office in grade school. The walk was so painful because you just knew your parents were about to be involved, and a world of grief was about to be opened on you.
Readers familiar with Flash XML prior to CS3 will doubtless groan to remember obtuse expressions, such as xmlInstance.firstChild.firstChild.childNodes[2]. Flash developers used properties like firstChild and childNodes because they had to, not because it was fun. Then there was the now defunct XMLConnector component, which complicated things more than it simplified the process. ActionScript 3.0 does away with this groping, thanks to something called E4X. Hey, hear that whooshing noise? That's the sound of everyone dashing to meet this new kid in the neighborhood, the one with the really cool bike.
What is E4X, and what makes it so good? Seemingly named after an extra from a George Lucas feature, those three characters form a cutesy abbreviation of ECMAScript for XML. It's an Ecma International specification that has been around for quote a while, but provides a completely new, simplified way to access data in an ActionScript 3.0 XML instance.
Note
What's ECMA? The letters stand for European Computer Manufacturers Association, which was formed in 1961. They got together a few years back to devise the ECMAScript Language Specification, which is the basis for JavaScript and ActionScript. They have moved quite beyond their computer roots and, today, the organization is officially known as Ecma International.
In E4X, element nodes are referenced by the name you give them. Paths to nested elements and attributes are easily expressed by a neatly compact syntax of dots (.) and at symbols (@). This syntax closely matches the dot-notation pathing you're familiar with from the Twinkie example in Chapter 4.
Let's see how it works. If you haven't done so already, open the LoadXML.fla file in this chapter's Exercise folder. Click into frame 1 of the scripts layer and open the Actions panel to reveal the ActionScript. The trace() function at line 9 is about to illustrate a number of dynamite E4X features.
Testing the movie as it stands puts the full XML document's contents into the Output panel. So far, so good. But if you don't care about the root element, <cartoons>, and simply want to see the <film> elements, update the trace() line to read trace(xmlDoc.film);. Once you do that, test the movie again. This time, the <cartoons> tag doesn't show, because you're accessing only its children.
To view <film> elements individually, use the array access operator, [], and specify the desired element, starting your count with 0:
trace(xml.film[0]);
// displays the first <film> element (I Yam What I Yam)
// and its children

trace(xml.film[1]);
// displays the second <film> element (Strong to the Finich)
// and its children
Now, what about attributes? To see those, just precede an attribute's name with the @ symbol as part of your dot-notation path reference. For example, if you want to see the title attribute of the first <film> element, type the following:
trace(xmlDoc.film[0].@title);
To see the second <film> element's title, substitute 0 with 1; to see the third, substitute 1 with 2; and so on. Based on this pattern, the last element's title attribute would be xmlDoc.film[4].@title. But we know to use the number 4 only because we're aware how many <film> elements there are. What if we didn't know? In that case, it helps to understand exactly what you're getting back from these E4X results. What you're getting are instances of the XMLList class, and that means you can invoke any of the methods that class provides on these expressions.
For example, you've already seen that the expression xmlDoc.film returns a list of all the <film> elements. That list is a bona fide XMLList instance. So, by appending an XMLList method—say, length()—to the expression, you get something useful (in this case, the length of the list, which is 5). We know that in this context, counting starts with zero, so to see the title attribute of the last <film> element, put the following somewhat complex expression inside the array access operator ([]):
trace(xmlDoc.film[xml.film.length() - 1].@title);
It may look a little scary, but it isn't when you reduce it to its parts. The expression xmlDoc.film.length() - 1 evaluates to the number 4, so what you're seeing is as good as actually using the number 4.
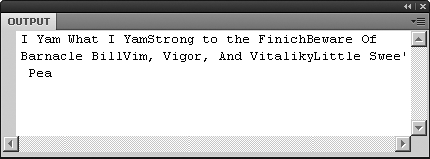
To see the title attribute of all <film> elements, drop the array access operator altogether:
trace(xmlDoc.film.@title);
In the Output panel, you'll see that the combined results run together, as shown in -Figure 13-1. This is because these attributes don't have any innate formatting. They aren't elements in a nested hierarchy; they are just individual strings.
In this situation, another XMLList method can help you out. To make each title appear on its own line, append toXMLString() to the existing expression:
trace([email protected]());
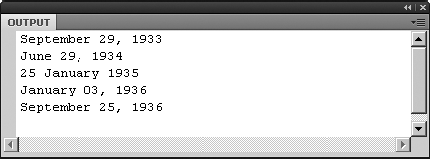
Swap title for the releaseDate attribute, as follows:
trace([email protected]());
As shown in Figure 13-2, you'll see release dates instead of titles in the Output panel.
What about looking at a list of the cast members? Viewing individual cast members is just as easy. Update the trace() function to look like this:
trace(xmlDoc.film[0].cast.character[1]);
This trace() function instructs Flash to look at the first <film> element's <cast> element, and then pull out that node's second <character> element, which happens to be Olive Oyl. For fun, and to see how easy E4X makes things for you, contrast the preceding intuitive reference with its ActionScript 2.0 equivalent: xmlDoc.firstChild.firstChild.firstChild.childNodes[1]. Which would you rather use?
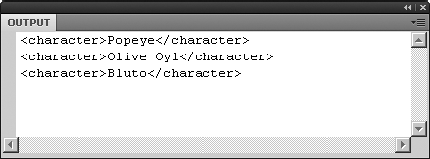
Moving back to the kinder, gentler world of ActionScript 3.0, update the trace() function as follows to see the whole cast of the third film:
trace(xmlDoc.film[2].cast.character);
This time, you get elements again, complete with their tag markup, as shown in Figure 13-3. This is just like tracing xmlDoc.film earlier, where the Output panel showed <film> elements and their descendants.
In the previous section, when you used the array access operator—xmlDoc.film[0].cast.character[1]—Flash gave you the immediate descendant of the <character> tag you specified, which was a text node (that is, just a string). Here, you're looking at a list of element nodes and their text node descendants. If you want just the text nodes, you can use another XMLList method, descendants(), to retrieve what you're after. You'll see an example in just a bit. First, make sure you grasp the idea that when you see the expression <character>Popeye</character>, you're not just looking at one node; you're looking at two.
Both the tag (<character>) and its content (Popeye, in this case) comprise the element and text nodes mentioned earlier. The W3C XML recommendation actually specifies a dozen node types, but ActionScript 3.0 supports only a few of them: element, attribute, text, comment, and processing instruction. (And this is actually a relief, because knowing those few lets you easily pull out a tag's content.)
Add the descendants() method to the end of your E4X expression to see it in action:
trace(xmlDoc.film[2].cast.character.descendants());
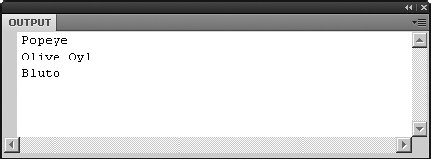
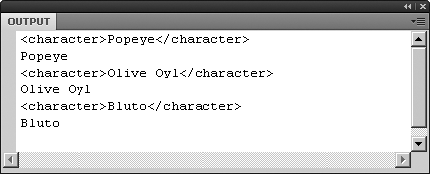
Like attributes, text nodes don't have any inherent formatting. To put each string on its own line, slap the toXMLString() method on the end:
trace(xmlDoc.film[2].cast.character.descendants().toXMLString());
The result is exactly the sort of thing you might use to populate a text field, as shown in Figure 13-4.
Note
Remember that we are dealing with text in this example. Although the re-sults may look rather plain, you can format and manipulate them in a number of ways, as outlined in Chapters 6 and 12.
To see how the descendants() method works, try it out at the end of the expression xmlDoc.film.cast, like this:
trace(xmlDoc.film[2].cast.character.descendants());
The result might surprise you: not just immediate descendants, but all descendants are shown (see Figure 13-5). The first child, <character>Popeye</character>, appears at the top of the list. This includes the <character> element along with its own "offspring," a text node. Next on display is the first grandchild, Popeye (the first child's child). After that, the second child, the second child's child (that is, the second grandchild), and so on. The list makes sense, but if you were expecting only a list of immediate children, well, now you know better.
All right, we'll give you one more illustration of E4X (we've saved the best for last). The popeye.xml file included with this chapter's Exercise folder files has slightly different runningTime attributes from those shown earlier in the chapter. Instead of a whole phrase, such as 6 min, these attributes show only numbers. Why? Because E4X allows you to evaluate comparisons, so you can filter content based on specific criteria.
Let's say you want to know which films have a running time longer than 6 minutes. Return again to our humble trace() function and update its parameter to the following:
trace(xmlDoc.film.(@runningTime > 6));
The result is a list of the <film> elements whose runningTime attribute is greater than 6, along with all their children (see Figure 13-6).

The parentheses tell Flash that you're intending to filter the returned XMLList instance. Inside the parentheses, the expression is a simple comparison, @runningTime > 6, which in plain English would be, "If you would be so kind, please tell us which <film> elements' runningTime attributes match this criterion." Flash searches every <film> element in the bunch because nothing appears between the word film and the dot that begins the next expression.
What if you want only the title of these films? Try this:
trace(xmlDoc.film.(@runningTime > 6)[email protected]());
The trick to understanding this expression, as always, is to break it into its parts. On its own, each concept is usually easy enough to understand. These concepts—these subexpressions—are separated by dots. A blow-by-blow account of the preceding trace() goes like this:
xmlDoc.filmreturns anXMLListinstance composed of all the<film>elements in thexmlDocinstance.Of this list, the expression
.(@runningTime > 6)filters only those<film>elements whoserunningTimeattribute is greater than the value6.The subexpression
.@titlerefines the results further by pulling only thetitleattribute.Finally,
.toXMLString()invokes theXMLList.toXMLString()method to clean up the results.
See the LoadXML--E4XFiltering.fla file in the Chapter 13 Complete folder for a working example of the preceding E4X filtering.
True, we already said "one more illustration of E4X," and that's the preceding one. If you're in a hurry to dispense with all this theory and jump head-first into a practical application, we tip our fedoras and invite you to make a beeline for the next section. But we figure at least a handful of you are wondering if it's possible to return film titles based on who appears in the cartoon. Let's pop open a can of spinach and take a gulp.
Open the LoadXML-E4XBonusRound.fla file that accompanies this chapter, and click into frame 1 of the scripts layer. Most of the ActionScript should look familiar. The important part appears in lines 9 through 12, because it introduces three things: an operator called the descendant accessor (..), a new XML method called parent(), and the for each..in statement:
var node:XML
for each (node in xmlDoc..character.(descendants() == "Bluto")) {
  trace(node.parent().parent().@title);
}
The for each..in statement was introduced to ActionScript 3.0 thanks to the E4X specification. A similar ActionScript statement, for..in, has been available for quite some time. You point for..in at an object, and it loops through that object's properties—however many properties there happen to be. But note that for..in loops on the properties' names, rather than the properties themselves. This can either be nifty or frustrating, depending on your needs. In contrast, the new for each..in statement loops on an object's actual properties, which is great for what we need in this particular endeavor.
To understand the mechanism of this E4X filtering, let's start with a skeleton and slowly build up to the skin. Here are the bones:
for each (someProperty in someObject) {
  // do something
}
The someObject in question is the hardest part of this equation, but based on what you've seen, it shouldn't be impenetrable. This object is an XMLList instance determined by the expression xmlDoc..character.(descendants() == "Bluto"). Up to this point, you would have used the longhand version to retrieve the same list. The longhand version looks like this:
xmlDoc.film.cast.character.(descendants() == "Bluto");
This version is still as valid as ever. But the descendant accessor (the double dots) lets you skip past the intermediate nodes—film and cast—straight to the element you're after. Pretty slick! Stepping through the subexpressions piece by piece, then, we get the following:
xmlDoc..character: All<character>elements in thexmlDocinstance, no matter to which intermediate nodes they belong..(descendants() == "Bluto"): Of that list, a comparison of the descendants of each<character>element against a particular string. These descendants are text nodes that happen to represent character names, and the comparison looks for a match with the string"Bluto". The returnedXMLListinstance is thesomeObjectfrom our skeleton.
That gives us the following:
var node:XML; for each (someProperty inxmlDoc..character.(descendants() =="Bluto")){ // do something }
The replacement for our stand-in someProperty is an XML instance, stored in an arbitrarily named variable, node.
var node:XML;for each (nodein xmlDoc..character.(descendants() == "Bluto")) { // do something }
All this means is that the for each..in statement is going to make laps around the node list returned by the comparison expression. On each lap, it will update the value of that node variable to the latest XML node it finds in that list. The node variable becomes the XML object in question. It's an XML reference, which means you can work your recently acquired E4X magic on it.
This is where the parent() method comes into play. Remember that at this point, you're dealing with an element node (<character>) whose descendant matches the string "Bluto". As an XML instance, the <character> node has access to the XML.parent() method, which pretty much works in the same way as the MovieClip.parent property. The parent of <character> is <cast>, and the parent of <cast> is <film>. Given that point of view, the title attribute, referenced with the @ symbol, makes sense:
var node:XML;
for each (node in xml..character.(descendants() == "Bluto")) {
  trace(node.parent().parent().@title);
}In spite of everything you've just seen, there will come a day when you pull on your E4X wizard hat, roll up your oversized E4X wizard sleeves, wave the wand . . . and nothing happens. You won't see anything in your XMLList instance. It won't be because you've done anything wrong, only that you've omitted something: the acknowledgment of an occasionally present XML namespace. In XML, namespaces are a way to filter or label certain elements in order to control their visibility. Namespaces basically give elements a secret handshake, and you can't see the elements unless you know it.
XML documents don't require namespaces, but many use them, including iTunes playlists, RSS feeds, and even Flash. In fact, let's use a bit of XML content that was generated by the Commands
<Motion duration="24" xmlns="fl.motion.*" xmlns:geom="flash.geom.*"xmlns:filters="flash.filters.*"> <source> <Source frameRate="24" x="150" y="120" scaleX="1" scaleY="1"rotation="0" elementType="movie clip" symbolName="Symbol 1"> <dimensions> <geom:Rectangle left="0" top="0" width="80" height="60"/> </dimensions> <transformationPoint> <geom:Point x="0.5" y="0.5"/> </transformationPoint> </Source> </source> <Keyframe index="0" tweenSync="true"/> </Motion>
In XML, namespaces are defined by xmlns attributes—in this case, in the <Motion> element. Of the three defined, two have identifiers (geom and filters) and one doesn't, which means it's there but doesn't have a name. Given what you know, and assuming the preceding XML is loaded into an XML instance named xmlDoc, you would expect to see the contents of the <Source> element with an E4X expression like this:
trace(xmlDoc..Source);
The problem is that if you test that—you can use CopyMotion.fla in the Exercise folder—you'll find that the Output panel does not display anything. To get your data back, you'll need to use the Namespace class, which is easy to do. Here's how:
In
CopyMotion.fla, click into frame 1 and open theActionspanel to view the full code andtrace()function:var xmlDoc:XML = new XML(); var loader:URLLoader = new URLLoader(); var req:URLRequest = new URLRequest("CopyMotion.xml"); loader.load(req); loader.addEventListener(Event.COMPLETE, completeHandler); function completeHandler(evt:Event):void { xmlDoc = XML(evt.target.data); trace(xmlDoc..Source); };Enter the following new ActionScript just before the
trace()function:var ns:Namespace = new Namespace("fl.motion.*");
This declares a variable, ns, which is set to an instance of the Namespace class. This instance is fed the value portion of the XML document's first mxlns attribute ("fl.motion.*") as a parameter.
At this point, that
nsvariable gives you a prefix you can use to unlock your data. Use the name qualifier operator (::) between thensvariable and the node it "unlocks."var ns:Namespace = new Namespace("fl.motion.*"); trace(xmlDoc..ns::Source);Test the movie, and your
<Source>element comes out of hiding, as shown in Figure 13-7.
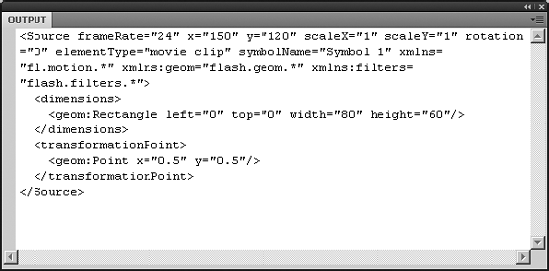
If you look carefully at the results in the Output panel, you'll see that the <Source> element now contains additional attributes not in the original XML document. Those are the namespaces. Why they show up here is one of the mysteries of life. But at least you won't be caught by surprise if you run into this sort of XML content.
If you don't know an
xmlnsattribute's value before writing your ActionScript, you can use theXML.namespace()method to grab the namespace currently in use. Replace the"fl.motion.*"parameter you entered just a moment ago with the following:var ns:Namespace = new Namespace(
xmlDoc.namespace()); trace(xmlDoc..ns::Source);Test again, and you'll see the same
Outputpanel content, even though ActionScript supplied the namespace information for you.
Typically, XML documents are used to define MP3 playlists or images for a slide show. You'll do just that sort of thing in Chapter 14. Here, to demonstrate the versatility of XML data, you will use it to draw shapes. Think of it as -XML-driven alphabet soup, drawn by ActionScript.
Open the
XMLDrawing.flafile from theExercisefolder for this chapter. Its partner is thedrawings.xmlfile located in the same folder, so open that in your favorite text editor.In the Flash document, click frame 1 of the
scriptslayer and open theActionspanel to review the following partially completed ActionScript:var xmlDoc:XML = new XML(); var loader:URLLoader = new URLLoader(); var req:URLRequest = new URLRequest("drawings.xml"); loader.load(req); loader.addEventListener(Event.COMPLETE, completeHandler); function completeHandler(evt:Event):void { xmlDoc = XML(evt.target.data); drawLetters(); };
Everything should be familiar except for the drawLetters() reference, which is a custom function you're about to write.
Place your cursor at the end of the existing code, hit Enter (Return) a couple times, and then type the following new ActionScript:
function drawLetters():void {
  var word:Sprite = new Sprite();
  addChild(word);

  var letterCount:int = xmlDoc.letter.length();
  var pointCount:int;
  var i:int;
  var j:int;
This is the beginning of your function. The function keyword makes the declaration, and because this function doesn't provide a return value, it's typed as :void.
Right off the bat, you have a number of variables. The first is a Sprite instance, stored in a variable named word. Think of a sprite as a low-overhead version of a movieclip. In this case, it's just a surface to draw on, and it has no need for a timeline of its own, which is what a MovieClip instance would provide. The addChild() method adds word to the main timeline's display list, which ensures that your sprite will be visible when you start filling it with shapes.
After that, you have a handful of variables used for counting: letterCount 1 is an integer (int) number that takes is value from the E4X expression xmlDoc.letter.length();. So what does xmlDoc.letter.length(); refer to? Take a look at the actual XML document, and you'll see it right away:
<word>
  <letter character="F" color="0xFF0000">
    <coords x="0" y="0" />
    <coords x="30" y="0" />
    <coords x="30" y="10" />
    <coords x="10" y="10" />
    <coords x="10" y="20" />
    <coords x="20" y="20" />
    <coords x="20" y="30" />
    <coords x="10" y="30" />
    <coords x="10" y="50" />
    <coords x="0" y="50" />
    <coords x="0" y="0" />
  </letter>
  <letter character="L" color="0x00FF00">
    <coords x="0" y="0" />
    <coords x="10" y="0" />
    <coords x="10" y="40" />
    <coords x="30" y="40" />
    <coords x="30" y="50" />
    <coords x="0" y="50" />
    <coords x="0" y="0" />
  </letter>
  . . .
</word>
The E4X reference to xmlDoc.letter gives you an XMLList list of the <letter> elements, and the length() method tells you how many of those elements are contained by the root element, <word>. The remaining variables in your function are also declared as int, but aren't given values yet.
Type the following new ActionScript after the existing code:
var letter:Sprite;
var node:XML;
for (i = 0; i < letterCount; i++) {
  node = xmlDoc.letter[i];

  letter = new Sprite();
  letter.graphics.lineStyle(1, 0x000000);
  letter.graphics.beginFill(node.@color);
Here you have two more variables: letter and node. The letter variable is declared as another Sprite instance, and node as another XML instance. These variables will repeatedly update to different values, thanks to something called a for loop, which immediately follows.
The for statement gives you a way to perform something more than once, and the setup occurs in three parts:
The
ivariable is set to0.A comparison expression will keep this loop going while the value of
iis less thanletterCount, which you set in step 3.iwill be incremented by1(that's what++does) every time theforloop runs another lap.
So, what is this loop going to do? On every lap, it updates the node variable to the E4X expression xmlDoc.letter[i]. That may look new, but you've seen this. The only thing different is that the array access operator ([]) is being fed the value of i, rather than a hard-coded number.
Once the value of node is determined, the value of letter is set to a new Sprite instance, and its graphic property is referenced. All sprites and movieclips have a graphics property, which points to an instance of the Graphics class associated with that particular sprite or movieclip. The Graphics class lets you draw things, and the last two lines configure the "pen." First, its stroke width is set to 1 (very thin) and its color to 0x000000 (black). Second, its fill is set to whatever color value is specified by the color attribute of the current <letter> element referenced by the node variable (beginFill(node.@color);).
With the pen ready, you're now prepared to draw. That's where a second for loop comes in.
Type the following new ActionScript after the existing code:
pointCount = node.coords.length();
for (j = 0; j < pointCount; j++) {
    letter.graphics.lineTo(node.coords[j].@x, node.coords[j].@y);
}
Here, the pointCount variable declared in step 3 is finally given a value. What value? Why, the number of <coords> elements inside the current <letter> element (again, as referenced by the node variable). This second for loop runs its laps inside the first one. Basically, the for loop that uses i runs through the <letter> elements, and the one that uses j runs through the <coords> elements.
All this inner loop does is invoke the lineTo() method as often as necessary, taking its x and y cues from the E4X expressions node.coords[j].@x and node.coords[j].@y, respectively. From right to left, you're asking for the x (or y) attribute of the current <coords> element of the current <letter> element (as referenced by node). In the XML document, these coordinates describe the points necessary to draw a rather blocky set of letters.
To complete the function, type the following ActionScript after the existing code:
letter.graphics.endFill();
    letter.x = i * 40;
    word.addChild(letter);
  }
  word.x = stage.stageWidth / 2 - word.width / 2;
  word.y = stage.stageHeight / 2 - word.height / 2;
}
Following after the inner for loop, the fill is closed with the endFill() method. The next line, letter.x = i * 40, updates the Sprite.x property of the current sprite—that is, the sprite into which you've just drawn a letter shape—and the sprite is added to the display list of word, which makes it a child display object of that sprite.
Why update the x property of the "letter" sprites? Because you don't want them stacked on top of each other. On its first lap through the for loop, the value of i is 0. Because 0 times 40 is 0, the first letter is positioned flush left inside the container sprite, word. On its second lap, the value of i is 1, which positions the second letter at 40 pixels in. On the third lap, the third letter is positioned at two times 40 pixels in, and so on.
Because each letter is added to the display list of word, all the letters can be moved as a single group. This happens in the last two lines, in which the x and y properties of word are set to half the width or height of the stage, minus half the width or height of word itself. Put simply, the word sprite is centered horizontally and vertically.
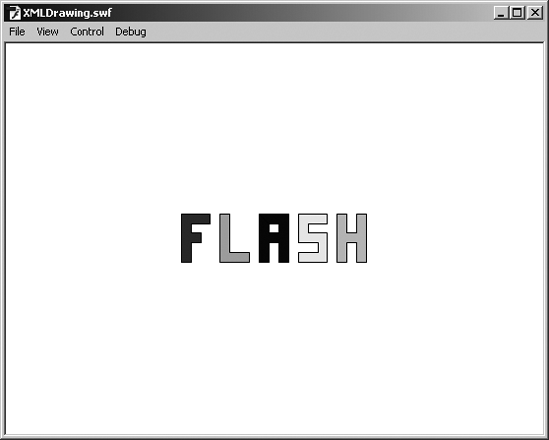
Test the movie. You will see the word
FLASHin block letterforms, whose coordinates and fill colors were determined by an XML document, as shown in Figure 13-8.Close the SWF. Here comes the cool part.
Switch over to the XML document, rearrange the
<letter>elements, and save the XML file. For example, just for a laugh, you might want to delete all of the elements except for the ones that drawAandH, and then swap them like this:<word> <letter character="H" color="0x00FFFF"> <coords x="0" y="0" /> <coords x="10" y="0" /> <coords x="10" y="20" /> <coords x="20" y="20" /> <coords x="20" y="0" /> <coords x="30" y="0" /> <coords x="30" y="50" /> <coords x="20" y="50" /> <coords x="20" y="30" /> <coords x="10" y="30" /> <coords x="10" y="50" /> <coords x="0" y="50" /> <coords x="0" y="0" /> </letter> <letter character="A" color="0x0000FF"> <coords x="0" y="0" /> <coords x="30" y="0" /> <coords x="30" y="50" /> <coords x="20" y="50" /> <coords x="20" y="30" /> <coords x="10" y="30" /> <coords x="10" y="50" /> <coords x="0" y="50" /> <coords x="0" y="0" /> <coords x="10" y="10" /> <coords x="20" y="10" /> <coords x="20" y="20" /> <coords x="10" y="20" /> <coords x="10" y="10" /> </letter> </word>Close the Flash authoring environment altogether.
Find the SWF you created just a moment ago—
XMLDrawing.swf—and double-click it to test the movie without recompiling.
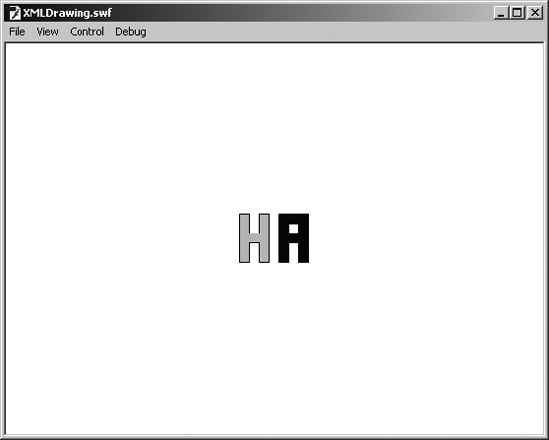
As shown in Figure 13-9, Flash laughs back. And you just changed the content of a SWF, in a dramatic way, without changing a jot of ActionScript!
In this chapter, we gave you the absolute basics of XML use in Flash. On the surface, it may not seem like much. However, what we have presented in this chapter forms the foundation for complex Flash projects ranging from video pickers, MP3 players, and portfolio sites, to e-commerce applications. In this chapter, you have discovered the following:
The relationship between an XML document and Flash CS4
How to retrieve and filter XML data using E4X syntax
How to dynamically draw shapes with XML
The most important point you need to take away from this chapter is the sheer flexibility of XML in your Flash design and development efforts. You can make your movies expand or contract effortlessly by simply adding to or subtracting from the XML document being used by the movie. This is the true meaning of dynamic.
Speaking of dynamic, you're about to enter the "Building Stuff" chapter, much of which collaborates with XML. Turn the page to start building.