
Up to this point in the book, you have created quite a few projects using images, text, audio, video, and other media. We bet you're feeling pretty good about what you've accomplished (you should!), and, like many who have reached your skill level, you are wondering, "How does all of this hang together?"
In this chapter, we will bring together the various skills and knowledge you have developed, and use them to create some rather interesting projects. We are going to start slowly and show you how to build a preloader, and then move through a slide show, an MP3 player, and finish with a full-bore video player. Some of these are quite complicated projects, but if you have reached this point in the book, you are ready to develop some Flash "chops" and explore what you can do with your newfound skills.
Here's what we'll cover in this chapter:
Loading visual content from outside the SWF
Preloading a movie with heavy internal content
Creating a slide show using external images and XML
Creating a custom MP3 player
Creating a custom video controller
The following files are used in this chapter (located in Chapter14/ExerciseFiles_Ch14/Exercise/):
Loading.flatoBeLoaded.swftoBeLoaded.pngBeachTrip.flabeach01.jpg–beach05.jpgNASATrip.fla798_01.jpg−798_08.jpgslideshow.xmlTinBangs.flacontrols.flaplaylist.xml(MP3 player version)WhiteLies(Timekiller).mp3YoungLions.mp3YourSkyIsFalling.mp3VideoPlayer.flaplaylist.xml(video player version)InkSong.mp4InspectorGadget.flvPeterWolf.flv
The source files are available online from either of the following sites:
http://www.FoundationFlashCS4.comhttp://www.friendsofED.com/download.html?isbn=9781430210931
Flash has a potentially bad habit that drives people crazy. In cases where everything in a movie is packed into the first few frames—and especially in single-frame movies—the SWF can take an awfully long time to display. Why? Because Flash Player loads content one frame at a time, and when a SWF's first frame is heavy, the rest of the movie suffers. It's even more interesting in cases where Export for ActionScript is selected for library assets, because those items are included in the movie's first frame, in a behind-the-scenes way, even if you don't place them there yourself (Flash does it for you automatically). This should explain to you why, when you hit certain websites, you're slugged with an interminable wait, involving fingers drumming on the mouse or your desk and audible sighs as you wait for the movie to start.
One useful solution is to remove your heaviest assets—large images, audio, and video files—and use ActionScript to load them at runtime. This way, the rest of your content—the lighter stuff, including text and vector artwork—displays almost immediately, while the heavy stuff streams into the SWF from your server. Just keep in mind that even the light stuff may need a few seconds to load. But at least your audience will be looking at something, and even the mere perception of at least something happening works PR wonders.
The dynamic loading we're talking about is accomplished through the use of the Loader class, new to ActionScript 3.0 and introduced in Flash CS3. (To be sure, ActionScript 2.0 and earlier also supported dynamic loading, but different approaches were required for different kinds of external files. ActionScript 3.0 makes it more consistent, and therefore simpler.) You can use the Loader class to load SWF files or image files (JPG, GIF, or PNG) into a SWF through the use of the load() method, and then take action when the requested files arrive.
To see how all of this works, open the
Loading.flafile in theExercise/Preloaderfolder for this chapter. You'll see there's a single movieclip on the stage; this movieclip is the only object in the library. We have given this symbol the instance nameclip.Select the first frame of the
scriptslayer, open theActionspanel, and add the following code:var loader:Loader = new Loader(); addChild(loader); //clip.addChild(loader); loader.contentLoaderInfo.addEventListener(Event.COMPLETE,
completeHandler); function completeHandler(evt:Event):void { //clip.x = 50; //clip.y = 50; }; loader.contentLoaderInfo.addEventListener(ProgressEvent.PROGRESS, progressHandler); function progressHandler(evt:ProgressEvent):void { trace(evt.bytesLoaded); }; var req:URLRequest("toBeLoaded.swf"); //var req:URLRequest("toBeLoaded.png"); loader.load(req);
The first line of code creates an instance of the Loader class and stores it in a variable named loader for easy reference. Because this Loader instance is about to load visual content, it's not enough to merely create the object. You also need to add it to a display list, which is accomplished by the second and third lines. Eventually, you'll need only one of the two addChild() lines (notice that the second one is currently commented out, which means it will be ignored by Flash Player), but here's what each does:
The first one (
addChild(loader);) addsloaderto the display list of the main timeline.The second one (
clip.addChild(loader);) addsloaderinstead to the display list of theclipmovieclip.
In just a moment, you'll see the difference between these two display lists.
The next two code blocks demonstrate a pair of event handlers. The first one listens for, and responds to, an Event.COMPLETE event, meaning that the requested file has fully loaded. The second one handles ProgressEvent.PROGRESS, which is dispatched repeatedly while the requested file is loading. The innards of the completeHandler() function are commented out for the time being, but you'll see how they're used soon. In the progressHandler() function, a trace() function tells the Output panel how many bytes have been loaded for the requested file.
Note
Handling Loader events is a bit different from what you've seen elsewhere in this book. With movieclips and button symbols, for example, the addEventListener() method is referenced directly by way of the symbol's instance name. With Loader, that method is routed through a contentLoaderInfo property. What's that? Nothing more than an instance of the ContentLoaderInfo class, which is included automatically when you create your Loader instance. The ContentLoaderInfo class contains information about Loader's content, such as the events we're using here.
The following two lines tell loader which file to request: a SWF or a PNG. The PNG request is commented out at the moment. The last line uses the req variable to summon the file.
Now test the movie. Two things will happen: you'll see a haloed guru in the container SWF's upper-left corner and you'll see a few numbers in the
Outputpanel. Those numbers show how much oftoBeLoaded.swfwas loaded during that particular occurrence ofProgressEvent.PROGRESS. You'll see only a few numbers, because the requested SWF loads very quickly from your hard drive.Close the SWF and return to the
Actionspanel. Comment out lines 2 and 16://addChild(loader); . . . //var req:URLRequest("toBeLoaded.swf"));And uncomment all the lines that were previously commented (just remove the double slashes at the beginning of each line other than 2 and 16).
At this point, you're adding loader to the display list of clip instead of the main timeline, you're telling clip to reposition itself when its content loads, and you're requesting the PNG file instead of the SWF.
Test the movie again. Your results should look like Figure 14-1.
This time, the PNG is loaded (it looks identical; only the file format is different). The PNG is added to the stand in movie clip, which is positioned at 50 pixels to the right and 50 pixels down from the upper-left corner of the stage. The Output panel shows considerably more numbers than last time. In addition, a normally hidden pane is now showing in the upper half of Flash Player. Hang tight to see why that's happening, because it's a really neat tool.
Let's review the display list concept. In the first case, the requested file is loaded into the main timeline, which positions it in the stage's upper-left corner, unless you tell it otherwise with code. In the second case, the file is loaded into a movieclip, which you can position by hand. Positioning by hand means you can get a rough idea beforehand where your files will load—though you can certainly use ActionScript to reposition your movieclip containers, as shown in the completeHandler() function. That stand in container doesn't need to have anything in it, by the way. The outline and the words "stand-in" in the movieclip's text field (visible in the sample file) are there for illustrative purposes. Usually, your container will be an empty movieclip symbol.

Now, why is the Output panel showing so many numbers in Figure 14-1? That happens because Flash lets you simulate various modem speeds when you test downloads in the authoring environment. After you launch the SWF (Control
The beauty of the Loader class is that you need only one instance to load as many SWFs or images as you want, provided you're displaying only one per frame at a time. (If you plan to display more than one per frame, you'll need one Loader instance per SWF or image—just declare the necessary number of variables and give each its own name.) Let's see how you can reuse a single Loader instance numerous times.
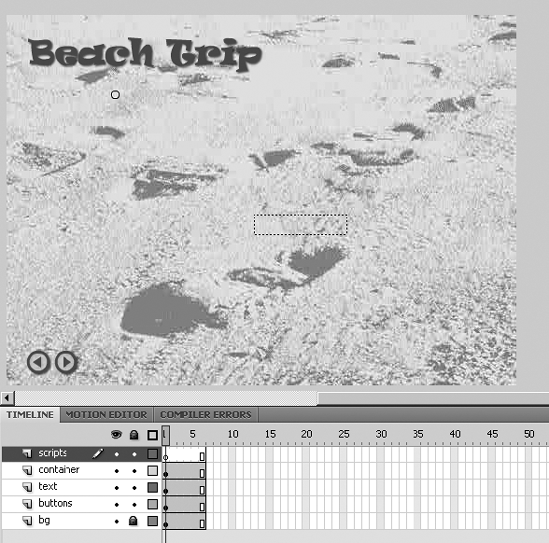
Open the
BeachTrip.flafile from theExercise/Preloaderfolder for this chapter. Inside, you'll see five layers in the main timeline, as shown in Figure 14-2:scripts, container(for the movieclip that holds the loaded images),text, buttons, andbg(for the background image stored in the library). Click around to get familiar with the FLA. The button symbols have the instance namesbtnPrevandbtnNext. The text field in the center is dynamic, and it has the instance nametfLoadProgress. Thecontainermovieclip is empty, so it appears as a small circle. Click that circle, and you'll see that its instance name iscontainer.Click info frame 1 of the
scriptslayer and type the following ActionScript:stop(); var loader:Loader = new Loader(); var req:URLRequest = new URLRequest(); container.addChild(loader); // Loader events loader.contentLoaderInfo.addEventListener(ProgressEvent.PROGRESS,
progressHandler);function progressHandler(evt:ProgressEvent):void { var percent:int = Math.round(evt.bytesLoaded / evt.bytesTotal * 100); tfLoadProgress.text = percent.toString() + "%"; } loader.contentLoaderInfo.addEventListener(Event.COMPLETE,completeHandler); function completeHandler(evt:Event):void { if (currentFrame != totalFrames) { enableButton(btnNext, true); } }
This is a multiframe movie, and we want it to stop dead in its tracks in frame 1. That explains the MovieClip.stop() method in the first line. Remember that you don't need an object reference prefix here, because Flash understands that the movieclip you're referring to is the main timeline. Next is the familiar Loader instance, again stored in a loader variable. In this case, the URLRequest instance is declared (req), and even instantiated (new URLRequest()), but not yet provided with a file name. That's going to happen in frames 2 through 6. To ensure that loaded images are placed in container's display list, loader is added as a child of container.
These three lines are followed by two event handlers, listening for ProgressEvent.PROGRESS and Event.COMPLETE, as before. The difference is that this progress event handler is sending its information to a dynamic text field (tfLoadProgress), rather than the Output panel. The complete handler is calling a custom function, enableButton(), which you'll write in just a moment. First, let's go over how this progress handler works.
In the previous exercise, you saw the ProgressEvent.bytesLoaded property referenced in terms of an evt parameter. That's happening again here. Additionally, you're making use of the bytesTotal property of the same ProgressEvent instance. An integer variable, percent, is declared and set to an arithmetic expression: evt.bytesLoaded / evt.byteTotal * 100. This calculates how many bytes have been loaded, divided by how many bytes there are total, multiplied by 100. This expression is rounded to the nearest integer by the Math.round() method. If there are 20,000 bytes total in the requested file and 10,000 of them have loaded, then the expression effectively means this:
10,000 / 20,000 * 100
Run the numbers, and you'll see that equates to 50, which is halfway (50%) loaded. Because percent is an int (integer) data type—as opposed to a string, as required by the text field—the Object.toString() method is invoked on percent as it is assigned to the text property of the tfLoadProgress text field. (All classes inherit from Object, so all objects inherit a toString() method.) The plus sign (+) concatenates the percent symbol (%) to the string value of percent, and that combined string is displayed in the text field. This way, users can see how much of the currently requested file has loaded as a percentage.
To understand the completeHandler() function, just remember that an if statement evaluates expressions to determine if they're true or false. In this case, two MovieClip properties are compared with the inequality operator (!=), which means "is not equal to." The expression inside the if statement's parentheses is true when the playhead is on any timeline frame but the last one. Only on the timeline's last frame is the value of its currentFrame property not equal to the value of its totalFrames property. Why do we care? In this BeachTrip.fla movie, the user is going to view a handful of JPGs by clicking a set of next and previous buttons. We don't want them to proceed while a requested image is still loading, so the btnNext button will be disabled in each frame until the Event.COMPLETE handler is triggered—on all frames but the last one (because there isn't a next frame after the last frame, of course).
Head back to the
Actionspanel and add the following new ActionScript beneath what's already there:btnPrev.addEventListener(MouseEvent.CLICK, movePrev); btnNext.addEventListener(MouseEvent.CLICK, moveNext); function movePrev(evt:MouseEvent):void { prevFrame(); } function moveNext(evt:MouseEvent):void { nextFrame(); }
This should be pretty familiar. Two button symbols, with the instance names btnPrev and btnNext, are associated with custom functions—event handlers—triggered by MouseEvent.CLICK. These functions are named movePrev() and moveNext(), respectively. Each function invokes either MovieClip.prevFrame() or MovieClip.nextFrame(), as relevant, in order to move the main timeline one frame back or one frame forward.
That takes care of buttons in their active state (they're active by default). What's missing is the custom enableButton() function that causes buttons to become active or inactive as desired.
Add the remaining new ActionScript to frame 1 beneath the code already present:
function enableButton(btn:SimpleButton, isActive:Boolean):void {
  btn.mouseEnabled = isActive;
  if (isActive) {
    btn.alpha = 1;
  } else {
    btn.alpha = 0.5;
  }
}
enableButton(btnPrev, false);
This function accepts two parameters, arbitrarily named btn and isActive. The first parameter refers to a SimpleButton instance (in other words, a button symbol); the second is a Boolean value (true or false). Inside the function, the passed-in button symbol is referenced by the btn parameter. Its SimpleButton.mouseEnabled property is set to the value of the isActive parameter. This makes the button either participate in mouse-related events (true) or ignore them (false). Next, an if statement checks the value of isActive. If true, the button's alpha property is set to 1 (100%)—in other words, fully opaque—otherwise, it's set to 0.5 (50%).
In the last line, this function is actually put to use. It renders the btnPrev button disabled—no mouse events and semitransparent—which makes sense in frame 1, because there's no previous frame to go back to.
Now add keyframes in frames 2 through 6 in the
scriptslayer. You're going to add a few lines of ActionScript to each of these frames, and you'll quickly see the pattern.Click into frame 2, and use the
Actionspanel to enter the following:req.url = "beach01.jpg"; loader.load(req); enableButton(btnPrev, false); enableButton(btnNext, false);
Click in frame 3 and enter this ActionScript:
req.url = "beach02.jpg";
loader.load(req);

enableButton(btnPrev, true);
enableButton(btnNext, false);
For frame 4, enter this code:
req.url = "beach03.jpg";
loader.load(req);

enableButton(btnNext, false);
Frame 5 gets this ActionScript:
req.url = "beach04.jpg";
loader.load(req);

enableButton(btnNext, false);
And finally, add the following code for frame 6:
req.url = "beach05.jpg";
loader.load(req);

enableButton(btnNext, false);
In all cases, the req variable, declared in frame 1, has its URLRequest.url property set to a particular JPG. After that, the Loader.load() method is invoked on the loader instance with req as its parameter. This loads a different JPG for each frame, but in every case, the same loader and req instances do the loading. Because loader was added to the display list of container in frame 1, every JPG will load inside the container movieclip.
In frame 2, btnPrev is disabled (enableButton(btnPrev, false);), because frame 2 represents the beginning of the slide show. The user still shouldn't be allowed to step back to the previous frame. In frame 3, btnPrev is enabled (enableButton(btnPrev, true);), because from that point, the user should be able to move forward and backward. When the user actually clicks the btnPrev button in frame 3, the playhead will move to frame 2, which redisplays the first image and again disables prevButton.
In all frame scripts, btnNext is disabled, which keeps the user from proceeding until the current image's Event.COMPLETE handler is triggered. Remember that this event handler invokes enableButton() and passes it the parameters btnNext and true.
Test your movie and use
View
As an alternative to loading external assets individually, you may want to use ProgressEvent.PROGRESS to inform the user about the load status of the SWF itself. The mechanism that takes care of this is commonly known as a preloader, and it's a fairly easy feat to accomplish. Preloaders can range from simple to incredibly complex. Regardless of the approach taken, the purpose of a preloader is to get something happening within that 15-second window of opportunity and have the user become engaged in the site almost immediately.
Here, you will create a movie preloader, using the yawning parrot animation seen elsewhere in the book. The goal of this exercise is to display the parrot animation when the SWF is visited for the first time, and to skip past that animation when the SWF has already been loaded. The skipping-past part happens because already-viewed SWFs are cached in the user's temporary Internet files, which means the comparison between loaded bytes and total bytes—evaluated here by an if statement in the first three lines of frame 1—sends the playhead past the animation without further ado. On the other hand, when a SWF is being viewed for the first time, the Event.COMPLETE event, which indicates that the SWF itself is fully loaded, is delayed. This allows the playhead to linger on the parrot animation, while a ProgressEvent.PROGRESS handler updates a percentage in the parrot's nested text field. Eventually, the complete event handler ushers the playhead along. Here's how it works:
Open the
NASATrip.flafile in yourExercise/Preloaderfolder for this chapter. Scrub through the timeline and you will see the yawning parrot, and will then be taken through a series of imported photos that collectively weigh over 200KB.Open the library and double-click the
parrotmovieclip to open it in theSymbol Editor. You will notice that we have added the necessary dynamic text field for you, in a box under the parrot (see Figure 14-3). This text field will keep the user informed of load progress.Click the
Scene 1link to return to the main timeline. Select the keyframe in frame 1 of thescriptslayer and open theActionspanel. Type the following code:if (loaderInfo.bytesLoaded >= loaderInfo.bytesTotal) { gotoAndPlay(26); } loaderInfo.addEventListener(Event.COMPLETE,completeHandler); function completeHandler(evt:Event):void { if (currentFrame == 15) { play(); } else { gotoAndPlay(26); } }

Let's take a moment and figure out what's going on, because as familiar as this should look by now, you're still seeing a few curveballs. This time, because the content is all internal to the SWF, you don't need a Loader instance. You're still checking loaded versus total bytes, and still listening for Event.COMPLETE, but in this case, the event is dispatched by a LoaderInfo instance (not ContentLoaderInfo, as with the previous example). The LoaderInfo instance is accessed by way of the DisplayObject.loaderInfo property, referenced in terms of the main timeline. This works because the main timeline is a MovieClip instance, which inherits from the DisplayObject class.
When a user sees this SWF in a browser, the Event.COMPLETE event is dispatched after all the frames in the main timeline have loaded. During the first viewing, this event will be delayed until the SWF's full content (more than 200KB) has loaded. Thanks to this delay, and because the bytesLoaded property of the main timeline's LoaderInfo instance isn't yet greater than or equal to bytesTotal, the playhead will easily make it to frame 15—which features the yawning parrot—and wait there until instructed to continue. Of course, the playhead won't wait unless you tell it to stop, so that's your next step.
Add a keyframe to frame 15 of the main timeline's
scriptslayer. Use theActionspanel to add the following single line of ActionScript:stop()
Thanks to that MovieClip.stop() method, the timeline will wait until the delayed Event.COMPLETE event is dispatched. As you can see from the if statement inside Step 3's completeHandler() function, the timeline will simply resume the play() method from that position as long as the function is triggered while the main timeline's MovieClip.currentFrame property is 15.
On the other hand, if the SWF is already cached on the user's computer, the completeHandler() function is triggered immediately—while the playhead is still in frame 1—which means the MovieClip.gotoAndPlay() method will send the playhead straight to frame 26, past the parrot movieclip. Bingo. So that explains part of the endeavor, but this isn't enough to update the text field inside the parrot symbol. For that, you'll need to write a ProgressEvent.PROGRESS handler. No time like the present.
Add the following new ActionScript below the existing
stop()method in frame 15 of thescriptslayer:loaderInfo.addEventListener(ProgressEvent.PROGRESS,
progressHandler); function progressHandler(evt:ProgressEvent):void { var percent:int = Math.round(evt.bytesLoaded / evt.bytesTotal * 100); parrot.percentage.text = percent.toString() + "%"; }
This code hasn't changed, in principle, from the percentage arithmetic you saw in the previous example. As with the Event.COMPLETE handler, this event is associated with the loaderInfo property of the main timeline. The progressHandler() function calculates a percent variable from the evt parameter's bytesLoaded and bytesTotal properties, multiplied by 100 and rounded to the nearest integer. The result, once again, is sent to the text property of a dynamic text field. But this time, the text field's instance name is percentage, and it lives inside a movieclip whose instance name is parrot. Remember that in cases where the SWF has already been viewed, the ActionScript in frame 15 is bypassed altogether.
The remainder of the code is a snap.
In the
scriptslayer, insert keyframes at frames 39, 49, 59, and 69. Enter the following code into frame 39:stop(); btnNext.addEventListener(MouseEvent.CLICK, clickHandler); function clickHandler(evt:Event):void { play(); }
This stops the timeline on the first image and wires up a custom clickHandler() function to the MouseEvent.CLICK event, which is dispatched when a user clicks the btnNext symbol that is fully visible on this frame. All this function does is resume the stopped timeline, which needs to be instructed to stop in the remaining keyframes.
Enter a
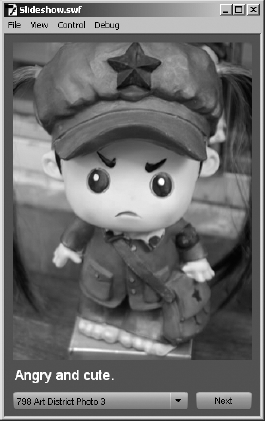
stop();method in frames 49, 59, and 69.Test the movie and verify that Flash Player immediately displays images from a NASA exhibition (Figure 14-4), with a button in the lower right to advance through the photos.
Simulate a modem by selecting
View

The popularity of websites like Flickr and Photobucket prove that people like to share photos. Of course, this was true even before the Internet. But modern technology makes it easier than ever to whip out that tumbling, unfolding wallet and proudly show off all the kids, aunts, uncles, cousin Ed, and Finnegan, not only to friends, but to every human on the planet. At the rate most people take pictures, photo collections just keep growing. So, if you were to make a photo slide show in Flash, you would want to be sure it was easy to update. With components and XML, that goal is closer than you may think.
To explore the concept, we'll start in an interesting location: the Quanjude Roast Duck Restaurant in Beijing, China. During the course of writing this book, one of the authors was in Beijing. One night, he was enjoying dinner in the company of a couple of Adobe engineers, John Zhang and Zhong Zhou. Naturally, one of the dishes was duck and, because of the restaurant's history, there was a particular way in which the duck was served and to be consumed. The author was struggling, and Zhong Zhou called the waitress over to demonstrate the proper (and complex!) procedure. It involved a wafer-thin wrap, duck meat, sauces, scallions, and a couple of other treats, which were to be added in a particular order. It took a couple of tries, but the grimacing author finally nailed it. When he thanked Zhong Zhu for the lesson, Zhong said, "It's really simple if you first master the process."
Mastering the creation of a Flash slide show is a lot like preparing that duck dish: it is all about process. We are going to show you two ways of creating a slide show, but the process is essentially the same for both. In fact, you'll be using some of the same process for the MP3 and video players later in the chapter.
To start, we're going to walk you through a self-contained, "hard-wired" movie that displays a small collection of external JPGs and their captions. The number of JPGs, and the order in which they appear, are "baked in" to the SWF, which means the movie must be edited and republished to accommodate new images. This slide show features ComboBox and Button components to let people choose which JPGs they want to see, and it even uses the UILoader and ProgressBar components to load the images, so this will be something of a cumulative exercise.
Once the test model is complete, we'll free the photo-specific data from its dungeon and move it to an XML file, where it can leap free in the fields like a shorn sheep, or paddle merrily around a pond like a duck. Here we go!
Start a new Flash document and save it as
Slideshow.flain this chapter'sExercise/Slideshowfolder. Set the movie's dimensions to320×480. Set the background color to whatever you like (we chose#336699).Create the following five layers:
scripts, progress bar, loader, caption, andnav. Lock thescriptslayer to avoid accidentally placing content in this layer.Open the
Componentspanel (WindowDrag an instance of the
UILoadercomponent to theloaderlayer. Set its width to300, height to400, Xposition to10, andYposition to10. Give it the instance nameloader.Captions will be displayed with a text field. Use the
Texttool to create a dynamic text field in thecaptionlayer. Set its width to300, height to28, Xposition. to10andYposition to416. Give this text field the instance namecaption. Make the font_sans,18pt, andwhite, so that it shows over the blue background.Drag an instance of the ComboBox component to the nav layer. Set its width to
220, Xposition to10, andYposition to450. Give it the instance name images.Drag an instance of the Button component to the
navlayer. Set its width to70, Xposition240, andYposition to450. Give it the instance namenext. Open theComponent Inspectorpanel and set the button'sLabelparameter toNext. At this point, you have something like the scaffolding shown in Figure 14-5.

Now it's time to bring these parts to life. For the most part, it's a matter of handling events for the components and populating the combo box.
Click into frame 1 of the
scriptslayer and open theActionspanel. Here's the first chunk of code:import fl.data.DataProvider; var imageData:Array = new Array( {label:"798 Art District Photo 1", data:"798_01.jpg",caption:"Lazy day on the street."}, {label:"798 Art District Photo 2", data:"798_02.jpg",caption:"Wall art."}, {label:"798 Art District Photo 3", data:"798_03.jpg",caption:"Angry and cute."}, {label:"798 Art District Photo 4", data:"798_04.jpg",caption:"The modern and the ancient!"}, {label:"798 Art District Photo 5", data:"798_05.jpg",caption:"Not sure what to make of this."}, {label:"798 Art District Photo 6", data:"798_06.jpg",caption:"The power of the artist?"}, {label:"798 Art District Photo 7", data:"798_07.jpg",caption:"Fashion shoot at a steam engine."}, {label:"798 Art District Photo 8", data:"798_08.jpg",caption:"A street in the district."} )
The first line imports the DataProvider class, which is needed later when it's time to populate the combo box. After that, an arbitrarily named variable, imageData, is set to an instance of the Array class. Arrays are lists of whatever you put in them. You can use the Array.push() method on an instance to add elements to that instance, but you can also pass in the whole collection at once, which we've done here. This array has eight items, separated by commas, and each item is an instance of the generic Object class with three properties.
What, no new Object() statement? How are these objects being created? That's what the curly braces ({}) are for. It's a shortcut, and we're taking it. You'll remember from Chapter 11 that ComboBox instances can be supplied with label and data information, so that explains what those properties are in the array. The caption property is a custom addition.
Press Enter (Return) a couple times and type in the following:
var currentImage:int = 0;
var req:URLRequest = new URLRequest();

function changePicture(pict:int):void {
  pb.visible = true;
  caption.text = imageData[pict].caption;
  req.url = imageData[pict].data;
  loader.load(req);
}
changePicture(0)
The first line after the comment declares an integer variable, currentImage, and sets it to 0. This number will keep track of which image is being viewed. Next, a req variable holds an instance of the URLRequest class, which will used to request the current image file. The next several lines declare a custom function, changePicture(), which accepts a single parameter, pict. This function does the following three things:
Makes the
ProgressBarinstance visible (yes, it's already visible at this point, but because later code turns off its visibility when an image finishes loading, it needs to be set back).Makes the text field display the current caption. The incoming
pictparameter determines which element to retrieve from theimageDataarray (imageData[pict]), and that element'scaptionproperty is retrieved. When the value ofpicthappens to be0, the expression effectively saysimageData[0], which means, "Pull the first entry from theimageDatalist, please." Why start at zero? It's just one of those things; arrays start counting from zero rather than one.Makes the
Loaderinstance load the current image. Here, again, theimageDataarray is consulted, but this time from the relevant item'sdataproperty, which is assigned to theURLRequest.urlproperty of thereqvariable. In turn,reqis fed to theloaderinstance by way of theLoader.load()method.
Immediately after its declaration, the changePicture() function is called, with 0 as its parameter. You're displaying the first image and its caption.
Now we just need to hook up the components.
Press Enter (Return) a couple times and type in the following:
pb.source = loader;

pb.addEventListener(Event.COMPLETE, completeHandler);
function completeHandler(evt:Event):void {
  pb.visible = false;
}
The first line associates the ProgressBar instance with the Loader instance. Thanks to the convenience of components, as the Loader component loads images, the progress bar will "automagically" know how to display load progress. The completeHandler() function makes the progress bar invisible when loading is complete.
Press Enter (Return) a couple times and type in the following:
images.dataProvider = new DataProvider(imageData);

images.addEventListener(Event.CHANGE, changeHandler);
function changeHandler(evt:Event):void {
  currentImage = images.selectedIndex;
  changePicture(currentImage);
}
The first line populates the combo box by setting its ComboBox.dataProvider property to a new DataProvider instance (this is why we need the import statement at the top). All the DataProvider instance needs is an array whose elements have label and data properties, which is exactly what we have in imageData. The caption properties are extra, but they don't hurt anything. That first line shoves the whole imageData array's content into the combo box in one swoop.
Next, the Event.CHANGE event is handled for the combo box. The handler function calls the custom changePicture() function and sets the currentImage variable to a number determined by the combo box's current selection. (The selectedIndex property doesn't care what data is in the selection; it only reports the number of the current selection, and that's all the currentImage variable needs.) This variable is then used as the parameter to the changePicture() function, which updates the current photo.
Press Enter (Return) a couple times and type in the following:
next.addEventListener(MouseEvent.CLICK, clickHandler);
function clickHandler(evt:MouseEvent):void {
  currentImage++;
  if (currentImage == imageData.length) {
    currentImage = 0;
  }
  images.selectedIndex = currentImage;
  changePicture(currentImage);
}
Here, the MouseEvent.CLICK event is handled for the button. The handler function does the following:
Increments the
currentImagevariable by one.Checks to see if
currentImageshares the same value as the expressionimageData.length(the number of items in theimageDataarray). If so, it means the user has clicked often enough to progress through all the images, socurrentImageis set back to0.Sets the combo box's current selection to
currentImage, to keep the combo box in sync with button clicks.Calls the custom
changePicture()function and passes itcurrrentImageas its parameter.
Test the movie. You'll be treated to a mini-tour of the 798 Art District in Beijing, China. Click the Next button to flip through the pictures in sequence, as shown in Figure 14-6, or use the combo box to skip around.
To simulate image downloads, so you can see the progress bar in action, select
View
As it turns out, wandering through the 798 Art District of Beijing makes a decent metaphor for this exercise, because after all of this careful examination of the art in the galleries, we're about to uncover a treasure in a gallery just a few more paces up the street.
Save your file to keep everything safe. Now select File
import fl.data.DataProvider;var xmlDoc:XML = new XML()var xmlLoader:URLLoader = new URLLoader()var xmlReq:URLRequest = new URLRequest("slideshow.xml")xmlLoader.load(xmlReq)xmlLoader.addEventListener(Event.COMPLETE,function xmlCompleteHandler (evt:Event):void {xmlDoc = XML(evt.target.data)images.dataProvider = new DataProvider(xmlDoc)changePicture(0)};
The imageData array is gone completely. In its place stands our trusty XML loading formula. The only differences here are the variable names. The URLLoader instance, for example, has been changed to xmlLoader, because loader is already in use as the instance name for the UILoader component. In the same way, the URLRequest instance is named xmlReq, because req is used later in the code, and the XML's completeHandler() function is named xmlCompleteHandler().
This time, we're loading the file slideshow.xml, and that's where the former imageData content now resides. Translated into XML, it looks like this:
<slideshow> <slide label="798 Art District Photo 1" data="798_01.jpg"caption="Lazy day on the street." /> <slide label="798 Art District Photo 2" data="798_02.jpg"caption="Wall art." /> <slide label="798 Art District Photo 3" data="798_03.jpg"caption="Angry and cute." /> <slide label="798 Art District Photo 4" data="798_04.jpg"caption="The modern and the ancient!" /> <slide label="798 Art District Photo 5" data="798_05.jpg"caption="Not sure what to make of this." /> <slide label="798 Art District Photo 6" data="798_06.jpg"caption="The power of the artist?" />
<slide label="798 Art District Photo 7" data="798_07.jpg"caption="Fashion shoot at a steam engine." /> <slide label="798 Art District Photo 8" data="798_08.jpg"caption="A street in the district." /> </slideshow>
This is practically the same as the previous array, except that this time, it's in a separate XML document instead of being hard-wired into the ActionScript.
Let's take another look at the Event.COMPLETE event handler for the xmlLoader instance. The function runs as follows:
function xmlCompleteHandler(evt:Event):void {
  xmlDoc = XML(evt.target.data);
  images.dataProvider = new DataProvider(xmlDoc);
  changePicture(0);
}
Notice that the DataProvider handling has been moved here from its former position next to the combo box Event.CHANGE handler. Why? Because under the circumstances, the combo box can't be populated until the XML has loaded. Next, the changePicture() call has also been moved here from its earlier position. Why? Same reason: until the XML loads, the changePicture() has no reference for what image to summon.
Two more paces!
At or near line 21, you'll find the changeFunction() declaration. You'll need to tweak two lines (changes in bold):
function changePicture(pict:int):void {
  pb.visible = true;
  caption.text = xmlDoc.slide[pict].@caption;
  req.url = xmlDoc.slide[pict].@data;
  loader.load(req);
}
Instead of pulling from the old imageData array, the text field and UILoader component now draw their information from the xml instance, using E4X syntax to specify the relevant <slide> element attributes. Here, the function's incoming pict parameter serves the same purpose as it did before: it specifies which <slide> element to consult.
Note
Don't forget to delete what used to be the last line in this chunk: that is, changePicture(0); which is now called inside the xmlCompleteHandler() function. It's easy to miss!
Here are the last touch-ups. There's a reward in sight! First, delete the following data provider line (which has been moved to the xmlCompleteHandler() function):
images.dataProvider = new DataProvider(imageData)
Finally, revise one reference in the button's event handler (new code in bold):
function clickHandler(evt:MouseEvent):void {
  currentImage++;
  if (currentImage == xmlDoc.slide.length()) {
    currentImage = 0;
  }
  images.selectedIndex = currentImage;
  changePicture(currentImage);
}
Since imageData is no more, that line depends on the number of <slide> elements, instead.
Test the movie and watch the show again. If you think you missed a step, compare your work to the SlideshowXML.fla work in this chapter's Complete folder.
Now that the movie has become XML-ified, you can have some fun editing the slideshow.xml file and running the SWF to see the changes. For example, delete the first three <slide> elements and test the movie again. Like magic, only the three remaining slides and captions display. Change the wording of one of the captions, and then run the SWF again. Change the order of the order of the <slide> elements. With every edit, the SWF takes these changes effortlessly in stride.
When people get around to working with audio in Flash, one of the more common requests is, "Can I make my own MP3 player?" After reading Chapter 5, you already know the answer is yes. By the end of that chapter, you had the beginnings of an MP3 player that could load tracks from a ComboBox instance, as well as toggle playback with a Play/Pause button. In this exercise, we're going to pick up with that project and continue to flesh it out.
Note
Thanks again to Benjamin Tayler, Bryan Dunlay, Philip Darling, and Robbie Butcher, of Tin Bangs (http://www.tinbangs.com/) for the generous use of their music.
There is going to be a lot going on here, so we suggest you set aside sufficient time to carefully follow along. You're about to be introduced to several new and fundamental concepts that will require your attention. Among them are the following:
Creating buttons that go the previous or the next audio track
Creating a seek slider that allows you to move through an audio selection
Creating a volume slider that allows the user to adjust the audio volume
Displaying an audio track's ID3 information
The key to this exercise is understanding technique. Although there will be a lot going on, you will discover everything presented here builds upon what you have learned in the book. In the previous exercise, for example, the XML version of the slide show had a Next button. Here you'll have that too, along with the addition of a Prev button. And, again, the external files will be loaded from XML.
This exercise is designed to follow a fairly standard workflow, which is to assemble your assets first, and then "wire them up" using ActionScript. This time, instead of components, you'll be creating some of your own controls.
The first order of business is to move the MP3 data to an XML file. Open the TinBangs.fla file found in the Exercise/MP3Player folder for this chapter. This file is functionally identical to the one in the Complete folder for Chapter 5. The only difference is that the code comments have been made more obvious, like this:
////////////////////////////////////////
// Obvious code comment
////////////////////////////////////////
Why? Because this project is going to have a lot of ActionScript, and these striking "mile markers" help organize things visually. Why so many slashes? ActionScript ignores them after the first two in the line, so the rest are part of the comment.
The first task is to swap out the Array instance, songList, for an external XML document, just as you did for the Beijing slide show. Doing this will reacquaint you with the existing ActionScript in place.
Click info frame 1 of the
scriptslayer, open theActionspanel, and then locate thesongListvariable declaration on line 13, which looks like this:var songList:Array = new Array( {label:"Select a song", data:""}, {label:"White Lies (Timekiller)", data:"WhiteLies(Timekiller).mp3"}, {label:"Young Lions", data:"YoungLions.mp3"}, {label:"Your Sky is Falling", data:"YourSkyIsFalling.mp3"} );Delete those lines of code and replace them with the following:
var songList:XML = new XML();
var loader:URLLoader = new URLLoader();
var xmlReq:URLRequest = new URLRequest("playlist.xml");
loader.load(xmlReq);

loader.addEventListener(Event.COMPLETE, completeHandler);
function completeHandler(evt:Event):void {
  songList = XML(evt.target.data);
  songsCB.dataProvider = new DataProvider(songList);
};
There's nothing new here. The
XMLinstance is namedsongListin this case, to minimize the impact on the rest of the code, which already refers to the song data by that name. AURLRequestinstance already exists asreq, so the new one here is namedxmlReq. The requested file is nowplaylist.xml, whose contents you'll see in just a moment. TheEvent.COMPLETEhandler setssongListto the loaded XML document's data, and then passes that to theComboBox.dataProviderproperty of thesongsCBcombo box.That last line inside the
completeHandler()function—the one that refers to the data provider—originally appeared among the lines of code that configured theComboBoxinstance, just before the line that readsaddChild(songsCB);. You'll still see it there (should be at or near line 35 at this point), so delete it. (You only need to set the combo box's data provider once, and that needs to happen inside thecompleteHandler()function, after the XML has loaded.)Just so you can see how similar the XML is to the original array, here's the content of the
playlist.xmlfile:<playlist> <song label="Select a song" data="" /> <song label="White Lies (Timekiller)" data=
"WhiteLies(Timekiller).mp3" /> <song label="Young Lions" data="YoungLions.mp3" /> <song label="Your Sky is Falling" data="YourSkyIsFalling.mp3" /> </playlist>Note that, as with the array, the first entry specifies a
labelattribute but leaves thedataattribute blank.Test the movie so far. It looks and works the same as it did at the end of Chapter 5, but now the MP3 file data is stored outside the FLA.
It's time to add the new stuff. But first, the authors would like to make a community service announcement.
We interrupt this program to introduce you to a fact of life that happens with collaborative Flash work. As mentioned in Chapter 5, the controller bar—with its VCR buttons and slider control—was created in Adobe Illustrator, and then imported into Flash. For the sake of demonstration, let's assume the designer didn't know how the controls would ultimately be used. If you don't think this will happen in your own Flash journeys, get ready to think again! In fact, count on it.
As a matter of good habit, you'll want to rename your library assets to better suit their actual use in this project. In addition, to improve the user's interactive experience, you'll also want to use the drawing tools to give these VCR buttons—which are actually movieclips—a bigger clickable surface area. This is especially important for the Pause button, because without the fix, the mouse could easily slip between the two vertical bars of the pause icon.
Renaming library assets is the sort of work that seems like housekeeping. And it is. but don't underestimate its value! When deadlines loom and a manager is breathing down your neck, it helps to know your library territory like the back of your hand. Take VolumeSlider, for example. In this MP3 player, that symbol is actually going to indicate how much of the audio has played. By dragging that slider, you'll be able to seek to various parts of the song. So, let's give it, and the other assets, better names.
Open the
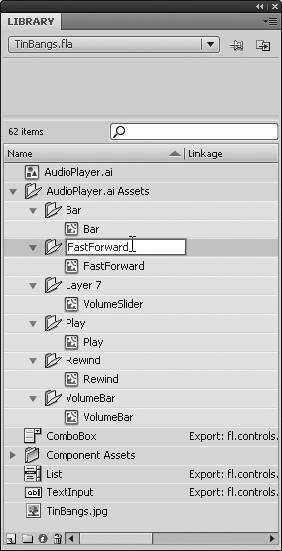
Librarypanel for theTinBangs.flafile. Locate the library'sAudioPlayer.ai Assetsfolder, and you'll see a number of subfolders that ultimately contain the movieclips used for the controls in thePlayerlayer of theTimelinepanel. These include a handful of movieclips and subfolders whose names don't presently suit the purposes of this MP3 player:FastForward, Layer 7, VolumeSlider, Rewind, andVolumeBar.Double-click the
FastForwardfolder, as shown in Figure 14-7, and rename it toNext. Do the same with theFastForwardmovieclip. This is, after all, a button that skips to the next song in the playlist, not a fast-forward button.Rename the
VolumeSlidersymbol toSeekKnob. Do the same with its containing folder,Layer 7.Rename the
Rewindsymbol and its folder toPrev.Complete your cleanup by renaming the
VolumeBarsymbol and its folder toSeekBar.
The previous steps helped you as a designer/developer. Now it's time to help the user.
Double-click the
Playsymbol to enter its timeline. Drag the playhead to frame 2, and you'll see two vertical bars that represent "pause," as shown in Figure 14-8.

Granted, this symbol has been zoomed in quite a bit in the figure, but even at actual size, it's easy to see how the mouse can slip between the two bars, or accidentally miss the symbol altogether by slipping too far left or right. If this were a button symbol, the solution would be elementary: head to the Hit frame and give the button a nice, sizable hit area. With movieclips, which don't have a Hit frame, you need to get creative. In this case, the solution happens in a layer named hit area.
Click frame 1 of the
hit arealayer, and you'll see a pixelated rectangle appear behind the "play" arrow icon, as shown in Figure 14-9.

This rectangle is a simple shape, drawn with the Rectangle tool. The reason you can't see it—until the shape is selected—is because the shape's fill color is set to 0% Alpha. From a visual standpoint, it's imperceptible, but when the user hovers a mouse over this symbol, even the invisible shape provides a larger clickable surface area.
Notice that the rectangle spans frames 1 and 2, so that it appears behind both the play and pause icons. This makes the hit area useful, regardless where this symbol's playhead appears.
Note
It is little things like this—giving a shape an opacity value of 0—that will separate you from the rest of the pack. This little trick takes maybe 2 to 3 minutes to accomplish. Someone who is unfamiliar with this will easily spend an hour trying to make the symbol "idiot-proof." This is a classic case of letting the software do the work instead of you overthinking it. In fact, the next step shows you how to do it yourself.
The other VCR controls, and the SeekKnob symbol, need the same treatment. You can draw these shapes if you like, or you can let Flash do the work for you. Let's look at both ways.
Double-click the
Prevsymbol to enter its timeline. Rename theLayer 1layer toarrows, then create a new layer namedhit areabeneath the first. In thehit arealayer, use theRectangletool to draw a 20 × 20 pixel square with no stroke, and a fill color of#FFFFFF(white) set to0% Alpha. Position the square so that it evenly fills the area behind the "prev" double arrows (we used anXposition of-2and aYposition of2).Right-click (Ctrl-click) frame 1 of the
hit arealayer and selectCopy Framesfrom the context menu. Now double-click theNextsymbol to enter its timeline. RenameLayer 1toarrows, and then create a new layer beneath the first (no need to name it). Right-click (Ctrl-click) frame 1 of the new layer and selectPaste Framesfrom the context menu. This accomplishes two things: it pastes the shape with the0% Alphaand also renames the layer tohit areafor you. Pretty slick! Reposition the shape so that it evenly fills the area behind the "next" double arrows (we used anXposition of-4and aYposition of2).Using whichever approach you prefer, position a similar shape beneath the hollow rectangle in the
SeekKnobsymbol. In our case, we renamed that symbol'sLayer 1layer toknob, and then pasted the same shape into a new layer. We changed the dimensions of the shape to 12 × 10 and positioned it at anXposition of-2.5and aYposition of-1.Note
Okay, so why two ways of doing the same thing? We are fond of telling anyone who will listen that there are usually 6,000 ways of doing anything in this business. What's the right way? Who cares? The only time someone cares is when it doesn't work.
As it turns out, the Illustrator designer forgot two widgets: a volume slider, which lets the user adjust volume, and a loading indicator, which tells the user an MP3 file is still loading. As often as not, you might need to create such assets yourself, but to speed things along, we've provided what you need in separate file named controls.fla. By using a technique we introduced in Chapter 3, you can quickly share the widgets from that FLA with your current working FLA.
Select
FileWith the
Playerlayer selected, drag theLoadingDisplaysymbol from the newly openedcontrols.flalibrary to the right side of the stage, as shown in Figure 14-10 (we usedX:462, Y:305). Check theTinBang.fla's own library, and you'll see the movieclip there as well. Easy as that, you now have a loading indicator.In the
TinBangs.flalibrary, double-click theLoadingDisplaymovieclip to open it in theSymbol Editor. Scrub the timeline, and you'll see that the symbol is nothing more than a series of dots that seem to spin.To make room for the volume slider, select the
SeekBarsymbol in theplayer backgroundlayer (the long red rectangle) and use theProperty inspectorto change its width to138.With the
Playerlayer selected, drag theVolumeSlidersymbol from thecontrols.flalibrary to the spot you just opened up—to the right of the other controls and just beneath the loading indicator (we usedX:424, Y:328).

When you drag the VolumeSlider symbol, an interesting thing happens in the TinBangs.fla library: not only does VolumeSlider appear, but VolumeBar and VolumeKnob come along for the ride, as shown in Figure 14-11. This is nothing to be alarmed about. These other symbols show up because they're nested inside VolumeSlider, so they piggyback their way in.
Drag the
volume icongraphic symbol from thecontrols.flalibrary to the stage, just to the left of theVolumeSlidersymbol (we usedX:414, Y:336). This is nothing more than an icon that helps indicate the purpose of the slider next to it.Double-click
VolumeSliderin theTinBangs.flalibrary to open it in theSymbol Editor.

This symbol is a bit more complicated than the circle of dots from the previous shared asset, but you've already been introduced to all the concepts. As Figure 14-12 shows, you'll find three layers: knob, mask, and bar. The knob layer contains a rectangular symbol, VolumeKnob, whose shape is composed of a 0% Alpha fill. This is effectively an invisible button, like the hit area shape in step 2, except that the "button" is a movieclip. The mask layer contains five slanted columns, and the bar layer simply contains a red rectangle (this is the VolumeBar symbol). If you like, temporarily lock the mask and bar layers, and you'll see the masking in action. When this symbol is wired up, the user will be able to drag the invisible VolumeKnob symbol left and right. The VolumeBar symbol, partially hidden by the mask, will simply match the position of VolumeKnob, and the result will be an illusion: it will appear to the user that dragging left and right changes a red fill shared by the five slanted columns.

Figure 14.12. A low-alpha shape inside the rectangular movieclip provides "surface area" for the mouse.
Select
Edit
With these assets in place, you're nearly ready to rock 'n' roll. Let's just make sure all the programmable assets have instance names, and then organize the timeline layers.
Carefully select the
VolumeBarandVolumeKnobsymbols on the stage to verify that they've already been given instance names:volumeBarandvolumeKnob, respectively.Return to the main timeline and, moving left to right, select each button in turn and verify they have the following instance names:
btnPrev, btnPlay, andbtnNext.Continuing toward the right, select the
SeekKnobsymbol and give it the instance nameseekKnob. Give theSeekBarsymbol the instance nameseekBar. ForVolumeSlider, make itvolumeSlider. Moving up, giveLoadingDisplaythe instance nameloadingDisplay. Finally, moving left again, give the text field the instance namesongData.Select the
Playerlayer by clicking its name. Now selectModifyThe
Playerlayer is still there, but now empty—so delete it. Rename theBarlayer toplayer backgroundand theinterfacelayer tobackground image, as shown in Figure 14-13.
Now everything is tidy and much easier to locate.

Now it's time to add the ActionScript. Fortunately, you have a leg up, because the Play/Pause button is already programmed. You did that in Chapter 5. In order to proceed, we're going to tidy up the existing ActionScript, just as we did with the library and timeline assets. We'll use the obvious code comments to help plot out our travel route.
Click into the scripts layer and review what's currently in place. This includes the revision you made earlier in this section, where songList became an XML instance (it had previously been an Array instance). Compare your work carefully. Nothing has changed since you last touched this code, but see if you can recognize what's going on. We'll meet you on the other side.
import fl.controls.ComboBox;
import fl.data.DataProvider;

////////////////////////////////////////
// Variables
////////////////////////////////////////

var song:Sound;
var channel:SoundChannel;
var req:URLRequest;
var pos:Number;

var songList:XML = new XML();
var loader:URLLoader = new URLLoader();
var xmlReq:URLRequest = new URLRequest("playlist.xml");
loader.load(xmlReq);

loader.addEventListener(Event.COMPLETE, completeHandler);
function completeHandler(evt:Event):void {
  songList = XML(evt.target.data);
  songsCB.dataProvider = new DataProvider(songList);
};

////////////////////////////////////////
// ComboBox
////////////////////////////////////////

// prep
var songsCB:ComboBox = new ComboBox();
songsCB.dropdownWidth = 200;
songsCB.width = 200;
songsCB.height = 24;
songsCB.x = 26;
songsCB.y = 68;
songsCB.dataProvider = new DataProvider(songList);
addChild(songsCB);

// events
songsCB.addEventListener(Event.CHANGE, changeHandler);

function changeHandler(evt:Event):void {
  if (songsCB.selectedItem.data != "") {
    req = new URLRequest(songsCB.selectedItem.data);
    if (channel != null) {
      channel.stop();
    }
    song = new Sound(req);
    channel = song.play();
    btnPlay.gotoAndStop("pause");
  }
};
////////////////////////////////////////
// Buttons
////////////////////////////////////////
// prep
btnPlay.stop();
btnPlay.buttonMode = true;
// events
btnPlay.addEventListener(MouseEvent.CLICK, clickHandler);
function clickHandler(evt:MouseEvent):void {
if (channel != null) {
if (btnPlay.currentLabel == "play") {
channel = song.play(pos);
btnPlay.gotoAndStop("pause");
} else {
pos = channel.position;
channel.stop();
btnPlay.gotoAndStop("play");
}
}
};It's worth noting that some of this code overlaps. (Don't worry if you didn't see it! That's a lot of ActionScript to pore through.) In the ComboBox block, for example, inside the changeHandler() function, notice that these two lines:
channel = song.play();
btnPlay.gotoAndStop("pause");
match these two lines in the Buttons block's clickHandler() function (relevant code in bold):
if (btnPlay.currentLabel == "play") {
  channel = song.play(pos);
  btnPlay.gotoAndStop("pause");
} else {
In simple projects, you don't need to lose any sleep over the occasional overlap. But it's definitely something you want to keep in mind. We've looked at some optimization already in this chapter (the preloader exercise), and there's more of that coming in Chapter 15. The concept of optimization applies as much to the structure of your ActionScript as it does to your assets. As we wire up the controls, you'll find that numerous event handlers are going to load, pause, or play a song, so it makes good sense to write custom functions to perform those actions. Then those functions can be reused by your various event handlers. Doing this makes your ActionScript easier to read and, ultimately, there's less of it to type. The result is code that is easier to deal with. We'll now make the revisions to get rid of the overlap.
Add the following new variables to the code inside your Variables block near the top (new code in bold):
//////////////////////////////////////// // Variables //////////////////////////////////////// var song:Sound; var channel:SoundChannel;var xform:SoundTransform;var req:URLRequest; var pos:Number;var currentSong:int;var rect:Rectangle;
Like the existing variables, the three new ones are declared, but not yet set to anything. The xform variable will be a SoundTransform instance, for controlling audio volume. currentSong is just like the currentImage variable in the Beijing slide show (here, it's used to keep track of the currently playing song). rect will be a Rectangle instance, which is used later to control the draggable distance of the seek and volume slider knobs.
Skip down to the ComboBox block. Within the changeHandler() function, change what you see so that it looks like this (revision in bold):
function changeHandler(evt:Event):void {
  if (songsCB.selectedItem.data != "") {
    currentSong = songsCB.selectedIndex;
    loadSong(songsCB.selectedItem.data);
  }
};
This trims up the function quite a bit. Instead of dealing with the loading code here—URLRequest, checking if the channel instance is null, and so on—those lines have been moved to a set of new functions you're about to write. These new functions will fit between the ComboBox block and the Buttons block. Copy one of those code block commented headings and paste it after the changeHandler() function. Change its caption to Song Functions, like this:
////////////////////////////////////////
// Song Functions
////////////////////////////////////////
After this commented heading, type the following new function:
function loadSong(file:String):void {
  req = new URLRequest(file);
  pauseSong();
  song = new Sound(req);
  song.addEventListener(Event.OPEN, soundOpenHandler);
  song.addEventListener(Event.COMPLETE, soundCompleteHandler);
  song.addEventListener(Event.ID3, soundID3Handler);
  playSong();
};
This is an example of double-dipping, as far as code optimization is concerned. You might even call it "passing the buck." Just as we passed along the loading code earlier, we're passing along some of the ActionScript here again, to two additional custom functions: pauseSong() and playSong(). It's all in the name of keeping the ActionScript lean.
Notice that the loadSong() function accepts a string parameter, which will be referenced by the file variable by code inside the function. In the previous code, the value of this parameter was supplied by the expression songsCB.selectedItem.data, which retrieved the MP3's file name from the ComboBox component's current selection. In later code—namely, the Prev and Next button event handlers—you'll see this same value supplied in other ways.
The req variable, declared early on in the Variables block, is finally set to a new instance of the URLRequest class, which allows the MP3 file to be requested. If a song is currently playing, it's stopped by virtue of the pauseSong() function (you'll see how in the next block of code).
The song variable is set to a new Sound instance, and because the req variable is fed right into the expression new Sound(), we bypass the need for the Sound.load() method. With the new Sound instance in place, it's ready for three event listeners: one when the MP3 is loaded (Event.OPEN), one when loading is complete (Event.COMPLETE), and one when the MP3 file's ID3 tags are encountered (Event.ID3). The event handler functions are intuitively named, and you'll see how they're used shortly.
Finally, the custom playSong() function rolls the music—which makes this a good idea to write those functions.
Let's continue adding code. Press Enter (Return) a couple times, and then type the following new ActionScript:
function playSong(pos:Number = 0):void {
  channel = song.play(pos);
  btnPlay.gotoAndStop("pause");
  seekKnob.addEventListener(Event.ENTER_FRAME, seekKnobUpdate);
};
function pauseSong():void {
  seekKnob.removeEventListener(Event.ENTER_FRAME, seekKnobUpdate);
  if (channel != null) {
    channel.stop();
  }
  btnPlay.gotoAndStop("play");
};
Most of this should seem familiar, but there's some new stuff, too. The playSong() function accepts a parameter, just like loadSong() does, but here, the parameter is already set to a value (pos:Number = 0)—so what's going on? New to ActionScript 3.0, this feature lets you provide default values for your parameters. What's it good for? Well, when referenced from the loadSong() function, playSong() isn't provided with a value; therefore, a default value of 0 is assumed. This will cause the song to play from the beginning when pos is passed into the first line inside this function: channel = song.play(pos);. As you'll see later, the Pause/Play button does pass in a value, because it lets you stop the music and resume from where you left off. In that case, the pos parameter will be supplied with a value, and the default 0 will be overruled.
So, when a song is played, it's assigned to the channel instance, and the btnPlay movieclip is sent to the pause label of its timeline. The other thing that needs to happen—and this is a glimpse ahead—is that the SeekKnob symbol needs to start moving along its track to indicate how much of the song has played. This is managed by way of an Event.ENTER_FRAME event, which triggers a seekKnobUpdate() function you'll write later in the exercise.
Once you understand the playSong() function, the pauseSong() function isn't hard to follow. It doesn't need a parameter. All it does is unhook the seekKnobUpdate() event handler, which halts the traveling of the SeekKnob symbol; determine if the channel instance is null, and if not, stop its playback; and send btnPlay's timeline to the play label.
Earlier, we wired up three Sound-related event listeners. It's time to write the handler functions for two of those. Press Enter (Return) a couple times and type the following new ActionScript:
// events
function soundOpenHandler(evt:Event):void {
  loadingDisplay.visible = true;
  loadingDisplay.play();
};
function soundCompleteHandler(evt:Event):void {
  loadingDisplay.stop();
  loadingDisplay.visible = false;
};
These functions are straightforward. After a quick // events comment, the soundOpenHandler() function simply sets the visibility of the LoadingDisplay symbol to true (this is the spinning dots symbol, imported from a shared library). To actually get the dots to spin, it invokes the MovieClip.play() method on the loadingDisplay instance name. This event handler function responds to the Event.OPEN event, which occurs whenever an MP3 file is loaded.
The soundCompleteHandler() function responds to the Event.COMPLETE event, which means a requested MP3 file has fully downloaded. As you can see, this handler stops the spinning dots and once again turns off the visibility of that movieclip.
Where's the Event.ID3 handler? It could certainly have been written here. Really, it's just a matter of organizational preference, and there's no arguing taste. To us, it makes sense to build out the rest of the code, which is composed entirely of event handlers, in the order in which the buttons and controls appear on the stage. We'll start with the buttons, move rightward to the sliders, then up to the dots, and then left again to the text field. It's the text field that does the two-step with the Event.ID3 event handler, so we'll meet it again at the end.
Ready for a quick intermission? Test the movie where it stands, and you'll see three error messages in the Compiler Errors panel, as shown in Figure 4-14. Those errors are due to three references to two event handler functions that don't exist yet. One of those is the Event.ID3 handler we just mentioned, located inside the loadSong() function. The other is the seekKnobUpdate() reference located in the playSong() and pauseSong() functions.
Find these addEventListener() and removeEventListener() references in the functions just mentioned, and comment them out, like this:
//song.addEventListener(Event.ID3, soundID3Handler);
//seekKnob.addEventListener(Event.ENTER_FRAME, seekKnobUpdate);
//seekKnob.removeEventListener(Event.ENTER_FRAME, seekKnobUpdate);
Test the movie again. The errors disappear.
If you like, compare your work with TinBangsMilestone.fla in the Complete/MP3Player folder for this chapter. When you're ready to move on, you'll be wiring up the buttons.
But before you proceed, make sure to uncomment those three lines again!
Remember that the Play/Pause button has already been programmed, which speeds things up a bit. Because we have the new playSong() and pauseSong() functions, you will need to make a few changes to what's there. Fortunately, this shortens the existing ActionScript, which is all part of the secondary plot for this exercise: code optimization. Let's do it.
In case you're not already there, click into frame 1 of the scripts layer again and open the Actions panel. Find the Buttons code block and update what you see to the following new lines (new ActionScript in bold):
//////////////////////////////////////// // Buttons //////////////////////////////////////// // prep btnPlay.stop(); btnPlay.buttonMode = true;btnPrev.buttonMode = true;btnNext.buttonMode = true;// events btnPlay.addEventListener(MouseEvent.CLICK,playHandler);btnPrev.addEventListener(MouseEvent.CLICK, prevHandler);btnNext.addEventListener(MouseEvent.CLICK, nextHandler);
There's nothing difficult here. The Prev and Next buttons need their MovieClip.buttonMode properties set to true, simply because—like Pause/Play—they're movieclips that are masquerading as buttons. Following suit, they get assigned to their respective event handlers. Because there are now three click-related event handlers, the function originally assigned to the btnPlay instance has been renamed playHandler() (it was formerly clickHandler()).
Speaking of clickHandler(), you need to update it so that it reflects the following new code, making sure to rename it as shown (revisions in bold):
functionplayHandler(evt:MouseEvent):void { if (channel != null) { if (btnPlay.currentLabel == "play") {playSong(pos);} else {
pos = channel.position;
      pauseSong();
    }
  }
};
Here's where the custom functions begin to earn their keep. The behavior of the playhandler() function is intact, but thanks to the playSong() and pauseSong() functions, the actual lines of code have been reduced.
Notice, as before, that on one side of the else clause, the pos variable is set to the SoundChannel.position property of the channel instance. On the other side of that else clause, pos is passed into the playSong() function as a parameter. When you look at the playSong() function definition in the previous section, you'll see that the variable between the function's parentheses also happens to be called pos. That's a coincidence, and nothing more. Whether or not they're named the same, a value that represents the song's position is conveyed, and that's all that matters.
Note
In real-world situations, you'll often find that project requirements change. In fact, it's rare when they don't! When this happens, you'll find yourself better equipped to respond to revisions when you're dealing with reusable functions. If the concept embodied by the playSong() function happens to change, you need to edit only one function in a single place, rather than needing to use a hunt-and-peck approach to touch up numerous blocks of code.
The Prev and Next buttons are taken care of with one function apiece. Add the following two event handlers beneath the playHandler() function:
function prevHandler(evt:MouseEvent):void {
  currentSong--;
  if (currentSong < 1) {
    currentSong = songList.song.length() - 1;
  }
  songsCB.selectedIndex = currentSong;
  loadSong(songList.song[currentSong].@data);
};
function nextHandler(evt:MouseEvent):void {
  currentSong++;
  if (currentSong > songList.song.length() - 1) {
    currentSong = 1;
  }
  songsCB.selectedIndex = currentSong;
  loadSong(songList.song[currentSong].@data);
};
These should be reminiscent of the Next button in the Beijing slide show. Here, these two functions are metaphorically mirror images of each other. In prevHandler(), the value of the currentSong variable is decreased by 1 (currentSong--). If currentSong is less than 1—which it will be, eventually—then the variable is set to one less than the total number of <song> elements in the XML document (songList.song.length() - 1). Why one less than the total? Because arrays start with 0, rather than 1. Why aren't we checking if currentSong is less than 0, then? Because the first entry in the XML, and therefore the ComboBox component, is the "dead" entry without data—the one that says Select a song.
Once currentSong is updated, the selected index of the ComboBox component is configured to reflect that change, and the custom loadSong() function is instructed to load the new current selection. The parameter's expression happens to be based on the XML content, using a bit of E4X syntax—songList.song[currentSong].@data—but it could have just as easily be taken from the ComboBox component.
In contrast, the nextHandler() function increments the value of currentSong, and then sets it back to 1 if it goes beyond one less than the total number of <song> nodes in the XML—in other words, the reverse. After that, the ComboBox component is updated and, once again, the loadSong() function is instructed to load the current selection.
Note
Wait a minute! The last two lines of these functions overlap! Shouldn't they be folded into yet another function—maybe updateSong()? You could certainly do that. Optimization is as much an art as a science, and we encour-age you to find your personal line in the sand.
You're about to enter into the thickest part of the ActionScript for this project, so you may want to pull out your machete. Actually, it's not so bad, once you strike past the first bit of foliage. The mosquitoes are pretty big, true, but that makes it all the easier to swat them with the blade.
Joking aside, the ActionScript for the sliders isn't going to make your head explode. To understand it better, it helps to take a closer look at the way the slider-related symbols are laid out. Their registration points, in particular, are designed to make the math as easy as possible, so let's take a gander. Figure 14-14 shows these registration points.

There are two parts to this slider: the SeekKnob symbol and the SeekBar symbol. When the knob is positioned on the bar's left edge, as shown in Figure 14-14, notice that the registration points of each symbol (the two pluses along each symbol's upper edges) are aligned. This happens because SeekBar's registration point—its 0,0 position—is located in that symbol's upper-left corner. SeekKnob's registration point, on the other hand, is located in that symbol's top center.
Both of these symbols are positioned 260 pixels from the left side of the stage. If SeekKnob's registration point was also in its own upper-left corner, it would have to be offset by several pixels to look as if it were hugging the left edge of SeekBar. As it is, however, the numbers are easy. To coordinate its movements with SeekBar, all SeekKnob has to do is know SeekBar's horizontal position (seekBar.x) and take into consideration SeekBar's width (seekBar.width). Figure 14-15 gives a quick visual breakdown.

Figure 14.15. The position of the knob and position and width of the bar are the critical properties.
To position the knob along the bar's left edge, all you need to do set its MovieClip.x property to the bar's MovieClip.x property. To slide it halfway across, set the knob's x property to the x property of the bar, plus half of the bar's width. To shove it all the way over, set its x property to bar's, plus the full width of the bar. Keep this principle in mind as we work through the seek slider ActionScript.
To begin, copy another one of the commented code block headers and paste it below the last bit of ActionScript (nextHandler(), from the Buttons section). Change the header's caption to Seek slider, and then type in the following ActionScript, so that your code looks like this:
////////////////////////////////////////
// Seek slider
////////////////////////////////////////

// prep
seekKnob.buttonMode = true;

// events
seekKnob.addEventListener(MouseEvent.MOUSE_DOWN, seekStartDrag);
Like the Prev, Play/Pause, and Next movieclip "buttons," the seekKnob instance needs to have its buttonMode property set to true. When the user clicks it, you want the user to be able to start dragging that knob, so the MouseEvent.MOUSE_DOWN event is associated with a custom function you're about to write, called seekStartDrag(). That function is triggered when the user clicks the mouse (MOUSE_DOWN) on the seekKnob instance. Type the following new ActionScript:
function seekStartDrag(evt:MouseEvent):void {
  if (song != null) {
    pauseSong();
    rect = new Rectangle(seekBar.x, seekKnob.y, seekBar.width, 0);
    seekKnob.startDrag(true, rect);
    stage.addEventListener(MouseEvent.MOUSE_UP, seekStopDrag);
  }
};
If the song instance isn't null—it's null, for example, before a song is chosen from the combo box—then pause the song, in case it's playing. Next, define a Rectangle instance (stored in the rect variable), which will be used to constrain dragging to the desired location.
Rectangle instances are specified at a particular location (x and y) and at a particular width and height. In this case, we want the knob to be draggable only from the left side of the bar (seekBar.x, the first parameter) to the right side (seekBar.width, the third parameter). Its vertical position is fine where it is (seekKnob.y, the second parameter) and shouldn't vary from that, which means we set the rectangle to a height of 0 (the fourth parameter).
The MovieClip.startDrag() method, invoked on seekKnob, is fed two parameters: true, which snaps dragging to the symbol's registration point, and rect, which confines dragging to the dimensions just described.
Finally, a MouseEvent.MOUSE_UP event handler is associated with the stage, configured to trigger a custom seekStopDrag() function. Why is this association made with the stage, rather than with seekKnob? Because the user might just drag the mouse off the knob before releasing the mouse (MOUSE_UP). If the event handler were associated with seekKnob, then seekStopDrag() wouldn't be triggered. But when it's assigned to the stage, that pretty much means the mouse can be lifted anywhere, and the dragging routine will stop.
Here's the seekStopDrag() function. Type the following new ActionScript:
function seekStopDrag(evt:MouseEvent):void {
  seekKnob.stopDrag();
  playSong(song.length * (seekKnob.x - seekBar.x) / seekBar.width);
  stage.removeEventListener(MouseEvent.MOUSE_UP, seekStopDrag);
};
The first thing this function does is invoke MovieClip.stopDrag() on the seekKnob instance. That part is easy. The challenge comes in telling the song where to begin playing again, because it all depends on where the knob is currently positioned along the bar. To illustrate, let's imagine the user dragged the knob right to the middle, and let's pretend the song is exactly 60 seconds long. Let's use those figures and run the math.
Here's the actual expression:
song.length * (seekKnob.x - seekBar.x) / seekBar.width
Using the numbers we just agreed on, that equates to this:
60 seconds × (knob's position / bar's position) / bar's width
60 * (329 / 260) / 138
60, multiplied by the difference between 329 and 260 (namely, 69) is 4,140. Divided by 138, the final number is 30 seconds, which is exactly what's expected when the knob is dropped halfway across.
The final total of the arithmetic equation is fed into the playSong() function, which starts the song from whatever value, in seconds, is provided.
The last thing this function does is to tell the stage to stop listening for the MOUSE_UP event, because the event obviously just occurred (since this function handles it).
In the playSong() function definition, seekKnob is associated with an Event.ENTER_FRAME event, which tells the knob to continuously update its position according to how much of the song has played. Here's that function. Type the following new ActionScript:
function seekKnobUpdate(evt:Event):void {
  var pos:Number = seekBar.width * channel.position / song.length;
  if (!isNaN(pos)) {
    seekKnob.x = seekBar.x + pos;
  } else {
seekKnob.x = seekBar.x; } };
Here's that pos variable again (a third one!). This one is unrelated to the other two, except in name. To the authors, pos just seems like an appropriate name for a variable for noting the position of something. In this case, pos is declared within the scope of this function and set to an expression that effectively does the opposite of the expression shown earlier. Let's run the numbers again, assuming that, at this very moment, our hypothetical 60-second song has played halfway through. Here's the actual expression:
seekBar.width * channel.position / song.length,
It equates to this:
bar's width × song's position / song's length
138 * 30 / 60
138 multiplied by 30 is 4,140 (sounds familiar, doesn't it?). 4,140 divided by 60 is 69. Hold that thought.
There may be times when neither channel nor song have property values that yield a valid number when run through the math. To safeguard against that, an if statement uses the isNaN() function (is Not a Number) to prod the value of pos (which is hypothetically 69). If pos is a valid number—that is, if !isNaN(pos) evaluates to true—then it is added to the current MovieClip.x value of seekBar, the sum of which is bestowed upon seekKnob. Because seekBar's position is 260, that (added to 69) puts seekKnob at 329, which is exactly halfway across the bar.
Note
The exclamation point (!) in front of the isNaN() function inverts whatever that function says, in the same way that the inequality operator (!=) means "is not equal to." If you want to find out if a value is not a valid number, check it against isNaN(). On the other hand, if you want to find out if a value is a valid number, check it against !isNaN().
The flip side of that if statement—meaning, pos is an unusable number—simply sets the knob's position to the position of the bar, which resets the knob to its original hug-the-left-side location.
As the song plays through, this seekKnobUpdate() function is triggered every time the timeline enters a frame; in other words, continuously. This causes the knob to indicate progress until the function is instructed to stop.
The mechanics of the volume slider work in pretty much the same way. A similar knob symbol is instructed to drag within a constrained area. The difference is that the knob's position in relation to its bar is used to adjust the volume of the currently playing song. In addition, a separate symbol is instructed to follow the knob, whose movement either hides or reveals that symbol behind a mask. Let's add the code.
Continuing below the previous ActionScript, give yourself another code comment heading, this time captioned as Volume slider. Type in these additional new lines:
//////////////////////////////////////// // Volume slider //////////////////////////////////////// // prep volumeSlider.volumeKnob.buttonMode = true; // events volumeSlider.volumeKnob.addEventListener(MouseEvent.MOUSE_DOWN,volumeStartDrag);
The volumeKnob instance is nested inside volumeSlider, and that's because those movieclips are nested. Other than that, there is nothing remarkable about this addition. Let's keep rolling.
Enter the following new ActionScript, which defines the volumeStartDrag() function just referenced:
function volumeStartDrag(evt:MouseEvent):void {
  rect = new Rectangle(8, volumeSlider.volumeKnob.y,
volumeSlider.volumeBar.width - 8, 0);
  volumeSlider.volumeKnob.startDrag(true, rect);
  volumeSlider.volumeKnob.addEventListener(MouseEvent.MOUSE_MOVE,
volumeAdjust);
  stage.addEventListener(MouseEvent.MOUSE_UP, volumeStopDrag);
};
As with the other slider, rect is set to a new Rectangle instance when the knob is clicked and fed appropriate values. In this case, the values are purposefully tweaked to move the knob in from the left edge just a bit. Why? Because if the volume knob were dragged all the way to the left, it would completely obscure the red movieclip rectangle behind the slanted five-column mask. Letting it go almost all the way to the left—8 pixels shy, in this case—looks good visually.
The startDrag() method is invoked on volumeKnob, and again the stage is associated with a MouseEvent.MOUSE_UP event to stop the dragging. This time, though, an additional event (MOUSE_MOVE) is associated with a custom function named volumeAdjust(). Let's look at both of those.
Enter the following new ActionScript:
function volumeStopDrag(evt:MouseEvent):void {
  volumeSlider.volumeKnob.stopDrag();
  stage.removeEventListener(MouseEvent.MOUSE_UP, volumeStopDrag);
  volumeSlider.volumeKnob.removeEventListener(MouseEvent.MOUSE_MOVE,
volumeAdjust);
};
function volumeAdjust(evt:MouseEvent):void {
  volumeSlider.volumeBar.x = volumeSlider.volumeKnob.x;
  if (channel != null) {
    xform = channel.soundTransform;
    xform.volume = (volumeSlider.volumeKnob.x - 8) / (
volumeSlider.volumeBar.width - 8);
    channel.soundTransform = xform;
  }
};
The volumeStopDrag() function is old hat by now. It stops the dragging and stops the MOUSE_MOVE handler. Let's break down the volumeAdjust() function.
First off, it sets the position of volumeBar to the position of volumeKnob. That hides and reveals the red rectangle behind its mask in concert with the knob's position. After that, assuming channel is not null, the xform variable—declared early on—is set to the SoundChannel.soundTransform property of the channel instance. This gives xform a SoundTransform.volume property, whose value is set in terms of volumeKnob's position (accounting for that 8-pixel shy span) in relation to the width of volumeBar.
The VolumeBar symbol happens to be 50 pixels wide, so let's run the numbers assuming the knob has been dragged halfway across the valid range. (Normally, halfway across would be 25, but we're adding half of that 8-pixel buffer, so half is 29 here.) Here's the actual expression:
volumeSlider.volumeKnob.x - 8) / (volumeSlider.volumeBar.width - 8
It equates to this:
knob's position - 8, divided by bar's width - 8
29 - 8 / 50 - 8
29 minus 8 is 21. 50 minus 8 is 42. 21 divided by 42 is 0.5, or 50%.
xform's volume property is set to 0.5, and then the final line reassigns xform to the channel.soundTransform property, which cuts the volume in half. Remember that this function is triggered every time the mouse moves, as it drags the knob.
Almost in the clear!
The rest of the controls require barely a flick of the tail. All we need to do is hide the LoadingDisplay symbol (the spinning dots) by default, and handle the Event.ID3 event. Let's do it.
Add another block of code that looks like this:
////////////////////////////////////////
// Loading display
////////////////////////////////////////

loadingDisplay.stop();
loadingDisplay.visible = false;
This stops and hides the spinning dots.
Now, enter your final block of code, and make it look like this:
////////////////////////////////////////
// Song Data
////////////////////////////////////////
function soundID3Handler(evt:Event):void {
  songData.text = song.id3.artist + ": " + song.id3.songName + "
(" + song.id3.year + ")";
};
This function is triggered whenever an MP3's ID3 tags are encountered. Tag information is retrieved from the Sound.id3 property of the song instance—here, song.id3.artist, .songName, and .year—and concatenated into a string fed to the songData text field's text property.
Note
ID3 tags have nothing to do with ActionScript 3.0 per se. The concept is part of the MP3 file format, and it just happens to be supported by ActionScript. On their own, ID3 tag names aren't especially easy to read. The tag intended for the artist's name, for example, is TPE1; the publication year is TYER, and so on. ActionScript provides friendly names for the most popular tags—comment, album, genre, songName, artist, track, and year—but the others are available by their less intuitive tag names. To see the full list, look up the Sound class in the ActionScript 3.0 Language and Components Reference, then skim down the Properties heading until you come to id3. Click that listing.
Test your MP3 player to give it a spin. Kick the tires a bit.
Even with the best of planning, you might be surprised to find that some aspects of a project, including its faults, don't make themselves apparent until the work is done—or at least, until a first draft is done. (Some projects never do seem to end! Hey, at least it's a paycheck.) In Chapter 15, we discuss the idea of planning a FLA beforehand—the authors do believe in the practice, with a passion—but sometimes you can't tell how a car is going to handle until you actually wrap your fingers around the steering wheel and slam your boot on the gas pedal.
In this case, you may have noticed that every time a new song plays, the volume jumps back up to 100%, no matter where you drag the volume slider. Worse, when this happens, the volume is audibly at full, even though the slider might be positioned all the way to the left. That's a bug, and we're going to fix it.
In addition, you might want the player to cycle through the whole playlist, rather than simply stop after a song ends. You might also want the first song to start playing automatically. All of these options are possible, and thanks to the thoughtful arrangement of our existing ActionScript, they're easy to implement.
Let's tie up this MP3 player with a bow. First, let's address the volume bug. Locate the volumeAdjust() function, just above the Loading display block, and give its evt parameter a default value of null—like this (revision in bold):
function volumeAdjust(evt:MouseEvent = null):void {What does this do? Without the addition, this function requires a MouseEvent parameter, which pretty much means it must be triggered in response to an event, which passes in the MouseEvent automatically. By giving the evt parameter a null value by default, you're making the parameter optional. This means the volumeAdjust() function can be triggered from anywhere, as an event handler or not.
Locate the playSong() function and update it to look like this (revision in bold):
function playSong(pos:Number = 0):void {
  channel = song.play(pos);
  volumeAdjust();
  btnPlay.gotoAndStop("pause");
  seekKnob.addEventListener(Event.ENTER_FRAME, seekKnobUpdate);
};
Just like that, the bug is fixed! The playSong() function actually sets the newly loaded song in motion, to speak, and associates the song instance with the channel instance. With channel updated, the xform variable, referenced inside volumeAdjust(), has what it needs to check the current position of the volume slider and adjust the volume accordingly.
Since we're in the playSong() function anyway, it's the perfect time to add a new event listener that will allow the player loop through its playlist. Update the playSong() function again to look like this (revision in bold):
function playSong(pos:Number = 0):void {
  channel = song.play(pos);
  channel.addEventListener(Event.SOUND_COMPLETE, nextHandler);
  volumeAdjust();
  btnPlay.gotoAndStop("pause");
  seekKnob.addEventListener(Event.ENTER_FRAME, seekKnobUpdate);
};
Once the channel variable is updated, it's associated with the already-written nextHandler() function in response to the Event.SOUND_COMPLETE event, which is dispatched when the sound channel of a currently playing sound reaches the end of the file.
Remember that the nextHandler() function is also associated with the MouseEvent.CLICK event, which is triggered when someone clicks the Next button. The MouseEvent class inherits some of its functionality from the Event class, and in this case, it's safe to strongly type the evt parameter inside the nextHandler() function as Event. This is because, at rock bottom, both Event and MouseEvent instances are ultimately instances of Event.
Locate the nextHandler() function and change it to look like this (revision in bold):
function nextHandler(evt: Event):void {Finally, to make this MP3 player begin in "auto-play" mode, locate the completeHandler() function, just above the ComboBox block, and add the new lines shown in bold:
function completeHandler(evt:Event):void {
  songList = XML(evt.target.data);
  songsCB.dataProvider = new DataProvider(songList);
  loadSong(songList.song[1].@data);
  songsCB.selectedIndex = 1;
};
When the XML playlist fully loads, completeHandler() is triggered. It populates the ComboBox component. In addition to that, it now invokes the loadSong() function and feeds it the file name from the first <song> element that actually refers to an MP3 file (remember that the very first <song> element—songList.song[0]—doesn't contain file data). After that, the function updates the ComboBox component to its first song entry (the one after the filler Select a song entry), by setting its selectedIndex property to 1.
Test your movie again and, while you're tapping your feet, give yourself a pat on the back.
You picked up a lot of knowledge about Flash video in Chapter 10. We are willing to bet that quite a few of you finished the chapter and wondered, "Can I create my own video controller . . . from scratch?" Glad you asked! On the heels of the MP3 player, building on what you already know, it won't even be very difficult.
To see how the controller is assembled, open the VideoPlayer.fla file in the Exercise folder for this chapter. Notice there is, for all intents and purposes, an empty stage with a controller near the bottom edge. Looking in the library, you will discover the controller is composed of nothing more than a number of movieclips, as shown in Figure 14-16. And you'll see that the entire Flash movie is composed of a single frame on the timeline.
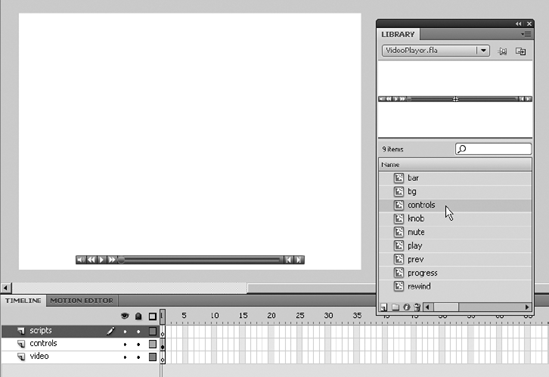
The really interesting thing about this controller is that it was created entirely in Flash using the techniques presented in Chapter 2 of this book. The shapes were all drawn with the Rectangle Primitive and Oval tools. Each object was then filled with either a linear or radial gradient and converted to a movieclip symbol. The icons are nothing more than characters from the Webdings font, broken down to shapes.
Feel free to poke through the movieclips to get an idea of how this project was assembled. The play and mute symbols have two frames apiece in their own timelines, and are laid out like the Play/Pause button from the MP3 player exercise; that is, frame labels distinguish between the play/pause icons and mute/unmute icons. The movieclips with icons use the same trick you learned about in the previous exercise—a background shape with 0% Alpha fill—to give these "buttons" greater clickable surface area.
It's all well and good to know how the controller was assembled, but of course, the real magic happens when it gets wired up with ActionScript. There's going to be a bit of code coming at you, but now that you've built an MP3 player, lots of this will look familiar.
First, you need a video object under the controls player. Right-click (Ctrl-click) inside the library and select New Video to create the object, and then drag it to the stage in the video layer. Change the object's dimensions so that it matches the width and height of the stage, and position it at 0,0. Give this video object the instance name myVideo.
Select the frame 1 in the scripts layer and open the Actions panel. Click once in the Script pane and enter the following code (to get the commented code block header, you can copy and paste from the previous exercise):
////////////////////////////////////////
// Variables
////////////////////////////////////////

var duration:Number;
var pos:Number;
var xform:SoundTransform;
var rect:Rectangle;

var currentVideo:int = 0;
var seekRate:int = 10;
var rwTimer:Timer = new Timer(100, 0);
var ffTimer:Timer = new Timer(100, 0);
The first four lines contain a number of variables that will be used later in the ActionScript: duration will refer to the length of the currently playing video, pos will correspond to the current position in the video, xform will adjust volume, and rect will constrain dragging for the slider knob.
The second four lines not only declare a few more variables, but initialize them with values, as well. currentVideo indicates the currently playing video, and seekRate determines how quickly the user will be able to fast-forward and rewind the current video. The last two set up two Timer instances that, when started, will trigger their associated functions—coming later—every 100 milliseconds (that is, every tenth of a second). The second parameter for each—a 0 in both cases—means the timers will repeat forever, or until told to stop.
Now it's time for the NetConnection and NetStream hookup. Enter the following new ActionScript beneath the existing code:
// net connection / net stream
var nc:NetConnection = new NetConnection();
nc.connect(null);
var ns:NetStream = new NetStream(nc);
myVideo.attachNetStream(ns);

var listener:Object = new Object();
listener.onMetaData = metaDataHandler;
function metaDataHandler(md:Object):void {
  duration = md.duration;
};
ns.client = listener;

ns.addEventListener(NetStatusEvent.NET_STATUS, statusHandler);
function statusHandler(evt:NetStatusEvent):void {
  if (evt.info.code == "NetStream.Play.Stop") {
    nextHandler();
  }
};
Much of this is code you saw a dozen times in Chapter 10. Most of the NetConnection and NetStream code—with our familiar nc and ns variable names—hasn't differed from elsewhere in the book.
What is new is that fact that we're actually using the onMetaData event this time, rather than throwing it the "oh, shut up already!" empty function seen previously (listener.onMetaData = function(md:Object):void {};). In this case, we do want something in the video's metadata: the duration of the video. We retrieve that value by pulling it from the duration property of the md parameter that represents the metadata:
listener.onMetaData = metaDataHandler;
function metaDataHandler(md:Object):void {
  duration = md.duration;
};
This value is stored in the duration variable declared earlier. You'll see how it's used in the fast-forward and rewind functions.
To make this video player loop through its playlist, as the MP3 player does, the same principle is used, but the mechanics are different here:
ns.addEventListener(NetStatusEvent.NET_STATUS, statusHandler);
function statusHandler(evt:NetStatusEvent):void {
  if (evt.info.code == "NetStream.Play.Stop") {
    nextHandler();
  }
};
A custom function, statusHandler(), is associated with the ns instance by way of a NetStatusEvent.NET_STATUS event. This is an event that is dispatched numerous times throughout the loading and playback of a video file, which makes sense. The video experiences all sorts of changes while it plays (loading, buffering, playing, and so on), and its status changes as a result. The NetStatusEvent class features an info property, which contains a code property that indicates the video's current status. When the video reaches its end—indicated by the string "NetStream.Play.Stop"—we want to trigger the custom nextHandler() function. This is just what we did with the MP3 player. And when we get to the button event handlers, you'll see how well you already recognize the nextHandler() function.
This video player reads its playlist from XML, so the next little bit won't be uncharted territory. Enter the following ActionScript beneath the existing code:
// xml
var videoList:XML = new XML();
var loader:URLLoader = new URLLoader();
var req:URLRequest = new URLRequest("playlist.xml");
loader.load(req);

loader.addEventListener(Event.COMPLETE, completeHandler);
function completeHandler(evt:Event):void {
  videoList = XML(evt.target.data);
  ns.play(videoList.video[currentVideo][email protected]());
  resumeVideo();
};
The only things worth noting here are the toString() method, tacked to the end of the E4X expression, and the reference to a custom resumeVideo() function. The reason toString() is needed here is because we're not using a custom loadVideo() function, like the MP3 player's loadSong(). The MP3 player's loadSong() function effectively converted its parameter's value to a string, and thanks to the omission here, we're taking care of that ourselves.
So how does the XML look this time? Like this:
<playlist>
  <video file="InkSong.mp4" />
  <video file="InspectorGadget.flv" />
  <video file="PeterWolf.flv" />
</playlist>
The resumeVideo() reference may seem a bit weird, because the video should already be playing, right? (Note the ns.play() call in the previous line.)
True enough, but as with the previous exercise, this player also tracks playback progress by way of a traveling slider knob, and the resumeVideo() function assigns the Event.ENTER_FRAME handler that manages that movement. In fact, speak of the devil . . .
Type the following ActionScript beneath the existing code:
////////////////////////////////////////
// Video functions
////////////////////////////////////////
function resumeVideo():void {
  ns.resume();
  videoControls.btnPlay.gotoAndStop("pause");
  videoControls.knob.addEventListener(Event.ENTER_FRAME,
seekKnobUpdate);
};
function pauseVideo():void {
  ns.pause();
  videoControls.btnPlay.gotoAndStop("play");
  videoControls.knob.removeEventListener(Event.ENTER_FRAME,
seekKnobUpdate);
};
Here are two custom functions that help thin out the code a bit for the remaining event handlers. Because of the animated slider knob and toggleable Play/Pause button, the act of pausing and resuming video playback requires more than just a reference to NetStream.pause() or NetStream.resume(). To save keystrokes down the line, these functions invoke the relevant NetStream methods and, in addition, update the Play/Pause button icon, and then either add or remove the custom seekKnobUpdate() function as a listener of the Event.ENTER_FRAME event.
Note that the knob instance—the knob movieclip in the library—is nested inside the videoControls instance (controls in the library). Nesting the symbols makes it easy to move around all of the playback controls as a single group while on the main timeline.
It's already time for the buttons! Nothing to it, but to do it.
In the Actions panel, type the following ActionScript beneath what's already there:
// prep
with (videoControls) {
  btnMute.stop();
  btnMute.buttonMode = true;
  btnRewind.buttonMode = true;
  btnPlay.stop();
  btnPlay.buttonMode = true;
  btnFastForward.buttonMode = true;
  btnPrev.buttonMode = true;
  btnNext.buttonMode = true;
};

// events
with (videoControls) {
  btnMute.addEventListener(MouseEvent.CLICK, muteHandler);
  btnRewind.addEventListener(MouseEvent.MOUSE_DOWN,
rwDownHandler);
btnRewind.addEventListener(MouseEvent.MOUSE_UP, rwUpHandler); btnPlay.addEventListener(MouseEvent.CLICK, playHandler); btnFastForward.addEventListener(MouseEvent.MOUSE_DOWN,ffDownHandler); btnFastForward.addEventListener(MouseEvent.MOUSE_UP, ffUpHandler); btnPrev.addEventListener(MouseEvent.CLICK, prevHandler); btnNext.addEventListener(MouseEvent.CLICK, nextHandler); };
The with() statement is new, but it's an easy concept to grasp, and useful in situations like this one. Basically, it's a programmer's shortcut. All of these movieclip buttons are nested inside the controls symbol, whose instance name is videoControls. Rather than referring tediously to each nested movieclip like this:
videoControls.btnMute.stop();
videoControls.btnMute.buttonMode = true;
videoControls.btnRewind.buttonMode = true;
// . . .
the with() statement allows us to skip the formalities and let the compiler know that, while we're inside those curly brackets ({ . . . }), we're talking about objects inside the videoControls instance.
With that explained, the ActionScript itself should make perfect sense. In the first several lines, the symbols' buttonMode property is set to true, to make these movieclips respond visually like buttons. In addition, btnMute and btnPlay are instructed to stop their timelines (these are the two symbols with more than one frame apiece).
The second group of lines wires up all the corresponding event handlers. Most of the buttons need to respond only to the MouseEvent.CLICK event, but the rewind and fast-forward buttons require the use of click and hold. For this reason, those movieclips are associated with MouseEvent.MOUSE_DOWN to begin the rewind or fast-forward routine, and MouseEvent.MOUSE_UP to cancel it.
Here's the code for the Mute button. Type this beneath the existing ActionScript:
function muteHandler(evt:MouseEvent):void {
  xform = ns.soundTransform;
  if (videoControls.btnMute.currentLabel == "on") {
    videoControls.btnMute.gotoAndStop("off");
    xform.volume = 0;
  } else {
    videoControls.btnMute.gotoAndStop("on");
    xform.volume = 1;
  }
  ns.soundTransform = xform;
};
The mechanism here is identical to the way the Play/Pause button works for the MP3 player: the movieclip's current label is consulted, and if it's showing "on," the playhead is shifted to the "off" frame (and vice versa). Based on this information, the xform instance's volume property is set to either 0 (silent) or 1 (full volume).
Here are the "down" and "up" handlers for the Rewind button. Once you grasp this one, you'll be able to understand the Fast-Forward button as well. Type this beneath the existing ActionScript:
function rwDownHandler(evt:MouseEvent):void {
  rwTimer.start();
};
function rwUpHandler(evt:MouseEvent):void {
  rwTimer.stop();
};
When users want to rewind, they click and hold the Rewind button. This triggers the rwDownHandler() function, which starts the rwTimer instance. The timer is what performs the actual rewinding, and you'll see how that works at the end of this exercise. When the user releases the button, the rwUpHandler() function stops the rwTimer. It's as simple as that.
Type the companion "up" and "down" handlers for the Fast-Forward button as well:
function ffDownHandler(evt:MouseEvent):void {
  ffTimer.start();
};
function ffUpHandler(evt:MouseEvent):void {
  ffTimer.stop();
};
The code for the Play button is just as self-explanatory. Enter its event handler beneath the existing ActionScript:
function playHandler(evt:MouseEvent):void {
  if (videoControls.btnPlay.currentLabel == "play") {
    pauseVideo();
  } else {
    resumeVideo();
  }
};
The code for the Prev and Next buttons is so similar to the MP3 player's version, we're confident you'll be able to connect the dots. Type the following ActionScript after the existing code:
function prevHandler(evt:Event):void {
  currentVideo--;
  if (currentVideo < 0) {
    currentVideo = videoList.video.length() - 1;
  }
  ns.play(videoList.video[currentVideo][email protected]());
  resumeVideo();
};
function nextHandler(evt:Event = null):void {
currentVideo++;
if (currentVideo > videoList.video.length() - 1) {
currentVideo = 0;
}
ns.play(videoList.video[currentVideo][email protected]());
resumeVideo();
};As with the MP3 player, the nextHandler() function's evt parameter is given a null value by default, and for the same reason: this function is invoked as an event handler and also as a stand-alone function.
We hope you're beginning to notice a theme here. Maybe a sense of déjà vu? The concepts we're discussing may not quite roll off the tongue just yet, but we hope some of these trees start looking familiar—that you get some comfort from the sense that Lake Nanagook seems to have a few well-worn landmarks. Let's take a look at the slider code for this video player.
Continuing with the existing code, type the following new ActionScript beneath the Buttons block:
//////////////////////////////////////// // Seek slider //////////////////////////////////////// // prep videoControls.knob.buttonMode = true; // events videoControls.knob.addEventListener(MouseEvent.MOUSE_DOWN,seekStartDrag);
This is old hat, by now. The knob is instructed to respond to the mouse cursor like a button, and a custom seekStartDrag() function is associated with the MouseEvent.MOUSE_DOWN event.
Here's that seekStartDrag() function. Type the following ActionScript beneath what's already there:
function seekStartDrag(evt:MouseEvent):void {
  videoControls.knob.removeEventListener(Event.ENTER_FRAME,
seekKnobUpdate);
  rect = new Rectangle(videoControls.bar.x, videoControls.knob.y,
videoControls.bar.width, 0);
  videoControls.knob.startDrag(true, rect);
  stage.addEventListener(MouseEvent.MOUSE_UP, seekStopDrag);
};
The instance names may have changed, but the dance is still the same.
When the user presses the mouse over the knob in order to drag it, the seekKnobUpdate() function, which animates its movement, needs to be halted. If not, the knob will skip around frantically, trying to obey both the startDrag() method (which happens in this very event handler) and the looping seekKnobUpdate() function. The very first line of this function—removeEventListener()—accomplishes this need perfectly. Why not instead use the custom pauseVideo() function, which also invokes the same removeEventListener()? It's a matter of choice. You certainly could. To mix things up, we decided to let the video continue while the user scrubs around.
The rect variable is assigned a new Rectangle instance, which is employed, as before, to constrain the area of the dragging. To wrap up the function, the stage is asked to keep an ear open for MouseEvent.MOUSE_UP.
Let's go ahead and write the event handler for that MOUSE_UP listener. Type in the following new code:
function seekStopDrag(evt:MouseEvent):void {
  videoControls.knob.stopDrag();
  ns.seek(duration * (videoControls.knob.x - videoControls.bar.x) /
videoControls.bar.width);
  if (videoControls.btnPlay.currentLabel == "pause") {
    videoControls.knob.addEventListener(Event.ENTER_FRAME,
seekKnobUpdate);
  }
  stage.removeEventListener(MouseEvent.MOUSE_UP, seekStopDrag);
};
Compare this with the version in the MP3 player, and you'll see how similar they are. When the user releases the mouse—either over the knob or accidentally off of it—the stopDrag() method halts the dragging. The location of the knob, in collaboration with the location of the bar and its width, is multiplied against the duration of the video—remember that this was gathered thanks to the onMetaData event handler—to determine the numeric value fed into the NetStream.seek() method. The seek() method sends the video to the nearest video keyframe specified by its parameter, provided that portion of the video has already downloaded.
The if statement checks if the video is currently playing, and if so, reassigns the Event.ENTER_FRAME event handler that animates the knob's position. Finally, because the stage listener is no longer needed, this function unhooks its MouseEvent.MOUSE_UP association.
And here's the seekKnobUpdate() function, which moves the knob in correspondence with the progression of the video. Type the following ActionScript under the existing code:
function seekKnobUpdate(evt:Event = null):void {
  var pos:Number = videoControls.bar.width * ns.time / duration;
  if (!isNaN(pos)) {
    videoControls.knob.x = videoControls.bar.x + pos;
  } else {
    videoControls.knob.x = videoControls.bar.x;
  }
};
This function operates just like its cousin in the MP3 player. Note that its evt parameter is set to null by default, which makes it optional. This happens here for the same reason you've seen the technique used elsewhere in this chapter: this function needs to be called either as an event handler or on its own. The on-its-own part happens in the Timer event handlers, which are coming up next.
In the NetStream.seek() method used in the previous section, the knob's position determined the time offset in which the video should play. Rewinding and fast-forwarding is nothing more than a repeat performance of the same functionality. The Timer instances you declared at the beginning of this exercise—rwTimer and ffTimer—and the seekRate variable, are about to give you everything you need to accomplish these features.
In the Actions panel, enter the following ActionScript beneath what's already there:
////////////////////////////////////////
// Timers
////////////////////////////////////////

// events
rwTimer.addEventListener(TimerEvent.TIMER, rewind);
ffTimer.addEventListener(TimerEvent.TIMER, fastforward);
When the rwTimer and ffTimer instances were declared, they were told to dispatch the TimerEvent.TIMER event every 100 milliseconds. Here, that event is associated with respective event handler functions for each timer. All you need to do now is write those functions.
Here's the first one of those, rewind(). Type the following ActionScript after the existing code:
function rewind(evt:TimerEvent):void {
  if (ns.time - seekRate > 0) {
    ns.seek(ns.time - seekRate);
  } else {
    ns.seek(0);
  }
  seekKnobUpdate();
};
Remember, when requested, this function executes every tenth of a second. The first thing it does is check the NetStream.time property, to see where the video currently is. Maybe it has been playing for 25 seconds, and if so, the time property would be 25. An if statement determines if the current video's time property minus seekRate (which happens to be 10) is greater than 0. At 25 seconds in, the answer is indeed yes, and if so, the ns instance is instructed to seek to that point in the video. Why check with an if statement? Because you don't want to seek to a negative number.
If the subtraction would, in fact, seek to a negative number, ns is told to seek to 0. Finally, the seekKnobUpdate() function updates the position of the knob to match the current time offset of the video.
With the code as it stands—specifically, a seekRate value of 10—the act of rewinding repeatedly sends the video playhead back 10 seconds at a time, which is a fairly hefty number. What if you want to seek to a finer degree? Just change seekRate to a smaller number—say, 5, 2, or maybe even 0.5. But watch out, if you do: unless you're using RTMP, as you would with Flash Media Server, you can only seek to video keyframes. The frequency of your keyframes (not timeline keyframes, but video keyframes) determines how successfully you can rewind or fast-forward. In the video files included with this chapter, you'll find that InkSong.mp4, which has many keyframes, handles a much smaller seekRate value than either of the FLVs. When you have a mix of videos, you'll need to go with the lowest common denominator, which in this case means the highest common seekRate value. How do you figure that value out? With good, old-fashioned testing.
To wrap it up, type these final lines at the very bottom of your script:
function fastforward(evt:TimerEvent):void {
  if (ns.time + seekRate < duration) {
    ns.seek(ns.time + seekRate);
  }
  seekKnobUpdate();
};
As you can see, this fastforward() code is nothing more than the opposite of its companion, rewind(). The reason there isn't an else clause in this one—it would have been else { ns.seek(duration) }—is that seeking to the very end of a video file is often a dicey thing. The duration value retrieved from the onMetaData handler is one of those "close, but not necessarily a cigar" things. Sometimes metadata isn't as truthful as it should be, and rather than accidentally make the attempt to seek too far past the duration of the file (which generates an error), this function puts the video as near the end of the video as it safely can.
As before, the seekKnobUpdate() function keeps the knob up-to-date on where it needs to be as fast-forwarding occurs. Remember that these timers are started and stopped in the event handlers triggered by mouse presses and releases to the Rewind and Fast-forward buttons.
Test the movie and enjoy the show (see Figure 14-17).

Note
After being mesmerized by the musical ink blots—truly an inventive and gorgeous combination of the visual and musical arts—you might be wondering what made us choose the particular videos we did to wrap up this chapter. There are a number of reasons, actually.
First and foremost, these videos are flat-out interesting.
Second, they're an inspiration. Chen Zhou, who created the "Ink's song" video, has accomplished with splashes of ink what Robert Bringhurst (quoted in Chapter 6) admonishes typographers to endeavor with text. The authors would like to thank the China Central Academy of Fine Arts' Media Lab in Beijing for permission to use Chen's video in this book. In the other two files, Greg Pattillo breaks the mold by performing his own interpretation of well-known tunes on the flute—while beatboxing at the same time. Recognized by the New York Times as "the best person in the world at what he does," Greg makes it clear that truly cool things can come from trying something new. We thank Greg for his permission to include his videos (collectively viewed online over 20 million times) with this book.
Third, these files are interesting from a technical standpoint. Why's that? The MP4 is an HD H.264-encoded file, while the FLVs are standard batch-encoded YouTube files. Why is this interesting? It demonstrates Flash Player's flexibility in a compelling way. Using a smattering of XML and less than 200 lines of ActionScript, you're able to build an insanely small (3KB!) video player that handles anything from 73MB HD video to popular YouTube performances. Now think back to Chapter 10. The FLVPlayback component does all of this, but the resulting SWF weighs in at 52KB. Use the drawing tools to create the assets, write a couple hundred lines of code to do it yourself, and your SWF sheds 49KB.
We think that's about as neat as it gets.
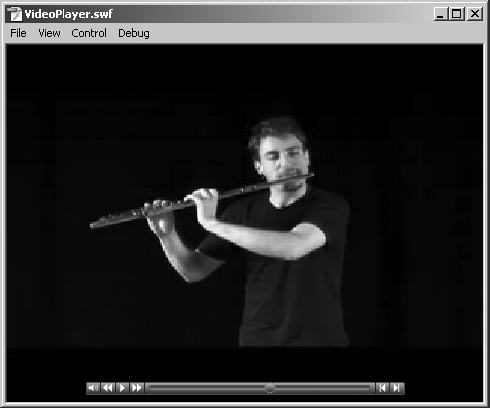
If you're interested in more beatbox flute, head over to http://cdbaby.com/cd/projectmusic, where Greg collaborates with Eric Stephenson (cello) and Peter Seymour (bass) in their genre-defying ensemble, PROJECT.
Rather than list what we covered in this chapter, we think it is more important to take a broader view of that statement. Step back for a moment and think about what you knew when you first laid this book on your desk and flamed up Flash CS4. The answer, we suspect, is "Not a lot."
Now think about your working through this chapter. The odds are pretty good you were able to follow along, and we are willing to bet there were a couple of points where you may have asked us to "move along a little quicker." This says to us that we have done our job, and that you may just know a lot more than you are aware of. Congratulations.
We were also a little sneaky with this chapter. If you follow the flow from the start to the end, you will see it actually follows the structure of this book: each exercise is designed to add to your knowledge base by building upon what you learned in the preceding exercise and, as we kept pointing out, in preceding chapters.
Finally, this chapter expanded on practically every concept presented in this book. If you have completed the exercises, then you have quite a bit of practical experience using Flash CS4.
Now that you've learned the ropes and have practiced numerous techniques, let's concentrate on the end game of the Flash design and development process: publishing your file.