
Most game programmers are interested in pushing graphics to the limit, first and foremost, and few of us really get enthusiastic about the sound effects and music in a game. That is natural, since the graphics system is the most critical aspect of the game. Sound can be an equal partner with the graphics to provide a memorable, challenging, and satisfying game experience far more than pretty graphics alone. Indeed, the sound effects and music are often what gamers love most about a game.
This chapter provides an introduction to the sound support that comes with Allegro, and Allegro is loaded with features! Allegro provides an interface to the underlying sound system available on any particular computer system first, and if some features are not available, Allegro will emulate them if necessary. For instance, a basic digital sound mixer is often the first request of a game designer considering the sound support for a game because this is the core of a sound engine. Allegro will interface with DirectSound on Windows systems to provide the mixer and many more features and will take advantage of any similar standardized library support in other operating systems to provide a consistent level of performance and function in a game on any system.
Here is a breakdown of the major topics in this chapter:
Using the sound initialization routines
Working with standard sample playback routines
Using low-level sample playback routines
I want to get started right away with a sample program to demonstrate how to load and play a WAV file through the sound system because this is the usual beginning of a more complex sound system in a game. Figure 6.1 shows the output from the PlayWave program. As with all the other support functions in Allegro, you only need to link to the Allegro library file (alleg.lib or liballeg.a) and include allegro.h in your program—no other special requirements are needed. Essentially, you have a built-in sound system along with everything else in Allegro. Go ahead and try out this program; I will explain how it works later in this chapter. All you need to run it is a sample WAV file, which you can usually find in abundance on the web in public domain sound libraries. I have included a sample clapping.wav file in the project folder for this program on the CD-ROM.

Figure 6.1. The PlayWave program demonstrates how to initialize the sound system and play a WAV file.
#include <allegro.h>

#define MODE GFX_AUTODETECT_WINDOWED
#define WIDTH 640
#define HEIGHT 480

int main(void) {
    SAMPLE *sample;
    int panning = 128;
    int pitch = 1000;
    int volume = 128;

    //initialize the program
    allegro_init();
    install_keyboard();
    install_timer();
    set_color_depth(16);
    set_gfx_mode(MODE, WIDTH, HEIGHT, 0, 0);

    //install a digital sound driver
    if (install_sound(DIGI_AUTODETECT, MIDI_NONE, "") != 0) {
        allegro_message("Error initializing sound system");
        return 1;
   }


    //display program information
    textout_ex(screen,font,"PlayWave Program (ESC to quit)",0,0,15,0);
    textprintf_ex(screen,font,0,10,15,0,"Sound Driver: %s",digi_driver-> name);
    textout_ex(screen,font,"Playing clapping.wav...",0,20,15,0);
    textout_ex(screen,font,"Left,Right - Pan Left,Right",0,50,15,0);
    textout_ex(screen,font,"Up,Down    - Pitch Raise,Lower",0,60,15,0);
    textout_ex(screen,font,"-,+       - Volume Down,Up",0,70,15,0);

    //load the wave file
    sample = load_sample("clapping.wav");
    if (!sample) {
        allegro_message("Error reading wave file");
        return 1;
    }


    //play the sample with looping
    play_sample(sample, volume, panning, pitch, TRUE);

    //main loop
    while (!key[KEY_ESC])
    {
        //change the panning
        if ((key[KEY_LEFT]) && (panning > 0))
           panning--;;
        else if ((key[KEY_RIGHT]) && (panning < 255))
          panning++;

        //change the pitch (rounding at 512)
        if ((key[KEY_UP]) && (pitch < 16384))
         pitch = ((pitch * 513) / 512) + 1;
       else if ((key[KEY_DOWN]) && (pitch > 64))
         pitch = ((pitch * 511) / 512) - 1;

       //change the volume
       if (key[KEY_EQUALS] && volume < 255)
          volume++;
       else if (key[KEY_MINUS] && volume > 0)
           volume--;;

       //adjust the sample
       adjust_sample(sample, volume, panning, pitch, TRUE);

       //pause
       rest(5);

       //display status
       textprintf_ex(screen,font,0,100,15,0,"PITCH: %5d", pitch);
       textprintf_ex(screen,font,0,110,15,0,"PAN:   %5d", panning);
       textprintf_ex(screen,font,0,120,15,0,"VOLUME:%5d", volume);
    }

    //destroy the sample
    destroy_sample(sample);
    //remove the sound driver
    remove_sound();
    allegro_exit();
    return 0;
}
END_OF_MAIN()
Now I want go over some of the functions in the PlayWave program and more Allegro sound routines that you'll need. At least this gives you a preview of what is possible with Allegro; but don't limit your imagination to this meager example, as there is more.
As with the graphics system, you must initialize the sound system before you use the sound routines. Why is that? Allegro runs as lean as possible and only allocates memory when it is needed. It would be a shame if every Allegro feature were allocated and initialized automatically with even the smallest of programs (such as a command-line utility). Now I'll go over some of the sound initialization routines you'll be using most often. If you require more advanced features, you can refer to the Allegro documentation, header files, and online sources for information on topics such as sound recording, Midi, and streaming. I will not cover those features here because they are not normally needed in a game.
The detect_digi_driver function determines whether the specified digital sound device is available. It returns the maximum number of voices that the driver can provide or zero if the device is not available. This function must be called before install_sound.
int detect_digi_driver(int driver_id)
The reserve_voices function is used to specify the number of voices that are to be used by the digital and Midi sound drivers, respectively. This must be called before install_sound. If you reserve too many voices, subsequent calls to install_sound will fail. The actual number of voices available depends on the driver, and in some cases you will actually get more than you reserve. To restore the voice setting to the default, you can pass –1 to the function. Be aware that sound quality might drop if too many voices are in use.
void reserve_voices(int digi_voices, int midi_voices)
The set_volume_per_voice function is used to adjust the volume of each voice to compensate for mixer output being too loud or too quiet, depending on the number of samples being mixed (because Allegro lowers the volume each time a voice is added to help reduce distortion). This must be called before calling install_sound. To play a sample at the maximum volume without distortion, use 0; otherwise, you should call this function with 1 when panning will be used. It is important to understand that each time you increase the parameter by one, the volume of each voice will be halved. So if you pass 2, you can play up to eight samples at maximum volume without distortion (as long as panning is not used). If all else fails, you can pass –1 to restore the volumes to the default levels. Table 6.1 provides a guide.
Here is the definition of the function:
void set_volume_per_voice(int scale)
After you have configured the sound system to meet your needs with the functions just covered, you can call install_sound to initialize the sound driver. The default parameters are DIGI_AUTODETECT and MIDI_AUTODETECT, which instruct Allegro to read hardware settings from a configuration file (which was a significant issue under MS-DOS and is no longer needed with the sound drivers of modern operating systems).
int install_sound(int digi, int midi, const char *cfg_path);
The remove_sound function removes the sound driver and can be called when you no longer need to use the sound routines.
void remove_sound()
The set_volume function is used to change the overall volume of the sound system (both digital and Midi), with a range of 0 to 255. To leave one parameter unchanged while updating the other, pass -1. Most systems with sound cards will have hardware mixers, but Allegro will create a software sound mixer if necessary.
void set_volume(int digi_volume, int midi_volume)
The digital sample playback routines can be rather daunting because there are so many of them, but many of these routines are holdovers from when Allegro was developed for MS-DOS. I will cover the most important and useful sample playback routines. Because sound mixers are common in the sound card now, many of the support functions are no longer needed; it is usually enough for any game that a sound mixer is working and sound effects can be played simultaneously.
If some of this listing seems like a header file dump, it is because there are so many sound routines provided by Allegro to manipulate samples and voice channels that a code example for each one would be too difficult (and time consuming). Suffice it to say, many of the seldom-used functions are included here for your reference.
The load_sample function will load a WAV or VOC file. The VOC file format was created by Creative Labs for the first Sound Blaster sound card, and this format was very popular with MS-DOS games. It is nice to have the ability to load either file format with this routine because VOC might still be a better format for some older systems.
SAMPLE *load_sample(const char *filename)
You can call the specific function if you always use the same type of file, although load_sample is smart enough to figure out the type of file you pass to it. The load_wav function will load a standard Windows or OS/2 RIFF WAV file. This function is called by load_sample based on the file extension.
SAMPLE *load_wav(const char *filename)
Likewise, the load_voc function will load a Creative Labs VOC file. This function is called by load_sample based on the file extension. If you aren't familiar with this type of file, I wouldn't be surprised because it pre-dates Windows 95. The first time I worked with this type of digital format was when I used the Sound Blaster Development Kit (which I showed a photo of in the first chapter).
SAMPLE *load_voc(const char *filename)
The play_sample function starts playback of a sample using the provided parameters to set the properties of the sample prior to playback. The available parameters are volume, panning, frequency (pitch), and a Boolean value for looping the sample.
The volume and pan range from 0 to 255. Frequency is relative rather than absolute—1000 represents the frequency at which the sample was recorded, 2000 is twice this, and so on. If the loop flag is set, the sample will repeat until you call stop_sample and can be manipulated during playback with adjust_sample. This function returns the voice number that was allocated for the sample (or –1 if it failed).
int play_sample(const SAMPLE *spl, int vol, int pan, int freq, int loop)
The stop_sample function stops playback and is often needed for samples that are looping in playback. If more than one copy of the sample is playing (such as an explosion sound), this function will stop all of them.
void stop_sample(const SAMPLE *spl)
The adjust_sample function alters the properties of a sample during playback. (This is usually only useful for looping samples.) The parameters are volume, panning, frequency, and looping. If there is more than one copy of the same sample playing (as in a repeatable sound, such as an explosion), this will adjust the first one. If the sample is not playing it has no effect.
void adjust_sample(const SAMPLE *spl, int vol, int pan, int freq, int loop)
The create_sample function creates a new sample with the specified bits (sampling rate), stereo flag, frequency, and length. The returned SAMPLE pointer is then treated like any other sample.
SAMPLE *create_sample(int bits, int stereo, int freq, int len)
The destroy_sample function is used to remove a sample from memory. You can call this function even when the sample is playing because Allegro will first stop playback.
void destroy_sample(SAMPLE *spl)
If you need more detailed control over how samples are played, you can use the lower-level voice functions as an option rather than using the sample routines. The voice routines require more work because you must allocate and free voice data in memory rather than letting Allegro handle such details, but you do gain more control over the mixer and playback functionality.
The allocate_voice function allocates memory for a sample in the mixer with default parameters for volume, centered pan, standard frequency, and no looping. After voice playback has finished, it must be removed using deallocate_voice. This function returns the voice number or -1 on error.
int allocate_voice(const SAMPLE *spl)
The deallocate_voice function removes a voice from the mixer after stopping playback and releases any resources it was using.
void deallocate_voice(int voice)
The reallocate_voice function changes the sample for an existing voice, which is equivalent to deallocating the voice and then reallocating it again using the new sample.
void reallocate_voice(int voice, const SAMPLE *spl)
The release_voice function releases a voice and allows it to play through to completion without any further manipulation. After playback has finished, the voice is automatically removed. This is equivalent to deallocating the voice at the end of playback.
void release_voice(int voice)
The voice_start function activates a voice using the properties configured for the voice.
void voice_start(int voice)
The voice_stop function stops (or rather, pauses) a voice at the current playback position, after which playback can be resumed with a call to voice_start.
void voice_stop(int voice)
The voice_set_priority function sets the priority of the sample in the mixer with a priority range of 0 to 255. Lower-priority voices are cropped when the mixer becomes filled.
void voice_set_priority(int voice, int priority)
The voice_check function determines whether a voice has been allocated, returning a copy of the sample if it is allocated or NULL if the sample is not present.
SAMPLE *voice_check(int voice)
The voice_set_position function sets the playback position of a voice in sample units.
void voice_set_position(int voice, int position)
The voice_get_position function returns the current position of playback for that voice or -1 if playback has finished.
int voice_get_position(int voice)
The voice_set_playmode function adjusts the loop status of a voice, and can be called even while a voice is engaged in playback.
void voice_set_playmode(int voice, int playmode)
The play mode parameters listed in Table 6.2 can be passed to this function.
Table 6.2. Play Mode Parameters
Play Mode Parameter | Description |
|---|---|
| Plays the sample once; this is the default without looping |
| Loops repeatedly through the sample |
| Plays the sample from start to end; supports looping |
| Plays the sample in reverse from end to start; supports looping |
| Plays the sample forward and backward, reversing direction each time the start or end position is reached during playback |
The voice_get_volume function returns the current volume of a voice in the range of 0 to 255.
int voice_get_volume(int voice)
The voice_set_volume function sets the volume of a voice in the range of 0 to 255.
void voice_set_volume(int voice, int volume);
The voice_ramp_volume function starts a volume ramp up (crescendo) or down (diminuendo) from the current volume to the specified volume for a specified number of milliseconds.
void voice_ramp_volume(int voice, int time, int endvol)
The voice_stop_volumeramp function interrupts a volume ramp that was previously started with voice_ramp_volume.
void voice_stop_volumeramp(int voice)
The voice_set_frequency function sets the pitch of a voice in Hertz (Hz).
void voice_set_frequency(int voice, int frequency);
The voice_get_frequency function returns the current pitch of the voice in Hertz (Hz).
int voice_get_frequency(int voice)
The voice_sweep_frequency function performs a frequency sweep (glissando) from the current frequency (or pitch) to the specified ending frequency, lasting for the specified number of milliseconds.
void voice_sweep_frequency(int voice, int time, int endfreq)
The voice_stop_frequency_sweep function interrupts a frequency sweep that was previously started with voice_sweep_frequency.
void voice_stop_frequency_sweep(int voice)
The voice_get_pan function returns the current panning value from 0 (left speaker) to 255 (right speaker).
int voice_get_pan(int voice);
The voice_set_pan function sets the panning position of a voice with a range of 0 (left speaker) to 255 (right speaker).
void voice_set_pan(int voice, int pan);
The voice_sweep_pan function performs a sweeping pan from left to right (or vice versa) from the current panning value to the specified ending value with a duration in milliseconds.
void voice_sweep_pan(int voice, int time, int endpan);
The voice_stop_pan_sweep function interrupts a panning sweep operation that was previously started with the voice_sweep_pan function.
void voice_stop_pan_sweep(int voice);
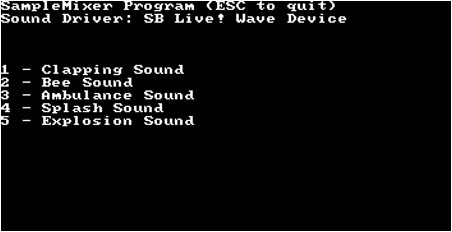
I think you will be pleasantly surprised by the simplicity of the next demonstration program in this chapter. SampleMixer is a short program that shows you how easy it is to feature multi-channel digital sample playback in your own games (and any other programs) using Allegro's digital sound mixer. Figure 6.2 shows the output from the program. As you can see, there is only a simple interface with no bells or whistles. The WAV files used in this sample program are included on the CD-ROM. I've highlighted key lines of code in bold.
#include <allegro.h>

#define MODE GFX_AUTODETECT_WINDOWED
#define WIDTH 640
#define HEIGHT 480
#define WHITE makecol(255,255,255)

int main(void)
{
    SAMPLE *samples[5];
    int volume = 128;
    int pan = 128;
    int pitch = 1000;
    int n;

    //initialize the program
    allegro_init();
    install_keyboard();
    install_timer();
    set_color_depth(16);
    set_gfx_mode(MODE, WIDTH, HEIGHT, 0, 0);

    //install a digital sound driver
    if (install_sound(DIGI_AUTODETECT, MIDI_NONE, "") != 0) {
        allegro_message("Error initializing the sound system");
        return 1;
    }

    //display program information
    textout_ex(screen,font,"SampleMixer Program (ESC to quit)",0,0,WHITE,0);
    textprintf_ex(screen,font,0,10,WHITE,0,"Sound Driver: %s", digi_driver->name);

    //display simple menu
    textout_ex(screen,font,"1 - Clapping Sound",0,50,WHITE,0);
    textout_ex(screen,font,"2 - Bee Sound",0,60,WHITE,0);
    textout_ex(screen,font,"3 - Ambulance Sound",0,70,WHITE,0);
    textout_ex(screen,font,"4 - Splash Sound",0,80,WHITE,0);
    textout_ex(screen,font,"5 - Explosion Sound",0,90,WHITE,0);

    //load the wave file
    //normally you would want to include error checking here
    samples[0] = load_sample("clapping.wav");
    samples[1] = load_sample("bee.wav");
    samples[2] = load_sample("ambulance.wav");
    samples[3] = load_sample("splash.wav");
    samples[4] = load_sample("explode.wav");

   //main loop
   while (!key[KEY_ESC])
   {
       if (key[KEY_1])
           play_sample(samples[0], volume, pan, pitch, FALSE);
       if (key[KEY_2])
           play_sample(samples[1], volume, pan, pitch, FALSE);
       if (key[KEY_3])
           play_sample(samples[2], volume, pan, pitch, FALSE);
       if (key[KEY_4])
           play_sample(samples[3], volume, pan, pitch, FALSE);
       if (key[KEY_5])
           play_sample(samples[4], volume, pan, pitch, FALSE);

       //block fast key repeats
       rest(50);
   }

   //destroy the samples
   for (n=0; n<5; n+ +)
       destroy_sample(samples[n]);

   //remove the sound driver
   remove_sound();
   allegro_exit();
   return 0;
}
END_OF_MAIN()Music is a fundamental component of a game and is just as important as the graphics (though not as well appreciated by the player—until it is missing!). You have learned about the sound playback functions in Allegro, so now it's time to learn how to play music. Allegro supports the Midi format natively. If you would like to load and play MP3 files for background music, there are some options. If you visit the Library section of www.allegro.cc, you'll find an Audio section with several Allegro audio libraries, including an MP3 library. You will also find Allegro support for Ogg Vorbis and the classic Mod format, which dates back to the Amiga, but is still very popular because of the relatively good quality (usually better than Midi).
A Midi song contains just notes, not digital samples, so a Midi player may sound different from one system to the next, depending on the quality of the Midi player. Some systems use small digital samples of instruments for Midi playback, while other systems just use a primitive frequency modulation (FM) synthesizer. However, a well-composed Midi does sound pretty good, and you definitely want music for your games. You can create your own music soundtrack for your game using any cheap electronic keyboard with a Midi interface. Most PC sound cards have a Midi port, which was popularized by Creative Labs on their Sound Blaster line.
If you have an electronic keyboard, you can't just plug the line out or microphone out into your PC, because that will record a digital copy of the sound coming from the keyboard. By using a Midi cable, your computer can capture the actual notes and save a Midi file. If all else fails, browse the web for free Midi libraries, but be careful where you get a Midi if you do manage to sell your game, because there could be licensing issues. You certainly can't use a copyrighted song, even if you found the Midi on a free site. For instance, you can't use the Midi version of “Bohemian Rhapsody” by Queen in Midi form, because the band could sue you for copyright infringement. In case you are curious, the typical licensing cost for use of a digital copy of a song in a game is $5,000 to $10,000 for a mildly successful band. Most classical music (from composers like Beethoven and Mozart) is fair game because copyrights expired centuries ago in most cases!
I will go over Allegro's Midi functions with you here, because I don't want to launch off into the topic of using third-party libraries, which may change and move around the web without warning. Basically, you have options, and they come with instructions of their own. Let's delve into Allegro's music support now.
There are a lot of helpful functions provided by Allegro for working with a Midi during playback, but I'm going to just go over the key functions because this isn't exactly rocket science. You can load up a Midi file and play it, with the option to pause and resume playback, or stop the music altogether. First, you load up a Midi file using the load_midi function:
MIDI *load_midi(const char *filename)
As you can see, this function returns a pointer to a struct called midi. So, before you can call this function you must first create a struct pointer, such as this:
midi *music;
Once you've defined this pointer, then you can load a Midi file and have the music loaded into memory and referenced by your pointer.
Allegro provides a way for you to get the length of a Midi in seconds. The function is called get_midi_length. This function simulates playing the entire song to the end and calculates the estimated length. You would normally call this function before starting playback, because it will stop any currently playing song.
int get_midi_length(MIDI *midi)
There are two ways to play a Midi file: either single playback or looped playback. The function to use in both cases is called play_midi, and it has two parameters. The first parameter is the filename, and the second is the looping option. If you want to play the music file just once, then pass 0 to the loop parameter. But if you want looping, then pass 1 to it.
int play_midi(MIDI *MIDI, int loop)
Once playback has started, you can pause the music and resume it again. This is useful if your game has a pause feature, in which case you will want the music to pause along with the gameplay. The pause and resume functions are very simple and have no parameters:
void midi_pause()
void midi_resume()
Now let's take a look at an example program that loads and plays a Midi file. This program is simplistic so you can see exactly the minimum code needed to play a song. I've highlighted the important code that's relevant to this topic in bold text.
#include <allegro.h>

#define MODE GFX_AUTODETECT_WINDOWED
#define WIDTH 640
#define HEIGHT 480
#define WHITE makecol(255,255,255)

int main(void)
{
    MIDI *music;
    int pos, length;

    //initialize the program
    allegro_init();
    install_keyboard();
    install_timer();
    set_gfx_mode(MODE, WIDTH, HEIGHT, 0, 0);
    textout_ex(screen, font, "PlayMidi Program (Hit ESC to quit)", 0, 0, WHITE, 0);

    //install the sound driver
    if (install_sound(DIGI_AUTODETECT, MIDI_AUTODETECT, NULL) != 0) {
       allegro_message("Error initializing sound system
%s
", allegro_error);
       return 1;
    }

    //load the midi file
    music = load_midi("kawliga.mid");
    if (!music) {
        allegro_message("Error loading Midi file");
        return 1;
    }

    //play the music
    if (play_midi(music, 0) != 0) {
        allegro_message("Error playing Midi
%s", allegro_error);
        return 1;
    }

    //display status information
    length = get_midi_length(music);
    textprintf_ex(screen, font, 0, 20, WHITE, 0, "Length:   %d:%02d",
        length / 60, length % 60);
   do {
      pos = midi_time;
      textprintf_ex(screen, font, 0, 30, WHITE, 0, "Position: %d:%02d",
          pos / 60, pos % 60);
          rest(100);
   } while((pos <= length) && (!key[KEY_ESC]));


     stop_midi();
     destroy_midi(music);
     remove_sound();
     allegro_exit();
     return 0;
}
END_OF_MAIN()This chapter provided an introduction to the sound support routines provided by Allegro for including sound effects in a game. Allegro provides an interface to the underlying operating system (with support for DirectSound) that, along with a software sound mixer, provides a consistent level of functionality and performance from one computer system to another. In this chapter, you learned how to initialize the sound system, load a WAV file, and play back the WAV file with or without looping. You were also provided with an example that demonstrated Allegro's automatic mixing of samples. In a nutshell, it requires very little effort to play a sound effect, and mixing is handled automatically, allowing you to focus on gameplay rather than the mechanics of an advanced sound system.
You can find the answers to this chapter quiz in Appendix A, “Chapter Quiz Answers.”