
The time has come to move into the core of the subject of this book on 2D game programming. Bitmaps are that core, and they are also at the very core of the Allegro game library. This chapter is not only an overview of bitmaps, but also of the subject of blitting—two subjects that are closely related. In fact, because blitting is the process of displaying a bitmap, it might just be considered the workhorse for working with bitmaps. By the end of this chapter, you will have a solid understanding of how to create, load, draw, erase, and delete bitmaps, and you will use this new information to enhance the Tank War game that you started back in Chapter 4 by converting it to a bitmap-based game. While doing so, you'll be prepared for an introduction to sprites in the next chapter. Here is a breakdown of the major topics in this chapter:
Creating and deleting bitmaps
Drawing and clipping bitmaps
The infamous sprite is at the very core of 2D game programming, representing an object that moves around on the screen. That object might be a solid object or it might be transparent, meaning that you can see through some parts of the object, revealing the background. These are called transparent sprites. Another special effect called translucency, also known as alpha blending, causes an object on the screen to blend into the background by a variable degree, from opaque to totally transparent (and various values in between). Sprite programming is one of the most enjoyable aspects of 2D game programming, and it is essential if you want to master the subject.
Before you can actually draw a bitmap image on the screen, you must find a way to create that image. Bitmaps can be created in memory at runtime, although that is not usually a good way to do it. The usual method is to draw a small graphic figure using a graphic editing tool, such as Paint Shop Pro, and then save the image in a graphic file (such as BMP, LBM, PCX, or TGA). Your program can then load that image and use it as a sprite.
But how do you grab the sprites out of a bitmap image? That will be the focus of the next chapter. For now, I'll focus on how to create a bitmap in memory and then draw it to the screen. You can actually use this method to create an entire game (maybe one like Tank War from Chapter 4?) by drawing graphics right onto a small bitmap when the program starts and then displaying that bitmap as often as needed. It makes sense that this would be a lot faster than doing all the drawing at every step along the way. This is how Tank War currently handles the graphics—by drawing every time the tanks need to be displayed. As you might imagine, it is much faster to render the tanks beforehand and then quickly display that bitmap on the screen. Take a look at this code:
Note
Render is a graphical term that can apply to any act of drawing onto the screen or constructing an image.
BITMAP *tank = create_bitmap(32, 32);
clear_bitmap(tank);
putpixel(tank, 16, 16, 15);
blit(tank, screen, 0, 0, 0, 0, 32, 32);
There are some new functions here that you haven't seen before, so I'll explain what they do. The first function, called create_bitmap, does exactly what it appears to do—it creates a new bitmap of the specified size. The clear_bitmap function zeroes out the new bitmap, which is necessary because memory allocation does not imply a clean slate, just the space—sort of like buying a piece of property that contains trees, bushes, and shrubbery that must be cleared before you build a house. Now take notice of the third line, with a call to putpixel. Look at the first parameter, tank. If you'll recall the putpixel function, the first parameter was always screen, which caused drawing to go directly to the screen. In this instance, you want the pixel to be drawn on the new bitmap!
The blit function is something entirely new and a little bit strange, won't you agree? If you have heard of sprites, you have probably also heard of blitting—but just in case you haven't, I'll go over it. Blit is shorthand for the process called “bit-block transfer.” This is a fancy way of describing the process of quickly copying memory (a bit block) from one location to another. I have never quite agreed with the phrase because it's not possible to copy individual bits haphazardly; only entire bytes can be copied. To access bits, you can peer into a byte, but there's no way to copy individual bits using the blit function. Semantics aside, this is a powerful function that you will use often when you are writing games with Allegro.
Isn't it surprising that you're able to draw a pixel onto the tank bitmap rather than to the screen? Allegro takes care of all the complicated details and provides a nice clean interface to the graphics system. On the Windows platform, this means that Allegro is doing all the DirectX record-keeping behind the scenes, and other platforms are similar with their respective graphics libraries. Now it starts to make sense why all of those graphics functions you learned back in Chapter 3 required the use of screen as the first parameter. I don't know about you, but I think it's kind of amazing how just a few short lines of code (such as those shown previously) can have such a huge impact. To validate the point, you'll open the Tank War game project at the end of this chapter and tweak it a little, giving it a technological upgrade using bitmaps. In the context of role playing, the game will go up a level.
There is so much information to cover regarding bitmaps and blitting that I'll get into the specifics of sprites in the next chapter.
Now what I'd like to do is introduce you to all of the bitmap-related functions in Allegro so you'll have a complete toolbox before you get into sprites—because sprites depend entirely on bitmaps to work. There are many aspects of Allegro that I don't get into in this book because the library has support for functionality (such as audio recording) that is not directly applicable to a game—unless you want to add voice recognition, perhaps?
You are already familiar with the screen bitmap. Essentially, this is a very advanced and complicated mapping of the video display into a linear buffer—in other words, it's easy to draw pixels on the screen without worrying about the video mode or the type of computer on which it's running. The screen buffer is also called the frame buffer, which is a term borrowed from reel-to-reel projectors in theaters. In computing, you don't already have a reel of film waiting to be displayed; instead, you have conditional logic that actually constructs each frame of the reel as it is being displayed. The computer is fast enough to usually do this at a very high frame rate. Although films are only displayed at 24 frames per second (fps) and television is displayed at 30 fps, it is generally agreed that 60 fps is the minimum for computer games.
Why do you suppose movies and TV run at such low frame rates? Actually, the human eye is only capable of discerning about 30 fps. But it's a little different on the computer screen, where refresh rates and contrast ratios play a part, since quality is not always a constant thing as it is on a theater screen. Although a video card is capable of displaying more than 60 fps, if the monitor is only set to 60 Hertz (Hz), then a discernable flicker will be apparent, which is annoying at best and painful at worst. Very low vertical refresh rates can easily give you a headache after only a few minutes. Although we deal with the screen in two dimensions (X and Y), it is actually just a single-dimensional array. You can figure out how big that array is by using the screen width and height.
Array_Size = Screen_Width * Screen_Height
A resolution of 800 × 600 therefore results in:
Array_Size = 800 * 600
Array_Size = 480,000
That's a pretty large number of pixels, wouldn't you agree? Just imagine that a game running 60 fps is blasting 480,000 pixels onto the screen 60 times per second! That comes to (480,000 * 60 = ) 28,800,000 pixels per second. I'm not even talking about bytes here, just pixels. Most video modes use three bytes per pixel (bpp) in 24-bit color mode, or 2 bpp in 16-bit color mode. Therefore, what I'm really talking about is on the order of 90 million bytes per second in a typical game. And when was the last time you played a game at the lowly resolution of 800 × 600? I usually set my games to run at 1280 × 960. If you were to use 1600 × 1200, your poor video card would be tasked with pushing 180 million bytes per second. Now you can start to see what all the fuss is about regarding high-speed memory, with all the acronyms like RDRAM, SDRAM, DDR, and so on.
Your PC doesn't need 180 MB of video memory in this case—just very, very fast memory to keep the display going at 60 fps. The latest video cards with 256-MB DDR really use most of that awesome video memory for storing textures used in 3D games. The actual video buffer only requires 32 MB of memory at most. That's quite a lot of new information (or maybe it's not so new if you are a videophile), and I've only talked about the screen itself. For reference, here is how the screen buffer is declared:
extern BITMAP *screen;
The real subject here is how to work with bitmaps, so take a look inside that bitmap structure:
typedef struct BITMAP    // a bitmap structure
{
  int w, h;              // width and height in pixels
  int clip;              // flag if clipping is turned on
  int cl, cr, ct, cb;    // clip left, right, top and bottom values
  GFX_VTABLE *vtable;    // drawing functions
  void *write_bank;      // C func on some machines, asm on i386
  void *read_bank;       // C func on some machines, asm on i386
  void *dat;             // the memory we allocated for the bitmap
  unsigned long id;      // for identifying sub-bitmaps
  void *extra;           // points to a structure with more info
  int x_ofs;             // horizontal offset (for sub-bitmaps)
  int y_ofs;             // vertical offset (for sub-bitmaps)
  int seg;               // bitmap segment
  ZERO_SIZE_ARRAY(unsigned char *, line);
} BITMAP;
The information in the BITMAP structure is not really useful to you as a programmer because it is almost entirely used by Allegro internally. Some of the values are useful, such as w and h (width and height) and perhaps the clipping variables.
The first thing you should know when learning about bitmaps is that they are not stored in video memory; they are stored in main system memory. Video memory is primarily reserved for the screen buffer, but it can also store textures. However, video memory is not available for storing run-of-the-mill bitmaps. Allegro supports a special type of bitmap called a video bitmap, but it is reserved for page flipping and double-buffering—something I'll get into in the next chapter.
As you have already seen, you use the create_bitmap function to create a memory bitmap.
BITMAP *create_bitmap(int width, int height)
By default, this function creates a bitmap using the current color depth. If you want your game to run at a specific color depth because all of your artwork is at that color depth, it's a good idea to call set_color_depth after set_gfx_mode when your program starts. The bitmap created with create_bitmap has clipping enabled by default, so if you draw outside the boundary of the bitmap, no memory will be corrupted. There is actually a related version of this function you can use if you want to use a specific color depth.
BITMAP *create_bitmap_ex(int color_depth, int width, int height)
If you do use create_bitmap_ex in lieu of create_bitmap with the assumed default color depth, you can always retrieve the color depth of a bitmap using this function:
int bitmap_color_depth(BITMAP *bmp)
After you create a new bitmap, if you plan to draw on it and blit it to the screen or to another bitmap, you must clear it first. The reason is because a new bitmap has random pixels on it based on the contents of memory at the space where the bitmap is now located. To clear out a bitmap quickly, call this function:
void clear_bitmap(BITMAP *bitmap)
There is also an alternative version called clear_to_color that fills the bitmap with a specified color (while clear_bitmap fills in with 0, which equates to black).
void clear_to_color(BITMAP *bitmap, int color)
Possibly my absolute favorite function in Allegro is create_sub_bitmap because there is so much opportunity for mischief with this awesome function! Take a look:
BITMAP *create_sub_bitmap(BITMAP *parent, int x, y, width, height)
This function creates a sub-bitmap of an existing bitmap that actually shares the memory of the parent bitmap. Any changes you make to the sub-bitmap will be instantly visible on the parent and vice versa (if the sub-bitmap is within the portion of the parent that was drawn to). The sub-bitmap is clipped, so drawing beyond the edges will not cause changes to take place on the parent beyond that border. Now, about that little mention of mischief? You can create a sub-bitmap of the screen!
I'll wait a minute for that to sink in.
Do you have an evil grin yet? That's right, you can use sub-bitmaps to update or display portions of the screen, which you can use to create a windowing effect. This is absolutely awesome for building a scrolling background—something we'll learn about in Part III. Another point is, you can create a sub-bitmap of a sub-bitmap of a bitmap, but I wouldn't recommend creating a feedback loop by creating a bitmap of a sub-bitmap of a bitmap because that could cause your video card or monitor to explode (well, maybe not, but you get the picture).
Okay, not really, but to be honest, that's the first thing I worry about when the idea of a feedback loop comes to mind. Feedback is generally good when you're talking about movies, books, video games, and so on, but feedback is very, very, very bad in electronics, as well as in software. Have you ever hooked up a video camera to a television and then pointed the camera at the screen? What you end up with is a view into eternity. Well, it would be infinite if the camera were centered perfectly, so the lens and TV screen are perfectly parallel, but you get the idea. If you try this, I recommend turning the volume down. Then again, leaving the volume on might help to drive the point home—feedback is dangerous, so naturally, let's try it.
BITMAP *hole = create_sub_bitmap(screen, 0, 0, 400, 300);
blit(hole, screen, 0, 0, 0, 0, 400, 300);
This snippet of code creates a sub-bitmap of the screen, and then blits that region onto itself. You can get some really weird effects by blitting only a portion of the sub-bitmap and by moving the sub-bitmap while drawing onto the screen. The point is, this is just the sort of reason you're involved in computer science in the first place—to try new things, to test new hypotheses, and to boldly go where no . . . let's leave it at that.
It's important to throw away your hamburger wrapper after you're finished eating, just as it is important to destroy your bitmaps after you're finished using them. To leave a bitmap in memory after you're finished is akin to tossing a wrapper on the ground. You might get away with it without complaint if no one else is around, but you might feel a tinge of guilt later (unless you're completely dissociated from your conscience and society in general). This is a great analogy, which is why I've used it to nail the point home. Leaving a bitmap in memory after your program has ended might not affect anything or anyone right now. After all, it's just one bitmap, and your PC has tons of memory, right? But eventually the trash is going to pile up, and pretty soon the roads, sidewalks, and parks in your once-happy little town will be filled with trash and you'll have to reboot the town . . . er, the computer. destroy_bitmap is your friend.
void destroy_bitmap(BITMAP *bitmap);
By the way, stop littering. You can't really reboot your town, but that would be convenient, wouldn't it? If Microsoft Windows was the mayor, we wouldn't have to worry about litter.
You probably won't need to use the bitmap information functions often, but they can be very useful in some cases. For starters, the most useful function is bitmap_mask_color, which returns the transparency color of a bitmap.
int bitmap_mask_color(BITMAP *bmp);
Allegro defines the transparency for you so there is really no confusion (or choice in the matter). For an 8-bit (256-color) bitmap, the mask/transparent color is 0, the first entry in the palette. All other color depths use pink as the transparent color (255, 0, 255). That's fine by me because I use these colors for transparency anyway, and I'm sure you would too if given the choice. I have occasionally used black (0, 0, 0) for transparency in the past, but I've found pink to be far easier to use. For one thing, the source images are much easier to edit with a pink background because dark-shaded pixels stand out clearly when they are superimposed over pink. Actually, Allegro assumes that transparency is always on.
This surprised me at first because I always made use of a transparency flag with my own sprite engines in the past. But this assumption really does make sense when the transparent color is assumed to be the mask color, which implies hardware support. On the Windows platform, Allegro tells DirectDraw that pink (255, 0, 255) is the mask color, and DirectDraw handles the rest. What if you don't want transparency? Don't use pink! For example, starting in Chapter 12, we'll get into backgrounds and scrolling using tiles, and you certainly won't need transparency. Although you will use the same blit function to draw background tiles and foreground sprites, there is no speed penalty for doing so because drawing background tiles is handled at a lower level (within DirectX, SVGAlib, or whatever library Allegro uses on your platform of choice).
An American president brought the simple word “is” into the forefront of attention a few years back, and that's what you're going to do now—focus on several definitions using the word “is.” The first is called is_same_bitmap.
int is_same_bitmap(BITMAP *bmp1, BITMAP *bmp2)
This function returns true if the two bitmaps share the same region of memory, with one being a sub-bitmap of another or both being sub-bitmaps of the same parent.
The is_linear_bitmap function returns true if the layout of video memory is natively linear, in which case you would have an opportunity to write optimized graphics code. This is not often the case, but it is available nonetheless.
int is_linear_bitmap(BITMAP *bmp)
A related function, is_planar_bitmap, returns true if the parameter is an extended-mode or mode-x bitmap. Given the cross-platform nature of Allegro, this might be true in some cases because the source code for your game might run if compiled for MS-DOS or console Linux.
int is_planar_bitmap(BITMAP *bmp)
The is_memory_bitmap function returns true if the parameter points to a bitmap that was created with create_bitmap, loaded from a data file or an image file. Memory bitmaps differ from screen and video bitmaps in that they can be manipulated as an array (such as bitmap[y][x] = color).
int is_planar_bitmap(BITMAP *bmp)
The related functions is_screen_bitmap and is_video_bitmap return true if their respective parameters point to screen or video bitmaps or sub-bitmaps of either.
int is_screen_bitmap(BITMAP *bmp)
int is_video_bitmap(BITMAP *bmp)
So if you create a sub-bitmap of the screen, such as:
BITMAP *scrn = screen
then calling the function like this:
if (is_screen_bitmap(scrn))
will return true. Along that same line of thinking, is_sub_bitmap returns true if the parameter points to a sub-bitmap.
int is_sub_bitmap(BITMAP *bmp)
Most modern operating systems use bitmaps as the basis for their entire GUI (Graphical User Interface), and Windows is at the forefront. There is an advanced technique for speeding up your program's drawing and blitting functions called “locking the bitmap.” This means that a bitmap (including the screen buffer) can be locked so that only your code is able to modify it at a given moment. Allegro automatically locks and unlocks the screen whenever you draw onto it.
That is the bottleneck! Do you recall how many drawing functions were needed in Tank War to draw the tanks on the screen? Well, converting those drawing functions into bitmaps not only sped up the game thanks to blitting, but it also sped it up because each call to rectfill caused a lock and unlock of the screen, which was very, very time consuming (as far as clock cycles are concerned). But even a well-designed game with a scrolling background, transparent sprites, and so on will suffer if the screen or destination bitmap is not locked first. This process involves locking the bitmap, performing all drawing, and then unlocking it.
To lock a bitmap, you call the acquire_bitmap function.
void acquire_bitmap(BITMAP *bmp)
A shortcut function called acquire_screen is also available and simply calls acquire_bitmap(screen) for you.
void acquire_screen()
There is a danger to this situation, however, if you fail to release a bitmap after you have acquired (or locked) it. So always be sure to release any bitmaps that you have locked! More than likely you'll notice the mistake because your program will likely crash from repeated acquires and no releases (in which case the screen might never get updated). This situation is akin to falling into a black hole—the closer you get, the faster you fall! Note also that there is another function called lock_bitmap that is similar but only used by Allegro programs running under MS-DOS (which likely will never be the case—even the lowliest PC is capable of running at least Windows 95 or Linux, so I see no reason to support DOS).
After you update a locked bitmap, you want to release the bitmap with this function:
void release_bitmap(BITMAP *bmp)
and the related shortcut for the screen:
void release_screen()
Clipping is the process of ensuring that drawing to a bitmap or the screen does not occur beyond the boundary of that object. In most cases this is handled by the underlying architecture (DirectDraw, SVGAlib, and so on), but it is also possible to set a portion of the screen or a bitmap with clipping in order to limit drawing to a smaller region using the set_clip function.
void set_clip(BITMAP *bitmap, int x1, int y1, int x2, int y2)
The screen object in Allegro and all bitmaps that are created or loaded will automatically have clipping turned on by default and set to the boundary of the bitmap. However, you might want to change the default clip region using this function. If you want to turn clipping off, then you can pass zeros to the x1, y1, x2, and y2 parameters, like this:
set_clip(bmp, 0, 0, 0, 0)
Why would you ever want to turn off clipping? It is a very real possibility. For one thing, if you are very careful how you update the screen in your own code, you might want to turn off automatic clipping of the screen to gain a slight improvement in the drawing speed. If you are very careful with your own created bitmaps, you can also turn off clipping of those objects if you are certain that clipping is not necessary. If you only read from a bitmap and you do not draw onto it, then clipping is irrelevant and not a performance factor at all. Clipping is only an issue with drawing to a bitmap. I highly recommend that you leave clipping alone at the default setting. More than likely, you will not need the slight increase in speed that comes from a lack of clipping, and you are more likely to crash your program without it.
Not too long ago, video memory was scarce and a video palette was needed to allow low-end video cards to support more than a measly 256 colors. Even an 8-bit display is capable of supporting more colors, but they must be palettized, meaning that a custom selection of 256 colors may be active out of a palette of many thousands of available colors. I once had an 8-bit video card, and at one time I used to work with an 8-bit video mode. (If you must know, VGA mode 13h was extremely popular in the DOS days.) Today you can assume that anyone who will play your games will have at least a 16-bit display. Even that is up for discussion, and it can be argued that 24- and 32-bit color will always be available on any computer system likely to run your games.
I think 24-bit color (also called true color) is the best mode to settle on, as far as a standard for my own games, and I feel pretty confident about it. If anyone is still stuck with a 16-bit video card, then perhaps it's time for an upgrade. After all, even an old GeForce 4 or Radeon 8500 card can be had for about 30 dollars. Of course, as often happens, someone with a 15-year-old laptop will want to run your game and will complain that it doesn't support 16-bit color. In the world we live in today, it's not always safe to walk the streets, but it is safe to assume that 24-bit color is available. For one thing, 16-bit modes are slower than 24-bit modes, even if they are supported in the GPU. Video drivers get around the problem of packing 24 bits into 16 bits by pre-packing them when a game first starts (in other words, when the bitmaps are first loaded), after which time all blitting (or 3D texture drawing) is as fast as any other color depth. If you want to target the widest possible audience for your game, 16-bit is a better choice. The decision is up to you because Allegro doesn't care which mode you choose; it will work no matter what.
You were given a glimpse at how to load a bitmap file way back in Chapter 3, but now I'm going to go over all the intricate details of Allegro's graphics file support. Allegro supports several formats, which is really convenient. If I were discussing only DirectX in this book, I would be limited to just BMP files (or I could write the code to load other types of files). Windows BMP files are fine in most cases, but some programmers prefer other formats—not for any real technical reason, but sometimes artwork is delivered in another format.
Allegro natively supports the graphics file formats in Table 7.1.
Table 7.1. Natively Supported Graphics File Formats
Graphics Format | Extension | Color Depths |
|---|---|---|
Windows / OS/2 Bitmap | BMP | 8, 24 |
Truevision Targa | TGA | 8, 16, 24, 32 |
Z-Soft's PC Paintbrush | PCX | 8, 24 |
Deluxe Paint / Amiga | LBM | 8 |
The easiest way to load a bitmap file from disk is to call the load_bitmap function.
BITMAP *load_bitmap(const char *filename, RGB *pal)
This function will load the specified file by looking at the file extension (BMP, TGA, PCX, or LBM) and returning a pointer to the bitmap data loaded into memory. If there is an error, such as if the file is not found, then the function returns NULL. The first parameter is the filename, and the second parameter is a pointer to a palette that you have already defined. In most cases this will simply be NULL because there is no need for a palette unless you are using an 8-bit video mode. Just for the sake of discussion, if you are using an 8-bit video mode and you load a true color image, passing a pointer to the palette parameter will cause an optimized palette to be generated when the image is loaded. If you want to use the current palette in an 8-bit display, simply pass NULL and the current palette will be used.
As I mentioned, load_bitmap will read any of the four supported graphics formats based on the extension. If you want to specifically load only one particular format from a file, there are functions for doing so. First, you have load_bmp.
BITMAP *load_bmp(const char *filename, RGB *pal)
As was the case with load_bitmap, you can simply pass NULL to the second parameter unless you are in need of a palette. Note that in addition to these loading functions, Allegro also provides functions for saving to any of the supported formats. This means you can write your own graphics file converter using Allegro if you have any special need (such as doing batch conversions).
To load a Deluxe Paint/Amiga LBM file, you can call load_lbm:
BITMAP *load_lbm(const char *filename, RGB *pal)
which does pretty much the same thing as load_bmp, only with a different format. The really nice thing about these loaders is that they provide a common bitmap format in memory that can be used by any Allegro drawing or blitting function. Here are the other two loaders:
BITMAP *load_pcx(const char *filename, RGB *pal)
BITMAP *load_tga(const char *filename, RGB *pal)
What if you want to add a feature to your game so that when a certain button is pressed, a screenshot of the game is written to disk? This is a very useful feature you might want to add to any game you work on. Allegro provides the functionality to save to BMP, PCX, and TGA files, but not LBM files. Here's the save_bitmap function:
int save_bitmap(const char *filename, BITMAP *bmp, const RGB *pal)
This couldn't be any easier to use. You just pass the filename, source bitmap, and optional palette to save_bitmap, and it creates the image file. Here are the individual versions of the function:
int save_bmp(const char *filename, BITMAP *bmp, const RGB *pal)
int save_pcx(const char *filename, BITMAP *bmp, const RGB *pal)
int save_tga (const char *filename, BITMAP *bmp, const RGB *pal)
Now how about that screen-save feature? Here's a short example of how you might do that (assuming you have already initialized graphics mode and the game is running):
BITMAP *bmp;
bmp = create_sub_bitmap(screen, 0, 0, SCREEN_W, SCREEN_H);
save_bitmap("screenshot.pcx", bmp, NULL);
destroy_bitmap(bmp);
Whew, that's a lot of function names to remember! But don't worry, I don't expect you to memorize them. Just use this chapter as a flip-to reference whenever you need to use these functions. It's also helpful to see them and get a little experience with the various bitmap functions that you will be using frequently in later chapters.
Blitting is the process of copying one bit block to another location in memory, with the goal of doing this as fast as possible. Most blitters are implemented in assembly language on each specific platform for optimum performance. The inherent low-level libraries (such as DirectDraw) will handle the details, with Allegro passing it on to the blitter in DirectDraw.
You have already seen the blit function several times, so here's the definition:
void blit(BITMAP *source, BITMAP *dest, int source_x, int source_y,
    int dest_x, int dest_y, int width, int height);
Table 7.2 provides a rundown of the parameters for the blit function.
Table 7.2. Parameters for the blit Function
Parameter | Description |
|---|---|
| The source bitmap (copy from) |
| The destination bitmap (copy to) |
| The x location on the source bitmap to copy from |
| The y location on the source bitmap to copy from |
| The x location on the destination bitmap to copy to |
| The y location on the destination bitmap to copy to |
| The width of the source rectangle to be copied |
| The height of the source rectangle to be copied |
Don't be intimidated by this function; blit is always this messy on any platform and with every game library I have ever used. But trust me, this is the bare minimum information you need to blit a bitmap (in fact, one of the simplest I have seen), and once you've used it a few times, it'll be second nature to you. The important thing to remember is how the source rectangle is copied into the destination bitmap. The rectangle's upper-left corner starts at (source_x, source_y) and extends right by width pixels and down by height pixels. In addition to raw blitting, you can use the blit function to convert images from one pixel format to another if the source and destination bitmaps have different color depths.
There are several more blitters provided by Allegro, including the very useful stretch_blit function.
void stretch_blit(BITMAP *source, BITMAP *dest, int source_x, source_y,
     source_width, source_height, int dest_x, dest_y, dest_width, dest_height);
The stretch_blit function performs a scaling process to squeeze the source rectangle into the destination bitmap. Table 7.3 presents a rundown of the parameters.
Table 7.3. Parameters for the stretch_blit Function
Parameter | Description |
|---|---|
| The source bitmap |
| The destination bitmap |
| The x location on the source bitmap to copy from |
| The y location on the source bitmap to copy from |
| The width of the source rectangle |
| The height of the source rectangle |
| The x location on the destination bitmap to copy to |
| The y location on the destination bitmap to copy to |
| The width of the destination rectangle (scaled into) |
| The height of the destination rectangle (scaled into) |
The stretch_blit function is really useful and can be extremely handy at times for doing special effects, such as scaling the sprites in a game to simulate zooming in and out. However, take care when you use stretch_blit because it's not as hardy as blit. For one thing, the source and destination bitmaps must have the same color depth, and the source must be a memory bitmap. (In other words, the source can't be the screen.) You should also take care that you don't try to specify a rectangle outside the boundary of either the source or the destination. This means if you are copying the entire screen into a smaller bitmap, be sure to specify (0, 0) for the upper-left corner, (SCREEN_W - 1) for the width, and (SCREEN_H - 1) for the height. The screen width and height values are counts of pixels, not screen positions. If you specify a source rectangle of (0, 0, 1024, 768), it could crash the program. What you want instead is (0, 0, 1023, 767) and likewise for other resolutions. The same rule applies to memory bitmaps—stay within the boundary or it could cause the program to crash.
A masked blit involves copying only the solid pixels and ignoring the transparent pixels, which are defined by the color pink (255, 0, 255) on high color and true color displays or by the color at palette index 0 in 8-bit video modes (which I will not discuss any more beyond this point). Here is the definition for the masked_blit function:
void masked_blit(BITMAP *source, BITMAP *dest, int source_x, int source_y,
     int dest_x, int dest_y, int width, int height);
This function has the exact same list of parameters as blit, so to learn one is to understand both, but masked_blit ignores transparent pixels while blit draws everything! This function is the basis for sprite-based games. Although there are custom sprite-drawing functions provided by Allegro, they essentially call upon masked_blit to do the real work of drawing sprites. However, unlike blit, the source and destination bitmaps must have the same color depth.
One of the rather odd but potentially very useful alternative blitters in Allegro is masked_stretch_blit, which does both masking of transparent pixels and also scaling.
void masked_stretch_blit(BITMAP *source, BITMAP *dest, int source_x,
     source_y, source_w, source_h, int dest_x, dest_y, dest_w, dest_h);
The parameters for this function are identical to those for stretch_blit, so I won't go over them again. Just know that this combines the functionality of masking and scaling. However, you should be aware that scaling often mangles the transparent pixels in an image, so this function can't guarantee perfect results, especially when you are when dealing with non-aligned rectangles. In other words, for best results, make sure the destination rectangle is a multiple of the source so that scaling is more effective.
Well, are you ready to start making enhancements to Tank War, as promised back in Chapter 4? The last three chapters have not been very forthcoming with this sort of information, so now that you have more knowledge, let's put it to good use. The jaunt into input devices and sound was necessary early on so you will have these key components available for any game you want to start writing right away. But we didn't really have enough to go on to add (for instance) joystick support, along with sound and music. The game is just too primitive at this point. But not for much longer! The stop-gap measure we'll take in this chapter is to move the graphics code from real-time rendering of vector shapes to pre-rendering those shapes onto bitmaps, and then drawing the bitmaps in the game loop. It might not sound like a huge improvement, but it is a good progression to the next step, without getting too far ahead of ourselves.
Tank War was developed in Chapter 4 to demonstrate all of the vector graphics support in Allegro, and also to provide a short break from all the theory. If I had my way, each new subject would be followed by a short game to demonstrate how a new feature works, but that would take too much time (and paper). Instead of going the creative route and creating a fun new game in every chapter, I think it's helpful to enhance an existing game with the new technology you learn as you go along. It has a parallel in real life, and it demonstrates the life-cycle of game development from early concept through the prototype stage and on to completion. In a sense, your knowledge of Allegro is going up like an RPG character's intelligence. One benefit to enhancing the game with new tricks and techniques you learn as you go along is that changes only affect a few lines of code here and there, while entirely new games take up pages of code. Besides, this is not a “101 games” type of book, like those that were popular years ago; instead, you are learning both high- and low-level game programming techniques that will work across different operating systems.
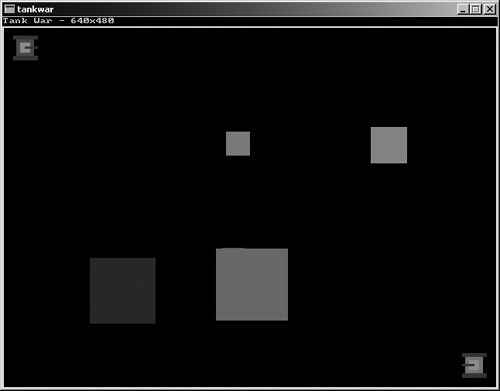
I have huge plans for Tank War, and you will snicker at these early versions later because you will be making all kinds of improvements to the game in the coming chapters—a scrolling background, animated sprites, joystick control, sound effects, and other great things. As you can see in Figure 7.1, the game looks identical to the version in Chapter 4. But it has undergone an “engine upgrade” to prepare it for a future tile- and sprite-based version of the game. Think of it as a 60's era car with a modern fuel injected engine!
Now, returning to the new code you just learned (which I will explain completely in the next section), what you need to do is create a bitmap surface for both of the tanks so that blitting will work. Create two tank bitmaps.
BITMAP *tank_bmp1 = create_bitmap(32, 32);
BITMAP *tank_bmp2 = create_bitmap(32, 32);
That will do nicely in theory, but the tank variables will be put in tankwar.h so the declaration will have to be separated from the initialization. (You can't use create_bitmap on the same line—more on that in a moment.) There's also the problem that each tank requires four directions, so each one will actually need four bitmaps. Now you need to clear out the bitmap memory so it's a nice clean slate.
clear_bitmap(tank_bmp1);
clear_bitmap(tank_bmp2);
Great! Now what? Now all you have to do is modify Tank War so it draws the tanks using blit instead of calling drawtank every time. Here is that blitting code:
blit(tank1, screen, 0, 0, X, Y, 32, 32);
blit(tank2, screen, 0, 0, X, Y, 32, 32);
Of course, this pseudo-code doesn't take into account the need for a separate bitmap for each direction the tank can travel (north, south, east, and west). But in theory, this is how it will work. On the CD-ROM, there is a project in the Chapter07 folder for Tank War with the completed changes. But I encourage you to load up the initial Chapter 4 version of Tank War and make these minor changes yourself so you can get the full effect of this lesson. When you open the tankwar project, you'll see the two files that comprise the source code: main.c and tankwar.h. Open the tankwar.h header file and add the following line after the gameover variable line:
//declare some variables
int gameover = 0;
BITMAP *tank_bmp[2][4];
This will take care of four bitmaps for each tank, and it's all wrapped nicely into a single array so it will be easy to use. Based on how the game uses tanks[0] and tanks[1] structures to keep track of the tanks, it will be easier if the bitmaps are stored in this array. Now open the main.c source code file. The goal here is to make as few changes as possible, keeping to the core of the original game at this point and just making those changes necessary to convert the game from vector-based graphics to bitmap-based graphics.
You can't really create the bitmaps in the header file, so this line just created the bitmap variables; you'll actually create the bitmaps in main.c. Do you remember how the tanks were set up back in Chapter 4? It was actually done by a function called setuptanks. All that needs to be done here is to create the two bitmaps, so put that code inside setuptanks. Look in main.c for the function and modify it as shown. (The changes are in bold.)
void setuptanks()
{
     int n;

     //player 1
     tanks[0].x = 30;
     tanks[0].y = 40;
     tanks[0].speed = 0;
     tanks[0].color = 9;
     tanks[0].score = 0;
     for (n=0; n<4; n+ +)
     {
          tank_bmp[0][n] = create_bitmap(32, 32);
          clear_bitmap(tank_bmp[0][n]);
          tanks[0].dir = n;
          drawtank(0);
     }
     tanks[0].dir = 1;

     //player 2
     tanks[1].x = SCREEN_W-30;
     tanks[1].y = SCREEN_H-30;
     tanks[1].dir = 3;
     tanks[1].speed = 0;
     tanks[1].color = 12;
     tanks[1].score = 0;
     for (n=0; n<4; n+ +)
     {
          tank_bmp[1][n] = create_bitmap(32, 32);
          clear_bitmap(tank_bmp[1][n]);
          tanks[1].dir = n;
          drawtank(1);
  }
}
It has required a lot of jumping around in the code, but so far you've only added a few lines of code. Not bad for starters! But now you're going to make some major changes to the drawtank function. This is where all those rectfill function calls will be pointed to the new tank bitmaps instead of directly to the screen. The actual logic hasn't changed, just the destination bitmap. I realize there are better and easier ways to rewrite this game to use bitmaps, but again, the goal is not to rewrite half the game, it is to make the least amount of changes to get the job done. Note the changes in bold and make these changes in the drawtank function so it looks like this:
void drawtank(int num)
{
    int x = 15; //tanks[num].x;
    int y = 15; //tanks[num].y;
    int dir = tanks[num].dir;


    //draw tank body and turret
     rectfill(tank_bmp[num][dir], x-11, y-11, x + 11, y + 11, tanks[num].color);
    rectfill(tank_bmp[num][dir], x-6, y-6, x + 6, y + 6, 7);


    //draw the treads based on orientation
    if (dir == 0 || dir == 2)
    {
       rectfill(tank_bmp[num][dir], x-16, y-16, x-11, y + 16, 8);
       rectfill(tank_bmp[num][dir], x + 11, y-16, x + 16, y + 16, 8);
    }
    else
    if (dir == 1 || dir == 3)
    {
       rectfill(tank_bmp[num][dir], x-16, y-16, x + 16, y-11, 8);
       rectfill(tank_bmp[num][dir], x-16, y + 16, x + 16, y + 11, 8);
    }


    //draw the turret based on direction
    switch (dir)
    {
       case 0:
            rectfill(tank_bmp[num][dir], x-1, y, x + 1, y-16, 8);
            break;
       case 1:
            rectfill(tank_bmp[num][dir], x, y-1, x + 16, y + 1, 8);
            break;
       case 2:
            rectfill(tank_bmp[num][dir], x-1, y, x + 1, y + 16, 8);
            break;
       case 3:
            rectfill(tank_bmp[num][dir], x, y-1, x-16, y + 1, 8);
            break;
    }
}
Now that wasn't difficult at all, was it? Just a single parameter on all the rectfill function calls to point the drawing onto the tank bitmaps instead of onto the screen, and a minor change to the x and y variables. The original Tank War would draw the tanks directly on the screen using the x and y values for each tank, so I just modified it here to base the x and y to the center of the tank bitmap instead. So let's summarize what has been done so far.
Define the tank bitmap variables.
Create the tank bitmaps in memory.
Draw the tank images onto the tank bitmaps.
What is left to be done? Just one more thing! Instead of calling drawtank in the main game loop, this has to be changed to blit! Let's do it. Scroll down to the end of the main.c file, look for the two drawtank lines of code, and replace them with the blit functions as the following listing shows:
//game loop
while(!gameover)
{
    //erase the tanks
    erasetank(0);
    erasetank(1);

    //check for collisions
    clearpath(0);
    clearpath(1);

    //move the tanks
    movetank(0);
    movetank(1);

    //draw the tanks
    blit(tank_bmp[0][tanks[0].dir], screen, 0, 0,
        tanks[0].x-16, tanks[0].y-16, 32, 32);
    blit(tank_bmp[1][tanks[1].dir], screen, 0, 0,
        tanks[1].x-16, tanks[1].y-16, 32, 32);

    //update the bullets
    updatebullet(0);
    updatebullet(1);

    //check for keypresses
    if (keypressed())
       getinput();

    //slow the game down (adjust as necessary)
    rest(30);
}
The blit function really is only complicated by the multi-dimensional tank_bmp array, but this array results in far fewer lines of code than would otherwise be necessary using a switch or an if statement to draw the appropriate bitmap.
This chapter was an essential step in the path to writing great 2D games. Bitmaps are the core of 2D games and of Allegro, and in this chapter you learned to create, load, draw, erase, stretch, and delete bitmaps using a variety of Allegro functions. You also learned quite a bit about blitting, the process of drawing a bitmap to the screen really fast, and even saw how to draw with transparency. If it feels a bit like we rushed through this subject too quickly, that is only because it's a prerequisite for the next chapter where you'll start learning about sprites, at which point the bitmap features are not as important.