
Chapter 12
Getting Started
IN THIS CHAPTER
![]() Getting acquainted with GarageBand’s global settings
Getting acquainted with GarageBand’s global settings
![]() Configuring GarageBand’s project-specific settings
Configuring GarageBand’s project-specific settings
![]() Taking control of projects with the control bar
Taking control of projects with the control bar
![]() Working on projects created on an iDevice on your Mac (and vice versa)
Working on projects created on an iDevice on your Mac (and vice versa)
Before you work and play with GarageBand on your iDevice, you should familiarize yourself with its settings. These settings are found in two places: Global settings are in the Settings app, and settings specific to the current project are in GarageBand’s Settings menu.
You probably don’t know how you like your preferences, at least not yet. But you will in just a few short pages. This chapter helps you adjust each item in both places, accompanied by the usual wit and wisdom and whatever else that I think you might find helpful.
Some of you may think that I’m putting the cart before the horse by covering preferences in Chapter 12, because some of the features these preferences affect won’t appear until later in this Part 4 or in Part 5. But there’s a method to my madness.
You're going to take a quick look at every one of the little critters (settings) so you know what they are, where they are, and how to configure them appropriately when you need them.
Global Settings
To adjust GarageBand’s global settings, tap the Settings app. Then scroll down the Settings list on the left side of the screen and tap GarageBand, as shown in Figure 12-1.
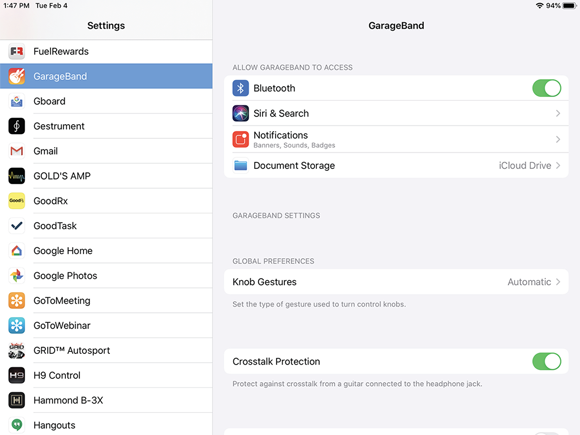
FIGURE 12-1: GarageBand’s global settings are found in the Settings app.
Allowing GarageBand access
The first four items control GarageBand’s access to external devices and other iDevice apps and services.
- Bluetooth: Use an external Bluetooth keyboard or other Bluetooth device with GarageBand.
- Siri & Search: Reveal the following four settings:
- Learn from this app: Allow Siri to learn how you use GarageBand and make suggestions across apps.
- Show in Search: Allow Search and Look Up to display information or shortcut suggestions or both for GarageBand.
- Suggest Shortcuts: Receive shortcut suggestions based on how you use the app.
- Show Siri Suggestions: Receive shortcut suggestions on your lock screen (based on how you use GarageBand).
- Notifications: Reveal the standard iOS (or iPadOS) Notifications settings screen. As usual, you can enable or disable notifications from GarageBand; enable or disable sounds and badges; and specify the behavior of notification previews and grouping.
- Document Storage: Choose a destination for saved projects. You can choose iCloud Drive, On My iPad (or iPhone), or any other cloud-based storage app on your device, such as Dropbox, Google Drive, or OneDrive.
Determining knob response
Tap Knob Gestures to choose how knobs respond to your touch. It’s hard to describe how they work, so try them one at a time so you can determine which feels most natural. To do that, tap Knob Gestures, and then tap Linear. Switch to GarageBand and swipe some knobs, noting how it feels.
Switch back to the Settings app, tap Knob Gestures, and then tap Circular. Switch to GarageBand again and swipe more knobs. Compare that to Linear and choose the one that feels most natural.
Or choose Automatic and let your iDevice determine what to do based on how you swipe the knob.
Reducing crosstalk
If you plug a guitar into your iDevice’s headphone port or Lightning port (using an appropriate plug adapter), enable the Crosstalk Protection setting to reduce noise (crosstalk) that could affect other tracks.
GarageBand Settings
To access GarageBand’s project-specific settings, tap the settings icon in the toolbar. The menu shown in Figure 12-2 appears.

FIGURE 12-2: GarageBand’s Settings menu.
Metronome and count-in
Before I talk about metronome settings, let me explain what a metronome is and why you'll probably need to use it.
It’s important to keep time with your song so you can play the right notes at the right time. To do that, you need to hear a steady beat. GarageBand’s built-in metronome plays that steady beat (sometimes called a click track) to help you play and record in perfect time at the project tempo you’ve specified.
You can turn the metronome on or off at any time — while recording, playing back, mixing, or mastering. But you’ll probably find it most useful while recording tracks.
 To make a choice that suits you, here are some tips to keep in mind:
- To play or sing in time with a song’s time signature, tempo, and other tracks, use the metronome every time that you record a track. Just remember that YMMV (your mileage may vary). Some musicians have perfect time and can play entire pieces without missing a beat. I’m such a lousy musician that I have trouble staying in time, even with the metronome clicking away.
- To toggle the metronome on and off (which I do often), tap the metronome icon in the toolbar. You can tell whether the metronome is on or off (without listening) by the metronome icon’s color — white is off and blue is on.
When I start a new project, I use the metronome during playback to rehearse parts without recording them and to try out different tempos for a piece. But as soon as I have drum and bass tracks — and maybe a guitar or keyboard part or two — I turn off the metronome and leave it off. By this point, the other tracks should be in time with each other, so I should be able to keep time with them when I’m playing or singing, without hearing the annoying tick of the metronome.
As the song’s track count increases, it gets harder to hear the metronome anyway. That’s why you may want to record your rhythm tracks — mostly drums and bass — first.
Just know that the metronome is there if you want it, during recording or playback. It can be turned on and off with a single tap of the metronome icon.
Now, here’s the scoop on the metronome and count-in settings shown in Figure 12-3:
The first two settings involve count-in:
- Count-in: Enable this setting to hear one measure of clicks before recording begins (after you tap the Record button). This feature helps ever so much when you need to start a song (or an overdub) in perfect time with either the metronome or with other tracks.
- Visual Count-in: When Count-in is enabled, you can also enable this setting to see a numerical countdown onscreen in time with the clicks.
Moving right along, the next five items are your options for the metronome’s click sound — Click, Woodblock, Hi-Hat, Rimshot, and No Sound. To try them, enable the metronome and tap the play icon. Now try them all and choose the one you prefer.
If you’re wondering why there’s an option for No Sound, that’s so you can enable Visual Count-in without hearing the metronome, because you must enable the metronome before you can enable Visual Count-in.
Finally, use the Metronome Level slider to set the volume level of the metronome.

FIGURE 12-3: Metronome and count-in settings.
Tempo, time, and key
The Tempo, Time Signature, and Key Signature settings are where you specify the (duh!) tempo, time signature, and key for your project.
Tempo
The Tempo setting determines this project’s beats per minute (bpm). Before you adjust it, you should probably enable the metronome and tap the play icon if you want to hear clicks at the selected tempo, which you almost certainly do.
Now, to change the tempo, press the number (110 in Figure 12-4) and drag up or down, or tap the little up or down arrows.
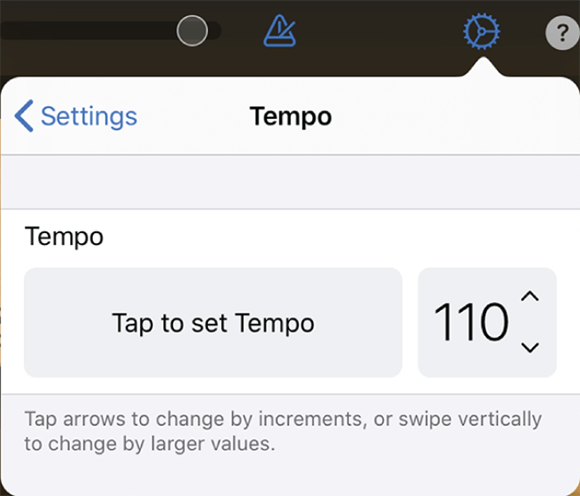
FIGURE 12-4: Set the tempo numerically or by tapping with your finger.
If you don’t know the precise number of beats per minute you seek, start at 110 and work your way up or down until you nail it.
Or, tap out the tempo with your finger on the Tap to Set Tempo button and let GarageBand figure out how many beats per minute you want.
To tap a tempo with your finger, do the following:
-
Enable the metronome.
Trust me, you want to hear clicks while you do this.
-
Tap the play icon.
The metronome starts clicking at the current tempo.
-
Tap the Tap to Set Tempo pad rhythmically at the tempo you desire.
The numerical value and time between clicks is updated in real time as you tap; keep tapping until the metronome clicks are playing at the tempo you desire.
And that’s how you set the tempo for the current project.
Time and key signatures
Setting the time signature is easy as long as your song is played in 4/4, 3/4, or 6/8 time. Those three are the only time signatures available, so I hope you weren’t planning to record any Dave Brubeck or Emerson, Lake, and Palmer tunes.
You have pretty much unlimited options for choosing your project’s key signature, as shown in Figure 12-5. Just tap the button for the key you desire, and then tap Major or Minor. If you’re not sure, leave the key set to C and enable Follow Song Key, which transposes touch instrument recordings to match the key in other tracks.
Other settings
The remaining settings are Edit Chords, Fade Out, Note Pad, Jam Session, Advanced, Restore Purchase, and Help. Here’s how they work:
- Edit Chords: You won’t discover the joys of the Smart Guitar until Chapter 15. For now, merely note that the Edit Chords setting lets you specify the chords you want the Smart Guitar to play (as shown in Figure 12-6).
- Fade Out: Enable this setting to have your song gradually fade-out at the end.
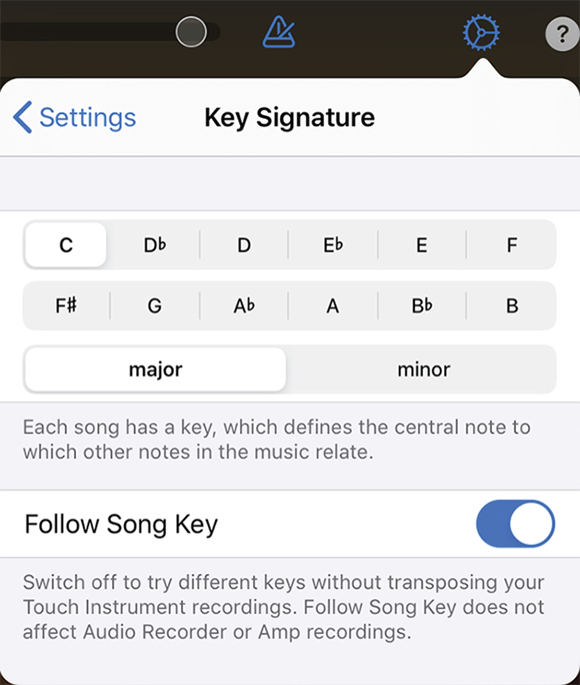
FIGURE 12-5: Any key signature you like, major or minor.
- Note Pad: Tap Note Pad to add a note to your project. For example, you might want to remind yourself to re-record the harmony vocal or add a third guitar part (or whatever). If you’re the type who likes to keep notes on your projects, this is a good place to keep them.
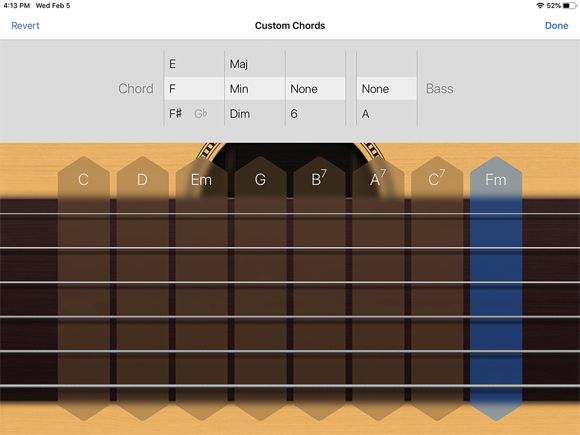
FIGURE 12-6: This is how you assign a chord (Fm) to the Smart Guitar’s rightmost chord strip.
- Jam Session: Enable this setting to jam with other users over Wi-Fi. I wrote an entire chapter about this topic (Chapter 21), so I’ll leave it at that for now.
- Advanced: Tap Advanced to reveal five settings you’ll rarely (or never) need:
- Multitrack Recording: Enable this setting if you want to record more than one track at a time. Note that when you connect an audio interface with more than one channel, GarageBand should allow multitrack recording regardless of this setting. It’s here because GarageBand doesn’t always recognize multi-input interfaces; if you plug one in and can’t record on multiple tracks at once, check this setting.
-
 24-bit Audio Resolution: Enable this setting to record, mix, or export higher-quality recordings.
Note that enabling this setting causes your saved projects to require as much as three times more storage than a project saved at the default resolution of 16-bits.
-
Run in Background: Enable this setting if you want GarageBand to continue running in the background while you use other apps.
Be careful. Enabling this setting may deplete your battery faster. - Bluetooth MIDI Devices: Tap this item to select a Bluetooth LE MIDI device (usually a keyboard or other MIDI controller) to use with GarageBand.
- Send MIDI Clock: You may need to enable this setting to sync your Bluetooth- or Lightning-connected MIDI device with your project. If your MIDI controller doesn’t perform as expected, enable this setting and try again.
- Restore Purchase: Tap this item to redownload any purchased (or free) sounds, presets, instruments, or other GarageBand add-ons.
- Help: I don’t know why this useful item is hidden away at the bottom of the Settings menu. Tap it to see the extensive GarageBand Help documentation (shown in Figure 12-7).
And that’s pretty much all you need to know about GarageBand’s global and project-specific settings.

FIGURE 12-7: The result of tapping the semi-hidden Help item in the Settings menu.
The Control Bar
The strip of icons that runs across the top of the GarageBand screen is known as the control bar. I cover these controls in greater detail throughout this part and Part 5. Following is a gentle introduction to each of its controls (from left to right):
 My Songs: Tap the my songs icon to save the current song and open the My Songs browser, which is where you create, save, and share your songs.
 Browser: Tap the browser icon to open Sound Browser (shown in Figure 12-8, top), where you can select a touch instrument or open the live loops grid. Swipe left or right to see other instruments; tap the Live Loops button at the top of the screen to switch to the live loops grid.
Press and hold down on the browser icon to choose a different instrument, as shown in Figure 12-8 (bottom).
Browser: Tap the browser icon to open Sound Browser (shown in Figure 12-8, top), where you can select a touch instrument or open the live loops grid. Swipe left or right to see other instruments; tap the Live Loops button at the top of the screen to switch to the live loops grid.
Press and hold down on the browser icon to choose a different instrument, as shown in Figure 12-8 (bottom). Tracks view: The tracks view icon lets you switch between the current touch instrument and tracks view.
Note that the tracks view icon appears only after you make at least one touch instrument recording in tracks view. Also note that the icon transmogrifies into an icon reminiscent of the selected track whilst in tracks view. Tap the instrument-looking icon to play the Smart instrument; tap the tracks view icon (shown in the margin) to return to tracks view.
You get the skinny on using tracks view in Chapter 14.

FIGURE 12-8: Swipe left or right (top), or press and hold down the browser icon (bottom) to select a different instrument.
 Grid: Tap the grid icon to switch between the current touch instrument and the live loops grid. You’ll see this icon only if a live loops grid has been created for this song. You can get the scoop on live loops and grids in Chapter 13.
 Track controls: Tap the track controls icon to see the controls for the selected track.
 FX: Tap the FX icon to show or hide the remix FX controls, which you learn about in Chapter 13.
 Undo: Tap the undo icon to undo the last thing you did. Deleted a region and want it back? Tap undo. Edited a take and don’t like the way it turned out? Tap undo.
The undo icon is context sensitive, which means it appears in your toolbar only if you do something that can be undone. If you don’t see it, there’s nothing to be undone at the moment.
 Go to beginning: Tap the go to beginning icon to move the playhead to the beginning of the song. If a song is playing, the go to beginning icon turns into a square stop icon.
 Play: Tap the play icon to begin playing your song from the playhead’s current position. Tap it (or the square stop icon) to stop playing.
 Record: Tap the record icon to begin recording. Tap the play or stop icon to end your recording.
-
Master volume slider: Slide the master volume slider to the right to make your song louder and to the left to make it softer.
You can use your iDevice’s volume buttons to change this setting, too.  Metronome: Tap the Metronome button to enable (blue) or disable (white) the metronome while playing or recording.
 Loop Browser: Tap the Loop Browser icon to show (blue) or hide (white) Loop Browser. Note that the Loop Browser icon appears only when you’re in track view.
 Settings: Tap to adjust the settings for this song, as discussed earlier in the chapter.
 Info: Although I’d call this icon help, Apple calls it info. Either way, tap this icon to see coaching tips for what’s on your screen, as shown in Figure 12-9 for tracks view.
And that, my friends, is your GarageBand control bar.
Before we move on to making songs, you need to know one more thing, namely, how to share projects with GarageBand on a Mac. Although you might think the process is as simple as sharing and opening a file, sadly, it’s not.
So, up next I describe what you need to know to share a project with your Mac (or share a Mac project with your iDevice).

FIGURE 12-9: Tap the info icon to see coaching tips, shown here for tracks view.
Sharing Projects with a Mac (and Vice Versa)
If you’re hoping to work on projects on both your Mac and iDevices, this section will save you a bunch of heartache.
If you start a project on your iDevice, when you first open the file on your Mac GarageBand asks you to resave the file (and optionally rename it, which is not a bad idea). The project then opens on your Mac and everything is more or less identical to the project on your iDevice.
Note that if you added a remix FX track to the song on your iDevice, that track will appear as an automation on the master track when you open the file on your Mac.
If you want to share a Mac project to an iDevice, however, things aren’t quite so easy. If you try to open a GarageBand for Mac project on your iDevice, you’ll see the error message shown in Figure 12-10.
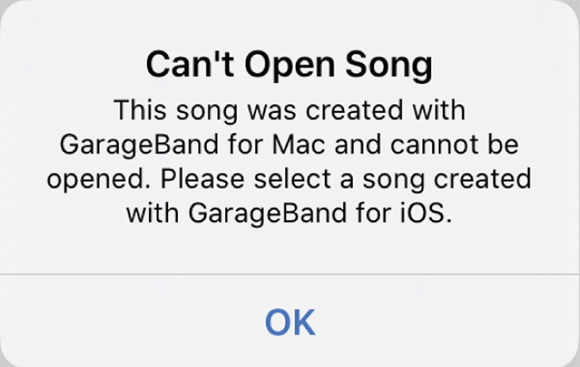
FIGURE 12-10: This is what you see if you try to open a Mac GarageBand file on an iDevice.
Don’t panic. Although you can’t just open a Mac GarageBand file on an iDevice, you can share a special GarageBand for iOS-compatible version of your Mac file and work on that file on your Mac.
Here’s how to share an iDevice-compatible version of your project from your Mac to your iDevice:
-
Choose Share ⇒ Project to GarageBand for iOS.
The Export to GarageBand for iOS dialog appears. Rename the file before the next step if you care to.
- In the sidebar of the Export to GarageBand for iOS dialog, click iCloud Drive and then click the GarageBand folder to select it.
-
Click the Save button.
Your project will now appear in the My Songs browser on your iOS device as a new song with a single track containing a mix of the entire GarageBand (Mac) project.
You can add, edit, and arrange new tracks in GarageBand for iOS, and then share the updated song back to iCloud. When you reopen the project in GarageBand on your Mac, the new tracks will be added to the original project.
Finally, it should go without saying that sharing a project to GarageBand for iOS requires an active Internet connection and iCloud login.
Now let’s start making some music!