
Hour 12. Using Multimedia in Your Website
What You’ll Learn in This Hour:
![]() How to link to multimedia files
How to link to multimedia files
![]() How to embed multimedia files
How to embed multimedia files
![]() How to use HTML5 audio and video elements
How to use HTML5 audio and video elements
![]() Additional tips for using multimedia
Additional tips for using multimedia
The term multimedia encompasses everything we see and hear on a web page: audio, video, and animation, as well as static images and text. In previous hours, you learned how to use images and text; in this hour, you learn about including the other types of multimedia in your websites. You don’t learn how to create any particular audio or video, but you do learn how to include such files in your site, through either linking or embedding the content.
Before even thinking about including multimedia in your site, remember that not every user has devices that will play your media type, nor do all users have broadband Internet connections that allow these large files to transfer quickly. Always warn your visitors that the links they click will take them to multimedia files, and offer them the choice to view or listen to the content—don’t force the files upon them.
Try It Yourself: Create or Find Some Multimedia to Use in Your Website
![]() Much of the material on the Internet is free. Of course, it’s still a good idea to double-check with the author or current owner of the content; you don’t want to be sued for copyright infringement. In addition, various offices of the U.S. government generate content that, by law, belongs to all Americans. (For example, any NASA footage found online is free for your use.)
Much of the material on the Internet is free. Of course, it’s still a good idea to double-check with the author or current owner of the content; you don’t want to be sued for copyright infringement. In addition, various offices of the U.S. government generate content that, by law, belongs to all Americans. (For example, any NASA footage found online is free for your use.)
![]() Many search engines have specific search capabilities for finding multimedia files. As long as you are careful about copyright issues, this can be an easy way to find multimedia related to a specific topic. A simple search for “sample Flash animations,” “sample QuickTime movie,” or “sample audio files” will produce more results than you can handle.
Many search engines have specific search capabilities for finding multimedia files. As long as you are careful about copyright issues, this can be an easy way to find multimedia related to a specific topic. A simple search for “sample Flash animations,” “sample QuickTime movie,” or “sample audio files” will produce more results than you can handle.
![]() If you are creatively inclined, determine the medium you like most—video production, audio production, or animation, for example. When you have a starting point, look into the various types of software that will enable you to create such artistic masterpieces. Many companies, including Adobe (www.adobe.com) and Apple (www.apple.com), provide multimedia software.
If you are creatively inclined, determine the medium you like most—video production, audio production, or animation, for example. When you have a starting point, look into the various types of software that will enable you to create such artistic masterpieces. Many companies, including Adobe (www.adobe.com) and Apple (www.apple.com), provide multimedia software.
Linking to Multimedia Files
The simplest and most reliable option for incorporating a video or audio file into your website is to simply link it in with an <a> tag, exactly as you would link to another HTML file.
For example, you could use the following line to offer an MOV video of an adorable kitten:
<a href="cute_kitten.mov">View an adorable kitten!</a>
When the user clicks the words View an adorable kitten!, the cute_kitten.mov QuickTime video file is transferred to his or her computer from your web server. Whichever helper application or plug-in the user has installed automatically starts as soon as the file has finished downloading. If no compatible helper or plug-in can be found, the web browser offers the user a chance to download the appropriate plug-in or save the video on the hard drive for later viewing.
Note
In case you’re unfamiliar with helper applications (helper apps, for short), they are the external programs that a web browser calls on to display any type of file it can’t handle on its own. Generally, the helper application associated with a file type is called on whenever a web browser can’t display that type of file on its own.
Plug-ins are a special sort of helper application installed directly into a web browser. They enable you to view multimedia content directly in the browser window.
Listing 12.1 contains the code for a web page that uses a simple image link to play a video in Windows Media file format. In addition to the image link, a link is placed within the text to provide context for the user.
LISTING 12.1 Linking an Image to a Windows Media Video
<!DOCTYPE html>
<html lang="en">
<head>
<title>Fun in the Pond</title>
</head>
<body>
<h1>This Kitten Loves to Play!</h1>
<div style="border-style:none; float:left; padding:12px"><a
href="kitten.wmv"><img src="projector.gif" alt="Kitten Video" /></a>
</div>
<p>All kittens love to play, but this one is particularly fond of her
yellow stuffed banana toy!</p>
<p>Click <a href="kitten.wmv">here</a> or on the projector graphic to
see a movie clip of this kitten in action.</p>
</body>
</html>
This code simply uses the projector.gif GIF image as a link to the kitten.wmv video clip. Figure 12.1 shows the pond sample page with the projector image in view. When the image is clicked, the Windows Media Player is invoked and begins to play the movie.
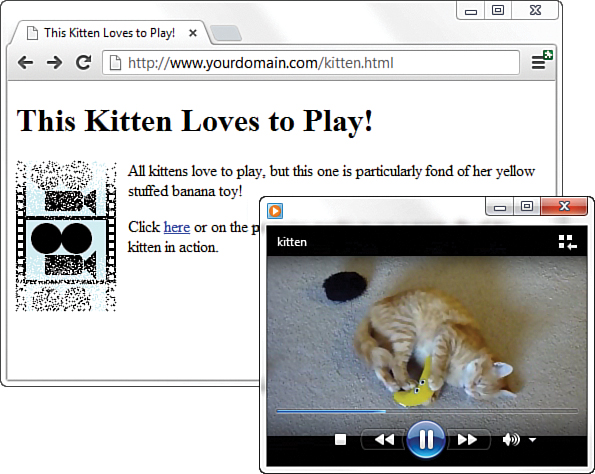
FIGURE 12.1 The projector.gif GIF image is used as an image link to a Windows Media file that launches an external helper application.
To view the video, you need only click the animated projector (or the text link in the paragraph). This action results in the browser either playing the video with the help of a plug-in (if one is found that can play the clip) or deferring to a suitable helper application.
If you change the link from kitten.wmv (Windows Media) to kitten.mov (QuickTime), your browser handles the link differently. Instead of launching another program, the QuickTime plug-in enables you to view the movie clip directly in the browser window (see Figure 12.2).
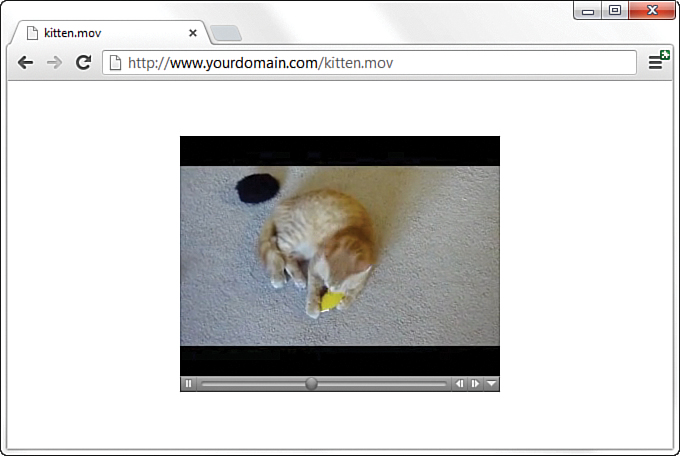
FIGURE 12.2 When you follow the image link, the kitten.mov QuickTime movie is played using the QuickTime browser plug-in.
As you might have guessed, this approach of using a simple link to play multimedia files offers the best backward compatibility because the browser bears all the responsibility of figuring out how to play a multimedia clip. The downside to this is that you don’t have much control over how a clip is played, and you definitely can’t play a clip directly in the context of a page.
Note
If your browser has no support for QuickTime, you can download the QuickTime player free from Apple at http://www.apple.com/quicktime/. Even if you do have QuickTime installed, some browsers play QuickTime movies differently based on whether a plug-in is installed. For example, on my Windows computer, Internet Explorer and Firefox both play QuickTime movies directly in the browser window via a plug-in, whereas Opera launches QuickTime as a helper application.
Embedding Multimedia Files
HTML has long contained a standard <object> element for embedding multimedia files in a web page. This element is widely supported in both desktop and mobile browsers and is used to represent a type of resource to be viewed or played in the browser but using an external plug-in.
Embedding a multimedia file into a web page produces a set of software controls that allow the file to be played directly—no secondary window is necessary, and there’s no need to navigate away from the page you are on. Following is code to embed the kitten video, which you saw earlier, using the <object> tag:
<object
width="320"
height="240"
type="video/x-ms-wmv"
data="pond.wmv"
</object>
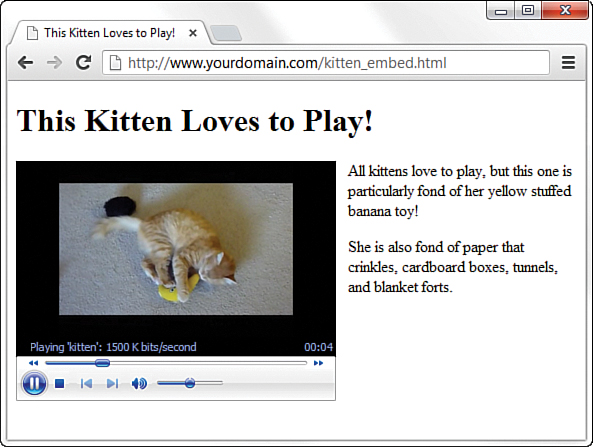
You can see the result of this code in Figure 12.3. This code isn’t much more complicated than adding an image to your web page; the only real difference is that here you specify the file type (in this case, video/x-ms-wmv).
Note
It’s important to note that Windows Media Player is a sophisticated enough media player that it automatically streams multimedia files, which means that it begins playing them after loading only the first few seconds of content. The idea is that the rest of the content is loaded in the background while you’re watching or listening to earlier portions. Visitors thus don’t have to wait through long download times when viewing or listening to your multimedia clips.
The width and height attributes of the <object> element determine the size of the embedded player (Windows Media Player, in this example). Some browsers automatically size the embedded player to fit the content if you leave these attributes off, whereas others don’t show anything. Play it safe by setting them to a size that suits the multimedia content being played.
Only two other attributes are necessary to display the appropriate video file: the data attribute, which has a value of the filename (or URL to the file) you want to play, and the type attribute, which identifies the type of media being displayed. In this case, the file is a Windows Media Video (WMV) file, specified by the MIME types. A MIME type is an identifier for uniquely identifying different types of media objects on the Internet. MIME stands for Multipurpose Internet Mail Extensions, and this name comes from the fact that MIME types were originally used to identify email attachments. These MIME types should be used in the type attribute of the <object> element to identify what kind of multimedia object the data attribute is referencing.
Following are the MIME types for several popular sound and video formats you might want to use in your web pages:
![]() WAV Audio—
WAV Audio—audio/vnd.wave
![]() MP3 Audio—
MP3 Audio—audio/mpeg
![]() MP4 Audio—
MP4 Audio—audio/mp4
![]() WMV—
WMV—video/x-ms-wmv
![]() MPEG Video—
MPEG Video—video/mpeg
![]() MPEG4 Video—
MPEG4 Video—video/mp4
![]() QuickTime—
QuickTime—video/quicktime
Listing 12.2 shows the relevant code for the pond web page, where you can see the <object> element as it appears in context.
LISTING 12.2 Using an <object> Element to Directly Embed a WMV Video Clip
<!DOCTYPE html>
<html lang="en">
<head>
<title>This Kitten Loves to Play!</title>
</head>
<body>
<h1>This Kitten Loves to Play!</h1>
<div style="float:left; padding:12px">
<object
width="320"
height="240"
data="kitten.wmv"
type="video/x-ms-wmv">
</object>
</div>
<p>All kittens love to play, but this one is particularly fond
of her yellow stuffed banana toy!</p>
<p>She is also fond of paper that crinkles, cardboard boxes, tunnels,
and blanket forts.</p>
</body>
</html>
Although this section has discussed “embedding” a multimedia object using the <object> element, you can use another element to achieve the same goal: the appropriately named <embed /> element. There’s a good reason I didn’t talk about the <embed /> element first—it has a negative and confusing history. In the days before HTML5, multimedia objects could be embedded in web pages in two ways: using <object> (part of the official specification) or using <embed /> (not part of the official specification, but implemented by the old Netscape browser). During this time, if you wanted to ensure that your embedded multimedia object was visible in all browsers, you used a little trickery and wrapped your <embed /> element inside an <object> element, like so:
<object
width="320"
height="240"
data="kitten.wmv"
type="video/x-ms-wmv">
<embed
width="320"
height="240"
type="video/x-ms-wmv"
src="kitten.wmv" />
</object>
Browsers that knew what to do with <object> elements did so and ignored the <embed /> element. But browsers that ignored the <object> element and knew what to do with the <embed /> element did just that. This was as annoying to web developers then as it is confusing to explain now.
Now, in the era of HTML5, both the <object> and <embed /> elements are valid, and you can use either one without having to use both. The only difference between the general usage of the two is that the <object> element uses the data attribute to refer to the multimedia resource, whereas the <embed /> element uses the src attribute (much like the <img /> tag).
Using Pure HTML5 for Audio and Video Playback
In the previous section, you learned more about the confusing history of the <object> and <embed /> elements than you probably imagined existed. The end result of this confusing history is that although you most certainly can continue to use <object> or <embed /> elements to embed audio or video in your web pages, and rely on external plug-ins to play those files, HTML5 contains native elements for playing audio and video. In this instance, native refers to the browser’s capability to play multimedia files without external plug-ins, and all major browsers on all platforms (including mobile) support these elements. This will be the preferred method of playing back audio and video moving forward.
Listing 12.3 shows how to use the <audio> element to embed an audio file that will be played natively by the browser. The <audio> element is quite simple and requires only one attribute—src, or the location of the resource you want to play. However, as you see in Listing 12.3, you’ll probably want to use a few other handy attributes.
LISTING 12.3 Using the <audio> Element to Embed and Play an Audio File
<!DOCTYPE html>
<html lang="en">
<head>
<title>Let's Hear Some Music</title>
</head>
<body>
<h1>Let's Hear Some Music</h1>
<p>Better yet, let's use the HTML5 <audio> element to do so!</p>
<audio
src="manhattan_beach.mp3"
preload="auto"
controls
autoplay
loop>
<!-- Message to display in case the audio element isn't
supported. -->
<p>Your browser does not support the audio element.</p>
</audio>
</body>
</html>
In addition to the src attribute, which, in this case, has a value of manhattan_beach.mp3 because that is the name of the audio file I want to play, I’m using four other attributes in this <audio> element:
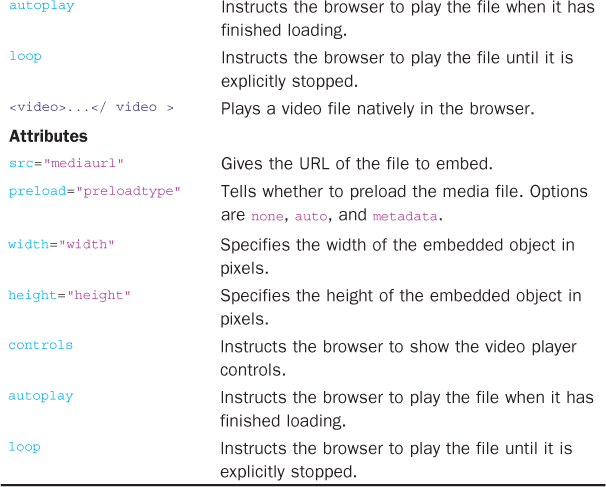
• preload—Has three possible values: none, auto, and metadata. Use none if you do not want to buffer the file, use auto to buffer the file, and use metadata if you want to buffer only the metadata for the file.
• controls—If present, shows the controls for the audio player.
• autoplay—If present, plays the file as soon as it loads.
• loop—If present, continues to play the file repeatedly until it is manually stopped.
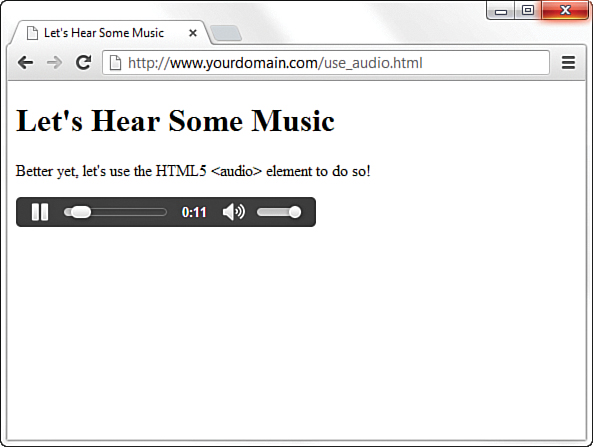
Figure 12.4 shows the page in Listing 12.3 as rendered by the Chrome web browser.
Tip
Notice the inclusion of a message to users inside the <audio> element. Although current versions of all major browsers support the <audio> element, if a user’s browser does not, that user will instead see the message within the <p></p> tags.
FIGURE 12.4 Using the <audio> element to play a sound file.
In practice, you probably wouldn’t want to automatically play and loop a sound file in your website—doing so is typically considered a particularly negative user experience. However, if you do automatically play a sound file (please don’t!), be sure to include the player controls so that users can immediately turn off the sound.
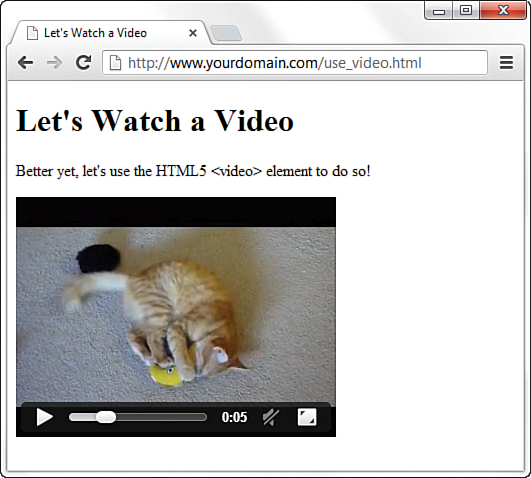
Using the HTML5 <video> element is quite similar to using the <audio> element. Listing 12.4 shows an example of this, in which the only real changes besides some text changes are the use of height and width attributes to define the space taken up by the video player and the video clip.
LISTING 12.4 Using the <video> Element to Embed and Play a Video File
<!DOCTYPE html>
<html lang="en">
<head>
<title>Let's Watch a Video</title>
</head>
<body>
<h1>Let's Watch a Video</h1>
<p>Better yet, let's use the HTML5 <video> element to do so!</p>
<video
src="kitten.mov"
preload="auto"
width="320"
height="240"
controls
autoplay
loop>
<!-- Message to display in case the video element isn't
supported. -->
<p>Your browser does not support the video element.</p>
</video>
</body>
</html>
The preload, controls, autoplay, and loop attributes do exactly the same for the <video> element as they do for the <audio> element. Figure 12.5 shows the page in Listing 12.4 as rendered by the Chrome web browser.
Additional Tips for Using Multimedia
Before you add video, audio, or animations to your website, ask yourself whether you really should do so. When you use these types of multimedia, be sure to do so for a reason. Gratuitous sound and video, just like gratuitous images, can detract from your overall message. Then again, if your message is “Look at the videos I’ve made” or “Listen to my music and download some songs,” then multimedia absolutely must play a role in your website.
Keep a few additional tips in mind:
![]() Don’t include multimedia in a page and set it to automatically play when the page loads. Always give users the option to start (and stop) your sound or video.
Don’t include multimedia in a page and set it to automatically play when the page loads. Always give users the option to start (and stop) your sound or video.
![]() When providing files for direct download, give users a choice of file type. Don’t limit yourself to providing multimedia content playable by only one type of player on only one operating system.
When providing files for direct download, give users a choice of file type. Don’t limit yourself to providing multimedia content playable by only one type of player on only one operating system.
![]() Multimedia files are larger than the typical graphics and text files, which means you need to have the space on your web server to store them, as well as the bandwidth allotment to transfer them to whomever requests them via your website.
Multimedia files are larger than the typical graphics and text files, which means you need to have the space on your web server to store them, as well as the bandwidth allotment to transfer them to whomever requests them via your website.
![]() If your site is entirely audio or video and offers very little by way of text or graphics, understand that a certain segment of your audience won’t see or hear what you want to present because of the limitations of their system or bandwidth. Provide these users with additional options to get your information.
If your site is entirely audio or video and offers very little by way of text or graphics, understand that a certain segment of your audience won’t see or hear what you want to present because of the limitations of their system or bandwidth. Provide these users with additional options to get your information.
![]() Leverage free online video hosting services, such as YouTube (www.youtube.com). Not only does YouTube provide storage for your video clips, but it also gives you the code necessary to embed the video in your own web page.
Leverage free online video hosting services, such as YouTube (www.youtube.com). Not only does YouTube provide storage for your video clips, but it also gives you the code necessary to embed the video in your own web page.
Summary
In this hour, you learned how to embed video and sound in a web page. You learned how to use a simple link to a multimedia file, which is the most broadly supported but least flexible option for playing media content. You then learned how to use the <object> or <embed /> elements to embed a media player directly in a web page, which can be used to include a vast array of media types, including WAV, MP3, AVI, WMV, and QuickTime videos, to name just a few. Finally, you learned about the <audio> and <video> elements in HTML5, which enable the browser to render audio or video files natively, or without external plug-in support.
Table 12.1 summarizes the tags discussed in this hour.

Q&A
Q. I hear a lot about streaming video and audio. What does that mean?
A. In the past, video and audio files took minutes and sometimes hours to retrieve through most modems, which severely limited the inclusion of video and audio on web pages. The goal everyone is moving toward is streaming video or audio, which plays while the data is being received. In other words, you don’t have to completely download the clip before you can start to watch it or listen to it.
Streaming playback is now widely supported through most media players, in both standalone versions and plug-ins. When you embed a media object using the <object> or <embed /> elements, the underlying media player automatically streams the media clip if the player supports streaming. When using the <video> element, you have more fine-grained control over the buffering and playback of your multimedia resource.
Q. How do I choose an audiovisual file format among QuickTime, Windows AVI/WAV, MPEG, and others? Is there any significant difference among them?
A. QuickTime is the most popular video format among Macintosh users, although QuickTime players are available for Windows as well. Similarly, AVI/WMV and WAV/WMA are the video and audio formats for Windows users, but you can get players for the Macintosh that support these formats. MPEG is another popular audio and video standard. MPEG-3 (MP3) is already extremely popular as the high-fidelity audio standard of choice. One other audio format that is based on MPEG is Apple’s AAC format, which might be more familiar to you because this is the native iTunes music format.
If most of your audience uses Windows, use AVI/WMV for video and WAV/WMA or MP3 for audio. If your audience includes a significant number of Macintosh users, use QuickTime or at least offer some alternative. MP3 is also an option for Mac audio.
Workshop
The Workshop contains quiz questions and activities to help you solidify your understanding of the material covered. Try to answer all questions before looking at the “Answers” section that follows.
Quiz
1. What’s the simplest method to provide access to a video on your website for the widest possible audience?
2. What basic HTML5 code would you use to embed a video file named myvideo.mov into a web page? The video requires an area on the page that is 320×305 pixels in size, and you want to show the video controls but do not want to automatically play or loop the file.
3. How would you code the <audio> element so that a media clip plays repeatedly? Assume that the audio file is called myaudio.mp3.
Answers
1. Just link to it:
<a href="myvideo.mov">my video</a>
2. The code follows:
<video width="320" height="305" src="myvideo.mov" controls></video>
3. Use the following:
<audio src="myaudio.mp3" autoplay></audio>
Exercises
![]() Find some freely available audio and video clips on the web, and practice placement within your text using the HTML5
Find some freely available audio and video clips on the web, and practice placement within your text using the HTML5 <audio> and <video> elements.
![]() The techniques and tags covered in this hour for embedding media with the
The techniques and tags covered in this hour for embedding media with the <object> and <embed/> elements also work with Flash files. To find out how you can use Flash to add interactive animations to your web pages, check out the Flash home page at http://www.adobe.com/products/flash.html.