
Hour 8. Using External and Internal Links
What You’ll Learn in This Hour:
![]() How to use anchor links
How to use anchor links
![]() How to link between pages on your own site
How to link between pages on your own site
![]() How to link to external content
How to link to external content
![]() How to link to an email address
How to link to an email address
![]() How to use window targeting with your links
How to use window targeting with your links
![]() How to style your links with CSS
How to style your links with CSS
So far, you have learned how to use HTML tags to create some basic web pages. However, at this point, those pieces of content are islands unto themselves, with no connection to anything else (although it is true that, in Hour 3, “Understanding Cascading Style Sheets,” I sneaked a few page links into the examples). To turn your work into real web content, you need to connect it to the rest of the web—or at least to your other pages within your own personal or corporate sites.
This hour shows you how to create hypertext links to content within your own document and how to link to other external documents. Additionally, you will learn how to style hypertext links so that they display in the color and decoration you desire—not necessarily the default blue underlined display.
Using Web Addresses
The simplest way to store web content for an individual website is to place the files all in the same folder together. When files are stored together like this, you can link to them by simply providing the name of the file in the href attribute of the <a> tag.
An attribute is an extra piece of information associated with a tag that provides further details about the tag. For example, the href attribute of the <a> tag identifies the address of the page to which you are linking.
When you have more than a few pages, or when you start to have an organization structure to the content in your site, you should put your files into directories (or folders, if you will) whose names reflect the content within them. For example, all your images could be in an images directory, corporate information could be in an about directory, and so on. Regardless of how you organize your documents within your own web server, you can use relative addresses, which include only enough information to find one page from another.
Note
Before we begin, you might want a refresher on the basics of where to put files on your server and how to manage files within a set of directories. This information is important to know when creating links in web content. Refer back to Hour 1, “Understanding How the Web Works,” specifically the section titled “Understanding Where to Place Files on the Web Server.”
A relative address describes the path from one web page to another, instead of a full (or absolute) Internet address.
As you recall from Hour 1, the document root of your web server is the directory designated as the top-level directory for your web content. In web addresses, that document root is represented by the forward slash (/). All subsequent levels of directories are separated by the same type of forward slash. For example:
/directory/subdirectory/subsubdirectory/
Suppose you are creating a page named zoo.html in your document root, and you want to include a link to pages named african.html and asian.html in the elephants subdirectory. The links would look like the following:
<a href="/elephants/african.html">Learn about African elephants.</a>
<a href="/elephants/asian.html">Learn about Asian elephants.</a>
Caution
The forward slash (/) is always used to separate directories in HTML. Don’t use the backslash (, which is normally used in Windows) to separate your directories. Remember, everything in the web moves forward, so use forward slashes.
These specific addresses are actually called relative-root addresses, in that they are relative addresses that lack the entire domain name, but they are specifically relative to the document root specified by the forward slash.
Using a regular relative address, you can skip the initial forward slash. This type of address allow the links to become relative to whatever directory they are in—it could be the document root, or it could be another directory one or more levels down from the document root:
<a href="elephants/african.html">Learn about African elephants.</a>
<a href="elephants/asian.html">Learn about Asian elephants.</a>
Your african.html and asian.html documents in the elephants subdirectory could link back to the main zoo.html page in either of these ways:
<a href="http://www.yourdomain.com/zoo.html">Return to the zoo.</a>
<a href="/zoo.html">Return to the zoo.</a>
<a href="../zoo.html">Return to the zoo.</a>
The first link is an absolute link. With an absolute link, there is absolutely no doubt where the link should go because the full URL is provided—domain name included.
The second link is a relative-root link. It is relative to the domain you are currently browsing and, therefore, does not require the protocol type (for example, http://) or domain name (for example, www.yourdomain.com); the initial forward slash is provided to show that the address begins at the document root.
In the third link, the double dot (..) is a special command that indicates the folder that contains the current folder—in other words, the parent folder. Anytime you see the double dot, just think to yourself, “Go up a level” in the directory structure.
If you use relative addressing consistently throughout your web pages, you can move directories of pages to another folder, disk drive, or web server without changing the links.
Tip
The general rule surrounding relative addressing (elephants/african.html) versus absolute addressing (http://www.takeme2thezoo.com/elephants/african.html) is that you should use relative addressing when linking to files that are stored together, such as files that are all part of the same website. Use absolute addressing when you’re linking to files somewhere else—another computer, another disk drive, or, more commonly, another website on the Internet.
Relative addresses can span quite complex directory structures, if necessary. Hour 23, “Organizing and Managing a Website,” offers more detailed advice for organizing and linking large numbers of web pages.
Linking Within a Page Using Anchors
The <a> tag—the tag responsible for hyperlinks on the web—got its name from the word anchor, which means a link serves as a designation for a spot in a web page. In examples throughout this book so far, you’ve learned how to use the <a> tag to link to somewhere else, but that’s only half its usefulness. Let’s get started working with anchor links that link to content within the same page.
Identifying Locations in a Page with Anchors
The <a> tag can be used to mark a spot on a page as an anchor, enabling you to create a link that points to that exact spot. Listing 8.1, presented a bit later in this hour, demonstrates a link to an anchor within a page. To see how such links are made, let’s take a quick peek ahead at the first <a> tag in the listing:
<a id="top"></a>
The <a> tag normally uses the href attribute to specify a hyperlinked target. The <a href> is what you click, and <a id> is where you go when you click there. In this example, the <a> tag is still specifying a target, but no actual link is created. Instead, the <a> tag gives a name to the specific point on the page where the tag occurs. The </a> tag must be included, and a unique name must be assigned to the id attribute, but no text between <a> and </a> is necessary.
Tip
You can actually use an id attribute on many container elements in HTML5, and use the </a> tag to point to those elements as anchor links as well.
Linking to Anchor Locations
Listing 8.1 shows a site with various anchor points placed throughout a single page. Take a look at the last <a> tag in Listing 8.1 to see an example:
<a href="#top">Return to Index.</a>
The # symbol means that the word top refers to a named anchor point within the current document rather than to a separate page. When a user clicks Return to Index, the web browser displays the part of the page starting with the <a id="top"> tag.
LISTING 8.1 Setting Anchor Points by Using the <a> Tag with an id Attribute
<!DOCTYPE html>
<html lang="en">
<head>
<title>Alphabetical Shakespeare</title>
</head>
<body>
<article>
<header>
<h1><a id="top"></a>First Lines of Shakespearean Sonnets</h1>
</header>
<p>Don't you just hate when you go a-courting, and you're down
on one knee about to rattle off a totally romantic Shakespearean
sonnet, and zap! You space it. <em>"Um... It was, uh... I think it
started with a B..."</em></p>
<p>Well, appearest thou no longer the dork. Simply refer to this page,
click on the first letter of the sonnet you want, and get an instant
reminder of the first line to get you started. <em>"Beshrew that
heart that makes my heart to groan..."</em></p>
<p style="text-align:center"><strong>Alphabetical Index</strong></p>
<div style="text-align:center">
<a href="#A">A</a> <a href="#B">B</a> <a href="#C">C</a>
<a href="#D">D</a> <a href="#E">E</a> <a href="#F">F</a>
<a href="#G">G</a> <a href="#H">H</a> <a href="#I">I</a>
<a href="#J">J</a> <a href="#K">K</a> <a href="#L">L</a>
<a href="#M">M</a> <a href="#N">N</a> <a href="#O">O</a>
<a href="#P">P</a> <a href="#Q">Q</a> <a href="#R">R</a>
<a href="#S">S</a> <a href="#T">T</a> <a href="#U">U</a>
<a href="#V">V</a> <a href="#W">W</a> <a href="#X">X</a>
<a href="#Y">Y</a> <a href="#Z">Z</a>
</div>
<hr />
<section>
<header>
<h1><a id="A"></a>A</h1>
</header>
<ul>
<li>A woman's face with nature's own hand painted,</li>
<li>Accuse me thus, that I have scanted all, </li>
<li>Against my love shall be as I am now</li>
<li>Against that time (if ever that time come) </li>
<li>Ah wherefore with infection should he live, </li>
<li>Alack what poverty my muse brings forth, </li>
<li>Alas 'tis true, I have gone here and there, </li>
<li>As a decrepit father takes delight, </li>
<li>As an unperfect actor on the stage, </li>
<li>As fast as thou shalt wane so fast thou grow'st, </li>
</ul>
<p><a href="#top">Return to Index.</a></p>
</section>
<hr />
<!-- continue with the alphabet -->
<section>
<header>
<h1><a id="Z"></a>Z</h1>
</header>
<p>(No sonnets start with Z.)</p>
<p><a href="#top"><em>Return to Index.</em></a></p>
</section>
</article>
</body>
</html>
Note
Near the end of Listing 8.1, you see a line that reads:
<!-- continue with the alphabet -->
This text (an HTML comment) will appear in your source code but will not be displayed by the browser. You can learn more about commenting your code in Hour 23.
Each of the <a href> links in Listing 8.1 makes an underlined link leading to a corresponding <a id> anchor—or it would if I had filled in all the text. Only A and Z will work in this example because only the A and Z links have corresponding text to link to, but feel free to fill in the rest on your own! Clicking the letter Z under Alphabetical Index in Figure 8.1, for example, takes you to the part of the page shown in Figure 8.2.
Caution
Anchor names specified via the id attribute in the <a> tag must start with an alphanumeric character. So if you want to simply number the IDs of anchors, be sure to start them with text (as in photo1, photo2, and so on) instead of just 1, 2, and so on.
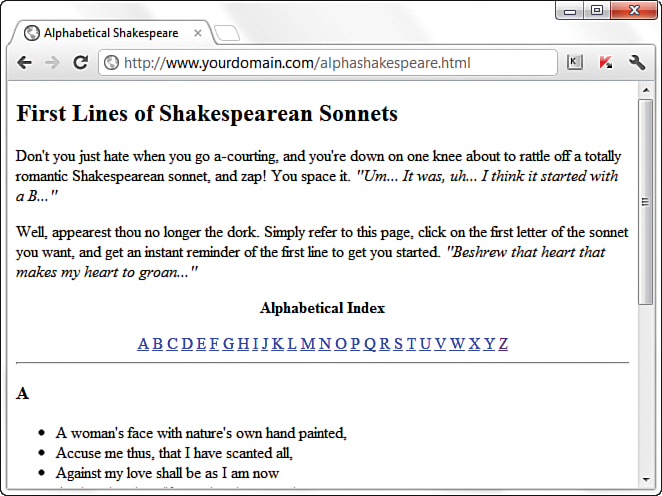
FIGURE 8.1 The <a id> tags in Listing 8.1 don’t appear at all on the web page. The <a href> tags appear as underlined links.
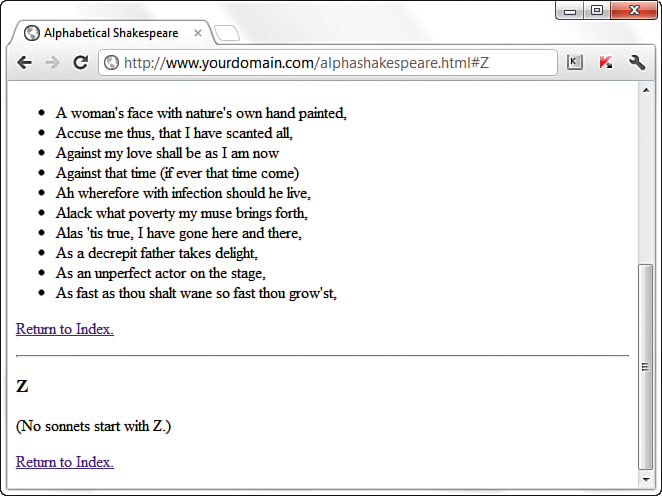
FIGURE 8.2 Clicking the letter Z on the page shown in Figure 8.1 takes you to the appropriate section of the same page.
Having mastered the concept of linking to sections of text within a single page, you can now learn to link other pieces of web content.
Linking Between Your Own Web Content
As you learned earlier in this hour, you do not need to include http:// before each address specified in the href attribute when linking to content within your domain (or on the same computer, if you are viewing your site locally). When you create a link from one file to another file within the same domain or on the same computer, you don’t need to specify a complete Internet address. In fact, if the two files are stored in the same folder, you can simply use the name of the HTML file by itself:
<a href="pagetwo.html">Go to Page 2.</a>
As an example, Listing 8.2 and Figure 8.3 show a quiz page with a link to the answers page shown in Listing 8.3 and Figure 8.4. The answers page contains a link back to the quiz page. Because the page in Listing 8.2 links to another page in the same directory, the filename can be used in place of a complete address.
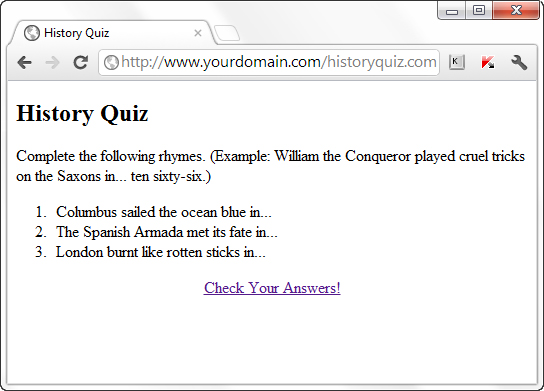
FIGURE 8.3 This is the historyquiz.html file listed in Listing 8.2 and referred to by the link in Listing 8.3.
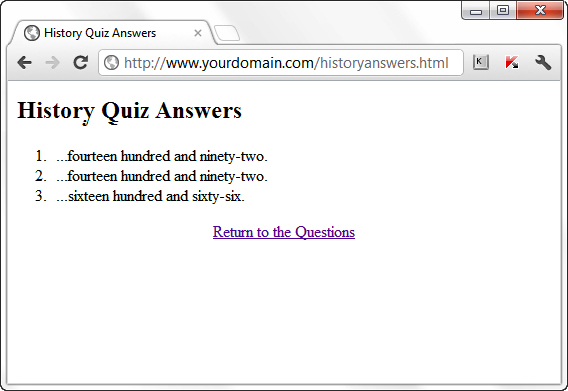
FIGURE 8.4 The Check Your Answers! link in Figure 8.3 takes you to this answers page. The Return to the Questions link takes you back to what’s shown in Figure 8.3.
LISTING 8.2 The historyanswers.html File
<!DOCTYPE html>
<html lang="en">
<head>
<title>History Quiz</title>
</head>
<body>
<section>
<header>
<h1>History Quiz</h1>
</header>
<p>Complete the following rhymes. (Example: William the Conqueror
Played cruel tricks on the Saxons in... ten sixty-six.)</p>
<ol>
<li>Columbus sailed the ocean blue in...</li>
<li>The Spanish Armada met its fate in...</li>
<li>London burnt like rotten sticks in...</li>
</ol>
<p style="text-align: center;">
<a href="historyanswers.html">Check Your Answers!</a>
</p>
</section>
</body>
</html>
LISTING 8.3 The historyanswers.html File That historyquiz.html Links To
<!DOCTYPE html>
<html lang="en">
<head>
<title>History Quiz Answers</title>
</head>
<body>
<section>
<header>
<h1>History Quiz Answers</h1>
</header>
<ol>
<li>...fourteen hundred and ninety-two.</li>
<li>...fifteen hundred and eighty eight.</li>
<li>...sixteen hundred and sixty-six.</li>
</ol>
<p style="text-align: center;">
<a href="historyquiz.html">Return to the Questions</a>
</p>
</section>
</body>
</html>
Note
In both Listings 8.2 and 8.3, you’ll see the use of the <section></section> tag pair around the bulk of the content. You might wonder whether that is entirely necessary—after all, it is the only content on the page. The answer is, no, it isn’t entirely necessary. The HTML would validate just fine, and no one looking at this code would be confused by its organization if the <section></section> tags were not present. They are used here just to make sure you get used to seeing them throughout these code examples, and to allow me to write this note about how you might use the <section></section> tags at some point in the future.
For example, if you were to put both the questions section and the answers section on one page, and apply the use of styles and a little bit of JavaScript-based interactivity, you could hide one section (the questions) until the reader clicked a link that would then show the other section (the answers). This action is beyond the scope of the book, but it is an example of how the simplest bit of markup can set you up for bigger things later.
Using filenames instead of complete Internet addresses saves you a lot of typing. More important, the links between your pages will work properly no matter where the group of pages is stored. You can test the links while the files are still on your computer’s hard drive. You can then move them to a web server, a CD-ROM, a DVD, or a memory card, and all the links will still work correctly. There is nothing magic about this simplified approach to identifying web pages—it all has to do with web page addressing, as you’ve already learned.
Linking to External Web Content
The only difference between linking to pages within your own site and linking to external web content is that, when linking outside your site, you need to include the full address to that bit of content. The full address includes the http:// before the domain name and then the full pathname to the file (for example, an HTML file, image file, multimedia file, and so on).
For example, to include a link to Google from within one of your own web pages, you would use this type of absolute addressing in your <a> link:
<a href="http://www.google.com/">Go to Google</a>
Caution
As you might know, you can leave out the http:// at the front of any address when typing it into most web browsers. However, you cannot leave that part out when you type an Internet address into an <a href> link on a web page.
You can apply what you learned in previous sections to creating links to named anchors on other pages. Linked anchors are not limited to the same page. You can link to a named anchor on another page by including the address or filename followed by # and the anchor name. For example, the following link would take you to an anchor named photos within the african.html page inside the elephants directory on the (fictional) domain www.takeme2thezoo.com.
<a href="http://www.takeme2thezoo.com/elephants/african.html#photos">
Check out the African Elephant Photos!</a>
Caution
Be sure to include the # symbol only in <a href> link tags. Don’t put the # symbol in the <a id> tag; links to that name won’t work in that case.
If you are linking from another page already on the www.takeme2thezoo.com domain (because you are, in fact, the site maintainer), your link might simply be as follows:
<a href="/elephants/african.html#photos">Check out the
African Elephant Photos!</a>
The http:// and the domain name would not be necessary in that instance, as you have already learned.
Linking to an Email Address
In addition to linking between pages and between parts of a single page, the <a> tag allows you to link to email addresses. This is the simplest way to enable your web page visitors to talk back to you. Of course, you could just provide visitors with your email address and trust them to type it into whatever email programs they use, but that increases the likelihood for errors. By providing a clickable link to your email address, you make it almost completely effortless for them to send you messages and eliminate the chance for typos.
An HTML link to an email address looks like the following:
<a href="mailto:[email protected]">Send me an
email message.</a>
The words Send me an email message will appear just like any other <a> link.
If you want people to see your actual email address (so that they can make note of it or send a message using a different email program), include it both in the href attribute and as part of the message between the <a> and </a> tags, like this:
<a href="mailto:[email protected]">[email protected]</a>
In most web browsers, when a user clicks the link, that person gets a window into which he or she can type a message that is immediately sent to you—the email program the person uses to send and receive email will automatically be used. You can provide some additional information in the link so that the subject and body of the message also have default values. You do this by adding subject and body variables to the mailto link. You separate the variables from the email address with a question mark (?), separate the value from the variable with an equals sign (=), and then separate each of the variable and value pairs with an ampersand (&). You don’t have to understand the variable/value terminology at this point. Here is an example of specifying a subject and body for the preceding email example:
<a href="mailto:[email protected]?subject=Book Question&body=
When is the next edition coming out?">[email protected]</a>
When a user clicks this link, an email message is created with [email protected] as the recipient, Book Question as the subject of the message, and When is the next edition coming out? as the message body.
Tip
If you want to specify only an email message subject and not the body, you can just leave off the ampersand and the body variable, equals sign, and value text string, as follows:
<a href="mailto:author@
somedomain.com?subject=
Book Question">author@
somedomain.com</a>
Before you run off and start plastering your email address all over your web pages, I have to give you a little warning and then let you in on a handy trick. You’re no doubt familiar with spammers that build up databases of email addresses and then bombard them with junk mail advertisements. One way spammers harvest email addresses is using programs that automatically search web pages for mailto links.
Fortunately, a little trick will thwart many (but not all) spammers. This trick involves using character entities to encode your email address, which confuses scraper programs that attempt to harvest your email address from your web pages. As an example, consider the email address [email protected]. If you replace the letters in the address with their character entity equivalents, some email harvesting programs will be thrown off. Lowercase ASCII character entities begin at a for the letter a and increase through the alphabet in order. For example, the letter j is j, c is c, and so on. Replacing all the characters with their ASCII attributes produces the following:
<a href="mailto:jcmeloni
@gmail.com">Send
me an email message.</a>
Because the browser interprets the character encoding as, well, characters, the end result is the same from the browser’s perspective. However, automated email harvesting programs search the raw HTML code for pages, which, in this case, is showing a fairly jumbled-looking email address. If you don’t want to figure out the character encoding for your own address, just type “email address encoder” into your search engine, and you will find some services online that will produce an encoded string for you.
Tip
If you put an email contact link in the footer of all your web pages, you make it easy for others to contact you; you give them a way to tell you about any problems with the page that your testing might have missed. Just don’t forget to use the email address character entity trick so that your address flies under the radar of spammers.
Opening a Link in a New Browser Window
Now that you have a handle on how to create addresses for links—both internal (within your site) and external (to other sites)—there is one additional method of linking: forcing the user to open links in new windows.
You’ve no doubt heard of pop-up windows, which are browser windows—typically advertising products or services—that are intended to be opened and displayed automatically without the user’s approval (many modern browsers disallow this behavior). However, the concept of opening another window or targeting another location serves a valid purpose in some instances. For example, you might want to present information in a smaller secondary browser window but still allow the user to see the information in the main window. This is often the case when clicking on a link to an animated demo, movie clip, or other multimedia element. You might also want to target a new browser window when you are linking to content off-site.
The word target is important because that is the name of the attribute used with the <a> tag. The target attribute points to a valid browsing context, or “new window to open.”
A valid HTML link that opens in a new window is constructed like so:
<a href="/some/file.html" target="_blank">Open a Window!</a>
Remember, opening a new browser window on behalf of your user—especially when it’s a full-size new window—goes against some principles of usability and accessibility, so be considerate if and when you do it.
Using CSS to Style Hyperlinks
The default display of a text-based hyperlink on a web page is underlined blue text. You might also have noticed that links you have previously visited appear as underlined purple text—that color is also a default. If you’ve spent any time at all on the web, you will also have noticed that not all links are blue or purple—and for that, I think, we are all thankful. Using a little CSS and knowledge of the various pseudoclasses for the <a> link, you can make your links look however you want.
Note
You can use graphics as links (instead of using text as links) by putting an <img /> tag between the opening <a> and closing </a> tags.
A pseudoclass is a class that describes styles for elements that apply to certain circumstances, such as various states of user interaction with that element.
For example, the common pseudoclasses for the <a> tag are link, visited, hover, and active. You can remember them with the mnemonic “Love–Hate”—LV (love) HA (hate), if you choose.
![]()
a:link describes the style of a hyperlink that has not been visited previously.
![]()
a:visited describes the style of a hyperlink that has been visited previously and is present in the browser’s memory.
![]()
a:hover describes the style of a hyperlink as a user’s mouse hovers over it (and before it has been clicked).
![]()
a:active describes the style of a hyperlink that is in the act of being clicked but has not yet been released.
For example, let’s say you want to produce a link with the following styles:
![]() A font that is bold and Verdana (and not underlined, meaning it has no text decoration)
A font that is bold and Verdana (and not underlined, meaning it has no text decoration)
![]() A base color that is light blue
A base color that is light blue
![]() A color of red when users hover over it or when they are clicking it
A color of red when users hover over it or when they are clicking it
![]() A color of gray after users have visited it
A color of gray after users have visited it
Your stylesheet entries might look like the following:
a {
font-family: Verdana, sans-serif;
font-weight: bold;
text-decoration: none;
}
a:link {
color: #6479A0;
}
a:visited {
color: #CCCCCC;
}
a:hover {
color: #E03A3E;
}
a:active {
color: #E03A3E;
}
Note
The colors in this example are indicated by their hexadecimal values.
Because the sample link will be Verdana bold (and not underlined) regardless of the state it is in, those three property and value pairs can reside in the rule for the a selector. However, because each pseudoclass must have a specific color associated with it, we use a rule for each pseudoclass, as shown in the code example. The pseudoclass inherits the style of the parent rule, unless the rule for the pseudoclass specifically overrides that rule. In other words, all the pseudoclasses in the previous example will be Verdana bold (and not underlined). However, if we had used the following rule for the hover pseudoclass, the text would display in Comic Sans when users hovered over it (if, in fact, the user has the Comic Sans font installed):
a:hover {
font-family: "Comic Sans MS";
color: #E03A3E;
}
Additionally, because the active and hover pseudoclasses use the same font color, you can combine style rules for them:
a:hover, a:active {
color: #E03A3E;
}
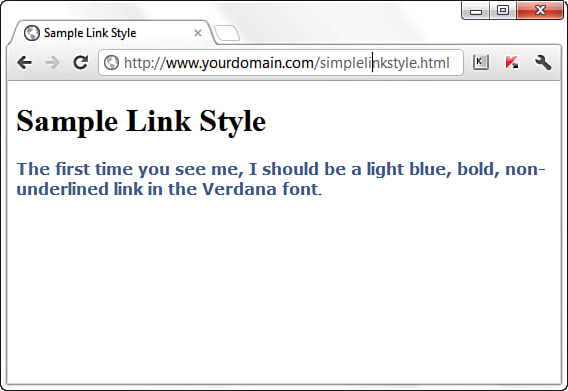
Listing 8.4 puts these code snippets together to produce a page using styled pseudoclasses; Figure 8.5 shows the results of this code.
LISTING 8.4 Using Styles to Display Link Pseudoclasses
<!DOCTYPE html>
<html lang="en">
<head>
<title>Sample Link Style</title>
<style type="text/css">
a {
font-family: Verdana, sans-serif;
font-weight: bold;
text-decoration: none;
}
a:link {
color: #6479A0;
}
a:visited {
color: #CCCCCC;
}
a:hover, a:active {
color: #FF0000;
}
</style>
</head>
<body>
<h1>Sample Link Style</h1>
<p><a href="simplelinkstyle.html">The first time you see me,
I should be a light blue, bold, non-underlined link in
the Verdana font</a>.</p>
</body>
</html>
If you view the example in your web browser, indeed the link should be a light blue, bold, nonunderlined Verdana font. If you hover over the link, or click the link without releasing it, it should turn red. If you click and release the link, the page will simply reload because the link points to the file with the same name. However, at that point, the link will be in your browser’s memory and thus will be displayed as a visited link—and it will appear gray instead of blue.
You can use CSS to apply a wide range of text-related changes to your links. You can change fonts, sizes, weights, decoration, and so on. Sometimes you might want several different sets of link styles in your stylesheet. In that case, you can create classes; you aren’t limited to working with only one set of styles for the <a> tag. The following example is a set of stylesheet rules for a footerlink class for links I might want to place in the footer area of my website:
a.footerlink {
font-family: Verdana, sans-serif;
font-weight: bold;
font-size: 75%;
text-decoration: none;
}
a.footerlink:link, a.footerlink:visited {
color: #6479A0;
}
a.footerlink:hover, a.footerlink:active {
color: #E03A3E;
}
As you can see in the example that follows, the class name (footerlink) appears after the selector name (a), separated by a dot, and before the pseudoclass name (hover), separated by a colon:
selector.class:pseudoclass
a.footerlink:hover
Summary
The <a> tag is what makes hypertext “hyper.” With it, you can create links between pages, as well as links to specific anchor points on any page. This hour focused on creating and styling simple links to other pages using either relative or absolute addressing to identify the pages.
You learned that when you’re creating links to other people’s pages, it’s important to include the full Internet address of each page in an <a href> tag. For links between your own pages, include just the filenames and enough directory information to get from one page to another.
You also learned how to create named anchor points within a page and how to create links to a specific anchor. You learned how to link to your email address so that users can easily send you messages. You even learned how to protect your email address from spammers. Finally, you learned methods for controlling the display of your links using CSS.
Table 8.1 summarizes the <a> tag discussed in this hour.
Q&A
Q. What happens if I link to a page on the Internet, and then the person who owns that page deletes or moves it?
A. That depends on how the maintainer of that external page has set up his web server. Usually, you will see a page not found message or something to that effect when you click a link that has been moved or deleted. You can still click the Back button to return to your page. As a site maintainer, you can periodically run link-checking programs to ensure that your internal and external links are valid. An example of this is the Link Checker service, at http://validator.w3.org/checklink.
Q. One of the internal links on my website works fine on my computer, but when I put the pages on the Internet, the link doesn’t work anymore. What’s up?
A. These are the most likely culprits:
![]() Capitalization problems. On Windows computers, linking to a file named
Capitalization problems. On Windows computers, linking to a file named MyFile.html with <a href="myfile.html"> works. On most web servers, the link must be <a href="MyFile.html"> (or you must change the name of the file to MyFile.html). To make matters worse, some text editors and file transfer programs actually change the capitalization without telling you. The best solution is to stick with all-lowercase filenames for web pages.
![]() Spaces in filenames. Most web servers don’t allow filenames with spaces. For example, you should never name a web page
Spaces in filenames. Most web servers don’t allow filenames with spaces. For example, you should never name a web page my page.html. Instead, name it mypage.html or even my_page.html or my-page.html (using an underscore or dash instead of a space).
![]() Local absolute addresses. If you link to a file using a local absolute address, such as
Local absolute addresses. If you link to a file using a local absolute address, such as C:mywebsite
ews.html, the link won’t work when you place the file on the Internet. You should never use local absolute addresses; when this occurs, it is usually an accident caused by a temporary link that was created to test part of a page. So be careful to remove any test links before publishing a page on the Web.
Q. Can I put both href and id in the same <a> tag? Would I want to for any reason?
A. You can, and it might save you some typing if you have a named anchor point and a link right next to each other. It’s generally better, however, to use <a href> and <a id> separately to avoid confusion because they play very different roles in an HTML document.
Q. What happens if I accidentally misspell the name of an anchor or forget to put the # in front of it?
A. If you link to an anchor name that doesn’t exist within a page or you misspell the anchor name, the link goes to the top of that page.
Workshop
The Workshop contains quiz questions and exercises to help you solidify your understanding of the material covered. Try to answer all questions before looking at the “Answers” section that follows.
Quiz
1. Your best friend from elementary school finds you on the Internet and says he wants to trade home page links. How do you put a link to his site at http://www.supercheapsuits.com/~billybob/ on one of your pages?
2. What HTML would you use to make it possible for someone clicking the words “About the Authors” at the top of a page to skip down to a list of credits somewhere else on the page?
3. If your email address is [email protected], how would you make the text “goodnight greeting” into a link that people can click to compose and send you an email message?
Answers
1. Put the following on your page:
<a href="http://www.supercheapsuits.com/~billybob/">Billy
Bob's site</a>
2. Type this at the top of the page:
<a href="#credits">About the Authors</a>
Type this at the beginning of the credits section:
<a id="credits"></a>
3. Type the following on your web page:
Send me a <a href="mailto:[email protected]">goodnight greeting</a>!
Exercises
![]() Create an HTML file consisting of a formatted list of your favorite websites. You might already have these sites bookmarked in your web browser, in which case you can visit them to find the exact URL in the browser’s address bar.
Create an HTML file consisting of a formatted list of your favorite websites. You might already have these sites bookmarked in your web browser, in which case you can visit them to find the exact URL in the browser’s address bar.
![]() If you have created any pages for a website, look through them and consider whether there are any places in the text where you’d like to make it easy for people to contact you. Include a link to your email address there. You can never provide too many opportunities for people to contact you and tell you what they need or what they think about your products—especially if you’re running a business.
If you have created any pages for a website, look through them and consider whether there are any places in the text where you’d like to make it easy for people to contact you. Include a link to your email address there. You can never provide too many opportunities for people to contact you and tell you what they need or what they think about your products—especially if you’re running a business.