As we said in the last section, Material Design is not a library. However, many libraries are based on Material philosophy, so we will choose Materialize CSS. Their components look very natural, and the best part is that Aurelia has its own implementation of this library called Aurelia-Materialize, which will facilitate us a lot in the development process and integration.
Let's open our created FIFA World Cup application and set the Terminal into the root folder; then we need to install some dependencies. Execute the following commands in the next order:
- $ au install jquery
- $ au install tslib
- $ au install materialize-amd
- $ au install aurelia-materialize-bridge
In our index.html file, lets include the Material Design icons to be imported into our project:
Next, in our main.js file, we need to configure our new plugin:
The b => b.useAll() script allows us to load all Aurelia-materialize components into our project. If you only need a few of them, you can specify each one in the next way:
.plugin('aurelia-materialize-bridge', bridge => {
    bridge
        .useButton()
        .useCollapsible()
        .useModal()
        .useTabs()
        .useWaves().preventWavesAttach();
});
You are done! We are finally ready to start developing our generated, configured, and running web application.
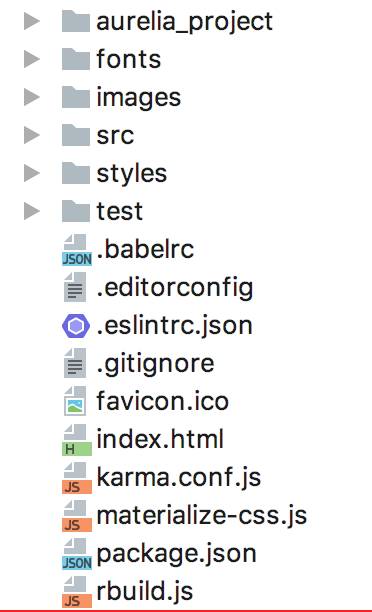
At this point, your application folder should contain the following (or similar) project structure:
If you are using an earlier version of Aurelia-CLI (0.33.1), please read the following recommendations:
- Add node_modules/jquery/dist/jquery.js to the prepend section of the vendor-bundle.js configuration in the aurelia.json file and remove jquery from dependencies section.
- Add node_modules/materialize-amd/dist/js/materialize.amd.js at the end of prepend section of the vendor-bundle.js configuration in the aurelia.json and remove the materialize-amd configuration from dependencies section.