
Chapter 11. Documentation: Read the Manual
There isn’t enough room in this book to teach you all of Ruby. There’s an old saying: “Give someone a fish, and you feed them for a day. Teach them how to fish, and you feed them for a lifetime.” We’ve been giving you fish so far. We’ve shown you how to use a few of Ruby’s classes and modules. But there are dozens more, some of them applicable to your problems, that we don’t have room to cover. So it’s time to teach you how to fish. There’s excellent documentation freely available on all of Ruby’s classes, modules, and methods. You just have to know where to find it, and how to interpret it. That’s what this chapter will show you.
Learning how to learn more
Your team is really enjoying the transition to Ruby. They’re impressed with the Array and Hash classes, and all the capabilities of the Comparable and Enumerable modules. But one developer has a concern...
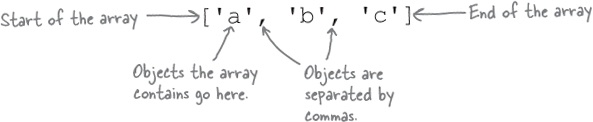
An array is used to hold a collection of objects. The collection can be any size you need.
Good question... Now is probably a good time to talk about Ruby’s documentation.
Ruby’s core classes and modules
As we’ve said before, Ruby comes with a huge collection of classes and modules to handle a wide variety of common computing tasks. Many of these are automatically loaded every time Ruby runs, without the need to load any external libraries; these are known as Ruby’s core classes and modules.
Ruby’s core classes and modules are loaded automatically, every time Ruby starts.
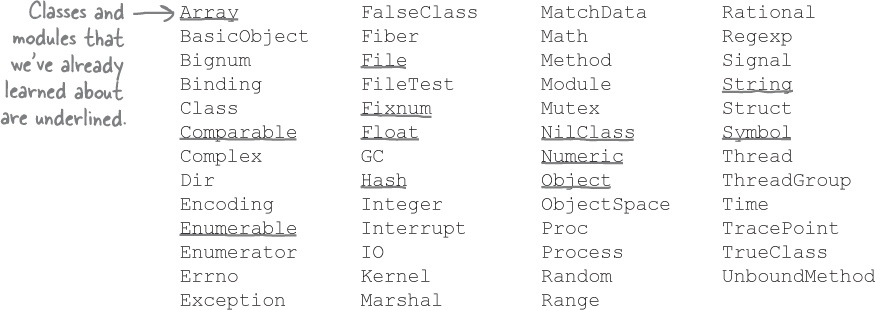
Here’s an incomplete list of core classes and modules:
Documentation
The only obstacle we face at this point is knowing what these classes are and how to use them. This chapter will show you how to find out, using Ruby’s documentation.
We’re not talking about looking up blog posts or help forums. A programming language’s documentation is in a specific, standardized format. It will list all the available classes and modules, and offer descriptions of each. Then it will list all the methods available for each class/module, and offer descriptions for those as well.
If you’ve used documentation for other languages, you’ll find that Ruby’s style isn’t too different. But there are a few quirks to the notation that you’ll need to know about. This chapter will show you what to look out for.
Here’s what we’ll be covering:
Documentation for classes and modules
Documentation for methods
Adding your own documentation to Ruby source
Let’s get started!
Relax
You don’t need to know about all these classes and modules right now.
After you’ve learned to read Ruby documentation, it would be a great idea to look some of them up, just to familiarize yourself with them. But you might not ever use some of these classes and modules, so don’t worry if you don’t get to all of them.
HTML documentation
As you’ll see later in the chapter, Ruby developers add documentation directly to their source code, using specially formatted comments. Programs are available to extract that documentation into a variety of formats, the most popular of which is HTML.
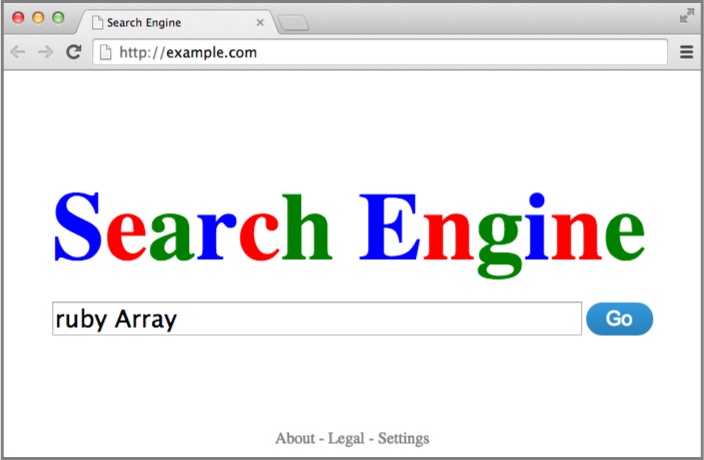
Thanks to sites that host this HTML documentation, information about any new class or module is usually just an Internet search away. Just load up your favorite search engine and type ruby followed by the name of the class, module, or method you want to know more about. (Including the word ruby helps to filter out results for similarly named classes from other programming languages.)
Popular Ruby documentation sites:
For each class or module, the documentation includes a description, examples of its use, and a list of its class and instance methods.
There are a few things you’ll need to know in order to navigate the HTML documentation. We’ll describe the specifics over the next few pages.
Listing available classes and modules
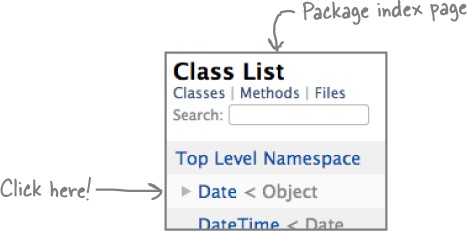
Ruby documentation sites will generally have an index of the available classes and modules.
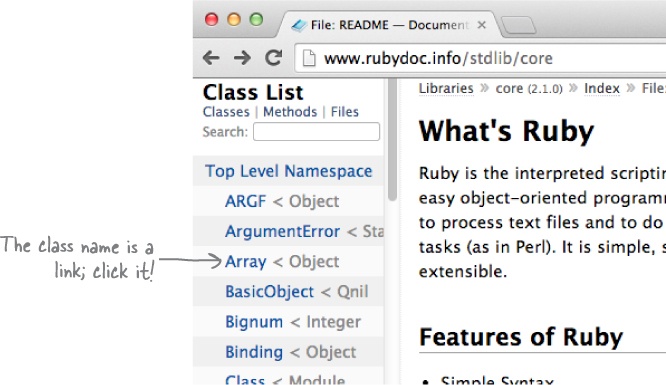
For example, if you visit this page in your browser:
http://www.rubydoc.info/stdlib/core
...you’ll see a list of classes on the lefthand side. Just click on the one you want.
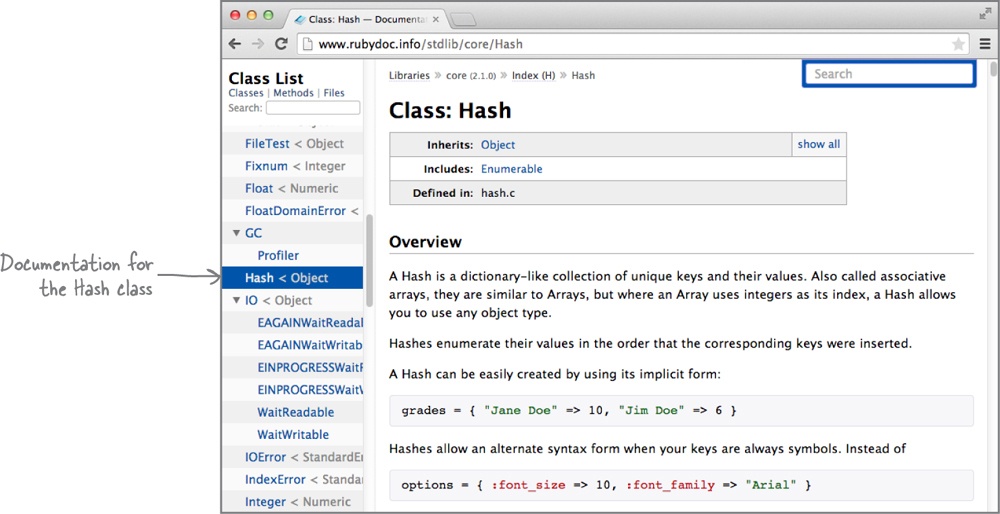
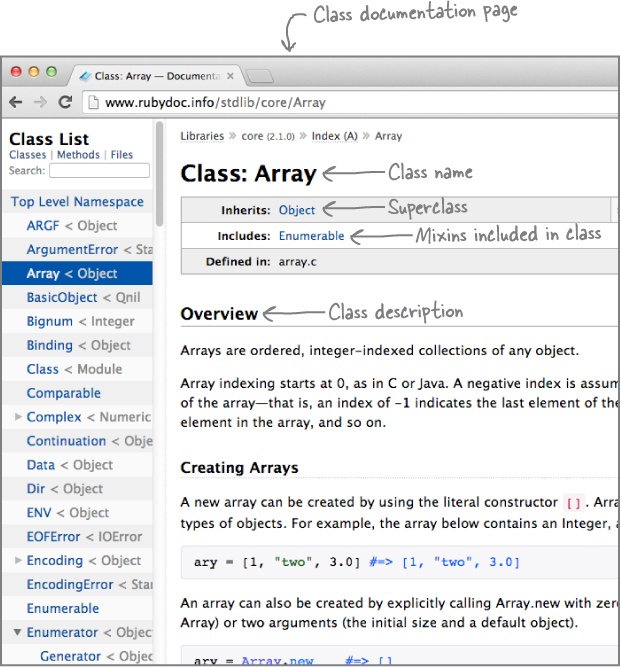
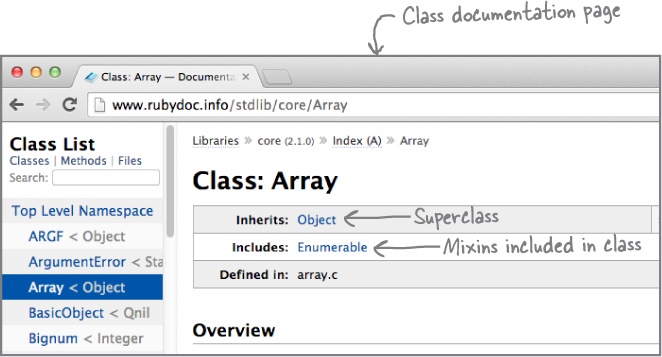
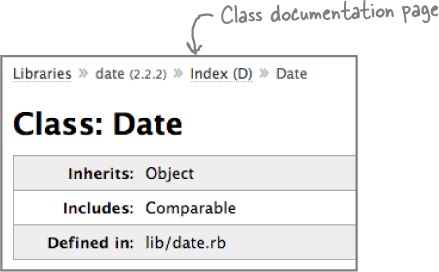
You’ll be taken to a page with all the details on your chosen class, including:
The class name
The name of the superclass and a link to its documentation
Links to the documentation of any modules the class mixes in
A description of the class’s purpose, usually including example code showing how to use it
Looking up instance methods
Ruby’s class documentation includes info on the class’s instance methods.
On every class’s documentation page, we’ll find an index of all the class’s instance methods. (On the rubydoc.info site, you’ll see the index if you scroll down the page.)
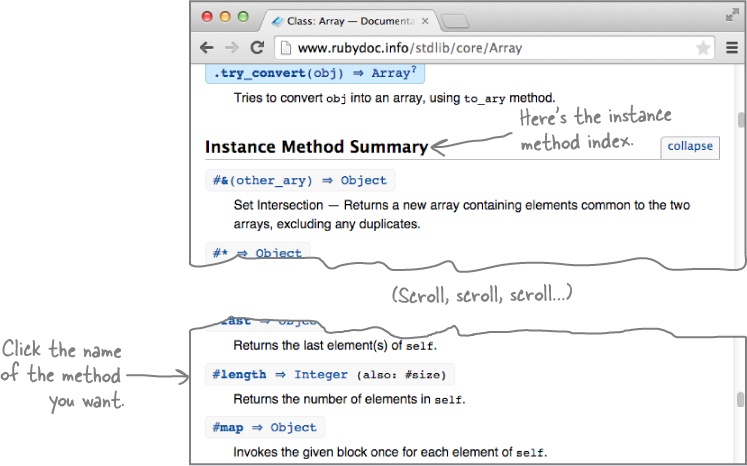
As with the index of class names, each method name is a link to the method’s documentation. So just click the name of the method you want to know more about.
Instance methods denoted with # in the docs
That’s the convention used in Ruby documentation to mark instance methods.
The documentation needs to distinguish instance methods from class methods, since they’re called differently. So, by convention, instance methods are labeled with a hash mark (#) at the start of their name.
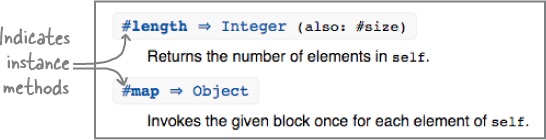
So, if you see Array#length mentioned in the docs, you can read it as “the Array class’s length instance method.”
Note that # is only used to denote instance methods in the documentation. In actual Ruby code, # marks a comment. So don’t try typing [1, 2, 3]#length in your actual code! If you do, Ruby will view #length as a comment, and ignore it.
Instance method documentation
Once you’ve found the instance method you want and clicked on its name, you’ll be taken to detailed documentation for the method.
Here’s documentation for the length instance method on Array objects:
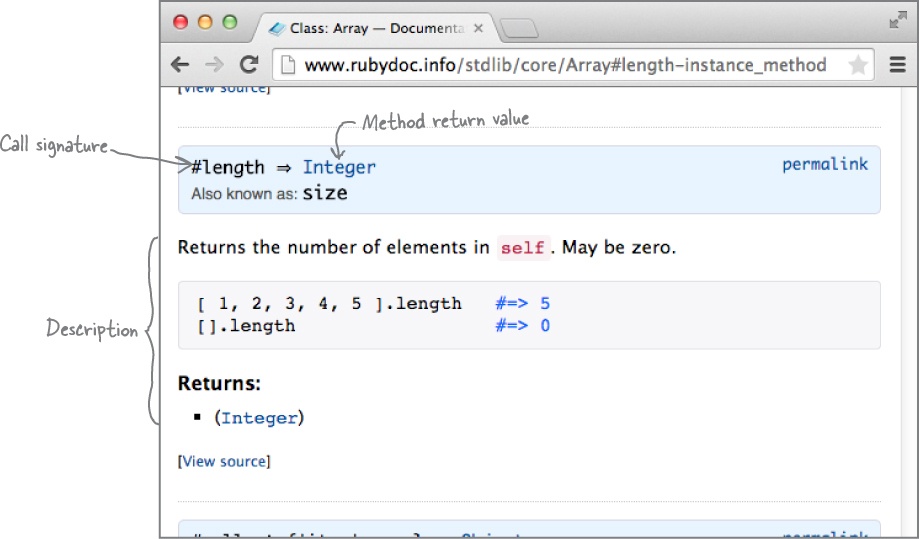
Generally, the method documentation will include a description of its purpose, and possibly some code samples showing its use.
At the top of the method’s documentation, you’ll find its call signature, which shows how to call the method and what return value to expect.
If the method doesn’t take any arguments or a block (like the length method above), its call signature will simply consist of the method name and the class of the return value you should expect.
Arguments in call signatures
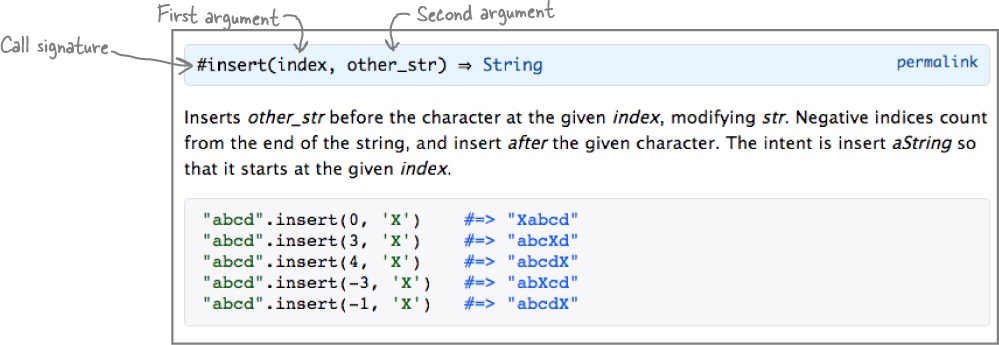
If a method does take arguments, the call signature will list them.
Here’s the documentation for the insert instance method on the String class, which lets you insert one string in the middle of another. The first argument is the integer index of the character it should insert before, and the second argument is the string it should insert.
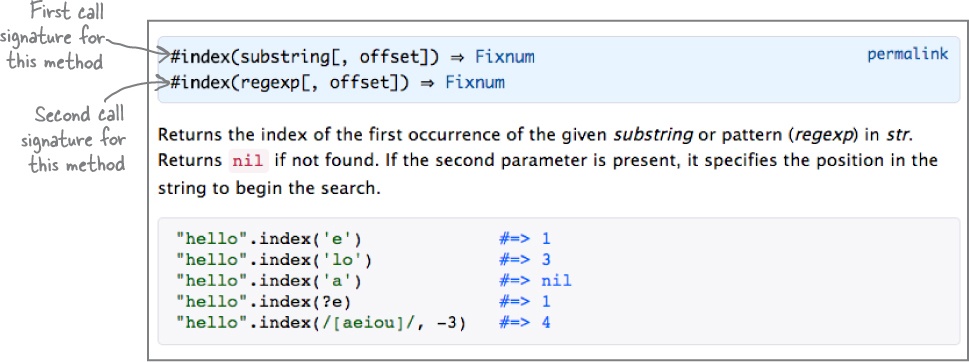
Sometimes, there will be multiple ways to call the same method. Such methods will have more than one call signature listed at the top of their documentation.
As an example, the index instance method for strings is below. Its first argument can be either a string or a regular expression. (We’ll talk briefly about what regular expressions are in the appendix; all you need to know now is that they’re a different class than strings.) So the documentation includes two call signatures for index: one with a string as the first argument, and one with a regular expression.
The square brackets ([]) around the second argument to index indicate that the argument is optional.
Blocks in call signatures
If the method takes a block, that will be shown in the call signature as well. If the block is optional, then there will be call signatures both with and without the block.
For example, with the each instance method on arrays, the block is optional, so you’ll have two sample calls listed (one with the block, and one without).
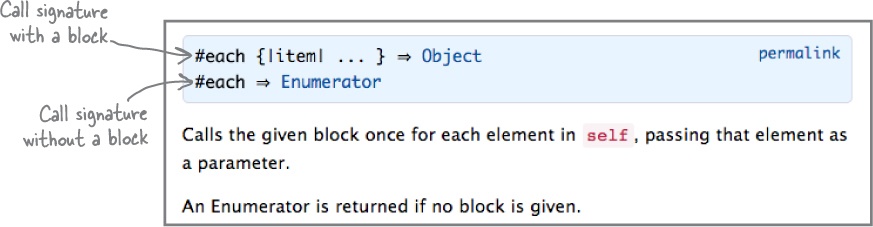
These two sample calls show different return values as well, because the call with a block will return the same array that each was called on, whereas the call without a block will return an instance of the Enumerator class. (Enumerators are beyond the scope of this book, but basically they’re a means of looping through a collection without using a block.)
Here’s a closer look at the call signature that shows the way we’ve been calling the each method in this book. You can see that it takes a block with a single parameter. It also returns an object—the array that

It’s worth noting that call signatures are in pseudocode: informal code you can’t actually run. The code resembles Ruby, but it will reference variable names that don’t exist, and will generally not be suitable for pasting into a real program. Nonetheless, call signatures are a great way to quickly get an idea of how a method should be used.
Read the docs for the superclass and mixins, too!
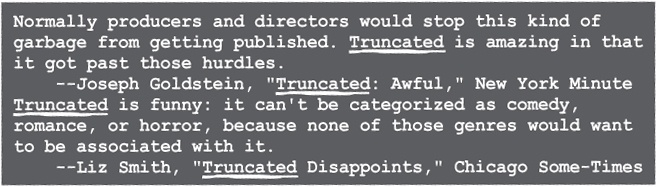
relevant_lines = lines.find_all { |line| line.include?("Truncated") }Note
This shortened code works just as well: only lines that include the substring "Truncated" are copied to the new array!
puts relevant_lines
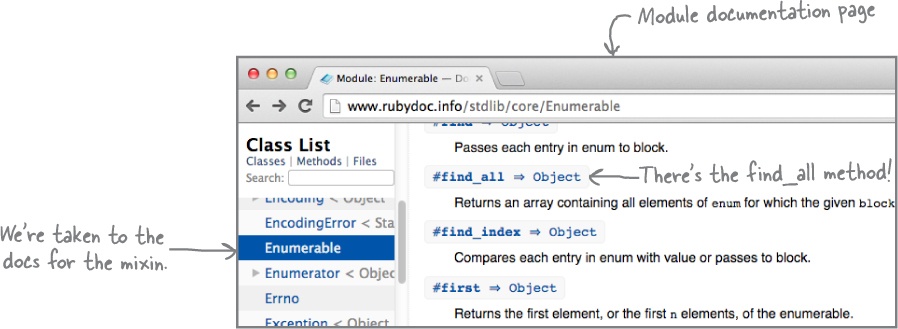
To find documentation for methods that come from a mixin or superclass, you need to go to the docs for that mixin or superclass.
Remember in Chapter 10 we learned that the Array class’s find_all instance method came from the Enumerable mixin? The Enumerable module is where you’ll find the documentation for find_all as well!
The documentation for a class doesn’t repeat the methods that it inherits from a superclass or mixes in from a module. (The docs would be huge and repetitive if it did.) So when you’re trying to learn about a new class, make sure you read the documentation for its superclass and for any modules it mixes in as well!
Read the docs for the superclass and mixins, too! (continued)
HTML documentation will include convenient links to the docs for the superclass and all mixins. Just click on the class or module name to be taken there.
If we click the link for Enumerable and scroll to the instance method index for the module, we’ll see find_all listed there. (Then, as before, we can click the method name to view the full details.)
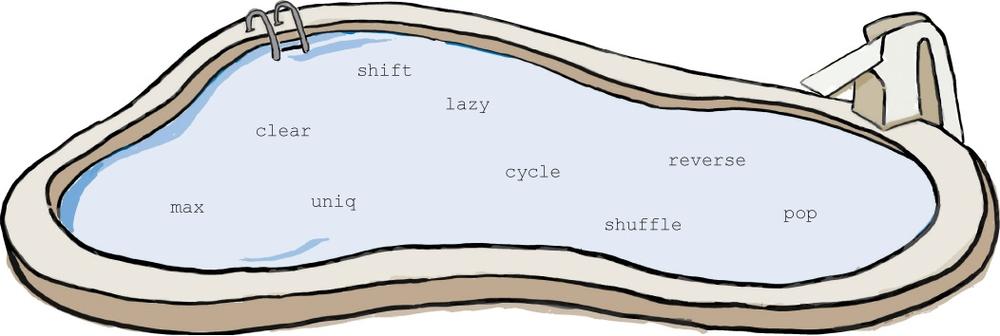
Pool Puzzle
Your job is to take instance method calls from the pool and place them into the blank lines in the code. There’s a catch this time, though: these are all methods we haven’t covered in this book (at least, not extensively). Visit http://www.rubydoc.info/stdlib/core/Array (or just do a web search for “ruby array”) to learn about the methods in the pool and figure out which ones you should call. Don’t forget to look at the documentation for Array’s superclass and mixin, too! Your goal is to make code that will run and produce the output shown.
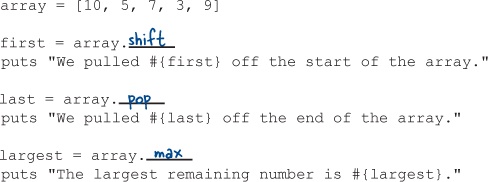
array = [10, 5, 7, 3, 9]

first = array._______
puts "We pulled #{first} off the start of the array."

last = array._______
puts "We pulled #{last} off the end of the array."

largest = array._______
puts "The largest remaining number is #{largest}."
Output:


Looking up class methods

Class methods have their own separate index on a class’s documentation page.
Looking up class method documentation is pretty much like looking up instance method documentation, with a couple of exceptions:
Class methods are listed under a separate index from instance methods.
Class methods are marked with a different symbol at the start of their name than instance methods.
So if we wanted to look up the File.open class method, we’d bring up the File class’s documentation, then scroll down the page until we got to the index of class methods. (It should appear right before the index of instance methods.) Then we’d scroll through that index until we found the

It’s important not to confuse class methods with instance methods. After all, you need to call open on the File class, not an instance of File. So while instance methods are marked with # at the start of their names, class methods are marked with a dot operator (.), as you see above.
(As we’ll see later, other HTML documentation marks class methods with ::, Ruby’s scope resolution operator, which is used to access constants or methods inside a class or module. If you see either . or :: at the start of the method name, you know you’re looking at a class method.)
Class method documentation
Once you’ve clicked the link in the class method index to bring up a specific method’s documentation, everything looks pretty similar to the docs for instance methods.
At the top, you’ll still see pseudocode call signatures for the method. Again, the method name will be marked with . instead of the # you’d see on instance methods. The class name is often omitted in call signatures, but you’ll need to include it in your actual code. Below the call signatures, you’ll find a description of the method’s purpose, and possibly some code samples showing how to use it.
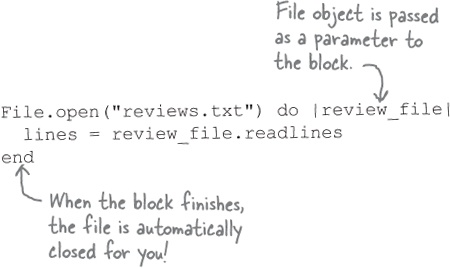
Here are the docs for the File.open method. Passing a block to File.open is optional, so there are two call signatures shown: one with the block and one without.
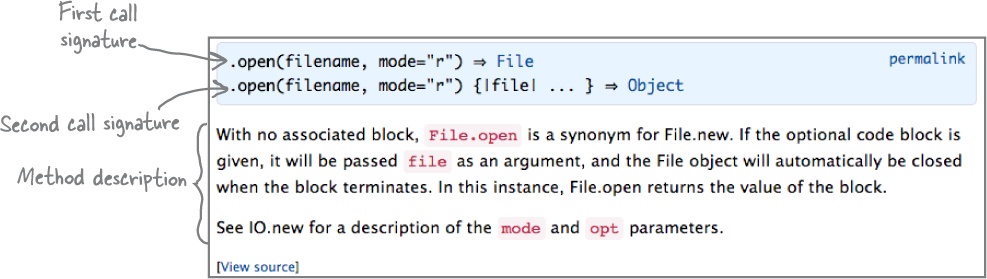
Once again, the call signatures also show different return values. If you omit the block, File.open will simply return a new File object.

But if a block is provided, the File object is passed to the block, and File.open instead returns the block’s return value.

Docs for a class that doesn’t exist?!
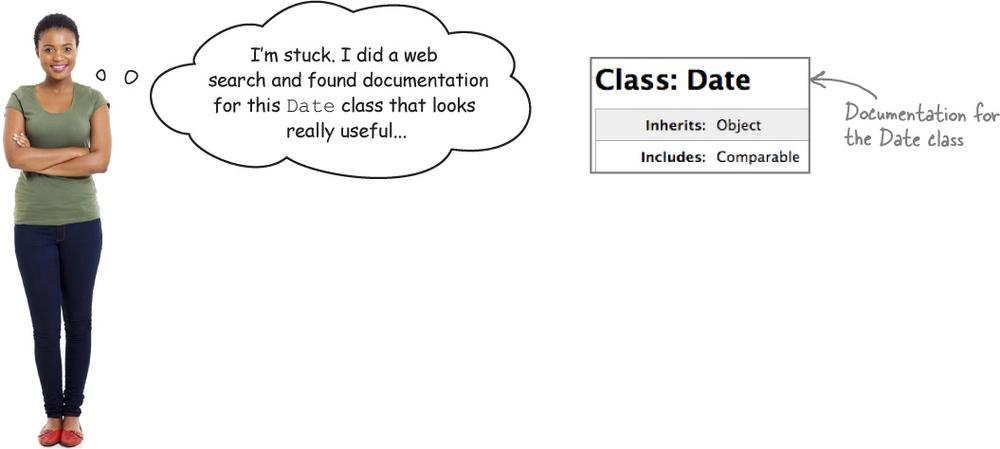
Oh, yes, the Date class is heavily used in Ruby.
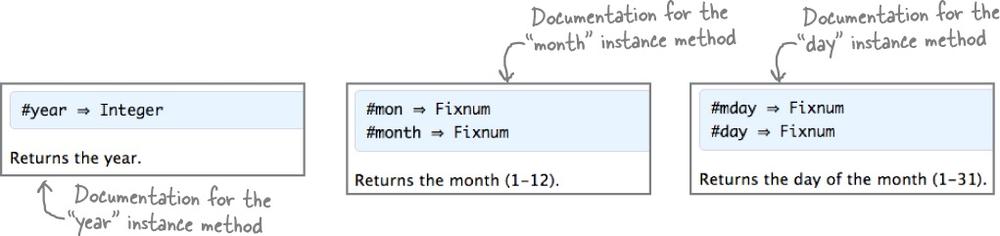
Date has a today class method that creates an object representing the current date...

...and it also has year, month, and day instance methods that can be used to get the year, month, and day.

That class isn’t one of Ruby’s core classes, which means it isn’t loaded automatically.
The Ruby standard library
At the start of the chapter, we said the “Ruby core” classes and modules are loaded into memory every time a program runs. But it would be terrible if every available class and module were loaded; Ruby would take much longer to start up, and would consume more of your computer’s memory. So, if a class or module isn’t likely to be needed by every program, it isn’t loaded automatically.
Instead, programs that need these specialized classes have to load them explicitly. You can load additional Ruby code via the require method.
Ruby comes with several directories full of library files containing useful classes and modules—these make up the Ruby standard library.
The standard library is a collection of classes and modules that are distributed with Ruby, but aren’t loaded at startup.
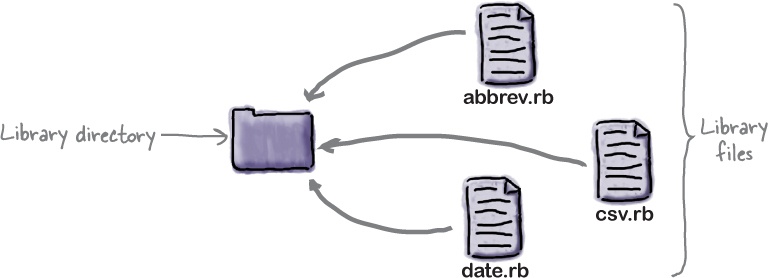
Standard library classes aren’t essential to every program, so they aren’t loaded automatically. But it’s easy to load them yourself. In your code, you can call require and pass it a string with the name of the file you want to load. You can leave off the filename extension (the characters following the dot).
Ruby will look through all the library directories it knows of. When the requested file is found, it’ll be loaded, and all the classes and modules it contains will become available for use in your program.
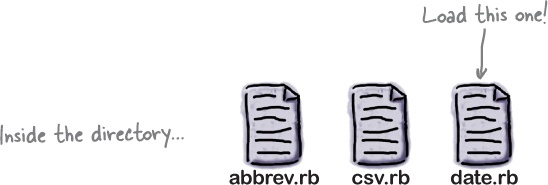
We can fix the code simply by passing 'date' to the require method. Doing so will load the Date class, which we can then use as much as we please!

There are many more classes and modules in Ruby’s standard library. Here’s an incomplete list:
File to require | Classes/modules |
|
|
|
|
|
|
|
|
|
|
|
|
|
|
|
|
|
|
|
|
|
|
|
|
|
|
|
|
|
|
|
|
|
|
|
|
|
|
|
|
|
|
|
|
|
|
|
|
|
|
|
|
|
|
|
|
|
|
|
|
|
|
|
|
|
|
|
|
|
|
|
|
|
|
|
|
|
|
|
|
|
|
|
|
|
|
|
|
|
|
|
|
|
|
|
|
|
|
|
|
|
|
|
|
|
|
|
|
|
|
|
|
|
|
|
|
|
|
|
|
|
|
|
|
|
|
|
|
|
|
|
|
|
|
|
|
|
|
|
|
|
|
|
|
|
|
|
|
|
|
|
|
|
|
|
|
Looking up classes and modules in the standard library
There are far more classes in Ruby’s standard library than we have room to document here. But as always, more information is just a web search away; just search for “ruby standard library.”
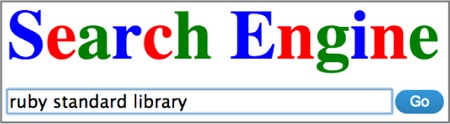
Suppose we needed more info about the Date class. Here’s how we might go about learning more...
This is one of many pages that will likely appear in your search results:
http://www.rubydoc.info/stdlib
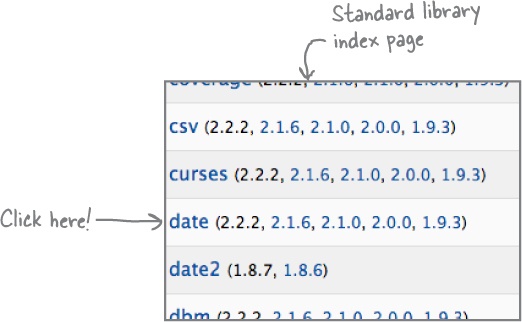
If you visit that page, you’ll see a list of packages on the lefthand side. Click on the package you want info on, and you’ll be taken to a new page.
As with Ruby core, you’ll see an index of classes and modules (although this will be much smaller, since it will only have the contents of the selected package). Click on the class or module you want.
You’ll be taken to the class’s documentation page, where you can read up on all its available class and instance methods!
Where Ruby docs come from: rdoc
You can use rdoc, a program included with Ruby, to generate documentation for your code. You give rdoc a Ruby source file to parse, and it will output HTML files with the documentation.
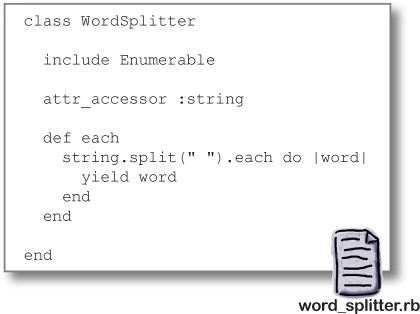
Below, we’ve copied the WordSplitter class that we created back in Chapter 10. Let’s see if we can use rdoc to generate HTML documentation for it.
If you haven’t already, save this code to a file named word_splitter.rb.
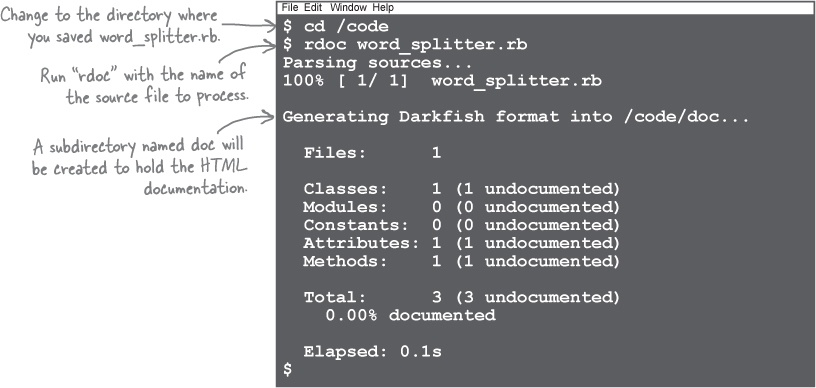
In your terminal, change to the directory where you saved the file. Then type this command:
rdoc word_splitter.rb
You’ll see output like this as rdoc processes your code. It will create a new subdirectory of the current directory (named doc by default) and write HTML files into it.
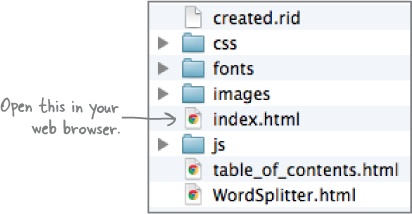
Among the files that rdoc creates in the doc subdirectory, you’ll find a file named index.html. Open this in your web browser (usually by double-clicking it).
What rdoc can deduce about your classes
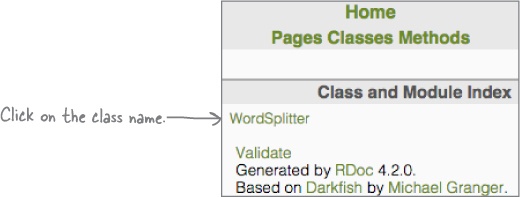
When you open the index.html file that rdoc generated, the first thing you’ll see is an index of classes and modules. Since our source file contained only the WordSplitter class, that’s the only class listed. Click on its name, and you’ll be taken to its documentation page.
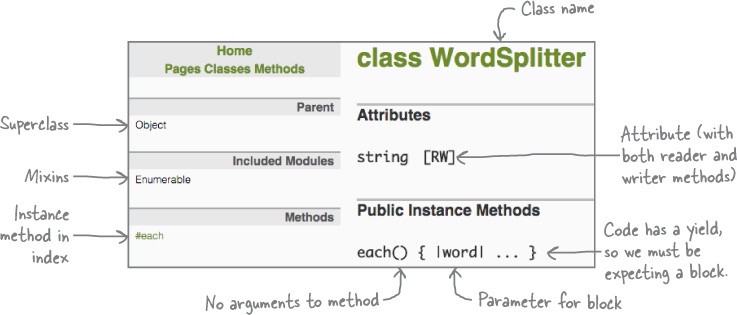
When rdoc processed our code, it noted several details about it. The class name is easy to pick out, of course. Less obvious is the fact that we didn’t declare a superclass, which means that the superclass of WordSplitter must be Object; rdoc notes this as well. It notes any modules we mix in, and any attributes we declare (including whether the attribute is readable, writable, or both).
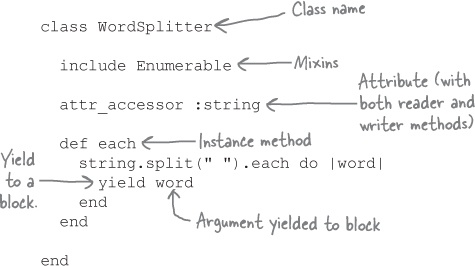
When it reaches the instance method definition, rdoc’s analysis gets really detailed. It notes the method name, of course. But it also notes whether we’ve defined any parameters for it (we haven’t). It even looks inside the method body to find the yield statement, from which it deduces that we must be expecting a block. It also notes the name of the variable we’re yielding.
All of these details are then used in the generated documentation for the class: class name, superclass, mixins, attributes. There’s an index of methods (with just the one entry). The full documentation for the method shows its arguments, and the fact that it takes a block.
Adding your own documentation, with comments
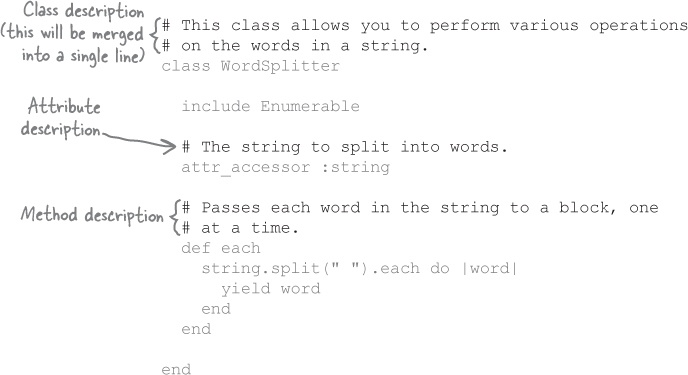
A new user looking to learn about our WordSplitter class could just as easily look at the source code to learn these details, though. What we really need is a plain-English description of the class and its methods.
Thankfully, rdoc makes it really easy to add descriptions to the HTML documentation—with plain old Ruby comments in your source code! Not only does this keep the documentation near your code, where it’s easy to update, it also helps out people who are reading the source instead of the HTML.
To add documentation for a class, simply add comments on the lines immediately before the class keyword. (If the comments span multiple lines, they’ll be merged into one line in the docs.) Attributes can be documented with comments on the lines right before the attribute declaration. And class and instance methods can be documented on the lines before the def keyword for the method.
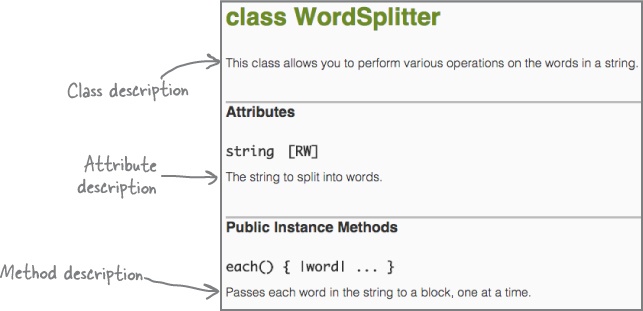
If you run rdoc on your source file again, the HTML files will be overwritten with a new version. Open the new file, and you’ll see your class description, attribute description, and method description, all in the right places!
The “initialize” instance method appears as the “new” class method
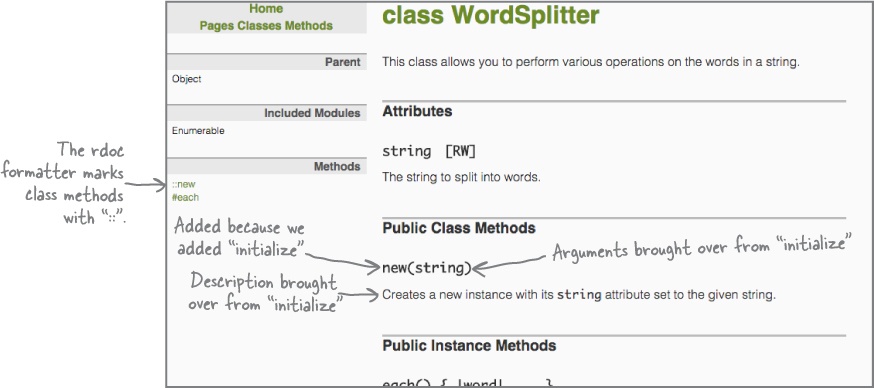
As you know, if you add an initialize method to a class, you don’t call it directly. Instead, it’s invoked via the new class method. This special case is also handled in the generated documentation. Let’s try adding an initialize method to WordSplitter, along with a description, and see what happens...
class WordSplitter
  ...
  # Creates a new instance with its string
  # attribute set to the given string.
  def initialize(string)
    self.string = string
  end
  ...
end
If we rerun rdoc and reload the HTML document, we’ll see that instead of documenting an initialize instance method, rdoc added a new class method. (The rdoc formatter marks class methods with :: in the method index.) Our description and the string argument are copied over to the new method as well.
That’s it! Adding a few simple comments to your code is all that’s required to generate easy-to-navigate, professional-looking HTML documentation for your classes, modules, and methods.
If you want others to find and use your code, great documentation is key. And Ruby makes it easy to add and maintain that documentation.
Up Next...
What should your program do when things go wrong? You probably could detect and handle the problem using only the tools we’ve shown you so far, but your code would quickly get messy. In the next chapter, we’ll show you a better way: exceptions.