
Chapter 3. Photos & Graphics
Selecting & Preparing Images for Your Presentation


SIZING AND OPTIMIZING PHOTOS 69


PREPARING LOGOS WITH TRANSPARENCY 76

ACQUIRING IMAGES WITH DIGITAL CAMERAS & SCANNERS 78


ENHANCING PHOTO APPEARANCE WITH POWERPOINT 84
Understanding File Formats
As you work with digital photos, clip art, and graphics from the Internet, you’ll come across a lot of different image types. Several different file formats have been created for both special purposes and licensing reasons. Without any additional work on your part, Microsoft PowerPoint 2007 recognizes the following options.
Windows Metafile (.emf or .wmf)
This file format is a proprietary one made by Microsoft for use throughout their software products. You will find it commonly used in the Microsoft Clip Organizer for illustrations. The .wmf file type was introduced first and supports 16 bits of information. The .emf file format (also known as enhanced metafile) is newer, and supports 32 bits of information for higher visual quality.

Windows Bitmap (.bmp, .dib, or .rle)
This file format is commonly used by Windows and is generally very compatible across applications. A disadvantage is that the files are typically not compressed, which can result in a large file size. When PowerPoint gets to a slide with graphics on it, it must cache the graphic. This can result in delays during your presentation when you’re clicking to advance slides. Most users prefer to work with compressed formats like JPEG when they need to insert photos.

Computer Graphics Metafile (.cgm)
The use of CGM files became a standard in 1987, they can be used for both vector and raster graphics. It is not widely supported for use on the Internet, but is more prevalent in technical fields like engineering. You may likely encounter it as well for military uses. CGM files generally are small.
GIF—Graphics Interchange Format (.gif)
The GIF format (pronounced gif or jif) is a very common Web format. It was originally developed for use in the CompuServe online service. The files are limited to a maximum of 256 colors (referred to as a bit image). This limit of colors can reduce file size, but can be problematic for photos. Users will choose GIFs for two primary reasons: the need for embedded transparency (such as in a corporate logo) or for basic animation.
What Does 8-bit Mean? When an image is referred to as 8-bit, that tells you the level of gray the image supports. This intensity of gray is used to create the colors you see. An 8-bit image means two to the eighth power (which equals 256).
JPEG—Joint Photographic Experts Group (.jpg)
The JPEG format is used to optimize large photos for multimedia use, such as the Internet or a slide presentation. The format uses lossy compression, which means that data is permanently thrown away to reduce file sizes. Most point-and-shoot digital cameras also use JPEG images. The JPEG format is best suited for images with many colors, such as photographs. But keep in mind a JPEG file suffers quality loss every time it is modified and resaved. Many professional image editors will wait to create a JPEG file until they have completed their image-editing tasks.

PNG—Portable Network Graphics (.png)
The PNG file format merges the best features of JPEG and GIF files. It allows for a 24-bit image (millions of colors) plus embedded transparency. While not all Web browsers support it (notably older versions of Internet Explorer) it is a standardized Web graphics format. PNG graphics are well suited for presentations, especially if you need embedded transparency.

PICT—Macintosh PICT (.pct)
This is the original image format used by Macintosh computers (pre-OS X). It can be used for both raster and vector graphics. This format will likely be encountered if you are working with an older PowerPoint presentation created on a Mac. While the format is widely supported, it is becoming less common.

TIFF—Tagged Image File Format (.tif)
The TIFF format is commonly used for high-quality printing. It can store up to 48 bits of color information, making it very accurate. TIFFs can be quite large is size, but they do support compression to reduce the size of the file.

CMYK Conversion. Many TIFF files are formatted using the CMYK image mode (Cyan Magenta Yellow and blacK), which is used in professional printing. This can cause problems in PowerPoint. It is a good idea to ask the image provider for an image using the RGB mode (Red Green Blue). You can also convert the images yourself with free converter applications such as Irfanview (www.irfanview.com).
Do Not Copy & Paste Images. If you copy and paste an image into a presentation, PowerPoint will attempt to link the image. It is a much better idea to save the file to a disk and choose the Insert Tab and click the Picture button.
Vector Markup Language (.vml)
Vector Markup Language (VML) is based on an XML exchange. It is an emerging standard and is supported by newer Web browsers. The standard is being pushed by Microsoft and the W3C, the standards setting consortium on the Web.
Other Formats
There are many other file formats that you’ll likely encounter, especially if you work with graphic professionals or Adobe applications. You have two options to work around unsupported image formats.

The first is to use the Microsoft Clip Organizer to import and convert the files. You can access the Clip Organizer by selecting the Insert tab then clicking the Clip Art button. The Clip Art pane opens to the right of your slide. Click the Organize clips button at the bottom of the pane to open the Microsoft Clip organizer. Microsoft installs several filters to convert images to acceptable formats for use in Microsoft Office.
If the Clip Organizer cannot import the image, then you must use another piece of software to convert the images. Nearly every other software shares file formats in common with PowerPoint (especially JPEG files). You can go back to the original application (or the image creator) to get another file. If that doesn’t work, then download an affordable image converter like Irfanview (www.irfanview.com) for PCs or Graphic Converter (www.lemkesoft.com) for Macintosh. ![]()
Sizing and Optimizing Photos
Accurately Scale and Crop Your Photos to Fit the Page and Optimize the File Size

1. Prepare Your Files
In order to complete this exercise (and others in this chapter) you’ll need to copy the project files to your local computer. From the project CD-ROM, open the HTW Project Files folder and copy the Chapter 3 folder to your local hard drive. This folder contains all of the files needed for this chapter. Open the file Ch3_Independence.pptx and switch to slide 2.
2. Add the First Photo
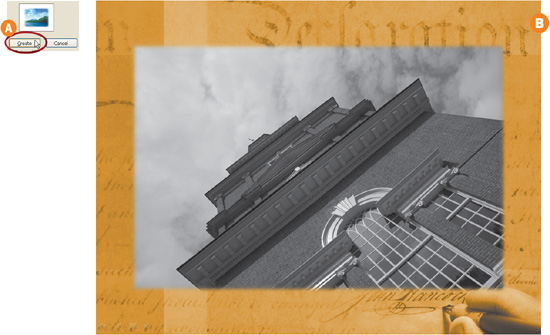
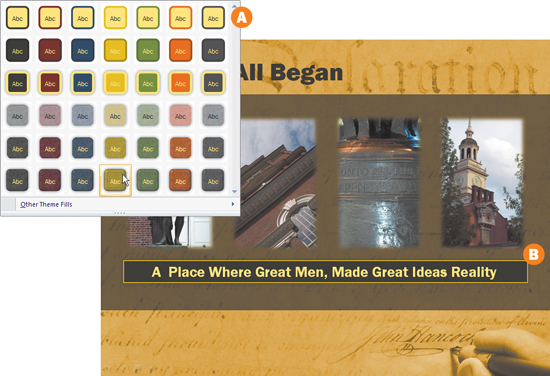
There are many ways to add an image to a slide. Lets examine one of the easiest. Select the Insert tab from the Ribbon. Click the Picture button to insert a photo from a file A. Navigate to the Chapter 3 folder you copied to your hard drive and open up the Photos folder. Select the first image, 01 Hall and click Insert. The photo is added to your slide; however it needs to be rotated and scaled B.
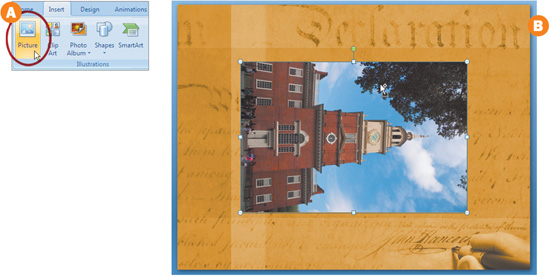
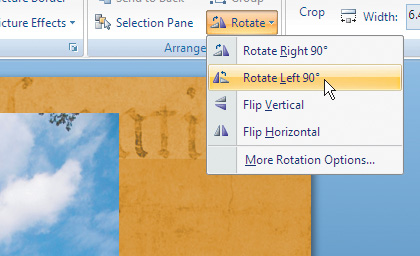
In order for the photo to display correctly, it must be rotated 90 degrees counterclockwise. Click the Format tab to adjust the image. In the Arrange group, click Rotate and choose Rotate Left 90° to properly orient the photo. Next, click and drag on the sizing handle in the upper right corner to adjust the size of the image.
Sizing Options. You can hold down modifier keys to adjust scaling. Holding the CTRL key will scale the object equally in all directions from its center. To maintain proportions on a free-drawn object like a shape, hold down the SHIFT key. Both keys can be combined as well.
4. Crop the Image
With the image still selected we can further refine it. By cropping, we can remove the crowd from the bottom of the photo. In the Ribbon, click the Format tab. In the Size group, click the Crop button A. Cropping handles appear on each corner and edge. You can drag these to hide part of the photo. Click the bottom edge and drag upward to crop the tourists out of the shot B.

5. Position the Image
Move your mouse over the center of the image until the cursor changes into a four-way arrow. Click and drag to reposition the photo on the slide.
Center on Page. To center a photo or object on a page, you can click the Format tab in the Ribbon. Click the Align button and choose Align Center and Align Middle. Make sure the Align to Slide option is also checked.
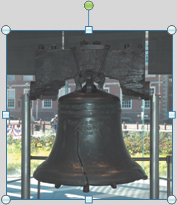
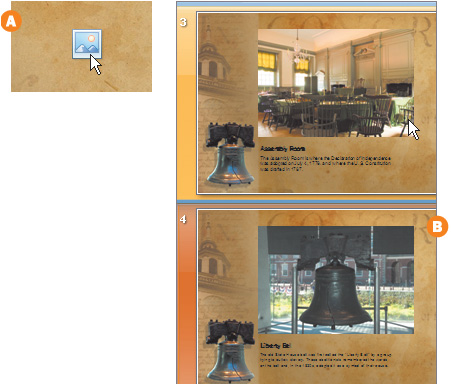
Some slide templates (including this one) use placeholders. A placeholder “reserves” a spot for an image or text in a slide design. A placeholder does not show up during a slide show if it’s left empty. However, it is easy to see when laying out the slide. Select slide 3 in the Slides tab of this project. Click the Image Placeholder icon in the middle of the slide A. The Insert Picture window opens up; navigate to the Photos folder you accessed earlier and select 02 Assembly Room. Click Insert to add the photo to the slide. Switch to slide 4 and insert the photo 03 Bell onto the slide B.
7. Optimize Your Digital Images
Digital photos are typically larger than you need for a slide. For example, a 7-megapixel digital camera will capture an image that is nearly 3,000 pixels wide. This is approximately three times larger than what you need in a standard 1024 x 768 presentation. That extra file size bloats a presentation, taking more disk space and more time to load. You can avoid image bloat with compression. From the Format tab, click Compress Pictures. Click the Options… button to specify optimization for Print, Screen, or E-mail. Click OK and Apply the optimization when you are ready.![]()
When to Optimize. Optimization works best when you are finished with a presentation. Once images are optimized, it’s difficult to enlarge or modify them without a loss of quality. You should choose to optimize a copy of your presentation before you try to move it onto a portable drive or laptop to give a presentation.
Using Clip Art
Clip art can work for or against you depending on how you use it. Making sure that your selections are consistent with the look of your presentation (colors, style, and overall feeling) is essential. You won’t always be able to find exactly what you’re looking for, but there are ways to edit clip art within PowerPoint to adapt it to your specific needs.
Browsing Clip Art
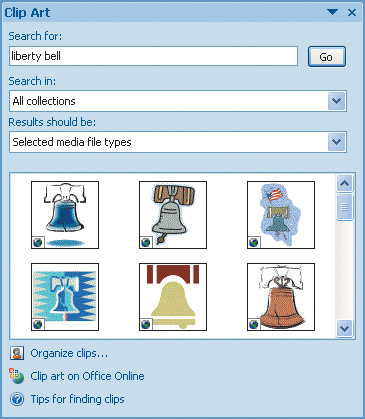
When you installed your Microsoft Office software, a library of clip art was included in the install. Microsoft has also made additional clip art collections available online (you’ll have access to them within PowerPoint if you are connected to the Internet). To browse through the available clip art selections, click on the Insert tab in the Ribbon. Then click on Clip Art in the Illustrations group. The Clip Art palette will open on your right. Use the search box to locate your illustration. You can drag and drop the thumbnail onto your slide or click on the Clip Art thumbnail to insert it on the current slide.
Expanding the Clip Art Library
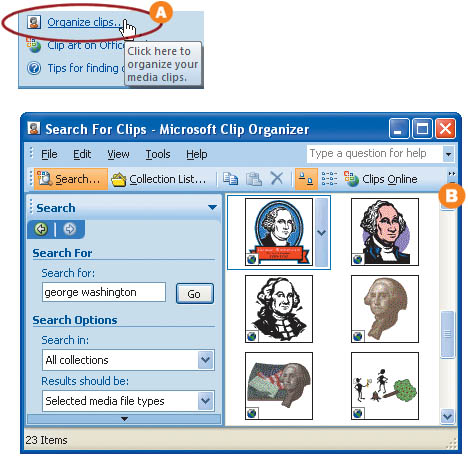
Once the Clip Art palette is open, click the Organize clips icon A. The Microsoft Clip Organizer will launch, displaying a collections list on the left and a viewing pane on the right B. It is important that you keep similar topics and styles together by creating new folders for each. To add a new folder to your existing library, click File, then New collection. Once the folder has been created and named, click File, then Add Clips to Organizer. You can then add clips automatically (your drive will be searched for all media files and a shortcut will be created in your Clip Organizer, leaving the originals in place) or select On My Own or From Scanner or Camera. If you have a scanner or camera hooked up, the Clip Organizer will launch the appropriate driver to pull your images in. There are also a variety of other clip art resources available online; www.iStockphoto.com is a great resource for clip art, photos, flash animations, and video.
On My Own. It’s usually best to use the On My Own option to add clips to your Clip Organizer. You can create folders for specific styles and categories within the organizer and then populate the folders with only the images, movies, and sounds that you know will be useable. It’s like organizing your closet—although the parachute pants are great for break dancing, it’s best to leave them out of your regular wardrobe rotation.
Modifying Clip Art
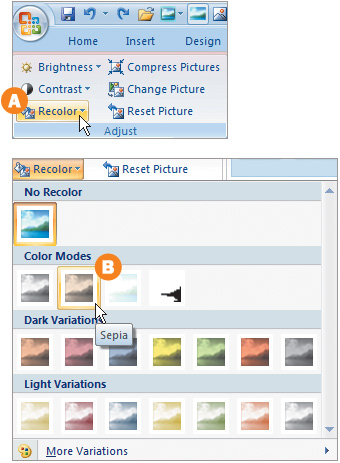
To maintain consistency within a presentation, many times it is necessary to modify the original colors or style of an illustration. You can make these adjustments by clicking on your clip art, and you’ll see a red tab in the Ribbon called Picture Tools. Click the Format tab beneath it. From the Adjust group, click Recolor A. Roll your cursor over the different options until you find a style that matches your presentation B. Can’t find what you’re looking for in the presets? Click More Variations. ![]()
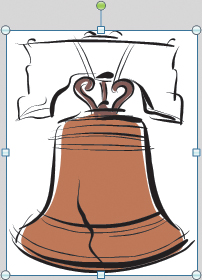
Selecting the Right Clip Art. Often a presentation is created using text, and then clip art is selected to match each slide. That workflow is ok, as long as you are consistent with the style of clip art that you select, and that style is consistent with your overall graphic look. For example, if you are using a woodcut style of clip art on most of your presentation, don’t suddenly integrate a watercolor style of clip art just because it fits the text better.
Raster/Vector Resources. Looking for more news and information on computer graphics? Then don’t miss our blog and resource Web site at www.rastervector.com.
AutoShapes
Organizing Information Visually Helps Guide Your Audience Through the Messages
1. When to Use a Shape
When manipulated to match the design of your overall presentation, AutoShapes can not only visually organize information but can add the professional polish that will set you apart. To get started, select slide 5.
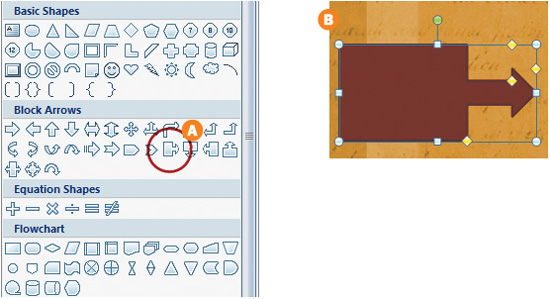
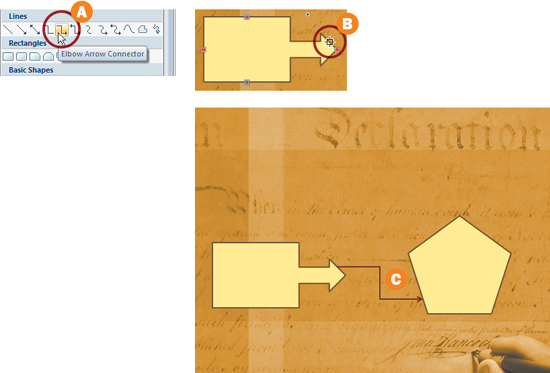
2. Draw a Shape
You’ll find the Shapes icon under the Insert tab in the Illustrations group. Click on the icon and select any shape from the drop-down menu A. Your cursor will change to crosshairs. Click and drag the mouse to create the shape that you selected. Release the mouse button when you are satisfied with the size of the shape B. To constrain proportions, hold down the Shift key while dragging your mouse. The shape will remain editable if you want to resize it later.
Create another shape on the opposite side of the page. Now select a line shape A. With your cursor still in the crosshairs mode, hover over one of the shapes you’ve created until the edges of the shape are highlighted with series of small red boxes B. Click and drag the mouse to the shape that you would like to connect to. Release the mouse button when you are satisfied with the position of the connecting line C.
Modifying Lines. Lines can be modified just like all other shapes by selecting them and using the Format tab under the Drawing Tools tab.
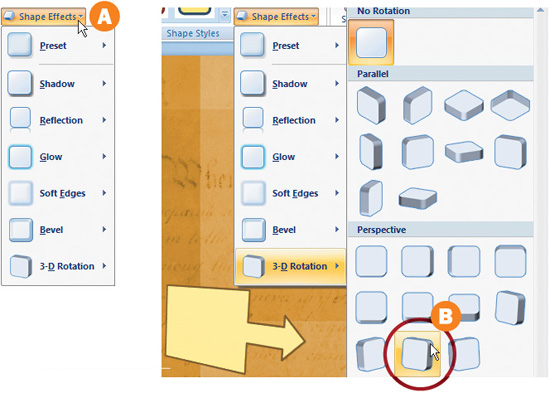
4. Modify Shapes to Match Your Design
Click on a shape that you’ve created. Under the Drawing Tools tab, select the Format tab and click on the Shape Effects drop-down menu A. Roll over a few presets and your shape will display a live preview B. It is possible to add images within a shape; add textures; move the shape around in 3-D space; make the shape appear to be made of glass; adjust the opacity, direction, distance, and softness of a drop shadow; add simple or beveled 3-D text within a shape, and more. Experiment with the different options available to you. ![]()
Setting a Default Shape. Once you have formatted your shape by adding your colors, shape effects, and text, right-click on it and select Set as Default Shape. Now, whenever you select a new shape (any shape) it will automatically default to the settings you’ve specified to match your presentation.
Preparing Logos with Transparency
Having a Logo with Transparency Allows for Easy Integration

1. Limitations
The Set Transparent Color tool will work very well if the logo that you are manipulating has a solid-color background. If the background you are trying to make transparent has a pattern or gradient, this method will only set one color to be transparent, leaving all other colors visible in the images background. To get started, select slide 6.

Transparency From the Start. If a graphic designer is preparing a logo for you, then ask for a PNG file with embedded transparency.
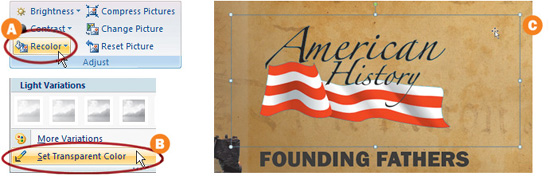
2. Import Logo File
In the Ribbon, click the Insert tab. From the Illustrations group, click the picture icon. Navigate to the Chapter 3 folder that you copied to your computer. Open the Photos folder and select the file 04 American History Logo.jpg. Click the Insert button at the bottom of the window to insert. You’ll notice that the logo imported with a blue, rectangular background that doesn’t quite match the look of the presentation.

3. Make the Background Transparent
Select the logo that you’ve just imported. In the Ribbon under Picture Tools, select the Format tab. From the Adjust group, click the Recolor icon A. Click the Set Transparent Color button B. With the Set Transparent Color tool activated, select the solid blue background of the American History logo. The logo should now have a mostly transparent background C.
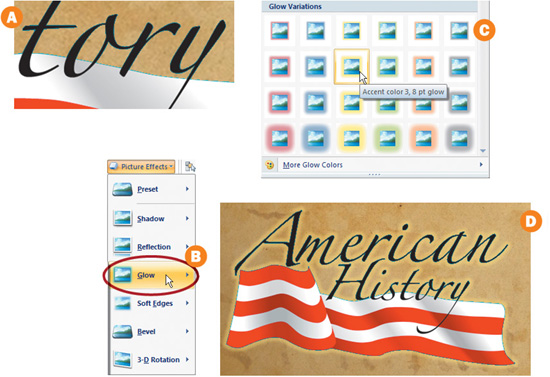
4. Work with Jagged Edges
You’ll notice that there is a slightly jagged blue edge around the logo A. This effect is called aliasing, and it’s a common issue with this method of making the background transparent. However, it’s easy to disguise. Click the Format tab in the Ribbon, select the Picture Effects button, and scroll down to Glow B. In the Glow Variations window, select accent color 3, 8 pt Glow. This will ensure an appropriate glow size to disguise the aliasing issue C. Then select the More Glow Colors button at the bottom of the window and choose a golden yellow color. There still will be some remnants of the former background color if you look closely, but this method should effectively disguise the aliasing problem from anyone viewing the presentation D. ![]()
Working with Multiple Logos. Many times you will want to have a slide in your presentation that includes multiple logos in a variety of colors. A way to maintain the overall visual style of your presentation is to place them in a table. Make sure that the table uses colors that are consistent with your presentation. It’s usually best to use a white background in order to accommodate the largest variety in colors.

Acquiring Images with Digital Cameras & Scanners
You’ll often need to bring original photos into your presentation. These may come from photos you take with a digital camera or from a flatbed scanner. It is important to understand how these devices treat digital images and to know how to import them into Microsoft PowerPoint.
What is Camera Raw? Newer digital cameras often write files using a variety of raw formats. These files are often very large as they capture what is essentially a “digital negative.” While these files are excellent for print work, they are overkill for presentations. You will need to convert and optimize these files to use in a presentation.
Digital Cameras
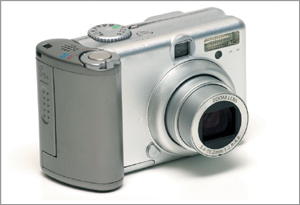
ISTOCKPHOTO/LONG HA
The good news is that most digital cameras can take a picture large enough for use in a presentation. However, you’ll want to look for cameras with features like a good lens and a flash to help you take better pictures. Besides camera quality, there are three major issues to consider when working with a digital camera:
• Transfer of Images—Be sure to load the drivers required for your hardware. If you work with several different cameras, you may want to get a USB card reader that supports multiple formats.
• Image Size—Most digital photos are much larger than you’ll need for a presentation. This is because images are generally intended for print output. You can use the Compress Pictures command (see Sizing and Optimizing Photos) or an image editor like Adobe Photoshop or Photoshop Elements.
• File Format—Digital cameras usually write files to one of three formats. JPEG, TIFF, or a camera raw format. PowerPoint can read JPEG or TIFF files for use in a presentation. Camera raw files will need to be converted.
Flatbed Scanners
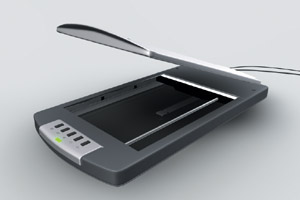
ISTOCKPHOTO/HEIKO ETZRODT
A scanner allows you to convert photos or documents into digital images. Doing this can be useful for inserting photos that were shot on film and printed or printed items like a newspaper story. There are several scanners available that are reasonably priced (in the $99 range). Be sure to look for one that has a minimum optical resolution of 300 pixels per inch.
Older versions of PowerPoint offered an Insert From Scanner command. This would scan the image and insert it directly into your slide. This could lead to bloated files, however, so Microsoft decided to leave it out of the current release. In PowerPoint 2007, the recommended workflow is to scan images directly to a disk and save them as files (JPEGs or TIFFs work best).![]()
Creating a Photo Album
This Quick and Easy System Creates a Professional-Looking Photo Album
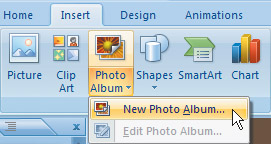
1. Insert a Photo Album
A photo album can hold multiple images on a single slide. In the Ribbon, click the Insert tab. From the Illustrations group, click the Photo Album icon and select New Photo Album.
2. Import Your Photos
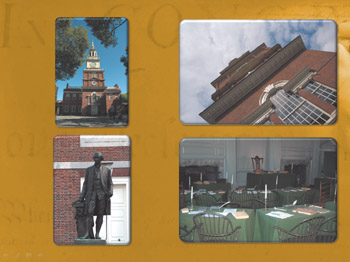
Select Insert picture from: File/Disk button and navigate to the Chapter 3 folder that you copied to your computer. Select the Photos folder and then the 05 Album_Photos folder. Click in an empty area of the window and drag around all of the photo thumbnails in the folder. You’ll notice that the filenames for all of the images that you selected are now in the Pictures in Album Window.
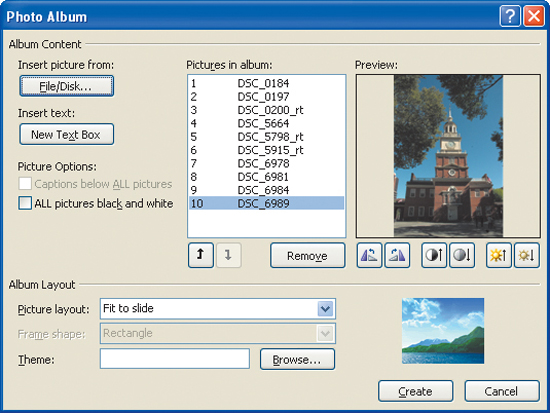
Click on a filename in the Pictures in album window and it will appear in the adjacent Preview window. You can specify the order of the photos in your album by selecting a photo and using the up and down arrow keys beneath the Pictures in album window to rearrange their order A. If a photo needs to be rotated (such as image 7 DSC_0197), then select its filename and rotate it using the rotate clockwise or rotate counterclockwise buttons B.
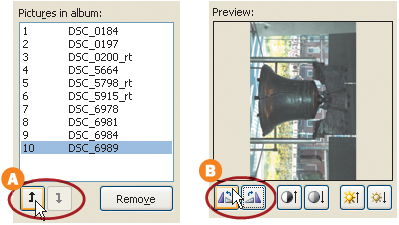
Selecting Multiple Images. Select multiple images in the Pictures in Album window by shift-clicking adjacent filenames or by control (Ctrl) clicking separated file names.
4. Review and Adjust
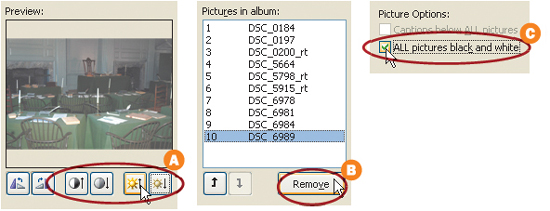
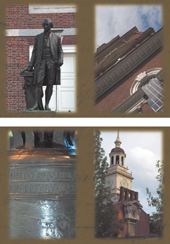
Click on each filename In the Pictures in album window and adjust the brightness and contrast levels using the buttons below the Preview window A. Remove any duplicates or unwanted photos by selecting the filename and clicking the Remove button below the Pictures in album window B. Many times there will be a variety of different styles of photography or a wide range of colors. To make the entire album consistent with the historic approach of this presentation, select the ALL pictures black and white option C.
Click on Picture Layout and select 1 picture. This will center each photo on its own page A. Select Soft Edge Rectangle from the Frame shape drop-down menu. This will give each photo a feathered edge to help blend into the slide background. Look at the thumbnail representation to the right B. In the Theme menu click Browse. Navigate to the Sources folder inside the Chapter 3 folder that you copied to your computer. Select American_History_Album.thmx. If you would like to add a slide with a blank text box, there is also a New Text Box button to accommodate that. You’ll notice that if you select it, a new number will appear in your Pictures in album window titled Text Box.
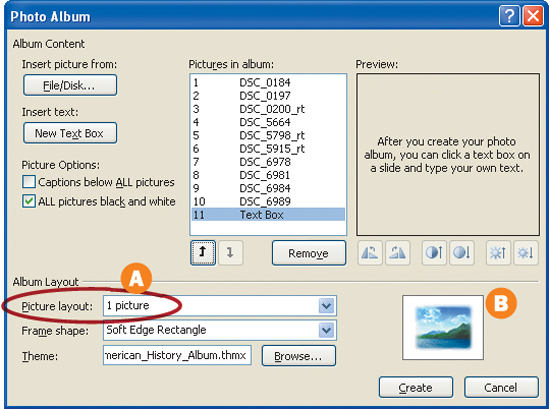
Why Can’t I Change My Frame Shape? If your Picture Layout is set to Fit to Slide, the picture will occupy the entire slide and not allow any Frame Shape adjustments. To allow these adjustments, simply make the picture anything other than Fit to Slide.
6. Create and Modify
Click the Create button at the bottom of the window and let PowerPoint go to work A. A photo album is automatically created to the specifications that you selected B. Even though PowerPoint has automated this process, all of your photos remain editable. You can still click on them and make modifications using the Format tab. You can also cut and paste these slides into your main presentation. ![]()
Adding Custom Borders
Borders can often help a photo or text box stand out from the background or other photos on a page. There are a few different ways to approach borders and frames.
Adding a Border
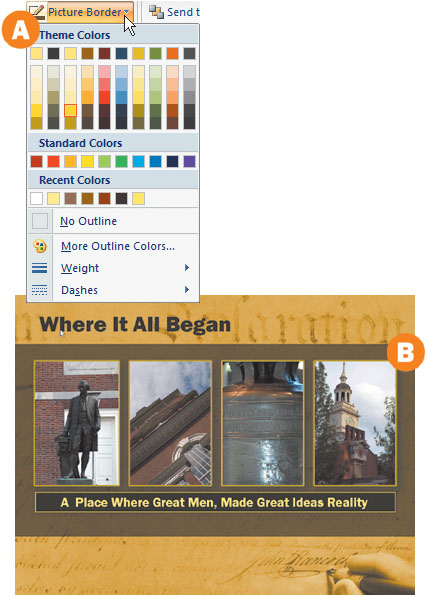
Select a photo or shift- click on multiple photos that you would like to modify with a border. Under Picture Tools in the Ribbon, select the Format tab. In the Picture Styles group, click the Picture Border drop-down menu A. From here you can choose the color, line weight, and style of your border. This is a simple way to help your photos stand out from the background or to make a series of different photos tie together visually B.
Adding Impact with Visual Style
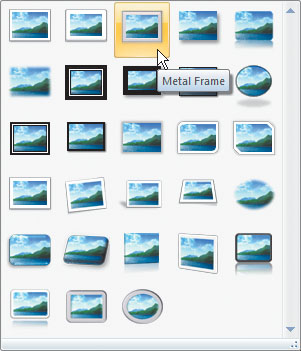
Select a photo or shift-click on multiple photos that you would like to modify with a touch of visual style. Under Picture Tools in the Ribbon, select the Format tab. In the Picture Styles group, there is a series of thumbnails with a variety of different framing/style options to select from. With your photos still selected, roll over each option and watch what happens to your photos. PowerPoint will give you a live preview of several different frames and overall photo styles to choose from. Be patient, some computers are faster than others at rendering a live preview.
Keeping Visuals Consistent
Although it may be fun to have a different border or frame for each photo, it is more visually appealing to have a consistent color and style to all of your borders and frames. The focus should always be on the content, not the carrier. Your audience should be focusing on your images, and not anticipating what kind of border you’ll use next.
Using Borders and Text Boxes
Borders and shape styles can be used to modify text boxes to add emphasis A. The process of modifying text boxes is very similar to modifying picture boxes. Just select the text box that you would like to manipulate and click the Format tab beneath the Drawing Tools tab. You can now roll over different styles in the Shape Styles gallery and review the live preview of your text box modifications B. Be cautious about making font and color changes that do not match your overall design.![]()
Quick Access to Picture Styles. The Quick Access Toolbar is a customizable toolbar that allows you to have access to functions that are independent of the tab that is currently active. Right-click one of the thumbnail icons in the Picture Styles Gallery. Select Add Gallery to Quick Access Toolbar. Voila! Now you’ll always have access to your style Gallery.
Enhancing Photo Appearance with PowerPoint
PowerPoint Allows for the Enhancement of Images to Improve Exposure and Contrast
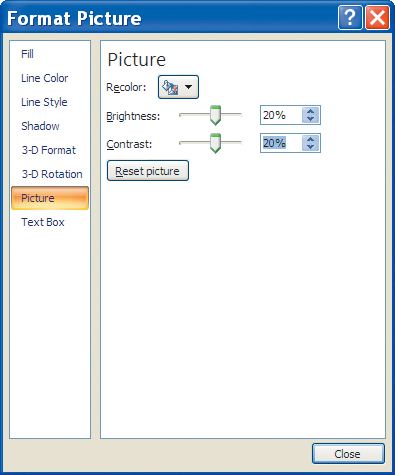
1. Adjust an Image
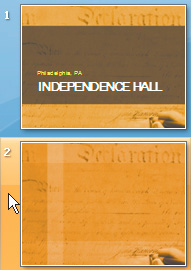
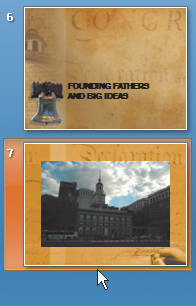
Within PowerPoint, you can perform minor image touchups to improve a photo. This is a convenient and fast way to fix an image that’s not quite right. To make things easier, select slide 7, which has an exterior photo of Independence Hall already on it. Click on the photo to select it.
The image is a bit dark. PowerPoint gives you two controls to adjust images: Brightness brightens (or darkens) the image; Contrast increases (or decreases) the intensity of the blacks. Click the Format tab in the Ribbon, and then click the Brightness or Contrast buttons in the Adjust group. Increase Brightness to taste, then restore any unwanted image lightening with the Contrast slider. ![]()
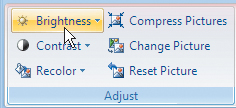
Give and Take. If you add brightness, you’ll often need to increase contrast to achieve the image’s best appearance. As brightness increases, the shadow areas will wash out, which required contrast to be intensified. If you’d like to adjust both properties simultaneously, then choose Picture Correction Options from either the Brightness or Contrast menus. For this image, add 20 percent to both the Brightness and Contrast fields.
Go Pro with Adobe Photoshop or Adobe Photoshop Elements. While fixing images in PowerPoint is convenient, there’s a world of improved opportunities to enhance images using a dedicated image editor. There are many different ones, but the market leaders are Adobe Photoshop and its scaled down counterpart, Photoshop Elements. If you plan to work regularly with photos, one of these is an important investment to make. For most users, the moderately priced Photoshop Elements ($99) will suffice. While PowerPoint offers only two commands for improving images (Brightness and Contrast), Photoshop Elements offers more than 100. Despite the number of features, the program is intuitive and truly useful. We’ll explore Photoshop features occasionally throughout this book. If you want to learn more, check out one of Rich’s books on Photoshop (he has several).