
Chapter 6. Adding Motion & Creative Transitions
Using Movement Within and Between Slides

OVERVIEW OF CUSTOM ANIMATION 102


ADDING TRANSITIONS TO SLIDES 115

USING THIRD PARTY TRANSITIONS 117


Overview of Custom Animation
The Custom Animation window offers several options to add animation within a slide. Click the Animations tab to access additional controls and then click the Custom Animation button. The Custom Animation task pane opens and unlocks four major categories of effects. These effects can be applied to any selectable element on a slide.
Entrance
The many Entrance effects can be used to add elements to a slide. PowerPoint organizes these effects into four subcategories: Basic, which offers a set of effects that use simple motion; Subtle, which uses gentle motion that is not distracting; Moderate, which uses more motion to draw attention to an element; and Exciting, which relies on large dramatic movements. The effect you choose should match the feeling you are trying to evoke. Are you gently switching from one topic to the next or do you really need to yell something aloud?
Emphasis
Emphasis effects can be added to elements on a slide that you’d like to draw attention to. These effects should be used sparingly, as they can be very distracting. The effects are grouped into the same four groups as the Entrance effects (Basic, Subtle, Moderate, and Exciting). These classifications can seem arbitrary, so you will want to test each effect before running your slide show.
Exit
Exit effects are the direct opposite of entrance effects. They can be used to remove objects from a slide to make room for new elements. Additionally, a negative build can be used to remove elements from a slide to create a topic of focus. The adding of exit effects is often overlooked, but they can be helpful when properly used. Exit effects are best used when you have several slides in a row with identical backgrounds. Instead of using transitions between slides, exit and entrance effects can be paired so one element flies out as another flies in.
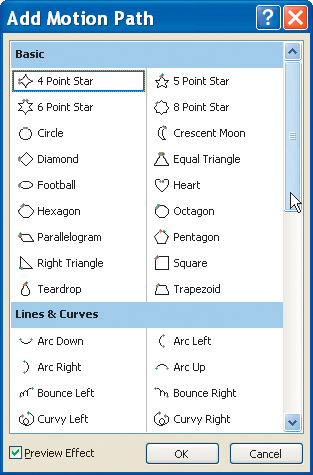
Motion Paths
Motion paths allow you to animate elements along straight or curved lines. These lines (or paths) can be used for both entrance and exit effects. PowerPoint offers 64 preset paths, organized into three categories: Basic, which uses several standard shapes such as stars, triangles, and others; Lines & Curves, which uses arcs and curves as well as angled lines to guide the animation; and the final category, Special, which uses more elaborate shapes as the motion path. Additionally, PowerPoint gives you the option to draw a Custom Path that best suits your needs. ![]()
Animating Bullets
Creating Animated Text Can Add Emphasis to a Presentation
1. Open a Presentation
In order to complete this exercise (and others in this chapter) you’ll need to copy the files to your local computer. From the project CD-ROM, open the HTW Project Files folder and copy the Chapter 6 folder to your local hard drive. This folder contains all of the files needed for this chapter. Open the file Ch6_Nursing.pptx.
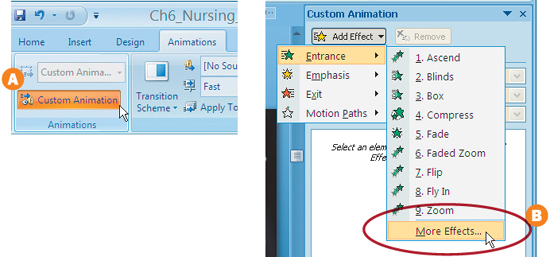
2. Access the Entrance Effects
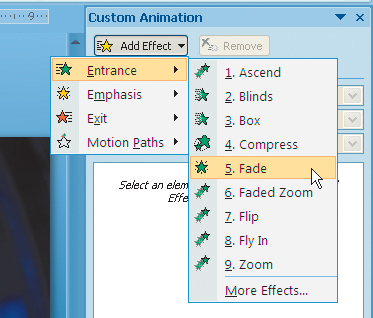
In order to animate a block of text you need to select it. Switch to slide 9 in the Slides list and click the text block with three bullets. Click the Animations tab in the Ribbon and then click the Custom Animation button to open the Custom Animation task pane A. Click the Add Effect button and choose Entrance > More Effects B, and the Add Entrance Effect window opens.
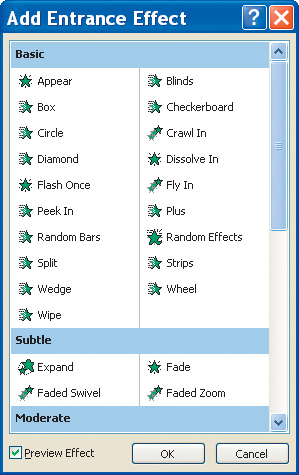
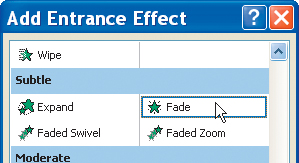
The Add Entrance Effect window opens so you can browse different entrance effects. Make sure that the Preview Effect box is checked so you can see the effects without applying them. Scroll through the list and preview different effects by single-clicking them. After previewing multiple effects, choose Fade and click OK.
Some of Our Favorite Effects. There are lots of entrance effects to choose from. Here are our favorites:
• Blinds
• Fly In
• Wipe
• Strips
• Fade
• Faded Zoom
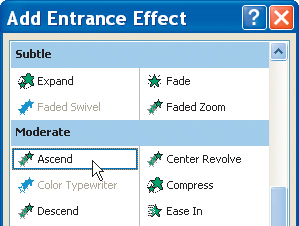
• Ascend
• Descend
4. Animate the Text Exit
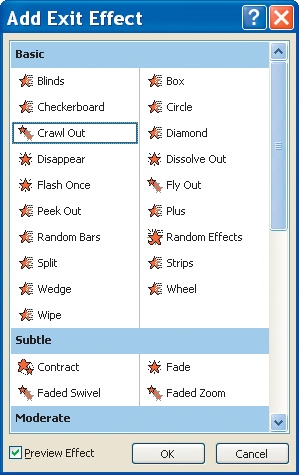
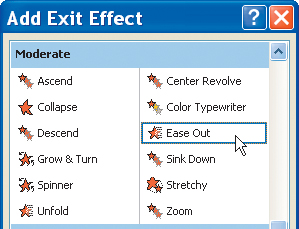
In addition to animating the entrance of the text you can animate the text’s exiting the slide. In the Custom Animation task pane choose Add Effect > Exit > More Effects. In the Add Exit Effect window you can preview different effects by single-clicking on them. After previewing multiple effects, choose Ease Out and click OK. The effect is applied to each stage of the builds; however this is not desired, as it will slow down the transition to the next slide. Step 5, provides the solution to this problem.
Changing Speeds. In the Custom Animation task pane you can modify the speed of the animations. Click on an effect in the list then choose a rate from the Speed list.
5. Modify the Exit Effect
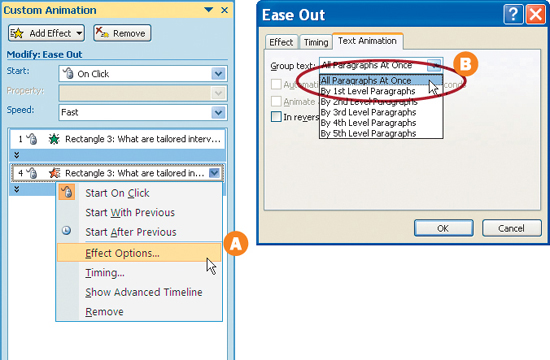
In the Custom Animation pane, click the Exit effect. Click the drop-down menu on the right of the effect name and choose Effect Options A. A window opens with the name of the effect in its title bar. Click the Text Animation tab and switch Group text to All Paragraphs At Once B. Click OK to apply the change then the Play button to preview the effect.
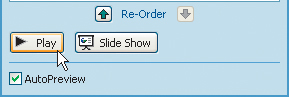
6. Preview, Then Repeat the Effect
To see the effects on the slide, click the Play button at the bottom of the Custom Animation task pane. After previewing the effect, repeat it on the next slide. Select slide 10, then repeat the Entrance and Exit effects. If you’d like extra practice, you can animate the bullets on slides 6, 14, 15, 17, and 18.
Stars in Your Eyes. If you see a star with a motion trail next to a slide in the Slides list, it means that custom animation has been applied to the content of that slide. This visual reminder is useful when you’re browsing slides to check your animations.
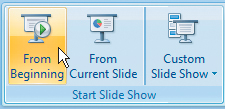
7. Preview the Presentation
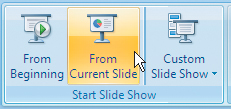
To understand how animation works, preview your work so far. Click on slide 9 in the Slides list. Choose Slide Show from the Ribbon. Click the button From Current Slide to preview the slide show. Click the space bar to advance the presentation. Each click will bring up one stage of the build. After the last bullet exits from the first slide, you will need to click again to start the next build. ![]()
Animating a Chart
The Entrance of a Chart Can Be Animated

1. Prep the Chart—Lines
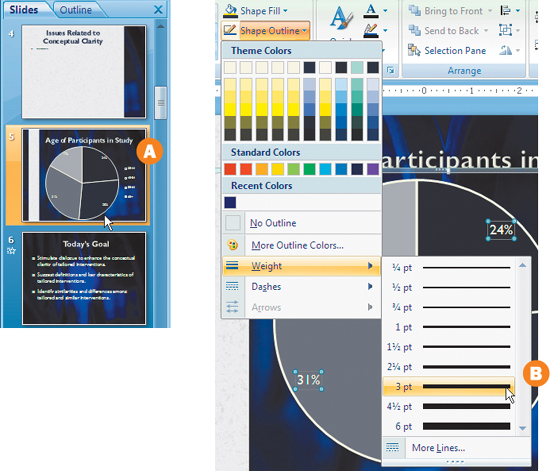
Before animating a chart, you should examine it to ensure it is ready for animation. Very thin lines and small text can be problematic, as they will shimmer when animating. Switch to slide 5 in the Slides list A and click the pie chart to select it. Click the Chart Tools Design tab to switch to formatting the artwork. Click the Shape Outline button and choose Weight > 3 pt to thicken the lines B.
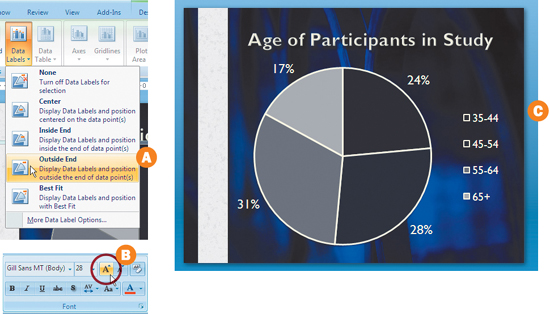
If the chart contains labels, be sure they appear outside of the chart (otherwise the animation may cover the numbers). Choose the Chart Tools Layout tab from the Ribbon and click the Data Labels button and choose Outside End A to move the data labels. Choose the Home tab in the Ribbon to access the type controls. Click on the percentage numbers to select them. Click the Increase Font Size button in the Font group two times B. Then select the legend of the chart and enlarge it by clicking the Increase Font Size button twice again C.
3. Add an Entrance Effect
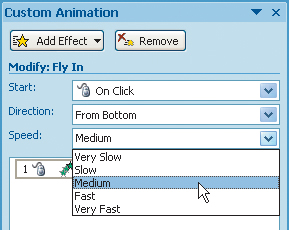
Now that the chart’s appearance has been optimized it can be animated. Click on the pie chart to select it, and then click the Animations tab in the Ribbon. If the Custom Animation task pane is not visible, click the Custom Animation button in the Animations group. Click the Add Effect button and choose Entrance > Fly In. The chart now flies in from the bottom of the screen, but the effect can be customized. Before animating pie segments individually, change the rate of the effect. Click the Speed list and set the rate to Medium.
4. Animate Elements Independently
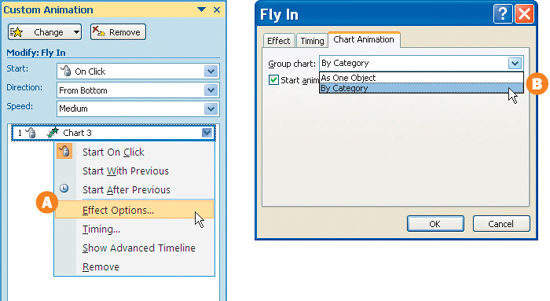
To create animation with impact, you can set the pie segments to build one at a time. This will allow the presenter to discuss each group independently. In the Custom Animation task pane click the drop-down menu on the first animation and choose Effect Options A. A new window opens with controls for the Fly In effect. Click the Chart Animation tab and change Group chart to By Category B and uncheck the Start animation by drawing the chart background box and clicking OK.
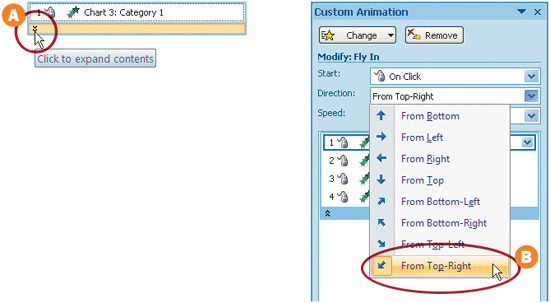
5. Adjust Animation Direction and Timings
In the Custom Animation task pane, click the double arrows to expand the contents of the animation effect (this will allow you to view and modify each animation independently) A. Click on the first animation (Chart 3: Category 1) and change its direction to From Top-Right in the Direction list B. Select the remaining segments and set each one to the following: Category 2, Bottom-Right; Category 3, Bottom-Left; and Category 4, Top-Left.
6. Preview the Animation
To view the changes in animation you have two choices. You can launch the presentation from the current slide by pressing Shift+F5 or you can click the Play button at the bottom of the Custom Animation pane.![]()
3-D Charts Don’t Animate Well. Trying to animate a 3-D chart doesn’t work very well. The 3-D elements do not build correctly, as their intersections collide and improperly overlap. For this reason, we choose to avoid animating a 3-D chart. We hope this issue will be addressed in a future update of PowerPoint software.
Using GIF Files
Another way to add animation to a slide is to use an animated GIF file (pronounced jif). The GIF or (Graphics Interchange Format) was first introduced by CompuServe in 1987. The format was further modified in 1989 to add animation support. The format only allows 256 colors per frame, and this color limitation can make the images appear coarse and grainy. There are lots of places to find GIF files (and you can even create your own). If you’d like some animation in your slide show, consider the GIF file as an option.
Clip Art on Office Online
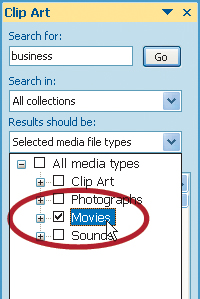
At first glance, you wouldn’t know that the Clip Art browser supports animated GIF files. That’s because Microsoft uses a different name. If you click the drop-down menu under Results should be, you can specify to search only for Movies. You can now perform keyword searches for animated graphics.
Searching Online
There is no shortage of manufacturers to choose from for GIF animations. A quick Web search will reveal plenty of options for any budget range. The sites with the most options and highest quality tend to cost more, but you should have no problems finding results. Be sure to shop around, as our searches found a ton of pricing options from pay-per-item to monthly membership plans. Be sure to weigh your options before making purchases. In fact, before buying anything, you may want to send a preview Web link if someone else must approve the presentation.
Here are a few sites to explore: www.gifanimations.com. www.animationfactory.com, www.gif.com.
Change the Color. If a GIF file doesn’t match your presentation’s color then don’t worry. Just select the GIF on your slide and switch to the Picture Tools Format tab in the Ribbon. Click the Recolor button in the Adjust group and make your desired color change.
Making Your Own
If you are artistically inclined, you can use most graphics and animation software programs to create GIF files. We frequently use Adobe After Effects for very advanced animation files. Another option is Adobe Photoshop, which has very rich Web support. For more on animating using Photoshop be sure to check out How to Wow with Photoshop CS2 for the Web by Jan Kabili and Colin Smith.![]()
GIF Versus SWF. There are two major Web formats for animation GIF as well as the newer SWF (or Flash) format. Because Flash files are often used for video, we covered Flash integration back in Chapter 4. If you need to use a SWF animation you can flip back and follow those steps.
Animating SmartArt
Animating Diagrams Is Easy with SmartArt
1. Choose the Slide to Animate
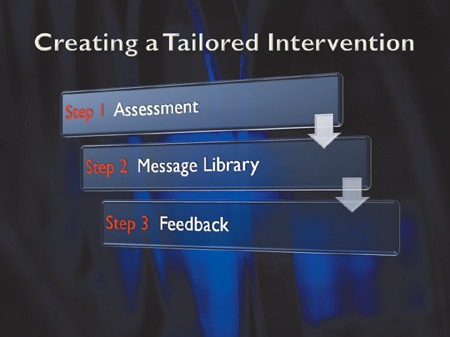
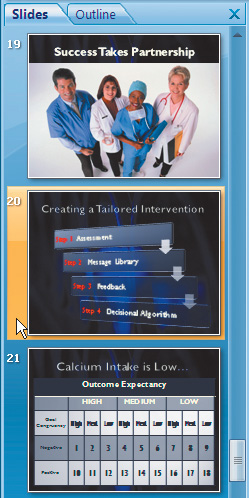
This presentation contains three pieces of SmartArt that can be animated. To animate SmartArt for maximum impact, use a reveal style build, in which each element is added in progression to the slide. To practice animating SmartArt, switch to slide 20 in the Slides list in your chapter project.
2. Select the SmartArt to Animate
With SmartArt you need to be aware when you click. For example, clicking on a box will put the graphic into editing mode. Instead, click just outside the graphic so a selection box occurs. The border around the SmartArt indicates that is selected (and can also be used to size and reposition the artwork).
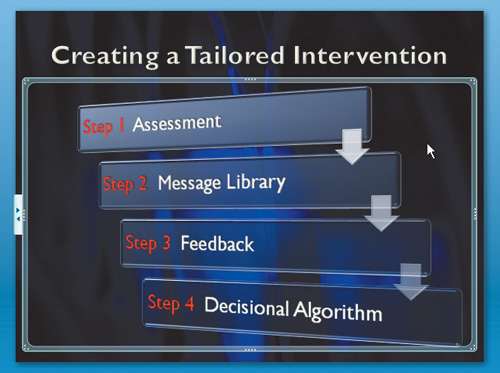
Click the Animations tab in the Ribbon to access control over animation. If the Custom Animation task pane is not visible, click the Custom Animation button in the Animations group. Click the Add Effect button and choose Entrance > More Effects. In the new window scroll down to the Moderate category and choose Ascend. A preview of the bars rising into place plays back. Click OK to apply the effect.
4. Convert the Custom Animation to a Build
In order to better control the Custom Animation, click the drop-down menu to the right of its name and choose Effect Options A. In the new window, click the SmartArt Animation tab. Change Group graphic to One by one (make sure the Reverse order box is unchecked) B. Click OK to apply the animation.
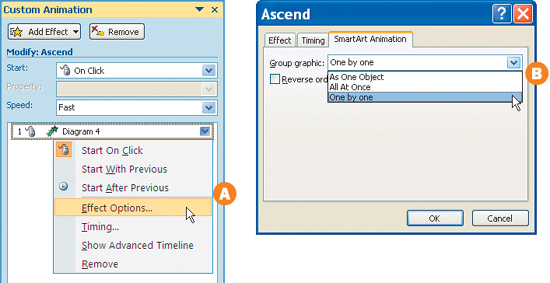
Faster Options. You can double-click on an effect in order to access its Effect Options. This shortcut can save you time.
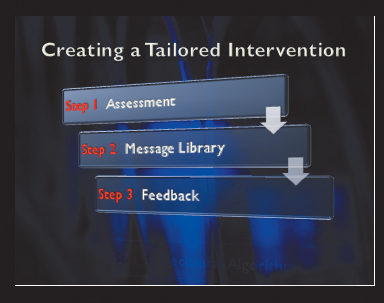
5. Preview the Animation
In order to see the animation in action, you can click the Play button at the bottom of the Custom Animation task pane. The four boxes should slide into place one after another. If you’d like additional practice, you can animate the SmartArt on slides 16 and 23 as well. ![]()
The Theory of Transitions
Presenters are oddly attracted to transitions (or wipes) between slides. This obsession is further fed by the fact that all presentation (and for that matter video) software pushes transitions as one of the top features. Are transitions helpful? Certainly. Do most presenters improperly use them? Most definitely! Restraint is key when choosing transitions.
When to Use Transitions
Most presenters think they should use a transition between every slide. This view assumes that you want something to signify a change of ideas to the audience. This theory works well if you remember that a cut (in which one shot instantly changes to another) is also considered a transition. Problems arise when presenters think of transitions as fun and begin to overly rely on them to add interest to their slide shows. A better approach is to determine how dramatic a change is needed. Ask yourself the following:
• How well do the adjoining slides fit together?
• What is the response you want from the audience? A continuation of thought, or an entirely new topic of discussion?
• Does the transition feel right, or is it jarring?
Yes, every slide will have a transition, and that transition will usually be a cut. Transition abuse is a common mistake of amateur presenters. When we call someone an amateur we don’t base it on how long the speaker has used software, rather on his or her lack of experience in standing in front of a live audience and delivering effective presentations.
Transition Speed
Virtually every transition in PowerPoint can have its speed changed (the exception being the Cut). Transitions give you three speed options: slow, medium, or fast. It is generally good to set your transitions to a consistent speed by using the same speed setting.
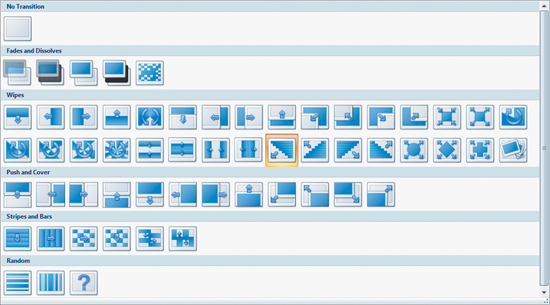
Transition Categories
PowerPoint 2007 offers 59 built-in transitions organized into the six categories listed below. These transitions are frequently slight variations upon each other (such as left-right-top-bottom).
• No Transition—There is only one transition in this category, and while it is named No Transition, it is often referred to as a cut. There is also a Cut in the Fade and Dissolves category and it functions in the same way as No Transition.
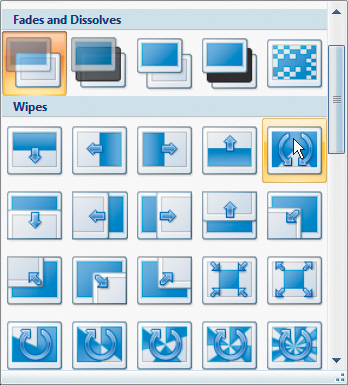
• Fades and Dissolves—In this category there are five transitions, all of which will either fade from one image to another or temporarily fade to black and move into the next slide. This category tends to be subtle and is well suited for most presentations.
• Wipes—The wipes category contains 32 different transitions. A wipe uses a shape such as a square or circle to reveal the incoming image. Wipes tend to be more dramatic than Fades or Dissolves and should be used less frequently.
• Push and Cover—This category offers 12 options. A Push uses one slide to push the old slide off the screen, much like trains on a track. A Cover pushes a new slide on top of the old, obscuring it in the process.
• Stripes and Bars—There are six different Stripes or Bars wipes to choose from. These use strips or checkerboard patterns to mix two images together.
• Random—The Random category uses either random horizontal or vertical bars to create the wipe. Additionally, a third option, called Random Transition, will pick from all the built-in options.
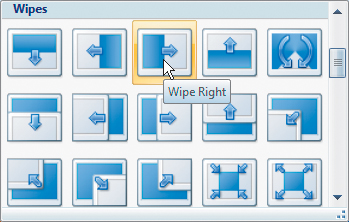
Limiting Styles
When using transitions, it’s important to keep your style consistent. Many presenters will try and use a different transition on every slide. While this is technically possible, it is a very bad idea. When choosing wipes, you’ll want them to be complementary (such as a Wipe Left and Wipe Right). By keeping your transitions consistent, the presentation will feel more professional and cohesive. This advice can be summed up by using the words of the wise Mr. Miyagi of The Karate Kid fame: “Wax on… wax off.” ![]()
Adding Transitions to Slides
Create Fluid Motion Between Slides
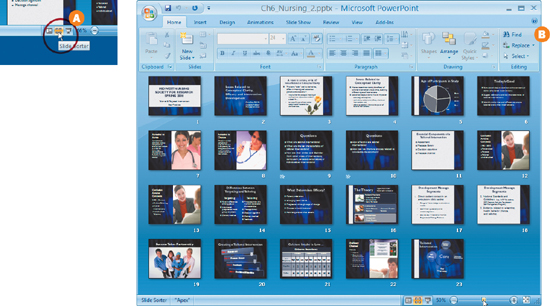
1. Switch to Slide Sorter View
The easiest way to apply slide transitions is to take a global view of your entire presentation. One easy way to do this is to switch to the Slide Sorter view by clicking the Slide Sorter icon on the bottom of the window A. Then adjust the Zoom slider so you can see all 23 slides in your window B. Depending upon the size of your computer monitor, you may need to use a different zoom level.
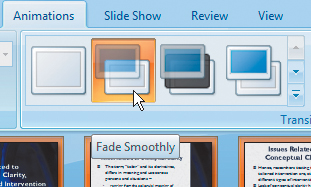
2. Apply a Global Transition
Generally you can apply a global transition to all of your slides and then modify individual transitions based on need. This global transition should be subtle (such as a Cut or Fade Smoothly). Press Ctrl+A to select all of your slides. Click the Animations tab and click the Fade Smoothly button in the Transitions to This Slide. A transition is applied to each slide; its existence is indicated by the star icon beneath each slide’s thumbnail.
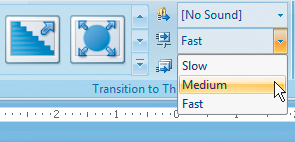
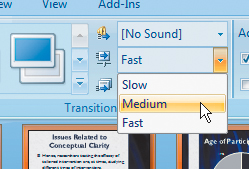
Since your slides are still selected, it is easy to apply a global speed change. Choose the Transition Speed drop-down menu and set the speed to Medium. The icons of your slides animate as the transitions are updated across all slides.
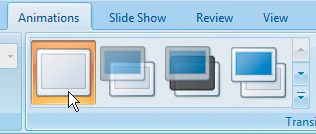
4. Adjust Individual Transitions
While the global transition works for most slides, you’ll often want to modify specific slides to customize your transitions. First, deselect all slides by clicking in an empty area in the slide sorter. You can then select multiple slides by Ctrl+clicking on their thumbnails. To practice, select slides 1, 2, 7, 8, 13, and 19. In the Animations tab click Fade Through Black to apply a new transition.

Hear No Evil. You may have noticed the Transition Sound option in the Animations tab—don’t use it! If you really feel the need to apply the Applause sound effect, your presentation needs more than a sound effect. That Whoosh sound? Lets just say that reliance on gimmicks makes for a bad presentation.
5. Remove Unwanted Transitions
Earlier you created an Entrance and Exit build for bulleted text on slides 9 and 10. These two slides do not need a transition in between them. Select slide 10 in the Slide Sorter then click the No Transition button in the Animations tab.
6. Watch the Show
Now that the presentation has had animation added you should watch it all the way through. Click the Slide Show tab to access the controls. Click the From Beginning button to view your show from the start. Click the space bar to advance your slide show through each animation. When you are finished with the presentation, press the escape key to exit the show. ![]()
Using Hyperlinks as Transitions. If you want to link to another slide in your presentation, you can use a hyperlink. You can either select an object (like a piece of SmartArt or a shape) or highlight a word of text. Then choose the Insert tab in the Ribbon and click on Hyperlink in the Links group. You can then choose to use a Place in This Document. Select a slide from the list and click OK. Hyperlinks can jump to any slide in the document, but the transitions on the slide will be ignored.
Using Third Party Transitions
PowerPoint can be modified through several different software add-ins. These modifications to the program are meant to increase functionality and enable customization. These tools are made by a variety of software companies, and you must purchase them if you want to add them to your toolbox. Lets explore the case for and against transition add-ins.
The Case for Transition Add-Ins
Simply put, if you want fancier and bigger transitions, then you’ll need to look at third-party plug-ins. We have tried several of them out and most do what they advertise. With little effort, your slides will be spinning, flying, and even morphing into new shapes. If your client or company wants fancy transitions then you’ll need to look beyond the built-in tools. The library of available effects is impressive, and they work well for attention-demanding situations like self-running presentations for trade shows. Keep in mind, though, that you can quickly spend more on add-ins than you paid for PowerPoint to begin with.
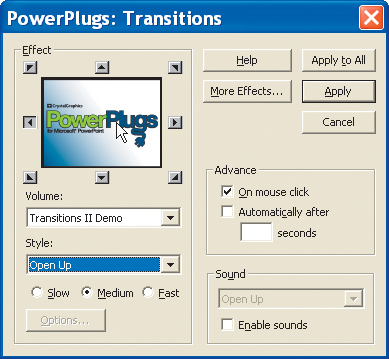
The Case Against Transition Add-Ins
The use of add-in transitions is very machine dependant. Many of them require robust graphics cards and system memory in order to play back. This means you’ll need a fast computer (and likely will need to bring your own with you). Additionally, the add-ins require that software be loaded on both the machine where the show was created as well as the one it was played back on. This can require lots of installing and technical challenges in the field. Another issue is stability. Complex 3-D effects greatly increase the chance of an application crash, which can be deadly in front of a live audience. The final issue is just plain good taste. While we have been pretty transparent about our feeling on gaudy transitions, it bears repeating—keep things simple and clean. After all, do you really need that 3-D animated-dolphin wipe? Wow your audience with good design and good information, not glitter and sound effects.![]()