
5. Bridge

In This Chapter
Opening files from Illustrator
Choosing a workspace for Bridge
Resetting the Bridge workspace
Creating and using collections
Rating and labeling thumbnails
Filtering the display of thumbnails
Choosing a sorting order for thumbnails
In this chapter, you will open files via the Open command and via Bridge, a separate application that serves as a conduit among programs in the Adobe Creative Cloud. You will also learn how to customize the Bridge window and use it to preview, open, label, rate, group, find, rename, delete, move, copy, and assign keywords to files. (Bridge is included with Illustrator.)
Note: Adobe Bridge must be downloaded and installed separately from Illustrator.![]()
Opening files from Illustrator
Follow the instructions below if you want to open Illustrator files using the Open command in Illustrator. Or if you prefer to use Bridge to open files — as we do and recommend — turn the page and start reading from there. (To learn how to import files from other programs into Illustrator, see Chapter 22.)
To open a file from Illustrator
1. To display the Open dialog, choose File > Open (Cmd-O/Ctrl-O).
2. In the Mac OS, to list files only in the formats that Illustrator can read, choose Enable: All Readable Documents. In Windows, to list all files, both readable and not, from the menu next to the File Name field, choose All Formats, or choose a specific format.
3. Locate and click a file name, then click Open. If an alert dialog about a color profile or missing font appears, see page 63; if an alert dialog pertaining to imported images appears, see page 303.
![]() To reopen a recently opened file, choose the file name from the File > Open Recent Files submenu.
To reopen a recently opened file, choose the file name from the File > Open Recent Files submenu.
To open an Illustrator file from the Macintosh Finder or Windows Explorer
Double-click the icon for an Illustrator file. The file name may include one of the following extensions: .ai, .ait, .eps, or .idea. Illustrator will launch if it isn’t already running.
In the Mac OS, you can also open a file by dragging its icon over the Adobe Illustrator CC application icon in the Dock. And you can open an Illustrator file that has an .svgz or .svg extension by this method or by double-clicking.
Launching Adobe Bridge
The excellent navigation controls and large thumbnail previews in Bridge make locating and opening files a snap. There are many useful features in Bridge to explore, such as the ability to organize file thumbnails into collections and collapsible stacks, assign keywords to files, and filter the display of thumbnails by various criteria.
To launch Adobe Bridge
To launch Adobe Bridge, do one of the following:
In the Mac OS or Windows, on the Application bar in Illustrator, click the Go to Bridge icon ![]() (Cmd-Option-O/Ctrl-Alt-O).
(Cmd-Option-O/Ctrl-Alt-O).
In the Mac OS, double-click the Adobe Bridge CC application icon ![]() or click the Bridge icon
or click the Bridge icon ![]() in the Dock.
in the Dock.
In Windows 8, display the Start screen, then click the tile for Adobe Bridge CC (64bit).
Features of the Bridge window
First, we’ll identify the main sections of the Bridge window (A, next page). The two rows of buttons and menus running across the top of the window are referred to jointly as the toolbar. The second row of the toolbar is also called the Path bar.
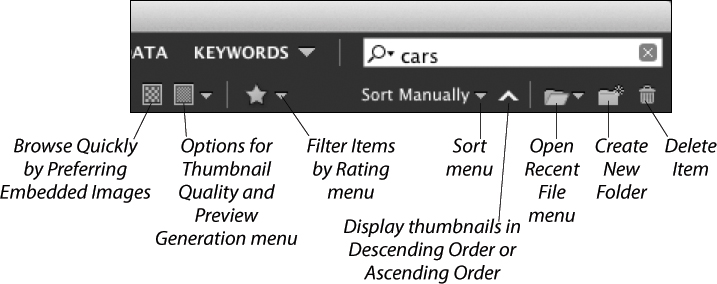

A Features of the Bridge window are identified above. You’ll learn about their functions throughout this chapter.
In the default workspace, Essentials, the main window is divided into three panes: a large pane in the center and a vertical pane on either side. Each pane contains one or more panels, which are accessed via their tabs: Favorites, Folders, Filter, Collections, Content, Preview, Metadata, and Keywords. Using panels in the side panes, you can manage files, filter the display of thumbnails, and display file data; the Content panel displays document thumbnails. You can hide, show, or resize any of the panels or move any panel into a different pane. At the bottom of the Bridge window are controls for changing the thumbnail size and layout. To customize the Bridge workspace, see pages 58–59 and 64–65.
We’ll explore the toolbar features and most of the panels in depth in this chapter. To help you get oriented, here is a brief description of the panels:
The Favorites panel displays a list of folders that you’ve designated as favorites, for quick access (see page 61).
The Folders panel contains a scrolling window with a hierarchical listing of all the top-level and nested folders on your hard disk. See page 60.
By clicking various criteria in the Filter panel, you can filter which file thumbnails in the current folder display in the Content panel. See page 72.
The Collections panel lists all your collections, which are groups that you have made of file thumbnails. Using collections, you can organize and access your file thumbnails without having to relocate the actual files. See pages 69–70.
The Content panel displays thumbnails for files (and, optionally, for nested folders) within the current folder. In the lower right corner of the Bridge window, you can click a View Content As button to control whether, and in what format, metadata pertaining to the current files displays in the Content panel (see page 65). The Content panel is used and illustrated throughout this chapter.
The Preview panel displays a large preview of one or more document (or folder) thumbnails that are selected in the Content panel. If a document you are previewing contains multiple artboards, controls are provided for navigating through them. If the thumbnail for a video file is selected in the Content panel, a controller for previewing the video displays in this panel. Or if a multipage PDF file is selected, you can click the left or right arrow to preview pages in the file. See pages 60–61.
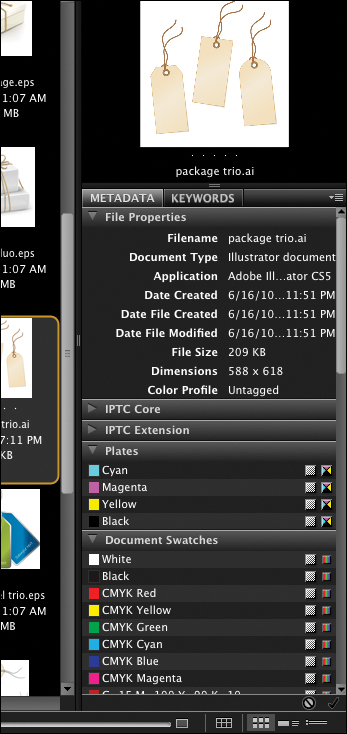
In the Metadata panel, you can find detailed information about the currently selected file, within expandable categories. The File Properties category, for example, lists such data as the file name, format, date created, and date modified. For a close-up of this panel, see the sidebar on page 61 (see also Bridge Help).
Use the Keywords panel to assign one or more descriptive subkeywords to your files, such as the client or project name or the subject matter of the artwork. You can search for file thumbnails based on the keywords that are assigned to them, and filter thumbnails by checking specific keywords in the Filter panel (see page 73).
Note: The Inspector panel isn’t covered in this book.
Choosing a workspace for Bridge
To reconfigure the Bridge window quickly, choose one of the predefined workspaces. (To create and save custom workspaces, see pages 64–66.)
To choose a workspace for Bridge
Do one of the following:
In the workspace switcher on the upper toolbar, click Essentials, Filmstrip, Metadata (List View for the thumbnails), Keywords, Preview, Light Table, Folders, or a user-saved workspace.A (If there’s room on the toolbar and you want to display more workspace names, pull the gripper bar to the left.)
From the Workspace menu on the workspace switcher, choose a workspace B–C (and A–C, next page).

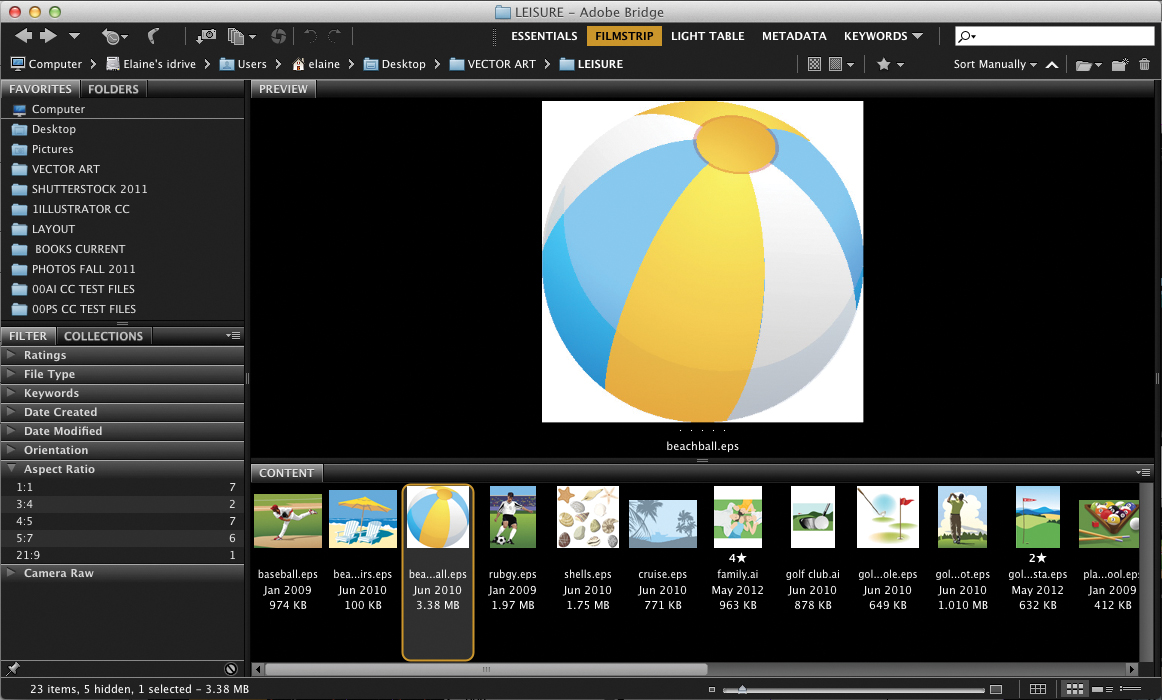
C The Filmstrip workspace features a large preview of the currently selected thumbnail(s), and the thumbnails are displayed horizontally.
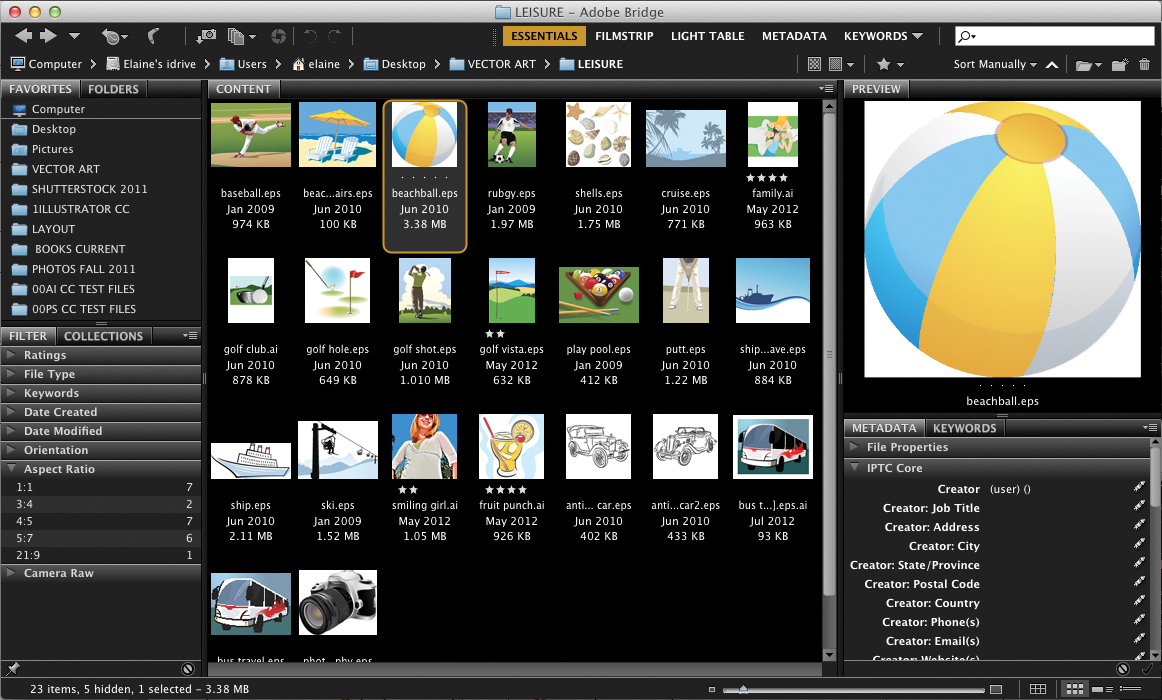
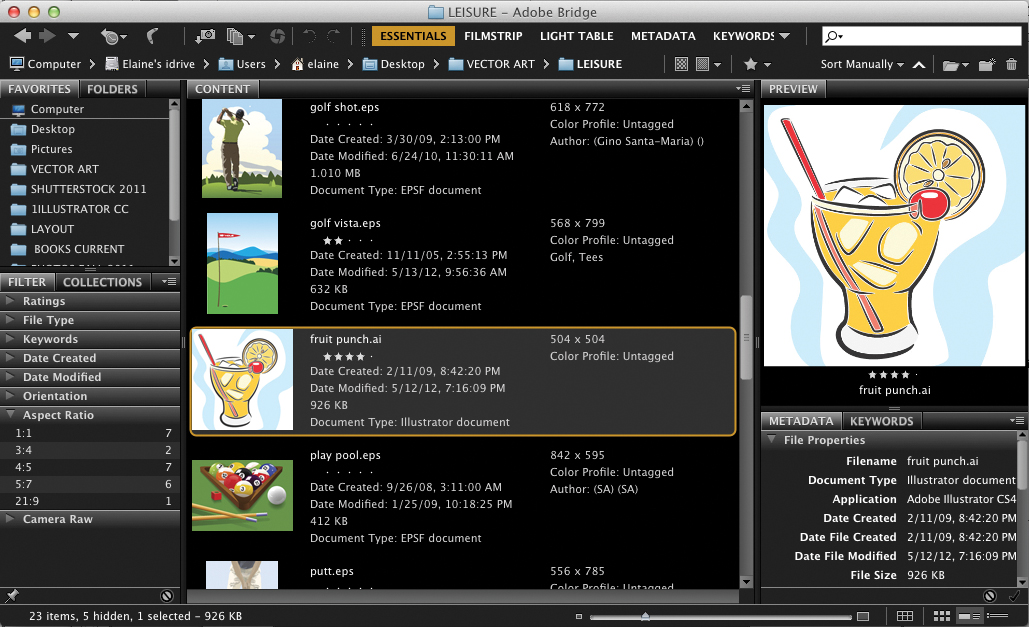
A In the Essentials workspace, all the panels are showing.
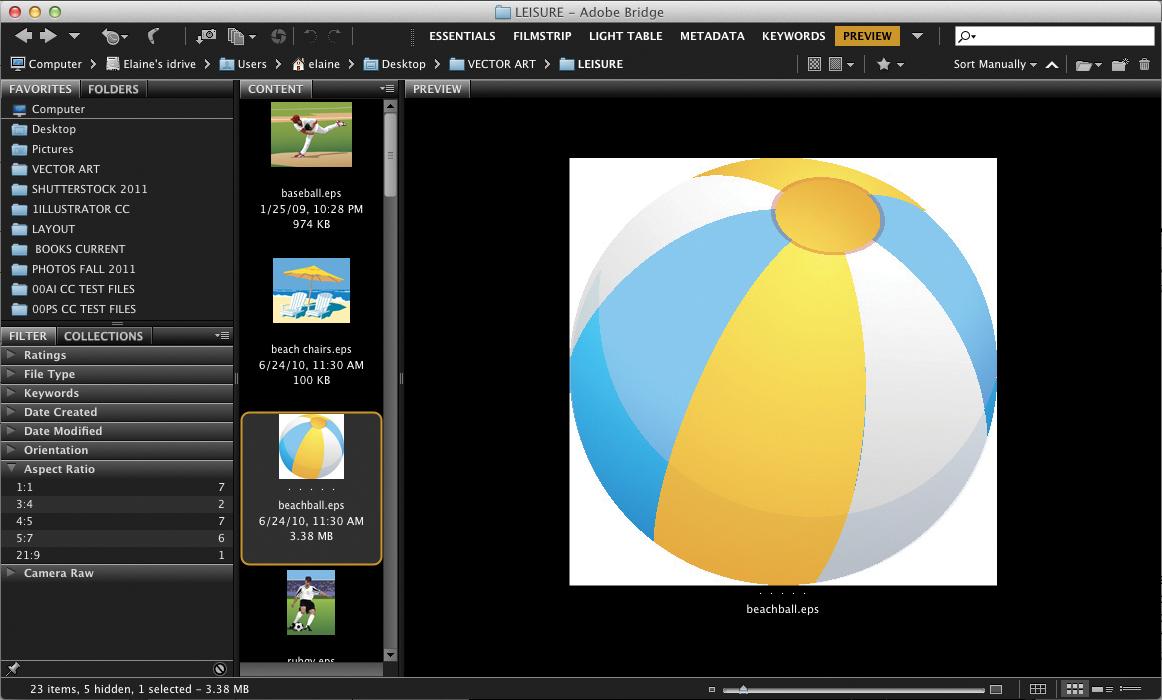
B In the Preview workspace, the Metadata and Keywords panels are hidden to make room for a large preview, and the thumbnails are displayed vertically.
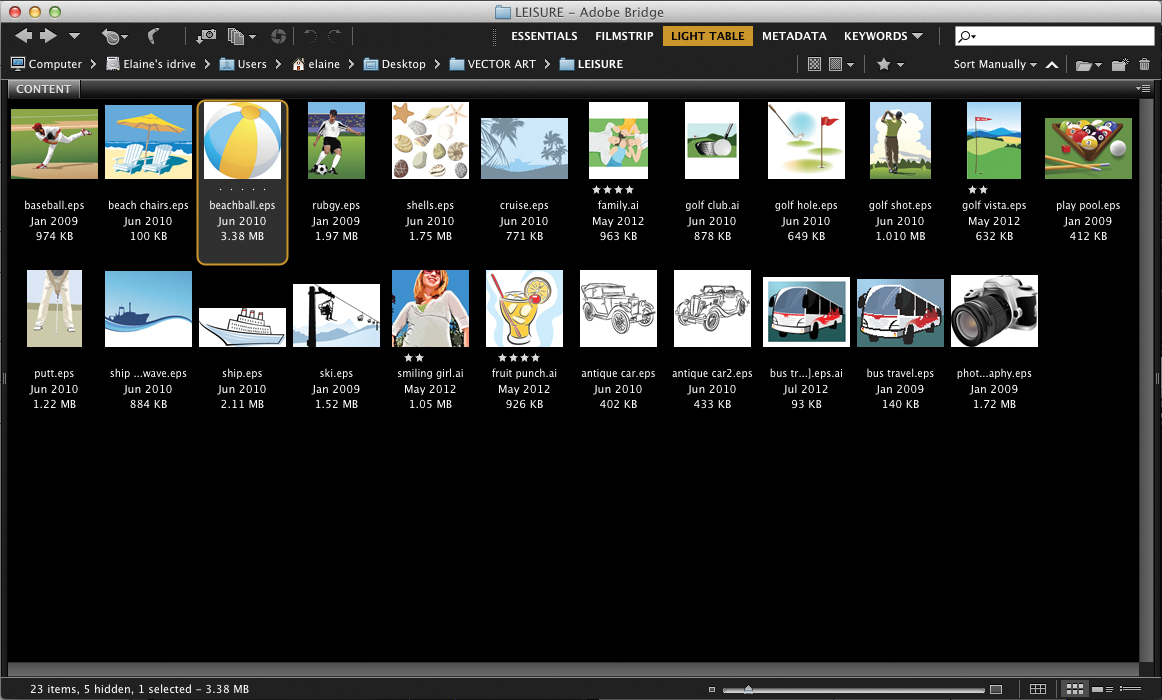
C The Light Table workspace allows you to display the largest number of thumbnails in a folder, because the Content panel occupies the whole Bridge window.
Press the shortcut for one of the first six workspaces on the switcher (as listed on the Workspace menu): Cmd-F1/Ctrl-F1 through Cmd-F6/Ctrl-F6. The shortcuts are assigned automatically to the first six workspaces on the switcher, based on their current order from left to right.
![]() To resize the thumbnails for any workspace, see page 64.
To resize the thumbnails for any workspace, see page 64.
To change the order of workspaces on the switcher
Do either of the following:
Drag a workspace name to the left or right.
Right-click a workspace name and choose a different name from the context menu.
Previewing graphics in Bridge
For navigating to and opening folders, Bridge provides controls on the toolbar and in the Folders and Favorites panels.
To select and preview graphics in Bridge
1. Do any of the following:
In the Folders panel, navigate to the folder to be opened. You can use the scrolling arrows, and you can expand or collapse any folder by clicking its arrowhead. Display the contents of a folder by clicking its icon in the Folders panel or by double-clicking its thumbnail in the Content panel. Note: For folder thumbnails to display in the Content panel, View > Show Folders must be checked.
Click the Go Back button ![]() on the toolbar A to step back through the last folders viewed, or the Go Forward button
on the toolbar A to step back through the last folders viewed, or the Go Forward button ![]() to reverse those steps.
to reverse those steps.

A These are the navigation controls in Bridge.
Click a folder name in the Favorites panel.
From the Go to Parent or Favorites menu ![]() on the toolbar, choose a parent or favorites folder.
on the toolbar, choose a parent or favorites folder.
Click a folder name on the Path bar (if the bar isn’t showing, choose Window > Path Bar).
From one of the menus ![]() on the Path bar, choose a folder. If another submenu displays, click yet another folder; repeat until you reach the desired folder.
on the Path bar, choose a folder. If another submenu displays, click yet another folder; repeat until you reach the desired folder.
![]() To display thumbnails for files in all the nested subfolders inside the current folder, choose Show Items from Subfolders from its menu.
To display thumbnails for files in all the nested subfolders inside the current folder, choose Show Items from Subfolders from its menu. ![]() To restore the normal view, click the Cancel button
To restore the normal view, click the Cancel button ![]() on the Path bar.
on the Path bar.
2. In the Content panel, do either of the following:
Click a thumbnail. A colored border will appear around it, and data about the file will be listed in the Metadata panel. An enlarged preview of the graphic will also display in the Preview panel, if that panel is showing.
To select multiple files, Cmd-click/Ctrl-click nonconsecutive thumbnails; or click the first thumbnail in a series of consecutive thumbnails, then Shift-click the last one you want to select.B

B Cmd-click/Ctrl-click multiple thumbnails in the Content panel to compare them in the Preview panel.
3. If the file for the currently selected thumbnail contains multiple artboards, you can cycle through them by clicking the left or right arrow below the preview or by entering the desired artboard number in the field and then pressing Return/Enter.A
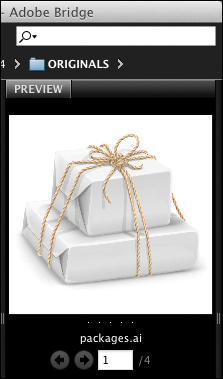
A In the Preview panel, you can cycle through multiple artboards in an Illustrator document by clicking the left or right arrow or by entering the desired artboard number in the field.
![]() A number in the upper left corner of a document thumbnail indicates that it’s in a stack (user-created group). To display all the document thumbnails in a stack, click the number; to collapse the stack, click the number again. To learn more about stacks, see page 67.
A number in the upper left corner of a document thumbnail indicates that it’s in a stack (user-created group). To display all the document thumbnails in a stack, click the number; to collapse the stack, click the number again. To learn more about stacks, see page 67.
![]() To cycle through thumbnails in the same folder, press the left or right arrow key. To quickly locate and select a particular thumbnail, start typing the file name (you don’t need to click anywhere first).
To cycle through thumbnails in the same folder, press the left or right arrow key. To quickly locate and select a particular thumbnail, start typing the file name (you don’t need to click anywhere first).
To add a folder to the Favorites panel
Do either of the following:
Drag a folder icon from the Content panel or from the Desktop into the Favorites panel.
Right-click a folder in the Folders or Content panel and choose Add to Favorites (or click the folder, then choose File > Add to Favorites).
![]() To remove a folder from the list of Favorites, right-click it and choose Remove from Favorites.
To remove a folder from the list of Favorites, right-click it and choose Remove from Favorites.
![]() Via check boxes in the Favorite Items area of Adobe Bridge CC/Edit > Preferences > General, you can control which system-defined folders appear in the top part of the Favorites panel.
Via check boxes in the Favorite Items area of Adobe Bridge CC/Edit > Preferences > General, you can control which system-defined folders appear in the top part of the Favorites panel.
Viewing the Metadata of a File
When you click the thumbnail for an Illustrator document, information about the file displays in expandable categories in the Metadata panel. You can use the IPTC Core category in this panel to attach creator, description, copyright, and other information to the currently selected file: Click the field next to a listing, enter or modify the file description information, press Tab to cycle through and edit other data, then click the Apply button ![]() in the lower right corner.
in the lower right corner.
Opening files from Bridge
You can open as many files in Illustrator as the currently available RAM and scratch disk space on your computer will allow. (To learn how to import files from other programs into Illustrator, see Chapter 22.)
To open files from Bridge into Illustrator
1. In the Content panel, display the thumbnails for the documents you want to open.
2. Do either of the following:
Double-click a thumbnail.
Click a thumbnail or select multiple thumbnails, then double-click one of them or press Cmd-O/Ctrl-O.
Illustrator will launch, if it isn’t already running, and the chosen document(s) will appear onscreen.
3. If the Font Problems dialog or an alert about a color profile appears, see the next page. If an alert about a linked image file appears, see the sidebar on page 303 and the first task on page 310.
![]() You can also open a file by right-clicking its thumbnail, then choosing Open (or Open With > Adobe Illustrator CC) from the context menu.
You can also open a file by right-clicking its thumbnail, then choosing Open (or Open With > Adobe Illustrator CC) from the context menu.
![]() To locate a file in Finder/Explorer, right-click its thumbnail in Bridge and choose Reveal in Finder/Reveal in Explorer from the context menu. The folder that the file resides in will open in a window in Finder/Explorer and the file icon will be selected.
To locate a file in Finder/Explorer, right-click its thumbnail in Bridge and choose Reveal in Finder/Reveal in Explorer from the context menu. The folder that the file resides in will open in a window in Finder/Explorer and the file icon will be selected.
![]() By default, the Bridge window stays open after you use it to open a file. To have the Bridge window close/minimize as you open a file, hold down Option/Alt while double-clicking the file thumbnail.
By default, the Bridge window stays open after you use it to open a file. To have the Bridge window close/minimize as you open a file, hold down Option/Alt while double-clicking the file thumbnail.
To reopen a recently opened file
To reopen a file that was recently opened and then closed, do one of the following:
Choose from the Open Recent File menu ![]() on the right side of the Path bar.
on the right side of the Path bar.
Choose from the File > Open Recent submenu.
From the Reveal Recent File or Go to Recent Folder menu ![]() on the toolbar, choose Adobe Illustrator > Recent Adobe Illustrator Files, then in the Content panel, click the thumbnail for a file to open it. To redisplay an “actual” folder when you return to Bridge, click the Go Back arrow
on the toolbar, choose Adobe Illustrator > Recent Adobe Illustrator Files, then in the Content panel, click the thumbnail for a file to open it. To redisplay an “actual” folder when you return to Bridge, click the Go Back arrow ![]() or a Favorites folder.
or a Favorites folder.
Responding to Alert Dialogs Upon Opening a File
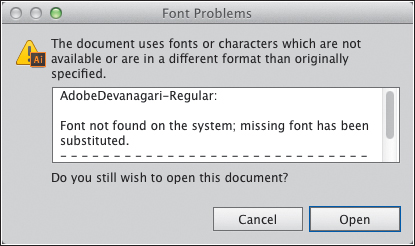
If you open a file in Illustrator that is using a missing font (the font isn’t available or isn’t installed), the Font Problems dialog will appear. If you click Open to let the document open with a substitute font and a missing font subsequently becomes available in the system, that font will also become available on the font menus in Illustrator and the type will redisplay correctly in the document.
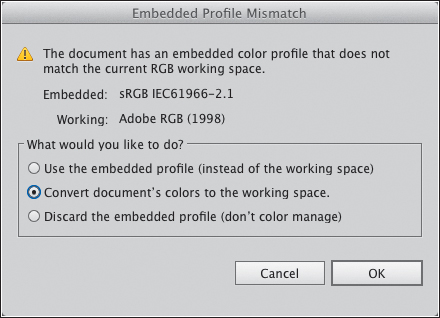
If the color profile in a file that you open doesn’t match the current working space for Illustrator, the Embedded Profile Mismatch alert dialog will appear. Click Use the Embedded Profile (Instead of the Working Space) if you must keep the document’s current profile; or to convert the profile to the current working space (and for better consistency with your color management workflow), click Convert Document’s Colors to the Working Space. Click OK. (See also pages 17–19 and 21.)
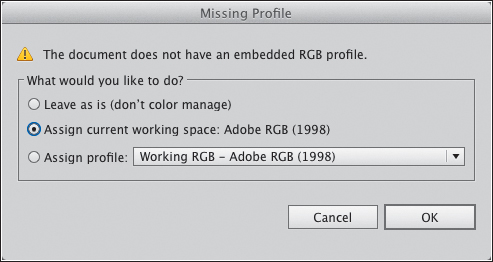
If the Missing Profile alert dialog appears as you open a file, click Assign Current Working Space. Listed next to this option will be the profile that is used in the Color Settings preset you chose for Illustrator on pages 17–19. With North America Prepress 2 chosen as the preset (for an RGB workflow), that profile will be Adobe RGB (1998); in a CMYK workflow, the profile will be U.S. Web Coated (SWOP) v2.
Customizing the Bridge window
To display or hide the panels
On the Window menu, check which panels you want to show or hide.
![]() To hide (and then show) the side panes, press Tab. To hide one side pane, double-click the dark vertical bar between that pane and the middle pane.
To hide (and then show) the side panes, press Tab. To hide one side pane, double-click the dark vertical bar between that pane and the middle pane.
To configure the panes and panels manually
Do any of the following:
To make a panel or panel group taller or shorter, drag its horizontal gripper bar upward or downward.A
A We are moving the gripper bar upward to shorten the Favorites panel group and lengthen the Filter panel group.
To make a whole pane wider or narrower, drag its vertical gripper bar to the left or right;B the adjacent pane will resize accordingly.
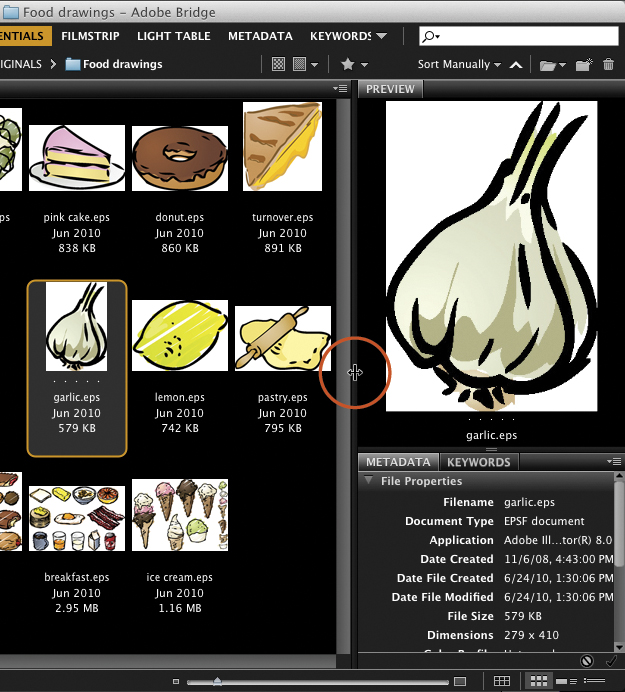
B We are moving the gripper bar for the right pane to the left to widen the Preview and Metadata panels.
You can minimize/maximize some panels by double-clicking the panel tab.
To move a panel into a different group, drag the panel tab, and release the mouse when the blue drop zone border appears around the desired group.
To display a panel as a separate group, drag its tab between two panels, and release the mouse when the horizontal blue drop zone line appears.
![]() To save a Bridge layout as a user-created workspace for easy access in the future, see page 66.
To save a Bridge layout as a user-created workspace for easy access in the future, see page 66.
To resize the document thumbnails
At the bottom of the Bridge window, drag the Thumbnail Size slider C or click the Smaller Thumbnail Size button ![]() or Larger Thumbnail Size button.
or Larger Thumbnail Size button.![]()
C Use the Thumbnail Size slider to resize the thumbnails in the Content panel.
![]() To display only full thumbnails, with grid lines between them, click the Lock Thumbnail Grid button
To display only full thumbnails, with grid lines between them, click the Lock Thumbnail Grid button ![]() at the bottom of the Bridge window. With this option on, the thumbnails won’t reshuffle if you resize the Content panel.
at the bottom of the Bridge window. With this option on, the thumbnails won’t reshuffle if you resize the Content panel.
To control the format in which metadata displays in the Content panel
1. In the lower right corner of the Bridge window, click one of these buttons: A View Content as Thumbnails (minimal file data), View Content as Details (more file data),B or View Content as List (small thumbnails with columns of data).
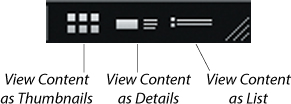
A These buttons control the display of metadata in the Content panel.
B When the View Content as Details button is activated, metadata displays next to the file thumbnails.
![]() If the View Content as List button is activated, you can change the column order by dragging any column header to the left or right.
If the View Content as List button is activated, you can change the column order by dragging any column header to the left or right.
2. To control which categories of metadata display below or next to the file thumbnails when the View Content as Thumbnails button is activated, go to Adobe Bridge CC/Edit > Preferences > Thumbnails, then select from any or all of the Show menus. For example, to have Bridge list file sizes, choose Size.
![]() When the View Content as Thumbnails button is activated, you can toggle the display of data on and off by pressing Cmd-T/Ctrl-T.
When the View Content as Thumbnails button is activated, you can toggle the display of data on and off by pressing Cmd-T/Ctrl-T.
Metadata in the Tool Tips
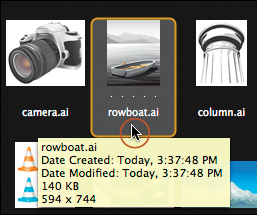
If Show Tooltips is checked in Adobe Bridge CC/Edit Preferences > Thumbnails, and you rest the pointer on a document thumbnail, the tool tip will list the metadata for that file. Uncheck the option if the tool tips become annoying.
Saving custom workspaces
By saving each workspace that you customize, you will be able to access those settings again quickly at any time. For example, you could save one workspace that is designed for locating files (a large Favorites/Folders panel), another workspace that is set up for browsing many thumbnails (a variation on the Light Table workspace), and yet another workspace that is geared toward creating and applying keywords (a lengthened Keywords panel).
To save a custom workspace for Bridge
1. Do all of the following:
Choose a size and location for the overall Bridge window.
Arrange the panel sizes and groups as desired.
Choose a thumbnail size for the Content panel.
Choose a sorting order from the Sort menu at the top of the Bridge window (see page 72).
Click a View Content button.
2. From the Workspace menu on the workspace switcher, choose New Workspace.
3. In the New Workspace dialog,A enter a Name for the workspace, check Save Window Location as Part of Workspace and/or Save Sort Order as Part of Workspace (both are optional), then click Save.
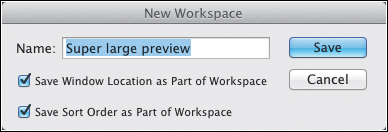
A In the New Workspace dialog, enter a Name for your custom workspace and choose options for it.
Note: Your new workspace will be listed first on the workspace switcher, and will be assigned the first shortcut (Cmd-F1/Ctrl-F1). To change the order of the workspaces on the bar, drag any workspace name horizontally to a different slot. When you do this, the shortcuts will be reassigned based on the new order.
![]() To delete a user-saved workspace, from the Workspace menu, choose Delete Workspace. From the menu in the dialog, choose the workspace to be deleted, then click Delete.
To delete a user-saved workspace, from the Workspace menu, choose Delete Workspace. From the menu in the dialog, choose the workspace to be deleted, then click Delete.
Resetting the Bridge workspace
When you make a manual change to a saved workspace, the change sticks with the workspace, even if you switch to a different one. For instance, if you were to change the thumbnail size for the default Filmstrip workspace, click a different workspace, then click back on the Filmstrip workspace, the new thumbnail size would still display. Via the commands for resetting workspaces, you can restore the default settings to any individual predefined (standard Adobe) or user-saved workspace or to all the predefined workspaces.
To reset the Bridge workspace
Do either of the following:
To restore the default settings to one workspace, right-click the workspace name on the switcher and choose Reset.
To restore the default settings to all the Adobe predefined workspaces, choose Reset Standard Workspaces from the Workspace menu.
Choosing Colors for the Bridge Interface
In Adobe Bridge CC/Edit > Preferences > General (Cmd-K/Ctrl-K), you can choose a User Interface Brightness (gray) value for the side panes; a different Image Backdrop value for the Content and Preview panels and for the background behind files when displayed in Full Preview View, Slideshow, or Review Mode; and an Accent Color for the border around selected folders, thumbnails, and stacks.
Getting to Illustrator Quickly
If Illustrator was the last Adobe application you were using, you can get back to it quickly from Bridge by clicking the Return to Adobe Illustrator (boomerang) button ![]() on the toolbar. Illustrator will launch, if it isn’t already running.
on the toolbar. Illustrator will launch, if it isn’t already running.
Using thumbnail stacks
Before learning about stacks, you need to know how to rearrange file thumbnails in the Content panel.
To rearrange thumbnails manually
Drag any thumbnail (or select, then drag multiple thumbnails) to a new location. Okay, that was a no-brainer. The header on the Sort menu switches to “Sort Manually.”
![]() Thumbnails remain where you place them unless you change the sorting order or perform a stacking operation.
Thumbnails remain where you place them unless you change the sorting order or perform a stacking operation.
One method for controlling how many thumbnails display at a given time is to group them into stacks. You can select the thumbnails for a stack based on any characteristic, such as a client or project, or the subject matter of the artwork.
To group thumbnails into a stack
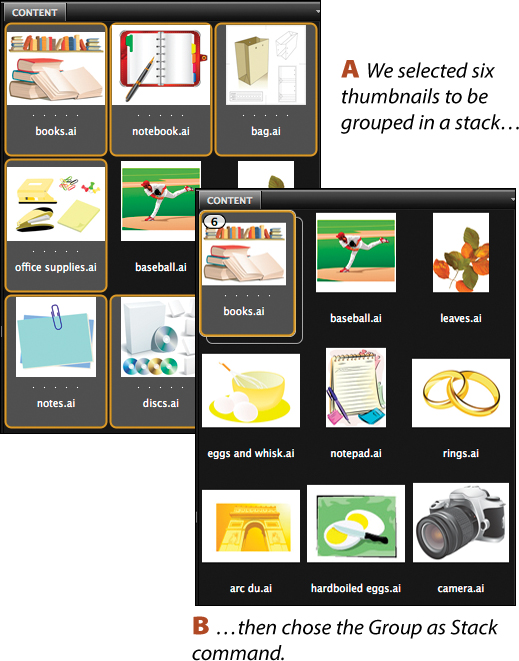
1. Shift-click or Cmd-click/Ctrl-click to select multiple thumbnails.A The first thumbnail in the selection is going to become the “stack thumbnail” (will display on top of the stack).
2. Press Cmd-G/Ctrl-G or right-click one of the selected thumbnails and choose Stack > Group as Stack.B A stack looks like a couple of playing cards in a pile, with the stack thumbnail on top. The number in the upper left corner (called the “stack number”) indicates how many thumbnails the stack contains.
To select the thumbnails in a stack
To expand, display, and select all the thumbnails in a stack, click the stack number (click it again to collapse the stack).
To select all the thumbnails in a stack while keeping the stack collapsed, click the stack border (the bottom “card”) or Option-click/Alt-click the stack thumbnail (the top one in the stack). Note that although the stack is collapsed, because it is selected, all the thumbnails it contains are displaying in the Preview panel, if that panel is showing.
To rearrange thumbnails within a stack
To move a thumbnail to a different position in an expanded stack, click it to deselect the other selected thumbnails, then drag it to a new spot (as shown by the vertical drop zone line).
To move a whole stack
1. Collapse the stack, then Option-click/Alt-click the stack thumbnail. The borders of both “cards” in the stack should now be highlighted.
2. Drag the document thumbnail (not the border).
![]() If you drag the top thumbnail of an unselected stack, you’ll move just that thumbnail, not the whole stack.
If you drag the top thumbnail of an unselected stack, you’ll move just that thumbnail, not the whole stack.
To add a thumbnail to a stack
Drag a thumbnail over a stack thumbnail, or if the stack is expanded, to the desired position.
To remove a thumbnail from a stack
1. Click the stack number to expand the stack.
2. Click a thumbnail to be removed (to deselect the other thumbnails), then drag it out of the stack.
To ungroup a stack
1. Click the stack number or stack thumbnail.
2. Press Cmd-Shift-G/Ctrl-Shift-G (Stacks > Ungroup from Stack) or right-click a stack thumbnail and choose Stack > Ungroup from Stack. The stack number and border will disappear.
Searching for files
To find files via Bridge
1. In Bridge, choose Edit > Find (Cmd-F/Ctrl-F). The Find dialog opens.A
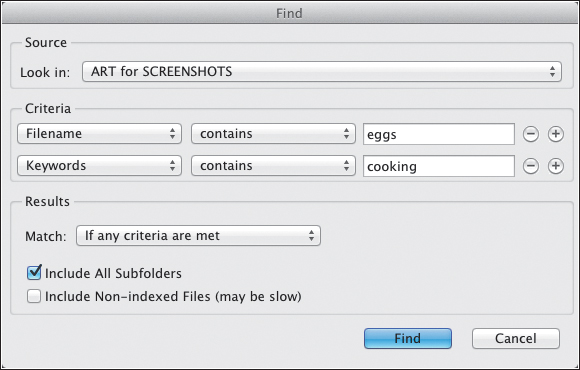
A Use the Find dialog to search for and locate files based on various criteria.
2. From the Look In menu in the Source area, choose the folder to be searched (by default, the current folder is listed). To select a folder that’s not on the list, choose Look In: Browse, locate the desired folder, then click Open.
3. From the menus in the Criteria area, choose search criteria (e.g., Filename, Date Created, Keywords, or Rating), choose a parameter from the adjoining menu, and enter data in the field. To add another criterion to the search, click the ![]() button, or to remove a row of fields, click
button, or to remove a row of fields, click ![]() .
.
4. From the Match menu, choose “If any criteria are met” to find files based on one or more of the criteria you have specified, or choose “If all criteria are met” to confine the selection to files that meet all of the criteria.
5. Check Include All Subfolders to let Bridge search through any of the subfolders that are contained within the folder you chose in step 2.
6. Optional: Check Include Non-indexed Files to let Bridge search files that it hasn’t yet indexed (files that Bridge has yet to display). This could slow down the search.
7. Click Find. The results of the search will display in the Content panel.B The parent folder will be listed on the Path bar and on the Reveal Recent File or Go to Recent Folder menu.![]()
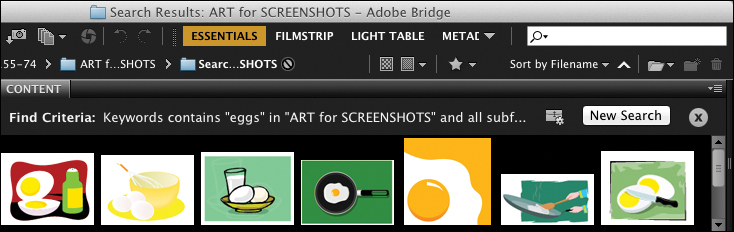
B The search results from the Find command display in the Content panel. The parameters that you used for the search and the name of the folder that was searched will be listed as the Find Criteria.
8. To create a collection from the search results, see the following page.
![]() To discard the current search results and initiate a new search, click New Search, or to dismiss the results, click the Cancel button.
To discard the current search results and initiate a new search, click New Search, or to dismiss the results, click the Cancel button.![]()
Quick Search for a File
In the Favorites panel, click Computer, then double-click the thumbnail for your hard disk; or navigate to a particular folder. In the search field ![]() on the Bridge toolbar, type the name of the file you’re looking for, then press Return/Enter.
on the Bridge toolbar, type the name of the file you’re looking for, then press Return/Enter.
Creating and using collections
The collection features in Bridge provide a useful way to catalog and access files without your actually having to relocate them. There are two kinds of collections: a Smart Collection, which is created from the results of a Find search, and what we call a “nonsmart” collection, which is created by dragging thumbnails manually to a collection icon.
To create a Smart Collection
1. Click the tab for the Collections panel. (If it’s hidden, choose Window > Collections Panel.)
2. Perform a search via the Edit > Find command (see the preceding page). When the search is complete, click the Save as Smart Collection button ![]() at the top of the Content panel.A
at the top of the Content panel.A

A To create a Smart Collection, click the Save as Smart Collection button in the Content panel.
3. A new Smart Collection icon ![]() appears in the Collections panel. Type a name in the highlighted field, then press Return/Enter.B
appears in the Collections panel. Type a name in the highlighted field, then press Return/Enter.B
B A new Smart Collection appears on the Collections panel. Type a name for it in the field.
![]() To add a collection to the Favorites panel, right-click the icon and choose Add to Favorites.
To add a collection to the Favorites panel, right-click the icon and choose Add to Favorites.
![]() To delete a collection, click it, then click the Delete Collection button.
To delete a collection, click it, then click the Delete Collection button. ![]() If an alert appears, click Yes. Not to worry: This won’t delete the actual files.
If an alert appears, click Yes. Not to worry: This won’t delete the actual files.
To display the contents of a collection
Click an icon ![]() in the Collections panel.
in the Collections panel.
If you edit an existing Smart Collection based on altered criteria in a new search, the collection contents will update automatically.
To edit a Smart Collection
1. In the Collections panel, click the icon for an existing Smart Collection.![]()
2. At the top of the Content panel or in the lower left corner of the Collections panel, click the Edit Smart Collection button. ![]() C
C
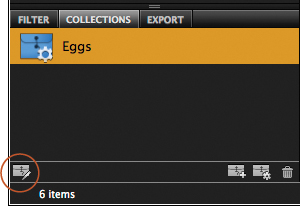
C To edit a Smart Collection, click a Smart Collection icon on the Collections panel, then click the Edit Smart Collection button at the bottom of the panel.
3. The Edit Smart Collection dialog opens. It looks like the Find dialog, which is shown on the preceding page. To add another criterion, click the next ![]() button, choose and enter the criterion, and choose “If any criteria are met” from the Match menu. You can also change the source folder and/or change the original criteria.
button, choose and enter the criterion, and choose “If any criteria are met” from the Match menu. You can also change the source folder and/or change the original criteria.
4. Click Save. The results of the new search will display in the Content panel.
Note: If you move a thumbnail from a Smart Collection into a folder that wasn’t used in the search (or move the actual file), it will be removed from the collection, but not from your hard disk. Don’t delete a thumbnail from a Smart Collection, however, unless you want Bridge to delete it from your hard disk!
You can also create a collection without running a search first. We call this a “nonsmart” collection. You can add to a nonsmart collection by dragging thumbnails into it (you cannot do this for a Smart Collection).
To create a nonsmart collection
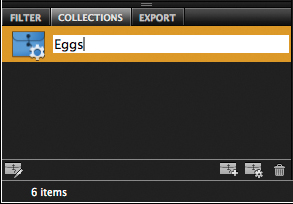
1. On the Content panel, select the document thumbnails to be placed into a collection. On the Collections panel, click the New Collection button, ![]() then click Yes in the alert dialog.
then click Yes in the alert dialog.
2. On the Collections panel, rename the collection,A then press Return/Enter. The number of thumbnails the collection contains is listed next to the name.
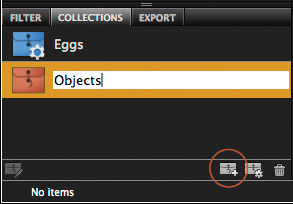
A To create a new collection, click the New Collection button, then type a name for it in the highlighted field.
To add thumbnails to a nonsmart collection
1. Display the Collections panel.
2. Drag one or more thumbnails from the Content panel over a nonsmart collection icon. ![]() B
B
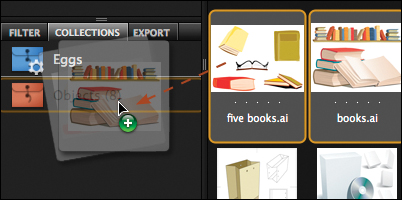
B Drag one or more thumbnails to a nonsmart collection listing to add them to that collection.
![]() You can copy and paste, or drag, thumbnails from a Smart Collection into a nonsmart one, or from one nonsmart collection into another.
You can copy and paste, or drag, thumbnails from a Smart Collection into a nonsmart one, or from one nonsmart collection into another.
To remove thumbnails from a nonsmart collection
1. On the Collections panel, click the icon for a nonsmart collection ![]() to display its contents.
to display its contents.
2. Select the thumbnails to be removed, then click Remove from Collection at the top of the Content panel.C
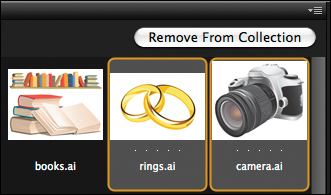
C To take selected thumbnails out of the currently selected collection, click Remove from Collection.
If you rename a file in Finder/Explorer or move a file from its original location on disk, it may be listed as missing from any standard collections it is a part of, and Bridge will try to relink it to those collections. If Bridge is unsuccessful, do as follows.
To relink a missing file to a nonsmart collection
1. On the Collections panel, click the collection to which you need to relink one or more files.
2. Next to the Missing File Detected alert at the top of the Content panel, click Fix.D
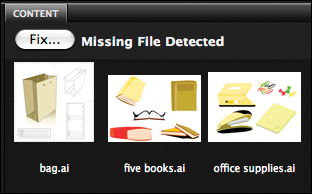
D To relink a file that’s missing from a collection, click Fix.
3. In the Find Missing Files dialog, click Browse, locate and select the missing file, then click Open. Click OK to exit the dialog.
Rating and labeling thumbnails
If you assign each thumbnail a star rating and/or a color label, you’ll be able to use that criterion to sort thumbnails in the Content panel, display them via the Filter panel (see the following page), and locate them via the Find command. In addition, you can apply a Reject rating to any thumbnails that you want to hide from the Content panel (but aren’t ready to delete from your hard drive).
To rate and label thumbnails
1. Select one or more thumbnails in the Content panel.
2. When you do any of the following, either a specific number of stars, a “Reject” label, or a colored label appears below the image thumbnail:
From the Label menu, choose a Rating (number of stars) and/or a Label (color-coded strip).A
A This thumbnail has an Approved (green) rating.
Right-click a thumbnail in the Content panel, and from the Label submenu on the context menu, choose a category.
Right-click in the Preview panel and choose a star rating and/or a label.
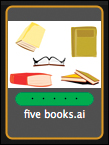
Click a thumbnail, then click any one of the five dots below it; stars will appear.B To remove a star, click the star to its left. To remove all the stars from a thumbnail, click to the left of the first star.C (If you don’t see the dots or stars, enlarge the thumbnails via the Thumbnail Size slider, and they should appear.)

B We clicked the third dot on this thumbnail to assign a three-star rating...

C ...but then we changed our minds, so we clicked to the left of the stars to remove them.
Press one of the keyboard shortcuts that are listed on the Label menu.
To label the losers with a red “Reject” label, choose Label > Reject (Option-Delete/Alt-Del).D If Show Reject Files is unchecked on the View menu, all rejected thumbnails will be hidden.
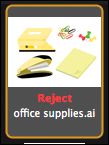
D This poor thumbnail has a Reject rating.
![]() If tool tips get in the way of your adding or removing stars, go to Adobe Bridge CC/Edit > Preferences > Thumbnails and uncheck Show Tooltips.
If tool tips get in the way of your adding or removing stars, go to Adobe Bridge CC/Edit > Preferences > Thumbnails and uncheck Show Tooltips.
![]() You can rename the Label categories in the Labels panel of the Preferences dialog for Bridge.
You can rename the Label categories in the Labels panel of the Preferences dialog for Bridge.
To remove ratings or labels from thumbnails
1. Select one or more document thumbnails in the Content panel.
2. Do either or both of the following:
Choose Label > No Rating or press Cmd-0/Ctrl-0 (zero).
Choose Label > No Label.
Filtering the display of thumbnails
The Filter panel lists data that is specific to files in the current folder, such as their label, star rating, date created, or keywords. When you check specific criteria in the panel, only thumbnails meeting those criteria display in the Content panel. (Note that thumbnails within stacks are ignored.)
To filter the display of thumbnails
Do either of the following:
On the Filter Items by Rating menu ![]() on the Bridge toolbar,A check the desired criteria.
on the Bridge toolbar,A check the desired criteria.
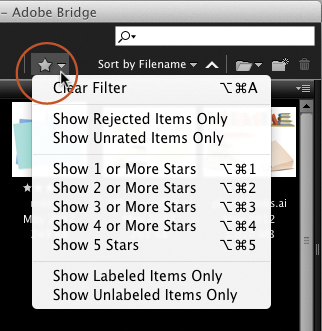
A You can filter the display of thumbnails via the Filter Items by Rating menu.
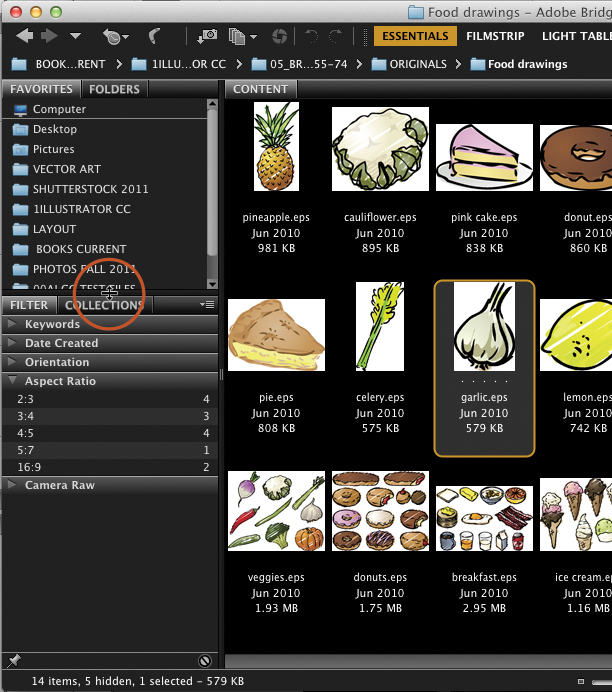
On the Filter panel, click the arrowhead to expand any category, such as Labels or Ratings, then check a criterion.B For example, to display only files that have a three-star rating, check the three-star listing under Ratings. To require that additional criteria be met, check more listings, either in the same category or in other categories. (To remove a criterion, click the listing again.)
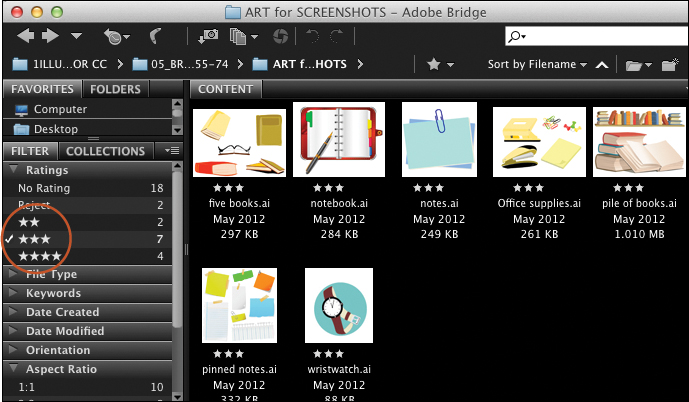
B Because we checked the three-star ranking in the Filter panel (Ratings category), only thumbnails matching that criterion (that have three stars) are displaying in the Content panel.
![]() To prevent the current filters (check marks) from clearing when you display other folders, click the Keep Filter When Browsing
To prevent the current filters (check marks) from clearing when you display other folders, click the Keep Filter When Browsing ![]() button on the panel. When active, the button will have a highlight color.
button on the panel. When active, the button will have a highlight color.
![]() To remove all check marks from the Filter panel, click the Clear Filter
To remove all check marks from the Filter panel, click the Clear Filter ![]() button at the bottom of the panel or press Cmd-Option-A/Ctrl-Alt-A.
button at the bottom of the panel or press Cmd-Option-A/Ctrl-Alt-A.
![]() The categories in the Filter panel (e.g., Ratings, Keywords) change dynamically depending on what categories are checked on the panel menu and on the metadata in files in the currently selected folder. For instance, if you haven’t applied ratings to any files in the current folder, there won’t be a Ratings category; if you apply a rating to one of the thumbnails, a Ratings category will appear.
The categories in the Filter panel (e.g., Ratings, Keywords) change dynamically depending on what categories are checked on the panel menu and on the metadata in files in the currently selected folder. For instance, if you haven’t applied ratings to any files in the current folder, there won’t be a Ratings category; if you apply a rating to one of the thumbnails, a Ratings category will appear.
Choosing a sorting order for thumbnails
The criterion that is checked on the Sort menu controls the order in which thumbnails display in the Content panel (regardless of which folder is currently displayed). By applying ratings, labels, and keywords (see the next page), choosing a sorting order, and checking categories in the Filter panel (see below), you’ll be able to locate and display just the files you need. The sorting order also affects the batch and automate commands in Bridge, because those commands process files based on the current sequence of thumbnails.
To choose a sorting order for thumbnails
From the Sort menu on the Path bar, choose a sorting order (such as By Date Created).C All the thumbnails in the Content panel will be re-sorted. To restore the last manual sort (rearrangement of thumbnails by dragging), choose Manually on the menu. If you display a different folder, the current sorting order will apply. Note: Sorting doesn’t change the order of thumbnails within stacks.
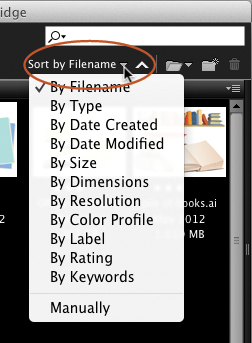
C From the Sort menu on the Path bar, choose a sorting order for thumbnails.
![]() To reverse the current order, click the Ascending Order
To reverse the current order, click the Ascending Order ![]() or Descending Order
or Descending Order ![]() arrowhead.
arrowhead.
Assigning keywords to files
Keywords (words that are assigned to files) are used by search utilities to locate files and by file management programs to organize them. In Bridge, you can create parent keyword categories (for events, people, places, etc.), as well as nested subkeywords within those categories, and then assign them to your files. You can locate files by entering keywords as search criteria in the Find dialog, build a Smart Collection based on a search for keywords, or display files by checking Keywords listings in the Filter panel.
To create keywords and subkeywords
1. Display the Keywords panel. To create a new parent keyword category, click the New Keyword button, ![]() then type a keyword.
then type a keyword.
2. To create a nested subkeyword, click a parent keyword, click the New Sub Keyword button, ![]() type a word, then press Return/Enter.A Each time you want to add another subkeyword, click the parent keyword first. You can also create nested sub-subkeywords.
type a word, then press Return/Enter.A Each time you want to add another subkeyword, click the parent keyword first. You can also create nested sub-subkeywords.
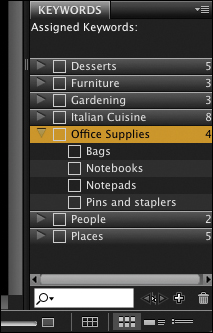
A We created a new parent keyword called “Office Supplies,” kept that category selected, then via the New Sub Keyword button, added some subkeywords to it.
![]() You can move (drag) any subkeyword from one parent keyword category into another.
You can move (drag) any subkeyword from one parent keyword category into another.
To assign keywords to files
1. Select one or more document thumbnails in the Content panel. If keywords are already assigned to any of the files in your selection, those words will be listed next to Assigned Keywords at the top of the Keywords panel; you can assign more.
2. Check the box for one or more subkeywords (and, if desired, keywords).B To remove a keyword or subkeyword from a file, uncheck the box.
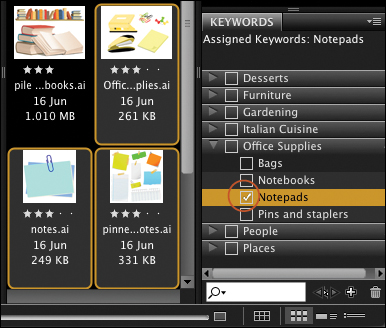
B We selected multiple file thumbnails, then assigned a subkeyword to them by checking the box.
![]() The keywords that are assigned to the files in the current folder are also listed in the Keywords category in the Filter panel.
The keywords that are assigned to the files in the current folder are also listed in the Keywords category in the Filter panel.
![]() To assign keywords via the File Info dialog, select one or more thumbnails, then from the Refine menu
To assign keywords via the File Info dialog, select one or more thumbnails, then from the Refine menu ![]() on the Bridge toolbar, choose File Info (Cmd-I/Ctrl-I). In the Keywords field of the Description tab, enter keywords, separated by semicolons or commas. Be on the alert for typing errors!
on the Bridge toolbar, choose File Info (Cmd-I/Ctrl-I). In the Keywords field of the Description tab, enter keywords, separated by semicolons or commas. Be on the alert for typing errors!
![]() If you click the thumbnail for a file to which keywords were assigned outside of Bridge, those keywords will display temporarily in the Keywords panel, under Other Keywords. To convert a temporary keyword to a permanent one, right-click it and choose Make Persistent from the context menu.
If you click the thumbnail for a file to which keywords were assigned outside of Bridge, those keywords will display temporarily in the Keywords panel, under Other Keywords. To convert a temporary keyword to a permanent one, right-click it and choose Make Persistent from the context menu.
Using the Keywords Panel
Exporting the Bridge cache
When the contents of a particular folder are displayed in the Content panel in Bridge for the first time, Bridge creates hidden cache files pertaining to those files and places them in the same folder. Bridge uses the cache to display program features, such as ratings, labels, and high-quality thumbnails. The thumbnails in a given folder redisplay more quickly once the cache has been created. Note: These hidden cache files can be read and used only by Bridge.
Setting the following preference will ensure that Bridge includes its cache data with any files that you copy to a removable disk or to a shared folder on a network.
To set a preference to have Bridge export the cache automatically
1. In Bridge, choose Adobe Bridge CC/Edit > Preferences (Cmd-K/Ctrl-K) > Cache.
2. Under Options, check Automatically Export Cache to Folders When Possible, then click OK.
If for some reason the cache preference is turned off and you need to export the cache for the files in a specific folder, follow these steps. The hidden cache files will be placed in the current folder and will also be included if you move or copy the Illustrator files.
To export the Bridge cache for the current folder
1. Display the contents of a folder in Bridge.
2. Choose Tools > Cache > Build and Export Cache.
3. In the Build Cache dialog, keep the Build 100% Previews option off, but do check Export Cache to Folders, then click OK.
![]() To display the cache file icons for the currently displayed folder, choose View > Show Hidden Files.
To display the cache file icons for the currently displayed folder, choose View > Show Hidden Files.
If Bridge is having trouble displaying a particular folder of thumbnails, try purging the cache for those thumbnails. This will prompt Bridge to rebuild the cache.
To purge cache files
Do either of the following:
To purge all the cache files from the current folder, choose Tools > Cache > Purge Cache for Folder “[current folder name].”
To purge the cache files just for specific thumbnails, select them, then right-click one of them and choose Purge Cache for Selection.
Managing files via Bridge
To create a new folder
Navigate to the folder to which you want to add a folder, then click the New Folder button ![]() at the right end of the Bridge toolbar. Type a name to replace the highlighted one; press Return/Enter.
at the right end of the Bridge toolbar. Type a name to replace the highlighted one; press Return/Enter.
You can move files to a different folder on your hard disk either by dragging them or via a command.
To move or copy files between folders
Method 1 (by dragging)
1. Select one or more thumbnails (Content panel).
2. In the Folders panel, navigate to (but don’t click) the folder or subfolder into which you want to move the selected files.
3. To move the selected files, drag them over the folder name in the Folders panel; or to copy them, do the same, except hold down Option/Ctrl while dragging (a + symbol will appear in the pointer). Or if you want to move (not copy) files to another hard disk, hold down Cmd/Shift while dragging.
Method 2 (via the context menu)
1. Select one or more thumbnails (Content panel).
2. Right-click one of the selected thumbnails, then from the Move To or Copy To submenu on the context menu, do either of the following:
Select a folder under Recent Folders or Favorites.
Select Choose Folder, locate a folder in the Open dialog, then click Open.
![]() To copy files via the Clipboard, select one or more thumbnails, press Cmd-C/Ctrl-C (copy), click the desired folder, then press Cmd-V/Ctrl-V (paste).
To copy files via the Clipboard, select one or more thumbnails, press Cmd-C/Ctrl-C (copy), click the desired folder, then press Cmd-V/Ctrl-V (paste).
To delete a file or folder
1. Click an image or folder thumbnail or Cmd-click/Ctrl-click or Shift-click multiple thumbnails.
2. Press Cmd-Delete/Ctrl-Backspace. If an alert dialog appears, click OK.
![]() To retrieve a deleted file or folder, choose Edit > Undo immediately. Or drag it from the trash for your operating system into the Content panel.
To retrieve a deleted file or folder, choose Edit > Undo immediately. Or drag it from the trash for your operating system into the Content panel.
To rename a file or folder
1. Click a thumbnail, then click the file or folder name; the name becomes highlighted.
2. Type a new name (keep the extension), then either press Return/Enter or click outside the name field.