
With the database console application active, you can open it in your web browser and use it to manipulate the MySQL service. We'll use the console application to create a database table and populate it. The table will implement a very simple to-do list.
Our database table will be called "Tasks" and will have three columns:
ID: It is an automatically incrementing number that uniquely identifies the rowName: It is a string value containing the name of a task to be doneCompleted: It is a Boolean value containing the completion status of the task.
Now, perform the following steps:
- Point your web browser to the home page for the database console. If you didn't note the address when you created it, go to the application control panel and click on Visit Live Site.
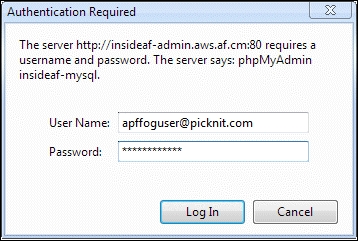
- An authentication dialog appears. The user name is the same e-mail address you use to access your AppFog account. The password is the value you previously set in the PMA_PASSWORD environment variable. Enter these and click on Log In. Refer the following screenshot:
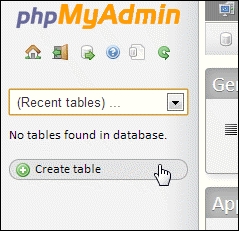
- The database console screen appears. Click on the Create table button on the left.
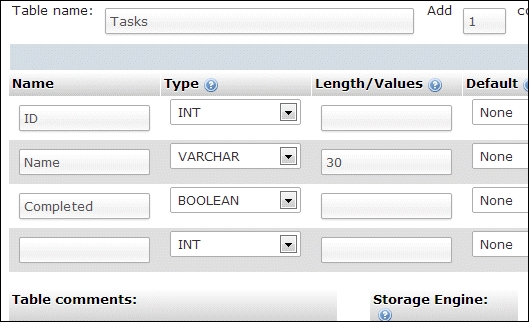
- A table structure page appears. This page contains many fields that you can safely ignore. Enter the following:
- At the top of the page under Table name enter Tasks
- In the first row of the structure table, enter the following details:
- Under Name enter
ID - Under Type select
INT - Under A_I (autoincrement) be sure the checkbox is checked
- In the second row of the structure table, enter the following details:
- Under Name enter
Name - Under Type select
VARCHAR - Under Length/Value enter
30 - In the third row of the Structure table:
- Under Name enter
Completed - Under Type select
Boolean
- Click on the Save button in the lower right. The main application window reappears.
- The name of the new table now appears on the left. Click on it.
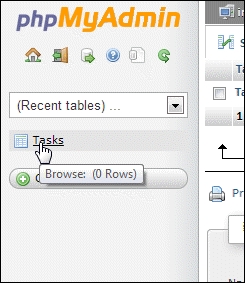
- A display for the new table appears. Notice that the type listed for the
Completedcolumn istinyint(1). In MySQL this type is used for Boolean values. Click on the Insert button at the top of the display as shown in the following screenshot: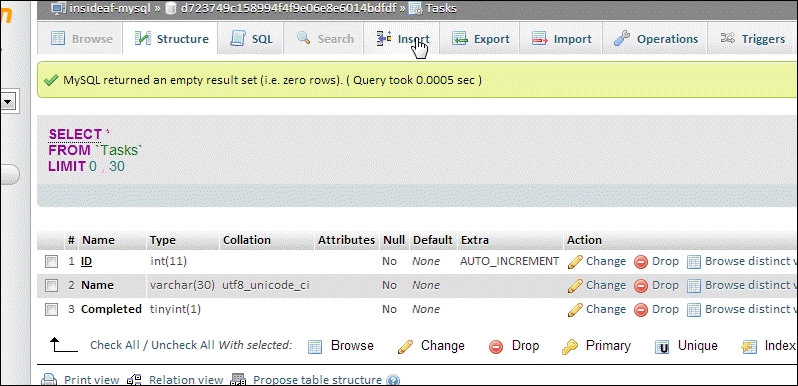
- A form for entering database values appears. Under the Value column:
- Leave the
IDvalue blank - For
NameenterCreate database table - For
Completedenter1
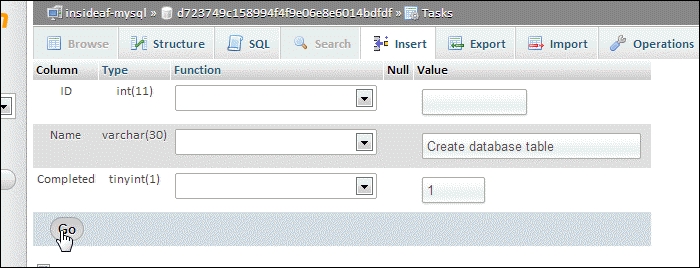
- Leave the
- Click on the Go button.
You now have a database table populated with a single row of data.
..................Content has been hidden....................
You can't read the all page of ebook, please click here login for view all page.