Chapter 3: Creating and Managing Virtual Machines
Creating a physical architecture to support your SharePoint 2019 farm starts with virtualization and setting up the servers needed to install all the software applications. In this chapter, we will see how to set up our Hyper-V environment using best practices and how to create redundancy using separate hosts. We will define server resources based on our requirements, finalize our configurations, and give guidance on how to maintain our hosts.
We will also discuss, as part of this chapter, understanding the importance of using Microsoft documentation as part of your installation and setup. Following best practices and Microsoft guidance is always the first thing you should do. Although it may not cover all the requirements, you will be able to find out what has fallen through the cracks. This will give you a baseline configuration to help you avoid any mistakes for the future of your environment, such as features, maintenance, and updates needed to support the environment.
We will also take a look at general changes in the Windows server over these past couple of operating system versions to make sure you are caught up and understand where Server 2019 is currently. Changes within the operating system can help you to use new features to support the environment to help bring you better use of your server features.
The following topics will be covered in this chapter:
- Creating hosts and VMs
- Defining needed server roles
- Installing Windows Server 2019 – host configuration
- Configuring Hyper-V Manager on Windows Server 2019
- Creating VMs
Technical requirements
For you to understand this chapter and the knowledge shared, the following requirements must be met:
- General understanding of Windows Server and Active Directory (AD)
- Experience with Hyper-V installation and configuration
- Experience with host installation and configuration
- Experience with Virtual Machine (VM) creation and configuration
You can find the code files present in this chapter on GitHub at https://github.com/PacktPublishing/Implementing-Microsoft-SharePoint-2019.
Creating hosts and VMs
When we start out trying to find the right hardware to support our SharePoint environment, we must have a SharePoint architecture as described in the first chapters of this book. If you have fully read Chapter 2, Planning and Architecture, you will recall that we looked at many scenarios to form an architecture for our SharePoint environment. We looked at our old environments, new features, changing features, and other aspects where there is a need for a change in strategies, such as Remote Blob Storage, so that we plan our new environment according to the needs of our users, administrators, management, and stakeholders, which is based on the current state and new requirements.
Host and VM configurations are the backbone of your server architecture and are the first step in starting to build a platform to support our farm. SharePoint runs well on hardware built to support it, as in any application, but the difference with SharePoint is that it covers many tiers and we need to think about those tiers as we look at starting our project implementation.
Some of your research should have already been completed as you should have already created a design document, but this doesn't mean we can't change a few things along the way as long as you document. We need to make sure to play our part in making changes and discussing these changes with other people on our team. Some of the areas that we may need to stop and think about in this portion of our implementation are the following:
- Server feature comparisons (which server is better for my needs: 2016 or 2019?)
- SQL Server version (which server is better for my needs: 2016, 2017, or 2019?)
- SharePoint Server version (which server is better for my needs: 2016, 2019, and/or Microsoft 365?)
- Third-party products, network products, and other data and backup integrations
Do not move forward until you have really finalized your choice of these supporting servers and you understand the differences. You don't want to go down the road of selecting a platform that doesn't support your future plans. You may see that a feature you need is not available in your version of operating system, AD, Exchange, SharePoint, or SQL. You may need a feature to support either an old application or new technology you were hoping to break ground with. Some of the differences in technology also come with added server resources, so make sure you are aware of those areas. Document all shortcomings, especially if you want to move forward with a product but you already know there is a hiccup in the support for the farm; just document this in the design document or in a separate document so that these items are noted.
The reason why I make this point is that there have been so many changes from SharePoint 2007 to SharePoint 2019 and the server platforms that support it, so it is possible that you may overlook some areas. Make sure you go back and look at the changes that have been made and ensure you are making the right decisions. Even some third-party products have areas that you wouldn't think of asking about, such as the product I have used for migration, AvePoint's FLY tool, which does not support SharePoint 2007. You want to make sure not to assume anything.
So, say you were building all this architecture to migrate from 2007 to 2019 and you thought you had the product to do it. Then, you get to the point where you need to use it and find out that it doesn't support your old environment. This would be a big loss of time because now you're back to square one trying to find a solution. One solution that still costs a lot of time would be migrating to 2010 first and then migrating to 2019 from that environment using the tool. This would take time because in SharePoint 2007, the main support was for classic authentication. When moving to 2019, you have to move to claims, so you would need to migrate to 2010 and update all the users from classic to claims and test. This could cause a major setback in the time spent.
So, my take on this is before you start, have a final discussion on these topics with your team and finalize anything you may need to move forward. Look at all aspects of the operating system, software, and third-party integrations before you move forward. This could be getting approvals on builds, approvals on funding, and other areas. You don't want to hold the project up because you didn't do enough research, so I am adding this point to give you a heads up to always do a second round of quick checking and research. This may take a week or two but it will be worth the effort in the long run to minimize time loss.
Server feature comparisons
There have been many changes to the Windows Server (Hyper-V) and SharePoint feature sets in the last two versions of these products. Since most of you reading this book will more than likely be migrating from SharePoint Server 2013, I think as part of this book we need to review the changes in Windows Server 2016 Server and those changes made within Windows Server 2019 to get a clear scope of the overall changes we need to be aware of.
It's important to understand what has been deprecated, what is no longer available, and those new features that have been added that may have even changed from the 2016 operating system version to 2019. Without this comparison, you may lose the functionality that you need to maintain your servers effectively as you would want. This gives you the opportunity to shop and look at other technologies as well. I am using Hyper-V as the example for this book because that is what 90% of my customers use for virtualization, and I use Hyper-V in my environment when setting up virtual servers as well.
Let's start our comparison by looking at Windows Server 2016 and looking at things that were changed from Windows Server 2012. This will give you a good baseline to work with to figure out which platform you want to use for your farm.
Windows Server 2016
If you have not had your ears open to all the changes that have been happening for the different Windows Server releases, here are some updates that you need to be aware of.
There are two support tracks for Windows Server: the Semi-Annual Channel (SAC) and the Long-Term Servicing Channel (LTSC). The difference between the two channels is the following:
- SAC: Microsoft will release two releases a year for Server Core.
- LTSC: Microsoft will release feature updates every 2 to 3 years.
Here is a list of new Hyper-V features on Windows Server 2016:
- Compatible with Connected Standby
- Discrete device assignment
- Operating systems disk encryption support
- Host resource protection
- Network adapters and memory
- Hyper-V Manager improvements
- Integration Services
- Linux secure boot
- Support for resources
- Nested virtualization
- Networking features
- Production checkpoints
- Rolling Hyper-V cluster
- Shared virtual hard disks
- VM backup
- Shielded VMs
- Start order
- Storage Quality of Service (QoS)
- Configuration file format
- Configuration version
- Virtualization security
- Windows containers
- Windows PowerShell Direct
Windows Server 2019
Here is a list of new Hyper-V features on Windows Server 2019:
- Desktop Experience
- System Insights
- Server Core
- Windows Defender Advanced
- SDN
- Shielded VMs
- HTTP/2
- Storage Migration Service
- Storage Spaces Direct
- Storage Replica
- Failover clustering
- Linux containers
- Kubernetes
- Container improvements
- Network performance
- Windows Time service
- High-performance SDN gateway
- Delay Background Transport
- Memory support
As you can see, there are no real differences here but more additions in Windows Server 2019. I am only adding this information to let you know what changes were implemented in Server 2016 because you need to know these features as they are part of 2019 as well. In most cases, as I have stated in this book, you are moving from an older version of SharePoint, so you really need to understand what has transpired from version to version in your operating system as well as SQL and SharePoint. This will give you an overall understanding of what your systems have the ability to support.
When looking at features and areas to support our environment, we also need to define the roles needed within the farm to support the services. In the next section, we will talk about server roles and the importance of these roles in the environment.
Defining needed server roles
Creating hosts should be the first step in starting the process to build our VMs for the platform. This means we have already completed our assessment and have met with all teams working on our new architecture as well as finalized that architecture so that we can implement it at this point. Making sure you have your architecture is one thing, but we also need to look at environments.
Did we build environments to support DEV, QA, TEST, and production? If not, we need to do so now and we need to make sure we have addressed our support farms. These environments can weigh heavily on how our development and test process is defined for our environment. These other farms can also change the way our environments are secured and managed. These should all be separate environments with their own hardware, admin accounts, service accounts, and in some cases, AD, depending on your defined requirements.
Separation in these areas should be consistent with maintaining the validity of your migrations of code and content through testing those components before bringing them to the production environment. DEV environments are typically small, one-server environments that are managed one to one or developer to developer. You will need more VMs depending on how big the development team you're supporting is. If your team is medium to large for developers, you will want to spread out the resources using Team Foundation Server as the bridge to support the code developed in these cases.
Within our architecture, we must include a design to support redundancy, backup, and restore, build enough resources for performance concerns, as well as build a stable server architecture. The last thing we want in our host configurations is the possibility of error and downtime associated with misconfiguration or calculations of resources. The best thing to do is to take your time and figure out what resources will be needed to support your environment, especially looking at hardware types (Dell, HP, NetApp, EMC), rack space planning, networking equipment, and cabling. We also want to give some measurements to our installation by looking at server resources such as CPU, memory, disk space, types of disks, and disk speed.
When choosing server resources, make sure to look at and evaluate the speed of the hardware resources you choose. These choices make a big difference in how the server responds to processing and deals with memory, as well as the requirements for disk speed. The disk choice could be dependent on what those disks are supporting within your server resource. We could use an SAS drive for our operating system and partitions where you need the fastest response. There are also RAID configurations we could use for redundancy, such as mirroring and/or RAID 10, to make sure our data is always protected. Disk arrays have changed over the years and could be another investment you could bring to the table. These new technologies bring better ways to manage disk space along with the ability for enormous growth using connected hardware.
Logging may not be something we will need the fastest disk for, so we could take a hit on those resources and choose lower-speed disks. We could also use lower-speed disks to support backup file locations and record center locations where there is not much activity or user interaction. This takes planning, coordination, and documentation of those areas to support the configurations you are setting in this case. I can't stress enough in this book about documentation. If you're not already doing it, please start doing it on this project. It will save you a lot of headache and pain down the road.
In another vein, you may not need as much memory for a VM server in certain environments or use cases. I can tell you that I've been in a bad situation before when I used less than the recommended processor and memory for an Exchange and Skype implementation that I carried out in a test environment. It caused a lot of errors within my Outlook and Skype clients due to the server not having enough memory to process presence within the application. So, this can be very important depending on the application. If you have the resources to do so, do as Microsoft recommends because it can save you a headache.
So, let's take my environment as an example and look at all the servers I will be building:
- AD server
- Web frontend servers
- App servers
- Two SQL servers
- Exchange server
You could call this an evaluation, proof of concept, or DEV environment, so not many people will be using this environment. The support for users is very minimal, which means I do not need a lot of resources to really support a lot of overhead. My server footprints will be small and resources will also be minimal. So, when looking at our example, we will create servers that do not need many resources, but we want enough resources to support our environment from a best practice perspective. Please take into consideration that we are not building production in our examples.
When making decisions on hardware, always consult the manufacturer to make sure you are making the right decision. You will need to explain what your project is about and what you want to get out of the hardware you purchase. Tell them about any software you are going to use, in this case, SharePoint and SQL Server, and how many users you will be supporting.
If you believe your CPU will be your biggest worry, then do some research before your conversation; ask the manufacturer about any details you found, test the scenarios, and look at reports from old environments as well to make the best decisions going forward. Make sure you buy/create a server that can provide a better response to your environment needs and not take on the same issues you had in the past from a hardware standpoint.
In my environment, I am using a Dell R710 server and installing Windows Server 2019 to build my host servers. I am doing this to show the new advanced features that Windows Server 2019 offers. In that configuration, my hosts have five Network Interface Cards (NIC), two eight core CPUs, 144 GB of disk space for my C drive, 2 TB of space for my VM locations, and 80 GB of RAM.
My environment has four host servers available and we will use two of the servers as SQL servers to support the database tier. SQL Server is the backbone of our SharePoint environment and we should not skimp on making this tier as strong as possible. For my other two hosts, I will use them as my SharePoint and/or web application tier. On this tier, any third-party applications can always be added as supported applications if needed.
We also need to make sure that as we build our servers, we also relate them to what application services we will be running on our SharePoint servers, especially using MinRoles. We will look into this more in Chapter 4, Installation Concepts, which will point out services we need to be careful with. Distributed Cache is one service where we need to be very careful with how it's configured, either as a MinRole as an individual server or accompanied by other services, and assign what resources it needs to run efficiently. MinRoles play a big part in what application services strictly run on a SharePoint server, so defining server resources goes hand in hand with our MinRole choices for our SharePoint servers.
In this environment, I will be using Hyper-V (because I am a Microsoft guy) to support the virtualization within the server builds. The host server will need to have dedicated server resources as well to make sure that the server can not only support the platform but also support itself as it needs resources to keep the server running and process any details used by the Hyper-V host. So, in our configuration, we need to make sure that out of the 80 GB of RAM and eight cores available, we set aside some good resources for our hosts. The host will not be working very hard in my environment because of the light user community.
So, let's get started with configuring our first host that will support AD!
Installing Windows Server 2019 – host configuration
To start our installation, please create a bootable DVD or USB to install Windows Server 2019. After doing so, reboot your system and choose the method with which you would like to start your installation. There are two ways to install Windows Server 2019: one is using Desktop Experience or a GUI interface, and the other is Core, which is all command-line driven. We will use the GUI interface because this is the default interface supported by SharePoint 2019.
The checklist of items we need to create our hosts is the following, and these items should be documented as a best practice for the support of the environment:
- IP addresses for the servers
- Server naming conventions
- Admin and service accounts
- A network supporting the servers
- ISO for installation of Windows Server 2019
- Licenses for all product installations
- Any company policy-related configuration details
- Any security policy-related configuration details
- Access to any custom server builds related to your company's policy
Again, to start the Windows installation, use a shared mounted DVD or mounted shared USB or folder. Once you have inserted the media, you will see the Windows setup screen, and then you can take the following steps to start the installation of Windows 2019 Server:
- Click Next to continue the installation:

Figure 3.1 – Windows setup screen
- Click Install now to continue the installation:
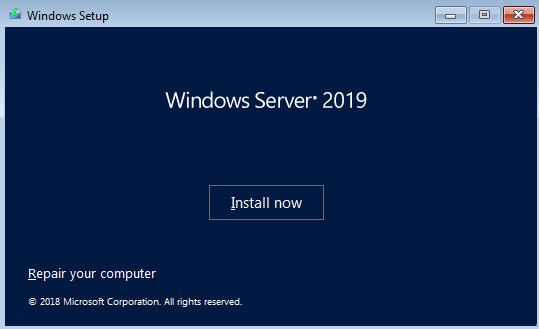
Figure 3.2 – Installation splash screen
- Click Next to continue the installation, choosing the desired operating system you would like to install:
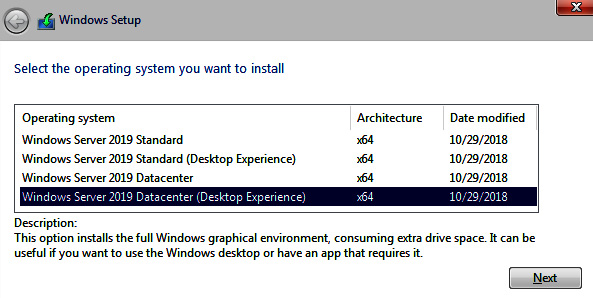
Figure 3.3 – Operating system choices
Note
Standard (Desktop Experience) supports small, virtualized environments and Datacenter (Desktop Experience) supports highly virtualized and cloud-based environments. The choices without Desktop Experience are core, which is supported using the command line only.
- Click the checkbox and then click Next to continue:

Figure 3.4 – Accepting the license terms
- Click Next to continue the installation (you may have many drives here and some may need formatting – use the tools as needed):
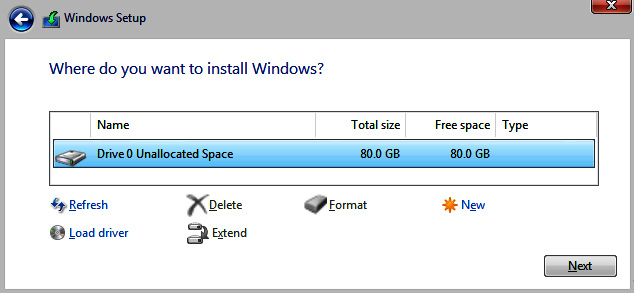
Figure 3.5 – Selecting a drive for installation
- Wait for the installation process to complete:
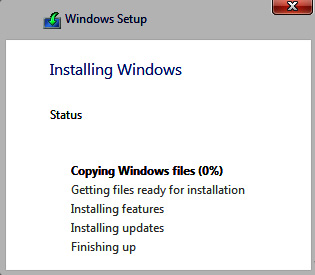
Figure 3.6 – Progress of installation during setup
- After your server reboots, you will be prompted to supply a password for the administrator credentials:
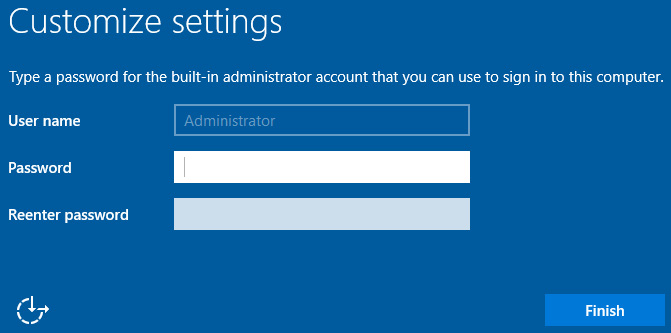
Figure 3.7 – Supply your credentials here
- Wait for the installation process to complete and you will see your desktop.
We have completed our installation of Windows Server. We will now configure our network and server names for the servers that will support our farm.
Configuring the network and server names
Make sure to update the IP address, server name, and domain before you start the installation! Let's look at the steps to start configuration:
- On the desktop, press Ctrl + Alt + Delete to log in to the server with your admin account.
- Click the start button to pull up a list of available options. Choose the file manager.
- Right-click on This PC on the Windows menu and choose Properties:
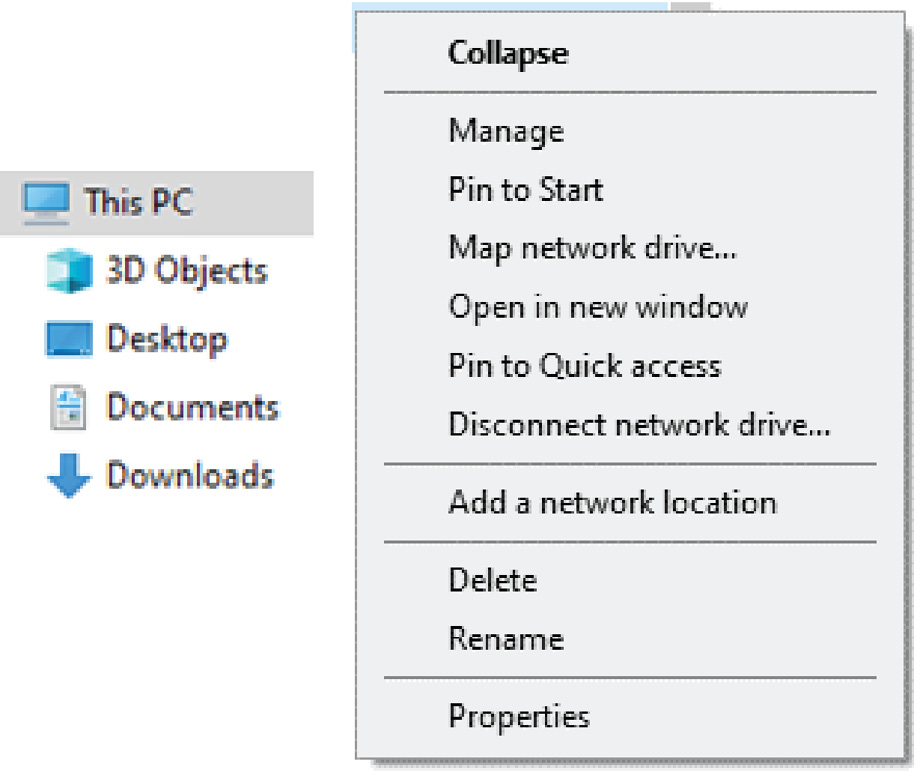
Figure 3.8 – Right-clicking on This PC
Change the server name to the desired name and change the settings.
This window will pop up to show the system properties:
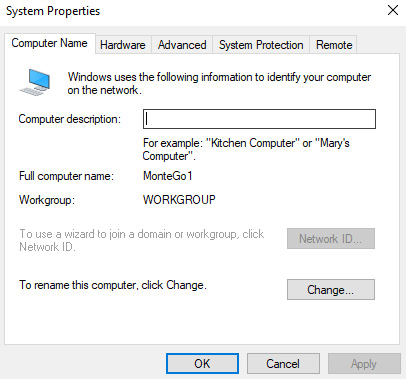
Figure 3.9 – System Properties
- Click the Change… box to change the server name:

Figure 3.10 – Changing your server name
- Click OK. Then, reboot the server and your server name will be updated.
Configuring network and internet access
We will start the configuration of network resources on our server at this point in our installation. This will include network configuration, which you will need to finish this configuration. Please have the IP addresses of your gateway, servers, and subnet mask and follow these steps:
- Once the server is installed, go to Control Panel and choose the Network and Internet feature. Next, select Network and Sharing Center:

Figure 3.11 – Network and Internet in Control Panel
- Click on Change adapter settings:

Figure 3.12 – Network connection view
- Right-click the Ethernet connection you would like to configure and choose Properties:

Figure 3.13 – Navigating to the properties of your Ethernet connection
- Choose Internet Protocol Version 4 and click Properties:

Figure 3.14 – Selecting properties
- Select Use the following IP address. Insert your static IP address for this server, the subnet mask, and the default gateway. Also, enter your preferred DNS server and alternate DNS server addresses. Then, click OK:

Figure 3.15 – Inserting the required details on this screen
Networking is set up for the server now and you will now be able to see the server on the network and browse the internet if the server is connected to the internet. Again, you can also add configurations for NIC teaming, which is more advanced and can easily be found on Microsoft's website.
Adding the server to the domain
Once you have set up networking on the server and you are able to access other resources from the server, we need to add the server to the domain. The domain is essential in centralizing the server farm to use the same authentication method for the farm. This is also given as SharePoint using AD for authentication.
Remember that in SharePoint 2016, AD is the only method of authentication supported. As in older versions, Forms Based Authentication (FBA) and other methods are supported out of the box. You will need to use Microsoft Identity Manager to configure those methods for use within SharePoint Server 2016.
To start adding the server to the domain, follow these steps:
- Go to Control Panel by typing control panel in the run or search area of the desktop. You can also find Control Panel by clicking start as well.
- Add the domain name you will use in your environment (this should be the name of the AD domain created for your farm) and the correct server name in the Computer name area of the form:

Figure 3.16 – Updating the domain
- Type in the domain admin account and password and click OK (if you do not get this screen and get an error, please check your DNS, and even rebooting may help at this point):

Figure 3.17 – Entering the username and password
- Click OK on the welcome message screen:
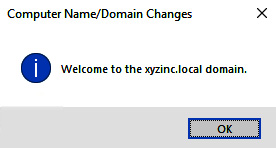
Figure 3.18 – Welcome screen
- Reboot your server!
We have now added our new server(s) to the domain. Repeat these steps as needed within the configuration of your servers. Now that we have our host established, installing Hyper-V is next on our list to be completed.
Configuring Hyper-V Manager on Windows Server 2019
There are two ways to install Hyper-V on Windows 2019 Server. One is through PowerShell and the other is through the GUI using a visual approach. In my view, it doesn't matter what you use. Although PowerShell is a very powerful set of tools to know and understand, you can get the same results through the GUI in most cases. I know that some admins choose to run everything in PowerShell and don't want to use the GUI, though.
To me, either of the two can get the job done in certain aspects of administration. PowerShell is more powerful and scripts make life easier, so you have to weigh up the benefits of the two. The GUI should be used by beginners so that they understand the platform before venturing down the PowerShell road. I use a mix of both the GUI and PowerShell in this book so that I can cater to both beginner and intermediate admins and others who just want to understand the platform.
To get a basic understanding of Hyper-V networking, there are some areas you may want to research to get more insight into the application. I have provided a list of research terms for you to look up to dig deeper. As we can't cover all of these topics in this book, knowing these terms can at least point you in the right direction:
- Hyper-V virtual switch
- Hyper-V working with DNS
- The OSI model for Hyper-V virtualization
- VLANs and Hyper-V configuration
- Hyper-V teaming
- Hyper-V and load balancing
- Hyper-V storage
If you would like to use PowerShell to install Hyper-V, make sure before running PowerShell that you start the process to get Hyper-V installed and that you are running it with elevated privileges in the GUI-mode installation. You must run as an administrator to run these commands successfully:
- The PowerShell command is as follows:
Install-WindowsFeature -Name Hyper-V -IncludeManagementTools -Restart
- Install Hyper-V with DISM (Deployment Image Servicing and Management) as follows:
dism /Online /Enable-Feature /FeatureName:Microsoft-Hyper-V /All
If you want to see the installation visually, then take the following steps:
- Open Server Manager from the desktop of your server by searching for server manager or click the icon for Server Manager in your start window. Select the following option and click Next:

Figure 3.19 – Selecting Installation Type
- Choose the server and click Next:
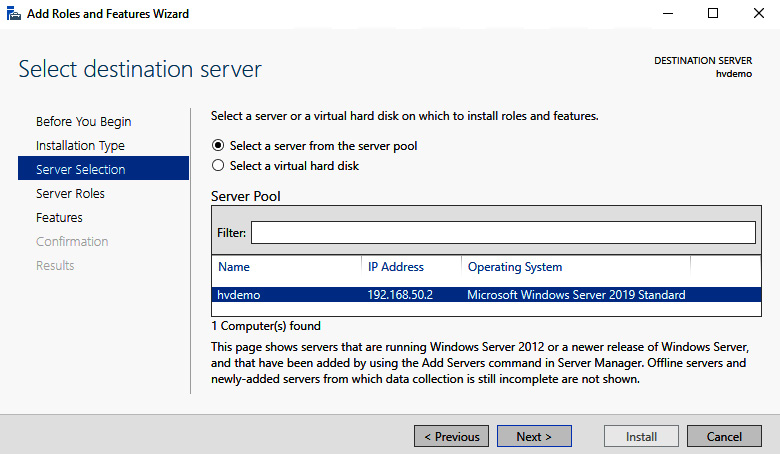
Figure 3.20 – Selecting the destination server
- Select Hyper-V and click Next:
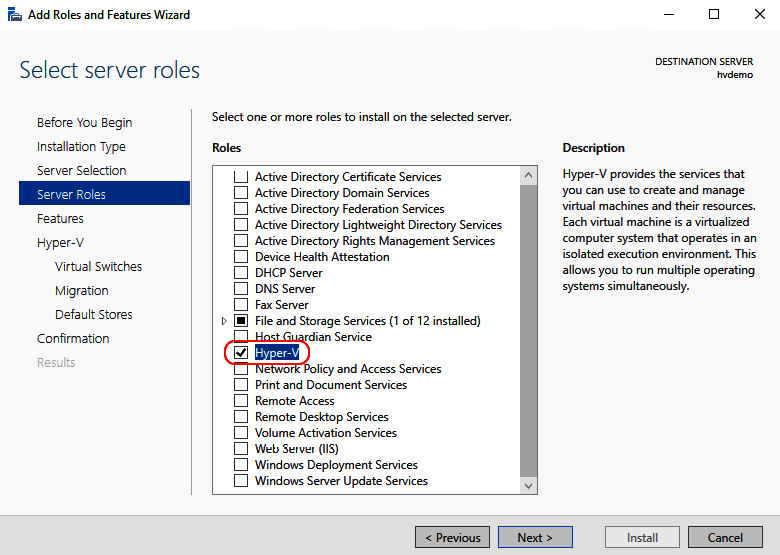
Figure 3.21 – Selecting the server roles
- Click the Add Features button, like so:

Figure 3.22 – Adding features
- Make sure to check all the Hyper-V roles, as shown in the following screenshot:

Figure 3.23 – Hyper-V roles selected
- Click Next once you have read the page that explains Hyper-V workloads on VMs:
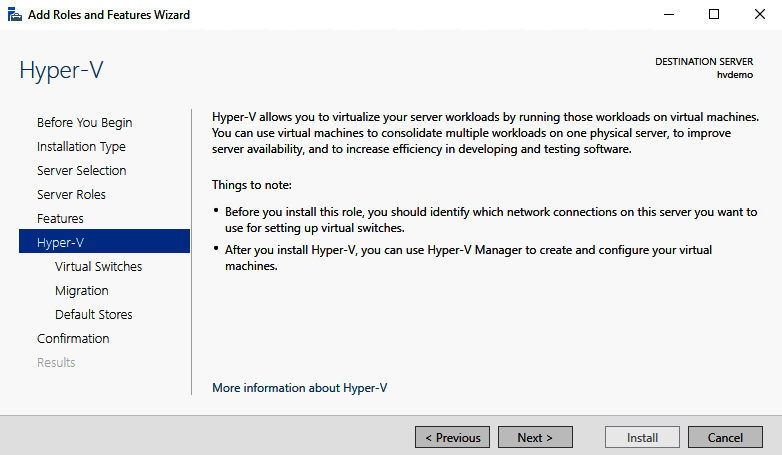
Figure 3.24 – Explanation page
- Select the Ethernet network adapter and click Next:
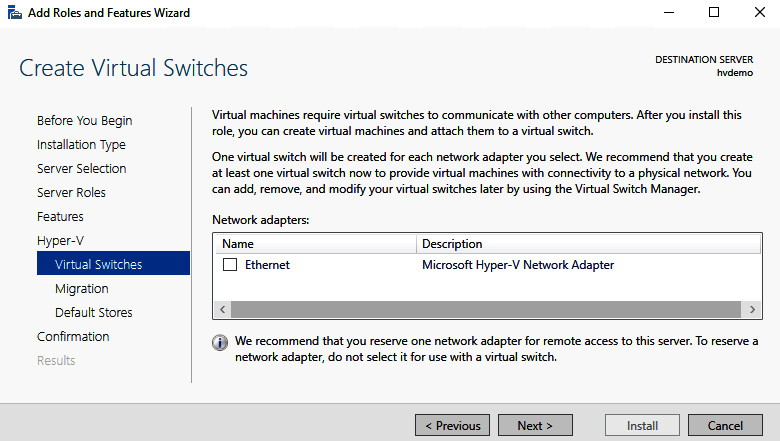
Figure 3.25 – Creating virtual switches
- In the Migration selection, make the selection depending on whether you will be using the live migrations features available within Hyper-V:

Figure 3.26 – Selecting security
- Select the default locations for hard disks and configuration files. Choose a location that can grow, not your operating system disk. Once you have added a location for each option, click Next:
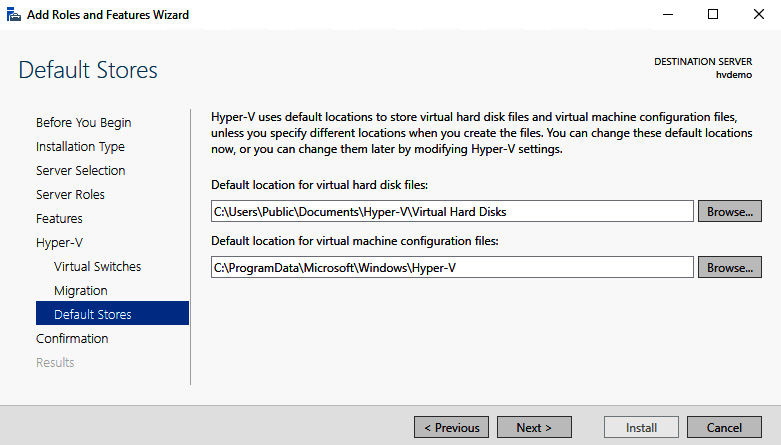
Figure 3.27 – Selecting the default locations
- Click Install:
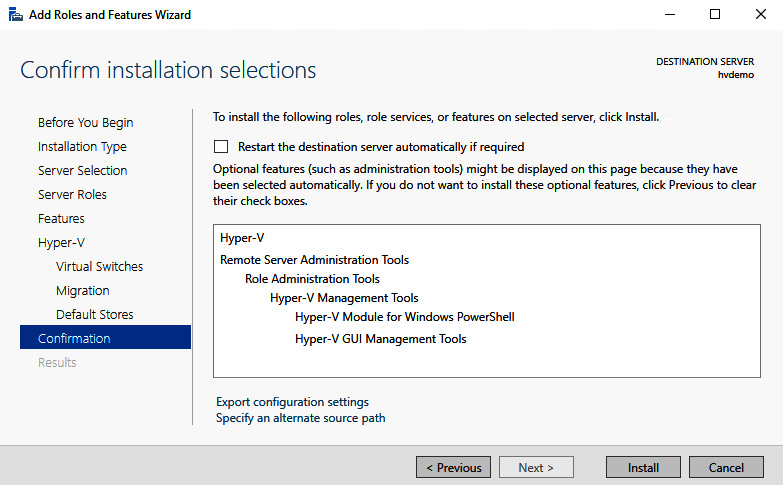
Figure 3.28 – Installation confirmation
When the process completes, reboot your server!
Hyper-V advanced post-installation options
Hyper-V used within Windows Server 2019 is a great product and Microsoft continues to build on the server technology by requiring very little post-installation configuration, which was needed in prior versions of the server technology. I will list some of the things you want to check before getting started with using Hyper-V, but from my standpoint, this installation was pretty rock solid.
As for networking, these areas should be addressed as a post-check of the Hyper-V installation depending on the configuration needed within your environment.
The host networking configuration requires the following:
- Create adapter teams.
- Create a virtual switch or create a switch-embedded team.
Note
These concepts only work in Windows Server 2016 and 2019 and are not supported in earlier versions of the Windows operating system.
As for the overall host configuration, please review this list of checks to make sure you have the locations and settings in place. If you are using live migration, please refer to those items that should be evaluated before starting to use Hyper-V:
- Configure the default virtual configuration storage location.
- Configure the default virtual disk storage location.
- Configure the live migration security settings.
- Configure the live migration performance settings.
There are also commands and other areas of Hyper-V that can be set through the command line and cannot be seen in the GUI. Please look through the list of cmdlets available to you and do some research. You may find that you need to use some of the available cmdlets to configure the Hyper-V configuration further. To list the commands available for Hyper-V, use the following command:
Get-Command -Module Hyper-V
PowerShell is powerful! Make sure you learn to use it as you go through this book to open your mind to more ways to administer the SharePoint farm and servers in the farm. Most administrators use PowerShell to manage everything.
Now that we have our server host configured, we can create VMs to support the resources needed within the environment.
Creating VMs
Since we now have hosts to create VMs, we can start the process of creating VMs to support our farm.
The checklist of items we need to create our VMs is the following:
- IP addresses for the servers
- Server naming convention
- A network supporting the servers
- Hosts configured for resources
- ISO for installation
- A list of the admin and service accounts with passwords created in AD
The VMs that we will be creating are listed here:
- AD (if you do not already have it)
- SharePoint servers based on MinRoles
- SQL Server
- Office Online Server
- Workflow Manager
- All the installation prerequisites
- Any PowerShell scripts
Creating our first VM
When creating our first VM, we want to locate the Hyper-V VM manager on our server. Let's take a look at how we can do that:
- Once opened, right-click the server name and select New | Virtual Machine…:
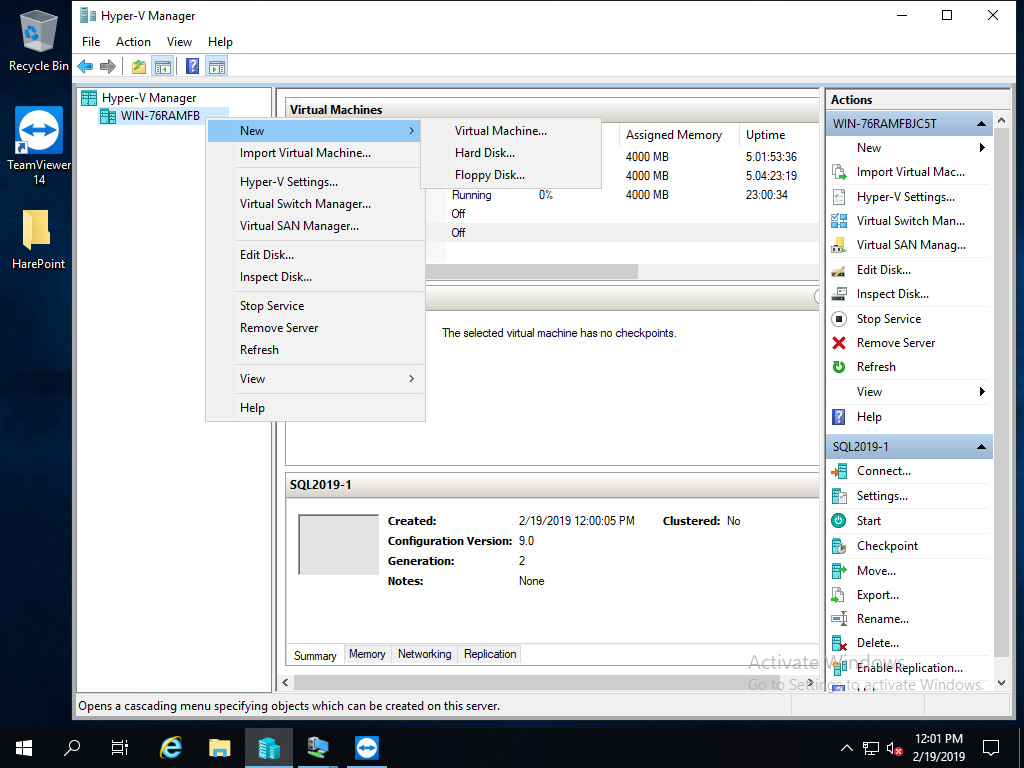
Figure 3.29 – Hyper-V Manager
- In Specify Name and Location, type in the name of your server and browse to select where your VMs will be located on your server. Click Next after reading the information about the creation wizard:
Note
This should be storage you have set aside on separate drive space; please avoid using the C drive!
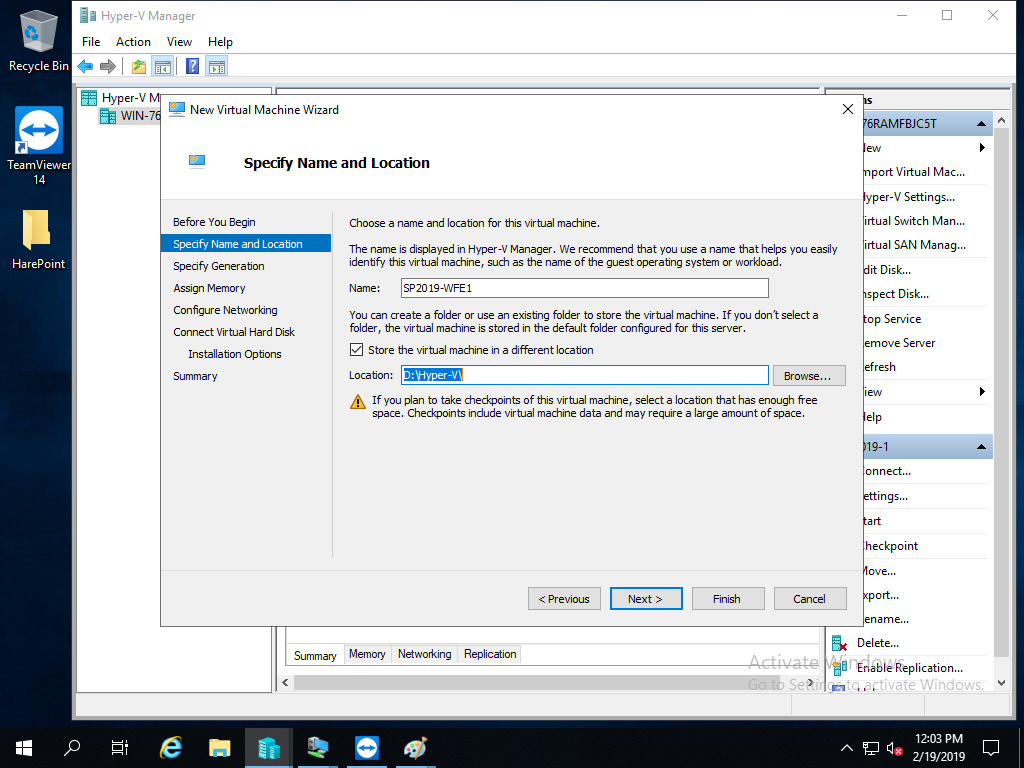
Figure 3.30 – Specify Name and Location
- Select the generation of server you would like to use as part of your farm. For the latest and greatest features, please select Generation 2:

Figure 3.31 – Specifying the generation
- Select the amount of memory you would like this server to use for support of the farm:
Note
Please do not use Dynamic Memory! This is not a supported feature for the support of SharePoint environments. You will not be supported by Microsoft if you were to call in for support.
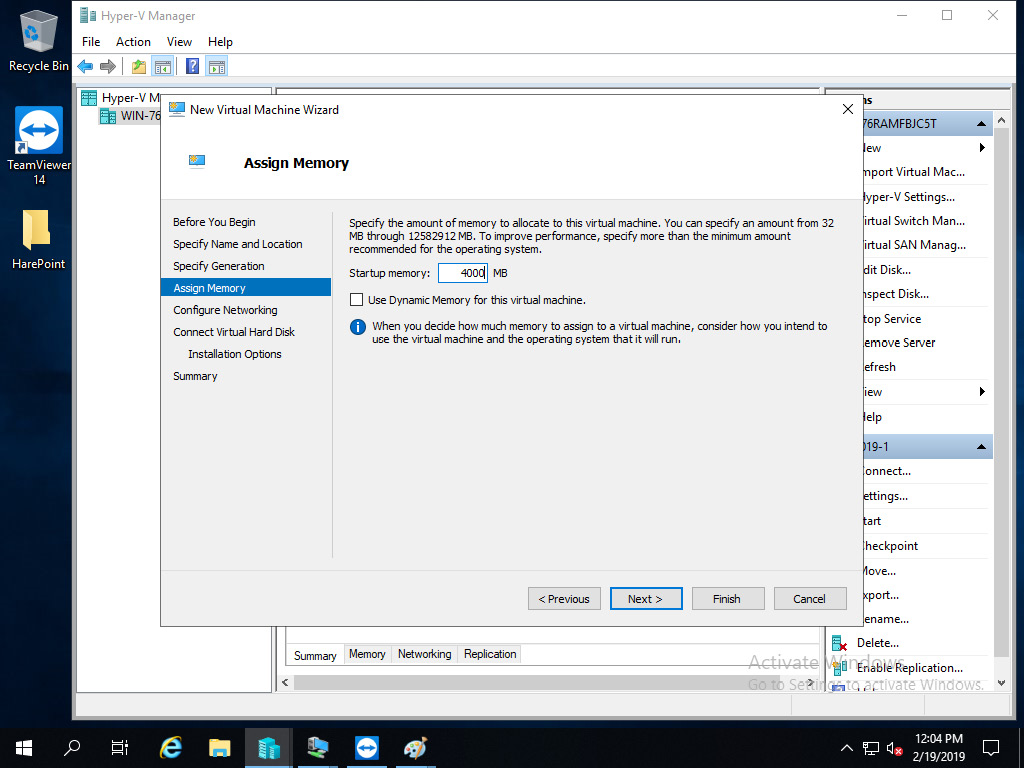
Figure 3.32 – Assign Memory
- Select the network adapter you would like to use for networking configuration:
Tip
You can always change this later by using NIC Teaming or both a switch with NIC teaming. This is just a demonstration of the basic functionality to get you started.

Figure 3.33 – Configure Networking
- The name of the server file for the VM is shown, as well as the location of the VM and the amount of disk space you would like this server to have for its first drive:
Tip
Refer back to your drive configurations in your design document to make sure you build your server correctly.

Figure 3.34 – Connect Virtual Hard Disk
- If you have an ISO image or a DVD of the installation for Windows, please connect it here using the Browse… button. If you are just creating the servers, then you can install the operating system later as well:
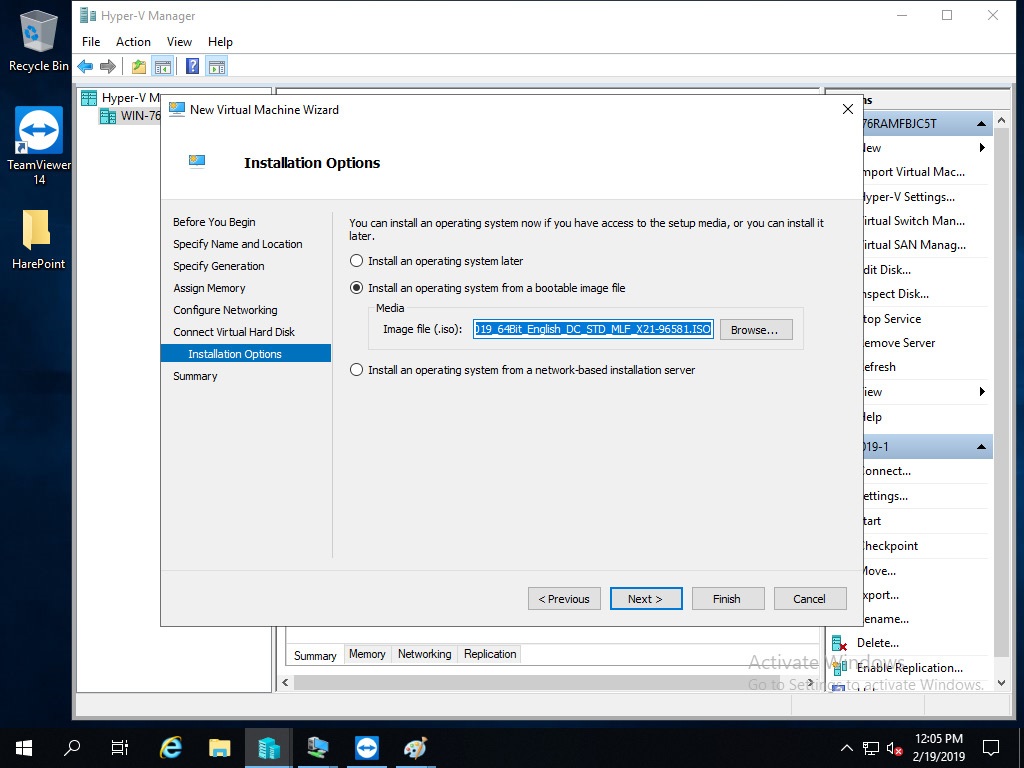
Figure 3.35 – Installation options
- Complete your server configuration by clicking Finish:

Figure 3.36 – Completing the New Virtual Machine Wizard
Note
This allows the VM to connect to resources on the host computer very easily and even allows drag-and-drop files. This is with Generation 2 VM servers and Windows Server 2016 or 2019 only!
- Once completed, go back and click on Integration Services and select Guest services:

Figure 3.37 – Selecting Guest services
- Start the installation by choosing your language and keyboard method. Click Next:

Figure 3.38 – Choosing a language
- Click Install now:
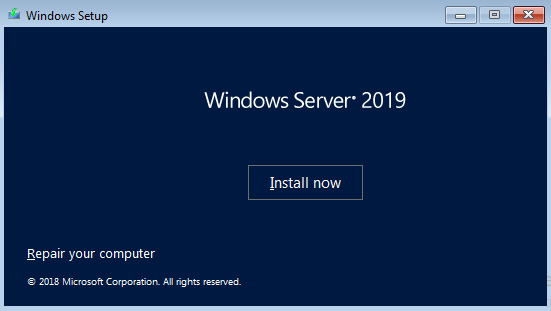
Figure 3.39 – Installation screen
- Choose the Windows operating system version and experience you would like to use for the server:
Tip
Remember that for all SharePoint servers, you will need to use the Desktop Experience installation. SharePoint does not support the core installation.

Figure 3.40 – Selecting the operating system to install
- Click the checkbox to accept the license terms and click Next:
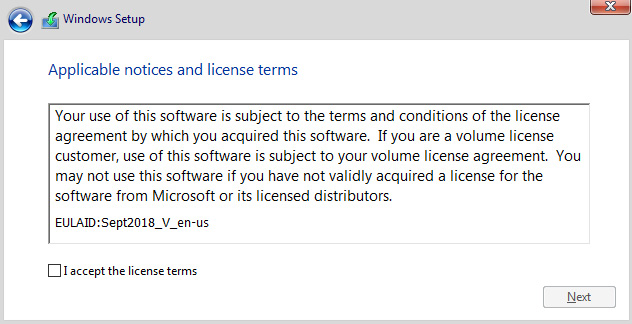
Figure 3.41 – Accepting the terms
- Choose the drive you would like to install Windows Server on and click Next:
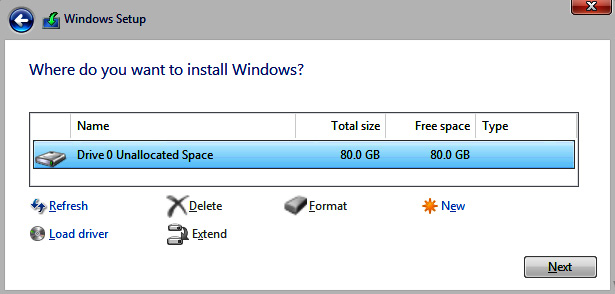
Figure 3.42 – Selecting the install location
You will see the Windows Server in-progress screen:

Figure 3.43 – Installation in progress
Windows is processing the installation:

Figure 3.44 – Progress screen
Finished! You have set up the first VM server on your Hyper-V platform.
Repeat these tasks to set up all your server VMs for the farm, including adding the server to the domain and any other areas covered in this chapter. The servers you plan to install in support of the environment should all use the same configurations on the VMs. Make sure you add one set of servers to one host and the other set to another host for support of redundancy.
Summary
In this chapter, we covered a lot to create the basics of the SharePoint platform. We learned about creating VMs and configuring the host to support the SharePoint resources supporting the platform. We also covered the differences between operating systems and how they have changed over the years in terms of features and support of the environment. Make sure that you understand these details because they will tailor the way that your environment is configured and managed going forward.
Do not under resource your host or VM servers. Make sure you have plenty of disk space and memory to support the environment. Also, remember that dynamic memory is not supported on SharePoint servers. This has changed since the Distributed Cache service was introduced. If you call for Microsoft support, they will not support you with VMs configured in this manner. Don't make mistakes from the beginning. With the low cost of server components, this should not be a limitation any more.
If you really apply yourself in these details, there is much more to research, as you can see from the notes I have provided in this chapter. Please make sure to research the topics I have covered and get a clear understanding of Hyper-V and the technology using the GUI for configuration – and, of course, PowerShell. Do not skip this as a step in your learning as PowerShell is a key way to manage servers and I suspect that it will be the only way to manage servers and cloud resources in the future.
It takes time to learn but, at the same time, it is not rocket science. Do not be intimidated because the more time you spend on it, the better you will be at managing servers with no GUI or visual aspects. Always remember to test your scripts before you run them in a production environment. This is why I have stressed in this chapter and the book to create DEV and TEST environments so that users are not impacted by mistakes. This also applies to SharePoint as there are PowerShell cmdlets for that platform as well. Move toward it openly and embrace its power.
In the next chapter, we will start our installations and do some pre-installation tasks to finalize our server configurations.
Questions
You can find the answers on GitHub under Assessments at https://github.com/PacktPublishing/Implementing-Microsoft-SharePoint-2019/blob/master/Assessments.docx
- What is the difference between the choice of a Standard Desktop Experience and the DataCenter Desktop Experience?
- The data location for your VMs should be managed on the same drive as your operating system. True or False?
- When creating the host and VM servers, should you use DHCP or a static address to configure IP addresses for your servers?
- What are the main three environments we need to have to support our SharePoint development processes ultimately? Why?
- How do MinRoles relate to server resources?
- Can the Distributed Cache service be affected by the configuration of your VM?