

Encryption
Encryption protects against the potential exposure of sensitive user data that is stored on discarded, lost, or stolen storage devices. IBM Storwize V5020, IBM Storwize V5030F and IBM Storwize V5030 support optional encryption of data at-rest. IBM Storwize V5010 does not support encryption.
Specifically, this chapter provides information about the following topics:
13.1 Planning for encryption
Data at-rest encryption is a powerful tool that can help organizations protect confidentiality of sensitive information. However encryption, like any other tool, needs to be used correctly to fulfill its purpose.
There are multiple drivers for an organization to implement data at-rest encryption. These can be internal, such as protection of confidential company data, and ease of storage sanitization, or external, like compliance with legal requirements or contractual obligations.
Therefore, before configuring encryption on the storage, the organization should define its needs and, if it is decided that data at-rest encryption is a required measure, include it in the security policy. Without defining the purpose of the particular implementation of data at-rest encryption, it would be difficult or impossible to choose the best approach to implementing encryption and verifying if the implementation meets the set goals.
Below is a list of items which may be worth considering during the design of a solution including data at-rest encryption:
•Legal requirements
•Contractual obligations
•Organization's security policy
•Attack vectors
•Expected resources of an attacker
•Encryption key management
•Physical security
There are multiple regulations that mandate data at-rest encryption, from processing of Sensitive Personal Information to guidelines of the Payment Card Industry. If there are any regulatory or contractual obligations that govern the data which will be held on the storage system, they often provide a wide and detailed range of requirements and characteristics that need to be realized by that system. Apart from mandating data at-rest encryption, these documents may contain requirements concerning encryption key management.
Another document which should be consulted when planning data at-rest encryption is the organization’s security policy.
The final outcome of a data at-rest encryption planning session should be replies to three questions:
1. What are the goals that the organization wants to realize using data at-rest encryption?
2. How will data at-rest encryption be implemented?
3. How can it be demonstrated that the proposed solution realizes the set goals?
13.2 Defining encryption of data at-rest
Encryption is the process of encoding data so that only authorized parties can read it. Secret keys are used to encode the data according to well-known algorithms.
Encryption of data at-rest as implemented in IBM Spectrum Virtualize is defined by the following characteristics:
•Data at-rest means that the data is encrypted on the end device (drives).
•The algorithm that is used is the Advanced Encryption Standard (AES) US government standard from 2001.
•Encryption of data at-rest complies with the Federal Information Processing Standard 140 (FIPS-140) standard, but is not certified.
•Ciphertext stealing XTS-AES-256 is used for data encryption.
•AES 256 is used for master access keys.
•The algorithm is public. The only secrets are the keys.
•A symmetric key algorithm is used. The same key is used to encrypt and decrypt data.
The encryption of system data and metadata is not required, so they are not encrypted.
Encryption is enabled at a system level and all of the following prerequisites must be met before you can use encryption:
•You must purchase an encryption license before you activate the function.
If you did not purchase a license, contact an IBM marketing representative or IBM Business Partner to purchase an encryption license.
•At least three USB flash drives are required if you plan not to use a key management server. They are available as a feature code from IBM (see the note on 749).
•You must activate the license that you purchased.
•Encryption must be enabled.
|
Note: Only data at-rest is encrypted. Host to storage communication and data sent over links used for Remote Mirroring are not encrypted.
|
Figure 13-1 shows an encryption example. Encrypted disks and encrypted data paths are marked in blue. Unencrypted disks and data paths are marked in red. In this example the server sends unencrypted data to a SAN Volume Controller 2145-DH8 system, which stores hardware-encrypted data on internal disks.
The data is mirrored to a remote Storwize V5000 Gen 1 system using Remote Copy. The data flowing through the Remote Copy link is not encrypted. Because the Storwize V5000 Gen1 is unable to perform any encryption activities, data on the Storwize V5000 Gen1 is not encrypted.

Figure 13-1 Encryption on single site
To enable encryption of both data copies, the Storwize V5000 Gen1 must be replaced by an encryption capable IBM Spectrum Virtualize system, as shown in Figure 13-2. After such replacement both copies of data are encrypted, but the Remote Copy communication between both sites remains unencrypted.

Figure 13-2 Encryption on both sites
Figure 13-3 shows an example configuration that uses both software and hardware encryption. Software encryption is used to encrypt an external virtualized storage system. Hardware encryption is used for internal, SAS-attached disk drives.

Figure 13-3 Example of software encryption and hardware encryption
Placement of hardware encryption and software encryption in the Storwize code stack are shown in Figure 13-4 on page 735. The functions that are implemented in software are shown in blue. The external storage system is shown in yellow. The hardware encryption on the SAS chip is marked in pink. Compression is performed before encryption. Therefore, it is possible to realize benefits of compression for the encrypted data.

Figure 13-4 Encryption placement in the SAN Volume Controller software stack
Each volume copy can use different encryption methods (hardware, software). It is also allowed to have volume copies with different encryption status (encrypted versus unencrypted). The encryption method depends only on the pool that is used for the specific copy. You can migrate data between different encryption methods by using volume migration or volume mirroring.
13.2.1 Encryption methods
There are two ways to perform encryption on devices running IBM Spectrum Virtualize: hardware encryption and software encryption. Both methods of encryption protect against the potential exposure of sensitive user data that are stored on discarded, lost, or stolen media. Both can also facilitate the warranty return or disposal of hardware. Which method is used for encryption is chosen automatically by the system based on the placement of the data:
•Hardware encryption: Data is encrypted by using Serial Attached SCSI (SAS) hardware. Used only for internal storage.
•Software encryption: Data is encrypted by using nodes’ CPU (encryption code leverages AES-NI CPU instruction set). Used only for external storage.
|
Note: Software encryption is available in IBM Spectrum Virtualize code V7.6 and later.
|
Both methods of encryption use the same encryption algorithm, the same key management infrastructure, and the same license.
|
Note: The design for encryption is based on the concept that a system should either be encrypted or not encrypted. Encryption implementation is intended to encourage solutions that contain only encrypted volumes or only unencrypted volumes. For example, once encryption is enabled on the system, all new objects (for example, pools) are by default created as encrypted.
|
13.2.2 Encryption keys
Hardware and software encryption use the same encryption key infrastructure. The only difference is the object that is encrypted by using the keys. The following objects can be encrypted:
•Pools (software encryption)
•Child pools (software encryption)
•Arrays (hardware encryption)
Encryption keys can be described as follows:
•Keys are unique for each object, and they are created when the object is created.
•Two types of keys are defined in the system:
– Master access key:
• The master access key is created when encryption is enabled.
• The master access key can be stored on USB flash drives and/or a key server(s). One master access key is created for each enabled encryption key provider.
• It can be copied or backed up as necessary.
• It is not permanently stored anywhere in the system.
• It is required at boot time to unlock access to encrypted data.
– Data encryption keys (one for each encrypted object):
• Data encryption keys are used to encrypt data. When an encrypted object (such as an array, a pool, or a child pool) is created, a new data encryption key is generated for this object.
• Managed disks (MDisk) that are not self-encrypting are automatically encrypted using the data encryption key of the pool or child pool that they belong to.
• Managed Disks (MDisks) that are self-encrypting will not be re-encrypted using the data encryption key of the pool or child pool they belong to by default. You can override this default by manually configuring the MDisk as not self-encrypting.
• Data encryption keys are stored in secure memory.
• During cluster internal communication data encryption keys are encrypted with the master access key.
• Data encryption keys cannot be viewed.
• Data encryption keys cannot be changed.
• When an encrypted object is deleted, its data encryption key is discarded (secure erase).
|
Important: If all master access key copies are lost and the system must cold reboot, all encrypted data is gone. No method exists, even for IBM, to decrypt the data without the keys. If encryption is enabled and the system cannot access the master access key, all SAS hardware is offline, including unencrypted arrays.
|
13.2.3 Encryption licenses
Encryption is a licensed feature that uses key-based licensing.
No trial licenses for encryption exist on the basis that when the trial runs out, the access to the data would be lost. Therefore, you must purchase an encryption license before you activate encryption. Licenses are generated by IBM Data storage feature activation (DSFA) based on the serial number (S/N) and the machine type and model number (MTM) of the nodes.
You can activate an encryption license during the initial system setup (on the Encryption screen of the initial setup wizard) or later on, in the running environment.
Contact your IBM marketing representative or IBM Business Partner to purchase an encryption license.
13.3 Activating encryption
The first step to use encryption is to activate your encryption license.
Activation of the license can be performed in one of two ways: Automatically or manually. Both methods are available during the initial system setup and on the running system.
13.3.1 Obtaining an encryption license
You must purchase an encryption license before you activate encryption. If you did not purchase a license, contact an IBM marketing representative or IBM Business Partner to purchase an encryption license.
When you purchase a license, you should receive a function authorization document with an authorization code printed on it. This code allows you to proceed using the automatic activation process.
If the automatic activation process fails or if you prefer using the manual activation process, use this page to retrieve your license keys:
Ensure that you have the following information:
•Machine type (MT)
•Serial number (S/N)
•Machine signature
•Authorization code
See 13.3.5, “Activate the license manually” on page 745 for instructions about how to retrieve the machine signature of a node.
13.3.2 Start activation process during initial system setup
One of the steps in the initial setup enables encryption license activation. The system asks “Was the encryption feature purchased for this system?”. To activate encryption at this stage, follow these steps:

Figure 13-5 Encryption activation during initial system setup
2. The Encryption window displays information about your storage system, as shown in Figure 13-6 on page 739.

Figure 13-6 Information storage system during initial system setup
3. Right clicking on the node opens a context menu with two license activation options (Activate License Automatically and Activate License Manually), as shown in Figure 13-7. Use either option to activate encryption. See 13.3.4, “Activate the license automatically” on page 742 for instructions about how to complete an automatic activation process. See “Activate the license manually” on page 745 for instructions on how to complete a manual activation process.

Figure 13-7 Selecting license activation method
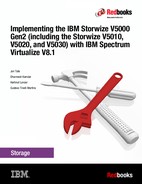
4. After either activation process is complete, you can see a green check mark in the column labeled Licensed next to a node for which the license was enabled and you can proceed with the initial system setup by clicking Next, as shown in Figure 13-8.
|
Note: Every enclosure needs an active encryption license before you can enable encryption on the system.
Attempting to add a non-licensed enclosure to an encryption-enabled system will fail.
|

Figure 13-8 Successful encryption license activation during initial system setup
13.3.3 Start activation process on a running system
To activate encryption on a running system, follow these steps:
1. Click Settings → System → Licensed Functions and click Encryption Licenses, as shown in Figure 13-9.

Figure 13-9 Expanding Encryption Licenses section on the Licensed Functions view
2. The Encryption Licenses window displays information about your nodes. Right-click the node on which you want to install an encryption license. This will open a context menu with two license activation options (Activate License Automatically and Activate License Manually), as shown in Figure 13-10. Use either option to activate encryption. See 13.3.4, “Activate the license automatically” on page 742 for instructions on how to complete an automatic activation process. See 13.3.5, “Activate the license manually” on page 745 for instructions on how to complete a manual activation process.

Figure 13-10 Select the node on which you want to enable the encryption
3. After either activation process is complete, you can see a green check mark in the column labeled Licensed for the node, as shown in Figure 13-11.

Figure 13-11 Successful encryption license activation on a running system
13.3.4 Activate the license automatically
|
Important: To perform this operation, the personal computer that is used to connect to the GUI and activate the license must be able to connect to the Internet.
|
To activate the encryption license for a node automatically, follow this procedure:
1. Select Activate License Automatically, the Activate License Automatically window opens, as shown in Figure 13-12.

Figure 13-12 Encryption license Activate License Automatically window
2. Enter the authorization code that is specific to the node that you selected, as shown in Figure 13-13. You can now click Activate.

Figure 13-13 Entering an authorization code
3. The system connects to IBM to verify the authorization code and retrieve the license key. Figure 13-14 shows a window which is displayed during this connection. If everything works correctly, the procedure takes less than a minute.

Figure 13-14 Activating encryption
4. After the license key has been retrieved, it is automatically applied as shown in Figure 13-15.

Figure 13-15 Successful encryption license activation
Problems with automatic license activation
If connections problems occur with the automatic license activation procedure, the system times out after 3 minutes with an error.
Check whether the personal computer that is used to connect to the IBM Storwize V5000 GUI and activate the license can access the internet. If you are unable to complete the automatic activation procedure, try to use the manual activation procedure that is described in 13.3.5, “Activate the license manually” on page 745.
Although authorization codes and encryption license keys use the same format (four groups of four hexadecimal digits), you can only use each of them in the appropriate activation process. If you use a license key when the system expects an authorization code, the system will display an error message, as shown in Figure 13-16.

Figure 13-16 Authorization code failure
13.3.5 Activate the license manually
To manually activate the encryption license for a node, follow this procedure:

Figure 13-17 Manual encryption license activation window
2. If you have not done so already, you need to obtain the encryption license for the node. The information required to obtain the encryption license is displayed in the Manual Activation window. Use this data to follow the instructions in 13.3.1, “Obtaining an encryption license” on page 737.
3. You can enter the license key either by typing it, by using cut or copy and paste, or by clicking the folder icon and uploading to the storage system the license key file downloaded from DSFA. In Figure 13-18, the sample key is already entered. You can now click Activate.

Figure 13-18 Entering an encryption license key
4. After the task completes successfully, the GUI shows that encryption is licensed for the given node, as shown in Figure 13-19.
Figure 13-19 Successful encryption license activation
Problems with manual license activation
Although authorization codes and encryption license keys use the same format (four groups of four hexadecimal digits), you can only use each of them in the appropriate activation process. If you use an authorization code when the system expects a license key, the system will display an error message, as shown in Figure 13-20.

Figure 13-20 License key failure
13.4 Enabling encryption
This section describes the process to create and store system master access key copies, also referred to as encryption keys. These keys can be stored on any or both of two key providers: USB flash drives or a key server.
Key server support is available in IBM Spectrum Virtualize code V7.8 and later. Additionally IBM Spectrum Virtualize code V8.1 introduces the ability to define up to four encryption key servers, which is a recommended configuration, as it increases key provider availability.
Support for simultaneous use of both USB flash drives and a key server is available in IBM Spectrum Virtualize code V8.1 and later. Organizations that use encryption key management servers might consider parallel use of USB flash drives as a backup solution. During normal operation such drives could be disconnected and stored in a secure location. However, in the event of a catastrophic loss of encryption servers, the USB drives could still be used to unlock the encrypted storage.
The following list of key server and USB flash drive characteristics might help you to choose the type of encryption key provider that you want to use.
Key servers can have the following characteristics:
•Physical access to the system is not required to perform a rekey operation.
•Support for businesses that have security requirements precluding use of USB ports.
•Possibility to use Hardware Security Modules (HSMs) for encryption key generation.
•Ability to replicate keys between servers and perform automatic backups.
•Implementations follow an open standard (KMIP) that aids in interoperability.
•Ability to audit operations related to key management.
•Ability to separately manage encryption keys and physical access to storage systems.
USB flash drives have the following characteristics:
•Physical access to the system might be required to process a rekey operation.
•No moving parts with almost no read or write operations to the USB flash drive.
•Inexpensive to maintain and use.
•Convenient and easy to have multiple identical USB flash drives available as backups. You can just copy them if needed.
|
Important: Maintaining confidentiality of the encrypted data hinges on security of the encryption keys. Pay special attention to ensuring secure creation, management and storage of the encryption keys.
|
13.4.1 Starting the Enable Encryption wizard
After the license activation step is successfully completed, you can now enable encryption. You can enable encryption after completion of the initial system setup using either GUI or CLI. There are two ways in the GUI to start the Enable Encryption wizard. It can be started by clicking Run Task button next to Enable Encryption on the Suggested Tasks window as shown in Figure 13-21.

Figure 13-21 Enable Encryption from the Suggested Tasks window
You can also click Settings → Security → Encryption and click Enable Encryption, as shown in Figure 13-22.

Figure 13-22 Enable Encryption from the Security panel
The Enable Encryption wizard starts by asking which encryption key provider to use for storing the encryption keys, as shown in Figure 13-23. You can enable either or both providers.

Figure 13-23 Enable Encryption wizard Welcome screen
The next section will present a scenario in which both encryption key providers are enabled at the same time. See 13.4.2, “Enabling encryption using USB flash drives” for instructions on how to enable encryption using only USB flash drives provider. See 13.4.3, “Enabling encryption using key servers” on page 753 for instructions on how to enable encryption using key server(s) as the sole encryption key provider.
13.4.2 Enabling encryption using USB flash drives
|
Note: The system needs at least three USB flash drives to be present before you can enable encryption using this encryption key provider. IBM USB flash drives are recommended, although other flash drives might work. You can use any USB ports in any node of the cluster. After creating the USB flash drives you can copy them if you need more than four.
Order IBM USB flash drives in e-config as Feature Code ACEA (IBM Storwize V7000), ACEB (IBM San Volume Controller) or ACEC (IBM Storwize V5000): Encryption USB Flash Drives (Four Pack).
|
Using USB flash drives as the encryption key provider requires a minimum of three USB flash drives to store the generated encryption keys. Because the system will attempt to write the encryption keys to any USB key inserted into a node port, it is critical to maintain physical security of the system during this procedure.
While the system enables encryption, you are prompted to insert USB flash drives into the system. The system generates and copies the encryption keys to all available USB flash drives.
Ensure that each copy of the encryption key is valid before you write any user data to the system. The system validates any key material on a USB flash drive when it is inserted into the canister. If the key material is not valid, the system logs an error. If the USB flash drive is unusable or fails, the system does not display it as output. Figure 13-79 on page 785 shows an example where the system detected and validated three USB flash drives.
If your system is in a secure location with controlled access, one USB flash drive for each canister may remain inserted in the system. If there is a risk of unauthorized access, then all USB flash drives with the master access keys must be removed from the system and stored in a secure place.
Securely store all copies of the encryption key. For example, any USB flash drives holding an encryption key copy, that are not left plugged into the system, can be locked in a safe. Similar precautions must be taken to protect any other copies of the encryption key that are stored on other media.
|
Notes: Generally, create at least one additional copy on another USB flash drive for storage in a secure location. You can also copy the encryption key from the USB drive and store the data on other media, which may provide additional resilience and mitigate risk that the USB drives used to store the encryption key come from a faulty batch.
Every encryption key copy must be stored securely to maintain confidentiality of the encrypted data.
|
A minimum of one USB flash drive with the correct master access key is required to unlock access to encrypted data after a system restart such as a system-wide reboot or power loss. No USB flash drive is required during a warm reboot, such as a node exiting service mode or a single node reboot. The data center power-on procedure needs to ensure that USB flash drives containing encryption keys are plugged into the storage system before it is powered on.
During power-on, insert USB flash drives into the USB ports on two supported canisters to safeguard against failure of a node, node’s USB port, or USB flash drive during the power-on procedure.
To enable encryption using USB flash drives as the only encryption key provider follow these steps:
1. In the Enable Encryption wizard Welcome tab, select USB flash drives and click Next, as shown in Figure 13-24.

Figure 13-24 Selecting USB flash drives in the Enable Encryption wizard
2. If there are fewer than 3 USB flash drives inserted into the system, you will be prompted to insert additional drives, as shown in Figure 13-25. The system will report how many additional drives need to be inserted.

Figure 13-25 Waiting for USB flash drives to be inserted
|
Note: The Next option remains disabled and the status at the bottom is kept at 0 until at least three USB flash drives are detected.
|
3. Insert the USB flash drives into the USB ports as requested.
4. After the minimum required number of drives is detected, the encryption keys are automatically copied on the USB flash drives, as shown in Figure 13-26.

Figure 13-26 Writing the master access key to USB flash drives
5. You can keep adding USB flash drives or replacing the ones already plugged in to create new copies. When done, click Next.
6. The number of keys that were created is shown in the Summary tab, as shown in Figure 13-27. Click Finish to finalize the encryption enablement.

Figure 13-27 Commit the encryption enablement
7. You receive a message confirming that the encryption is now enabled on the system, as shown in Figure 13-28.

Figure 13-28 Encryption enabled message using USB flash drives
8. You can confirm that encryption is enabled, as well as verify which key providers are in use, by going to Settings → Security → Encryption, as shown in Figure 13-29.

Figure 13-29 Encryption view showing using USB flash drives as the enabled provider
13.4.3 Enabling encryption using key servers
A key server is a centralized system that receives and then distributes encryption keys to its clients, including IBM Spectrum Virtualize systems.
IBM Spectrum Virtualize supports use of an IBM Security Key Lifecycle Manager (SKLM) key server as an encryption key provider. SKLM supports Key Management Interoperability Protocol (KMIP), which is a standard for management of cryptographic keys.
|
Note: Make sure, that the key management server functionality is fully independent from storage provided by systems using a key server for encryption key management. Failure to observe this requirement may create an encryption deadlock. An encryption deadlock is a situation in which none of key servers in the given environment can become operational because some critical part of the data in each server is stored on a storage system that depends on one of the key servers to unlock access to the data.
|
IBM Spectrum Virtualize code V8.1 and later supports up to 4 key server objects defined in parallel.
Before you can create a key server object in the storage system, the key server must be configured. Ensure that you complete the following tasks on the SKLM server before you enable encryption on the storage system:
•Configure the SKLM server to use Transport Layer Security version 2 (TLSv2). The default setting is TLSv1, but IBM Spectrum Virtualize supports only version 2.
•Ensure that the database service is started automatically on startup.
•Ensure that there is at least one Secure Sockets Layer (SSL) certificate for browser access.
•Create a SPECTRUM_VIRT device group for IBM Spectrum Virtualize systems.
For more information about completing these tasks, see SKLM documentation at IBM Knowledge Center at:
Access to the key server storing the correct master access key is required to enable encryption for the cluster after a system restart such as a system-wide reboot or power loss. Access to the key server is not required during a warm reboot, such as a node exiting service mode or a single node reboot. The data center power-on procedure must ensure key server availability before storage system using encryption is booted.
To enable encryption using a key server follow these steps:
1. Ensure that you have service IPs configured on all your nodes.
2. In the Enable Encryption wizard Welcome tab, select Key servers and click Next, as shown in Figure 13-40.

Figure 13-30 Selecting Key server as the only provider in the Enable Encryption wizard
3. The wizard moves to the Key Servers tab, as shown in Figure 13-31. Enter the name and IP address of the key servers. Note that the first key server specified must be the primary SKLM key server.
|
Note: The supported versions of IBM Security Key Lifecycle Manager (up to V2.7, which was the latest code version available at the time of writing) differentiate between the primary and secondary key server role. The Primary SKLM server as defined on Key Servers screen of Enable Encryption wizard must be the server defined as the primary by SKLM administrators.
|
4. The key server name serves just as a label, only the provided IP address will be used to actually contact the server. If the key server’s TCP port number differs from the default value for the KMIP protocol (for example, 5696), then enter the port number. An example of a complete primary SKLM configuration is shown in Figure 13-31.

Figure 13-31 Configuration of the primary SKLM server
5. If you want to add additional, secondary SKLM servers, then click “+” and fill the data for secondary SKLM servers, as shown on Figure 13-32. You can define up to four SKLM servers. Click Next when you are done.

Figure 13-32 Configuring multiple SKLM servers
6. The next page in the wizard is a reminder that SPECTRUM_VIRT device group dedicated for IBM Spectrum Virtualize systems must exist on the SKLM key servers. Make sure that this device group exists and click Next to continue, as shown in Figure 13-33.

Figure 13-33 Checking key server device group
7. The next step is to enable secure communication between the IBM Spectrum Virtualize system and the SKLM key servers. This can be done by either uploading the public certificate of the certificate authority (CA) used to sign all the SKLM key server certificates, or by uploading the public SSL certificate of each key server directly. Figure 13-34 shows the case when an organization’s CA certificate is used. Click Next to proceed to the next step.

Figure 13-34 Uploading the key server or certification authority SSL certificate
8. Subsequently, configure the SKLM key server to trust the SSL certificate of the IBM Spectrum Virtualize system. You can download the IBM Spectrum Virtualize system public SSL certificate by clicking Export Public Key, as shown in Figure 13-35. You should install this certificate in the SKLM key server in the SPECTRUM_VIRT device group.

Figure 13-35 Downloading the Spectrum Virtualize SSL certificate
9. When the IBM Spectrum Virtualize system SSL certificate has been installed on the SKLM key server, acknowledge this by selecting the box indicated in Figure 13-36 and click Next to proceed to the next step.

Figure 13-36 Acknowledge Spectrum Virtualize SSL certificate transfer
10. The key server configuration is shown in the Summary tab, as shown in Figure 13-37. Click Finish to create the key server object and finalize the encryption enablement.

Figure 13-37 Finish enabling encryption using a key server
11. If there are no errors while creating the key server object, you receive a message that confirms that the encryption is now enabled on the system, as shown in Figure 13-38.

Figure 13-38 Encryption enabled message using a key server
12. Confirm that encryption is enabled in Settings → Security → Encryption, as shown in Figure 13-39. Note the four green checks, which indicate that all four SKLM servers are detected as available by the system.

Figure 13-39 Encryption enabled with only key servers as encryption key providers
13.4.4 Enabling encryption using both providers
IBM Spectrum Virtualize code V8.1 and later allows parallel use of both key server and USB flash drive encryption key providers. It is possible to configure both providers in a single run of encryption enable wizard. To perform such configuration, the system must meet requirements of both SKLM and USB flash drive encryption key providers.
Spectrum Virtualize supports enabling encryption using an IBM Security Key Lifecycle Manager (SKLM) key server. SKLM supports Key Management Interoperability Protocol (KMIP), which is a standard for encryption of stored data and management of cryptographic keys.
|
Important: Make sure that the key management server functionality is fully independent from storage provided by systems using a key server for encryption key management. Failure to observe this requirement may create an encryption deadlock. An encryption deadlock is a situation in which none of key servers in the given environment can become operational because some critical part of the data in each server is stored on an encrypted storage system that depends on one of the key servers to unlock access to the data.
|
IBM Spectrum Virtualize code V8.1 and later supports up to four key server objects defined in parallel.
Before you can create the key server object in a storage system, the key server must be configured. Ensure that you complete the following tasks on the SKLM server before you enable encryption on the storage system:
1. Configure the SKLM server to use Transport Layer Security version 2 (TLSv2). The default setting is TLSv1, but IBM Spectrum Virtualize supports only version 2.
2. Ensure that the database service is started automatically on startup.
3. Ensure that there is at least one Secure Sockets Layer (SSL) certificate for browser access.
4. Create a SPECTRUM_VIRT device group for IBM Spectrum Virtualize systems. A device group allows for restricted management of subsets of devices within a larger pool.
For more information about completing these tasks, see SKLM at IBM Knowledge Center:
Access to the key server storing the correct master access key is required to enable encryption for the cluster after a system restart such as a system-wide reboot or power loss. Access to the key server is not required during a warm reboot, such as a node exiting service mode or a single node reboot. The data center power-on procedure must ensure key server availability before storage system using encryption is booted.
To enable encryption using a key server follow these steps:
1. Ensure that you have service IPs configured on all your nodes.
2. In the Enable Encryption wizard Welcome tab, select Key servers and click Next, as shown in Figure 13-40.

Figure 13-40 Selecting Key servers in the Enable Encryption wizard
3. The wizard moves to the Key Servers tab, as shown in Figure 13-42. Enter the name and IP address of the key servers. Note that the first key server specified must be the primary SKLM key server.
|
Note: The supported versions of IBM Security Key Lifecycle Manager (up to V2.7, which was the latest code version when this book was written) differentiate between primary and secondary key server role. Primary SKLM server as defined on Key Servers screen of Enable Encryption wizard must be the server defined as primary by SKLM administrators.
|

Figure 13-41 Configuration of the primary SKLM server
4. If you want to add additional, secondary SKLM servers, then click the Plus sign (+) and fill the data for subsequent SKLM servers, as shown in Figure 13-42 on page 763. You can define up to four SKLM servers. Click Next when you are done.

Figure 13-42 Configuring multiple SKLM servers
5. The next page in the wizard is a reminder that SPECTRUM_VIRT device group dedicated for IBM Spectrum Virtualize systems must exist on the SKLM key servers. Make sure that this device group exists and click Next to continue, as shown in Figure 13-43.

Figure 13-43 Checking key server device group
6. The next step is to enable secure communication between the IBM Spectrum Virtualize system to and the SKLM key servers. This can be done by either uploading the public certificate of the certificate authority used to sign all the SKLM key server certificates, or by uploading the public SSL certificate of each key server directly. Figure 13-44 shows the case when an organization’s CA certificate is used. When either file has been selected, you can click Next.

Figure 13-44 Uploading the key server or certification authority SSL certificate
7. Subsequently, configure the SKLM key server to trust the SSL certificate of the IBM Spectrum Virtualize system. You can download the IBM Spectrum Virtualize system public SSL certificate by clicking Export Public Key, as shown in Figure 13-45 on page 765. You should install this certificate in the SKLM key servers in the SPECTRUM_VIRT device group.

Figure 13-45 Downloading the Spectrum Virtualize SSL certificate
8. When the IBM Spectrum Virtualize system SSL certificate has been installed on the SKLM key server, acknowledge this by selecting the box indicated in Figure 13-46 and click Next to proceed to the next step.

Figure 13-46 Acknowledge Spectrum Virtualize SSL certificate transfer
9. The next step in the wizard is to store the master encryption key copies on USB flash drives. If there are fewer than three drives detected, the system will request plugging additional USB flash drives as shown on Figure 13-47. You cannot proceed until the required minimum number of USB flash drives is detected by the system.

Figure 13-47 At least 3 USB flash drives are required to configure USB flash drive key provider
10. When at least three USB flash drives are detected, the system will write master access key to each of the drives. Note that the system will attempt to write the encryption key to any flash drive that it detects. Therefore, it is crucial to maintain physical security of the system during this procedure.After the keys are successfully copied to at least three USB flash drives, the system displays a screen, as shown in Figure 13-48.

Figure 13-48 Master Access Key successfully copied to USB flash drives
11. The next screen presents you with the summary of the configuration that will be implemented on the system, as shown in Figure 13-49. Click Finish to create the key server object and finalize the encryption enablement.

Figure 13-49 Encryption configuration summary in two providers scenario
12. If there are no errors while creating the key server object, the system displays a screen that confirms that the encryption is now enabled on the system, and that both encryption key providers are enabled (see Figure 13-50).

Figure 13-50 Encryption enabled message using both encryption key providers
13. You can confirm that encryption is enabled, and verify which key providers are in use, by going to Settings → Security → Encryption, as shown in Figure 13-51. Note four green check marks confirming that the master access key is available on all four SKLM servers.

Figure 13-51 Encryption enabled with two key providers available
13.5 Configuring additional providers
When the system is configured with a single encryption key provider, it is possible to add a second provider.
|
Note: If you set up encryption of your storage system when it was running IBM Spectrum Virtualize code version earlier than V7.8.0, then when you upgrade to code version V8.1 you have to rekey the master encryption key before you can enable second encryption provider.
|
13.5.1 Adding SKLM as a second provider
If the storage system is configured with the USB flash drive provider, it is possible to configure SKLM server(s) as a second provider. To enable SKLM server(s) as a second provider, follow these steps:
1. Go to Settings → Security → Encryption, expand the Key Servers section and click Enable, as shown in Figure 13-52. Note that to enable key server as a second provider, the system has to detect at least one USB flash drive with a current copy of the master access key.

Figure 13-52 Enable SKLM server as a second provider
2. Subsequently, follow the steps required to configure the key server provider, as described in 13.4.3, “Enabling encryption using key servers” on page 753. One difference to the process described in that section is that the wizard will give you an option to migrate from the USB flash drive provider to key server provider. Select No to enable both encryption key providers, as shown in Figure 13-53.

Figure 13-53 Do not disable USB flash drive encryption key provider
3. This choice is confirmed on the summary screen before the configuration is committed, as shown in Figure 13-54.

Figure 13-54 Configuration summary before committing
4. After you click finish, the system will configure SKLM servers as a second encryption key provider. Successful completion of the task is confirmed by a message (Figure 13-55).

Figure 13-55 Confirmation of successful configuration of two encryption key providers
5. You can confirm that encryption is enabled, as well as verify which key providers are in use, by going to Settings → Security → Encryption, as shown in Figure 13-56. Note four green check marks confirming that the master access key is available on all four SKLM servers.

Figure 13-56 Encryption enabled with two key providers available
13.5.2 Adding USB flash drives as a second provider
If the storage system is already configured with an SKLM encryption key provider, it is possible to configure USB flash drives as a second provider. To enable USB flash drives as a second provider follow these steps:
1. Go to Settings → Security → Encryption, expand the USB Flash Drives section and click Configure, as shown in Figure 13-57. Note that to enable USB flash drives as a second provider, the system has to be able to access key servers with the current master access key.

Figure 13-57 Enable USB flash drives as a second encryption key provider
2. After you click Configure, you will be presented with a wizard similar to described in 13.4.2, “Enabling encryption using USB flash drives” on page 749. Note that you will not be given an option to disable SKLM provider during this process. After successful completion of the process you will be presented with a message confirming that both encryption key providers are enabled, as shown in Figure 13-58.

Figure 13-58 Confirmation of successful configuration of two encryption key providers
3. You can confirm that encryption is enabled, as well as verify which key providers are in use, by going to Settings → Security → Encryption, as shown in Figure 13-59. Note four green check marks indicating that the master access key is available on all four SKLM servers.

Figure 13-59 Encryption enabled with two key providers available
13.6 Migrating between providers
IBM Spectrum Virtualize V8.1 introduced support for simultaneous use of both USB flash drives and a key server as encryption key providers. The system also allows migration from configuration using only USB flash drive provider to key servers provider and vice versa.
13.6.1 Migration from USB flash drive provider to encryption key server
The system is designed to facilitate migration from USB flash drives encryption key provider to encryption key server provider. If you follow the steps described in 13.5.1, “Adding SKLM as a second provider” on page 768, but when executing procedure step 2 on page 769 select Yes instead of No (see Figure 13-60). This will cause de-activation of the USB Flash drives provider, and the procedure will complete with a single active encryption keys provider – SKLM server(s).

Figure 13-60 Disable USB Flash drive provider while migrating to SKLM provider
13.6.2 Migration from encryption key server to USB flash drive provider
Migration in the other direction, that is to say from using encryption key servers provider to USB flash drives provider, is not possible using only the GUI.
To perform the migration, add USB flash drives as a second provider. You can do this by following steps described in 13.5.2, “Adding USB flash drives as a second provider” on page 770. Subsequently in the CLI issue the following command:
chencryption -usb validate
to make sure that USB drives contain the correct master access key. Subsequently, disable the encryption key server provider by running the following command:
chencryption -keyserver disable
This will disable the encryption key server provider, effectively migrating your system from encryption key server to USB flash drive provider.
13.7 Recovering from a provider loss
If you have both encryption key providers enabled, and you lose one of them (by losing all copies of the encryption key kept on the USB flash drives or by losing all SKLM servers), you can recover from this situation by disabling the provider to which you lost the access. In order to disable the unavailable provider you must have access to a valid master access key on the remaining provider.
If you have lost access to the encryption key server provider, then run the command:
chencryption -keyserver disable
If you have lost access to the USB flash drives provider, then run the command
chencryption -usb disable
If you want to restore the configuration with both encryption key providers, then follow the instructions in 13.5, “Configuring additional providers” on page 768.
|
Note: If you lose access to all encryption key providers defined in the system, then there is no method to recover access to the data protected by the master access key.
|
13.8 Using encryption
The design for encryption is based on the concept that a system should either be fully encrypted or not encrypted. Encryption implementation is intended to encourage solutions that contain only encrypted volumes or only unencrypted volumes. For example, once encryption is enabled on the system, all new objects (for example, pools) are by default created as encrypted. Some unsupported configurations are actively policed in code. For example, no support exists for creating unencrypted child pools from encrypted parent pools.
However, exceptions exist:
•During the migration of volumes from unencrypted to encrypted volumes, a system might report both encrypted and unencrypted volumes.
•It is possible to create unencrypted arrays from CLI by manually overriding the default encryption setting.
|
Notes: Encryption support for Distributed RAID is available in IBM Spectrum Virtualize code V7.7 and later.
You must decide whether to encrypt or not encrypt an object when it is created. You cannot change this setting at a later time. To change the encryption state of stored data you have to migrate it from an encrypted object (for example, a pool) to an unencrypted one, or vice versa. Volume migration is the only way to encrypt any volumes that were created before enabling encryption on the system.
|
13.8.1 Encrypted pools
See Chapter 4, “Storage pools” on page 143 for generic instructions on how to open the Create Pool window. After encryption is enabled, any new pool will by default be created as encrypted, as shown in Figure 13-61.

Figure 13-61 Create Pool window basic
You can click Create to create an encrypted pool. All storage that is added to this pool will be encrypted.
You can customize Pools view in the management GUI to show pool encryption status. Click Pools → and again Pools, and then click the Actions → Customize Columns → Encryption, as shown in Figure 13-62.

Figure 13-62 Pool encryption state
If you create an unencrypted pool, but you add only encrypted arrays or self-encrypting MDisks to the pool, then the pool will be reported as encrypted, because all extents in the pool are encrypted. The pool reverts back to the unencrypted state if you add an unencrypted array or MDisk.
Further information about how to add encrypted storage to encrypted pools is in the following sections. You can mix and match storage encryption types in a pool. Figure 13-63 shows an example of an encrypted pool containing storage using different encryption methods.

Figure 13-63 Mix and match encryption in a pool
13.8.2 Encrypted child pools
See Chapter 4, “Storage pools” on page 143 for instructions on how to open the Create Child Pool window. If the parent pool is encrypted, every child pool must be encrypted too. The GUI enforces this requirement by automatically selecting Encryption Enabled in the Create Child Pool window and preventing changes to this setting, as shown in Figure 13-64.

Figure 13-64 Create a child pool of an encrypted parent pool
However, if you want to create encrypted child pools from an unencrypted storage pool containing a mix of internal arrays and external MDisks. the following restrictions apply:
•The parent pool must not contain any unencrypted internal arrays
•All SAN Volume Controller nodes or Storwize canisters in the system must support software encryption and have the encryption license activated
|
Note: An encrypted child pool created from an unencrypted parent storage pool reports as unencrypted if the parent pool contains any unencrypted internal arrays. Remove these arrays to ensure that the child pool is fully encrypted.
|
If you modify Pools view as described earlier in this section, you will see the encryption status of child pools, as shown in Figure 13-65. The example shows an encrypted child pool with non-encrypted parent pool.
 .
.Figure 13-65 Child pool encryption state
13.8.3 Encrypted arrays
See Chapter 4, “Storage pools” on page 143 for instructions on how to add internal storage to a pool. After encryption is enabled, all newly built arrays are hardware encrypted by default. The graphical user interface (GUI) supports only this default option.
|
Note: To create an unencrypted array when encryption is enabled use the command-line interface (CLI) to run the mkarray -encrypt no command. However, you cannot add unencrypted arrays to an encrypted pool.
|
You can customize MDisks by Pools view to show array encryption status. Click Pools → MDisk by Pools, and then click Actions → Customize Columns → Encryption as shown in Figure 13-66.

Figure 13-66 Array encryption state
You can also check the encryption state of an array by looking at its drives in Pools → Internal Storage view. The internal drives associated with an encrypted array are assigned an encrypted property that can be seen by clicking an icon at the right edge of the table header row and selecting the Encrypted option from the menu, as shown in Figure 13-67.

Figure 13-67 Drive encryption state
13.8.4 Encrypted MDisks
See Chapter 4, “Storage pools” on page 143 for instructions on how to add external storage to a pool. Each MDisk belonging to external storage added to an encrypted pool or child pool is automatically encrypted using the pool or child pool key, unless the MDisk is detected or declared as self-encrypting.
The user interface gives no method to see which extents contain encrypted data and which do not. However, if a volume is created in a correctly configured encrypted pool, then all data written to this volume will be encrypted.
The extents could contain stale unencrypted data if the MDisk was earlier used for storage of unencrypted data. This is because file deletion only marks disk space as free, the data is not actually removed from the storage. So, if the MDisk is not self-encrypting and was a part of an unencrypted pool, and then was moved to an encrypted pool, then it will contain stale data from its previous life. Another failure mode is to misconfigure an external MDisk as self-encrypting, while in reality it’s not self-encrypting.
In that case, the data written to this MDisk would not be encrypted by IBM SAN Volume Controller, because IBM SAN Volume Controller would be convinced that MDisk will encrypt the data by itself. At the same time, the MDisk will not encrypt the data, because it’s not self-encrypting, so we end up with unencrypted data on an extent in an encrypted pool.
However, all data written to any MDisk that’s a part of correctly configured encrypted pool, is going to be encrypted.
You can customise the MDisk by Pools view to show the object encryption state by clicking Pools → MDisk by Pools, selecting the menu bar, right-clicking it, and selecting the Encryption Key icon. Figure 13-68 shows a case where self-encrypting MDisk is in an unencrypted pools.

Figure 13-68 MDisk encryption state
Self-encrypting MDisks
When adding external storage to a pool, you should be exceptionally diligent when declaring the MDisk as self-encrypting. Correctly declaring an MDisk as self-encrypting avoids waste of resources, such as CPU time. However, when used improperly it may lead to unencrypted data at-rest.
To declare an MDisk as self-encrypting, select Externally encrypted when adding external storage in the Assign Storage view, as shown in Figure 13-69.

Figure 13-69 Externally encrypted MDisk
IBM Spectrum Virtualize products can detect that an MDisk is self-encrypting by using the SCSI Inquiry page C2. MDisks provided by other IBM Spectrum Virtualize products will report this page correctly. For these MDisks, the Externally encrypted box shown in Figure 13-69 will not be selected. However, when added, they are still considered as self-encrypting.
|
Note: You can override external encryption setting of an MDisk detected as self-encrypting and configure it as unencrypted using the CLI command chmdisk -encrypt no. However, you should only do so if you plan to decrypt the data on the backend or if the backend uses inadequate data encryption.
|
To check whether an MDisk has been detected or declared as self-encrypting, click Pools → MDisk by Pools and customize the view to show the encryption state by selecting the menu bar, right-clicking it, and selecting the Encryption Key icon, as shown in Figure 13-70.

Figure 13-70 MDisk self-encryption state
Note that the value shown in the Encryption column shows the property of objects in respective rows. That means that in the configuration shown in Figure 13-70, Pool1 is encrypted, so every volume created from this pool will be encrypted. However, that pool is backed by three MDisks, out of which two are self-encrypting and one is not. Therefore, a value of “no” next to mdisk7 does not imply that encryption of Pool1 is in any way compromised.
It only indicates that encryption of the data placed on mdisk7 will be done via software encryption, while data placed on mdisk2 and mdisk8 will be encrypted by the back-end storage providing these MDisks.
|
Note: You can change the self-encrypting attribute of an MDisk that is unmanaged or is a part of an unencrypted pool. However, you cannot change the self-encrypting attribute of an MDisk after it has been added to an encrypted pool.
|
13.8.5 Encrypted volumes
See Chapter 6, “Volume configuration” on page 287 for instructions on how to create and manage volumes. The encryption status of a volume depends on the pool encryption status. Volumes that are created in an encrypted pool are automatically encrypted.
You can modify Volumes view to show if the given volume is encrypted. Click Volumes → Volumes then click Actions → Customize Columns → Encryption to customize the view to show volumes encryption status, as shown in Figure 13-71.

Figure 13-71 Volume view customization
Note that a volume is reported as encrypted only if all the volume copies are encrypted, as shown in Figure 13-72.

Figure 13-72 Volume encryption status depending on volume copies encryption
When creating volumes make sure to select encrypted pools to create encrypted volumes, as shown in Figure 13-73.

Figure 13-73 Create an encrypted volume by selecting an encrypted pool
You cannot change an existing unencrypted volume to an encrypted version of itself dynamically. However, this conversion is possible by using two migration options:
•Migrate a volume to an encrypted pool or child pool.
•Mirror a volume to an encrypted pool or child pool and delete the unencrypted copy.
For more information about either method, see Chapter 6, “Volume configuration” on page 287.
13.8.6 Restrictions
The following restrictions apply to encryption:
•Image mode volumes cannot be in encrypted pools.
•You cannot add external non self-encrypting MDisks to encrypted pools unless all nodes in the cluster support encryption.
•Nodes that cannot perform software encryption cannot be added to systems with encrypted pools that contain external MDisks that are not self-encrypting.
13.9 Rekeying an encryption-enabled system
Changing the master access key is a security requirement. Rekeying is the process of replacing current master access key with a newly generated one. The rekey operation works whether or not encrypted objects already exist. The rekeying operation requires access to a valid copy of the original master access key on an encryption key provider which you plan to rekey. Use the rekey operation according to the schedule defined in your organization’s security policy and whenever you suspect that the key might have been compromised.
If you have both USB and key server enabled, then rekeying is done separately for each of the providers.
|
Important: Before you create a master access key, ensure that all nodes are online and that the current master access key is accessible.
Note: There is no method to directly change data encryption keys. If you need to change the data encryption key used to encrypt given data, then the only available method is to migrate that data to a new encrypted object (e.g. encrypted child pool). Because the data encryption keys are defined per encrypted object, such migration will force a change of the key used to encrypt that data.
|
13.9.1 Rekeying using a key server
Ensure that all the configured key servers can be reached by the system and that service IPs are configured on all your nodes.
To rekey the master access key kept on the key server provider, complete these steps:
1. Click Settings → Security → Encryption, ensure that Encryption Keys shows that all configured SKLM servers are reported as Accessible, as shown in Figure 13-74. Click the Key Servers section label to expand the section.

Figure 13-74 Locate Key Servers section on Encryption screen

Figure 13-75 Start rekey on SKLM key server

Figure 13-76 Confirm key server rekey operation
|
Note: The rekey operation is performed only on the primary key server configured in the system. If you have additional key servers configured apart from the primary one, they will not hold the updated encryption key until they obtain it from the primary key server. To restore encryption key provider redundancy after a rekey operation, replicate the encryption key from the primary key server to the secondary key servers.
|
You receive a message confirming the rekey operation was successful, as shown in Figure 13-77.

Figure 13-77 Successful key server rekey operation
13.9.2 Rekeying using USB flash drives
During the rekey process, new keys are generated and copied to the USB flash drives. These keys are then used instead of the current keys. The rekey operation fails if at least one of the USB flash drives does not contain the current key. To rekey the system, you need at least three USB flash drives to store the master access key copies.
After the rekey operation is complete, update all other copies of the encryption key, including copies stored on other media. Take the same precautions to securely store all copies of the new encryption key as when you were enabling encryption for the first time.
To rekey the master access key located on USB flash drives provider, complete these steps:
1. Click Settings → Security → Encryption. Click the USB Flash Drives section label to expand the section as shown in Figure 13-78.

Figure 13-78 Locate USB Flash Drive section in the Encryption view
2. Verify that all USB drives plugged into the system are detected and show as Validated, as shown in Figure 13-79. You need at least three USB flash drives, with at least one reported as Validated to process with rekey.

Figure 13-79 Start rekey on USB flash drives provider
3. If the system detects a validated USB flash drive and at least three available USB flash drives, new encryption keys are automatically copied on the USB flash drives, as shown in Figure 13-80. Click Commit to finalize the rekey operation.

Figure 13-80 Writing new keys to USB flash drives
4. You should receive a message confirming the rekey operation was successful, as shown in Figure 13-81.

Figure 13-81 Successful rekey operation using USB flash drives
13.10 Migrating between key providers
Once you have encryption enabled on the system it is possible to migrate from one key provider to the other.
If you only have the USB key provider enabled, and you choose to enable the key server, then the GUI gives you an option to disable the USB key provider during key server configuration. Follow the procedure as described in 13.4.3, “Enabling encryption using key servers” on page 753. During the key server provider configuration the wizard will ask if the USB flash drives provider should be disabled, as shown in Figure 13-82.

Figure 13-82 Disable the USB provider via encryption key server configuration wizard
Select Yes and continue with the procedure to migrate from USB to SKLM provider.
It is also possible to migrate from key server provider to USB provider or, if you have both providers enabled, to disable either of them. However, these operations are possible only via the CLI.
13.11 Disabling encryption
You are prevented from disabling encryption if there are any encrypted objects defined apart from self-encrypting MDisks. You can disable encryption in the same way whether you use USB flash drives, key server or both providers.
To disable encryption, follow these steps:
1. Click Settings → Security → Encryption and click Enabled. If no encrypted objects exist, then a drop-down menu is displayed. Click Disabled to disable encryption on the system. Figure 13-83 shows an example for a system with both encryption key providers configured.

Figure 13-83 Disabling encryption on a system with both providers
2. You receive a message confirming encryption has been disabled. Figure 13-84 shows the message when using a key server.

Figure 13-84 Encryption disabled
..................Content has been hidden....................
You can't read the all page of ebook, please click here login for view all page.