
By now, you have a fair understanding of Microsoft Cognitive technologies, its various offerings in terms of service, and a sneak preview of understanding their concepts. Microsoft has done a fantastic job in abstracting the research on AI and machine learning, hiding all complex processing nuances by giving easy-to-consume REST based services, sitting on its Azure Cloud solution. In fact, the entire suite of Microsoft Cognitive Services is exposed as REST APIs. Since the REST API has an API endpoint, you really don’t need any specific platform or programming language to consume it. Another advantage of the REST API is that it can accept input in JSON or XML format and give output in the same formats. This gives you great flexibility to consume REST API directly in all major programming languages, such as C#, Java, PHP, Ruby, Python, JavaScript, and so on. As this book targets .NET developers, we will restrict ourselves to using C# throughout the book. But, really, the fundamentals of consuming Microsoft Cognitive Services remain the same for any language.
Prerequisites for consuming Cognitive Services
Obtaining a subscription key for Cognitive Services
Calling the Microsoft Cognitive Vision API
Consuming the Cognitive Vision API using Visual Studio
Interesting uses of the Computer Vision API
Free Tier and Pay Per Use Model
What’s the cost of calling Microsoft Cognitive Services?
Are there some free services available for personal use?
What happens if I provide my credit card details?
Can I put a limit on the use of APIs?
What are the SLAs for Cognitive APIs being available in enterprise scenarios?
Before we delve into more details, let’s answer these questions. Microsoft Cognitive Services come with two types of models for consuming cognitive services, namely free tier and paid tier (some of the services only have a paid tier). Free tier, as the name suggests, provides an opportunity to consume Microsoft Cognitive Services without paying anything to Microsoft. Free tier is mostly useful for the end user to give a try with personal or low-volume applications. If your requirement fulfills any of these requisites, we certainly encourage you to use free tier. As you can expect, a free tier for each service also have some restrictions. As it doesn’t support SLA for services provided by Microsoft, free tier is often called as a restricted tier.
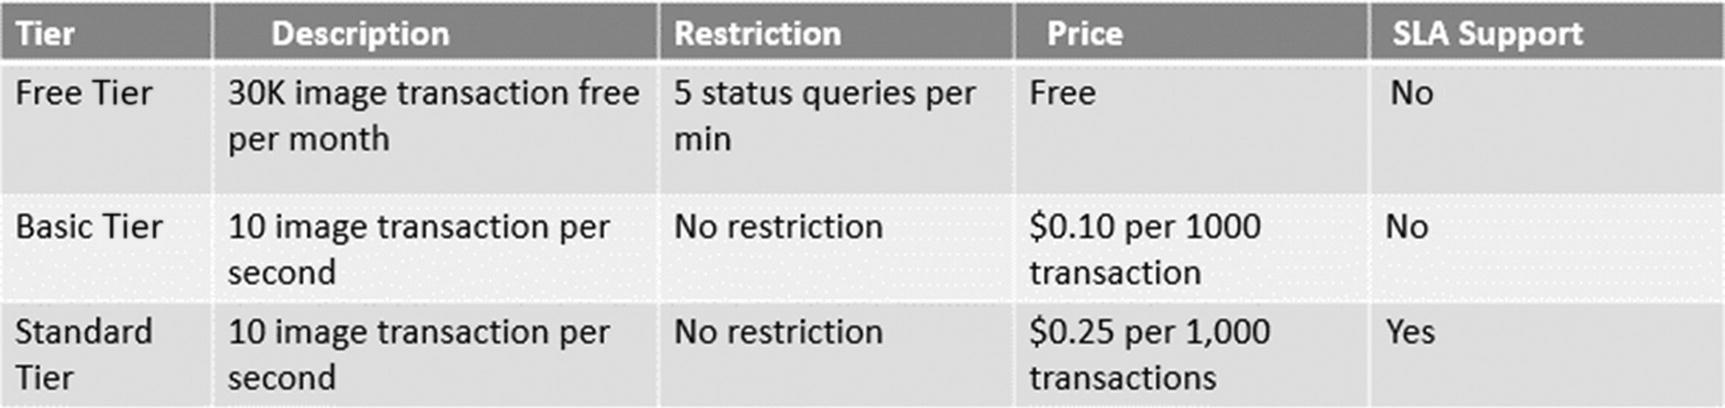
Various pricing tiers for the Emotions API
Note
While writing this book, if your free tier session or usage expires, Microsoft Cognitive Services does not automatically move from free tier to paid tier. Rather, your services don’t yield a response. We encourage you to go ahead and use free tier with ease but do check the Microsoft Cognitive Service policy, as it can change over time.
Understanding the Prerequisites
Each cognitive API is unique and so is its usage and applicability. It is important first to understand which Cognitive API needs to be consumed. Chapter 4 introduced the various APIs. Apart from knowing which cognitive API to consume, you need to have its subscription key and programming language of choice. Each subscription key for any cognitive service is unique and exclusive, i.e. the subscription key is unique for that user and for that specific service. You can’t use the same subscription key to call two different cognitive services—the subscription key for the Emotions API is not valid for calling the Speech API.
In previous chapters, we discussed that consuming cognitive services through REST API is language and platform independent. This means you are free to consume in any of your favorite languages. Since we are targeting .NET developers in this book, we use Visual Studio as our development IDE. Visual Studio 2017, as you may know, is a perfect development environment and default industry-wide code editor for creating an application for the .NET developer. Installing Visual Studio by default installs your .NET Framework, language support, template, and compiler. All versions of Visual Studio come with several editions (community, professional, enterprise, etc.)—we use the Visual studio 2017 professional edition.
Note
We don’t cover the installation of Visual Studio 2017 professional edition. If you don’t have Visual Studio, visit the download section of https://www.visualstudio.com to install it.
Although we use C# as our preferred language for creating examples, concepts of consuming REST services don’t really change even if you are consuming it in a non-.Net environment. We further extend our smart hospital use case to consume some cognitive services. Flip back to the end of Chapter 1 if you need to review the smart hospital use case. Throughout this book, our examples and code are entirely focused on building the smart hospital.
Subscription key
Visual Studio 2017
Your passion and enthusiasm
You already have the passion and enthusiasm for creating a smart AI application, that’s why you are reading this book. Assuming you have installed Visual Studio 2017, you now just need to grab your subscription key for the Cognitive API and get started.
How to Get the Subscription Key for Cognitive Services
All Microsoft Cognitive Services API require a subscription key to be passed either as a header or query parameter. All you need in order to get a subscription key for your cognitive services is a Hotmail account. You can go through any of the Microsoft Cognitive APIs and click on the Get an API key option, which requires signing it, and you are done. But wait!! You also need more quota for consuming the key. Thinking of longer-term perspective, we recommend you get it through a free subscription, which requires you to have an Azure account. If you already have an Azure account, you can directly go to the next section or create the account here.
Creating the Azure Account
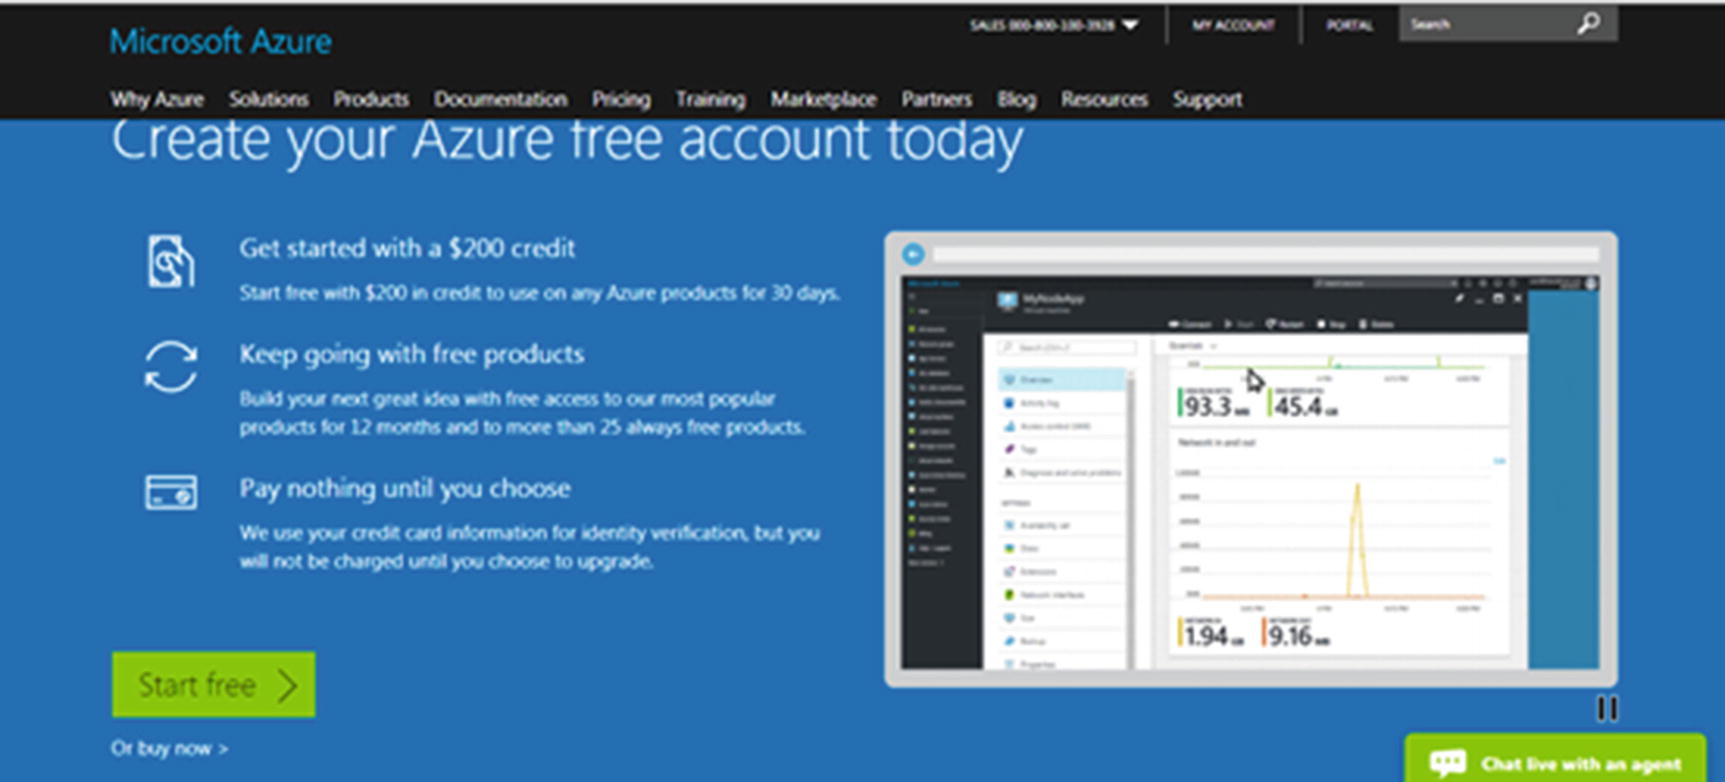
The screen for Azure portal free subscription
Microsoft wants to encourage new developers and architects such as you to play with an Azure account. As soon as you create the Azure account, you are entitled with $200 of credit which you can eventually use during your trial period of 30 days to explore other Azure products, such as testing and deploying apps on Azure VMs, getting insightful information about your data, to name a few. In addition to $200, you will get $50 every month for using professional Visual Studio 2017 edition.
Tip
These bonus freebies are certainly useful to consume other Azure services and make your application more interesting. In due course of the book, we use this money to consume other IOT services as well.

The form for signing up for the free Azure subscription
Fill in the form by entering your personal details, phone, and credit card details before clicking on Sign Up. It is important to note that phone and card details are just for verification of your identity. There won’t be any charges levied on the card. It is also important to know that Azure doesn’t upgrade your tier (from free to paid) by default. Instead, once the trial period is over, the service stops but your accounts still stays. You have the option anytime to go back again, access your account, and access the service. You can also use the credits that you have received by creating your free account along with using the professional edition of VS 2017.
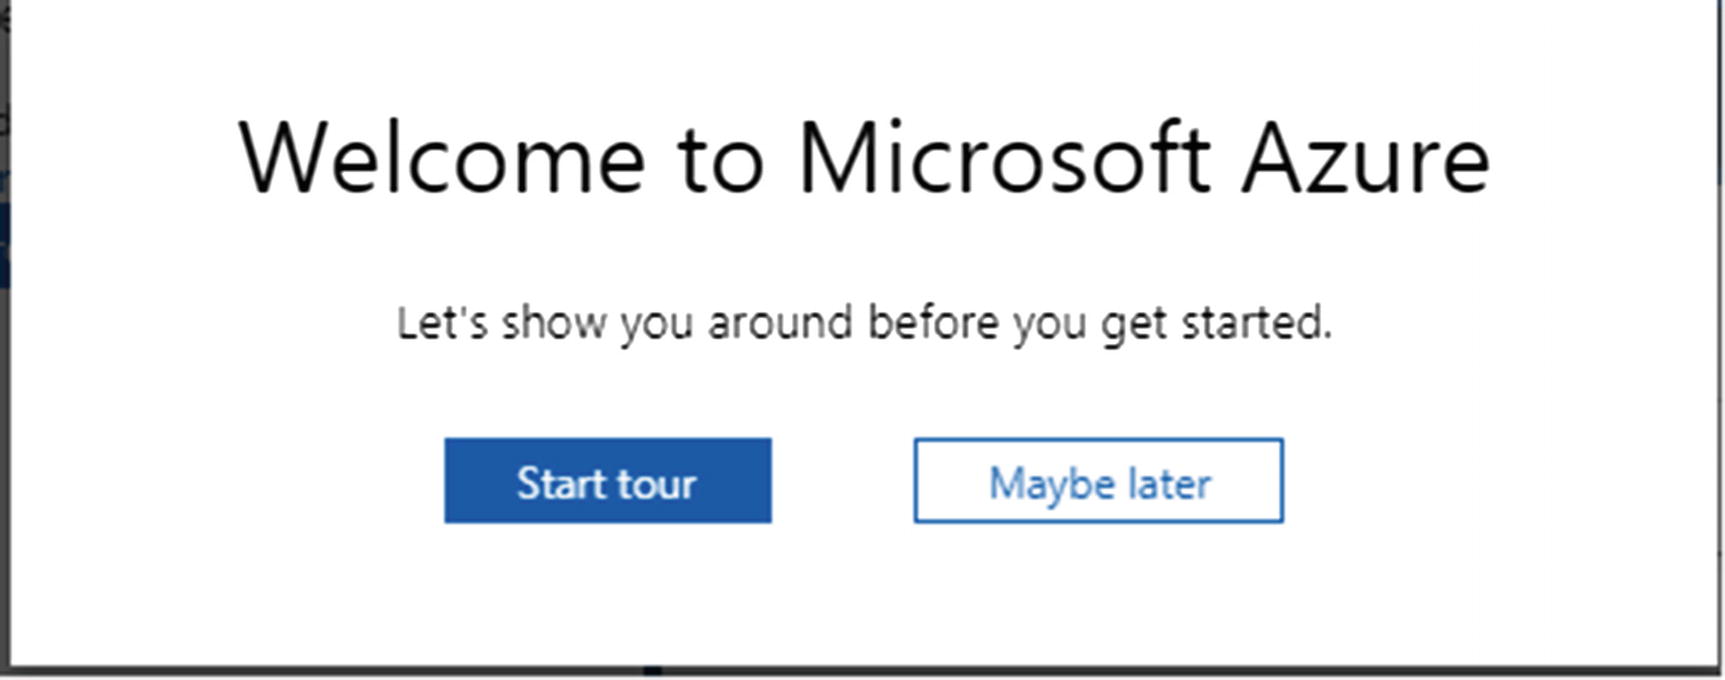
The options for first-time users to take a tour of the Azure portal. If it is your first time on Azure portal, it is highly recommended to take a quick short tour of the portal.
You are then redirected to the dashboard, as shown in Figure 5-5, which gives you the step-by-step process in a wizard-like interface to create new resources.
Getting the Subscription Key from Azure Portal

The Azure portal dashboard

No keys and subscription associated for the first-time users
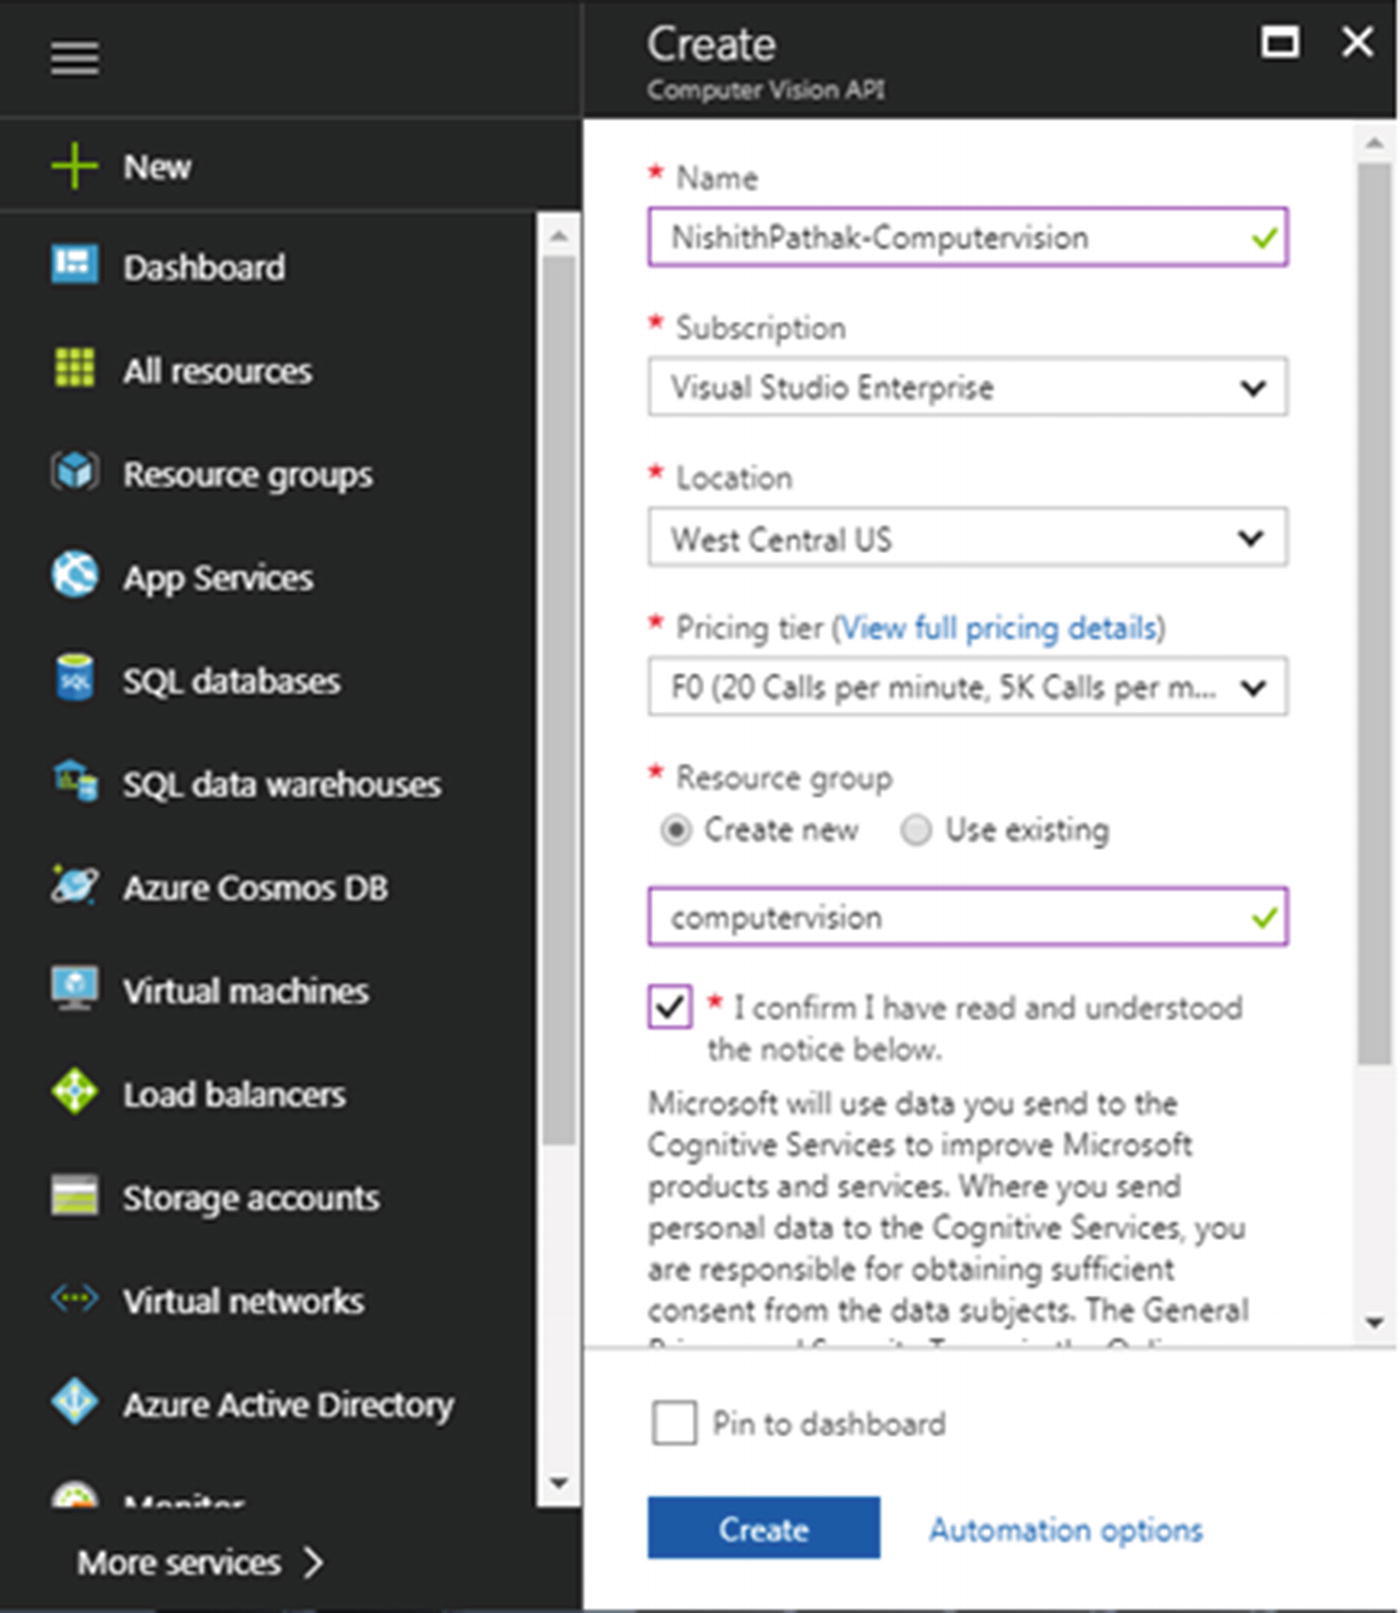
The blade of the Azure portal for creating the computer vision subscription key
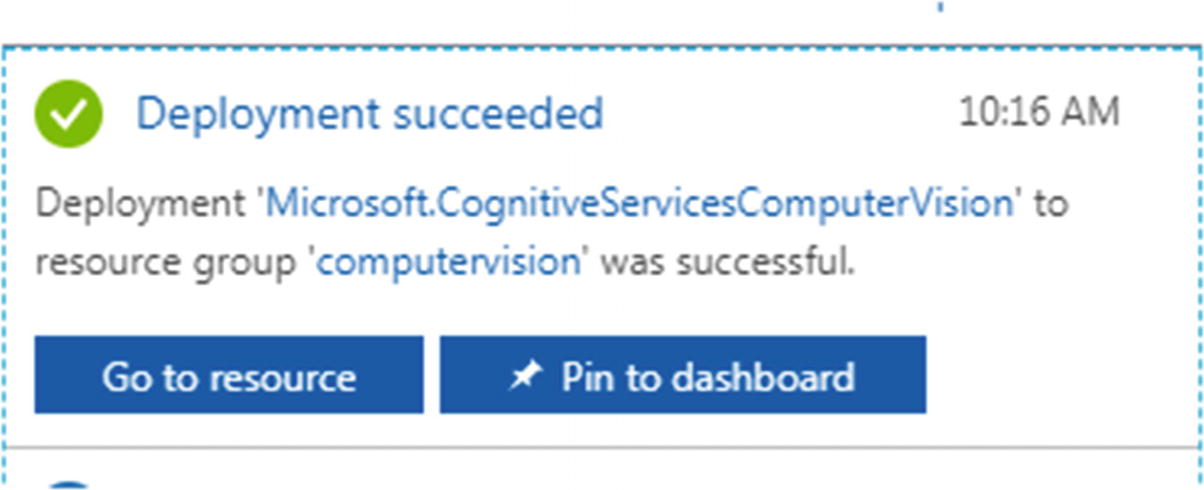
The notification of successful creation of the computer vision in Azure portal

The computer vision keys generated in the Azure account
Testing the API
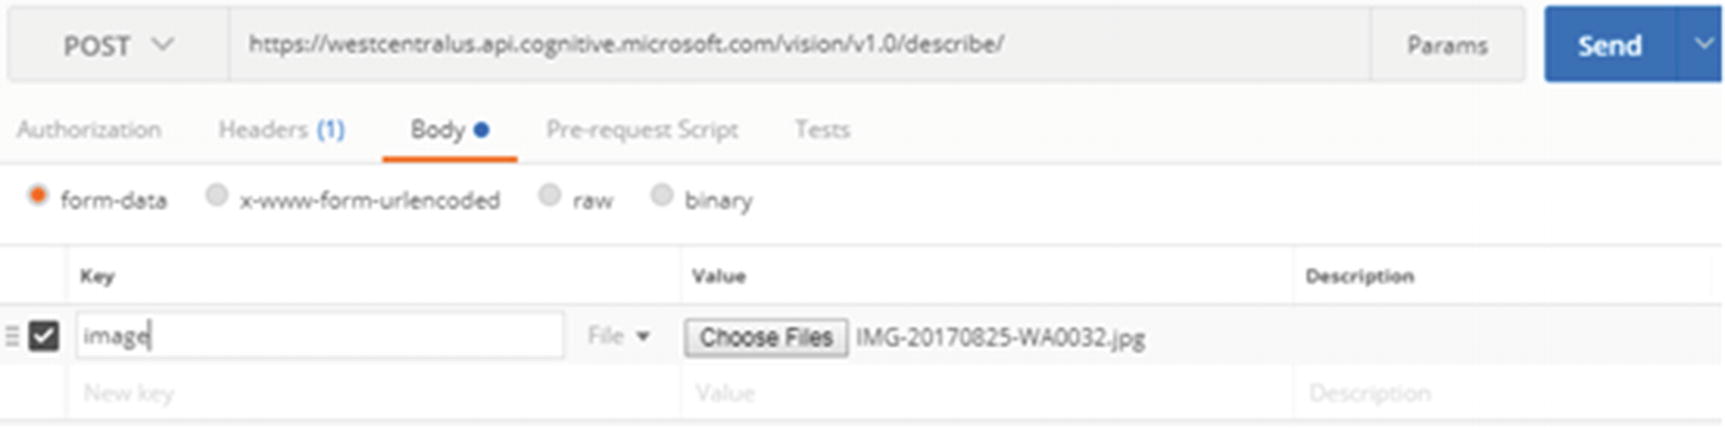
The Postman tool for testing the computer vision API

Image used in Postman to test the subscription key
The JSON response for this image should be:
As you see, the text caption shows "a young boy standing in a room". Isn’t this really accurate! Think about how useful this is, in just a single call. These insights can be tremendously beneficial in quite a number of use cases, such as security, creating a visual impaired solution for the blind, and so on. Now you are all set to use the same cognitive services to do more interesting work. The first thing we should do is get familiar with calling these cognitive services in Visual Studio.
Creating Your First Smart Cognitive Application
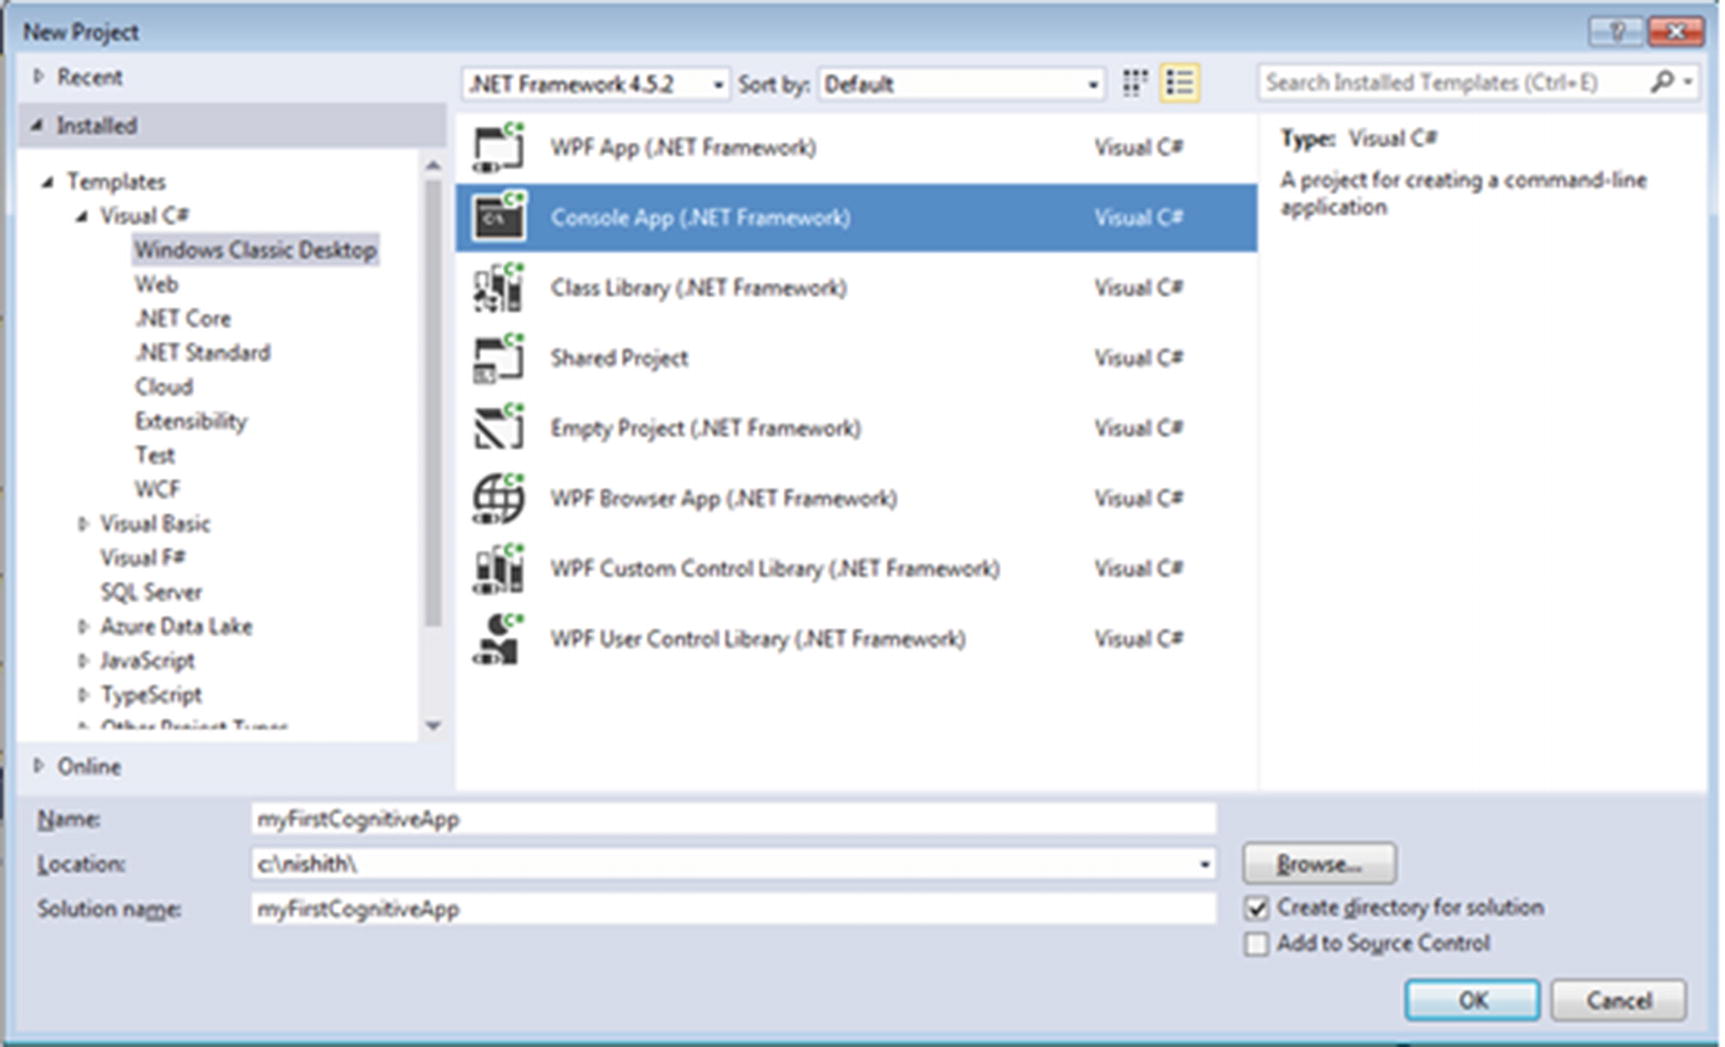
The VS 2017 new project template
Note
From here on, we assume that you understand how to create a new project using Visual Studio 2017. Going forward, we will simply ask you to create a new project in VS, specifying the template and any specific project name (if required).
System.Web
System.Configuration
System.Net.Http

The Add Reference dialog box in Visual Studio 2017
Steps for Consuming the Cognitive API
Step 1. Create the HTTP client to make HTTP calls.
Step 2. Build the HTTP request object with appropriate parameters.
Step 3. Call the Computer Vision API by passing the HTTP request created in Step 2 and getting the response back from the API.
Your function signature should look like the following:
If you look at this signature, you’ll observe that the function has been marked as static and async. The function has been marked static so that you can directly call it from the main function. Here, we use C#’s async programming while calling the API to make the user experience smoother and more responsive.
Build the HttpClient Instance
The first and most important step for calling the Cognitive API from Visual Studio is to build the httpClient instance. The HttpClient class resides in the System.Net.Http namespace. Its instance is required to get, post, put, and delete HTTP calls. There are multiple ways to instantiate httpclient. Creating an instance inside a using block automatically disposes the object at the end of the block. Disposing of I/O-intensive objects appropriately is important because the system resources they use aren’t kept reserved and are immediately made available to other programs. Your httpclient instantiation should look like this:
Build the Http Request Object with Appropriate Parameters
Now that you have created the httpClient instance, the next step is to pass the subscription key in the header and the image as multipart form data content. In order to pass the subscription key as a header, you need a unique header key named Ocp-Apim-Subscription-Key, which is used across all cognitive services to recognize its value as a subscription key. You can create the key-value pair or hard code it. Instead, we recommend storing the subscription key in the configuration file, which will prevent any recompilation due to a change in the subscription key. You can add it to httpclient instance created in the previous steps. Your code should look like this:
The next step is to pass the image as multipart form data content to the httpclient. The .NET Framework provides the container class MultipartFormDataContent, which resides in the System.net.http namespace, to do the honors.
It’s better to instantiate these objects using using to get them automatically disposed of. Once the container class is created, you can read the entire image in the body in the byte format and add it to the multipartFormDataContent instance, as shown here. The File.ReadAllBytes() method takes in the absolute path of a file and returns its byte sequence.
Calling Microsoft Cognitive Vision API
Now you are all set to call the Cognitive Vision API. For the httpclient to make a POST call to the Cognitive Vision API, you need to provide it the correct HTTP address of the Cognitive API and the API in the multipartFormDataContent object. Specify the address as shown here by setting maxCandidates as 1, which ensures that only one description is returned from the API.
The next step is to call the Microsoft Cognitive API in an asynchronous manner, passing the address and the multiform data content, as shown in this code:
The previous code uses the asynchronous operation while calling the API. It is always a best practice to call all your APIs in an asynchronous way to ensure your application is not unresponsive until you hear back from the API. The entire code of your console application should now look something like this:
The Result of Your Code
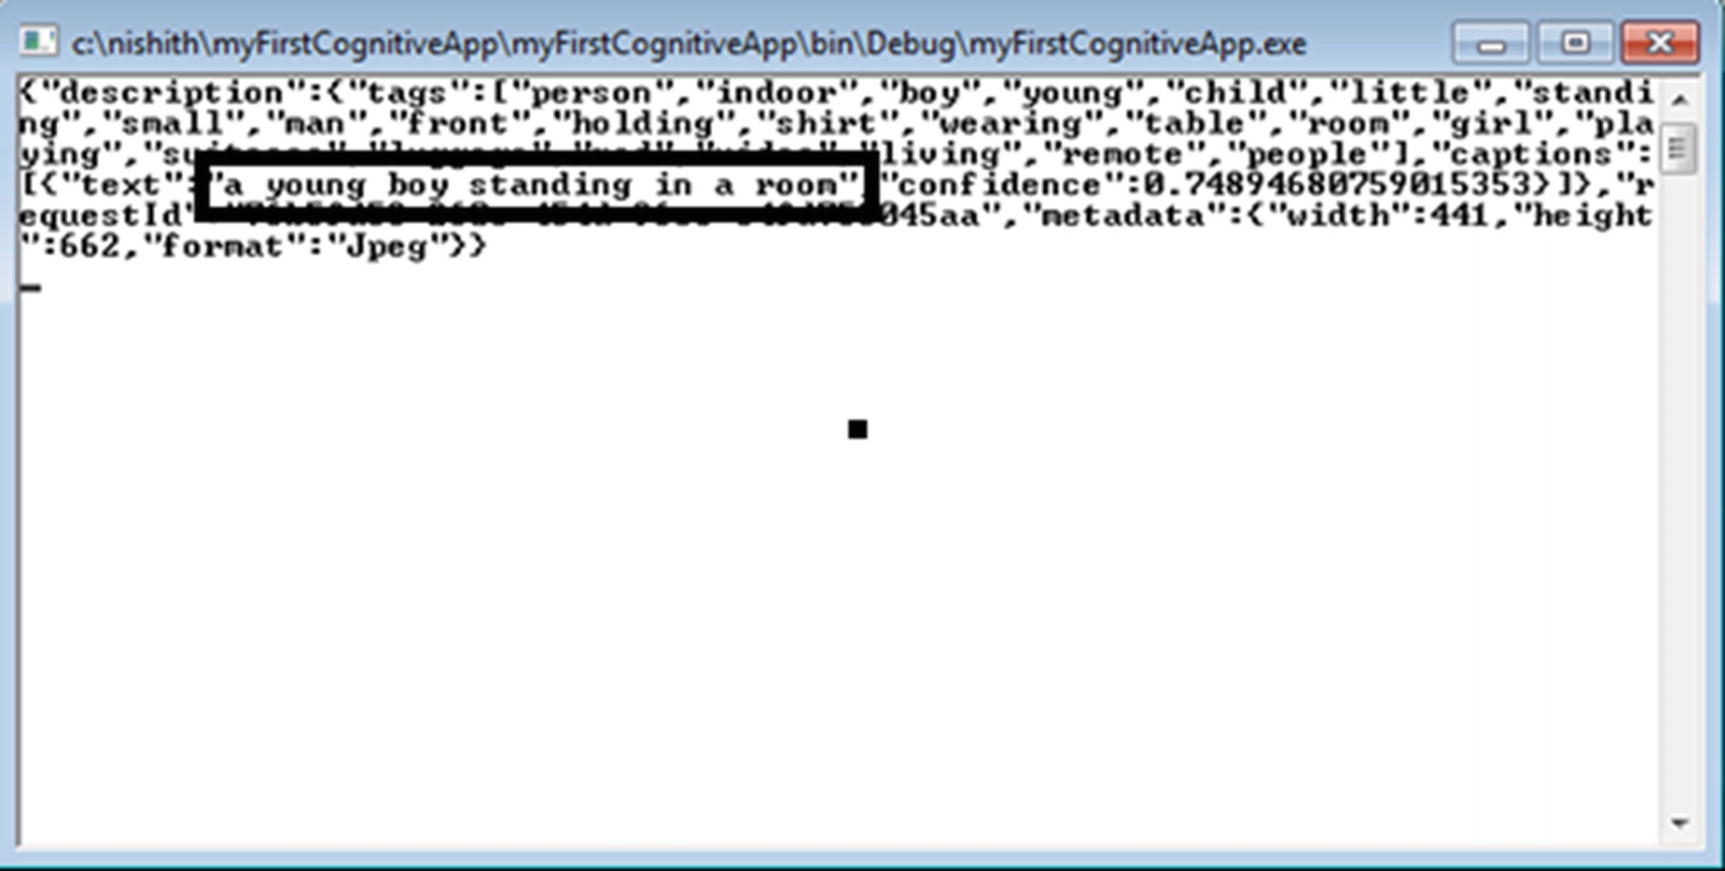
The output in the console window
Congratulations! You are finally not just able to call cognitive applications but have a clear understanding of the steps required to call the Cognitive API. Similar steps need to be performed in the next chapters for consuming cognitive services, so it’s better to revise the steps once again before marching ahead in our journey of creating smarter applications.
Let’s Do Something a Little More Interesting
Go back to your Console application and replace
With

The image of Mahatma Gandhi, which now we are passing to the console application
The Output

The output of passing the Mahatma Gandhi image
This same cognitive service API that could describe the image is able to recognize Steve Jobs. Isn’t this amazing? What’s the trick? Under the covers, Microsoft has a celebrity recognition image classification model that spans more than 200,000 celebrities from various verticals like industry, politics, sports, and entertainment. Whenever any call is made to Microsoft Cognitive Vision API, a check is performed to see if the person detected is part of this classification model or not.
Your Next Tasks
Provide an image and generate thumbnails
Extract a printed or handwritten text from an image
Analyze a video in real time, frame by frame
We suggest that you modify this program and try it with various images and test functionalities by tweaking the code a bit. You will be amazed to see how the Microsoft Cognitive Vision API can do all these tasks with great finesse.
Recap
In this chapter, you learned about the prerequisites required to consume the Cognitive API. This was followed by a stepwise approach to getting your subscription key. You then learned about the approach of calling the Microsoft Cognitive API with a detail code walkthrough in Visual Studio. You also got an idea about the various possibilities of tasks that can be achieved by just calling Microsoft Cognitive API. In the next chapter, we use the other Microsoft Cognitive APIs to extend our hospital use case and learn how to use Microsoft Cognitive APIs to turn a regular hospital into a smart one.