Appendix D. JUnit IDE integration
- Installing Eclipse and NetBeans
- Setting up the book’s source code in Eclipse and NetBeans
- Running JUnit tests in Eclipse and NetBeans
In this appendix, you’ll get to know the two most popular Java IDEs: the Eclipse IDE and the NetBeans IDE. We cover installation procedures, configuration, and how to run the book’s source code from within the IDEs.
D.1. JUnit integration with Eclipse
This section serves as a quick start to get you up and running with Eclipse and with the integrated JUnit.
D.1.1. Installing Eclipse
Installing Eclipse is very simple; the process consists of downloading Eclipse from http://eclipse.org/ and then unzipping it to somewhere on your hard drive. We recommend downloading Eclipse 3.2 or greater. In the remainder of this appendix, we assume Eclipse is installed in [ECLIPSE_HOME] (for example, C:eclipse-3.2).
D.1.2. Setting up Eclipse projects from the source
It’s extremely easy to set up an Eclipse project, because we provide the Eclipse project files with the book’s source code distribution. Please refer to appendix C, “The source code for the book,” for directory structure organization and project names.
The first Eclipse project to import corresponds to the ch01-jumpstart/ directory. This project contains the source code for the first chapter of the book. To import this project, select File > Import and then select Existing Project Into Workspace. Point the Project Content to the ch01-jumpstart/ directory on your hard disk.
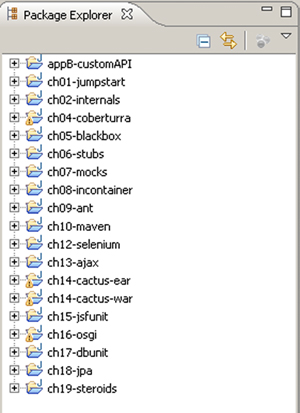
Repeat the process for all the projects you wish to see in your Eclipse workspace. If you import all the projects, you should end up with the workspace shown in figure D.1.
Figure D.1. Eclipse workspace when all the book projects have been imported
D.1.3. Running JUnit tests from Eclipse
To run a JUnit test in Eclipse, select the Java perspective (![]() ), click the test class to execute, click the Run As icon arrow (
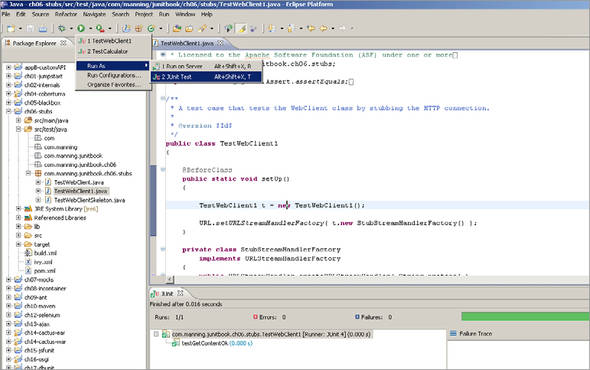
), click the test class to execute, click the Run As icon arrow (![]() ), and select JUnit Test. Figure D.2 shows what you get if you run the TestWebClient1 test case found in the ch05-stubs Eclipse project from chapter 5.
), and select JUnit Test. Figure D.2 shows what you get if you run the TestWebClient1 test case found in the ch05-stubs Eclipse project from chapter 5.
Figure D.2. Running the TestWebClient1 test case in Eclipse using the built-in JUnit plug-in
For full details on how to run JUnit tests from Eclipse, please see the integrated Eclipse Help: Click Help > Help Contents. Then, in the Help browser, select the following topic: Java Development User Guide > Getting Started > Basic Tutorial > Writing And Running JUnit tests.
D.1.4. Running Ant scripts from Eclipse
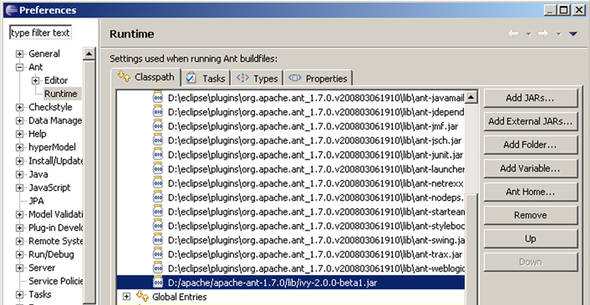
Before running Ant scripts, make sure you’ve added the Ivy ivy.jar library to your Ant classpath (it’s needed by our Ant scripts). To do so, select Window > Preferences, choose Ant > Runtime in the Preferences dialog box, and add the JAR, as shown in figure D.3.
Figure D.3. Adding the JDK ivy-[version].jar to the Ant classpath in Eclipse
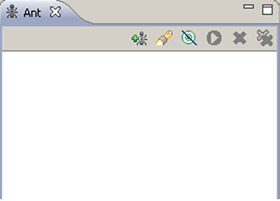
To execute a target from an Ant buildfile, first tell Eclipse to display the Ant view by clicking the Window > Show View menu item and selecting Ant. Figure D.4 shows the result.
Figure D.4. Eclipse displays the Ant view.
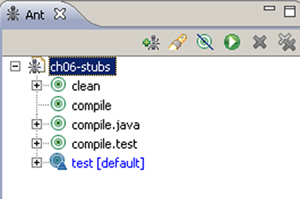
Then, click the icon to add a buildfile to the Ant view. For example, add the build.xml file from the ch06-stubs project. The Ant view now lists all the Ant targets it has found in the build.xml file, highlighting the default target (see figure D.5).
Figure D.5. The Ant view displays all the Ant targets found in build.xml.
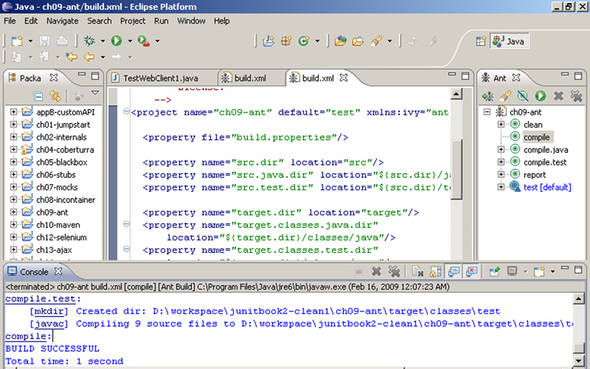
To execute a target, select it and click the button. Figure D.6 shows the result of executing the compile target. Note that Eclipse captures the Ant output and displays it in the console view at the bottom right of the figure.
Figure D.6. Result of executing the compile Ant target for the ch09-ant project
For full details on how to run Ant scripts from Eclipse, please see the integrated Eclipse Help; click Help > Help Contents. Then, in the Help browser, select the following topic: Workbench User Guide > Getting Started > Ant & External Tools Tutorial > Eclipse Ant Basics.
D.2. Introducing the JUnitMAX Eclipse plug-in
Kent Beck, one of the creators of JUnit, started another Eclipse plug-in called JUnitMAX (http://www.threeriversinstitute.org/junitmax/subscribe-w-infinitest.html). JUnitMAX requires a $2 monthly subscription, but it offers quite a few features that you might find interesting.
Let’s take another look at the very first test case that we introduced in this book (listing D.1).
Listing D.1. The CalculatorTest case
public class CalculatorTest {
    @Test
    public void add() {
        Calculator calculator = new Calculator();
        double result = calculator.add( 10, 50 );
        assertEquals( 60, result, 0 );
    }
}
D.2.1. Integrated in your development cycle
One of the main features of JUnitMAX is that it’s tightly integrated in your development cycle. For instance, let’s get an Eclipse with JUnitMAX installed and type in the code from listing D.1. Now let’s deliberately introduce an error inside the test. After you press Ctrl+S to save your file, Eclipse will compile it, and JUnitMAX will run the test for you, showing you the error we just introduced (figure D.7).
Figure D.7. Introducing an error in our test case causes JUnitMAX to execute the tests and report the error as a red marker at the beginning of the line.

The test errors and failures are shown as compilation problems. You can also see them on a project level in the package explorer; this way the risk of missing them and committing broken tests is almost zero.
Now it’s time to fix the error and save the document. The result is shown in figure D.8.
Figure D.8. Our test passes when we fix the error and save the file.
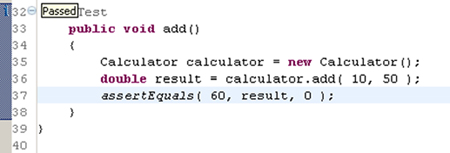
You see that the plug-in ran our test again and flagged it with a blue icon to denote that it passed.
JUnitMAX runs your tests during development time, thus saving you the time required to explicitly run your tests through a separate interface—Ant, Maven, or some other graphic runner.
D.2.2. Execution order
Another neat feature of this JUnit plug-in is the special order in which different tests are executed.
Tests don’t fail at random. Recently failed tests are more likely to fail again. When you execute your tests with the JUnitMAX plug-in, it will take note of this and will run your recently failed tests first. This way, you get valuable feedback on the status of your tests very early in the running phase. The plug-in also executes your short tests before longer ones, again giving you valuable information early.
D.2.3. Reverting to last stable version
One of the most annoying problems is someone committing code in the source repository that breaks existing functionality—obviously he forgot to run his set of tests. We can detect possible problems early by using a continuous integration system like the ones we explored in chapter 10. Obviously, we need some time to see why the things are breaking down. But how do we know what the last stable version of a test was? How do we easily revert to the last version of our test case in which all the tests passed?
One way is to check your version control logs. The JUnitMAX plug-in, however, offers an easier solution to this problem. You right-click your test in the package explorer of Eclipse and select the Revert To Last Green item. Nice, isn’t it?
D.3. JUnit integration with NetBeans
This section serves as a reference guide to how to work with the NetBeans IDE and how to write, execute, and compose JUnit tests from within NetBeans.
D.3.1. Installing NetBeans
NetBeans installation requires several steps. First, you need to go to the download section of the NetBeans website (http://www.netbeans.org/downloads/index.html). You need to select from the upper-right corner of the page the platform on which you’ll install the software as well as the type of installation you want. In this book we use the 6.5 version of the NetBeans project installed on Windows.
The second step consists of downloading the appropriate installer (for Windows machines it’s an .exe wizard, and for UNIX it’s an .sh script). The last step is to follow the wizard and actually install the software.
D.3.2. Setting up NetBeans projects from the source
Luckily enough, the NetBeans IDE recognizes the Eclipse configuration files, so you can easily import any Eclipse project into NetBeans and start working. We used the Eclipse IDE to develop the software that comes with the book, so if you want to import it, all you have to do is follow these steps:
1.
Click File > Import Project > Eclipse Project.
2.
In the wizard that appears, browse to the folder that contains the workspace with all the chapter projects.
3.
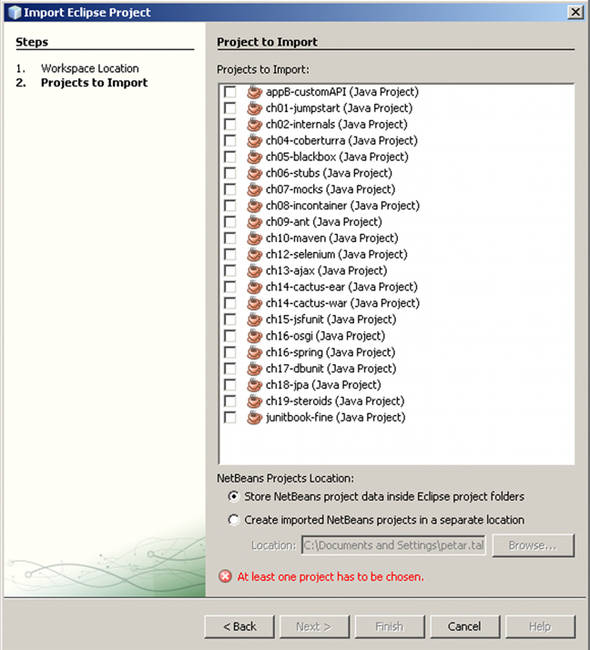
Select the projects that you want to import (figure D.9).
Figure D.9. Import Eclipse projects into NetBeans.
D.3.3. Running JUnit tests from NetBeans
Once you import the projects into your workspace, we can demonstrate how to run some of the tests there. Before we do that, there are several things to consider.
First, take a closer look at any of the projects. You’ll see something like the tree shown in figure D.10.
Figure D.10. Compilation problems with NetBeans

These compilation problems are due to the fact that NetBeans, unlike Eclipse, explicitly keeps two separate directories: one for the source files and one for the test-source files. For each of these folders NetBeans keeps a different set of libraries to include in the classpath. As you see in the figure, NetBeans detects src estjava as a source folder, and the source-folder classpath probably doesn’t contain the JUnit JAR file. To see all the libraries that are included in the classpath, right-click your project, choose Properties, and in the box that appears choose the Libraries tag from the left tree. As you will see, the Compile Tests tab contains the JUnit JAR, so indeed the compilation problems were caused by the fact that NetBeans recognizes the folder as a source folder and not as a source-test folder.
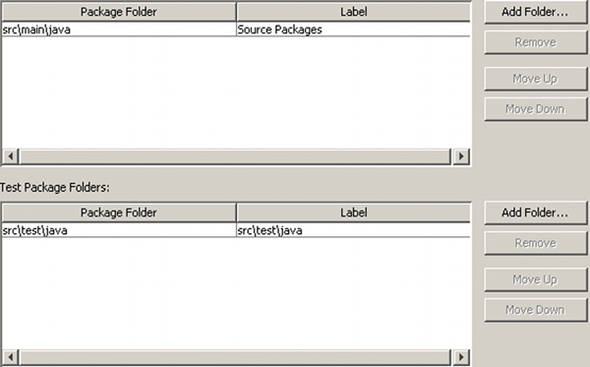
To solve this problem, again right-click your project, choose Properties, and in the Sources tag remove your src estjava folder from the Source Package Folders list and add it to the Test Package Folders list. The final setup should look like the one shown in figure D.11.
Figure D.11. Resolved source folders
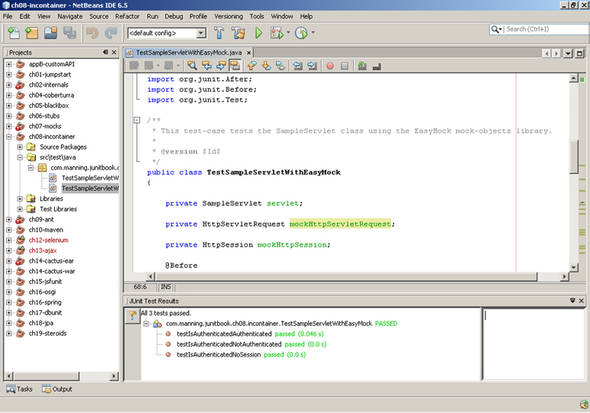
To execute a JUnit test from within NetBeans, you need to make sure the test resides in the correct folder (the test-source folder). Unlike Eclipse, NetBeans will never execute a JUnit test if it resides in the source folder (if your class resides in the source folder and you try to execute it, NetBeans will start looking for a main method instead of running the class as a test). Given that you already made sure all of your tests are located in the test-source folder, you have several options. Either right-click inside the class and choose Run File (Shift+F6), or right-click the file inside the Projects view and select Run File, or simply press Shift+F6. No matter what method you use, the result should be similar to the screen shown in figure D.12.
Figure D.12. Result from executing a sample JUnit test case
D.3.4. Running Ant scripts from NetBeans
To run an Ant script from NetBeans, first you need to open the Files perspective. You can do that by choosing the Window > Files menu. Then navigate to your project and right-click the build.xml. There should be Run Target item in the context menu. From there you can choose the targets that you want to execute. You can also specify which of the targets should be your default target.
If you want to add additional libraries to the Ant installation, it’s good to know that NetBeans uses its own Ant installation. You can add your additional JAR files in the lib/ folder of the NetBeans Ant installation (normally this would be [NETBEANS_INSTALLATION]/java2/ant/lib).
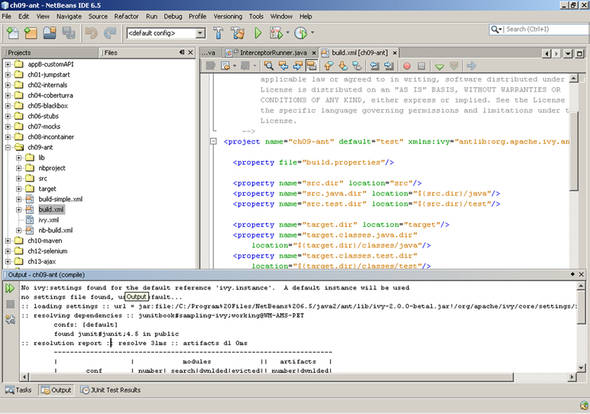
Figure D.13 shows the output of the execution of an Ant build script in NetBeans.
Figure D.13. Results from executing the Ant script in NetBeans