After reading this chapter, you'll be able to
Understand objects in JavaScript, including object properties, object methods, and classes.
Create objects.
Define properties for objects using classes.
Understand arrays in JavaScript.
Use several array methods.
Understand the Date object in JavaScript.
Use the Date object to display the current date on a Web page.
For those who are new to object-oriented programming concepts or may need a bit of a refresher, read on. If you're already comfortable with object-oriented programming, skip ahead to the section called Creating Objects.
A programming paradigm describes a methodology for solving the problems at hand. There are more than 25 different programming paradigms, some of which you might be hard-pressed to find used in an actual program. Others you might have heard of or even used without knowing it. There's functional programming, event-driven programming, component-oriented programming, structured programming, and many others.
Programming paradigms come and go. Object-oriented programming has been around for many years, however, and doesn't appear to be going away anytime soon, so if you haven't yet learned the basics, then there's no time like the present.
This section can't do much more than scratch the surface of this subject. Specifically, I want to get you familiar with object-oriented technology, so you're comfortable with the subset of object-oriented programming concepts and terminology typically used by a JavaScript programmer.
Objects are things. In the real world, as opposed to the virtual and sometimes surreal world of computer programming, a ball, a desk, and a car are all objects. An object is something that has describable characteristics, that you can do things to, and that behaves in a particular way. An object in the object-oriented programming paradigm is a combination of code and data that similarly exhibits characteristics and behavior.
Objects have properties—things defined as attributes about them. Going back to the real world again, a ball has a color property—perhaps red, white, or multicolored. It also has a size property—perhaps it is small like a baseball or bigger like a basketball, or something else entirely. These properties might be represented like this:
ball.color

ball.size
Just as objects can have properties, they also can have methods. Methods define the way an object behaves. A ball might have a roll method, which would calculate how far the ball will roll. In theory, not all objects have methods and not all objects have properties, though in practice all objects have at least one method or one property.
Remember from Chapter 7, that a method is just a function that belongs to an object. A method definition that uses a function literal for the roll method might look like this:
ball.roll = function() {
    var distance = this.size * this.forceApplied;
}Classes define sets of objects that share the same properties and methods. Classes simplify the creation of multiple objects of the same type. Consider this example. Throughout previous chapters, I've used a star object in some examples. Example 8-1 shows what we'd need for a comprehensive Web page with information about 14 important stars.
Example 8-1. Assembling a Star Object
var star = {};

star["Polaris"] = new Object;
star["Mizar"] = new Object;
star["Aldebaran"] = new Object;
star["Rigel"] = new Object;
star["Castor"] = new Object;
star["Albireo"] = new Object;
star["Acrux"] = new Object;
star["Gemma"] = new Object;
star["Procyon"] = new Object;
star["Sirius"] = new Object;
star["Rigil Kentaurus"] = new Object;
star["Deneb"] = new Object;
star["Vega"] = new Object;
star["Altair"] = new Object;

star["Polaris"].constellation = "Ursa Minor";
star["Mizar"].constellation = "Ursa Major";
star["Aldebaran"].constellation = "Taurus";
star["Rigel"].constellation = "Orion";
star["Castor"].constellation = "Gemini";
star["Albireo"].constellation = "Cygnus";
star["Acrux"].constellation = "Crux";
star["Gemma"].constellation = "Corona Borealis";
star["Procyon"].constellation = "Canis Minor";
star["Sirius"].constellation = "Canis Major";
star["Rigil Kentaurus"].constellation = "Centaurus";
star["Deneb"].constellation = "Cygnus";
star["Vega"].constellation = "Lyra";
star["Altair"].constellation = "Aquila";

star["Polaris"].type = "Double/Cepheid";
star["Mizar"].type = "Spectroscopic Binary";
star["Aldebaran"].type = "Irregular Variable";
star["Rigel"].type = "Supergiant with Companion";
star["Castor"].type = "Multiple/Spectroscopic";
star["Albireo"].type = "Double";
star["Acrux"].type = "Double";
star["Gemma"].type = "Eclipsing Binary";
star["Procyon"].type = "Double";
star["Sirius"].type = "Double";
star["Rigil Kentaurus"].type = "Double";
star["Deneb"].type = "Supergiant";
star["Vega"].type = "White Dwarf";
star["Altair"].type = "White Dwarf";

star["Polaris"].spectralClass = "F7";
star["Mizar"].spectralClass = "A1 V";
star["Aldebaran"].spectralClass = "K5 III";
star["Rigel"].spectralClass = "B8 Ia";
star["Castor"].spectralClass = "A1 V";
star["Albireo"].spectralClass = "K3 II";
star["Acrux"].spectralClass = "B1 IV";
star["Gemma"].spectralClass = "A0 V";
star["Procyon"].spectralClass = "F5 IV";
star["Sirius"].spectralClass = "A1 V";
star["Rigil Kentaurus"].spectralClass = "G2 V";
star["Deneb"].spectralClass = "A2 Ia";
star["Vega"].spectralClass = "A0 V";
star["Altair"].spectralClass = "A7 V";

star["Polaris"].mag = 2.0;
star["Mizar"].mag = 2.3;
star["Aldebaran"].mag = 0.85;
star["Rigel"].mag = 0.12;
star["Castor"].mag = 1.58;
star["Albireo"].mag = 3.1;
star["Acrux"].mag = 0.8;
star["Gemma"].mag = 2.23;
star["Procyon"].mag = 0.38;
star["Sirius"].mag = -1.46;
star["Rigil Kentaurus"].mag = -0.01;
star["Deneb"].mag = 1.25;
star["Vega"].mag = 0.03;
star["Altair"].mag = 0.77;
As you can see, there's a lot of repeated code in Example 8-1. Each star is defined and then given four properties: the constellation in which it appears, its type, its spectral class, and its magnitude (represented by the word mag in the code listing).
Now consider the code in Example 8-2. It accomplishes the same thing as the code in Example 8-1, but with the help of a class.
Example 8-2. Assembling a Star Object Using a Class
var star = {};

function Star(constell,type,specclass,magnitude) {
    this.constellation = constell;
    this.type = type;
    this.spectralClass = specclass;
    this.mag = magnitude;
}

star["Polaris"] = new Star("Ursa Minor","Double/Cepheid","F7",2.0);
star["Mizar"] = new Star("Ursa Major","Spectroscopic Binary","A1 V",2.3);
star["Aldebaran"] = new Star("Taurus","Irregular Variable","K5 III",0.85);
star["Rigel"] = new Star("Orion","Supergiant with Companion","B8 Ia",0.12);
star["Castor"] = new Star("Gemini","Multiple/Spectroscopic","A1 V",1.58);
star["Albireo"] = new Star("Cygnus","Double","K3 II",3.1);
star["Acrux"] = new Star("Crux","Double","B1 IV",0.8);
star["Gemma"] = new Star("Corona Borealis","Eclipsing Binary","A0 V",2.23);
star["Procyon"] = new Star("Canis Minor","Double","F5 IV",0.38);
star["Sirius"] = new Star("Canis Major","Double","A1 V",-1.46);
star["Rigil Kentaurus"] = new Star("Centaurus","Double","G2 V",-0.01);
star["Deneb"] = new Star("Cygnus","Supergiant","A2 Ia",1.25);
star["Vega"] = new Star("Lyra","White Dwarf","A0 V",0.03);
star["Altair"] = new Star("Aquila","White Dwarf","A7 V",0.77);
The function, shown here, creates a class for stars as shown in bold in Example 8-2.
When called, the end result is a new star object:
star["Polaris"] = new Star("Ursa Minor","Double/Cepheid","F7",2.0);As you can see, even though the two code listings are functionally equivalent, the code in Example 8-2 is much shorter and easier to understand. Carrying this forward, imagine an object that had nine properties instead of just the four shown here.
An object is created in two ways:
Which of these ways you use depends largely on personal preference; they both accomplish the same task.
Once an object has been created, you can start assigning to it the properties and methods that it will contain. If you have just one star object, then you could assign properties directly to it, like this:
star.name = "Polaris";
star.constellation = "Ursa Minor";
The previous section showed how to create multiple related objects with multiple properties and how to use a class to assign those properties efficiently.
With a for…in loop, it's possible to loop through each of the properties in an object. Try it out:
Looping through object properties
Using Microsoft Visual Studio, Eclipse, or another editor, edit the file proploop.htm in the Chapter 8 sample files folder.
Within the page, add the for loop shown below in bold type:
<!DOCTYPE HTML PUBLIC "-//W3C//DTD HTML 4.01//EN" "http://www.w3.org/TR/html4/strict.dtd"> <html> <head> <title>Properties</title> <script type = "text/javascript"> var star = {}; function Star(constell,type,specclass,magnitude) { this.constellation = constell; this.type = type; this.spectralClass = specclass; this.mag = magnitude; } star["Polaris"] = new Star("Ursa Minor","Double/Cepheid","F7",2.0); star["Mizar"] = new Star("Ursa Major","Spectroscopic Binary","A1 V",2.3); star["Aldebaran"] = new Star("Taurus","Irregular Variable","K5 III",0.85); star["Rigel"] = new Star("Orion","Supergiant with Companion","B8 Ia",0.12); star["Castor"] = new Star("Gemini","Multiple/Spectroscopic","A1 V",1.58); star["Albireo"] = new Star("Cygnus","Double","K3 II",3.1); star["Acrux"] = new Star("Crux","Double","B1 IV",0.8); star["Gemma"] = new Star("Corona Borealis","Eclipsing Binary","A0 V",2.23); star["Procyon"] = new Star("Canis Minor","Double","F5 IV",0.38); star["Sirius"] = new Star("Canis Major","Double","A1 V",-1.46); star["Rigil Kentaurus"] = new Star("Centaurus","Double","G2 V",-0.01); star["Deneb"] = new Star("Cygnus","Supergiant","A2 Ia",1.25); star["Vega"] = new Star("Lyra","White Dwarf","A0 V",0.03); star["Altair"] = new Star("Aquila","White Dwarf","A7 V",0.77); </script> </head> <body> <script type = "text/javascript" >for (var propt in star) {alert(propt);}</script> </body> </html>View this page in a Web browser. You'll be presented with an alert() dialog box for each of the stars in the star object, a total of 14 in all. (Yes, it's a lot of clicking. Sorry about that.) Here's an example of the type of dialog box you'll see:

This step-by-step exercise built on the earlier example of using classes to define properties of objects. In this case, a star object was created with the following code:
var star = {};That object was then given several properties of individual star names with a call to create a new Star object (using the class):
star["Polaris"] = new Star("Ursa Minor","Double/Cepheid","F7",2.0);Each of the properties of the original star object, in this case the names of each star, were then enumerated within the <body> of the code itself using a for…in loop:
for (var propt in star) {
    alert(propt);
}
You might be wondering how to get to the actual properties of the stars themselves, like the constellations, magnitudes, types, and spectral class. Chapter 11 will show you how to enumerate through each of these.
Sometimes you don't want or need to loop through every property. Sometimes you just want to know if a given property already exists within an object. You can use the in operator to test for the property, as in this pseudocode:
if (property in object) {
    // do something here
}
A more complete example is shown in Example 8-3, where the star object is examined for one of the star names, Polaris, and if found, a new property is added to it.
Example 8-3. Looking for a Property
var star = {};

function Star(constell,type,specclass,magnitude) {
    this.constellation = constell;
    this.type = type;
    this.spectralClass = specclass;
    this.mag = magnitude;
}

star["Polaris"] = new Star("Ursa Minor","Double/Cepheid","F7",2.0);
star["Mizar"] = new Star("Ursa Major","Spectroscopic Binary","A1 V",2.3);
star["Aldebaran"] = new Star("Taurus","Irregular Variable","K5 III",0.85);
star["Rigel"] = new Star("Orion","Supergiant with Companion","B8 Ia",0.12);
star["Castor"] = new Star("Gemini","Multiple/Spectroscopic","A1 V",1.58);
star["Albireo"] = new Star("Cygnus","Double","K3 II",3.1);
star["Acrux"] = new Star("Crux","Double","B1 IV",0.8);
star["Gemma"] = new Star("Corona Borealis","Eclipsing Binary","A0 V",2.23);
star["Procyon"] = new Star("Canis Minor","Double","F5 IV",0.38);
star["Sirius"] = new Star("Canis Major","Double","A1 V",-1.46);
star["Rigil Kentaurus"] = new Star("Centaurus","Double","G2 V",-0.01);
star["Deneb"] = new Star("Cygnus","Supergiant","A2 Ia",1.25);
star["Vega"] = new Star("Lyra","White Dwarf","A0 V",0.03);
star["Altair"] = new Star("Aquila","White Dwarf","A7 V",0.77);

if ("Polaris" in star) {
    star["Polaris"].aka = "The North Star";
    alert("Polaris found and is also known as " + star["Polaris"].aka);
}Just as properties were added to self-defined objects, methods also can be added. For example, the class used in earlier examples can be extended to include a method called show(), which just presents an alert() dialog box. This method could be extended to do whatever you need it to do. For example, look at this code:
function Star(constell,type,specclass,magnitude) {
    this.constellation = constell;
    this.type = type;
    this.spectralClass = specclass;
    this.mag = magnitude;
    this.show = function show() {
        alert("hello, this is a method.");
    }
}
Calling or invoking that method looks like this:
star["Polaris"].show();
Object-oriented programming in JavaScript doesn't end here. More advanced features of the object-oriented programming paradigm like inheritance, superclassing, and prototypes are all possible with JavaScript, but they are beyond the scope of this book. MSDN Magazine published an article about some of the more advanced concepts and that article can be found at http://msdn.microsoft.com/msdnmag/issues/07/05/JavaScript/default.aspx.
Covered in Chapter 4, arrays enable a set of values to be grouped into an object and then accessed through a numbered index value. Chapter 4 gave some examples of ways to define arrays. First, you can use the new Array( ) explicit constructor as follows:
var star = new Array( );
star[0] = "Polaris";
star[1] = "Deneb";
star[2] = "Vega";
star[3] = "Altair";
You also can do the same thing using the implicit array constructor (square brackets), like so:
var star = ["Polaris", "Deneb", "Vega", "Altair"];
The length property of an array returns the number of elements in the array. There's an important distinction to be made between how many elements the array contains and how many have been defined. Here's a simple example. Take the implicit star array definition shown just previously. You can count four star names: Polaris, Deneb, Vega, and Altair. The length property returns the same thing:
var numStars = star.length; // star.length is 4.
To introduce you to some of the methods of the array object, this section looks at a few of those methods. More information can be found within the ECMA-262 specification at http://www.ecma-international.org/publications/files/ECMA-ST/Ecma-262.pdf.
Elements can be added to an array, either prepended or appended using a few different methods.
var myArray = new Array( );

myArray[0] = "first";

myArray[1] = "second";

var newArray = myArray.concat("third");

// newArray is now [first,second,third]
You can also concatenate another array, like this:
var myFirstArray = [51,67];
var mySecondArray = [18,"hello",125];
var newArray = myFirstArray.concat(mySecondArray)
// newArray is [51,67,18,"hello",125]
Adding elements with concat()
Using Visual Studio, Eclipse, or another editor, edit the file concat.htm in the Chapter 8 sample files folder.
Within the page, add the code shown below in bold type:
<!DOCTYPE HTML PUBLIC "-//W3C//DTD HTML 4.01//EN" "http://www.w3.org/TR/html4/strict.dtd"> <html> <head> <title>Concat</title> <script type = "text/javascript">var star = ["Polaris", "Deneb", "Vega", "Altair"];for (var i = 0; i < star.length; i++) {alert(star[i]);}</script> </head> <body> </body> </html>Save the page and view it in a Web browser. You'll receive an alert() dialog box (like the one shown here) for each of the four star names defined in the star array.
Now alter the code to concatenate some additional stars onto the star array. (Yes, I realize that you could just add them directly to the star array, but that's cheating.) Here's the code (the changes are highlighted):
<!DOCTYPE HTML PUBLIC "-//W3C//DTD HTML 4.01//EN" "http://www.w3.org/TR/html4/strict.dtd"> <html> <head> <title>Concat</title> <script type = "text/javascript"> var star = ["Polaris", "Deneb", "Vega", "Altair"];var newstars = ["Aldebaran", "Rigel"];var morestars = star.concat(newstars);for (var i = 0; i < morestars.length; i++) {alert(morestars[i]);}</script> </head> <body> </body> </html>Save and view the page in a Web browser. You'll now receive six alert() dialog boxes (sorry!), one for each star, like this one for Aldebaran:


- Joining and concatenating with join
The join() method converts all the elements of an array to a joined string. This method is unlike the concat() method, which concatenates but does not perform any type conversions. Here's the code:
var star = ["Polaris", "Deneb", "Vega", "Altair"];
var starString = star.join();
The starString variable would contain Polaris,Deneb,Vega,Altair, as shown in Figure 8-1.
The join() method enables you to specify the join delimiter as well. Instead of just using a comma, you might want to use an asterisk, like this:
var star = ["Polaris", "Deneb", "Vega", "Altair"];
var starString = star.join("*");
The result would be Polaris*Deneb*Vega*Altair, as shown in Figure 8-2.
Tip
The join() method is a quick way to see the contents of an array without creating an entire for loop structure.
- Using push and pop to add and remove elements
Where concat() returns the newly concatenated array, push() and pop() add and remove elements, but also return the new length of the array to which the method is applied. The methods push() and pop() operate on the end of the array:
var star = ["Polaris", "Deneb", "Vega", "Altair"];
star.push("Aldebaran");
This code would result in the star object containing five elements: Polaris, Deneb, Vega, Altair, and Aldebaran.
The pop() method removes the last element and returns the element that is removed:
var star = ["Polaris", "Deneb", "Vega", "Altair"];
var removedElement = star.pop();
The removedElement variable would contain the string "Altair" because that was the last element of the array. The length of the array would also be shortened (or decremented) by 1.
var star = ["Polaris", "Deneb", "Vega", "Altair"];
star.unshift("Aldebaran");["Aldebaran", "Polaris", "Deneb", "Vega", "Altair"]
Now use shift() to remove an element from the beginning of an array:
var star = ["Polaris", "Deneb", "Vega", "Altair"];

var removedElement = star.shift();
The star array would now contain:
["Deneb", "Vega", "Altair"]
- Using slice to return parts of an array
The slice() method is useful if you need to return specific portions of an array, though care must be taken because unless a copy of the array is made, slice() will change the original array. For instance, this code would return and place into the cutStars variable the value "Vega,Altair" because Vega and Altair are the third and fourth elements of the star array (remember that arrays start counting from zero). The code is as follows:
var star = ["Polaris", "Deneb", "Vega", "Altair"];
var cutStars = star.slice(2,3);
Sorting elements with sort It's sometimes helpful to sort the elements of an array. Look at this code:
var star = ["Polaris", "Deneb", "Vega", "Altair"];
var sortedStars = star.sort();
The result is shown in Figure 8-3 and as you can see, the elements of the star array are now sorted alphabetically, even though they weren't given alphabetically in the code. Note that both the original star array and the sortedStars variable contain sorted lists.

Be careful not to use the sort() method to sort numbers. Consider this code:
var nums = [11,543,22,111];
var sortedNums = nums.sort();
One might expect that the sortedNums variable would contain 11,22,111,543, but instead it sorts the values alphabetically, as shown in Figure 8-4.

Figure 8-4. Attempting to sort numbers with sort() doesn't work—at least not if you want them sorted in numerical order.
The array object has other methods that you should know about, but you might not use them much, depending on the requirements of your Web site. Refer to the ECMA-262 standard for more information. Two such methods that you might encounter are listed in Table 8-1.
The JavaScript language makes available several useful objects to assist with tasks common to the JavaScript program. Among these are some that have already been discussed, such as the Number object and the Math object, covered in Chapter 4.
This section looks at the Date object. Both the Regexp object and the String object will be covered as appropriate when they're used throughout the remainder of the book.
The Date object includes many methods that are helpful when working with dates in JavaScript—too many, in fact, to attempt to examine in any depth in a beginner-level book such as this, but I'll show you some examples that you'll likely want to incorporate in your projects.
Here's some simple code to return a date for the current time, adjusted for the local time zone and formatted automatically by the toLocaleDateString() method:
var myDate = new Date( );
alert(myDate.toLocaleDateString());
When run, this code might result in a date like that shown in Figure 8-5.
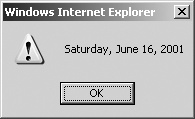
Figure 8-5. The Date object returns a date string, which can be localized using the toLocaleDateString method of the Date object.
By itself, the Date object can be handed a number of arguments ranging from zero arguments up to seven arguments. When the Date object constructor is passed a single string argument, the string is assumed to contain the date. When it is passed a number type of argument, the argument is assumed to be the date in milliseconds since January 1, 1970, and when it is passed seven arguments, they're assumed to be:
new Date(year, month, day, hours, minutes, seconds, milliseconds)
Remember the following points when using a Date object:
The year should be given with four digits unless you want to specify a year between the year 1900 and the year 2000, in which case you'd simply send in the two-digit year, 0 through 99 and it will be added to 1900. So, 2008 equals the year 2008, but just 98 will be turned into 1998.
The month is represented by an integer 0 through 11, with 0 being January and 11 being December.
The day is an integer from 1 to 31.
Hours are represented by 0 through 23, where 23 represents 11 PM.
Minutes and seconds are both integers ranging from 0 to 59.
Milliseconds are an integer from 0 to 999.
Although this step-by-step exercise uses some items that won't be covered until later chapters, because we're looking at the Date object now, it's a good time to show you how to write the date and time to a Web page. This seems like a fairly popular thing to do. This exercise shows the whole process, including things that I won't explain right now, but I will later.
Writing the date and time to a Web page
Using Visual Studio, Eclipse, or another editor, edit the file writingthedate.htm in the Chapter 8 sample files folder.
Within the page, add the code shown below in bold type:
<!DOCTYPE HTML PUBLIC "-//W3C//DTD HTML 4.01//EN" "http://www.w3.org/TR/html4/strict.dtd"> <html> <head> <title>the date</title> </head> <body> <p id="dateField"> </p> <script type = "text/javascript">var myDate = new Date();var dateString = myDate.toLocaleDateString() + " " + myDate.toLocaleTimeString();var dateLoc = document.getElementById("dateField");dateLoc.innerHTML = "Hello - Page Rendered on " + dateString;</script> </body> </html>When saved and viewed in a Web browser, you should receive a page like this (though obviously the date you see probably will be different from what's shown here).

The relevant JavaScript from this exercise is repeated here:
var myDate = new Date();
var dateString = myDate.toLocaleDateString() + " " + myDate.toLocaleTimeString();
var dateLoc = document.getElementById("dateField");
dateLoc.innerHTML = "Hello - Page Rendered on " + dateString;
The JavaScript related to the Date object is really rather simple. It takes advantage of the toLocaleDateString() method, which you've already seen, and its cousin, toLocateTimeString(), which returns the local time. These two methods are concatenated together with a single space and placed into the dateString variable, like this:
var dateString = myDate.toLocaleDateString() + " " + myDate.toLocaleTimeString();
The remainder of the code writes the contents of the dateString variable to the Web page. More information on that aspect of JavaScript is described in Chapter 10.
Other Date-Writing Procedures
The procedure shown in the "Writing the date and time to a Web page" exercise isn't the only way to write the date to the page. There are several others, many of which depend solely on developer preference (in other words, there's no "best" way). One other way to do it is to call Date() as a function rather than creating a new Date object as was done in the exercise. The key difference is the use of the new statement. When called with the word new, as in new Date(), an object is constructed, whereas when Date() is called without the word new, it's called as a function. Here is relevant JavaScript for using Date as a function:
var myDate = Date();
var dateLoc = document.getElementById("dateField");
dateLoc.innerHTML = "Hello - Page Rendered on " + myDate;
However, if you call this, you'll notice a subtle difference in the output, as shown here:
Notice in this screenshot that the word Saturday is abbreviated to Sat, where the previous screenshot displayed the entire word. The subtle differences in formatting can be important if you are processing the result rather than just displaying it.
Counting down to a certain date in the future
Using Visual Studio, Eclipse, or another editor, edit the file countdown.htm in the Chapter 8 sample files folder.
Add the following code shown in bold type to the page:
<!DOCTYPE HTML PUBLIC "-//W3C//DTD HTML 4.01//EN" "http://www.w3.org/TR/html4/strict.dtd"> <html> <head> <title>the date</title> </head> <body> <p id="dateField-id001"> </p> <script type = "text/javascript">var today = new Date();var then = new Date();// January 1, 2011then.setFullYear(2011,0,1);var diff = then.getTime() - today.getTime();diff = Math.floor(diff / (1000 * 60 * 60 * 24));var dateLoc = document.getElementById("dateField");dateLoc.innerHTML = "There are " + diff + " days until 1/1/2011";</script> </body> </html>Save the page and view it in a Web browser. Depending on the date on your computer, the number of days represented will be different, but the general look of the page is as it appears here:

Tip
Be careful if using JavaScript dates for anything other than display. Because they are dependent on the visitor's time, you shouldn't rely on them for anything that might be important, like an ordering process.
The exercise you just completed used some additional functions of both the Math and Date objects, namely floor() and getTime(). While this book does cover a lot of ground, it's not a complete JavaScript language reference. For that and even more information, refer to MSDN, including this article, http://msdn2.microsoft.com/en-us/office/aa905433.aspx, which contains many helpful links to other JavaScript resources.
One final exercise shows how to calculate (or better yet, roughly estimate) the time it takes for a Web page to load in a person's browser.
Note
This isn't an entirely accurate procedure because it can't take into account the time it takes for images (or other multimedia items), which are external to the text of the Web page, to load and render. There are also technically a few more bits that will load after the script is finished running. But it's another widget that I've seen on several Web sites, and you might find it useful. At any rate, it shows another example of calculating dates.
Using Visual Studio, Eclipse, or another editor, edit the file render.htm in the Chapter 8 sample files folder.
Add the following code shown in bold type to the page:
<!DOCTYPE html PUBLIC "-//W3C//DTD XHTML 1.0 Transitional//EN" "http://www.w3.org/TR/xhtml1/DTD/xhtml1-transitional.dtd"> <html> <head> <title>the date</title> <script type = "text/javascript">var started = new Date();var now = started.getTime();</script> </head> <body> <p id="dateField-id002"> </p> <script type = "text/javascript">var bottom = new Date();var diff = (bottom.getTime() - now)/1000;var finaltime = diff.toPrecision(5);var dateLoc = document.getElementById("dateField");dateLoc.innerHTML = "Page rendered in " + finaltime + " seconds.";</script> </body> </html>Save the page and view it in a Web browser. Depending on the speed of your computer, Web server, and the network connection, you might receive a page that indicates that it took 0 seconds for the page to load, like this:
If your page takes 0.0000 seconds, as mine did, then you can introduce a delay into the page so you can test it. (I'd never recommend doing this on a live site, however, since I can't think of a reason why you'd want to slow down the rendering of your page! But it can come in handy for testing purposes.) A cheap and easy way to slow the JavaScript executing is a for loop:
for (var i = 0; i < 1000000; i++) {
   //delay
)
(The value I chose, 1000000, is arbitrary. You may need to choose a bigger or smaller number to cause the desired delay.) The final code looks like this:
<!DOCTYPE html PUBLIC "-//W3C//DTD XHTML 1.0 Transitional//EN" "http://www.w3.org/TR/xhtml1/DTD/xhtml1-transitional.dtd"> <html xmlns="http://www.w3.org/1999/xhtml" > <head> <title>the date</title> <script type = "text/javascript"> var started = new Date(); var now = started.getTime();for (var i = 0; i < 1000000; i++) {//delay}</script> </head> <body> <p id="dateField-id003"> </p> <script type = "text/javascript"> var bottom = new Date(); var diff = (bottom.getTime() - now)/1000; var finaltime = diff.toPrecision(5); var dateLoc = document.getElementById("dateField"); dateLoc.innerHTML = "Page rendered in " + finaltime + " seconds."; </script> </body> </html>Save the page and again view it in a Web browser. You should see some delay in the page load, which will cause the value to be a positive number:
When using this or similar functions to determine the page load times, it's important to place the initial variable near the top of the page or script and then another one near the bottom of the page to calculate a more accurate value—or at least as accurate as possible.


You've now seen just a few of the more than 40 methods of the Date object. Many of these have UTC (Coordinated Universal Time) counterparts, meaning that they will get or set the date and time in UTC rather than local time. Table 8-2 lists the methods that return dates. With the exception of getTime() and getTimezoneOffset(), all these methods have UTC counterparts that are called using the format getUTCDate(), getUTCDay(), and so on.
Table 8-2. The get Methods of a Date Object
Many of the get…() methods have siblings prefixed with set, as shown in Table 8-3. And like their get brethren, most of the set…() methods have UTC counterparts, except for setTime().
Table 8-3. The set Methods of a Date Object
Method | Description |
|---|---|
setDate() | Sets the day of the month of a date. |
setFullYear() | Sets the four-digit year of a date. Also accepts the month and day-of-month integers. |
setHours() | Sets the hour of a date. |
setMilliseconds() | Sets the milliseconds of a date. |
setMinutes() | Sets the minutes of a date. |
setMonth() | Sets the month as an integer of a date. |
setSeconds() | Sets the seconds of a date. |
setTime() | Sets the time using milliseconds since January 1, 1970. |
Some other methods include one you've already seen, toLocaleDateString(), and others related to it like toLocaleString(), toGMTString(), toLocaleTimeString(), toString(), toDateString(), toUTCString(), and toTimeString(). Experiment with these as you see fit. These simple code examples will get you started. Try typing them in the address bar of your browser:
javascript:var myDate = new Date(); alert(myDate.toLocaleDateString());
javascript:var myDate = new Date(); alert(myDate.toLocaleString());
javascript:var myDate = new Date(); alert(myDate.toGMTString());
javascript:var myDate = new Date(); alert(myDate.toLocaleTimeString());
javascript:var myDate = new Date(); alert(myDate.toString());
javascript:var myDate = new Date(); alert(myDate.toDateString());
javascript:var myDate = new Date(); alert(myDate.toUTCString());
javascript:var myDate = new Date(); alert(myDate.toTimeString());
Create code to loop through a simple array of four objects, shown here, and display those in an alert() dialog box, one for each element of the array:
var star = ["Polaris", "Deneb", "Vega", "Altair"];
Create an object to hold the names of three of your favorite songs. The objects should have properties containing the artist, the song length, and the title for each song.
The first step-by-step exercise in this chapter used a list of stars and a class to populate those objects, shown here:
function Star(constell,type,specclass,magnitude) {
    this.constellation = constell;
    this.type = type;
    this.spectralClass = specclass;
    this.mag = magnitude;
}
star["Polaris"] = new Star("Ursa Minor","Double/Cepheid","F7",2.0);
star["Mizar"] = new Star("Ursa Major","Spectroscopic Binary","A1 V",2.3);
star["Aldebaran"] = new Star("Taurus","Irregular Variable","K5 III",0.85);
star["Rigel"] = new Star("Orion","Supergiant with Companion","B8 Ia",0.12);
star["Castor"] = new Star("Gemini","Multiple/Spectroscopic","A1 V",1.58);
star["Albireo"] = new Star("Cygnus","Double","K3 II",3.1);
star["Acrux"] = new Star("Crux","Double","B1 IV",0.8);
star["Gemma"] = new Star("Corona Borealis","Eclipsing Binary","A0 V",2.23);
star["Procyon"] = new Star("Canis Minor","Double","F5 IV",0.38);
star["Sirius"] = new Star("Canis Major","Double","A1 V",-1.46);
star["Rigil Kentaurus"] = new Star("Centaurus","Double","G2 V",-0.01);
star["Deneb"] = new Star("Cygnus","Supergiant","A2 Ia",1.25);
star["Vega"] = new Star("Lyra","White Dwarf","A0 V",0.03);
star["Altair"] = new Star("Aquila","White Dwarf","A7 V",0.77)
The code then used a simple for loop to move through each of the star objects and display the names of the stars, as shown here:
for (var propt in star) {
    alert(propt);
}
Your task is to modify this code to display one single dialog box with all the star names rather than displaying one for each star.